Last Updated on February 5, 2024 by teamobn
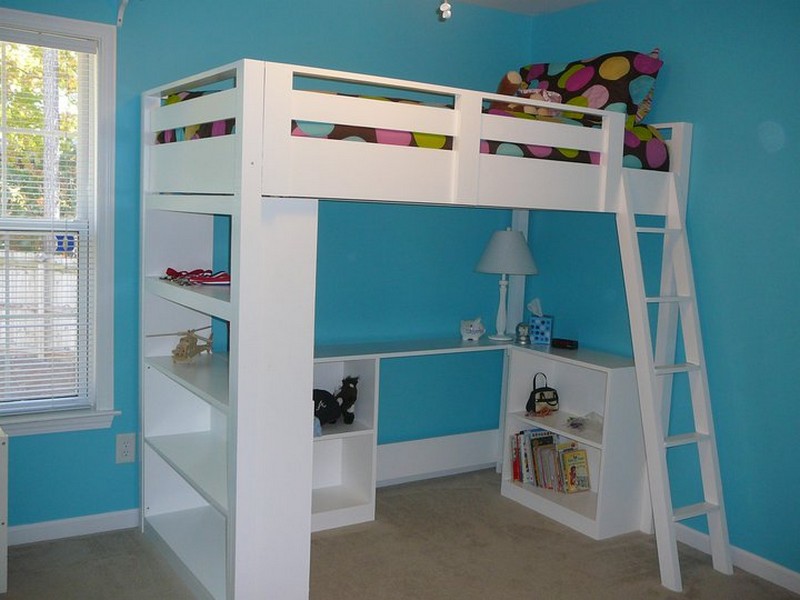
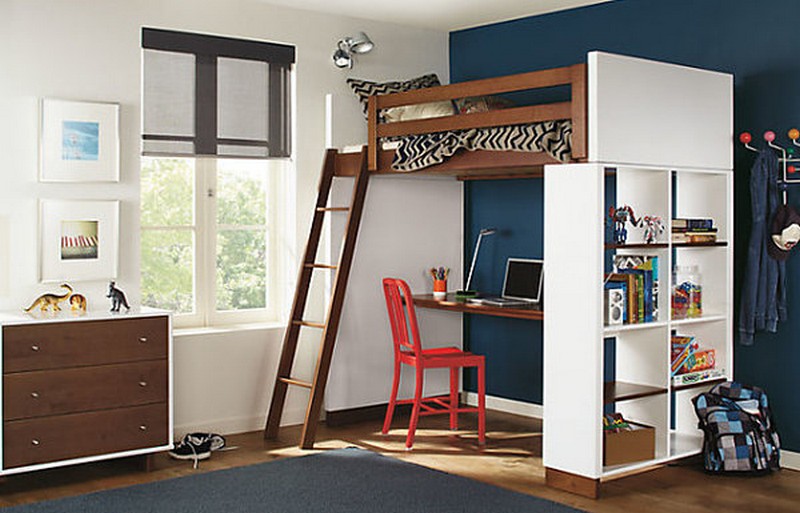
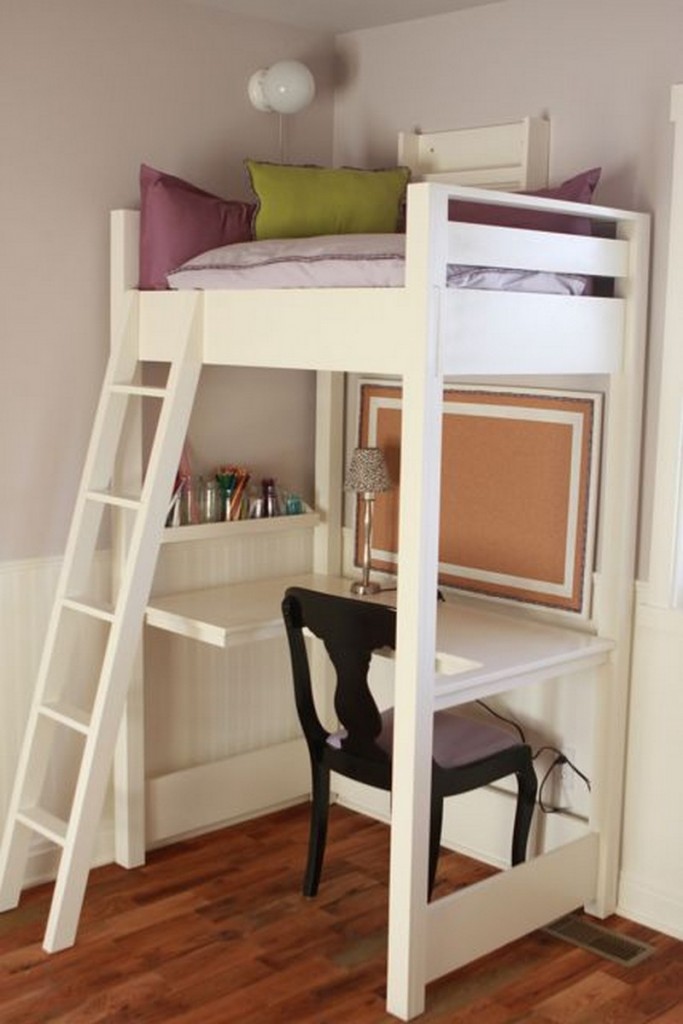
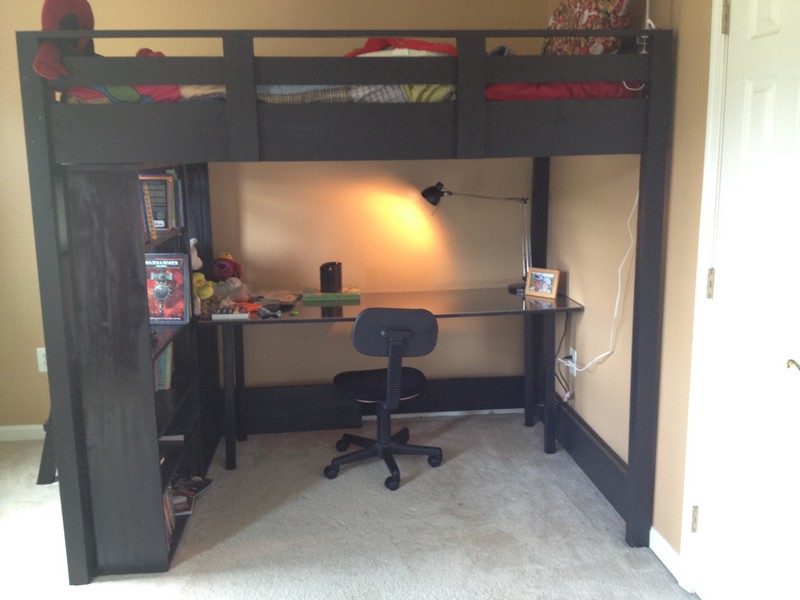
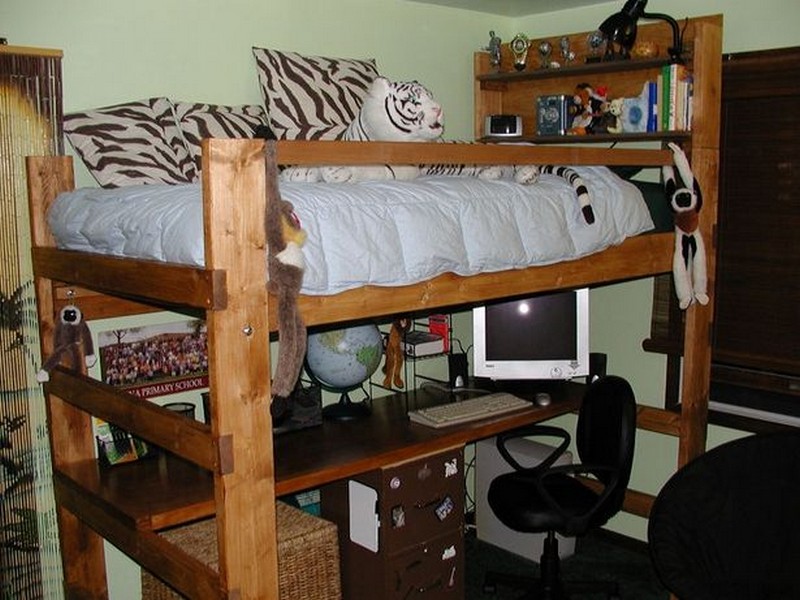
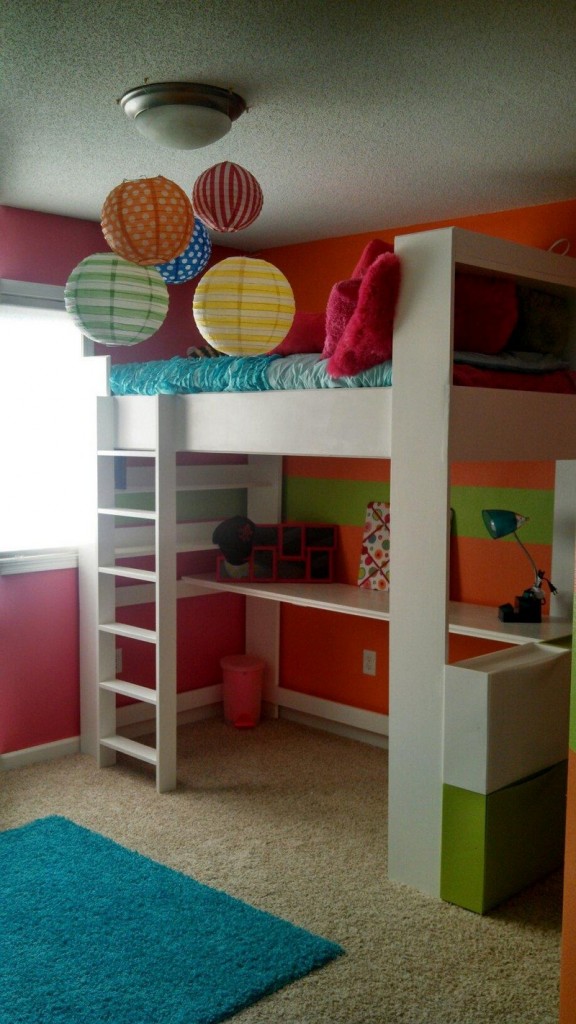
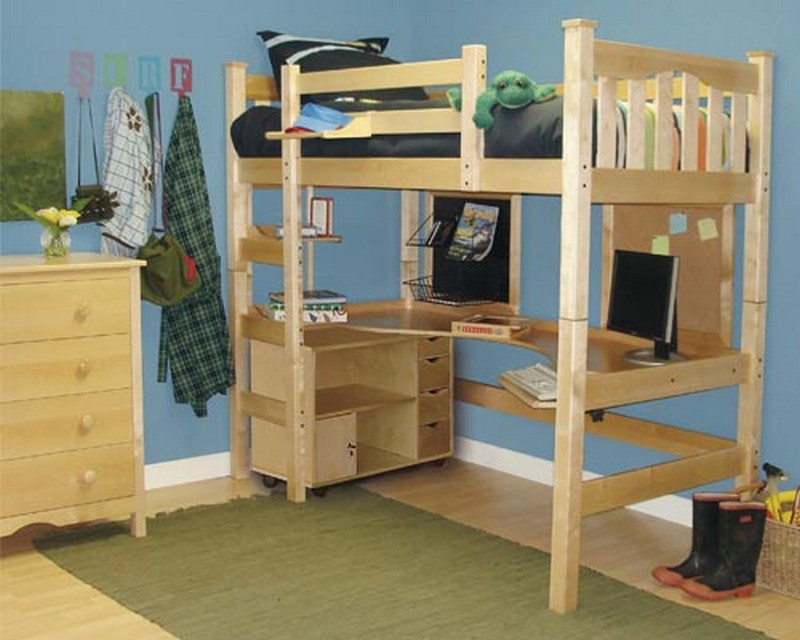
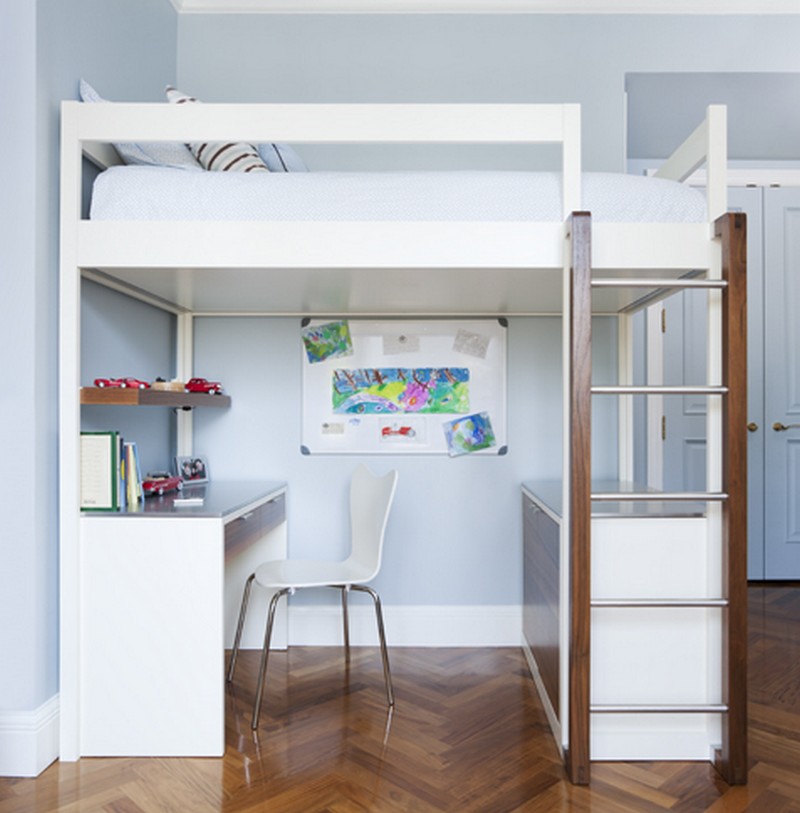
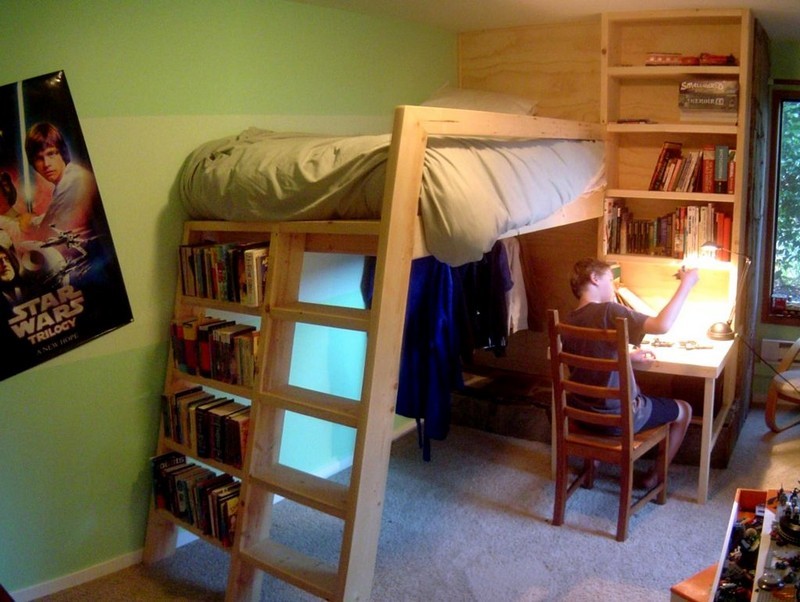
A highly functional kids’ bedroom can be achieved by maximizing space. Start by choosing the right bed. Loft beds with desks underneath are a great alternative to a conventional bed. Children can use their desks as a study area.
They can work against the desk or at a desk that is situated on the floor. If the child is into writing or drawing, they will spend more time doing those tasks. This is especially true if the bedroom is small. The saved space can be used to create a functional work and sleep area.
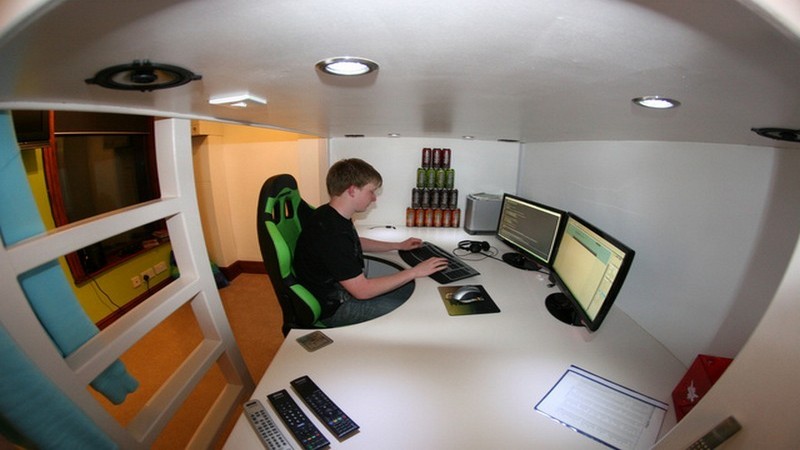
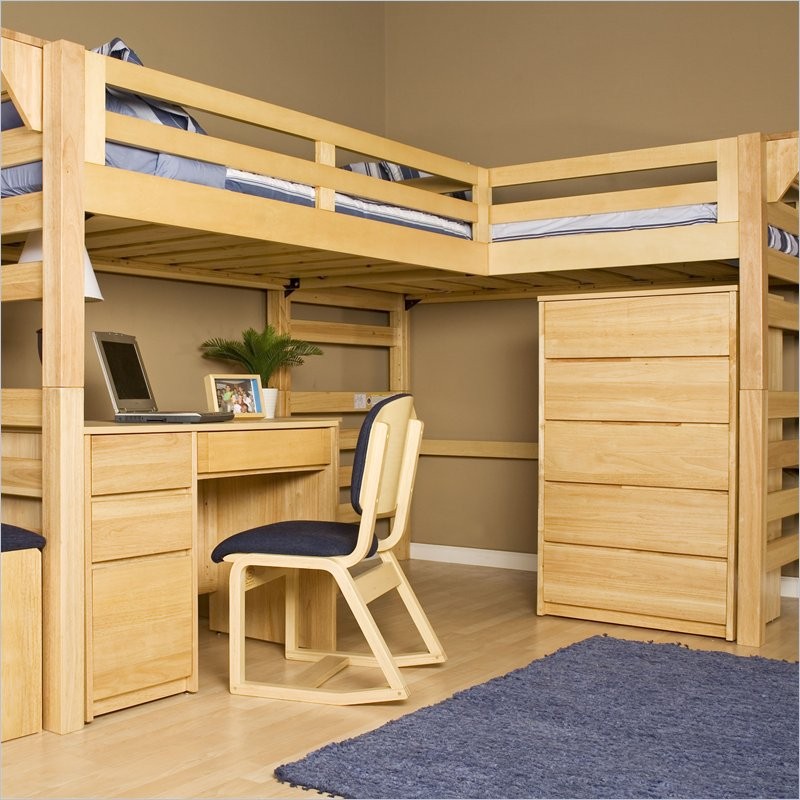
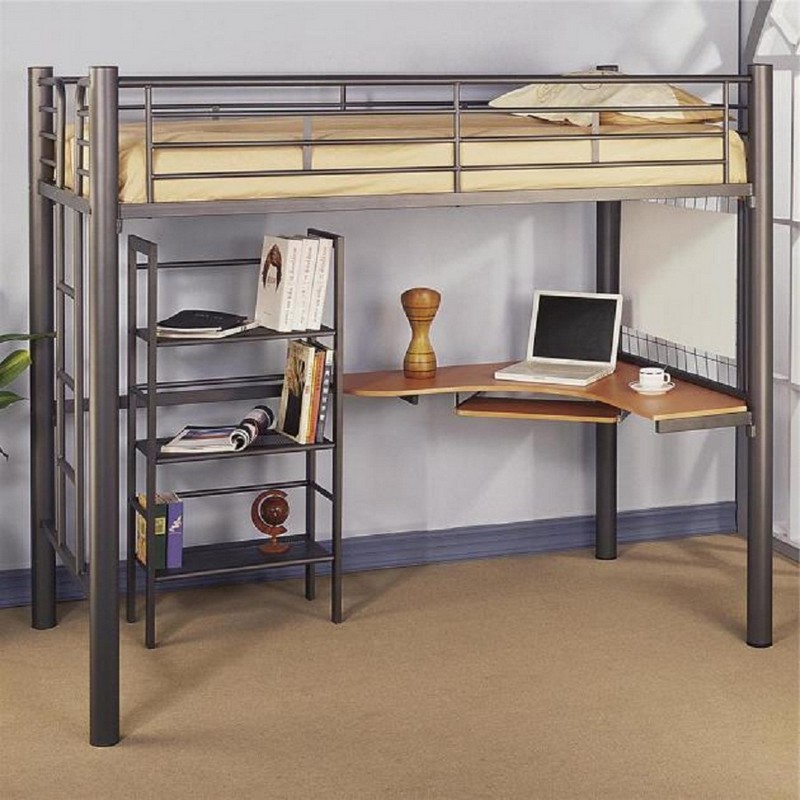
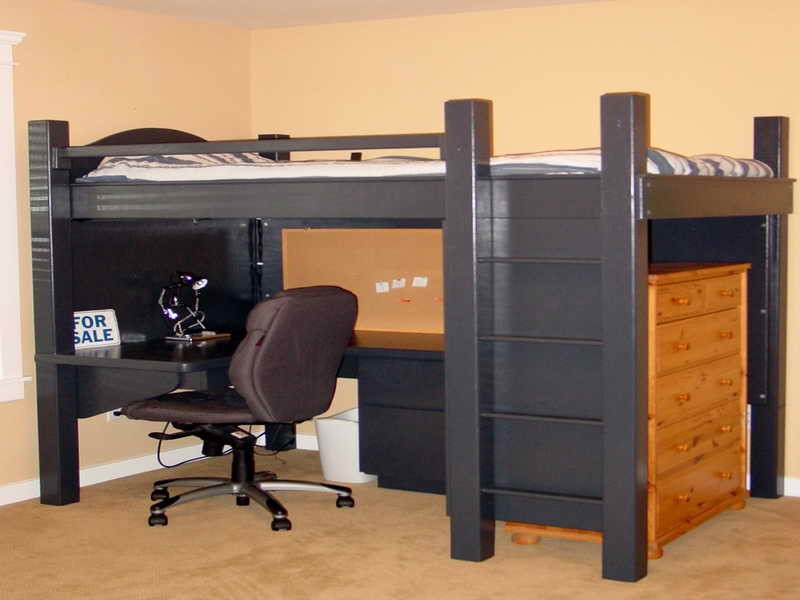
The space created underneath the bed can be used in a variety of ways. It’s commonly turned into a work area by adding a desk. It’s an ideal place to do homework, finish their projects, and study. Depending on the configuration, you can also add a computer, bookshelf, and extra storage.
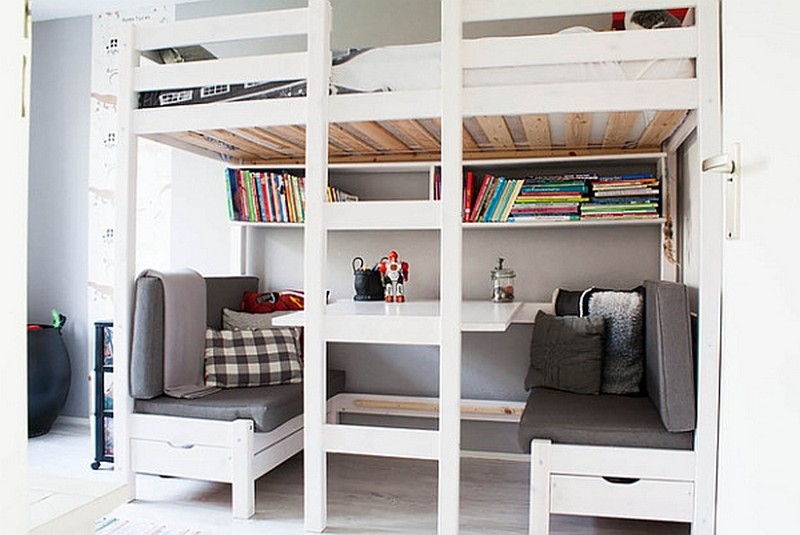
Another way of using the space underneath the loft bed is by adding a futon chair and turning it into an extra living space. And during sleepovers, the futon chair can be turned into an extra bed. The futon chair can transform into a comfortable bed.
This chair can also be used as a sofa. The futon chair has many advantages. Folding the chair is convenient. The futon chair is foldable so it easily fits into any space. This chair can also be used as a sofa. It easily sits on any floor.
Could you use one of these in your child’s bedroom?
If you want one, but don’t want to spend your money on an expensive store-bought loft bed, you can build your own.
How to Build Loft beds with desks?
Materials & Tools
- Airline cable wire
- Eyelet screws
- Rope
- Level
- Measuring tape
- Drill
- Speed square
- Wood glue
- 4” and 2” wood screws
- 2×4 lumber
- 1×6 lumber
- 1×4 select pine
- 1-1⁄4” dowels
- 1-1⁄4” spade drill bit
Instructions
1. Gather the materials
Before anything else, you need to identify the size that you want for any loft beds with desks, then collect all needed materials for the DIY project.
2. Mount the frame on the wall
After gathering the required materials for your loft beds with desks. Apply 4” wood screws to mount the frame onto the walls, then use 1x6s on the frame’s length to make a platform, and screw these to the 2x4s.
3. Attach the bed
Attach an eyelet screw to the bed’s end and connect it to the wall with airline cable wire.
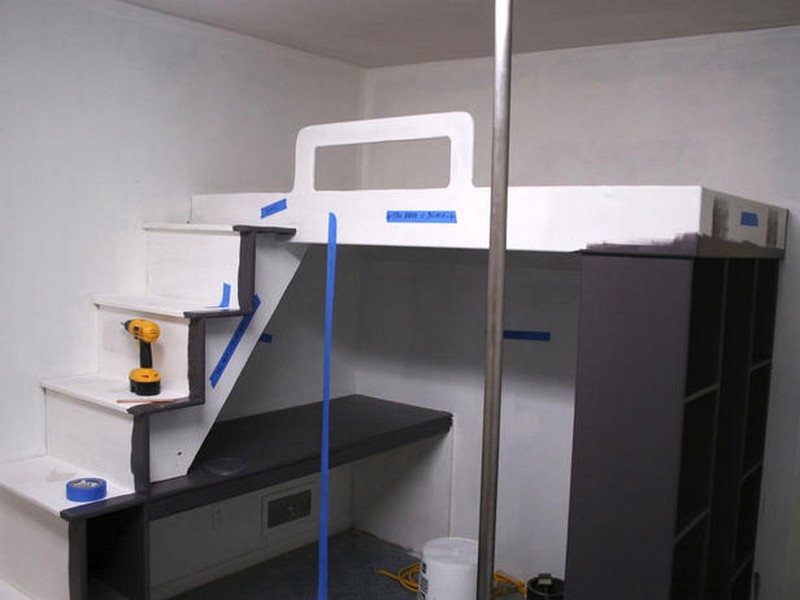
4. Create and install a ladder
Steps and rails can be made of dowels and 1×4 select pine. Add 1.5” to the measurement of the height of your bed on the wall. In order to calculate the angle at which the ladder must lean, trace a line using a speed square from the end of the rail to approximately 7″ down.
After cutting this with a jigsaw, position the rails precisely on top of each other and outline the same line to match them exactly.
If you prefer a 5-step ladder, then divided the height of my rails by 6 to ensure spaces for each step. Mark the measurements on rails and use a 1-1⁄4” spade drill bit to make a pocket on rails.
5. Create and install ladder rails
For the ladder rails, use 1-1⁄4’ dowels, cut to 15″ lengths. Apply wood glue for each dowel notch, line it up, and drill with 2″ wood screw into the rail on each side, directly into the dowel, which will provide extra support.
6. Create a safety rail
Lastly, make a safety rail with a measurement of 14” tall by 54” long. With select 2×2 pine, make a grid, and use pocket screws and wood glue. Connect each piece straight to the bed.
Building loft beds with desks are relatively easy and significantly cheaper. The skills needed are quite basic and there are lots of bed plans available on the internet. You can find all the materials needed in your local hardware stores.


Click on any image to start the lightbox display. Use your Esc key to close the lightbox. You can also view the images as a slideshow if you prefer 😎
Safety Features for DIY Loft Beds
Building loft beds with desks is an exciting project that can transform a child’s bedroom into a functional space for sleep, study, and play. However, safety should always be your top priority. Focusing on key safety features ensures that your loft beds with desks is practical and a haven for your child.
Railings
Railings are fundamental to ensuring the safety of loft beds with desks. These critical components act as a barrier, preventing falls and injuries that can occur, especially when children are sleeping or playing on the bed. It’s important to install railings on all exposed sides of the loft beds with desks to maximize safety, leaving no gaps that could pose a risk of slipping through.
When constructing or installing railings, choosing durable and strong materials is crucial. Metal or solid wood railings are excellent choices, as they can withstand daily use’s wear and tear without compromising safety. The design of the railings should also include no sharp edges or points that could cause injury.
The height of the railings is another important consideration. Railings should stand at least 5 inches higher than the mattress’s surface. This height minimizes the risk of rolling over the railings, even with pillows or bedding. For added safety, consider extending the height of the railings beyond the minimum requirement if the user is particularly active during sleep.
Furthermore, the spacing between the railing bars should be narrow enough to prevent a child’s head from fitting through. The Consumer Product Safety Commission recommends that the spaces between bars be no more than 3.5 inches apart to prevent entrapment and strangulation hazards.
In addition to these specifications, ensuring that the railings are securely attached to the bed frame is vital. They should be checked regularly for any signs of loosening or wear and tightened or repaired as necessary. This regular maintenance helps maintain the structural integrity of the loft beds with desk, ensuring it remains a safe space for children to sleep, study, and play.
Sturdy Ladder
The ladder is a key component of any loft beds with a desk, providing a safe means for getting in and out of bed. Its design, construction, and installation require careful consideration for maximum safety and durability. A well-built ladder supports the user’s weight comfortably and securely, preventing accidents and falls.
For the ladder to serve its purpose effectively, it must be constructed from strong, durable materials that can handle the stress of daily use. Solid wood or heavy-duty metal are preferred for their strength and longevity. The construction of the ladder should also ensure that it does not flex or bend under weight, which could lead to instability and potential falls.
Securing the ladder to the loft beds with desks frame is crucial for stability. The connection points should be reinforced to ensure the ladder remains firmly in place, even when supporting full body weight. Screws, bolts, or brackets used for attaching the ladder should be checked regularly to ensure they haven’t loosened over time, which could compromise the ladder’s safety.
Adding anti-slip pads to each step is an important safety measure to prevent slips and falls. These pads provide extra grip, even when socks or slippers are worn. For additional safety, ensure the ladder’s steps are wide enough to accommodate the user’s feet comfortably, and consider designing the ladder with a slight incline towards the bed, which can make climbing up and down easier and safer.
Furthermore, the ladder should be designed with ergonomics, ensuring it is at an appropriate angle for easy climbing. This means the ladder should neither be too steep, which can be difficult to climb, nor too shallow, which can take up unnecessary space. The optimal angle allows for a comfortable ascent and descent, reducing the strain on the user.
Secure Attachment to Walls
Ensuring the bed is securely attached to the wall studs for loft beds with desks is crucial for stability and safety. This step is vital in preventing the loft bed from tipping or wobbling, which could lead to accidents.
Secure attachment becomes even more critical when a desk or shelving is integrated into the loft beds with desks design. Adding these elements alters the weight distribution, potentially increasing the risk of the bed tipping over if not properly anchored.
Use heavy-duty brackets designed to support significant weight to achieve a secure attachment. These brackets should be firmly fixed into the wall studs, not just the drywall, to provide a strong anchor point. Wall studs offer the support needed to hold the loft beds with desks in place, ensuring it can safely support the weight of the user, the mattress, and any items on the desk or shelves.
Ensure that all connections between the loft beds with desks, the brackets, and the wall are tight and regularly check them for any signs of loosening. Over time, the movement from climbing up and down the ladder or shifting weight on the bed can cause connections to become loose. Periodic tightening of these connections will help maintain the bed’s stability and prolong its lifespan.
Appropriate Mattress Height
Maintaining the appropriate mattress height is another critical safety consideration for loft beds with desks. A mattress that is too high can significantly reduce the effectiveness of the bed’s railings, thereby increasing the risk of falls. The safety railings are designed to prevent users from rolling out of bed, but if the mattress is too high, it can render these railings less effective or even useless.
To ensure safety, check the manufacturer’s recommendations for the maximum mattress height for your specific loft beds with desk. These recommendations are based on the height of the railings and the overall design of the bed to ensure adequate protection against falls. Sticking to the recommended mattress height helps preserve the functionality of the safety railings and keeps the sleeper safe.
Selecting the correct mattress height contributes to safety by ensuring the railings can do their job and affects the overall comfort and aesthetics of the loft beds with desk setup. Following these guidelines, you can create a safe, functional, and comfortable space that maximizes the benefits of loft beds with a desk.
Regular Inspections
Regular inspections are critical to maintaining the safety and longevity of loft beds with desks. By conducting these inspections, you can identify and address any potential issues before they lead to accidents or injuries. It’s essential to check the loft bed with desk for signs of wear and tear, as well as any loose fittings that could compromise the bed’s stability.
During these inspections, pay close attention to the structural integrity of the loft beds with desks. Look for cracks, splits, or warping in the wood or metal that could indicate weakness. These issues can arise from regular use over time and may not be immediately apparent without a thorough inspection.
Loose screws are another common issue that can affect the safety of loft beds with desks. Screws can gradually loosen due to the movements of climbing up and down the ladder or the shifting weight on the bed and desk.
Use a screwdriver or appropriate tool to tighten any loose screws you find during your inspection. If screws continue to loosen over time, consider using a thread-locking compound to keep them securely in place.
Additionally, it’s important to check all connections and joints on the loft beds with desks. Ensure that brackets, bolts, and other hardware are tight and secure. If any parts are worn or damaged, replace them immediately to prevent further damage or potential accidents. Using original manufacturer parts for replacements can help maintain the structural integrity of the loft beds with the desk.
Regular maintenance of the loft bed with desk not only prevents accidents caused by structural failures but also extends the life of the furniture. By dedicating time to inspect and maintain the loft bed with desk, you can ensure it remains a safe, sturdy, and functional piece in your home. This proactive approach to maintenance can give you peace of mind, knowing that the loft bed with desk is in the best possible condition for daily use.
FAQ for Loft Beds with Desks
Can I customize my loft bed with a desk to fit my child’s room?
Yes, loft beds with desks are highly customizable. You can choose different materials, colors, and sizes to match your child’s personality and room decor. You can also add unique elements like extra shelving, a bulletin board, or specific lighting to create a personalized space.
What safety features should I look for in loft beds with desks?
Safety features to look for include sturdy railings on all sides not against a wall, a safe and secure ladder, secure attachment to wall studs, appropriate mattress height, and regular inspections to tighten any loose screws and replace worn parts.
How do I ensure the loft bed with desks is securely attached to the wall?
Use heavy-duty brackets to attach the loft bed frame directly to the wall studs. Ensure all connections are tight and check them regularly for any signs of loosening to maintain stability and prevent the bed from tipping over.
What is the recommended mattress height for a loft bed with a desk?
The recommended mattress height varies by manufacturer, but generally, the mattress should not exceed a height where the top of the mattress is less than 5 inches below the top of the safety railings. Check the manufacturer’s recommendations to maintain safety.
How often should I inspect the loft bed with desk for wear and tear?
Regular inspections should be conducted at least every six months, or more frequently if the bed is used vigorously. Look for signs of wear and tear, loose fittings, and any damage that might compromise the bed’s structure and safety.
Are loft beds with desks suitable for adults?
Yes, many loft beds with desks are designed to support adult weights and sizes. Ensure the loft bed you choose has a suitable weight capacity and is made of sturdy materials like solid wood or metal to safely support an adult.
Can the desk under the loft bed be removed or changed?
Depending on the design of the loft beds with desks, the desk may be removable or interchangeable. Some models offer modular designs that allow you to customize the layout as needed, including removing or replacing the desk.
How can I maximize the space under a loft bed with a desk?
Besides using the space for a desk, you can add storage solutions like drawers, shelves, or cabinets. Consider also adding a small seating area for reading or relaxing to fully utilize the space.
Conclusion
Loft beds with desks offer a smart solution for maximizing space in small bedrooms, combining a comfortable sleeping area with a functional work station. These beds are not only space savers but also create a productive environment for studying or working. With the right safety features, such as sturdy railings, secure ladders, and proper attachment to wall studs, loft beds with desks can be a safe and stylish addition to any room.
If you liked these, you will also like viewing other Bedroom Ideas, Loft Bedrooms – making space, and Bunk Beds.