Last Updated on March 11, 2024 by teamobn
Keeping the school stuff together makes the stress of mornings less for everyone in the family. If you’re looking for a storage system for your kid’s backpacks, then this DIY backpack station might interest you!
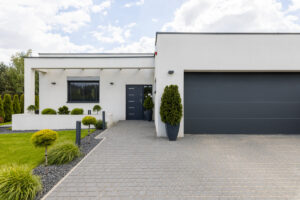
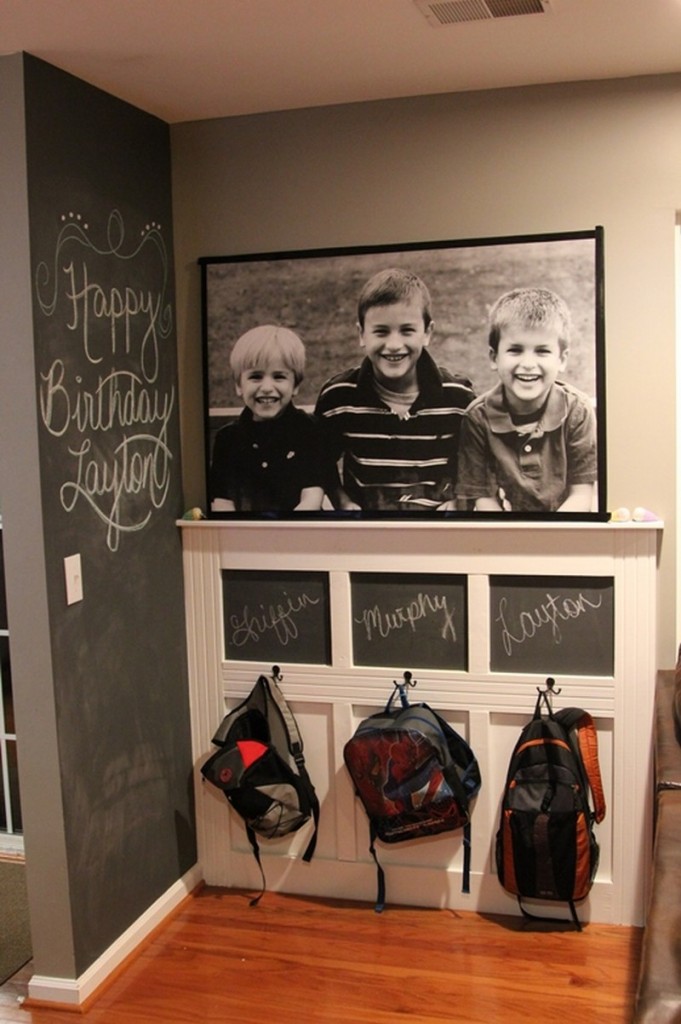
This project not only provides great storage for your bags and whatnot, but it also serves as a beautiful outfit for a rather dull wall. The long ledge on top allows for a display of family pictures and souvenir items.
Awesome Backpack Station Idea for Your Family
With this DIY piece of furniture, you can have a space-saving storage solution plus a beautiful entryway to welcome anyone entering the house! Could this be your next weekend project?
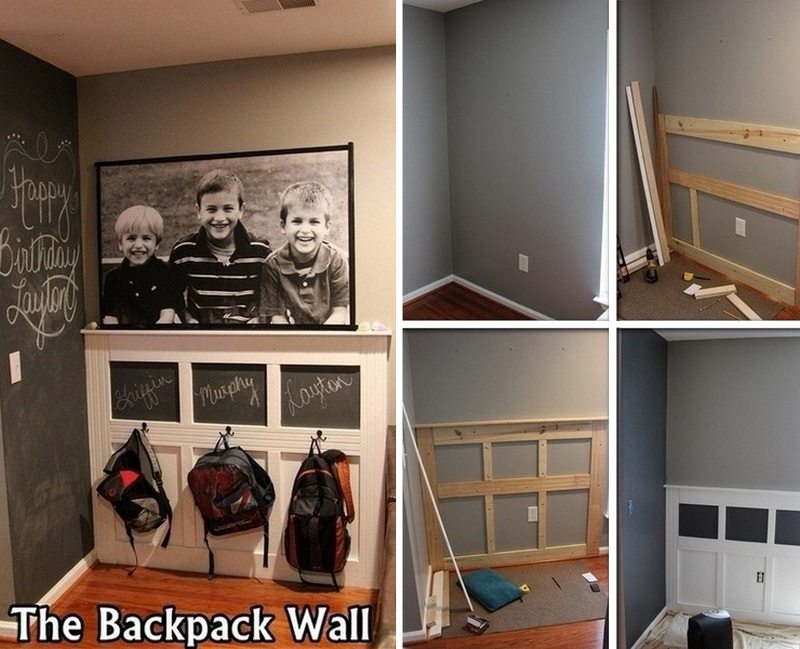
How to Build a Backpack Station for Kids
This is a great way to keep your family organized and make sure everyone’s belongings are in one place. First, you’ll need to gather some supplies.
Materials:
- ¾” thick Wood boards (3 and 6 inches wide)
- Screw-in Hooks
- Wood Filler
- Carpenter’s Tape
- Primer and Paint
- Chalkboard Paint
Tools:
- Drill
- Saw
- Tape Measure
If you’re like most people, you probably have a backpack full of textbooks, materials, and other essentials that you need to tote around with you daily. lugging all that weight around can be a pain, and it’s easy to forget things when you’re constantly on the go.
One way to make your life a little bit easier (and your bag a little bit lighter) is to build a backpack station. This can be a simple shelf or cabinet near your door where you can store your bags and all of its contents so you’re never caught off guard without something you need.
Here are a few tips for building the perfect backpack station:
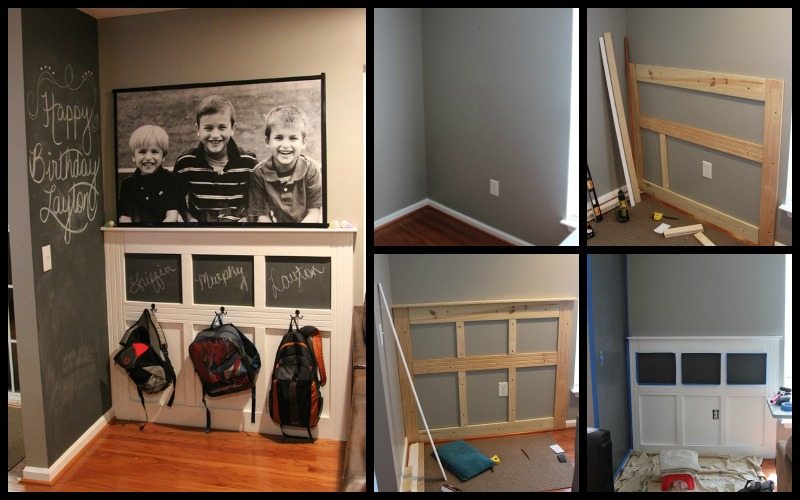
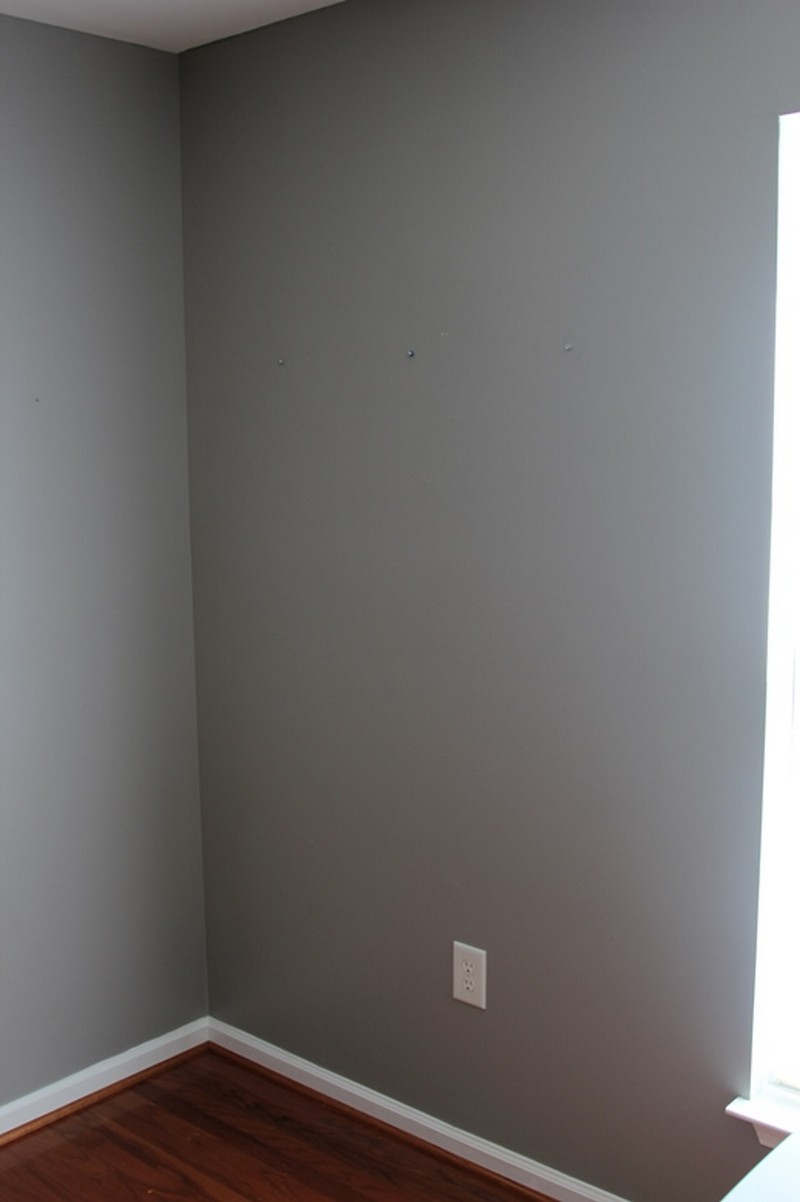
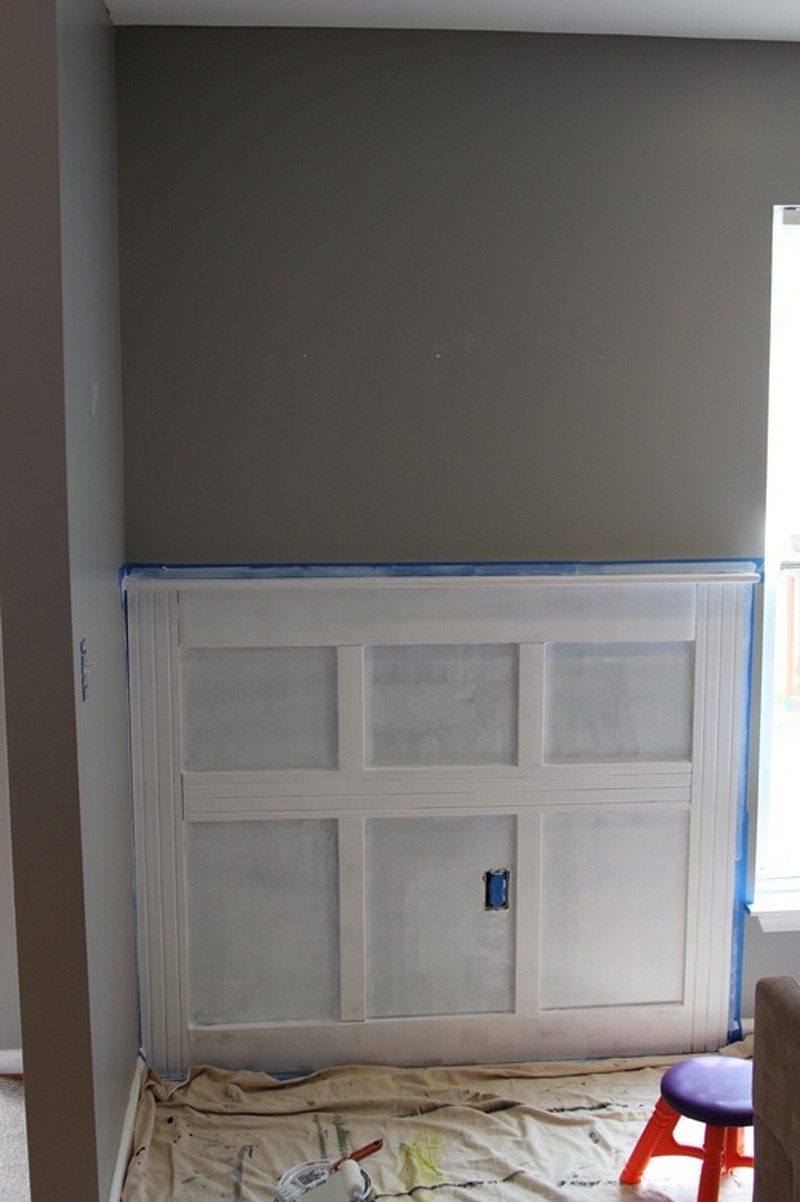
1. Measure the wall area
Using your tape measure, measure one side of your wall. Make sure it’s big enough to hang all your kids’ backpacks.
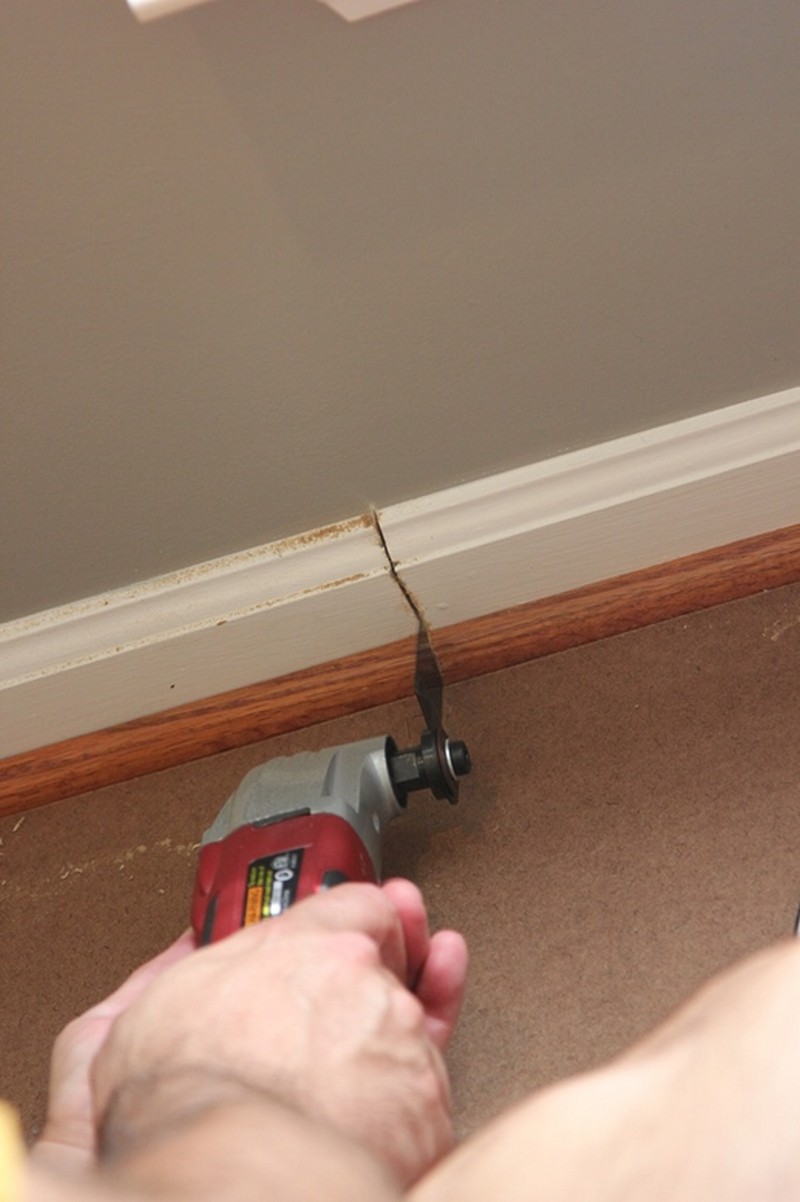
2. Cut and mount the 1×6
Cut and mount the 1×6 on the left side of the wall. Make sure the blade is parallel to the wall. You may need to adjust the blade depth to get the desired look.
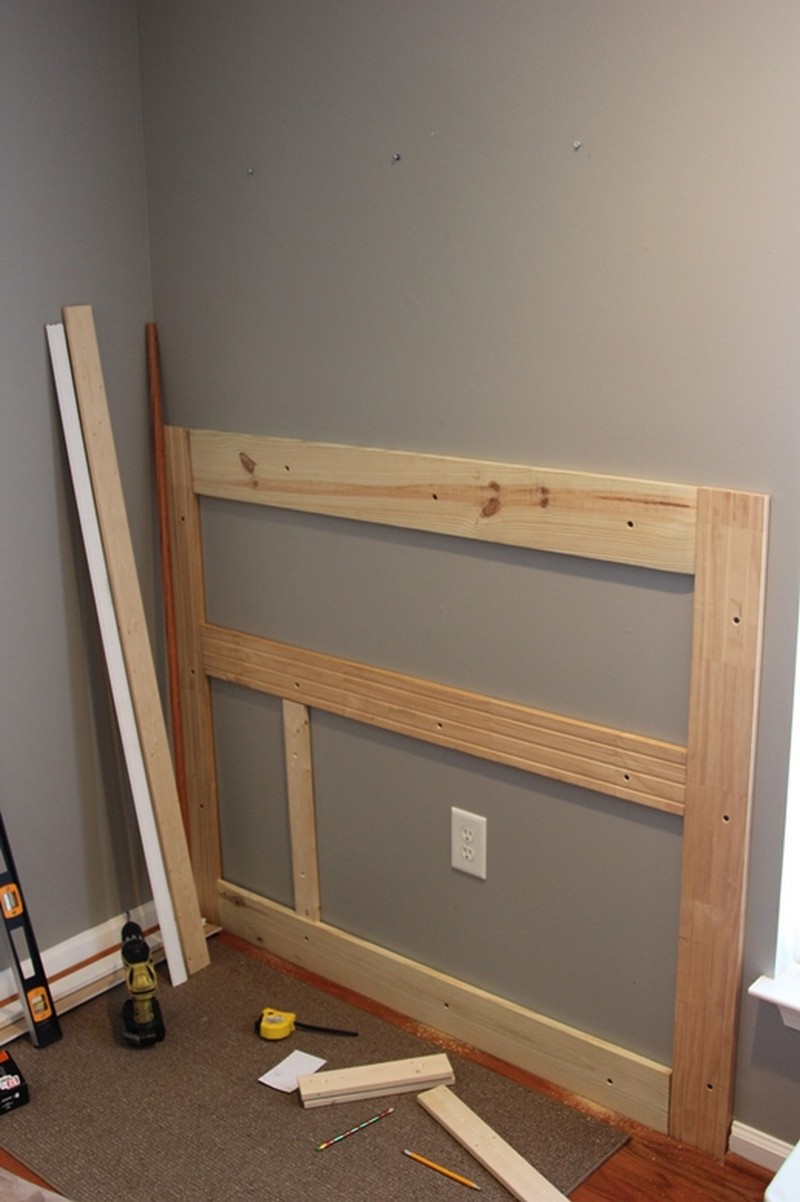
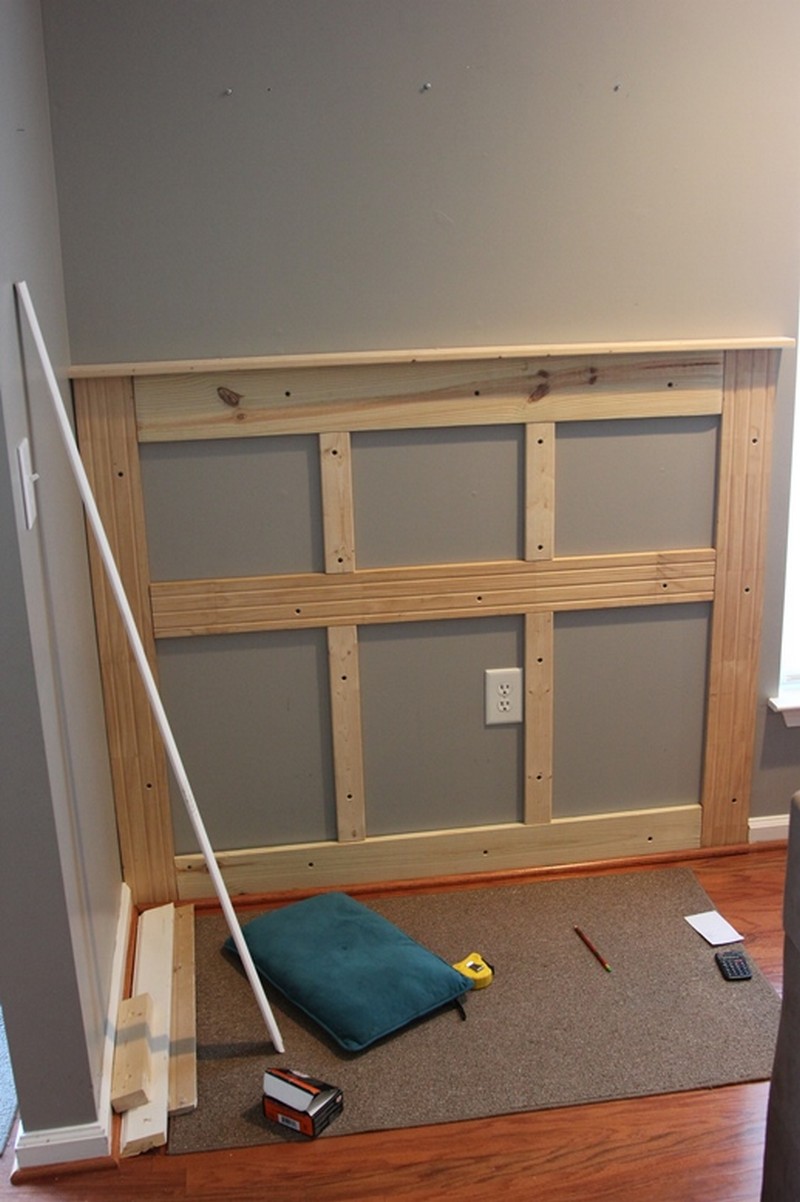
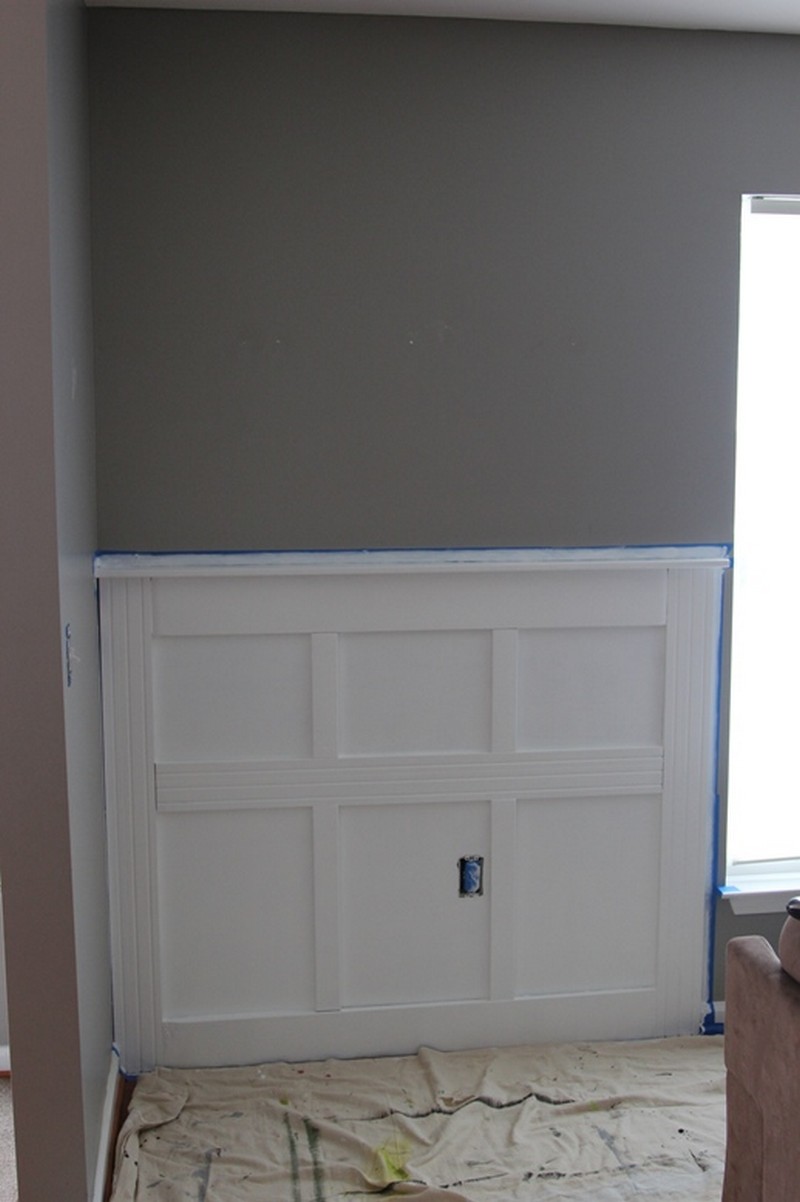
3. Cut and mount the 1×3 for the studs
These studs are placed horizontally across the bottom, middle and top. The middle one is where you will add the hooks
4. Cut and mount a 1×3 for the shelf
To make it look nicer, you can add another 1×3 on top of the horizontal piece located above the middle stud. This will serve as their small shelf.
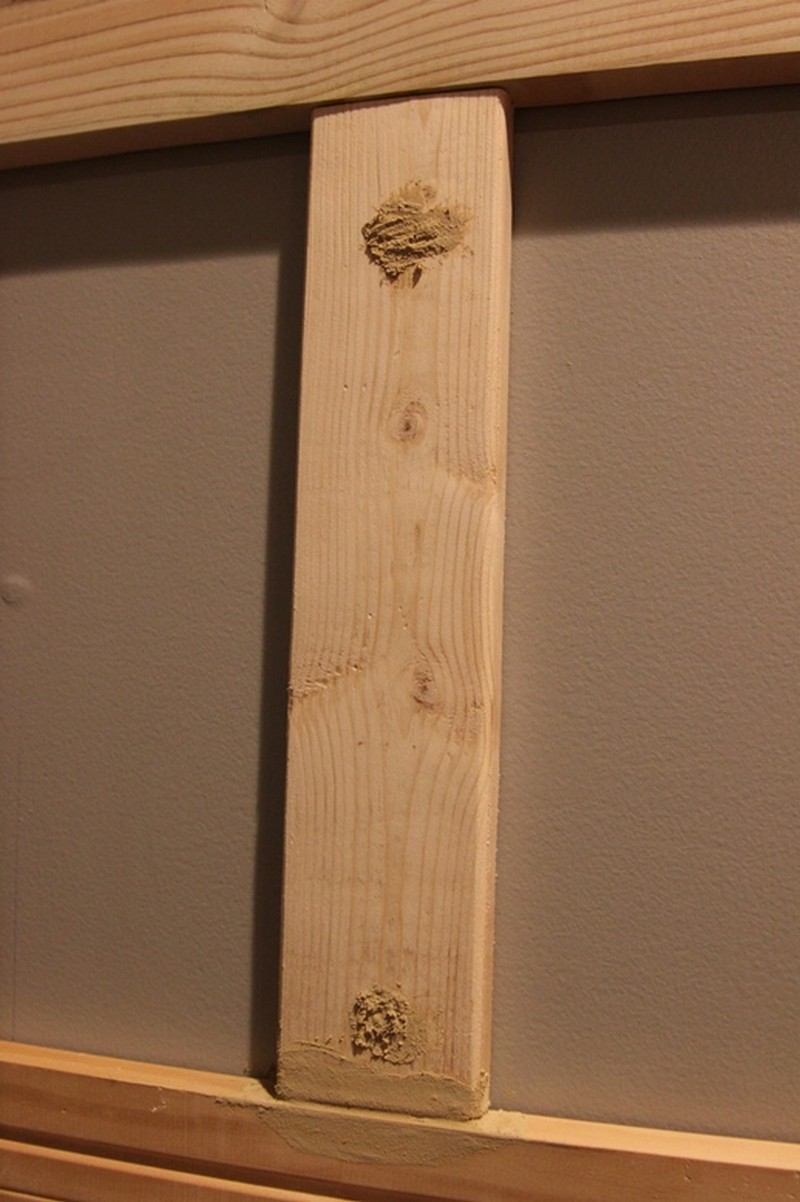
5. Add wood putty
Be sure to add wood putty on the seams and screw holes before you begin painting. It’s important to let the putty dry completely before proceeding. This will help ensure a professional-looking finish.
6. Sand it down
Once dry, you can now smoothen them by sanding and wiping off the dust.
7. Add hooks for the backpack
Don’t forget to add the hooks for your backpacks! You can use an ordinary C-hook or screw-in hooks for your backpack station.
8. Apply paint
To make it look like the ideal backpack station for your boys, why not paint it blue or green! or maybe a pink or yellow for your girls’ backpack station! After painting, just let it dry for a few hours or a day.
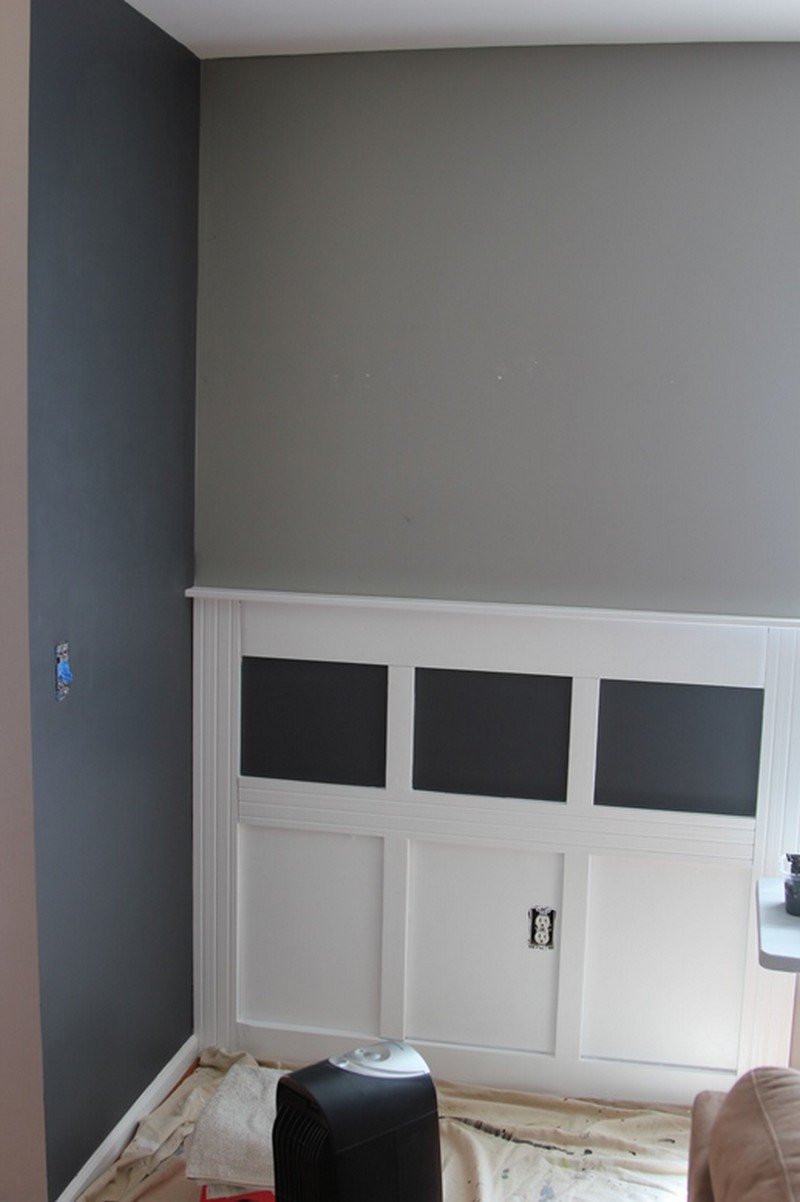
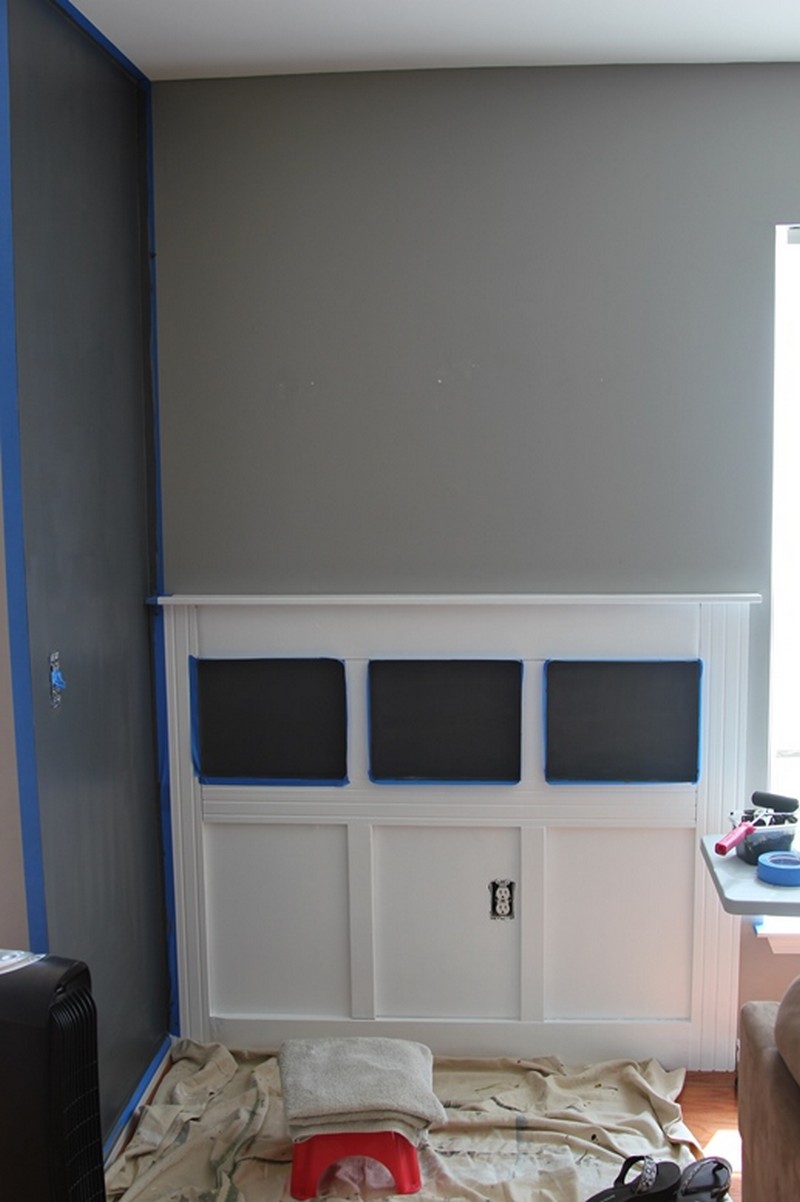
9. Mount the chalkboard
A large chalkboard and a frame of your kids can be added on either side for a touch of more detail. You can add notes to the chalkboard for your kids! Such a personal touch! Isn’t this the perfect backpack station for your kids!
Great job! Your kids can now enjoy using their backpack station! This will help them keep their backpacks organized and ready to go to school each day. ????
Click on any image to start the lightbox display. Use your Esc key to close the lightbox. You can also view the images as a slideshow if you prefer 😎


Thanks to Scatter Shot for this great project.
If you liked this project, you will also like viewing these storage ideas…
More Ideas? Designing the Ultimate Backpack Station for Your Kids
In the hustle and bustle of daily life, keeping track of your kids’ belongings can feel like a never-ending challenge. From backpacks and lunch boxes to coats and shoes, it’s easy for things to get lost in the shuffle. But fear not!
With a little creativity and ingenuity, you can design the ultimate backpack station for your kids—a dedicated space where they can store their belongings in style and stay organized all year round. Join me as we explore some creative designs and ideas to transform your entryway or mudroom into a functional and fun backpack station that your kids will love.
1. The Colorful Cubby System
Say goodbye to clutter with a colourful cubby system that puts everything in its place. Start by installing a row of cubbies along the wall, each labelled with your child’s name or initials. Assign a cubby for backpacks, lunch boxes, jackets, and shoes, ensuring that everything has its own designated spot.
Add a pop of colour with vibrant paint or patterned wallpaper to make the cubbies stand out and add personality to your space. Don’t forget to include hooks or pegs for hanging coats and bags, as well as baskets or bins for storing smaller items like hats, gloves, and scarves.
2. The DIY Pegboard Organizer
Get creative with a DIY pegboard organizer that combines form and function in one stylish package. Start by mounting a large pegboard to the wall, then customize it with a variety of hooks, shelves, and accessories to suit your needs. Use S-hooks to hang backpacks and lunch boxes, while wire baskets or shelves can hold shoes, water bottles, and other essentials.
Add a touch of whimsy with decorative elements like chalkboard labels, photo frames, or even mini chalkboards where your kids can leave messages or reminders for each other. The best part? You can easily rearrange and customize the pegboard as your needs change over time.
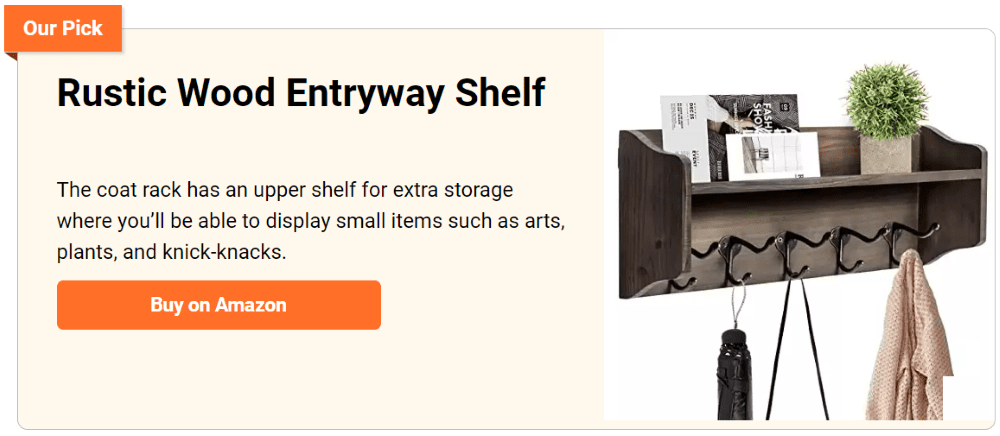
3. The Rustic Wooden Rack
For a touch of rustic charm, consider a wooden rack made from reclaimed lumber or pallet wood. Start by constructing a simple frame with shelves or cubbies for storage, then add hooks or pegs along the bottom for hanging backpacks and coats. Sand and stain the wood to enhance its natural beauty, or paint it in bold colours for a modern twist.
Add personal touches like stencilled names or monograms to give each child their own designated space. Finish the look with decorative elements like chalkboard panels or framed artwork to add interest and personality to your space.
4. The Space-Saving Wall-Mounted Shelf
Short on space? No problem! A wall-mounted shelf can provide the perfect solution for storing backpacks and other essentials without taking up valuable floor space. Start by installing a sturdy shelf along the wall at a height that’s easily accessible for your kids.
Add hooks or pegs underneath for hanging backpacks, lunch boxes, and jackets, while baskets or bins on top can hold smaller items like hats, gloves, and school supplies. For added convenience, consider installing a small bench or stool underneath where your kids can sit while putting on their shoes or backpacks.
5. The Magnetic Chalkboard Command Center
Combine organization and creativity with a magnetic chalkboard command centre that’s as practical as it is stylish. Start by mounting a large chalkboard to the wall, then add magnetic hooks, clips, and containers for holding backpacks, lunch boxes, and other essentials.
Use chalkboard markers to write each child’s name or assign tasks and responsibilities for the week, such as homework assignments or chores. Add a touch of whimsy with colourful magnets or decorative accents, and don’t forget to include a ledge or shelf for holding chalk, erasers, and other supplies.
6. The Nook and Cranny Organizer
Make the most of every inch of space with a nook and cranny organizer that maximizes storage potential. Start by identifying unused or underutilized areas in your entryway or mudroom, such as corners, alcoves, or awkwardly shaped spaces. Then, get creative with custom-built shelving, cabinets, or cubbies that fit snugly into these spaces, providing storage for backpacks, shoes, and other essentials.
Consider incorporating pull-out drawers or baskets for hidden storage, as well as hooks or pegs for hanging coats and bags. Add personality with decorative elements like wallpaper, paint, or artwork to transform these hidden spaces into functional and stylish storage solutions.
With a little creativity and imagination, designing the ultimate backpack station for your kids is easier than ever. Whether you prefer a colourful cubby system, a DIY pegboard organizer, or a rustic wooden rack, there are endless possibilities for creating a space that is both functional and fun. So roll up your sleeves, unleash your creativity, and transform your entryway or mudroom into a stylish and organized space that your kids will love coming home to.
The Wrap Up
As we draw the curtains on our exploration of the backpack station, it becomes evident that this simple yet ingenious organizational solution holds significant advantages that extend far beyond mere convenience. From streamlining daily routines to fostering independence and responsibility in children, the backpack station serves as a cornerstone of efficiency and harmony within the home.
The primary advantage of a backpack station lies in its ability to streamline daily routines, particularly during the hectic mornings. Gone are the days of frantic searches for misplaced backpacks or forgotten school supplies.
With everything neatly organized and readily accessible in the backpack station, mornings become smoother and more efficient. This not only reduces stress for parents but also sets a positive tone for the entire day, creating a ripple effect of productivity and calmness throughout the household.
Beyond its practical benefits, the backpack station serves as a catalyst for nurturing independence and responsibility in children. By providing them with a designated space for their belongings, the station empowers kids to take charge of their own organization and daily tasks.
Instead of relying on constant reminders from parents, children learn to manage their backpacks, pack their essentials, and prepare for the day independently. This fosters a sense of self-reliance and accountability that will serve them well as they navigate the challenges of school and adulthood.
At its core, the backpack station is a testament to the importance of organization and order within the household. By establishing designated spots for backpacks, lunch boxes, shoes, and other essentials, the station helps eliminate clutter and create a sense of harmony in the entryway or mudroom.
With everything neatly arranged and easily accessible, both children and parents can quickly locate what they need and maintain a tidy living space. This not only enhances efficiency but also cultivates a sense of calmness and tranquility in the home.
Beyond its practical benefits, the backpack station serves as a focal point for family interaction and collaboration. Whether it is designing and building the station together or maintaining it as a shared responsibility, the process of creating and using the backpack station strengthens family bonds.
It provides an opportunity for parents and children to work together towards a common goal, fostering a sense of teamwork and unity. By involving children in the decision-making process and encouraging them to contribute to the upkeep of the station, parents create opportunities for quality time and shared experiences that deepen familial connections.
Finally, the presence of a backpack station in the home creates a positive and nurturing environment that supports the well-being and development of children. With a designated space for their belongings, children feel valued and respected, knowing that their needs and preferences are taken into account.
Frequently Asked Questions
1. What is a backpack station, and why do you need one?
A backpack station is a designated area in your home where your kids can store their backpacks, shoes, jackets, and other school essentials. It serves as a centralized hub for organizing and storing items, making mornings smoother and more efficient.
By having a dedicated space for their belongings, kids learn responsibility and independence while parents enjoy a clutter-free entryway.
2. How can I build a backpack station?
Building a backpack station is easier than you might think. Start by identifying a suitable location, such as an entryway, mudroom, or hallway. Next, gather materials such as hooks, shelves, baskets, and a bench.
Follow step-by-step instructions or tutorials to assemble and install the components, ensuring everything is securely anchored to the wall or floor.
3. Do you need any special tools or skills to build a backpack station?
While basic DIY skills are helpful, you don’t need to be a carpenter or handyman to build a backpack station. Many tutorials provide clear instructions and diagrams, making the process accessible to beginners.
Basic tools such as a drill, screwdriver, level, and measuring tape are typically required, but nothing overly complicated.
4. How much space do you need for a backpack station?
The amount of space required depends on the size of your family and the number of items you need to store. A small corner or wall alcove can suffice for a compact backpack station, while larger families may require a more extensive setup with multiple shelves, hooks, and compartments. Measure your available space and plan accordingly to maximize efficiency.
5. Can you customize your backpack station to suit your family’s needs?
Absolutely! One of the advantages of building a backpack station is the ability to customize it according to your family’s preferences and lifestyle. Choose colours, materials, and designs that complement your home decor and reflect your personal style.
Consider adding features such as chalkboard paint for notes and reminders or labels for each child’s belongings. In addition to chalkboard paint, you can explore other writable surfaces such as whiteboard panels, acrylic boards, or adhesive chalkboard decals. These options offer flexibility in size, shape, and placement, allowing you to customize your backpack station according to your preferences and available space. With writable surfaces, you can create designated areas for each child to write their name, jot down assignments or tasks, or leave messages for family members.
6. How do you maintain and organize my backpack station once it’s built?
Maintaining your backpack station is relatively simple with regular upkeep and organization. Encourage your kids to clean out their backpacks and store items in designated bins or compartments each day.
Use hooks for hanging backpacks and jackets, baskets for shoes and accessories, and shelves for books and homework. Periodically declutter and reassess your storage needs to keep the station tidy and efficient.
7. Are there any safety considerations you should be aware of?
Safety should always be a top priority when building and using a backpack station. Ensure that shelves, hooks, and other components are securely anchored to the wall or floor to prevent tipping or collapse.
Avoid placing heavy items on high shelves where they could pose a risk of falling. Teach your kids to use the backpack station responsibly and to be mindful of their surroundings.