Last Updated on November 12, 2025 by teamobn
Building a treehouse is a rewarding DIY project that creates a magical outdoor space for children and adults alike. Whether you’re constructing a simple platform or an elaborate multi-room structure, following proper building techniques ensures safety and longevity.
This comprehensive guide walks you through the entire process, from selecting the right tree to adding finishing touches. According to the International Code Council, proper planning and adherence to building codes are essential for creating a safe, durable treehouse that will last for decades.
Contents
- 1 What You’ll Learn:
- 2 Step-by-Step Guide on How to Build A Tree House Safely
- 2.1 Step 1: Stick To Building Codes
- 2.2 Step 2: Select a Healthy, Suitable Tree
- 2.3 Step 3: Create or Choose a Design Plan
- 2.4 Step 4: What Essential Tools and Materials are Needed to Build a Tree House?
- 2.5 Step 5: How to Build a Tree House Platform Frame?
- 2.6 Step 6: How to Add Support Posts or Braces to Your Tree House
- 2.7 Step 7: How to Install Flooring with Safety Padding?
- 2.8 Step 8: How to Construct Walls, Roof and Features for Your Tree House?
- 2.9 Step 9: How to Add a Ladder or Stairs and Finishing Touches To Your Tree House?
- 3 Frequently Asked Questions (FAQ)
- 4 Bottom Line
What You’ll Learn:
- How to choose the right tree species and assess tree health
- Building code requirements and permit processes
- Exact materials and costs (with breakdown)
- Step-by-step construction techniques
- Safety guidelines and inspection checklists
- Common mistakes to avoid
Step-by-Step Guide on How to Build A Tree House Safely
So, if you’re a Do-It-Yourself (DIY) kind of person who has never done this before, below are nine easy steps that will guide you to the completion of the treehouse of your dreams.
Step 1: Stick To Building Codes
The construction of any structure is no longer a smooth process due to the legalities. In the past, building permits were not required for the erection of tree houses on family property.
However, with the introduction of modern treehouses fitted with amenities, a building permit may be required depending on your state guidelines. Most jurisdictions require permits for structures over 120-200 square feet or exceeding 10-15 feet in height. Always check with your local building department before starting construction.
Before purchasing any materials or selecting a tree, you must understand the legal requirements in your area. Building codes exist to ensure structural safety and prevent property disputes.
What You Need to Check:
| Requirement | Typical Standard | Where to Check |
|---|---|---|
| Permit Threshold | Structure >120-200 sq ft or >10-15 ft high | City/County Building Department |
| Setback from Property Lines | 10-15 feet minimum | Local Zoning Office |
| Maximum Height | 15-20 feet (varies by jurisdiction) | Municipal Building Code |
| HOA Approval | May require written permission | Homeowners Association |
| Tree Ordinance Compliance | Protected species may be restricted | Environmental/Parks Department |
⚠️ IMPORTANT: According to the International Residential Code (IRC), even if your treehouse falls below permit thresholds, you’re still responsible for building a structurally sound structure. Insurance companies may deny claims for unpermitted structures.
Step 2: Select a Healthy, Suitable Tree
Choose a mature hardwood tree (oak, maple, ash, or beech) with a minimum trunk diameter of 12 inches. The tree should be 15-20 years old, disease-free, and have a strong root system.
The tree is your foundation, so selecting the right one is critical. According to USDA Forest Service research, mature hardwoods provide the best combination of strength, stability, and longevity for treehouse construction.
Best Tree Species for Treehouses:
| Tree Species | Weight Capacity | Growth Rate | Longevity | Rating |
|---|---|---|---|---|
| Oak | 2,000-5,000 lbs | Slow | 100+ years | ⭐⭐⭐⭐⭐ Excellent |
| Maple | 1,500-3,500 lbs | Medium | 80-100 years | ⭐⭐⭐⭐⭐ Excellent |
| Ash | 1,500-3,000 lbs | Medium | 80-100 years | ⭐⭐⭐⭐ Very Good |
| Beech | 1,500-3,000 lbs | Slow | 80-100 years | ⭐⭐⭐⭐ Very Good |
| Pine (mature) | 1,000-2,000 lbs | Fast | 50-80 years | ⭐⭐⭐ Good (use caution) |
| ❌ Willow | 500-1,000 lbs | Very Fast | 30-50 years | ❌ Avoid – Too weak |
| ❌ Poplar | 500-1,000 lbs | Very Fast | 30-50 years | ❌ Avoid – Too brittle |
Tree Health Assessment Checklist:
✓ Minimum Requirements:
- Trunk diameter: 12 inches minimum (measure at 4-5 feet height)
- Age: 15-20 years old minimum
- Height: Sufficient for 8-15 foot platform height
- Location: At least 10-15 feet from property lines
🔍 Inspection Points (Check for RED FLAGS):
- Visible decay, cavities, or hollows in the trunk
- Fungal growth (mushrooms/conks on trunk or roots)
- Cracks or splits in major branches
- Dead or dying branches in canopy (>25% dead wood)
- Leaning trunk (indicates root problems)
- Exposed or damaged root system
- Recent soil disturbance around roots
- Signs of insect infestation (bore holes, sawdust)
Pro Tip: Consider hiring a certified arborist (cost: $100-$300) to assess tree health before building. The International Society of Arboriculture maintains a directory of certified professionals. This investment can prevent costly failures and safety hazards.
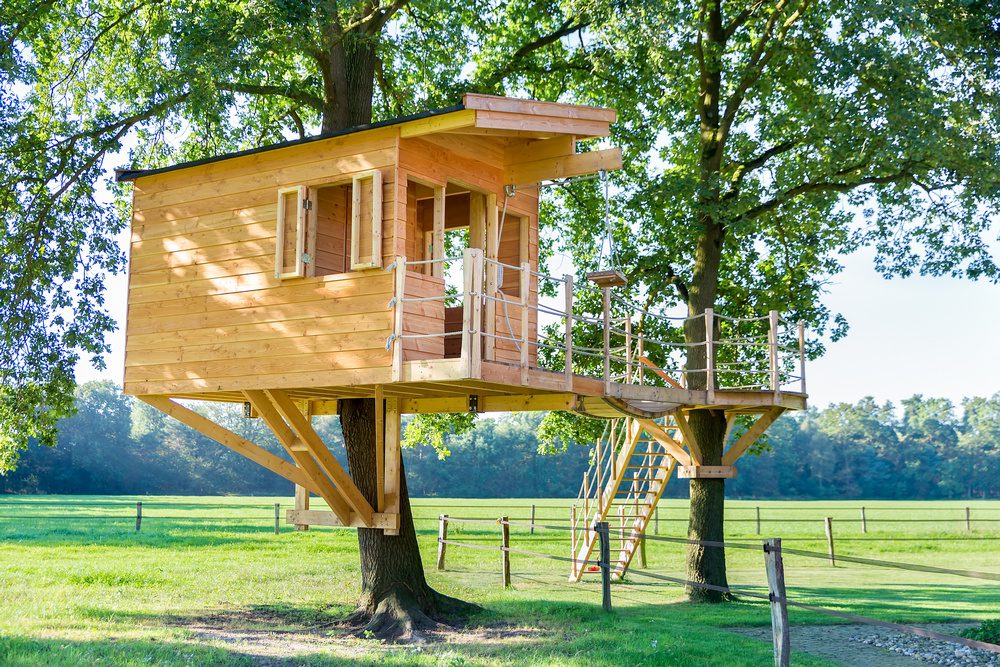
Step 3: Create or Choose a Design Plan
Design a platform under 200 square feet (to minimize permit requirements) at a height of 8-10 feet for children. Include railings 36-42 inches high, windows for ventilation, and a secure entrance.
Planning your design before purchasing materials saves money and ensures you build a safe, functional structure. Your design should balance aesthetics, safety, budget, and intended use.
Recommended Dimensions:
| Component | Recommended Size | Notes |
|---|---|---|
| Platform Size | 6×8 to 10×12 feet | Keep under 200 sq ft to avoid most permits |
| Platform Height | 8-10 feet (children) 10-15 feet (adults) | Check local height restrictions |
| Railing Height | 36-42 inches | Required by most building codes |
| Door Opening | 24-30 inches wide | Allows easy access with supplies |
| Window Size | 18×24 inches minimum | Provides ventilation and emergency exit |
| Ceiling Height (interior) | 4-6 feet | Sufficient for children; 6+ feet for adults |
| Tree Clearance | 3-6 inches all sides | Allows for tree growth and movement |
Popular Treehouse Design Types:
1. Platform Style (Easiest)
- Simple open deck around a tree
- Optional railings and partial roof
- Cost: $300-$800
- Build time: 1-2 days
- Best for: Young children, small yards
2. Enclosed Cabin (Most Popular)
- Four walls with windows and a door
- Full roof with weatherproofing
- Cost: $800-$2,000
- Build time: 3-5 days
- Best for: Year-round use, privacy
3. Multi-Level or Elaborate
- Multiple rooms or levels
- Features like slides, rope bridges, zip lines
- Cost: $2,000-$10,000+
- Build time: 1-2 weeks
- Best for: Experienced builders, larger budgets
Design Resources:
- Free Treehouse Plans Library
- Treehouse design software: SketchUp (free), Home Designer
- Inspiration: Pinterest, Instagram (#treehousedesign)
- Books: “Treehouses You Can Actually Build” by David & Jeanie Stiles
Safety Features (Non-Negotiable):
- ✅ Railings: 36-42 inches high on all elevated, open sides
- ✅ Baluster spacing: No more than 4 inches apart (prevents head entrapment)
- ✅ Ladder/stairs: Handrails on both sides, non-slip surfaces
- ✅ Windows: Safety glazing or acrylic (not standard glass)
- ✅ Emergency exit: At least one window or door accessible without ladder
- ✅ Load capacity: Design for 50 pounds per square foot minimum
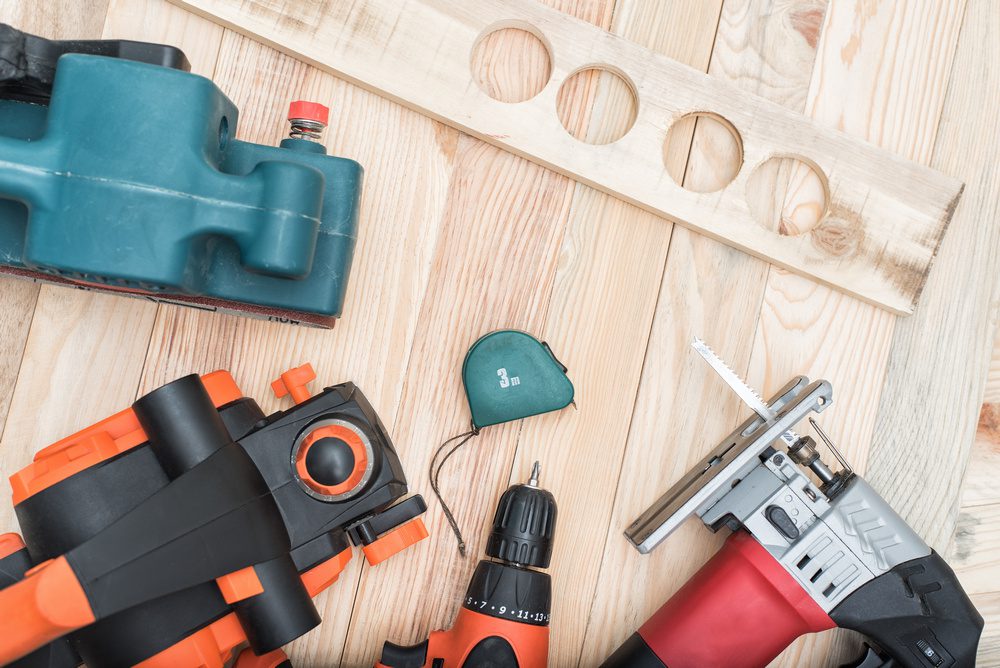
Step 4: What Essential Tools and Materials are Needed to Build a Tree House?
You’ll need power tools (cordless drill, jigsaw, circular/table saw), hand tools (level, tape measure, hammer, wrench), and safety equipment. Materials include pressure-treated lumber, lag bolts or TABs, deck screws, and roofing materials.
Having all tools and materials ready before starting construction streamlines the building process and prevents costly trips to the hardware store mid-project.
Complete Tools Checklist:
Power Tools (Essential):
- Cordless drill – 18V or higher recommended (drilling, driving screws)
- Impact driver – Optional but speeds up fastening significantly
- Jigsaw – For curved cuts around tree trunk and detail work
- Circular saw or table saw – Cutting lumber to length
- Miter saw – Optional, for precise angled cuts on trim
Hand Tools (Essential):
- 24-inch level – Ensuring platform is level
- 25-foot tape measure – All measurements
- Speed square – Marking perpendicular cuts
- Adjustable wrench set – Tightening lag bolts
- Socket set – Alternative for bolt tightening
- 16-20 oz framing hammer – Assembling frames
- Chalk line – Marking straight lines
- Post level – Checking vertical support posts
Safety Equipment (Non-Negotiable):
- Safety glasses – Always wear when cutting or drilling
- Work gloves – Prevent splinters and blisters
- Hearing protection – For extended power tool use
- Fall protection harness – When working above 6 feet
- First aid kit – Keep on-site during construction
- Ladder stabilizer – Prevents ladder movement
Complete Materials List (8×8 Basic Treehouse):
| Material | Quantity | Purpose | Est. Cost |
|---|---|---|---|
| 2x6x8′ pressure-treated lumber | 8-10 pieces | Platform frame joists | $80-$120 |
| 2x4x8′ pressure-treated lumber | 16-20 pieces | Decking, wall framing | $60-$90 |
| 4x4x10′ pressure-treated posts | 2-4 pieces | Support posts (if needed) | $40-$80 |
| 3/4″ x 10″ lag bolts with washers | 8-12 pieces | Tree attachment (or use TABs below) | $20-$35 |
| TABs (Tree Attachment Bolts) | 4-6 pieces | Alternative to lag bolts (recommended) | $80-$150 |
| 3″ deck screws (5 lb box) | 1-2 boxes | General assembly | $30-$50 |
| 1/2″ plywood sheets (4×8) | 4-6 sheets | Walls, roof sheathing | $120-$180 |
| Roofing material (shingles or metal) | 2-3 bundles | Roof covering | $60-$120 |
| Windows (or DIY with acrylic) | 2-3 openings | Light, ventilation | $50-$150 |
| Door or hatch | 1 | Entry access | $30-$100 |
| Railing materials (2×4, balusters) | As needed | Safety railings | $60-$100 |
| Rubber flooring mats | 8-12 sq ft | Floor cushioning | $40-$80 |
| Exterior paint/stain | 1-2 gallons | Weatherproofing, aesthetics | $40-$80 |
| TOTAL ESTIMATED COST (Basic 8×8): | $630-$1,335 | ||
Money-Saving Tips:
- Buy lumber in bulk — many suppliers offer 10-15% discounts
- Check for “cull lumber” with minor defects (30-50% off)
- Rent expensive tools (table saw, miter saw) instead of buying
- Use reclaimed materials for non-structural elements (windows, trim)
- Shop end-of-season sales for roofing materials
TABs vs. Lag Bolts — Which to Choose?
| Feature | TABs (Tree Attachment Bolts) | Standard Lag Bolts |
|---|---|---|
| Cost | $15-$25 each | $2-$4 each |
| Tree Damage | Minimal (designed for trees) | Moderate |
| Load Capacity | 2,000-4,000 lbs each | 500-1,500 lbs each |
| Installation | Requires specific drilling | Standard hole drilling |
| Tree Growth | Accommodates growth better | May girdle tree over time |
| Recommendation | ✅ Best for permanent structures | ✓ Acceptable for temporary/small builds |
If the budget allows, TABs are the superior choice for tree health and longevity. For small, temporary structures, quality lag bolts (3/4″ x 10″) are acceptable.
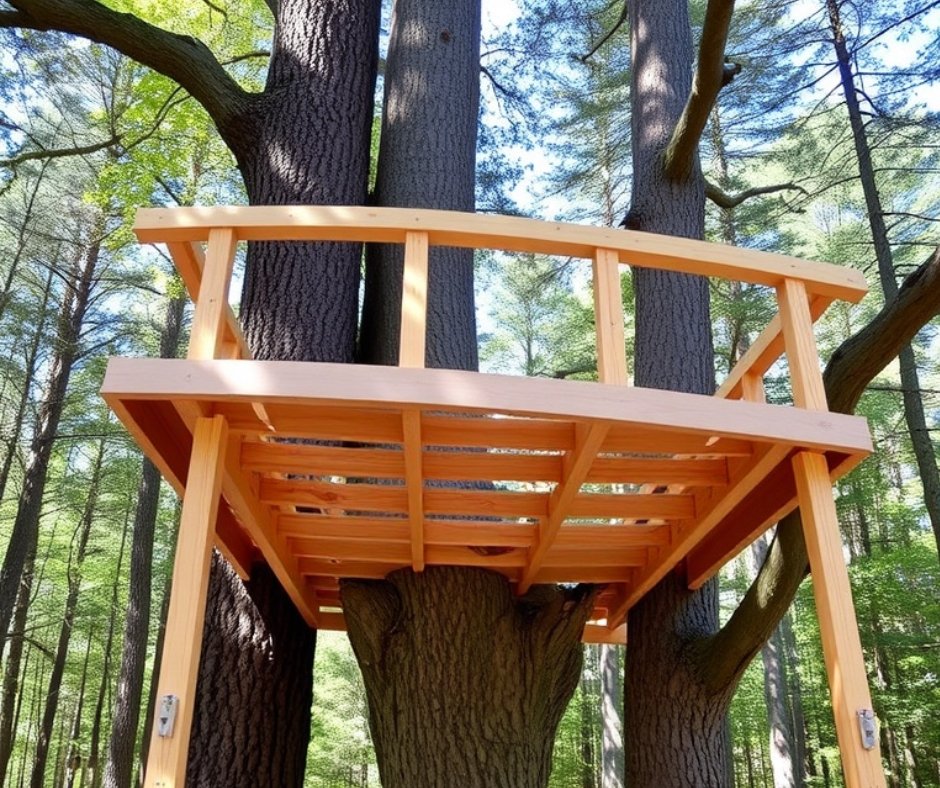
Step 5: How to Build a Tree House Platform Frame?
Construct a rectangular frame using 2×6 or 2×8 pressure-treated lumber with joists spaced 16 inches on center. Attach to the tree using 3/4-inch lag bolts or TABs, leaving 3-6 inches clearance around the trunk for growth.
The platform is the foundation of your treehouse, so it must be level, sturdy, and properly attached. This is the most critical structural element of the entire project.
Platform Construction Steps:
Step 5A: Create the Frame on the Ground
- Cut perimeter beams
- Use 2×6 or 2×8 lumber for outer frame (e.g., two 8-foot pieces, two 6-foot pieces for 6×8 platform)
- Assemble rectangle:
- Connect corners using 3″ deck screws (3 screws per joint) or metal corner brackets
- Check square
- Measure diagonals — they should be equal
- Add interior joists
- Install 2×6 joists every 16 inches across the span
- Use joist hangers
- Metal joist hangers provide superior strength over toe-screwing
Step 5B: Cut Opening for Tree Trunk
- Measure trunk diameter
- At the height where platform will sit
- Add 6-8 inches clearance
- Total opening should be trunk diameter + 6-8 inches (allows for growth and sway)
- Mark location
- Center opening on tree trunk
- Cut opening
- Use jigsaw to cut circular or square opening in frame
- Add framing
- Double up joists around opening for strength
Step 5C: Attach Platform to Tree
Method 1: TAB Attachment (Recommended)
- Mark attachment points
- 4 points around trunk, 12-18 inches apart vertically
- Drill pilot holes
- Follow TAB manufacturer specifications (typically 3/4″ diameter, 6″ deep)
- Install TABs
- Drive into the tree until the collar contacts the bark
- Attach platform
- Set the platform onto the TABs, secure with washers and nuts
- Check level
- Adjust with shims if needed
Method 2: Lag Bolt Attachment
- Mark points
- Drill locations on trunk (6-12 points depending on platform size)
- Pre-drill holes
- Use 5/8″ drill bit, 6-8 inches deep (prevents splitting)
- Install lag bolts
- 3/4″ x 10″ with washers, tighten with wrench
- Leave 1/2″ gap
- Don’t fully tighten — allows tree to grow
💡 Pro Tip: Always pre-drill holes before installing lag bolts or TABs. Drilling into the tree without pilot holes can cause the wood to split and severely damage the tree. Use a drill bit 1/8″ smaller than your bolt diameter.
Load Distribution Guidelines:
| Platform Size | Minimum TABs/Bolts | Weight Capacity | Recommended Joist Size |
|---|---|---|---|
| 6×6 feet | 4 TABs or 6 lag bolts | 1,800 lbs (50 lbs/sq ft) | 2×6 |
| 8×8 feet | 4-6 TABs or 8 lag bolts | 3,200 lbs (50 lbs/sq ft) | 2×6 or 2×8 |
| 10×10 feet | 6-8 TABs or 10-12 lag bolts | 5,000 lbs (50 lbs/sq ft) | 2×8 |
| 10×12 feet | 8-10 TABs or 12-16 lag bolts | 6,000 lbs (50 lbs/sq ft) | 2×8 or 2×10 |
Formula: Platform capacity = Area (sq ft) × 50 lbs/sq ft (live load standard).
Common Mistakes to Avoid:
- Not pre-drilling: Causes tree splitting and damage
- Too-tight attachment: Doesn’t allow for tree growth
- Insufficient clearance: Tree rubs against platform, causing damage
- Unlevel platform: Causes structural stress and makes building walls difficult
- Undersized joists: Results in bounce and sag
- Skipping joist hangers: Toe-screwing alone is insufficient for structural loads
Step 6: How to Add Support Posts or Braces to Your Tree House
Install 4×4 support posts from ground to platform corners, or add knee braces (diagonal supports) from tree trunk to platform for additional stability. This prevents excessive bounce and withstands wind loads.
Even with solid tree attachment, most treehouses benefit from additional support. This is especially important for larger platforms, windy areas, or when using multiple trees.
When to Add Support:
- ✓ Platform larger than 8×8 feet
- ✓ Tree trunk less than 12 inches diameter
- ✓ High wind area (coastal, exposed hilltops)
- ✓ Heavy use expected (multiple children simultaneously)
- ✓ Multi-level structures
- ✓ Platform height over 10 feet
Support Methods:
Option 1: Vertical Support Posts (Most Common)
Pros:
- ✓ Provides maximum stability
- ✓ Takes load off tree
- ✓ Easiest to install
- ✓ Good for flat ground
Installation:
- Dig post holes: 18-24 inches deep, 12 inches diameter
- Set posts: Use 4×4 or 6×6 pressure-treated posts
- Pour concrete: Fill holes with concrete, let cure 48 hours
- Attach to platform: Use metal post caps or lag bolts
- Check plumb: Posts must be perfectly vertical
Option 2: Knee Braces (Diagonal Supports)
Pros:
- ✓ Less visible than posts
- ✓ No ground disturbance
- ✓ Good for sloped ground
- ✓ Allows tree movement
Installation:
- Cut 2×6 or 2×8: Length depends on angle (typically 4-6 feet)
- Angle at 45-60 degrees: From tree trunk to platform corner
- Attach to tree: Use lag bolts or TABs on tree side
- Attach to platform: Bolt through frame member
- Install 2-4 braces: At least one per corner
Option 3: Cable Supports
Pros:
- ✓ Minimal visual impact
- ✓ Allows maximum tree movement
- ✓ Good for flexible designs
Installation:
- Use aircraft-grade cable: 1/4″ or 3/8″ galvanized steel
- Install eye bolts: Into tree and platform
- Attach with turnbuckles: Allows tension adjustment
- Add cable guards: Rubber sleeve protects tree bark
⚠️ WARNING: Never wrap cables or chains around a tree trunk without protection. This creates a “girdling” effect that cuts into the bark as the tree grows, eventually killing the tree. Always use wide tree straps or protective sleeves.
Support Structure Comparison:
| Method | Stability | Tree Impact | Cost | Difficulty | Best For |
|---|---|---|---|---|---|
| Vertical Posts | ⭐⭐⭐⭐⭐ | Low (takes load off tree) | $$ | Easy | Large platforms, beginners |
| Knee Braces | ⭐⭐⭐⭐ | Medium | $ | Medium | Medium platforms, aesthetics |
| Cable Supports | ⭐⭐⭐ | Low (with protection) | $$ | Hard | Flexible designs, minimal impact |
| No Additional Support | ⭐⭐ | High (all load on tree) | $ | Easy | Small platforms (<8×8), large trees only |
Pro Tip: For platforms over 10×10 feet, consider a hybrid approach: use posts at the corners farthest from the tree, and knee braces near the tree. This balances stability with tree health.
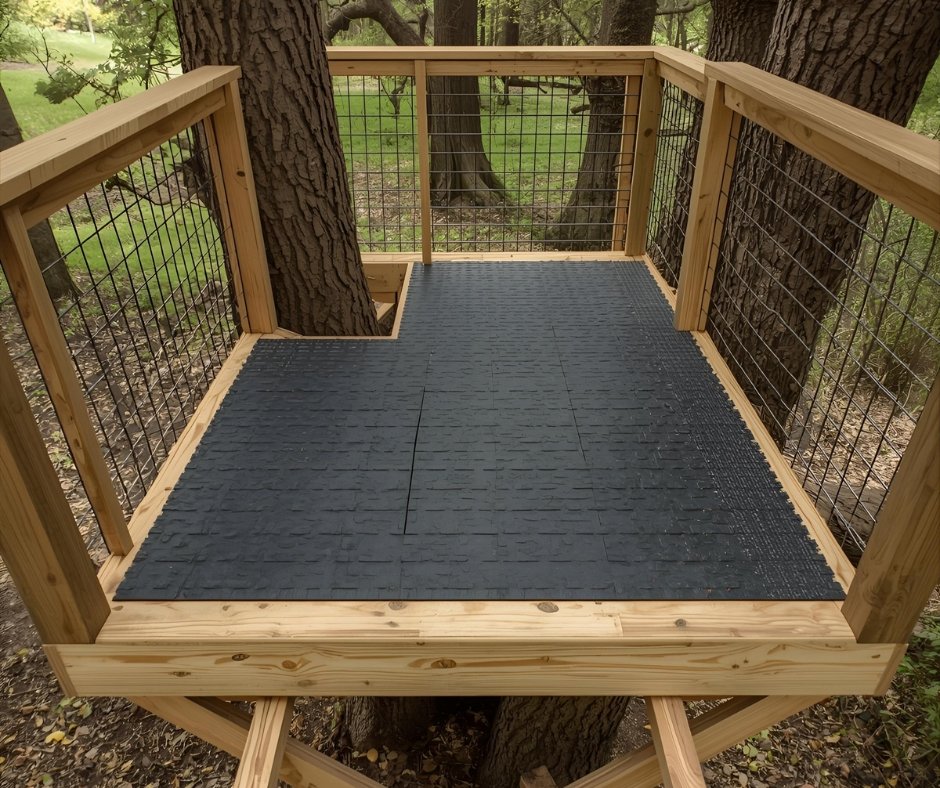
Step 7: How to Install Flooring with Safety Padding?
Lay 2×4 or 2×6 decking boards across the platform frame, spacing them 1/4 inch apart for drainage. Add rubber flooring mats or economy foam mats on top for cushioning and insulation.
The floor is where kids will play, so it needs to be strong, safe, and weather-resistant. Proper installation prevents rot and provides a comfortable surface.
Decking Installation:
Step 7A: Install Deck Boards
- Select lumber: 2×4 or 2×6 pressure-treated boards
- Plan layout: Run boards perpendicular to joists
- Leave gaps: Space boards 1/4 inch apart (use 16d nails as spacers)
- Stagger seams: If boards don’t span full width, offset end joints
- Fasten securely: Two 3″ deck screws per joist, per board
- Countersink slightly: Screw heads flush or just below surface
Why the Gap? The 1/4-inch spacing between deck boards is essential for:
- ✓ Water drainage (prevents standing water and rot)
- ✓ Air circulation (keeps wood dry underneath)
- ✓ Expansion room (wood swells when wet)
- ✓ Debris falling through (leaves, dirt don’t accumulate)
Step 7B: Around the Tree Trunk
- Measure carefully: Mark tree trunk location on each board
- Cut curves: Use jigsaw to cut semi-circles in adjacent boards
- Maintain clearance: Leave 3-6 inches gap between boards and trunk
- Install trim ring: Add decorative trim around opening (optional but recommended)
Flooring Material Options:
| Material | Durability | Cost (8×8) | Pros | Cons |
|---|---|---|---|---|
| Pressure-Treated Pine | 15-20 years | $80-$120 | Affordable, rot-resistant, widely available | Can splinter, requires maintenance |
| Cedar | 20-25 years | $200-$300 | Naturally rot-resistant, beautiful, splinter-resistant | More expensive, fades over time |
| Composite Decking | 25-30 years | $250-$400 | No maintenance, won’t rot, splinter-free | Most expensive, can get hot in sun |
| Marine-Grade Plywood | 10-15 years | $120-$180 | Smooth surface, no gaps | Requires sealing, no drainage |
Recommendation: Pressure-treated lumber offers the best balance of cost, durability, and availability for most DIY projects.
Pro Tip: If using foam mats outdoors, choose high-density closed-cell foam designed for playgrounds. These resist UV damage and moisture better than cheap indoor mats. Brands like IncStores and Greatmats offer outdoor-rated options.
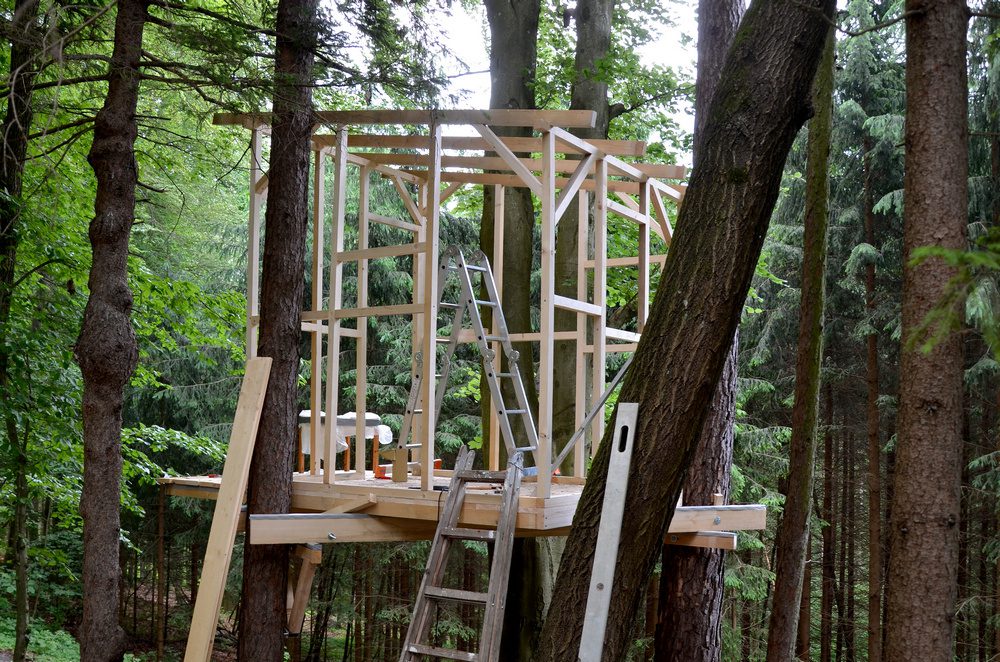
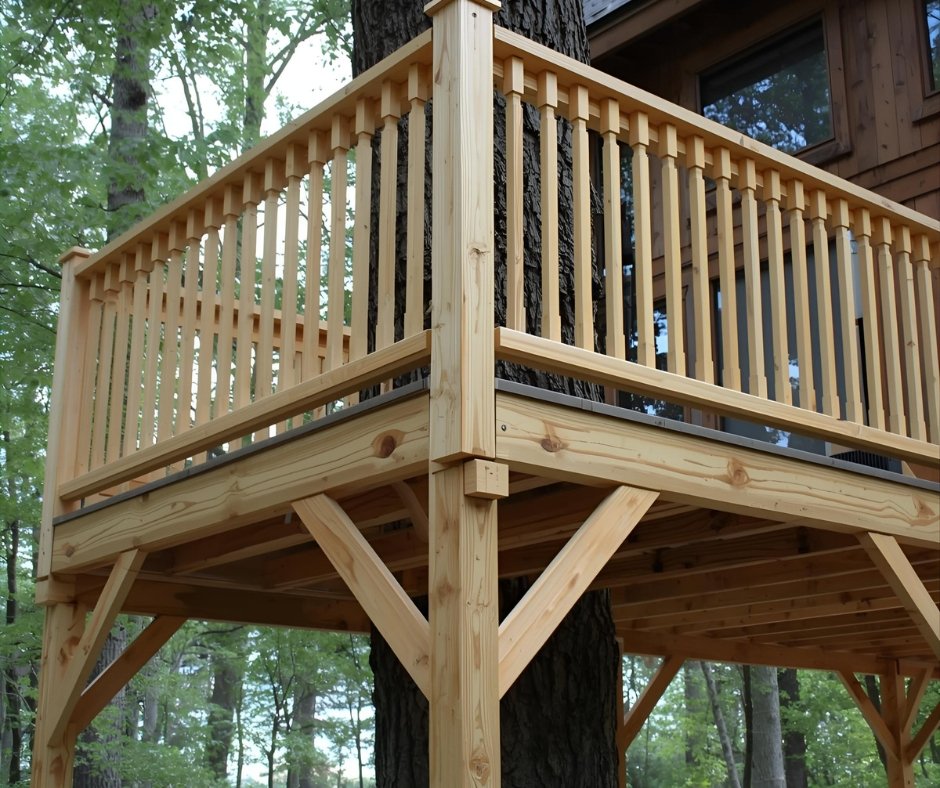
Step 8: How to Construct Walls, Roof and Features for Your Tree House?
Frame walls with 2×4 studs spaced 16 inches on center, leaving openings for windows and doors. Sheath with 1/2″ plywood, install windows and door, then build a pitched roof frame. Cover with plywood sheathing and roofing material. Add railings (36-42 inches high) around all open platform edges.
This step transforms your platform into an actual treehouse. Take your time with measurements to ensure windows and doors fit properly and the structure is weathertight.
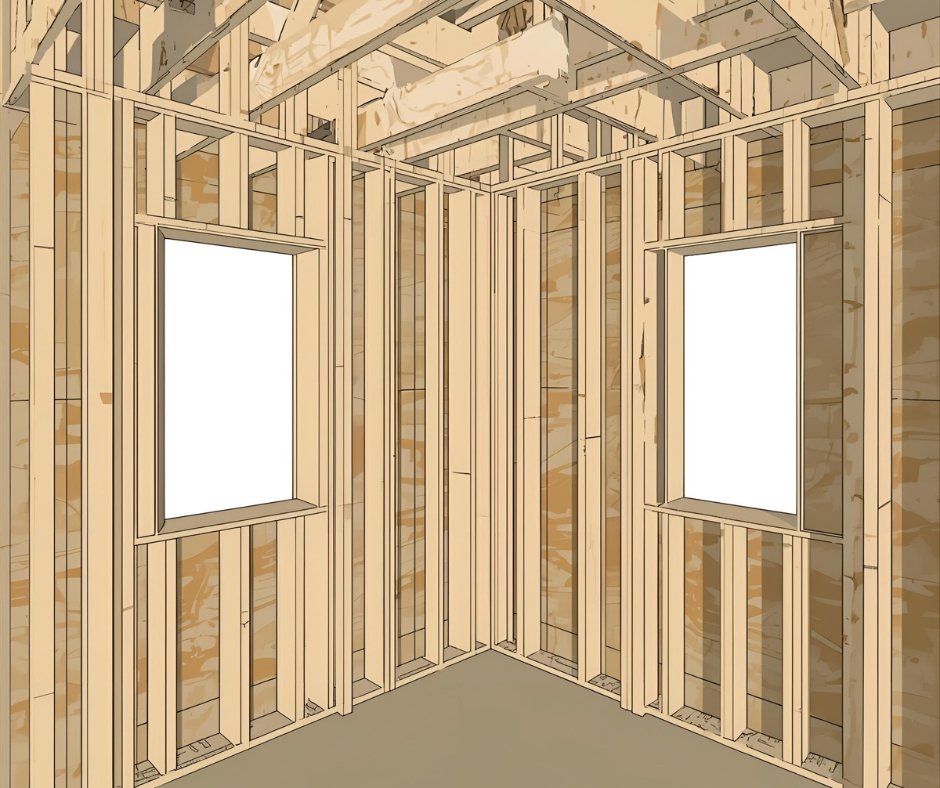
Wall Construction:
Step 8A: Build Wall Frames
- Build on platform: Construct walls lying flat, then tilt up into place
- Bottom plate: 2×4 the length of each wall, fastened to platform edge
- Studs: Vertical 2x4s every 16 inches on center
- Top plate: 2×4 the length of wall, nailed across top of studs
- Window/door openings: Add horizontal headers across openings, with jack studs for support
- Stand up walls: Tilt frame vertical, brace temporarily
- Connect corners: Screw wall frames together at corners
Framing 101 – Opening Headers:
For window and door openings:
- Openings up to 3 feet wide: Single 2×6 header (or doubled 2×4)
- Openings 3-5 feet wide: Doubled 2×6 header
- Openings over 5 feet: Doubled 2×8 or 2×10 header
Headers carry the load above the opening to the studs on either side.
Step 8B: Apply Wall Sheathing
- Cut plywood: 1/2″ CDX plywood or OSB to fit each wall
- Install horizontally: Start at bottom, work up
- Fasten every 6 inches: Use 2″ screws or 8d nails along studs
- Cut window/door openings: Mark from inside, cut with jigsaw
- Leave gaps: 1/8″ between sheets for expansion
Roof Construction:
Step 8C: Build Roof Frame
A pitched roof sheds rain and snow effectively. For an 8×8 treehouse, a simple gable roof works best.
- Determine pitch: 4:12 (4 inches rise per 12 inches run) is standard
- Cut rafters: 2×4 or 2×6 with angled cuts (use a rafter calculator online)
- Ridge board: Center beam that rafters attach to
- Spacing: Rafters every 24 inches on center
- Overhang: Extend rafters 6-12 inches past walls for eave protection
- Collar ties: Horizontal boards connecting opposite rafters (prevents spreading)
Step 8D: Roof Sheathing and Covering
- Sheathing: 1/2″ plywood across rafters
- Tar paper: Roll 15-lb felt paper over sheathing (weatherproofing underlayment)
- Roofing: Install asphalt shingles, metal roofing, or corrugated panels
- Start at bottom: Overlap each row upward (water flows down)
- Ridge cap: Special shingles or trim along peak
| Roofing Material | Lifespan | Cost (8×10 roof) | Pros | Cons |
|---|---|---|---|---|
| Asphalt Shingles | 15-20 years | $60-$120 | Easy to install, traditional look | Shorter lifespan |
| Metal Roofing | 40-50 years | $120-$200 | Very durable, lightweight, fast install | Noisy in rain |
| Corrugated Panels | 20-30 years | $50-$100 | Cheapest, fast install | Less attractive |
| Cedar Shakes | 20-25 years | $200-$300 | Beautiful, authentic | Most expensive, fire risk |
Windows and Door:
Step 8E: Install Windows
- Options: Salvaged windows, DIY acrylic, small barn sash windows
- Size: 18×24 inches minimum for ventilation
- Safety: Use acrylic or safety glass (not standard glass)
- Installation: Frame opening, add trim, secure window with screws
- Sealing: Caulk around edges to prevent leaks
Step 8F: Install Door
- Options: Pre-hung door, DIY plywood door, Dutch door (split horizontally)
- Size: 24-30 inches wide, 4-6 feet tall
- Hardware: Hinges (3), latch or lock, handle
- Swing: Door should open outward (safer in emergency)
Safety Railings (Critical!):
Step 8G: Build and Install Railings
Railings are required by building codes on any platform more than 30 inches above ground. They prevent falls and are non-negotiable for child safety.
Code Requirements:
- Height: 36-42 inches from platform surface
- Baluster spacing: No more than 4 inches between vertical balusters (prevents head entrapment)
- Strength: Must withstand 200 lbs horizontal force (lean test)
- No horizontal rails: Avoid ladder-like designs (kids climb)
Construction:
- Posts: 4×4 posts at corners and every 4-6 feet
- Top rail: 2×4 or 2×6 horizontal board across top of posts
- Bottom rail: 2×4 near platform surface
- Balusters: 2x2s or decorative spindles every 4 inches max
- Fasten securely: Through-bolts or structural screws at posts
⚠️ CRITICAL SAFETY: Improper or missing railings are the leading cause of treehouse injuries. Never skip railings, even on small platforms. Test strength by leaning hard — railings should not flex more than 1/4 inch.
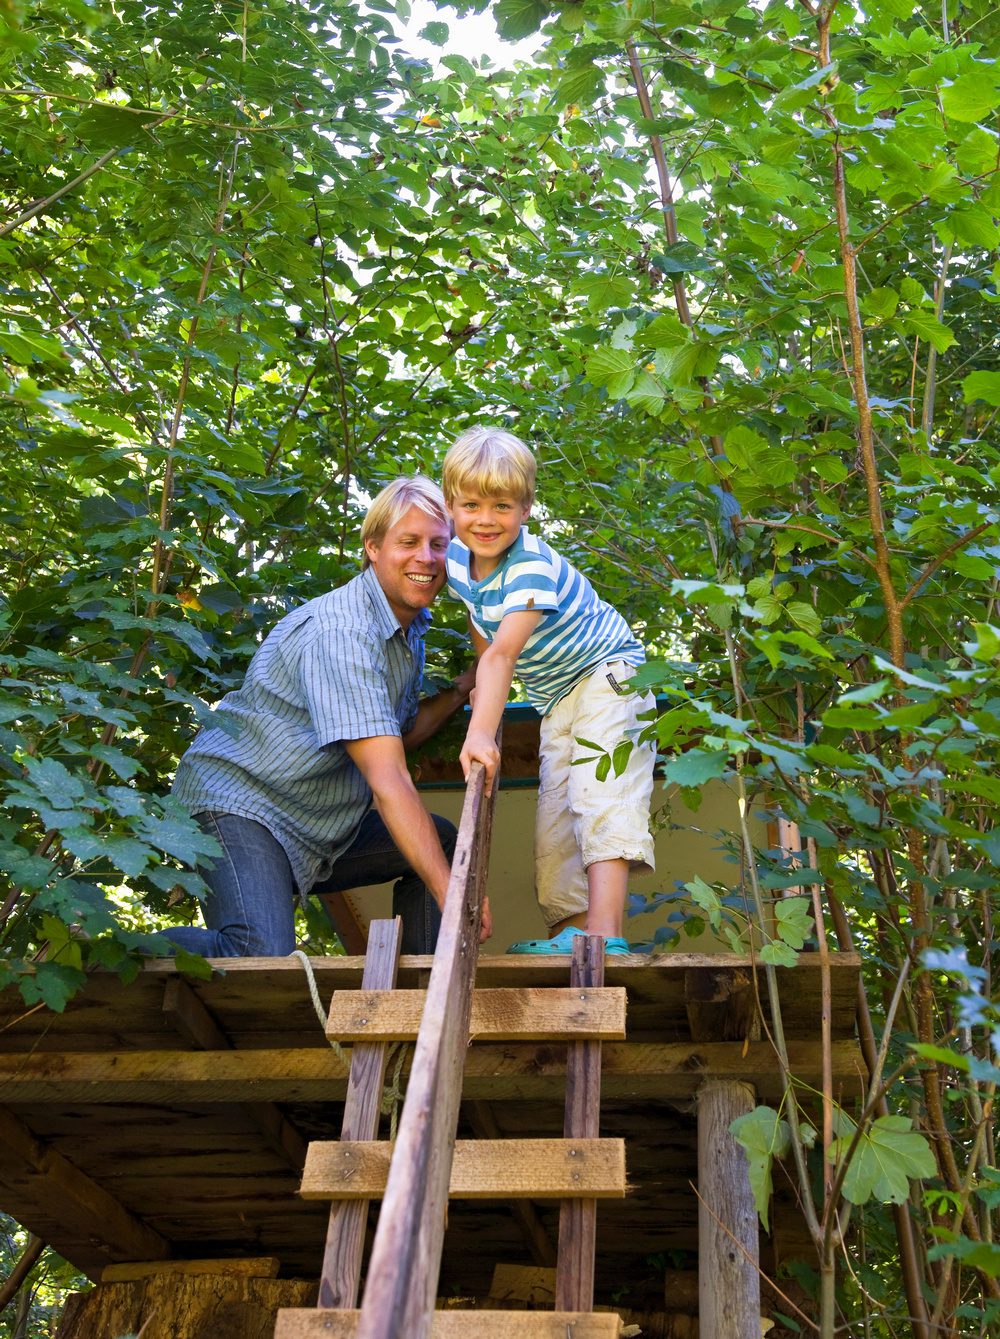
Step 9: How to Add a Ladder or Stairs and Finishing Touches To Your Tree House?
Install a sturdy ladder with handrails or build permanent stairs with a minimum width of 30 inches. Add finishing elements like exterior paint, trim, themed decorations, and lighting. Perform a final safety inspection of all connections, railings, and structural elements.
The final step brings everything together and makes your treehouse safe to access. Don’t rush this — a poorly secured ladder is a major safety hazard.
Access Options:
Option 1: Straight Ladder (Simplest)
Pros: Cheap ($20-$50), fast install, small footprint
Cons: Harder to climb, not for young children (under 6)
Best for: Platforms 6-10 feet high, older kids/adults
Construction:
- Rails: Two 2x4s or 2x6s, length = height + 2 feet overhang
- Rungs: 1″ diameter wooden dowels or 2×3 boards every 10-12 inches
- Attachment: Bolt top to platform, secure bottom to ground or tree
- Safety: Extend 2-3 feet above platform for handholds
- Angle: 75-80 degrees from ground (nearly vertical)
Option 2: Angled Ladder (Better)
Pros: Easier to climb, more comfortable
Cons: Takes more space ($40-$100)
Best for: Most treehouses, family use
Construction:
- Rails: 2×6 boards for sides
- Steps: 2×4 boards every 8-10 inches (easier than rungs)
- Angle: 60-70 degrees from ground
- Handrails: Add 2×3 handrails on both sides (critical for safety)
- Footprint: Requires 3-5 feet of ground space
Option 3: Stairs (Best, Most Expensive)
Pros: Safest, easiest access, suitable for all ages
Cons: Most expensive ($150-$400), largest footprint
Best for: Permanent structures, young children, accessibility
Construction:
- Stringers: 2×12 boards with notches cut for steps (minimum 2, ideally 3)
- Treads: 2×6 or 2×8 boards for each step
- Risers: Vertical distance between steps = 7-8 inches (code standard)
- Width: Minimum 30 inches, 36 inches preferred
- Handrails: Both sides, 34-38 inches high
- Landing: Platform at top (if space allows)
| Access Type | Safety Rating | Min. Age | Cost | Space Required | Difficulty |
|---|---|---|---|---|---|
| Rope Ladder | ⭐⭐ | 10+ | $ | Minimal | Easy |
| Straight Ladder | ⭐⭐⭐ | 6+ | $ | Minimal | Easy |
| Angled Ladder | ⭐⭐⭐⭐ | 4+ | $$ | Medium | Medium |
| Stairs | ⭐⭐⭐⭐⭐ | 2+ (supervised) | $$$ | Large | Hard |
| Climbing Wall | ⭐⭐ | 8+ | $$ | Medium | Medium |
Pro Tip: For young children (under 8), consider building stairs or an angled ladder with handrails on BOTH sides. Many jurisdictions require handrails for any access route over 4 steps high. Check local codes.
Frequently Asked Questions (FAQ)
- Do I need a permit to build a treehouse?
- It depends on local rules. Permits are more likely if the treehouse is large/tall, near property lines, has utilities, or is commercial. Always check your local building department and HOA.
- How high can I build it, and how far from property lines should it be?
- Many places cap height around 13 ft (to roof peak) and require ~10 ft setbacks, but rules vary — confirm locally.
- Which trees are best, and how do I check if mine is healthy?
- Mature, healthy hardwoods (e.g., oak, maple, beech) with strong trunks/roots are ideal. Avoid diseased, brittle, or short‑lived species; consult a certified arborist if unsure.
- What attachments should I use to avoid harming the tree?
- Use purpose-built Treehouse Attachment Bolts (TABs) and engineered brackets that allow for growth and movement; avoid constricting straps and undersized lag screws.
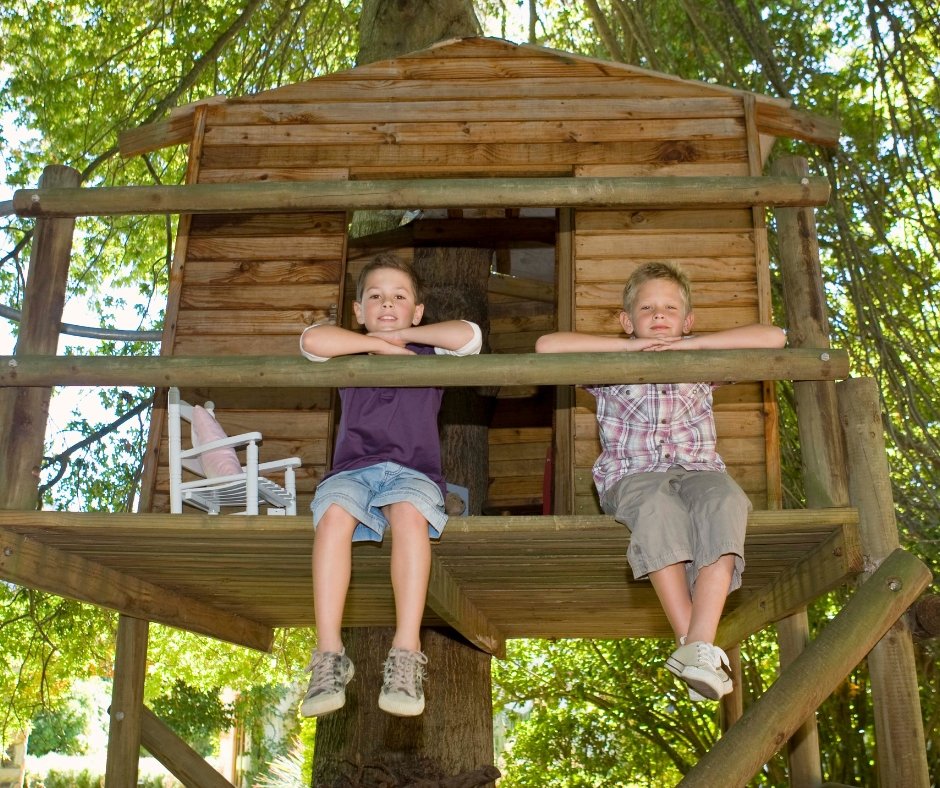
- What safety features are essential for kids?
- Sturdy guardrails, safe access (ladder or stairs with handrails), non-slip decking, clear fall zone with soft ground cover, and the ability to secure access when unsupervised.
- How much does it cost and how long does it take?
- Costs range widely: simple DIY platforms can be hundreds to a few thousand; custom/pro builds can run into the tens of thousands. Timeframe spans from a weekend (small DIY) to several weeks (larger builds).
- Will electricity or plumbing change the rules or insurance?
- Yes. Utilities can reclassify the structure as habitable, triggering permits, inspections, and stricter codes; insurers may require added safety measures or endorsements.
Bottom Line
Learning how to build a treehouse takes planning, patience, and the right tools. A solid design and a healthy tree make all the difference. With safety in mind, your DIY treehouse can become a backyard retreat that lasts for years.
A treehouse is guaranteed to make everyone happy, regardless of age. Building one may be challenging, but the result — a getaway place for your kids — is worth all the effort. So, gather your tools and start creating a great addition to your home using the easy steps outlined above. Have fun and let your creative juices flow. Good luck!