Last Updated on June 20, 2024 by teamobn
Want to add a little whimsey to your garden? Flowers and colourful plants surely bring life into our homes, but sometimes we still feel the need to add more to make them merrier. If you – or your children, think your garden needs more life, these garden art ideas can turn your yard into a wonderland!
If you have little kids at home, make it a family affair! You can make some of these DIY garden projects with them. They’ll learn how to recycle, repurpose and reuse as they’re also having lots of fun.
These beautiful garden art ideas will bring more life and fun to your home while giving you the opportunity to save — Mother Earth and your wallet! 😉
If you had all of these in your garden, you might have to hire a traffic controller! What do you think?
What are some of the best garden art ideas we can make?
Click on any image to start the lightbox display. Use your Esc key to close the lightbox. You can also view the images as a slideshow if you prefer?
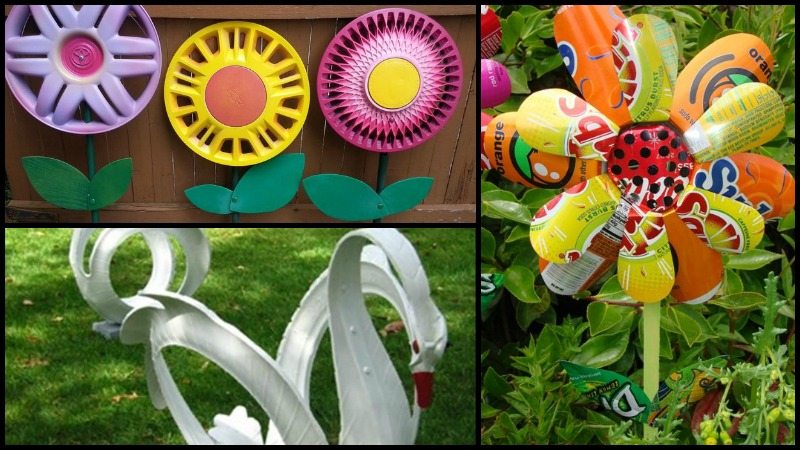
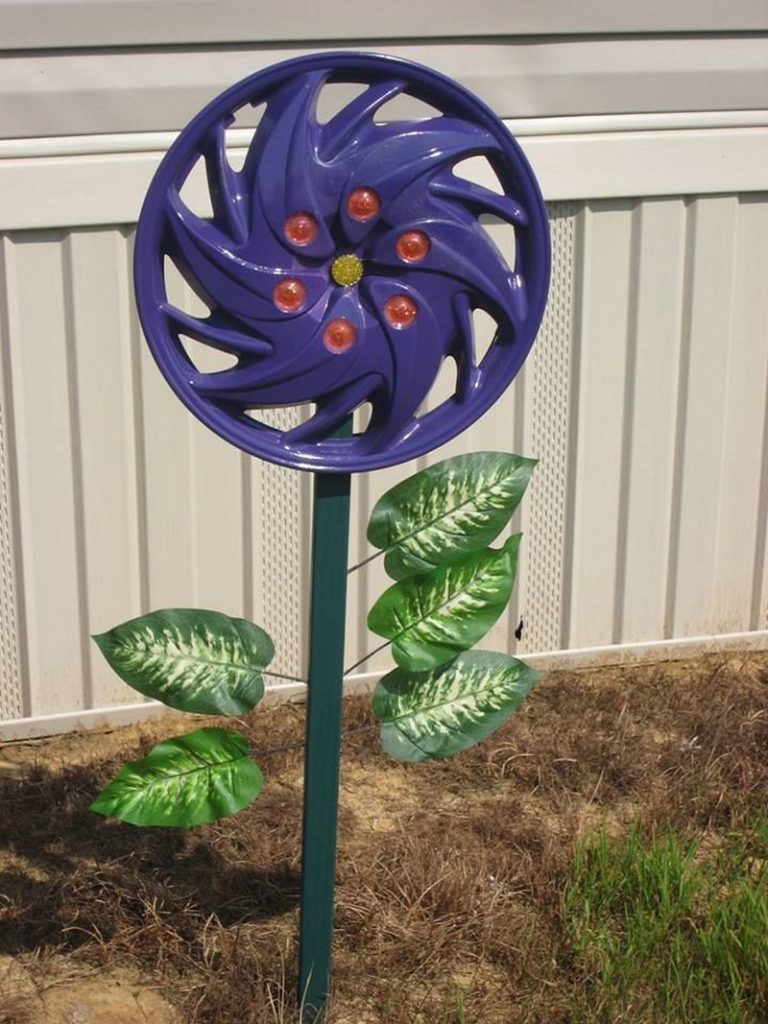
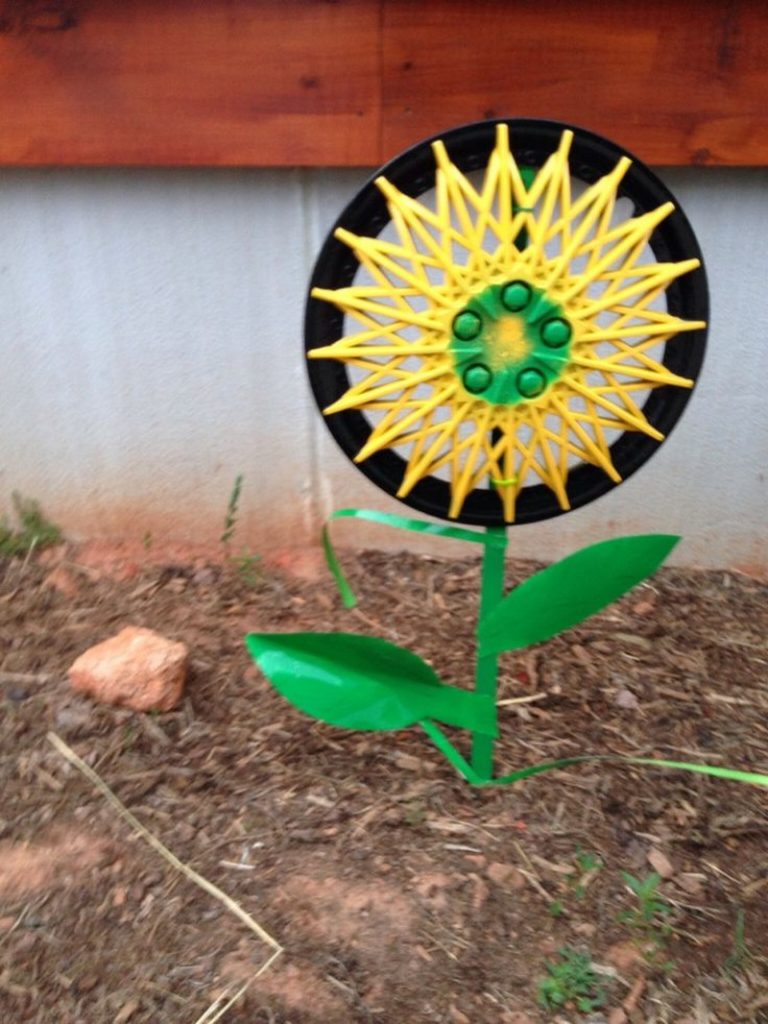
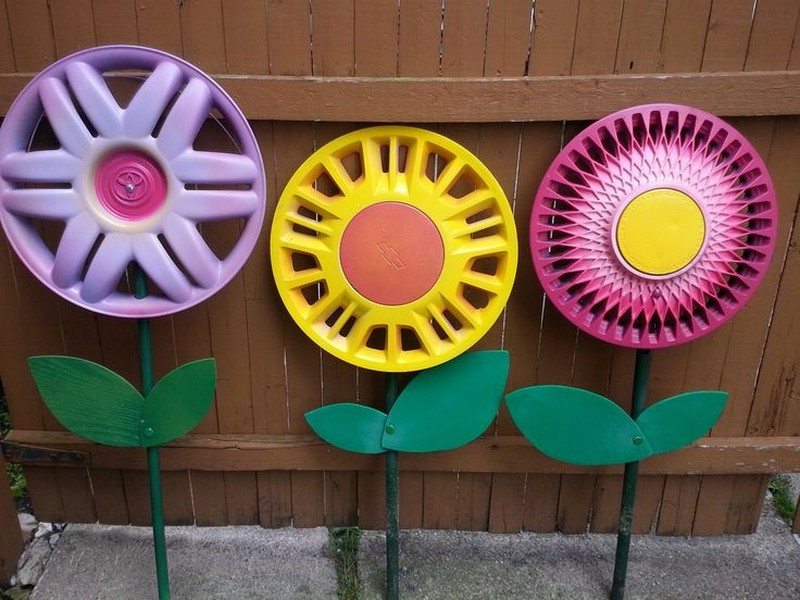
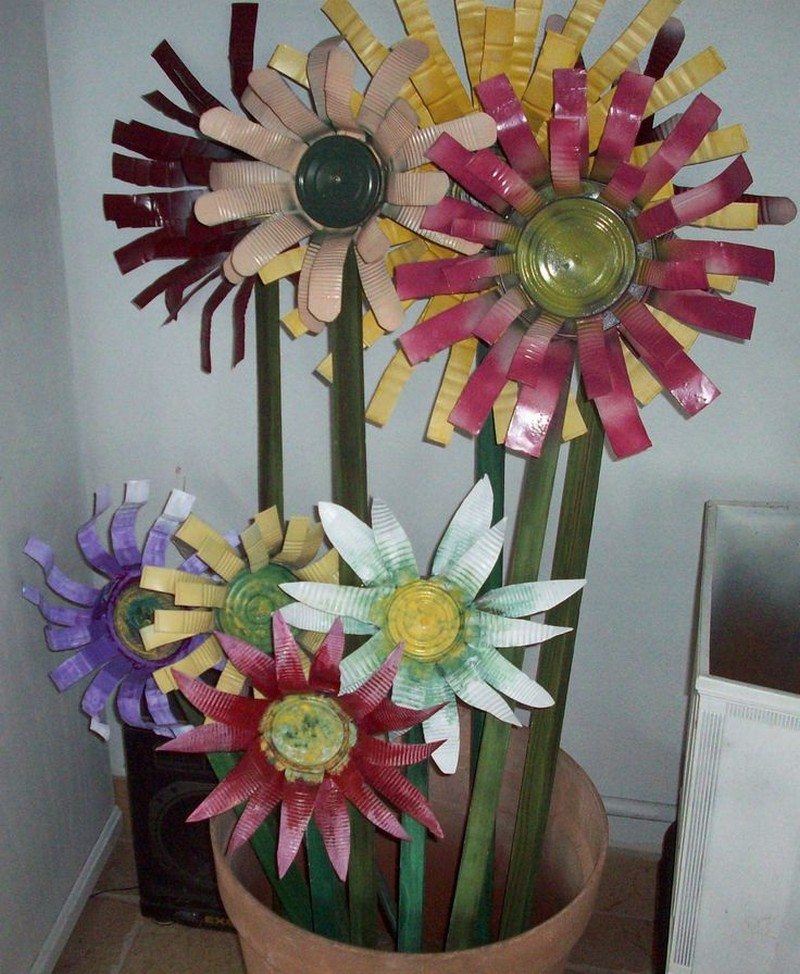
1. Hubcap Flower
Dads may have a couple of old hubcaps lying around the garage. Instead of throwing it all away, why not make colourful flower decors with them? Now that’s one less ‘trash’ in the garage area!
How to make a Hubcap Flower garden art?
- Just simply wash and dry these hubcaps
- Then spray paint them with different colours to make a flower design
- You can add more plastics, and design these as the flower’s stem and leaves
Now you have beautiful flowers displayed in your garden!
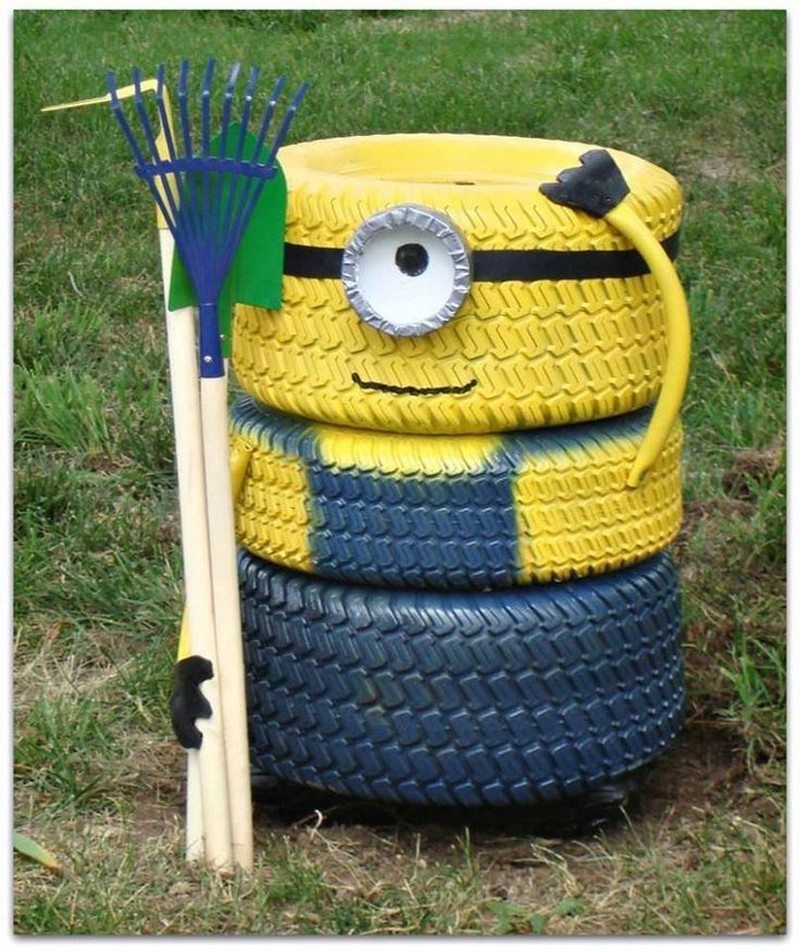
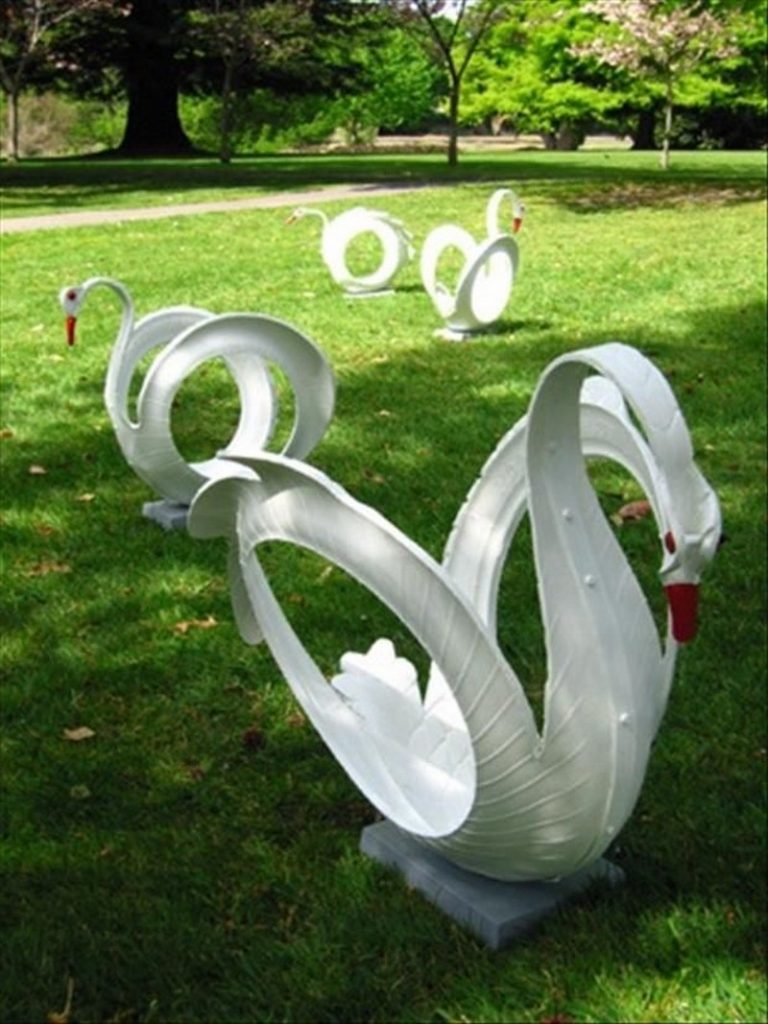
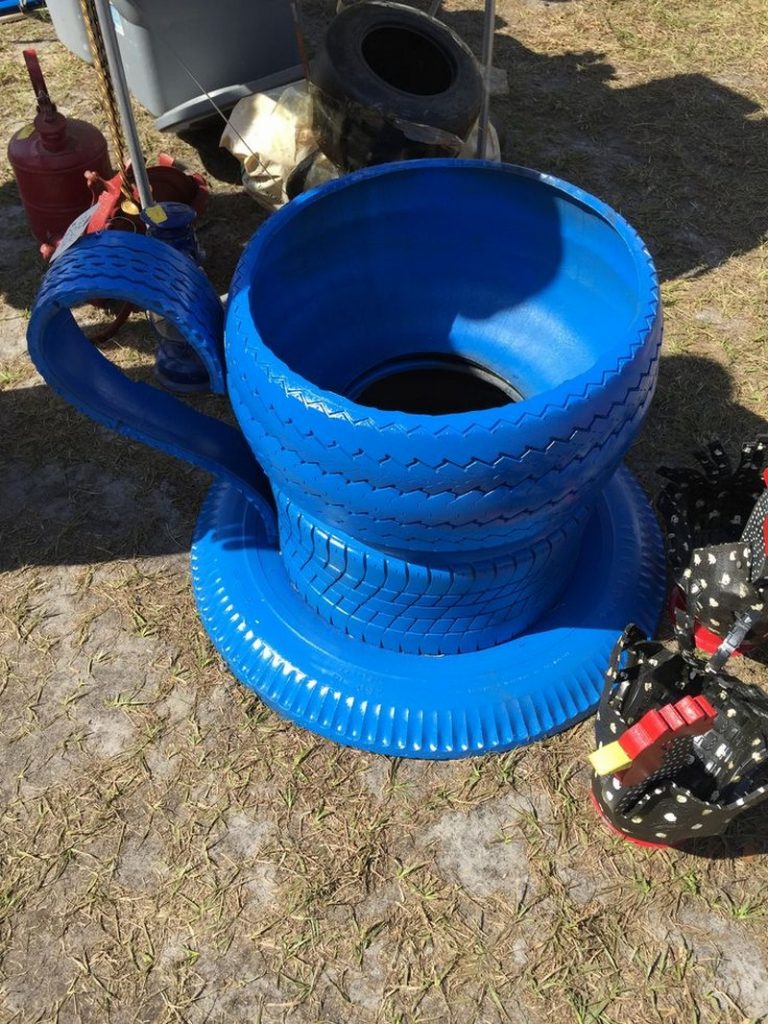
2. Old Tires
Flat tires in the garage as well? Every year, we might be changing our tires. Imagine how many tires have we disposed of. Without knowing, we are contributing to our Earth’s damage. So instead of getting rid of them, why not turn them into cute ‘sculptures’ such as cartoon characters or giant teacups!
How to make an Old Tires garden art?
- Just clean the tires thoroughly, and let them dry.
- Then paint these old tires with your favourite colour, using acrylic paint.
- You can pile these up, or cut them to create different forms, such as a swan, a cup, or whatever you can imagine.
- When it’s all done, just add some soil and your beautiful plants to it.
And now you have an attractive sculpture in your garden!
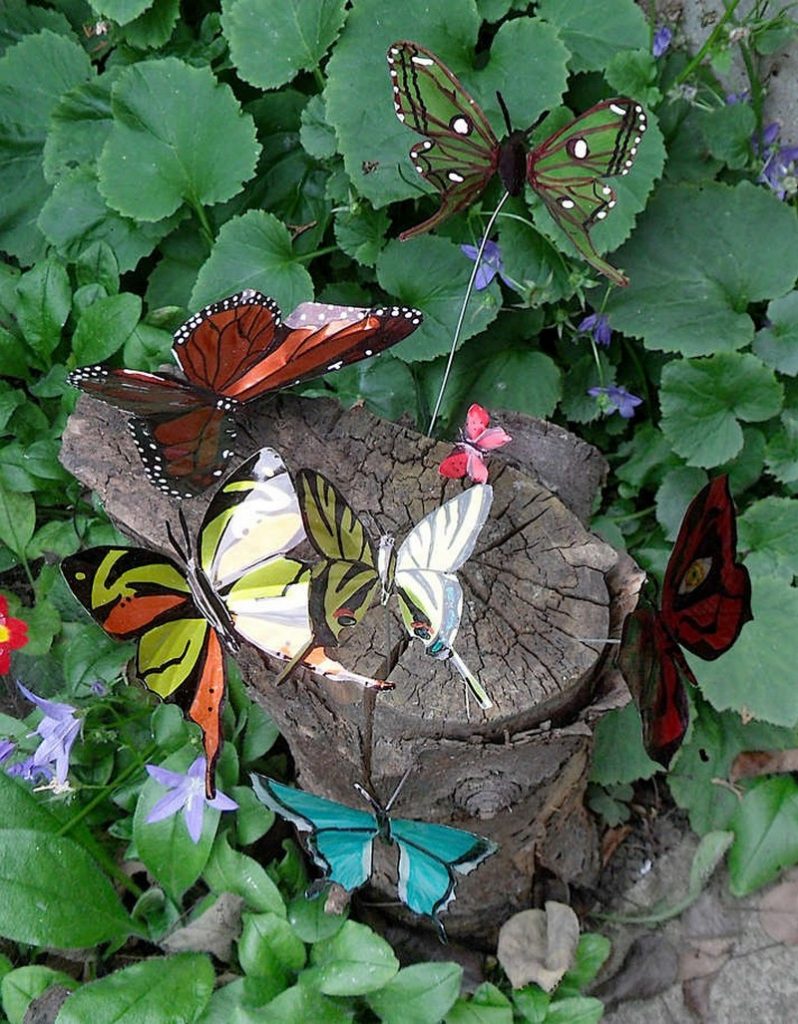
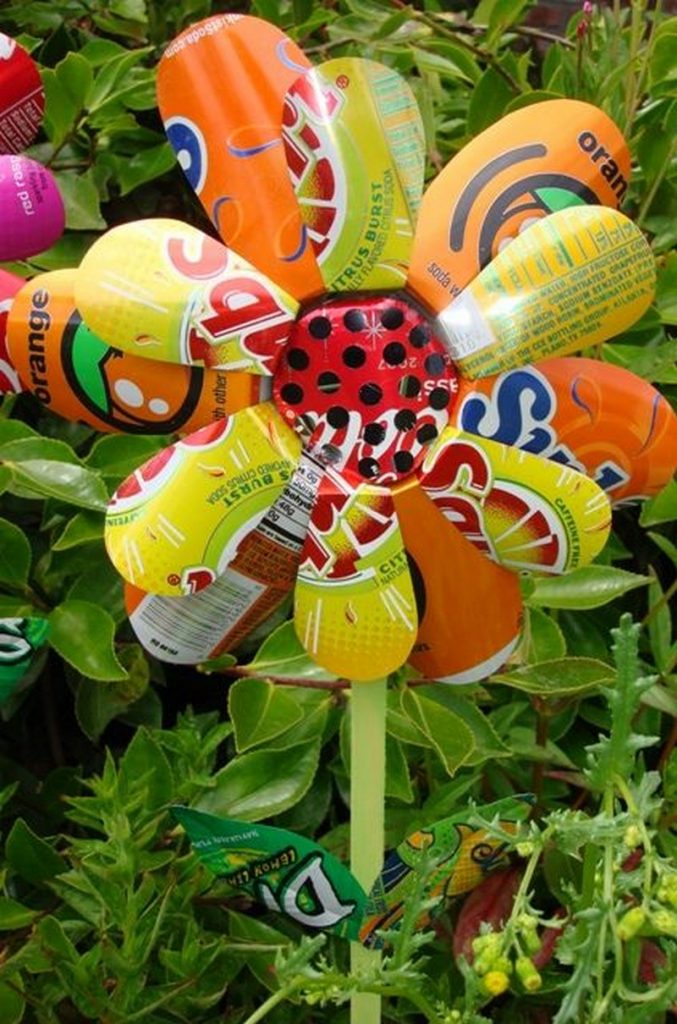
3. Soda Cans
Another trash artwork to work on is your soda cans. Instead of throwing these away, compile them and use them to decorate your garden. You can also use colourful empty soda cans to make butterflies and flowers. But we hope you’re not drinking too much soda enough for a bouquet! 😀
How to make the Soda Cans garden art?
- First, wash these cans thoroughly, then let them dry
- Draw some layout patterns, like flowers, leaves and butterflies
- Cut them carefully
- Glue to form the flower or butterfly shape
- Paint them to highlight the design
And now you can scatter these designs all over your garden!
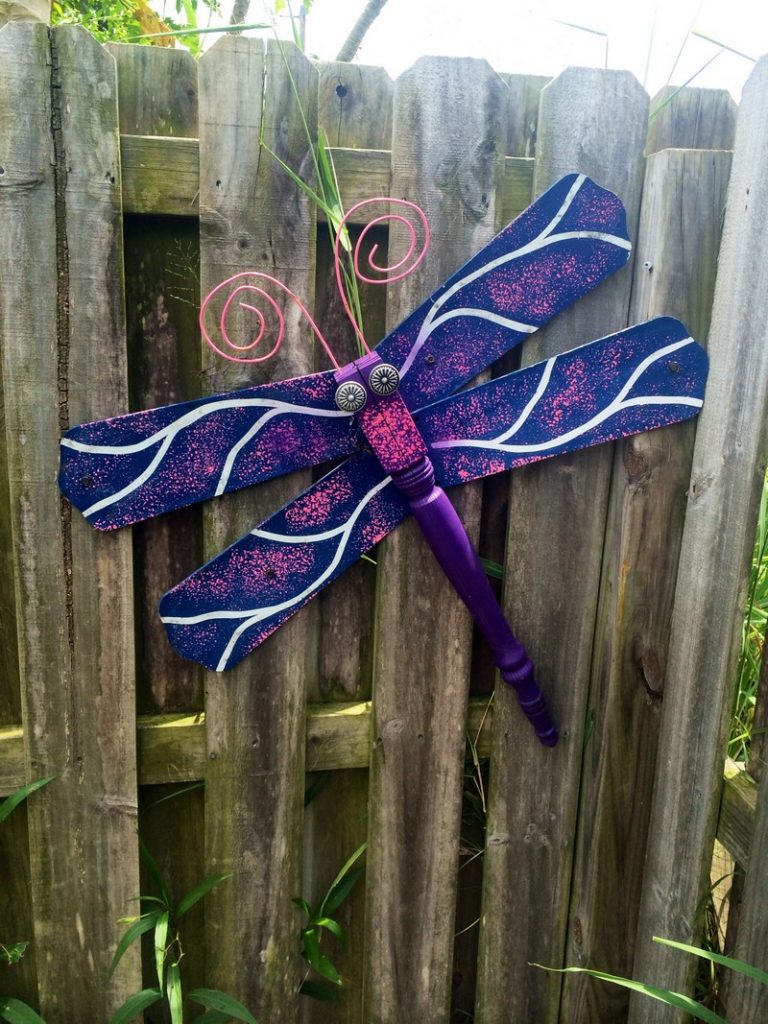
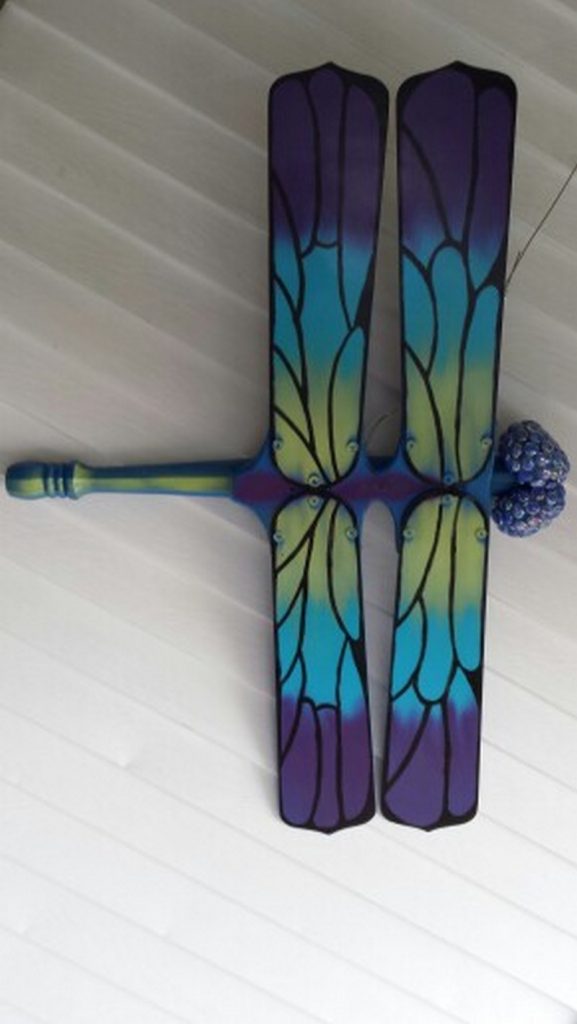
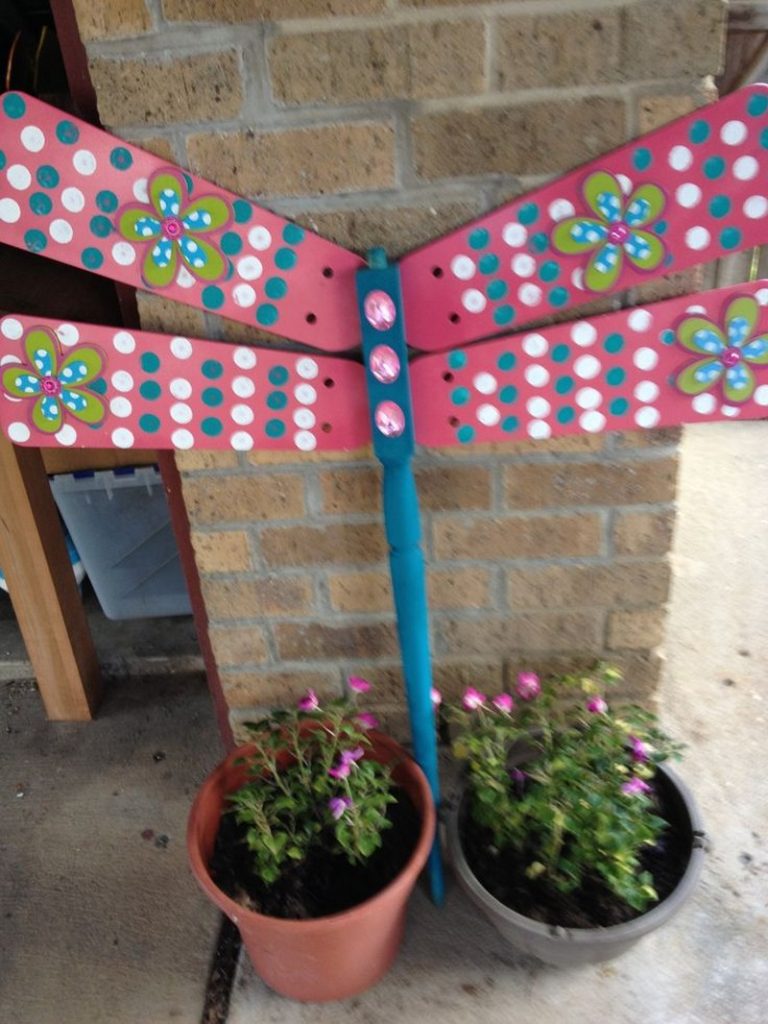
4. Ceiling Fan Blades
Aren’t these giant dragonflies cool to have around the garden? Simply put together ceiling fan blades and a table leg, and paint away!
How to make the Ceiling Fan Blades garden art?
- First, wash these fan blades thoroughly, then let them dry
- Paint them with bright colours to highlight the design
- Glue to form the dragonfly shape
And now you can attach these fascinating dragonflies to your backyard fences or back walls!
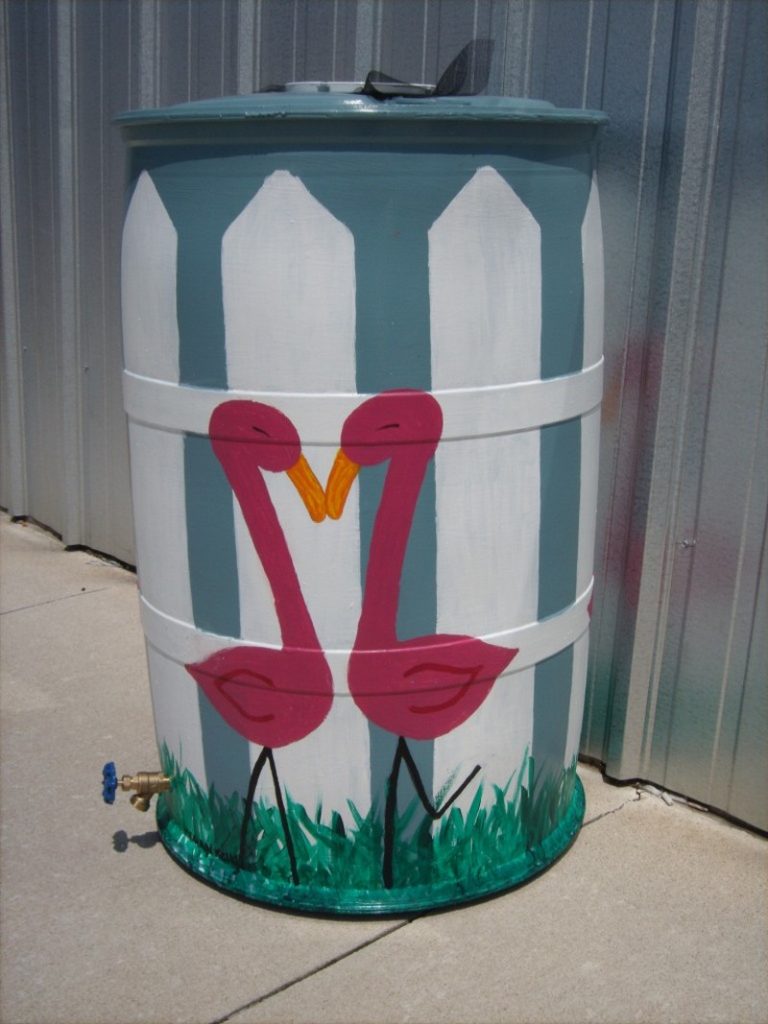
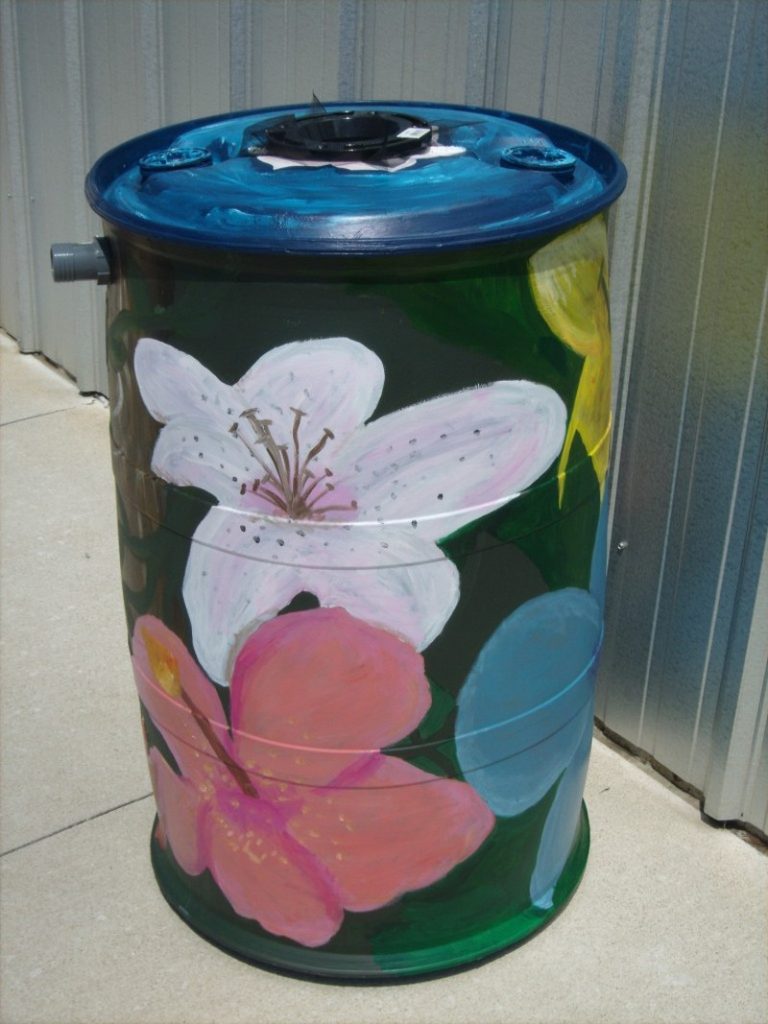
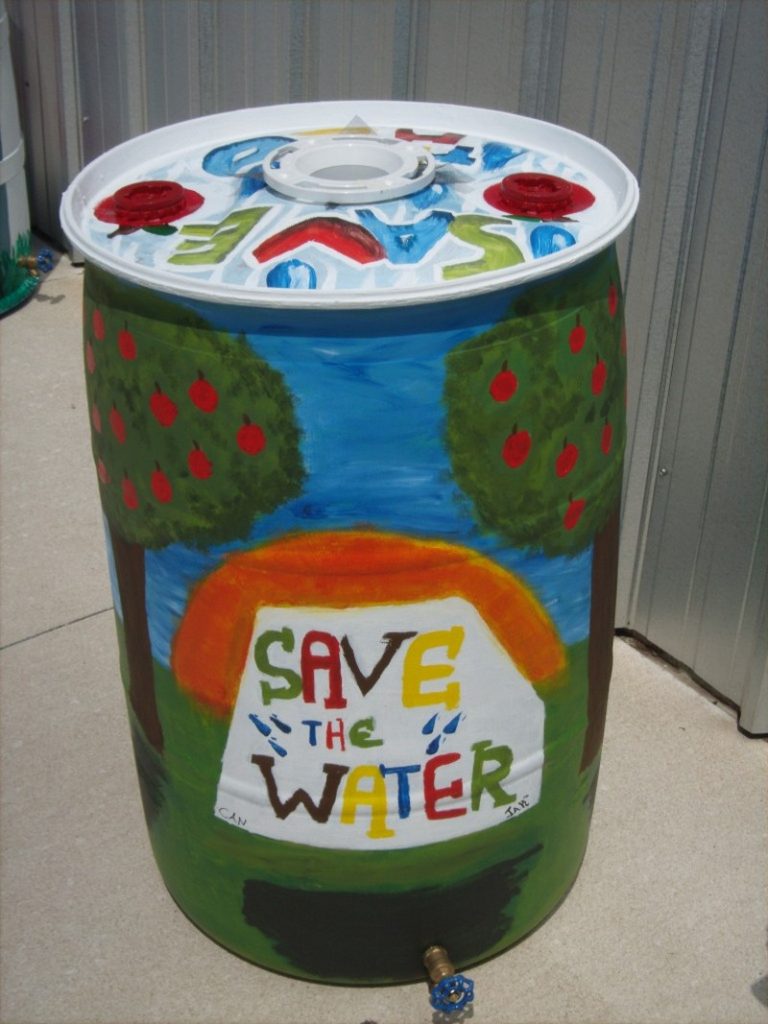
5. Drum Barrels
If you love painting, then you can definitely add more colour to your garden by making your masterpiece on your rain barrels or drum planters!
How to make the Drum barrels garden art?
- Just clean the drum barrels thoroughly, and let them dry.
- Then paint these old drum barrels with your favourite colour, using acrylic paint.
- You can add a faucet at the bottom to make it your drum container or you can add a few small holes underneath the barrels and turn it into a drum planter.
- When it’s all done, just add some soil and your beautiful plants to it.
And now you have a stunning drum planter or container in your backyard!
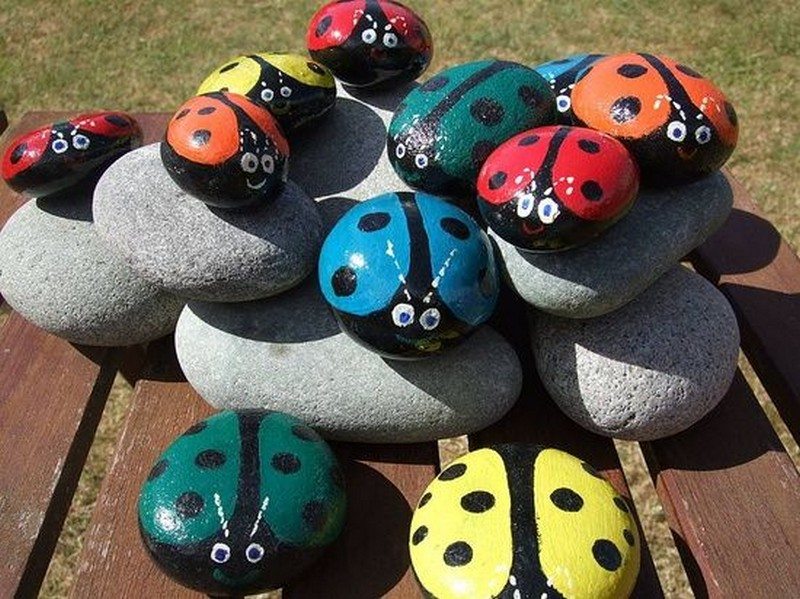
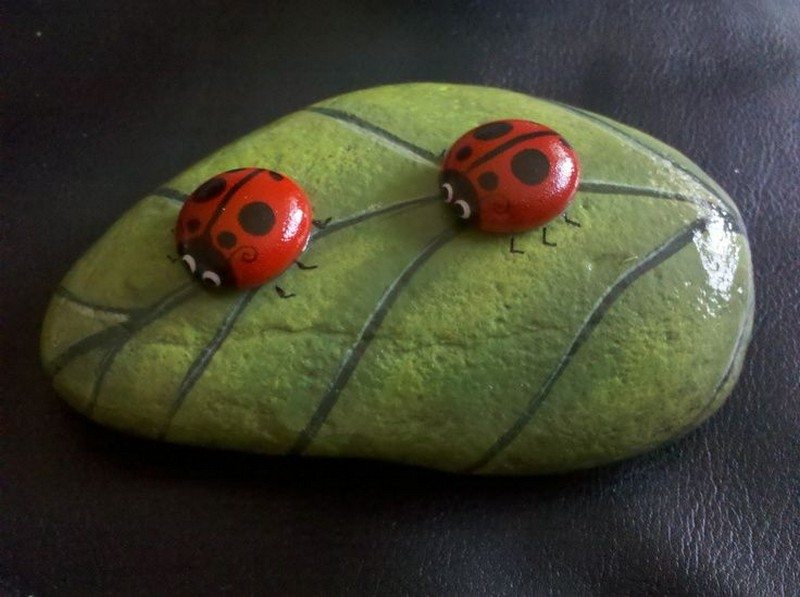
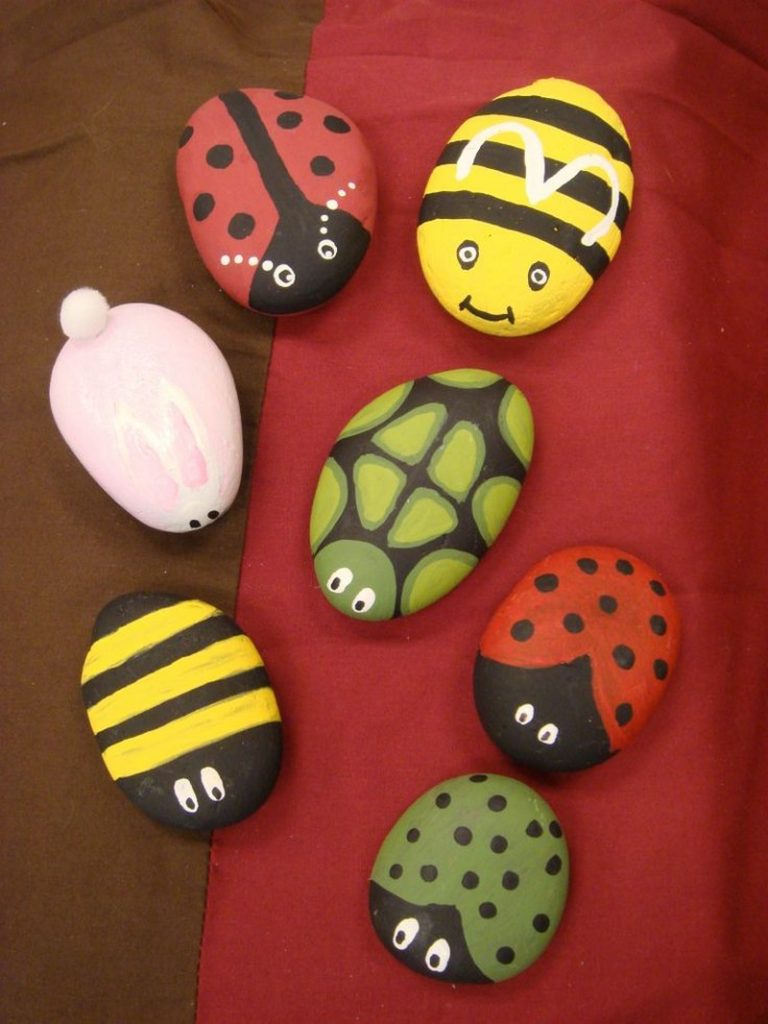
6. Stones
This ladybug rocks idea is for the kids! Make it their weekend project, yes?
How to make the ladybug Stone art?
- This is so easy, just gather and choose the smooth and firm shape stones
- Then clean these stones, using acrylic paint
- And paint them to design a ladybug shape
And now you can scatter these cute stones all over your garden!
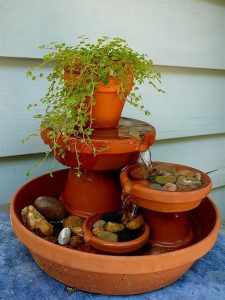
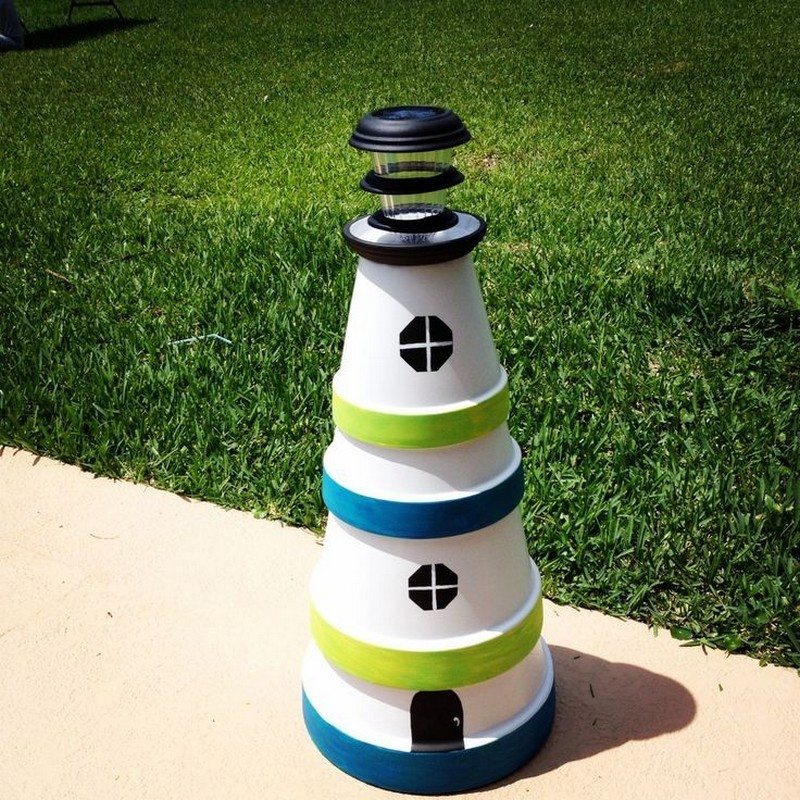
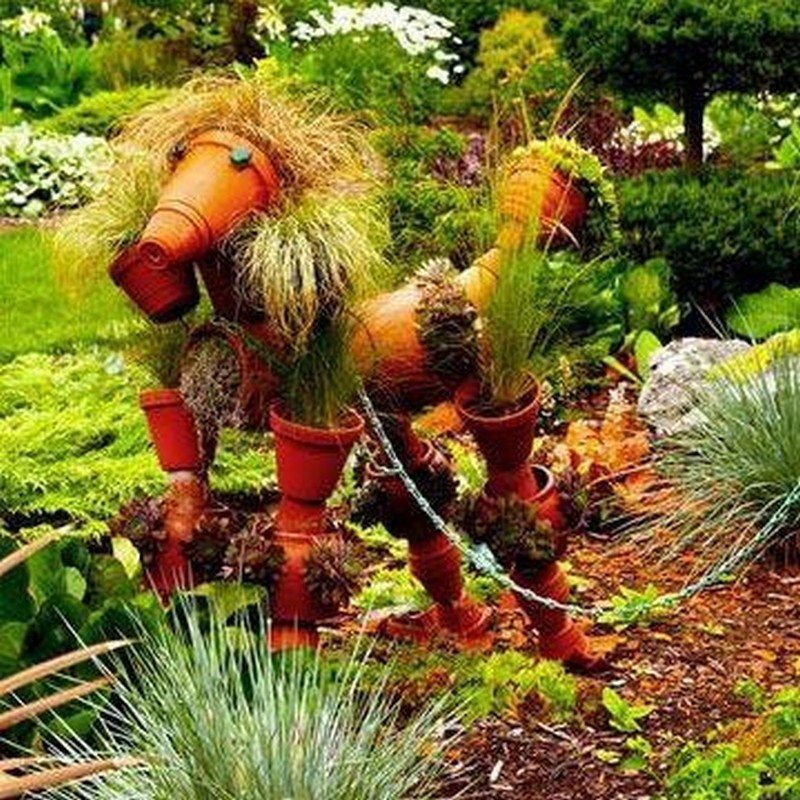
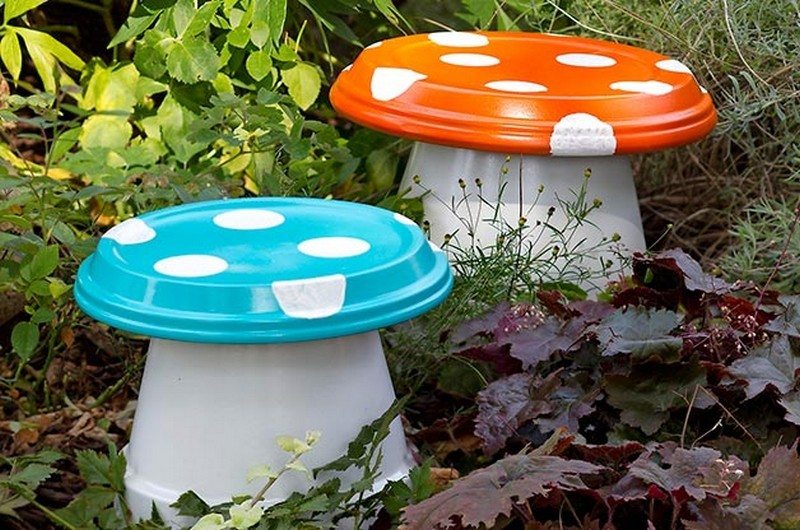
7. Terra Cotta Pots
These terra cotta examples definitely bring more life to the garden. I can imagine having friendly gnomes to protect my house. How about you?
How to make a Terra cotta pot art?
- Just gather and clean your old terra cotta pots and saucers
- Paint them with different colours, using acrylic paint
- Pile them up them according to the design you want, you can design a lighthouse, a horse or a mushroom as shown below.
And now you can decorate these gorgeous terracotta pots in your backyard!
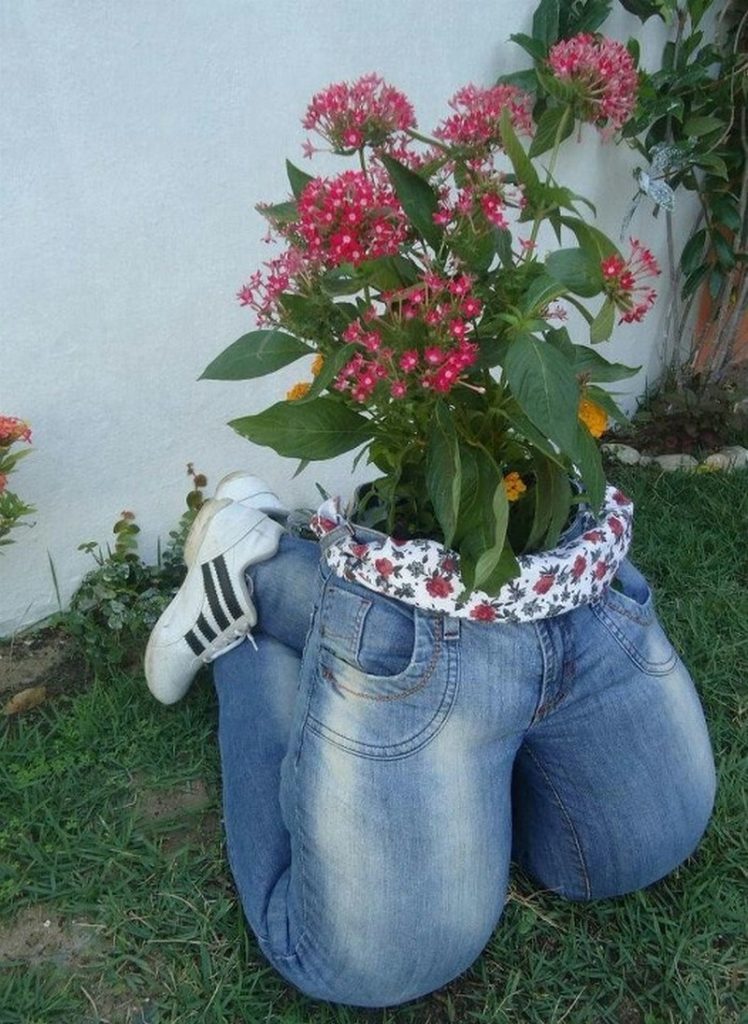
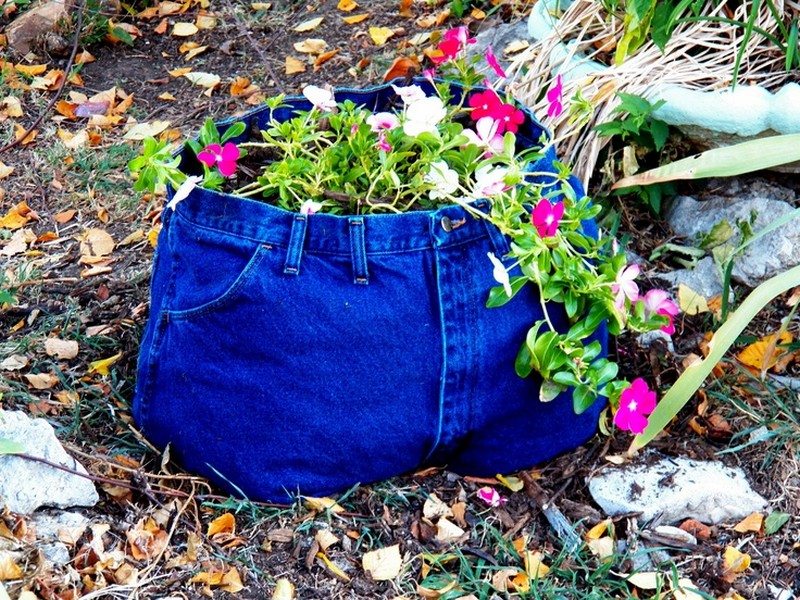
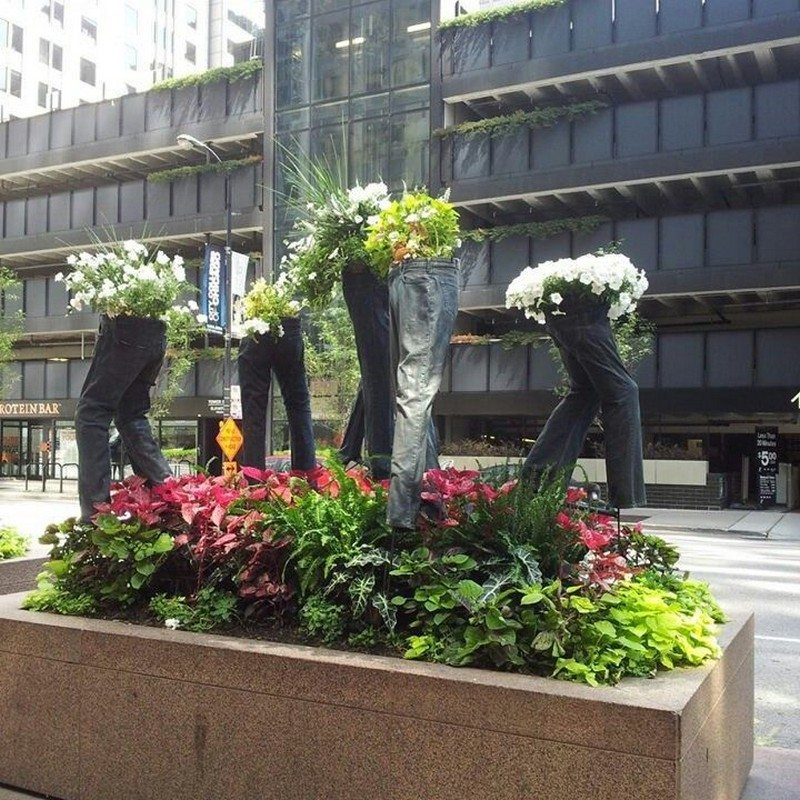
8. Old Jeans
They could be creepy at first, but we think this would make a good and different version of a scarecrow! It’s also another great way to upcycle small jeans. What do you think?
How to make an Old Jeans Planter art?
- Just gather and clean your old jeans
- Fold or design them according to what your garden needs
- To retain the shape, add a stand and soil.
- Then add your beautiful plants to it.
Now you can display these enchanting old jeans planters in your backyard! 😉
We hope this inspired the creative gardeners in you! Do you have new ideas to share? 🙂
How to Integrate Garden Art into Your Outdoor Space
Incorporating garden art into your outdoor space can transform a plain garden into a vibrant and personalized oasis. Garden art adds character, highlights your creativity, and complements the natural beauty of your plants. Whether you’re aiming for a whimsical, modern, or classic look, strategic placement of garden art can enhance your garden’s overall aesthetic.
Here’s how to seamlessly integrate garden art into your outdoor environment.
Choose a Theme
Before selecting garden art pieces, decide on a theme or style that reflects your personal taste and complements your garden’s design. Themes can range from rustic and vintage to contemporary and abstract. Having a clear theme will help you create a cohesive look.
- Rustic Charm: Incorporate weathered metals, wooden sculptures, and vintage items like old tools or farm equipment.
- Modern Elegance: Opt for sleek, minimalist sculptures, geometric shapes, and metallic finishes.
- Whimsical Wonderland: Use colorful, playful pieces such as fairy houses, animal figures, and vibrant mosaics.
Tip: Mix and match elements from different themes to create a unique, eclectic garden style.
Highlight Key Areas
Identify focal points in your garden where art can stand out. These areas might include entryways, garden paths, or corners that need visual interest. Placing garden art in strategic locations draws the eye and creates a sense of discovery as you explore the space.
- Entrances and Pathways: Frame doorways or pathways with arches, statues, or tall sculptures to create a welcoming entrance.
- Corners and Borders: Fill empty corners or the edges of garden beds with statues, planters, or artistic installations to add depth and interest.
- Water Features: Enhance ponds, fountains, or birdbaths with reflective sculptures, floating art, or water-resistant pieces.
Placement Tip: Consider the sightlines from various angles and how the art interacts with surrounding plants and structures.
Consider Scale and Proportion
Balance is key when integrating art into your garden. Ensure that the size of your art pieces is appropriate for the space they occupy. Too large, and they can overwhelm; too small, and they may get lost among the foliage.
- Large Gardens: Use larger sculptures or multiple pieces to fill open spaces and create impactful statements.
- Small Gardens: Opt for smaller, detailed art that can be nestled among plants or placed on raised platforms to draw attention.
Pro Tip: Combine different sizes of art pieces to create layers and visual interest without overcrowding the space.
Blend with Nature
Integrate garden art in a way that complements and enhances the natural elements of your garden. Choose colors, materials, and designs that echo the surrounding flora and landscape.
- Natural Materials: Use materials like wood, stone, and clay that age beautifully and blend naturally with the garden environment.
- Harmonizing Colors: Select art pieces that either match or contrast pleasingly with the colors of your plants and flowers.
- Living Art: Consider art that incorporates living plants, such as vertical gardens, succulent walls, or plant sculptures.
Integration Idea: Place art pieces where they interact with the natural elements, like wind chimes that catch the breeze or bird feeders that attract wildlife.
Create a Narrative
Tell a story with your garden art by creating themed vignettes or connecting pieces through a common motif. This approach adds depth and a personal touch to your garden, making it more engaging and meaningful.
- Themed Sections: Designate areas of your garden to different themes or stories, such as a fairy garden, a zen corner, or a wildlife habitat.
- Sequential Placement: Arrange art pieces in a sequence that leads visitors through a narrative journey, encouraging exploration and discovery.
- Personal Touches: Incorporate personalized elements like family initials, favorite quotes, or DIY projects that reflect your personality and memories.
Narrative Tip: Use garden art to highlight and celebrate the changing seasons, holidays, or significant life events, adding a dynamic element to your garden’s story.
Ensure Durability and Maintenance
Garden art must withstand outdoor conditions. Choose pieces that are made from durable, weather-resistant materials and consider their maintenance needs.
- Weather Resistance: Opt for materials that can handle exposure to sun, rain, and temperature changes, like treated wood, metal, or stone.
- Easy Maintenance: Select art pieces that are easy to clean and maintain. Regularly check and care for them to preserve their beauty and longevity.
- Secure Installation: Ensure that larger or heavier pieces are securely anchored to prevent tipping or damage from wind or other elements.
Durability Tip: Apply protective coatings to metal or wood art pieces to prevent rust and decay, keeping them looking fresh and vibrant.
Integrating garden art into your outdoor space is an exciting way to express creativity and enhance the beauty of your garden. You can create a visually stunning and personally meaningful garden by thoughtfully choosing themes, highlighting key areas, balancing scale, blending with nature, creating narratives, and ensuring durability. Embrace the opportunity to turn your garden into an outdoor gallery that delights and inspires all who visit.
Conclusion
Here are eight imaginative ways to turn commonplace objects into gorgeous garden décor. Every project encourages sustainability and recycling in addition to bringing flair and beauty to your outside area. Accept these do-it-yourself projects to make your garden a special expression of your inventiveness and respect for the natural world.
If you liked these garden art projects, you might also like these easy DIY projects…