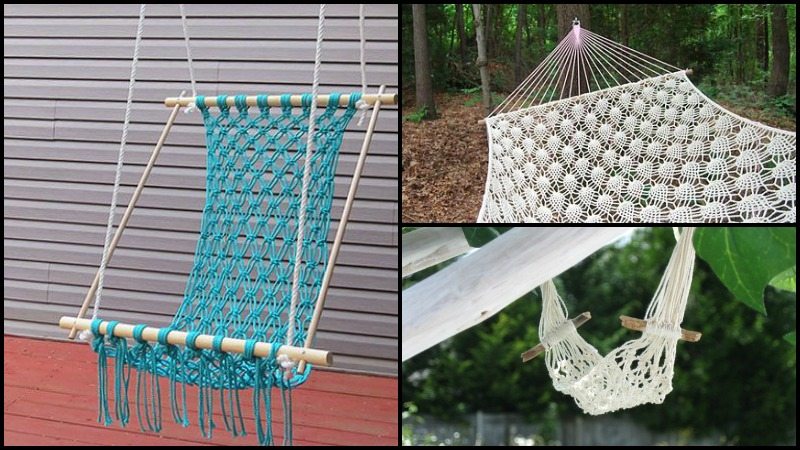
Want a hammock for your porch, but can’t find one that suits your taste? Why not make your own?
An outdoor area is never complete without a place to sit and relax. A hammock is one of your best options. It’s a great place to relax and take a nap. Installing a hammock doesn’t require a lot of tools, and moving it to a different location is very easy.

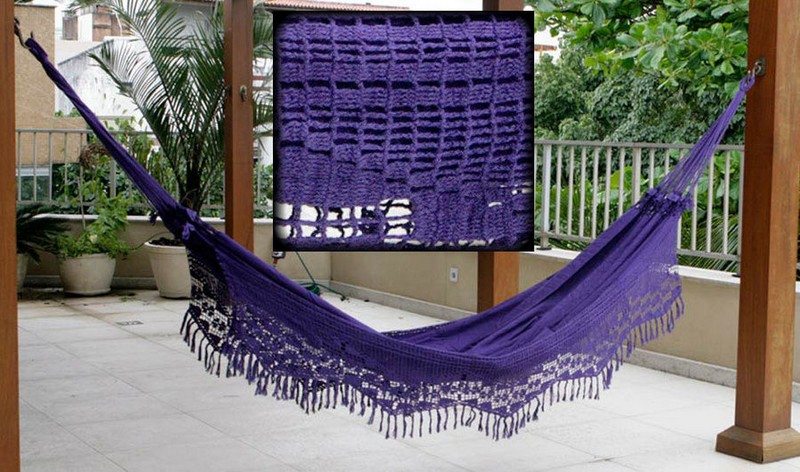
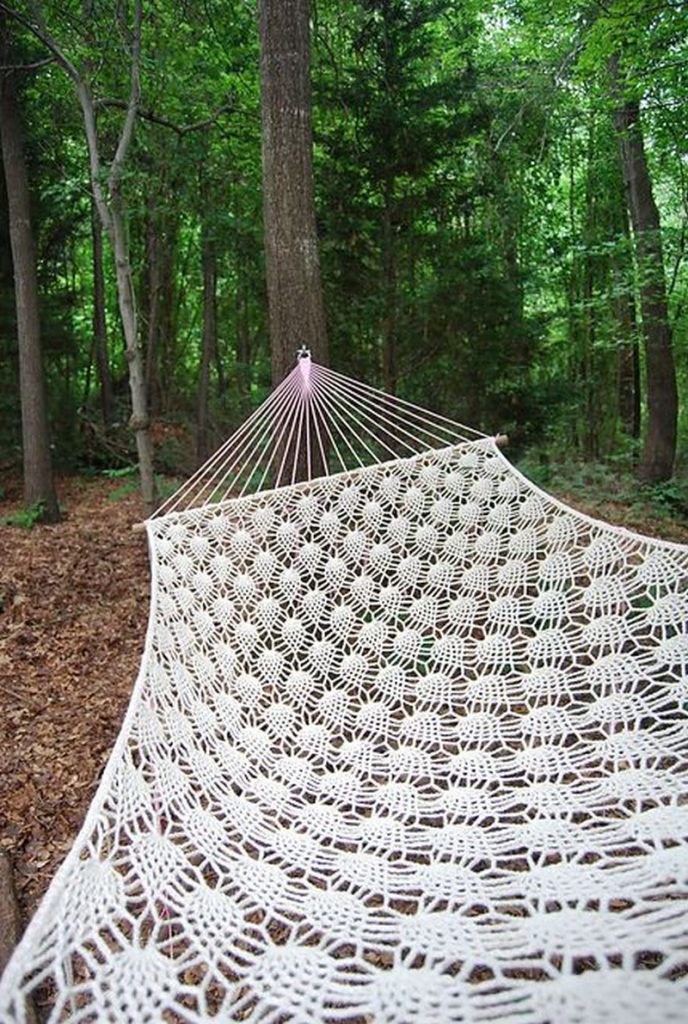
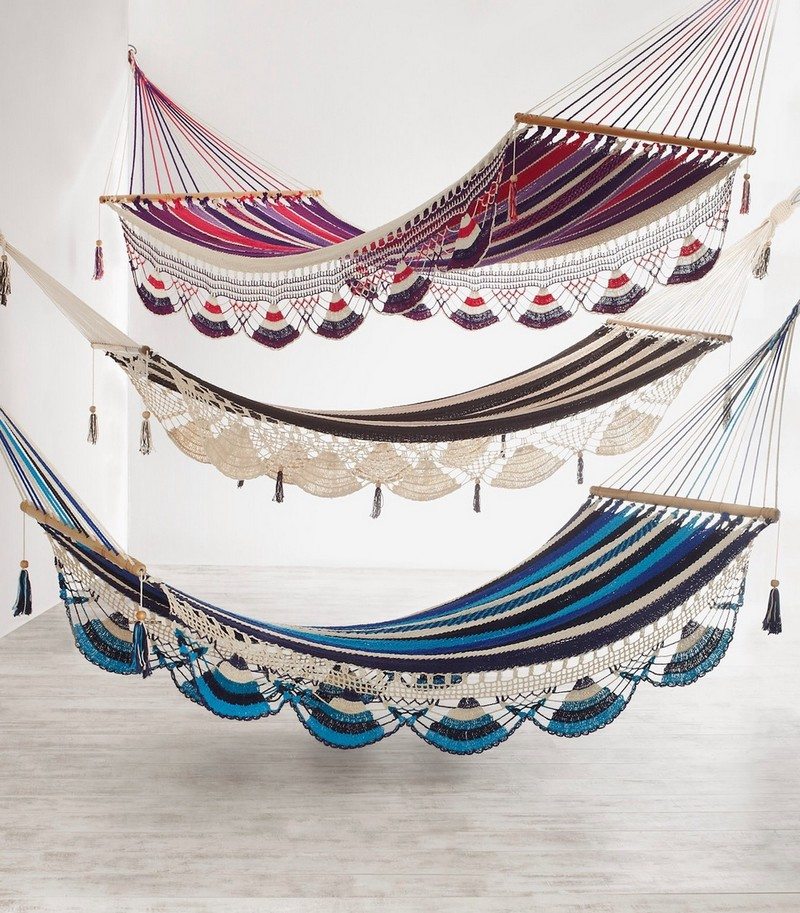
Making this particular hammock involves knotting strings or cords into patterns called macrame. You can easily match this with your outdoor area as there are many patterns and colors to choose from. You can also paint the dowels to match the color of the hammock’s cords.
How will you personalize your crocheted hammock? 🙂
Crafting a Crocheted Hammock
Materials:
- 3 pcs of 30″ long, 1-1/4″ Hardwood Dowels
- 2 pcs of 36″ long, 5/8″ Hardwood Dowels
- 200 yards of 1/4″ Macrame Cord Rope
- 1″ Wood Screws
Tools:
- Measuring Tape
- Drill
- Scissors
How to Make a Crocheted Hammock
1. Measure and gather the materials
Carefully measure the marked holes on the dowel aligned to the frame.
2. Drill holes
Make sure that alignments are carefully checked before drilling.
3. Make the frame
Create a frame for the seat.
4. Secure the frame
Secure the frame by screwing them together and hanging while creating the seat.
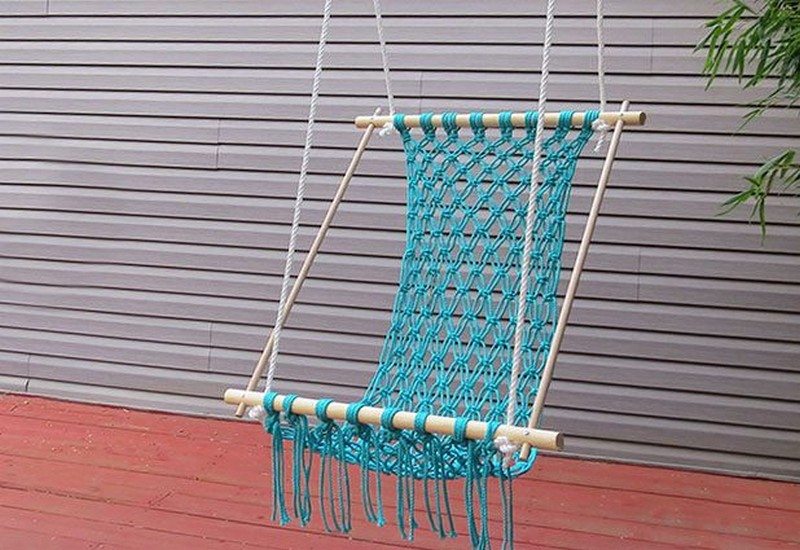
5. Make the seat
Make the seat using the cords by folding, looping, and knotting them uniformly to
6. Attach the seat to the frame
Attach the seat by covering all 4 cords around the dowel and bind a knot to attach the ends to the frame’s bottom.
7. Connect the rope to the dowel
Make sure the rope reaches up to the top third dowel. Make a loose knot with the rope and tie it around the dowel, providing 60 inches between the third dowel and the frame base.
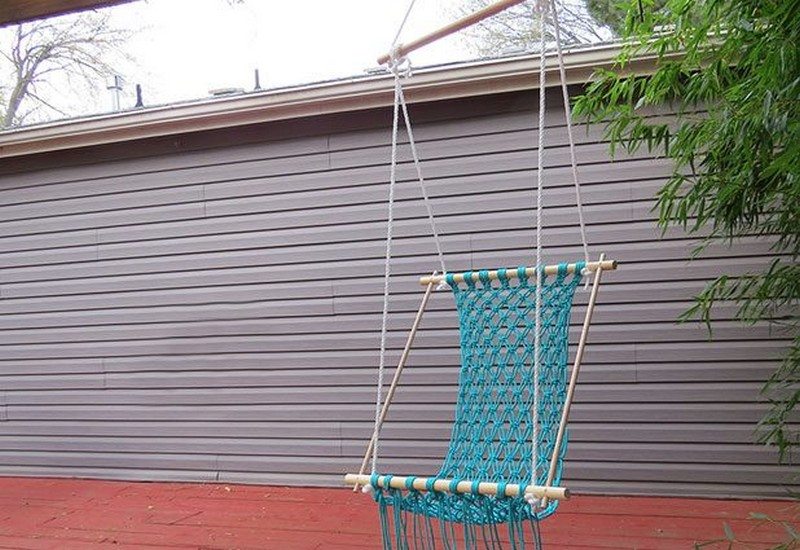
8. Hang the seat
Adjust and tighten the knots. Check the ropes before you hang your seat. Use a strong anchor, hook, or screw. Ensure safety before using the hammock.
Thanks to eHow for this great project. You can get step-by-step instructions here…
Click on any image to start the lightbox display. Use your Esc key to close the lightbox. You can also view the images as a slideshow if you prefer?


Guide to Yarn and Cord Types for Crocheting Hammocks
Creating a crocheted hammock is not only a fulfilling DIY project but also a beautiful addition to any outdoor or indoor space. The key to crafting a durable and comfortable hammock lies in choosing the right materials.
This guide will delve into the various types of yarns and cords available for crocheting hammocks, highlighting their advantages, disadvantages, and unique properties such as UV resistance, weather durability, and weight support capacity.
Crocheted Hammock Materials
When it comes to crocheting hammocks, the choice of material is crucial. A crocheted hammock needs to be strong enough to support weight, withstand the elements if used outdoors, and offer comfort and relaxation. The selection of yarn or cord can significantly affect the hammock’s performance, durability, and overall aesthetic appeal.
Cotton Cord: A Classic Choice
Cotton cord is a popular choice for crocheted hammocks due to its softness, comfort, and versatility. It’s excellent for those who prioritize comfort and a classic look. Cotton is breathable and absorbs moisture, making it pleasant to the touch, especially in hot weather. However, its susceptibility to mildew and fading when exposed to the elements means it may not be the best choice for all weather conditions.
Synthetic Cords: Durability and Weather Resistance
For those looking for a more durable and weather-resistant option, synthetic cords like nylon or polyester are excellent choices. These materials are known for their ability to withstand various weather conditions, including rain and sun exposure, thanks to their UV resistance and quick-drying properties. Synthetic cords are also stronger than cotton, offering better weight support and longevity, making them ideal for a crocheted hammock intended for frequent use.
Hemp and Jute: Eco-Friendly Options
Eco-conscious crafters might prefer natural fibers like hemp or jute for your crocheted hammock. These materials are not only sustainable but also boast high durability and resistance to weathering. Hemp, in particular, is known for its strength and mildew resistance, making it suitable for outdoor hammocks. However, these materials can be rougher to the touch compared to cotton, which might affect the comfort level.
Blended Materials: The Best of Both Worlds
Blended materials combine the benefits of natural and synthetic fibers, offering a balanced option for crocheted hammocks. For example, a blend of cotton and polyester can provide the softness and breathability of cotton with the durability and weather resistance of polyester. These blends often result in a material that is easy to work with, comfortable, and more capable of withstanding outdoor conditions.
Choosing the Right Material for Your Crocheted Hammock
When selecting the material for your crocheted hammock, consider the intended use, location, and your personal preferences for comfort and appearance. For outdoor use, synthetic materials or hemp may offer the best durability and weather resistance. For indoor use or in covered outdoor areas, cotton could provide the most comfort and aesthetic appeal.
The effort to creating the perfect crocheted hammock begins with selecting the right yarn or cord. By considering the factors of UV resistance, weather durability, and weight support, you can choose a material that not only meets your needs but also enhances your crafting experience.
Whether you opt for the comfort of cotton, the durability of synthetic fibers, the eco-friendliness of hemp or jute, or the versatility of blended materials, your crocheted hammock can become a cherished piece for relaxation and enjoyment.
Preserving the Charm of Your Crocheted Hammock
The allure of a crocheted hammock, with its intricate patterns and inviting design, can transform any outdoor or indoor space into a serene retreat. To maintain its beauty and ensure its longevity, it’s essential to provide your crocheted hammock with the care it deserves. Regular maintenance not only preserves its aesthetic appeal but also ensures that it remains a durable and comfortable haven for relaxation year after year. In this article, we’ll delve into detailed care and maintenance tips for your crocheted hammock, covering everything from cleaning methods to repair techniques and cord maintenance.
Regular Cleaning
Keeping your crocheted hammock clean is fundamental to its upkeep. Dirt, dust, and outdoor elements can accumulate within the fibers, leading to wear and potential damage over time.
- Light Cleaning: For light dirt and dust, gently shake your crocheted hammock to dislodge debris. You can also use a soft brush to carefully remove any accumulated dust without damaging the fibers.
- Deep Cleaning: When a more thorough cleaning is needed, hand wash your crocheted hammock with mild soap in lukewarm water. Avoid using harsh detergents, as they can degrade the yarn or fabric. Rinse thoroughly to remove all soap residues and lay flat to dry in a shaded area. Never use a dryer, as the heat can shrink or damage the material.
Sun and Water Damage Prevention
Prolonged exposure to the sun and moisture can be detrimental to your crocheted hammock. UV rays can fade the colors and weaken the fibers, while moisture can lead to mold and mildew growth.
- UV Protection: When not in use, store your crocheted hammock away from direct sunlight. If it must be left outdoors, consider using a UV protectant spray designed for fabrics, following the manufacturer’s instructions carefully.
- Moisture Management: Ensure your crocheted hammock is completely dry before storing it to prevent mold and mildew formation. If your hammock does get wet, hang it in a well-ventilated, shaded area to air dry thoroughly.
Cord and String Maintenance
The integrity of your crocheted hammock greatly depends on the condition of its cords or strings. Regular checks and maintenance can prevent unexpected breakages and extend the life of your hammock.
- Inspection: Periodically inspect the cords or strings for signs of wear, fraying, or weakness. Pay special attention to areas where the hammock bears the most weight, as these are more prone to stress.
- Retightening and Repair: If you notice any loose strings or cords, carefully retighten them to maintain the hammock’s shape and strength. For minor damages, such as frayed strings, consider repairing them with matching yarn or cord. If the damage is extensive, consulting a professional or the manufacturer for repair advice is best.
Storage
Proper storage is crucial when your crocheted hammock is not in use, especially during harsh weather conditions or the off-season.
- Clean Before Storing: Always clean your crocheted hammock before storing it to prevent dirt from setting in and attracting pests.
- Dry Storage: Make sure the hammock is completely dry to avoid mold and mildew growth. Store it in a cool, dry place, preferably in a breathable storage bag to protect it from dust and pests.
By following these detailed care and maintenance tips, you can ensure that your crocheted hammock remains a beloved part of your relaxation routine for many years. Regular upkeep not only preserves its functionality but also its unique beauty, making every moment spent in your crocheted haven even more enjoyable.
Enhancing Your Crocheted Hammock
Crocheted hammocks, with their intricate patterns and snug comfort, have become a staple in the realm of relaxation. Whether strung between two shady trees in a garden or serving as a cozy nook in your living space, a crocheted hammock is more than just a place to rest; it’s a personal oasis.
However, the experience can be significantly enhanced with a few thoughtful additions. This article will explore various ways to accessorize your crocheted hammock, ensuring it becomes your go-to spot for comfort and functionality.
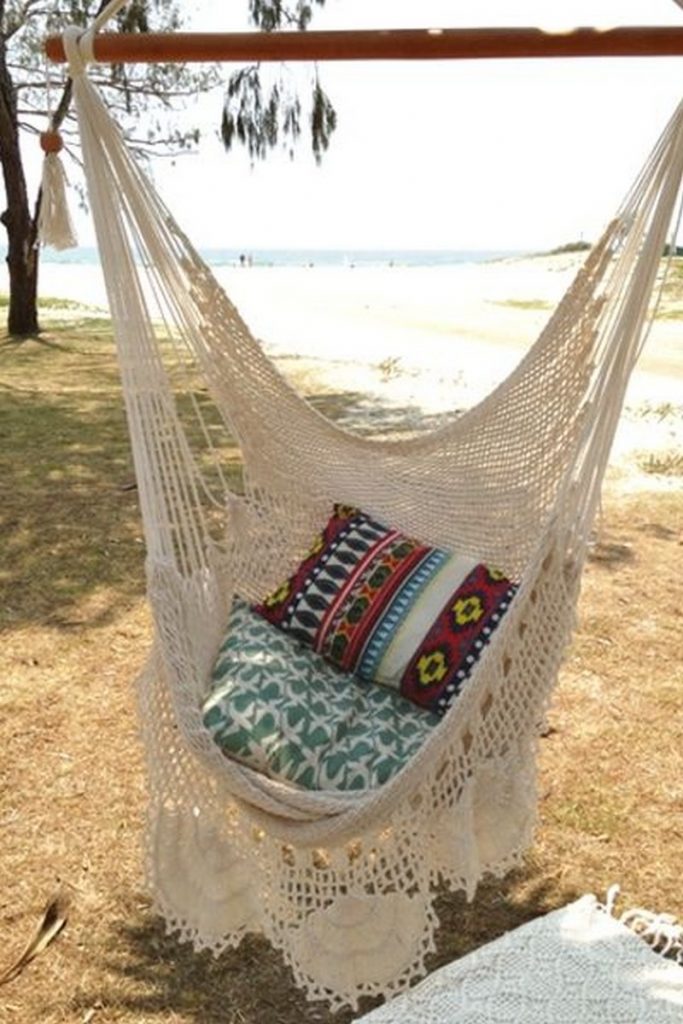
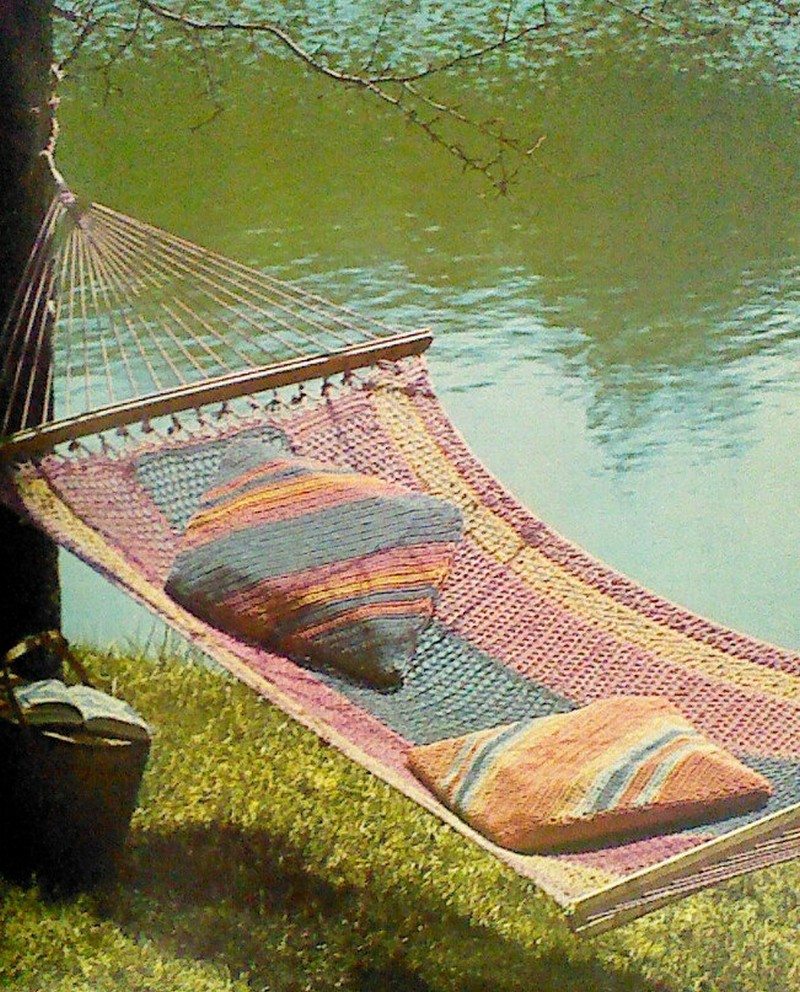
Add Plush Pillows
One of the simplest yet most effective ways to enhance the comfort of your crocheted hammock is by adding pillows. Soft, plush pillows can transform your hammock into a cloud-like sanctuary, perfect for extended lounging sessions.
Opt for weather-resistant fabrics if your crocheted hammock is outdoors, ensuring durability through various weather conditions. Pillows add not only comfort but also a splash of color and personality to your hammock, making it even more inviting.
Install Side Pockets
For those who love to have their essentials within reach, installing side pockets to your crocheted hammock is a game-changer. These pockets can be custom-made to fit the design of your hammock, providing the perfect spot for books, magazines, sunglasses, or small electronics. This addition is not only practical but also enhances the functionality of your crocheted hammock, ensuring everything you need is at arm’s length.
Attach a Mosquito Net
Enjoying the tranquility of dusk in your crocheted hammock can be marred by the presence of mosquitoes and other pesky insects. Attaching a mosquito net can solve this problem, allowing you to relax without the annoyance of insects.
Mosquito nets designed for hammocks are easy to set up and dismantle, providing protection when needed without compromising the aesthetics of your crocheted hammock. This addition is particularly useful for those who enjoy spending time outdoors in their hammock during the evening.
Incorporate a Hammock Underquilt
For cooler evenings or for those who enjoy their crocheted hammock year-round, an underquilt is an essential accessory. Hammock underquilts are designed to attach to the underside of your hammock, providing insulation and warmth without sacrificing comfort. This accessory ensures that you can continue to enjoy your crocheted hammock even when the temperature drops, making your hammock a versatile piece for all seasons.
Upgrade with a Hammock Stand
Not everyone has the perfect pair of trees to hang their crocheted hammock from. In such cases, a hammock stand becomes an invaluable accessory. Hammock stands come in various materials and designs, offering stability and flexibility in where you can set up your hammock. By choosing a stand that complements the style of your crocheted hammock, you can enjoy the comfort and beauty of your hammock in any location you desire.
Accessorizing your crocheted hammock is not just about adding extras; it’s about enhancing the overall experience of relaxation and enjoyment. Whether through the addition of plush pillows, practical side pockets, protective mosquito nets, warm under quilts, or versatile hammock stands, there are countless ways to make your crocheted hammock even more comfortable and functional.
Incorporating Crocheted Hammocks into Home Decor
In the world of home decor, the quest for uniqueness and comfort often leads to the incorporation of traditional crafts into modern settings. One such timeless piece is the crocheted hammock, a handwoven marvel that brings a blend of style and functionality to any living space. This article explores how crocheted hammocks can be seamlessly integrated into various home styles, enhancing the overall ambiance and providing a cozy retreat within your walls.
The Charm of Crocheted Hammocks
Crocheted hammocks, with their intricate patterns and soft, durable fabric, offer more than just a place to relax. They are a testament to craftsmanship and tradition, carrying the essence of leisure and relaxation into the heart of home design. Whether suspended in a sunny corner, draped over a sturdy frame, or hung in a bedroom, a crocheted hammock adds a focal point of interest and an inviting touch to any room.
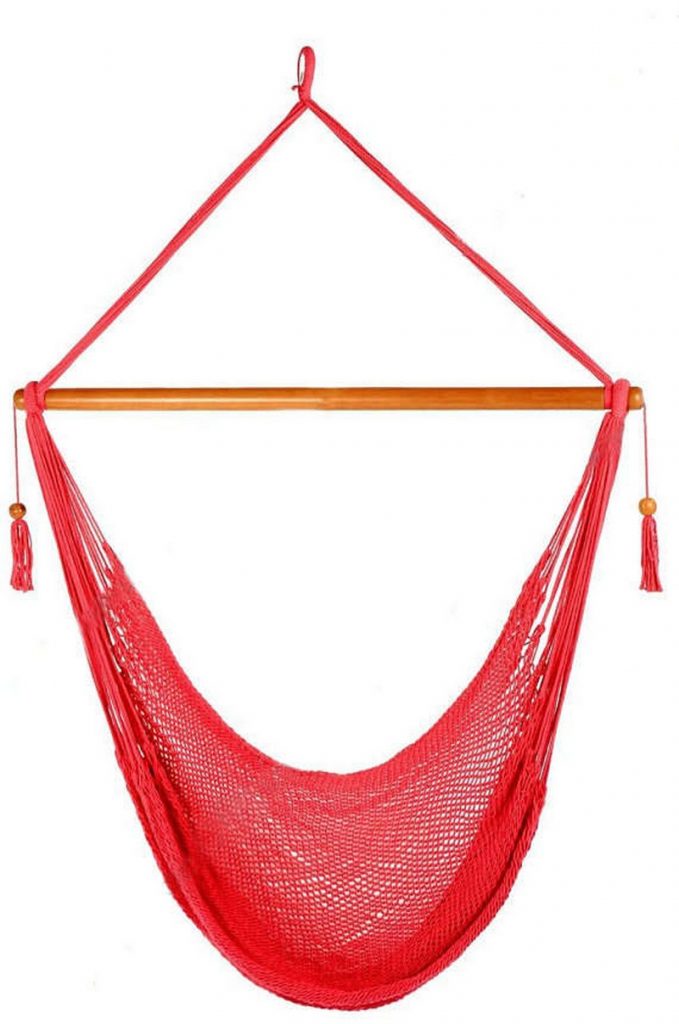
Living Room Luxe
Incorporate a crocheted hammock into your living room to create a unique lounging area that invites conversation and relaxation. Choose a color that complements your existing decor, ensuring the hammock enhances the room’s aesthetic rather than overwhelming it.
A crocheted hammock can serve as a swing seat, offering a whimsical touch to the space while providing additional seating for guests. Accentuate it with plush pillows and a lightweight throw for added comfort and style.
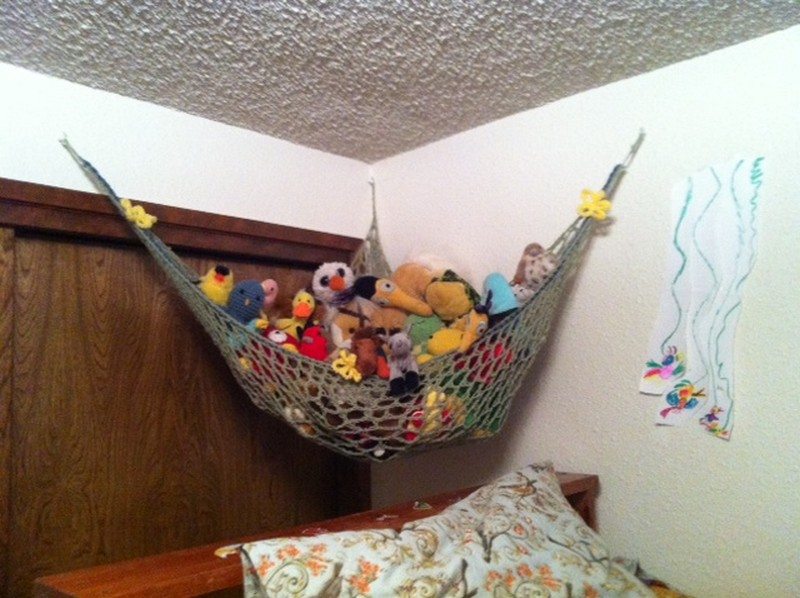
Cozy Corners and Reading Nooks
Transform a neglected corner of your home into a cozy reading nook with the addition of a crocheted hammock. It’s the perfect spot to curl up with a good book, surrounded by soft lighting and your favorite decorative elements. This setup not only maximizes unused space but also introduces a comfortable, secluded spot for relaxation and introspection.
Bedroom Bliss
A crocheted hammock can bring a sense of serenity and relaxation to any bedroom. Consider hanging a hammock alongside your bed as an unconventional seating area or a place to lay back and enjoy some quiet time before sleep. The gentle sway of a hammock promotes relaxation and can be a perfect addition to your bedtime routine, aiding in stress reduction and enhancing the overall tranquility of the space.
Outdoor Oasis Indoors
For those who love the outdoors but are limited by space or climate, bringing a crocheted hammock indoors can create a sense of an outdoor oasis. Positioned near a window with plenty of natural light, a hammock can bridge the gap between indoor comfort and the beauty of nature. It serves as a reminder to slow down and appreciate the simpler moments, whether it’s basking in the sunlight or enjoying the view from your very own indoor retreat.
Practical Considerations
While the aesthetic appeal of crocheted hammocks is undeniable, their installation requires careful consideration. Ensure the structural integrity of walls or ceilings before hanging a hammock, and opt for high-quality hardware to secure it safely. Additionally, consider the hammock’s material and care instructions to maintain its beauty and longevity.
Incorporating a crocheted hammock into your home decor is not just about adding a piece of furniture; it’s about embracing a lifestyle that values comfort, beauty, and the art of relaxation. Whether as a statement piece in your living room, a cozy nook for reading, or a serene addition to your bedroom, a crocheted hammock enriches your living space with its unique charm and versatile functionality. Let the gentle sway of a crocheted hammock transport you to a place of peace and relaxation, right in the heart of your home.
Conclusion
A crocheted hammock is a decorative and relaxing bedding that fits any of your interior space. This floating bed is perfect for your bedroom, outdoor porch, or reading corner. With the proper care, this hammock can last for a long time.
If you liked this project, you will also like viewing these easy DIY projects and Swing Bed Made From Recycled Trampoline