Last Updated on November 7, 2024 by teamobn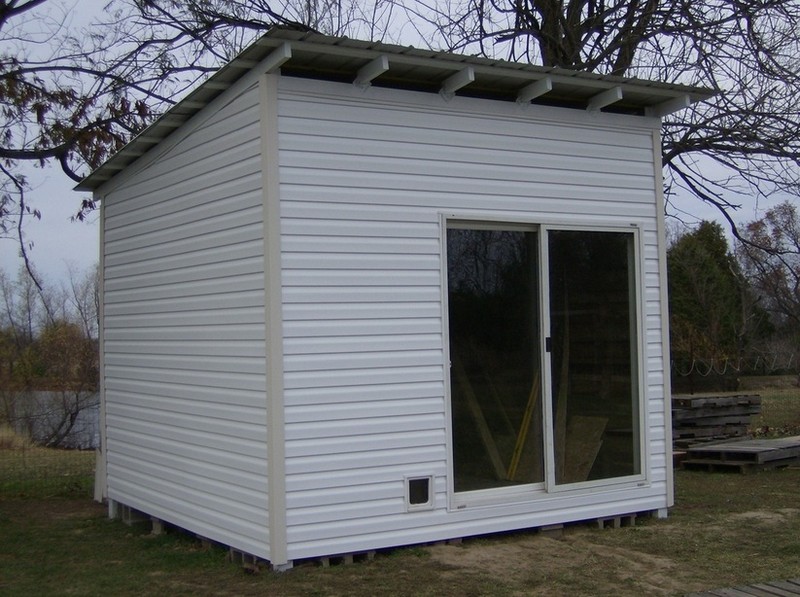
When you think of pallet projects, do you think of them as being “rough and ready”? This is often the case, as pallets are often made from recycled materials and are not always the most aesthetically pleasing.
However, with a little bit of creativity, pallets can be transformed into beautiful and unique pieces of furniture or art. With a little bit of effort, your pallet project can be something that you’re proud to show off.
Why Upcycle a DIY Pallet Shed
This DIY Pallet Shed is a great way to save money while still getting a high-quality shed. By using repurposed pallets, you can keep costs to a minimum while still getting a durable and long-lasting shed. This shed is easy to build and can be completed during the weekend.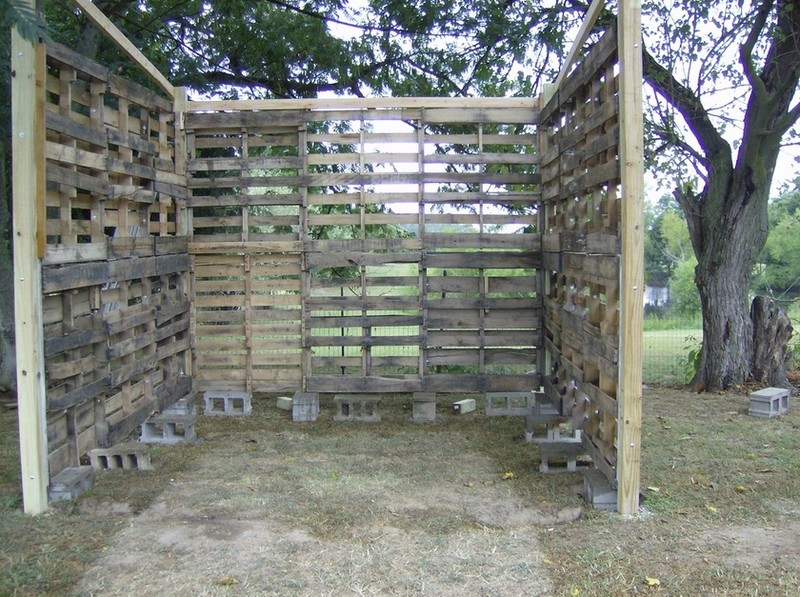
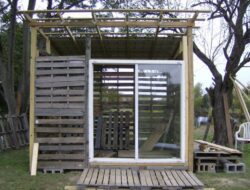
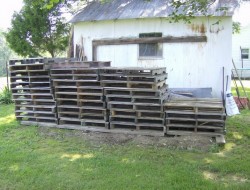
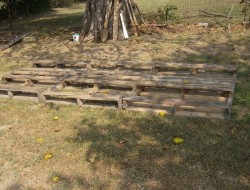
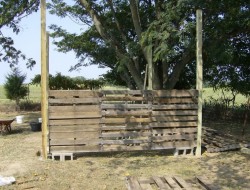
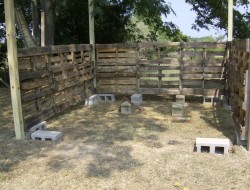
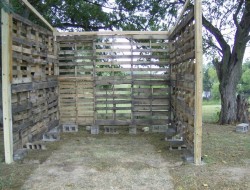
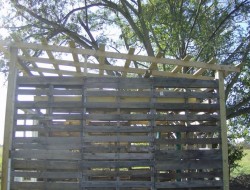
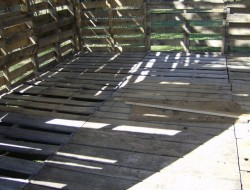
The great thing about using pallets to build this DIY Pallet shed is that you don’t have to dismantle them. You can simply join whole pieces together to build the walls, as long as the pallets you get are of the same size. This makes the process much quicker and easier and means you don’t have to worry about disposing of the pallets afterwards.
There are plenty of old doors waiting to be used again. Reusing old doors is a great way to add character to your home while also being environmentally friendly. You can find old doors at salvage yards, antique stores, or even online.You can often get them free, or at a very low cost, online.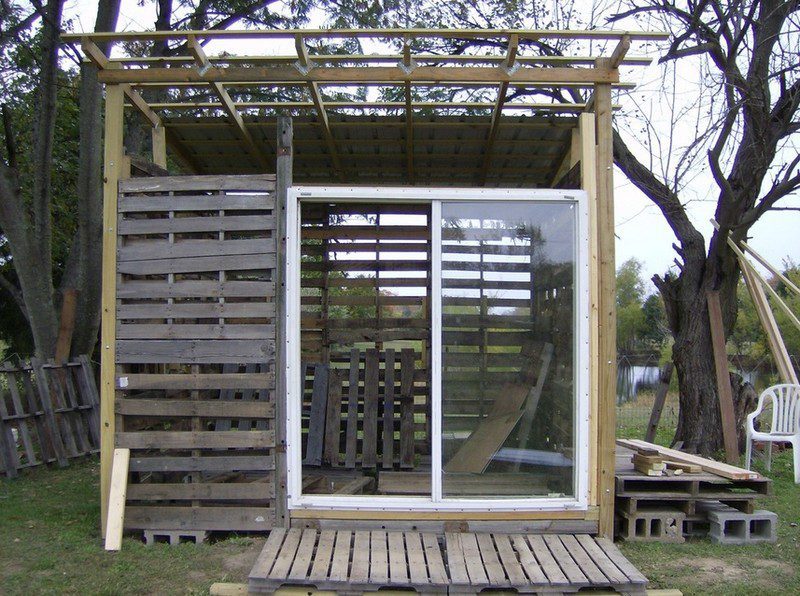
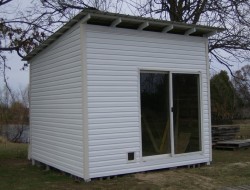
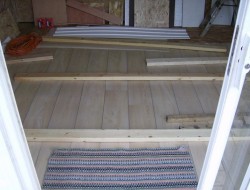
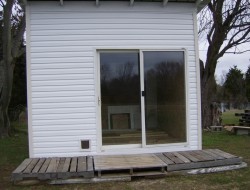
The double-insulated, sliding glass door used in this shed was obtained for free. The door was originally intended for a different type of shed but was able to adapt to this purpose. The glass is double-paned and the frame is made of metal, so it’s very durable.
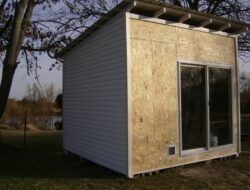
The door slides open smoothly and easily, making it a great addition to the shed. The idea of having this kind of door is really clever as sliding doors like this are usually a little wider opening than a standard door. You also get ample natural lighting inside the DIY pallet shed reducing or eliminating the need for one or more windows.
The pallet framing system is an excellent choice for those looking for a fast build with excellent strength and rigidity. This system offers many benefits that make it an ideal choice for a variety of applications.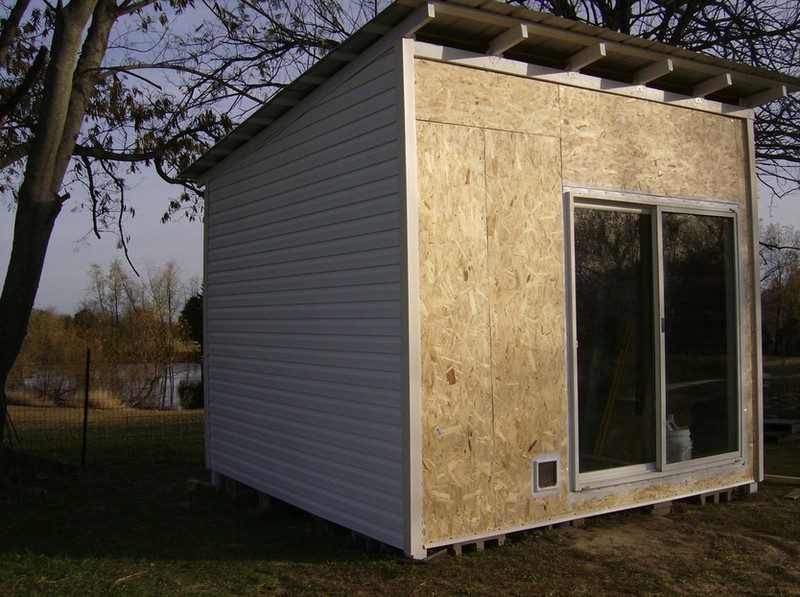
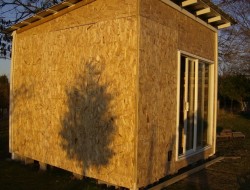
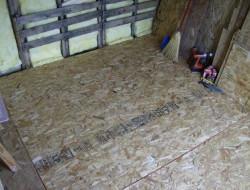
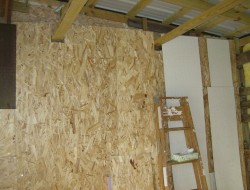
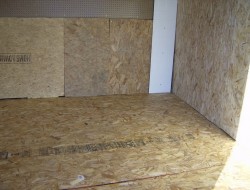
The OSB panel makes the wall of this DIY Pallet shed. This is a great way to save money on your shed, as OSB panels are much cheaper than traditional siding materials. Plus, the panels are easy to work with and can be cut to fit any size shed.
The wall is doubled with professional-grade vinyl siding, making it more elegant and durable. This siding is easy to clean and maintain, and it will keep your home looking great for years to come.
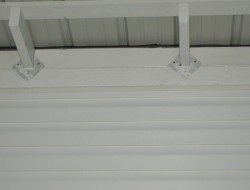
This DIY Pallet shed uses metal sheet roofing which is a great way to protect your shed from the elements. You can easily find metal sheets at your local hardware store, which’re relatively inexpensive. This roofing option is also easy to install, so you can complete this project at a weekend.
Building a DIY Pallet Shed
Materials:
- Old Pallets
- Old Door
- 4×4 Timber
- 2×4 Timber
- 1×4 Timber
- Concrete Blocks
- Vinyl Sliding
- OSB Panel
- Insulation
- Linoleum Flooring
- Pegboard
- Metal Sheet Roofing
- Water Resistant Weather Stripping
- Silicone Caulking
- Roofing Brackets
- Pole Barns Screws
- Large Bolts
Tools:
- Power Drill
- Table Saw
- Jigsaw
- Carpenter’s Level
Instructions
Step 1: Plan Your Shed
- Decide on the shed’s dimensions.
- Sketch a simple design, including door and window placements.
Step 2: Prepare the Site
- Clear the area where the shed will be located.
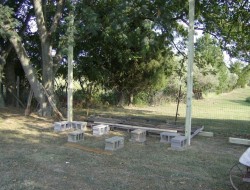
- Lay down concrete blocks as a foundation to ensure stability and level ground.
Step 3: Build the Base
- Use 4×4 timber to construct the frame for the shed’s base.
- Ensure the frame is level using the carpenter’s level.
- Secure the frame to the concrete blocks with large bolts.
Step 4: Construct the Wall Frames
- Cut 2×4 timber to size for the wall frames using the table saw.
- Assemble the wall frames, spacing studs about 16 inches apart.
- Use the power drill and screws to secure the studs in place.
Step 5: Install the Pallet Walls
- Attach old pallets to the wall frames using pole barn screws and the power drill.
- Ensure the pallets are securely attached and the walls are sturdy.
Step 6: Add the Roof Frame
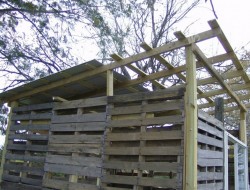
- Construct the roof frame with 2×4 timber, cutting angles with the jigsaw for a sloped design.
- Secure the roof frame to the walls with screws and roofing brackets.
Step 7: Apply the Roofing
- Cut metal sheet roofing to size and attach it to the roof frame with screws.
- Use water-resistant weather stripping along the edges to prevent leaks.
Step 8: Install the Door and Windows
- Fit the old door into the designated space, securing it with screws.
- If windows are desired, cut openings with the jigsaw and secure window frames in place.
Step 9: Seal and Insulate
- Apply silicone caulking around the door, windows, and any gaps to seal the shed.
- Install insulation between the wall studs and cover with OSB panel or pegboard for interior walls.
Step 10: Add Exterior and Interior Finishes
- Attach vinyl siding to the exterior walls using screws for a more polished look.
- Lay linoleum flooring inside the shed for a clean, finished floor.
- Optional: Install pegboard on interior walls for tool organization.
Step 11: Final Touches
- Check the entire structure for any missed spots or potential improvements.
- Add any additional shelving or storage solutions as needed.
Click on any image to start the lightbox display. Use your Esc key to close the lightbox. You can also view the images as a slideshow if you prefer 😎
Maintenance and Care for Your DIY Pallet Shed
Maintaining your DIY pallet shed is key to ensuring it stands the test of time and weather. Regular care keeps it functional and looking great. Here are some tips to help you keep your pallet shed in top condition.
Check for Pests Regularly
Pests pose a significant threat to wooden structures, including your DIY pallet shed. Regular inspections are crucial to catch early signs of termites, carpenter ants, and other pests that could weaken or destroy the wood. When checking your pallet shed, pay close attention to corners, joints, and any areas that seem damp or hidden.
If you notice powdery residues, tiny holes, or hear a hollow sound when tapping the wood, these could be indicators of pest infestation. Early detection allows for prompt treatment, which might involve applying pesticides or calling in pest control professionals. Taking immediate action prevents pests from causing irreversible damage to your pallet shed, ensuring its longevity and structural integrity.
Weatherproofing Your Shed
Much like any outdoor structure, your DIY pallet shed is constantly exposed to weather elements such as rain, sun, snow, and wind. To safeguard your shed and extend its lifespan, applying a weather-resistant stain or paint is essential. This protective layer shields the wood from moisture and UV rays and prevents rot and fading, keeping your shed looking its best.
Choose a product specifically designed for outdoor wood and suitable for the climate in your area. For best results, prepare the surface by cleaning it thoroughly and sanding down any rough spots before applying the stain or paint.
Reapplying the protective layer every few years ensures ongoing protection against the elements. This routine maintenance task not only enhances the durability of your pallet shed but also contributes to its visual appeal, making it a standout feature in your outdoor space.
Roof Maintenance
The roof is a critical component of your DIY pallet shed, acting as the first line of defense against the elements. It’s essential to inspect the metal sheet roofing periodically for any signs of wear, such as rust or physical damage. Even small imperfections can lead to bigger problems, like water leakage, which could compromise the integrity of your shed and the items stored inside.
If you notice issues, addressing them promptly, either through repair or replacement, is key to maintaining the shed’s overall health. Regular roof maintenance ensures the longevity of your pallet shed, keeping the interior dry and safe from external damage. It’s a simple yet effective step in protecting your investment and ensuring that your shed remains a functional and reliable storage space for years.
Keep it Clean
Maintaining cleanliness inside your DIY pallet shed is more than just about aesthetics; it’s about preservation and functionality. Regularly sweeping the interior, clearing out debris, and checking for cobwebs or mold in corners are crucial practices. A clean environment prevents the accumulation of moisture, which can lead to mold growth and attract pests.
By keeping the shed tidy, you’re more likely to spot potential issues early on, such as leaks that could indicate a problem with the roof or walls, or signs of pest infestations that need to be addressed. Regular cleaning not only extends the life of your pallet shed but also ensures it remains a pleasant and healthy space for storing tools, garden equipment, or any other items you need to protect from the elements.
Landscaping and Outdoor Decor for Your DIY Pallet Shed
Creating a cohesive outdoor space around your DIY pallet shed enhances its appearance and integrates it seamlessly into your garden or backyard. With thoughtful landscaping and outdoor decor, you can elevate the aesthetic appeal of your pallet shed and turn it into a focal point of your outdoor living space. Here are some ideas to get you started.
Choose Complementary Plantings
Select plants that complement the rustic charm of your pallet shed. Add a mix of perennials, shrubs, and climbing vines to create a lush, inviting environment. Planting flowers with colors that match or contrast with your shed can create visual harmony. Climbing plants like ivy or clematis can add a touch of elegance to the shed’s exterior walls.
Create a Pathway
Design a pathway leading to your pallet shed using stepping stones, gravel, or wood chips. This not only adds a functional element, guiding visitors to the shed, but also enhances the overall look of your garden. Choose materials that match the rustic vibe of the shed for a cohesive look.
Add Outdoor Lighting
Incorporate outdoor lighting to highlight your pallet shed and the surrounding landscape. Solar-powered lights along the pathway, string lights around the shed, or spotlights focused on the structure can create a warm, inviting atmosphere. Lighting not only adds to the aesthetic appeal but also increases the functionality of the space, allowing you to enjoy your shed and garden even after sunset.
Incorporate Seating
Place a bench or a couple of chairs near your pallet shed to create a cozy relaxing spot. This invites you to take a break and enjoy your garden’s beauty. Choose furniture that complements the rustic aesthetic of the shed, such as wooden benches or metal chairs with cushions in outdoor fabrics.
Install a Rain Garden
Position a rain garden near your DIY pallet shed to manage runoff in an eco-friendly way. Choose native plants that thrive in your local climate and can handle the ebb and flow of moisture levels. This not only adds biodiversity to your garden but also complements the sustainable nature of your pallet shed.
Use Decorative Mulch
Surrounding your DIY pallet shed with decorative mulch can tie the landscape together while suppressing weeds and retaining soil moisture. Choose a color and texture of mulch that complements the wood of the pallets, such as natural bark mulch, to enhance the rustic feel.
Incorporate a Vertical Garden
Maximize space and add a green touch to your DIY pallet shed by installing a vertical garden on one of its walls. Use pallets to create the vertical garden, planting herbs, succulents, or flowers. This beautifies the shed and emphasizes the versatility of pallets in garden projects.
Add a Water Feature
A small water feature, such as a birdbath or a fountain, near your DIY pallet shed can create a serene atmosphere. The sound of water adds a tranquil element to the garden, making the space around your pallet shed a peaceful retreat.
Create an Outdoor Art Display
Personalize the space around your DIY pallet shed with outdoor art that reflects your style. This could be anything from a painted mural on the shed itself to sculptures or metalwork placed in the garden. Art pieces can add a unique touch and serve as conversation starters.
Build a Fire Pit Area
Consider building a shed out of pallets with a fire pit if space allows. This creates a cozy gathering spot for evenings outdoors. Ensure it’s safely distanced from the shed and any plants. Using materials that echo the rustic theme of the shed, like stone or brick, can unify the space.
FAQ on Building a DIY Pallet Shed
- Can I build a DIY pallet shed without prior construction experience?
- Yes, you can build a DIY pallet shed even if you’re new to construction projects. Anyone can tackle this project with detailed instructions, the right materials, and basic tools. However, having a basic understanding of tool safety and construction principles is helpful.
- What type of pallets are best for constructing a DIY pallet shed?
- For building a DIY pallet shed, look for pallets that are sturdy, in good condition, and free from chemicals. Pallets marked with “HT” (heat-treated) are ideal because they’re free from harmful chemicals and safe for use in projects.
- How long does it take to build a DIY pallet shed?
- The time it takes to build a DIY pallet shed can vary based on the size of the shed and your skill level. On average, it can take a weekend to several weekends to complete, especially if you’re working on it in your spare time.
- Do I need a permit to build a DIY pallet shed?
- Permit requirements for building a DIY pallet shed vary by location. It’s essential to check with your local building department or municipality to understand the regulations and whether a permit is needed for your project.
- How can I make my DIY pallet shed more weather-resistant?
- To make your DIY pallet shed more weather-resistant, use weather-resistant paint or stain on the exterior pallets, ensure the roof is properly sealed and insulated, and use water-resistant weather stripping around doors and windows.
- What can I do to ensure my DIY pallet shed is stable and durable?
- To ensure your DIY pallet shed is stable and durable, start with a solid pallet shed foundation foundation using concrete blocks or a gravel base. Use high-quality materials for the structure and roof, and make sure everything is well-secured and properly sealed against the elements.
- Can I customize the size and design of my DIY pallet shed?
- Absolutely! One of the benefits of building a DIY pallet shed is the flexibility to customize the size, design, and features to suit your needs and preferences. Plan your design carefully, considering what you’ll use the shed for and the space available in your yard.
- What should I do if I find pests in my pallets?
- If you find pests in your pallets, treat the wood with a suitable pesticide or opt for heat treatment if possible. Inspect all pallets thoroughly before use to avoid introducing pests to your DIY pallet shed.
- How do you install rafters and purlins in a pallet wood shed?
- Start by measuring and cutting your pressure-treated two-by-fours to the appropriate length. These will serve as your rafters, providing a robust framework for the roof. Use galvanized roof ties to securely fasten each rafter to the top sills of the shed. Space the rafters 24 inches apart from the center to ensure adequate support. Take a pressure-treated 1-by-4-inch piece and screw it perpendicularly across the rafters.
- How do you choose a location for your pallet wood shed?
- Seek out a flat, even section of your yard to minimize the need for additional groundwork. This stability helps construct a solid foundation, preventing future issues like uneven settling. Observe the sun and shade patterns in your yard. Ideally, your shed should receive enough sunlight to keep it dry, reducing the risk of mold without overheating the contents inside.
- How do you modify the pallets to fit the design?
- Use a circular saw to cut pallets into the required sizes, such as halving one pallet and trimming sections off others to fit the specified dimensions.
- What is the sequence of steps for assembly?
- Start by creating the floor with two pallets joined side-by-side. Then, cut a pallet in half for the back wall and attach to other pallets. Finally, prepare and attach the side walls.
Conclusion
Building a DIY pallet shed is a rewarding project combining sustainability and practicality. By following step-by-step instructions and using the right materials and tools, you can create a sturdy and attractive shed in your backyard for various purposes. This project allows for customization to fit your specific needs and offers a sense of accomplishment as you repurpose materials into something functional and stylish.
For more upcycling ideas, check out our post on innovative recycling projects for soda crates!

