Last Updated on January 5, 2024 by teamobn
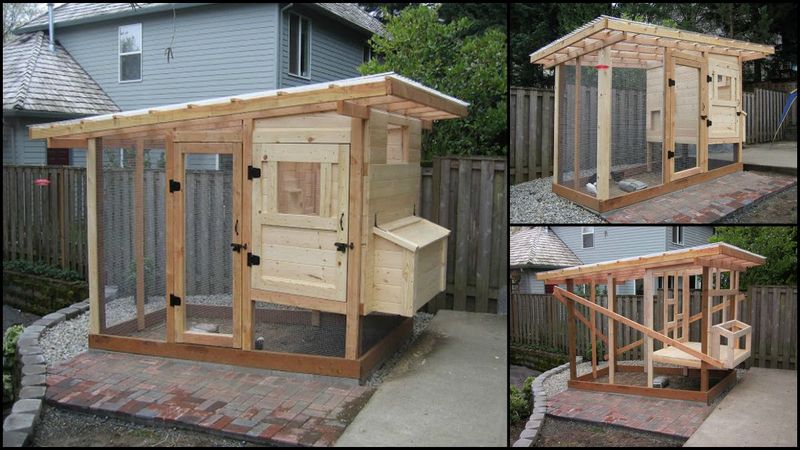
Backyard chickens are great at eating kitchen scraps and bugs in the garden (and providing free eggs in return), but they do need somewhere safe at night, from predatory animals.
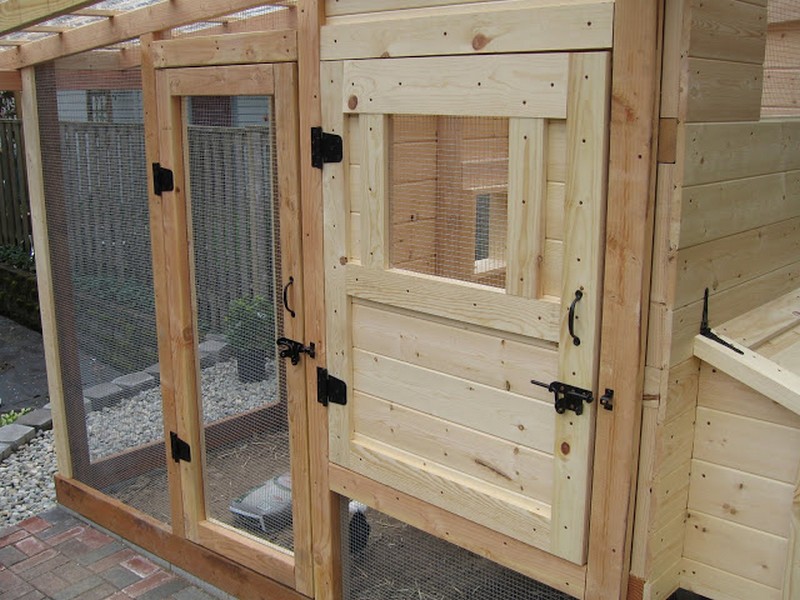
That’s why you need a homemade chicken coop if you have chickens in your yard. Here’s a homemade coop that impressed us. If you have chickens in your backyard, we’re sure you’ll appreciate both its functionality and specifications.
What are the benefits of building a homemade chicken coop?
Constructing a homemade chicken coop has gained popularity as individuals seek a self-sustaining lifestyle. Developing your own coop presents various benefits, such as cost conservation and enhancing the welfare of your hens. Here are other benefits for you to check out!
1. Healthier chooks
Chooks are healthier when raised in our backyard since they are naturally fed. Unlike the chickens raised in factories that use antibiotics to speed up their growth, they are usually fed a non-organic diet.
2. Healthier eggs
Since the chooks are raised with an organic diet, the eggs have more vitamins A, E, Omega 3, and beta carotene.

3. Delicious eggs
Fresh eggs are tastier than eggs from the supermarket where these eggs have been sitting for days in the market plus the transportation period.
4. Usable compost chicken poop
Chicken poops and egg shells are all effective compost bins.
5. Chickens help you in gardening
Chickens are everywhere looking for worms, bugs, etc. They help you clean your garden.
6. Educational for kids
Chicken behavior is a good educational study for your kids. Egg collecting is a good experience too for the kids.
7. Business
Selling your chooks’ eggs to your neighbors is a good business idea.
What do you think of this homemade chicken coop? Is there any more room for improvement?
Materials Needed to Build a Chicken Coop
Being adequately equipped before starting the project can speed up the process and boost efficiency. It is advisable to verify your materials list and measurements prior to starting your project to guarantee that all necessary items are available. Here are the necessary materials for this project:
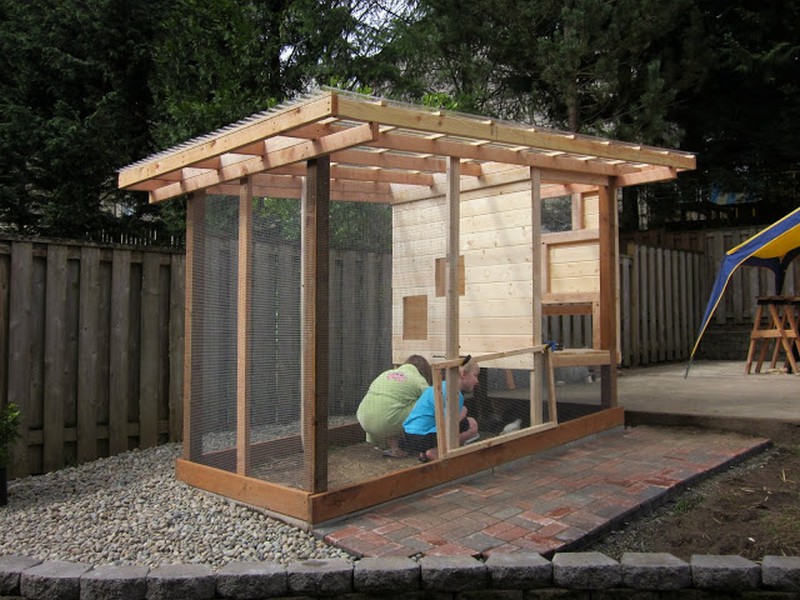
- Framing Materials
- This includes 1″ thick timber, which will be used to create the main frame of the coop. Additionally, 2×2 timber can be used for support beams and other structural elements.
- Hardware Cloth
- To protect your chickens from predators, you’ll need to cover any openings in the coop with 1/2″ hardware cloth. This includes windows, doors, and any other openings that could be accessed by predators.
- Roofing Materials
- You’ll need a sturdy and weather-resistant material to cover the roof of your coop. Clear Suntuf panels or metal roofing can be good options.
- Bricks
- Bricks can be used as a foundation for your coop, as well as to create a barrier around the outside to prevent predators from digging under the coop.
- Hinges and Screws
- These will be used to attach doors and windows to the coop, as well as any other moving parts.
- Rope
- Create a ramp or ladder for your chickens to access the coop using a rope. Alternatively, devise a pulley system to hoist and lower their food and water.
- Drawer Handles
- These can serve as handles for doors and windows, facilitating their opening and closing.
- Bolt Locks
- Secure your coop’s doors and windows with bolt locks to ensure your chickens’ safety at night.
- Plexiglass
- Choose plexiglass over traditional glass for safer window installation in your chicken coop.
Tools
- Cordless Drill
- Will help you with drilling jobs, attaching screws, etc. Make sure to have extra batteries and chargers on hand to ensure you have enough power to complete the project.
- Hammer
- Select a hammer with a grip that is comfortable and a weight that suits your strength and level of expertise.
- Tape Measure
- A tape measure is critical for measuring and marking cuts accurately.
- Saw
- A saw is essential for cutting timber and other materials to the correct size. A circular saw or handsaw are both suitable options, depending on your preference and skill level.
- Square
- A square can be used to ensure that your cuts are straight and precise. It’s essential to have a square to maintain the structural integrity of your coop.
- Level
- It is important to use a bar level to balance and level your coop.
- Screwdriver
- Although a cordless drill has the functionality of a screwdriver, it is advisable to have a manual screwdriver for screws that are smaller or more delicate.
- Pliers
- You will need pliers to bend, cut, and grasp wire and small components.

Utilizing these tools will enable you to finish your homemade chicken coop project with efficiency and accuracy. Exercise caution utilize safety equipment when handling power tools, and take breaks as needed to prevent exhaustion and injury.
How to Build a Homemade Chicken Coop?
To construct a successful homemade chicken coop, it is important to establish accurate measurements and procure essential materials. Prior to beginning construction, a comprehensive plan of the coop’s size and layout is fundamental.
Determine the Measurement and Gather the Materials
When designing your homemade chicken coop, consider the number of chickens you intend to house. It is advisable to allocate a minimum of four square feet of floor space and eight to ten square feet outside per chicken.
This will guarantee that your chickens have enough room to move freely and maintain their well-being. Determine the dimensions and wall height of the coop based on the chickens’ size and jumping ability. Allow for at least 2-3 feet of headroom within the coop. After determining the proper measurements, gather the essential materials.
Build the Post
Establishing sturdy posts is important when building a durable homemade chicken coop. These serve as the foundation and support for the entire structure, so it’s vital to take the necessary measures to ensure their proper installation.
Dig holes for the posts, ensuring sufficient depth for stability and support. The depth requirement will vary based on the coop’s size and height, as well as your soil conditions. Consult with local building codes or experts to determine the optimal depth for your situation.
Once the holes are dug, set the posts in place and use a level to ensure they are plumb and straight. You can then secure the posts with concrete or tamped soil to prevent shifting or settling over time. It’s crucial to ensure the posts are firmly in place before moving on to the next step of building your homemade chicken coop.
Properly establishing the posts is crucial to maintaining the structural integrity of your homemade chicken coop and creating a safe and secure habitat for your feathered companions.
Construct the Roof
Building a homemade chicken coop entails a crucial step in constructing the roof. It serves a dual purpose of providing shelter and protection against weather conditions while regulating the temperature and ventilation inside the coop.
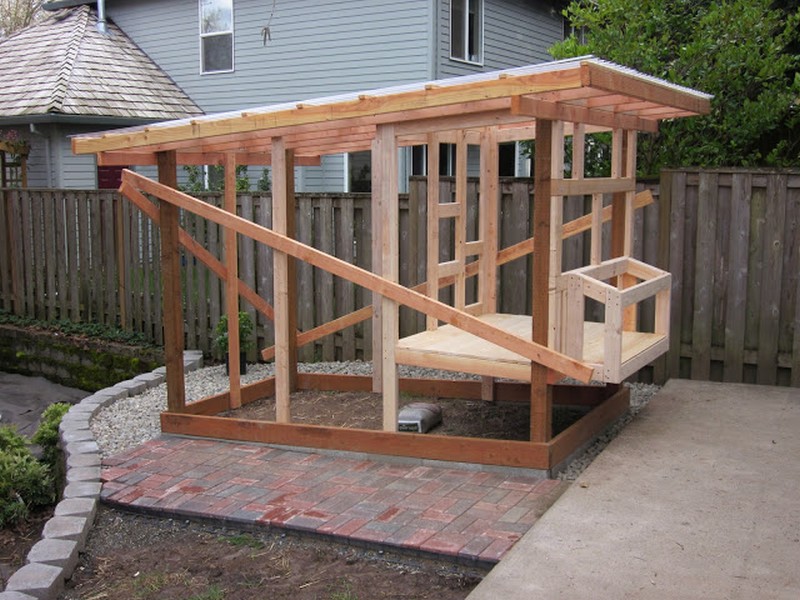
Before starting the roof construction, you’ll need to determine the appropriate roofing material based on your climate and personal preference. Clear Suntuf panels are a popular choice as they allow natural light to enter the coop while providing protection from rain and other harsh weather conditions. You’ll also need framing materials such as 2×2 or 2×4 timber, screws, and other hardware.
To construct the roof, start by cutting the framing material to the appropriate size and angle. Ensure adequate roof pitch for proper drainage, generally at a 1/4″ per foot slope. Subsequently, secure roofing material with screws and hardware after framing installation.
To further improve ventilation and regulate temperature, you can add vents or windows to the roof. This will help circulate fresh air and prevent heat buildup during hot weather. Plexiglass or other clear materials can be used for the windows, providing additional natural light and visual access to your chickens.
Constructing a well-designed and functional roof for your homemade chicken coop is crucial for your chickens’ health, comfort, and protection from the elements. Consider consulting with experts or conducting additional research to ensure that your coop roof meets your specific requirements and preferences.
Install Border Pavers
Mounting the baseboards is an essential step in building a sturdy and secure homemade chicken coop. The baseboards serve as the foundation for the coop, providing a stable platform for the walls and roof while also blocking the predators from digging.
To install the baseboard panels, start by clearing the area where you plan to build your homemade chicken coop. Prepare the site by clearing away any obstructions such as rocks or debris that may hinder construction. Then, place the bricks or cinder blocks that will serve as the foundation for the baseboards.
After laying the foundation, proceed to install the base panels made of sturdy timber measuring 1 inch in thickness. Cut the panels according to the dimensions of your coop. You’ll also need screws or nails to attach the panels to the foundation.
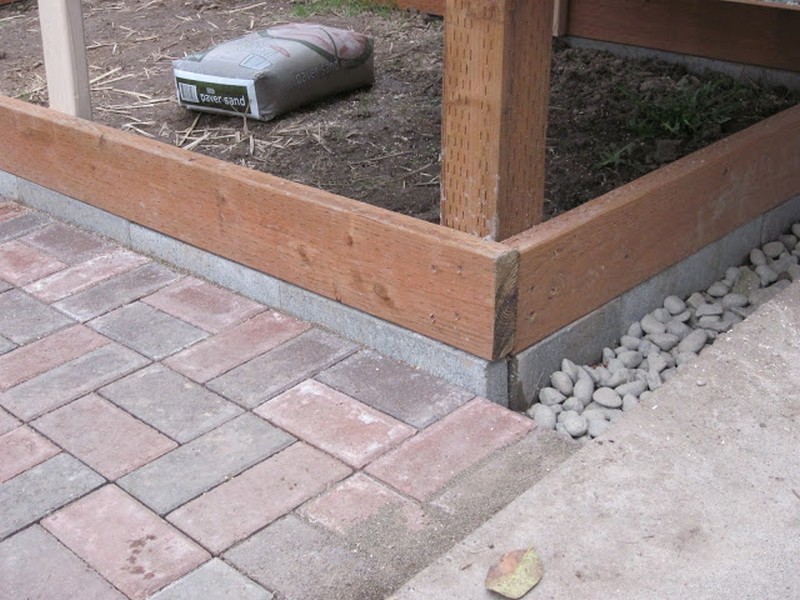
To mount the base panels, start by attaching one panel to the foundation using screws or nails. Ensure that the panel is level and securely fastened to the foundation. Repeat this process for the remaining panels until the base is complete.
Establish a Brick Patio
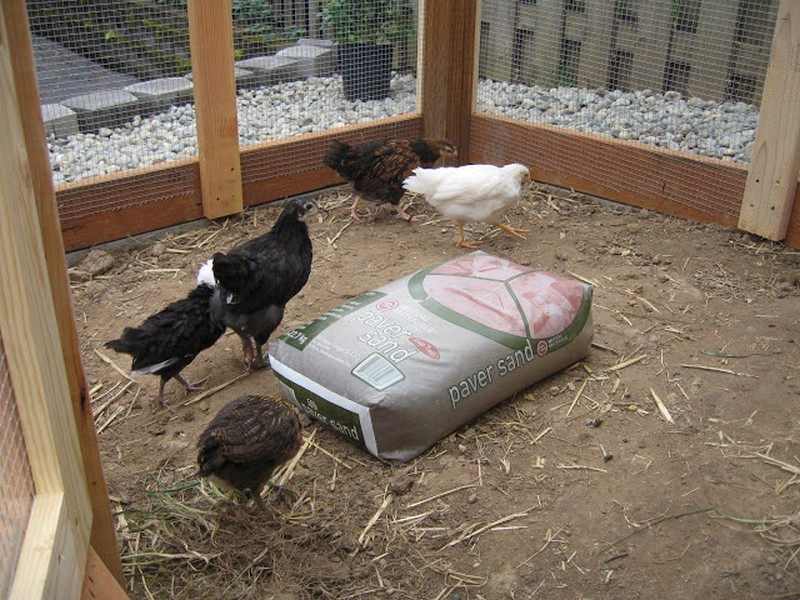
Establishing a brick patio is a great addition to any homemade chicken coop as it provides a stable and level surface outside your homemade chicken coop for you to move around on. A brick patio can also help with drainage and prevent mud from forming in the coop area.
To establish a brick patio, start by measuring the area where you plan to build it. Prepare the ground by removing debris and ensuring it is level. Collect bricks, sand, and a shovel. Apply a layer of sand to the prepared ground.
The sand layer, approximately 1-2 inches thick, must be leveled to prevent weed growth between the bricks and promote adequate drainage.
Next, begin laying the bricks in a pattern of your choosing. You can use a herringbone, basket weave, or running bond pattern, depending on your preference. Ensure that the bricks are tightly packed together and level with the sand layer.
As you continue to lay the bricks, periodically check to ensure that the surface is level. You can use a level or a string line to help with this. After laying the bricks, apply a layer of sand and sweep it into the gaps. This will promote stability and prevent shifting in the long run.
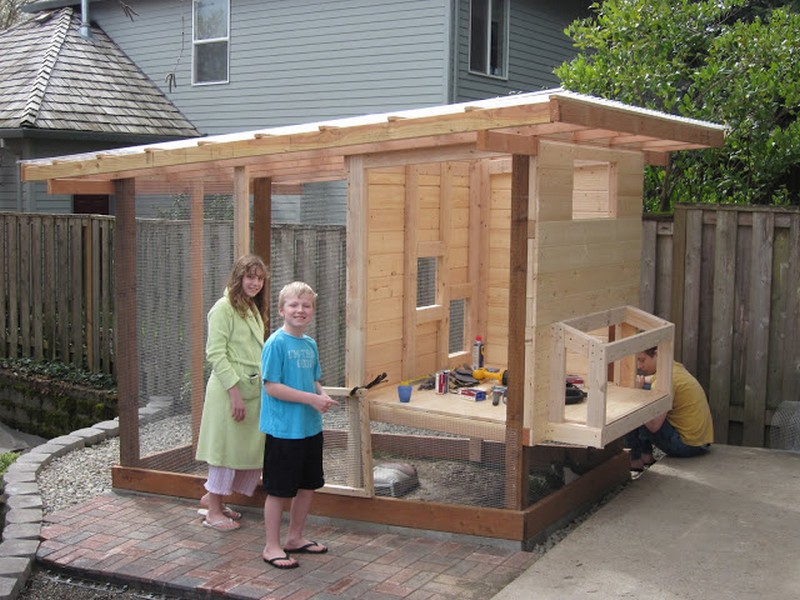
It’s important to ensure your brick patio is securely established to prevent any tripping hazards or instability for you while checking on your chickens. This will help to ensure your safety and comfort while you move around outside your homemade chicken coop.
The Frames and the Nest Container
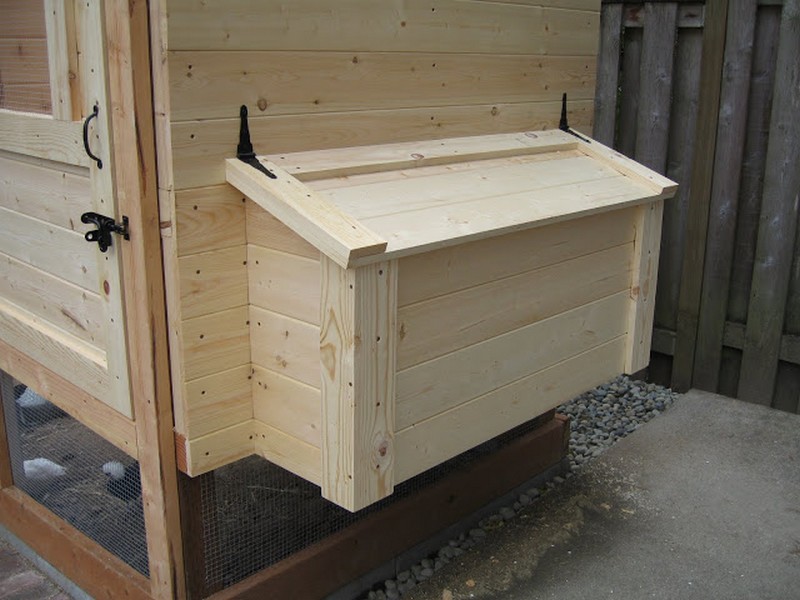
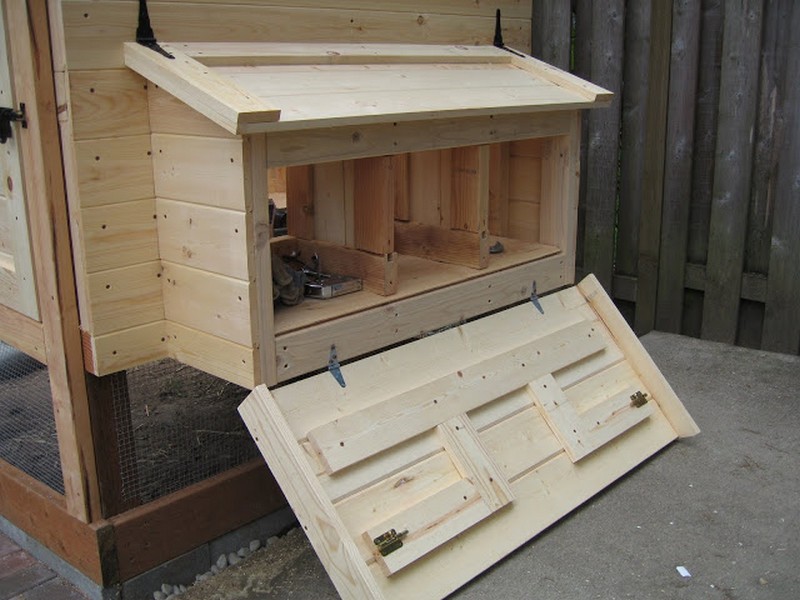
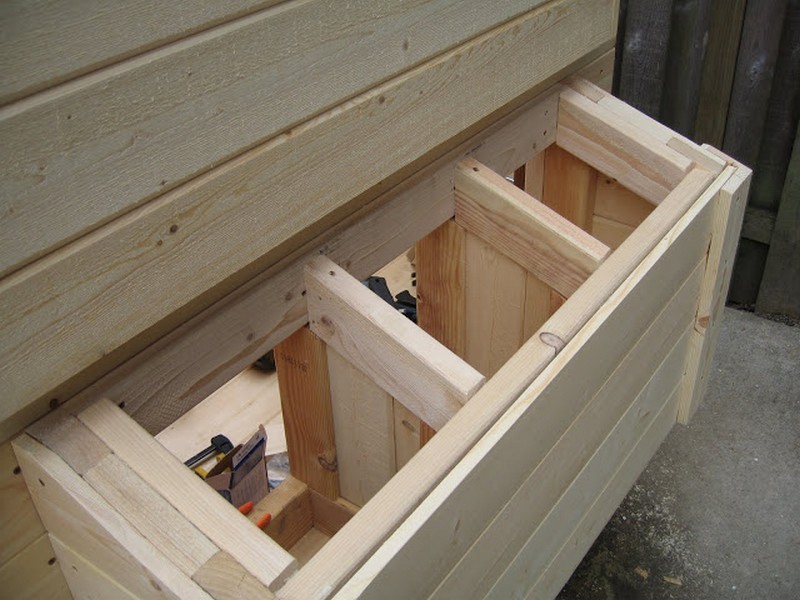
Making the frames of a homemade chicken coop is an essential step in building a comfortable and safe living space for your feathered friends. There are several materials you can use to make the frames, but in this case, we will use hardware cloth and 1-inch thick timber. Once the frames are built, you can add a nest container to provide a cozy and secure place for your hens to lay their eggs.
To start, gather the necessary materials such as 1-inch thick timber, hinges, screws, plexiglass, and hardware cloth. Cut the timber to the specific length required for every frame section, consisting of the walls, roof, and door. Utilize a cutting tool, such as a saw, to ensure accuracy.
Next, attach the hardware cloth to the timber frame using staples or screws. Make sure the hardware cloth is tightly secured to the frame to prevent predators from gaining access to the coop.
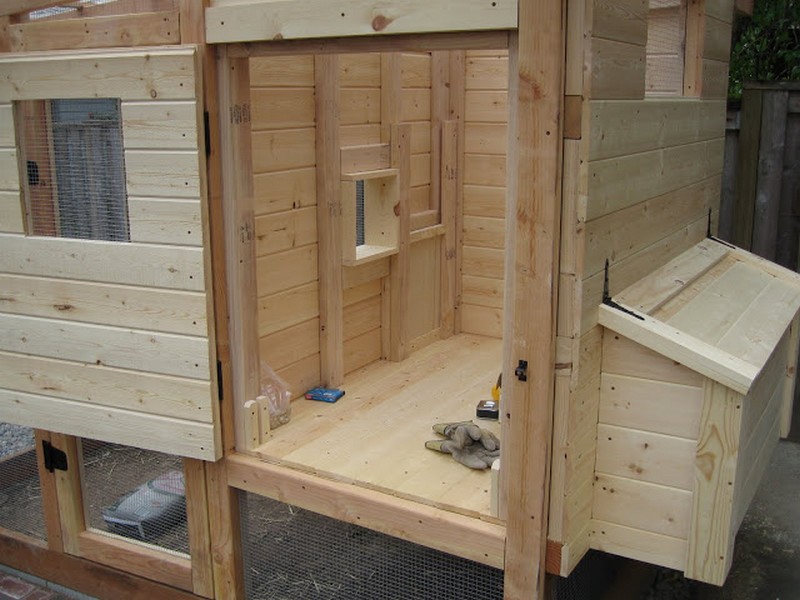
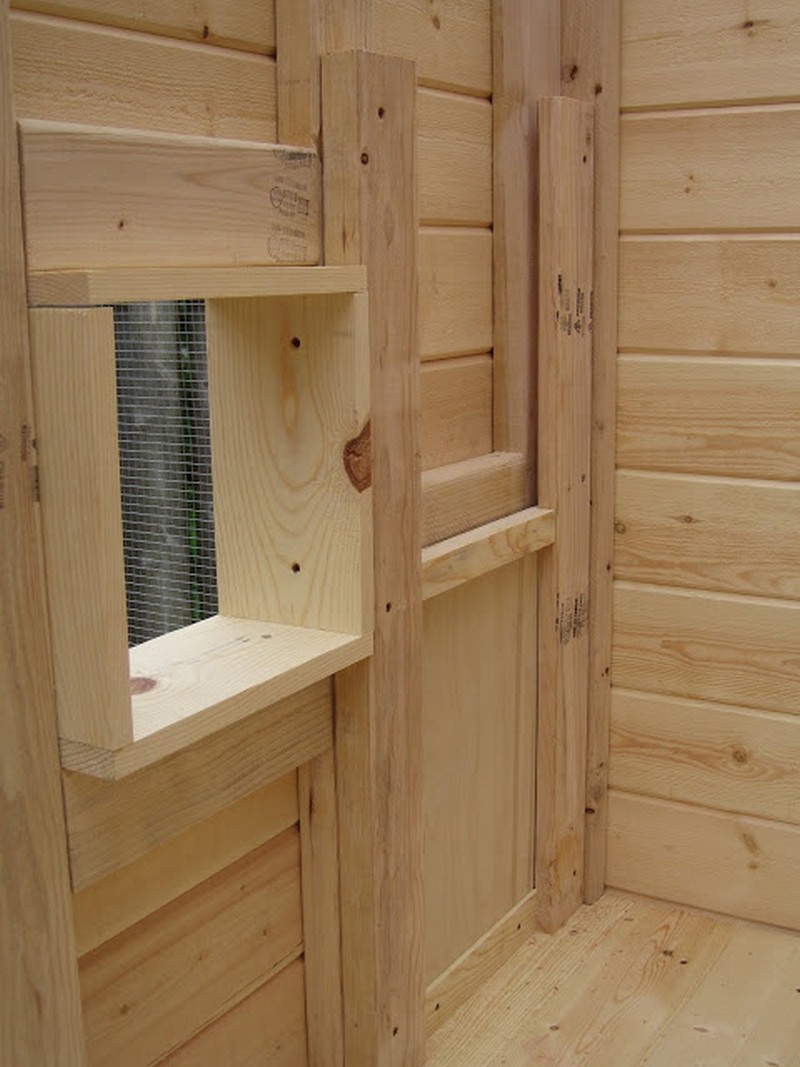
Once the frame is assembled, you can add a nest container. Construct a receptacle from durable materials such as plywood and locate it in a peaceful, isolated corner of the chicken coop. The container must be spacious enough to house your hens and feature an accessible opening or detachable lid for effortless egg retrieval.
Once the nest container is in place, ensure its stability by fastening it to the coop’s frame using screws or hinges. This will prevent any shifting or tipping over.
Finally, check the frames and nest container to ensure that everything is securely fastened and stable. By taking the time to properly make the frames and nest container, you’ll be able to provide your feathered friends with a safe and comfortable home.
Finalize the Flooring and the Coverings
Finalizing the flooring and coverings is an important step in building a homemade chicken coop. To make the sidings removable, like a window, for easy access, follow these steps:
Select the suitable flooring for your coop, choosing from options like wood chips, straw, or sand. Spread it evenly on the coop floor, making sure it is at least 2 inches thick.
Next, install the coverings on the coop’s walls. It’s important to make the coverings removable to provide easy access for cleaning and maintenance. Secure durable coverings like plexiglass tightly to the coop frame. Use hinges or screws for easy access.
After installing the coverings, ensure to fasten the edges to prevent predators from entering the coop. Employ durable materials like 1/2 inch hardware cloth to secure the edges.
To make the coverings even more accessible, consider adding a latch or bolt lock to keep them securely in place when closed. This will also help prevent unwanted pests and predators from getting into the coop.
Finally, test the removable sidings to make sure they open and close smoothly. Ensure that the flooring material is properly spread and maintained to keep your chickens healthy and comfortable. With a properly constructed homemade chicken coop, you can provide a safe and comfortable home for your feathered friends while also making it easy for you to maintain and clean.

Install a Run Door and a Pop Door
Installing a run door and a pop door is an important step in building a homemade chicken coop. The homemade coop doors enable the chickens to access the interior freely. Here are the installation steps to follow:
After installing the doors, assess their functionality by testing their smoothness of opening and closing. Verify their security and proper latching to ward off predators from entering the coop.
- To establish the dimensions and placement of the run door, ensure it is sizeable enough for easy access to the coop interior. Subsequently, mark the coop frame where it should be located, measure the door dimensions, and utilize a saw to create an opening.
- Mount the door by attaching the hinges to both the door and frame. Verify that the door moves effortlessly and without obstruction. Employ a rope or drawer handle to construct a latch mechanism.
- Determine the dimensions and placement of the pop door, which is usually smaller than the run door and located on the side of the coop for chicken ingress and egress. Measure and mark the door’s location on the coop frame.
- Install the pop door: Cut an opening in the frame using a saw, and then attach the door hinges to the frame and the door. Again, make sure the door swings freely and smoothly. A rope or drawer handle can serve as a latch for the pop door.
- After installing the doors, assess their functionality by testing their smoothness of opening and closing. Verify their security and proper latching to ward off predators from entering the coop.
Installing run-and-pop doors is crucial for constructing a homemade chicken coop, as they offer entry points for the chickens and allow convenient access to the interior for upkeep and sanitation purposes.
Now you can enjoy your new homemade chicken coop!
Conclusion
To summarize, constructing a homemade chicken coop is a satisfying and enjoyable endeavor that offers safe and comfortable shelter for your feathered companions while also providing you with fresh eggs and a deeper connection to the natural world.
With appropriate resources, equipment, and direction, building a coop can be a simple task. By sticking to these guidelines, you can construct a strong and practical coop that ensures your chickens enjoy a contented and healthy existence long into the future.
Therefore, be prepared to put in the effort, procure the necessary materials, and embark on constructing a splendid and functional chicken coop!
It is optional if you would like to add a few electrical wirings for the lights of your homemade chicken coop and a CCTV camera to monitor your chooks!
Click on any image to start the lightbox display. Use your Esc key to close the lightbox. You can also view the images as a slideshow if you prefer 😎


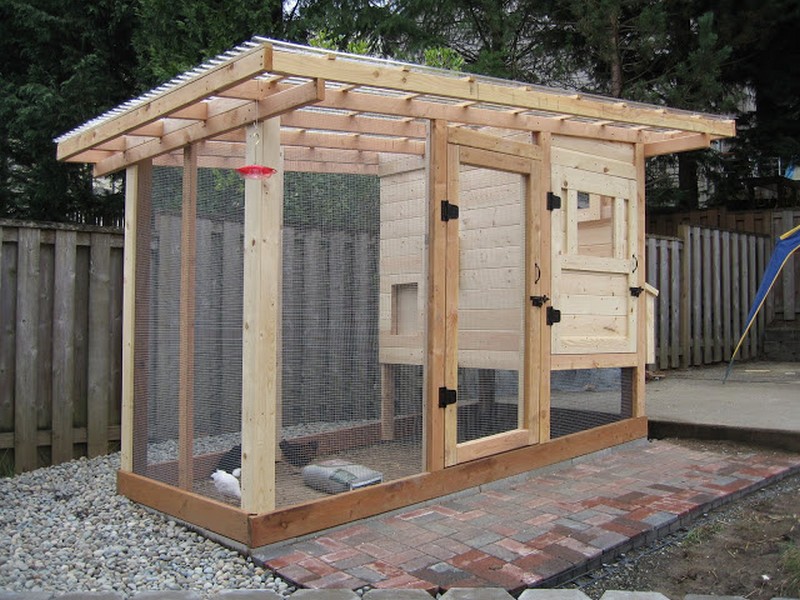
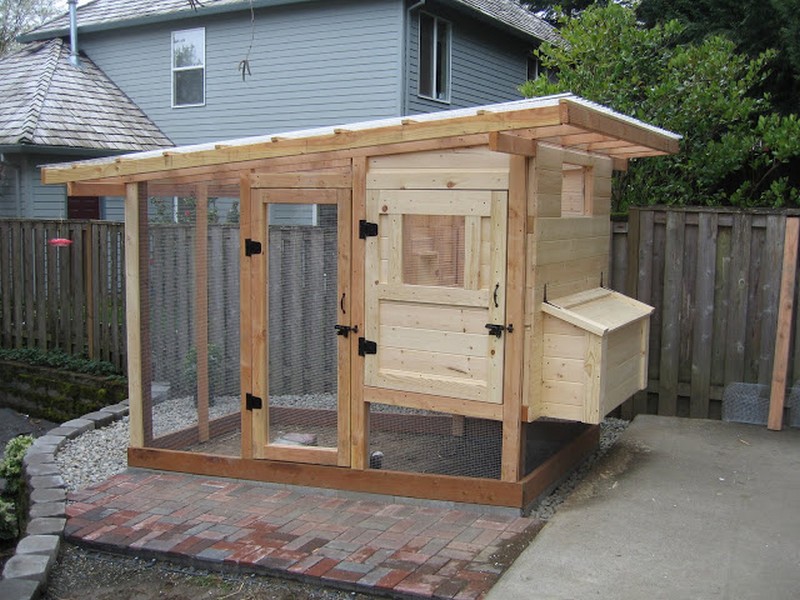
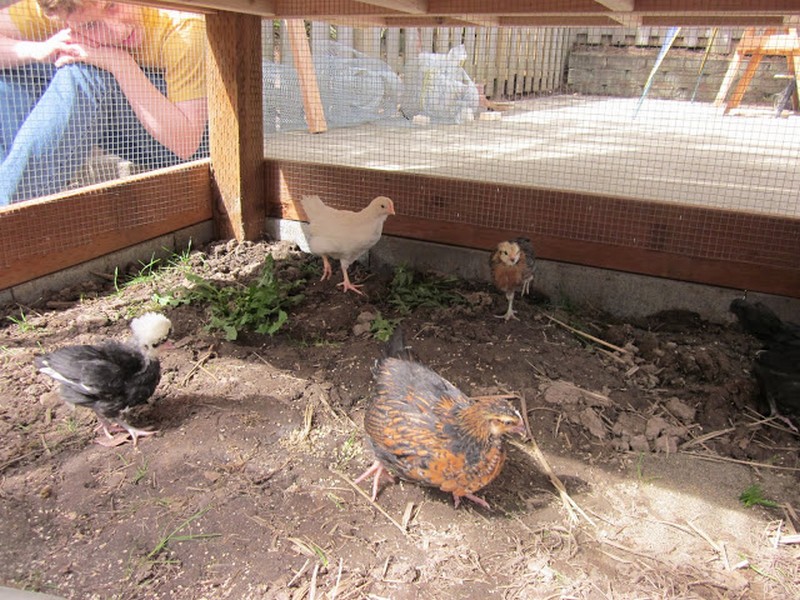
Thanks to Tinkering Lab for this great project. You can get the full step-by-step instructions here…
Looking to build a chicken coop but don’t want to spend a fortune? Check out our free chicken coop plans here…
If you liked this project, you will also like viewing these chicken coop ideas…


