Last Updated on January 29, 2025 by teamobn
Are you planning your next camping trip? Butane canisters for your portable stove need to be bought and carted. There’s a much better alternative! Next time you head off for a camping trip, why not make your own portable tin can rocket stove?
A tin can rocket stove is an excellent example of appropriate technology that costs you next to nothing to build and just a few sticks to run. You can build these systems in a day or two and then watch them turn twigs into heat far more efficiently than most wood stoves. If you don’t mind rooting around to scavenge bits here and there, they can cost virtually nothing to build.
Building a Tin Can Rocket Stove
Making one costs nothing as it’s made from recycled cans. You’ll also need a couple of tools that you might readily have in your toolbox. The steps in making this stove are very easy. In fact, this is something that is taught to boy and girl scouts!
Will you be bringing one of these on your next camping trip?
Materials:
- Gallon Can
- Pineapple Juice Can
- 2 Bean-sized Cans
- Ashes
- Gloves
- Safety Goggles
Toos:
- Tin Snips
- Hammer
- Large Sharp Object similar to a big nail
- Pliers
Steps:
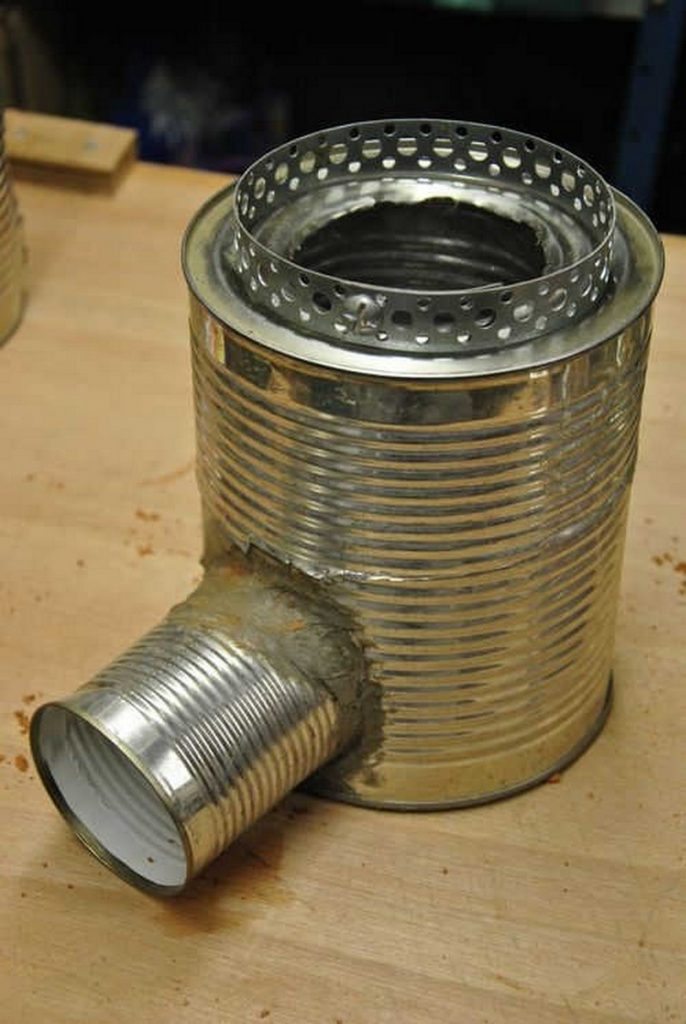
Step 1: Prepare the Gallon Can (Outer Body)
- Mark the Hole – Place the pineapple juice can against the gallon can about 2 inches from the bottom. Trace its outline using a marker.
- Cut the Hole – Using tin snips, cut out the traced circle. This hole will serve as the feed opening where fuel (twigs, sticks) is inserted.
- Smooth the Edges – Use pliers to bend or flatten sharp edges to prevent injuries.
Step 2: Prepare the Pineapple Juice Can (Burn Chamber)
- Mark the Intake Hole – On the pineapple juice can, mark a circle slightly smaller than the diameter of one of the bean-sized cans near the bottom.
- Cut the Intake Hole – Use tin snips to cut out the marked section.
- Attach the Airflow Tube – Insert one bean-sized can into the hole. This will serve as the airflow intake that helps oxygen feed the fire.
- Secure with Pliers – Bend and press the edges tightly around the bean-sized can to hold it in place.
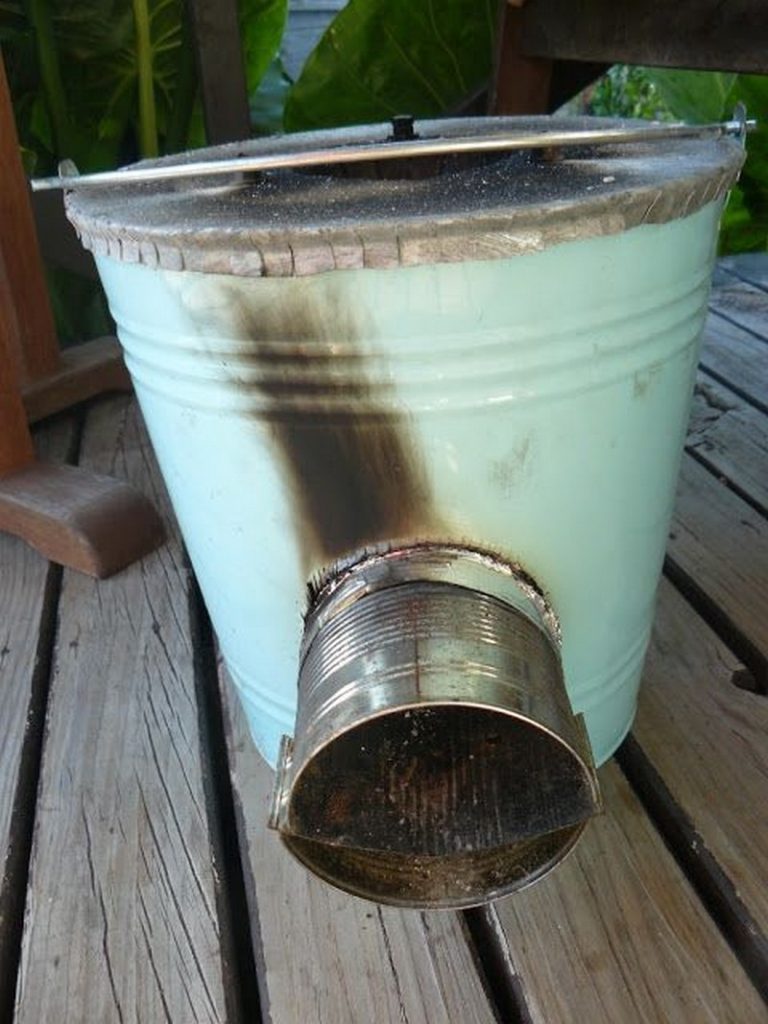
Step 3: Assemble the Rocket Stove
- Insert the Burn Chamber – Place the pineapple juice can (burn chamber) into the gallon can through the hole you made in Step 1. The attached bean-sized can should stick out for airflow.
- Secure in Place – If needed, use a hammer to tap the cans snugly together.
- Fill with Insulation – Pour ashes around the pineapple juice can inside the gallon can. This helps trap heat and improves efficiency.
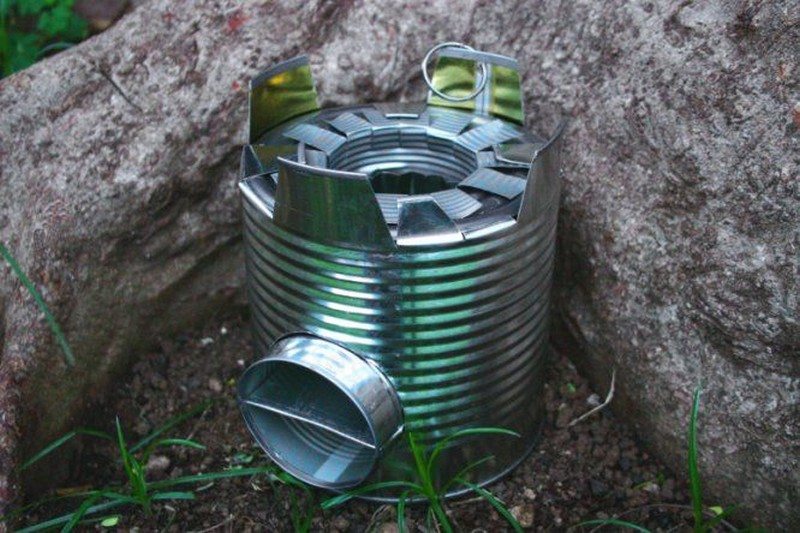
- Create the Pot Stand – Take the second bean-sized can, cut it open, and flatten it slightly. Then, cut small ventilation holes to create a grate that allows heat to escape while supporting a pot.
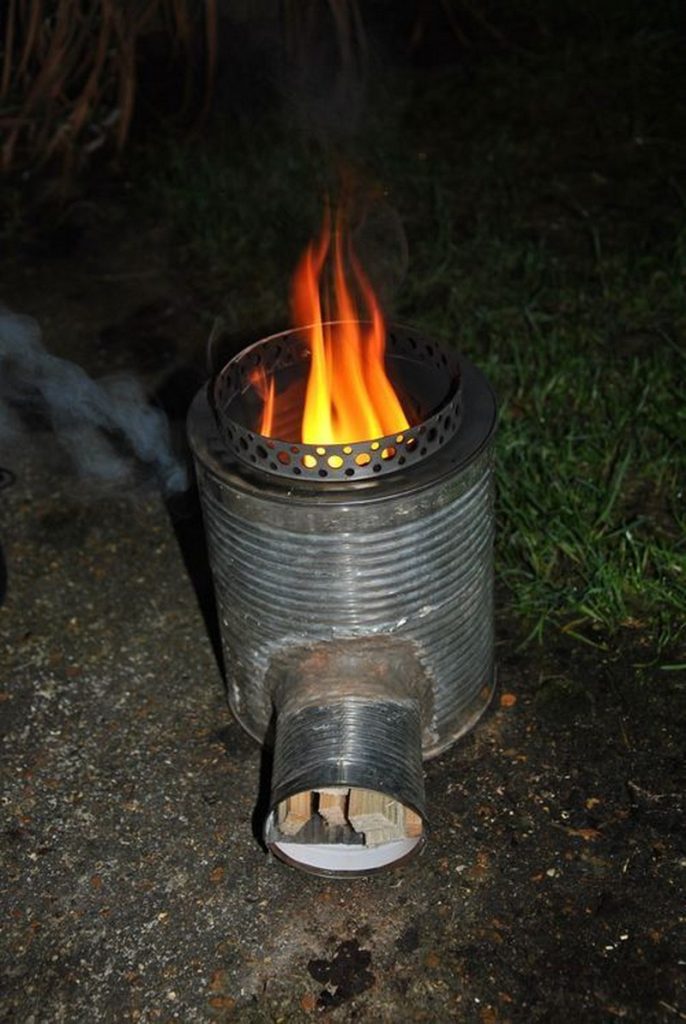
Step 4: Test the Tin Can Rocket Stove
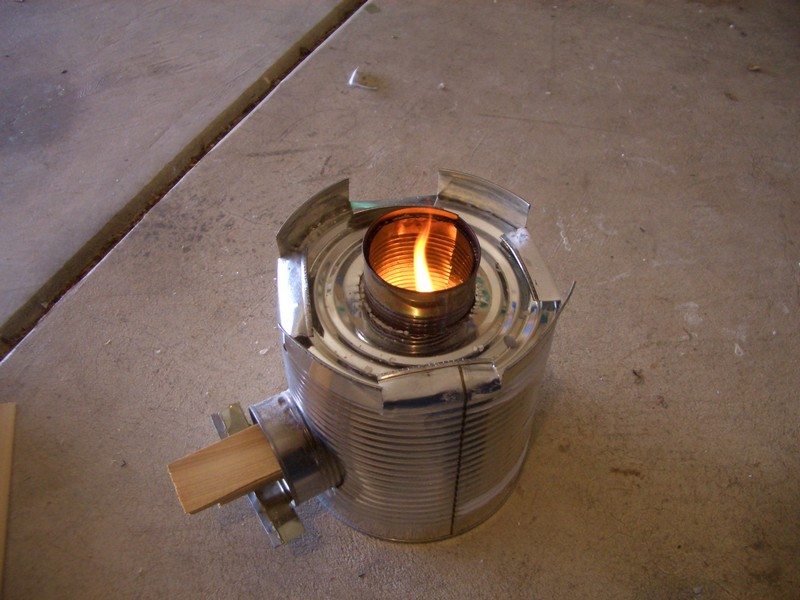
- Start the Fire – Place twigs, dry leaves, or small sticks into the burn chamber. Light it using waxed paper or dry kindling.
- Observe the Airflow – The bean-sized can intake tube should help draw in air, keeping the flame strong.
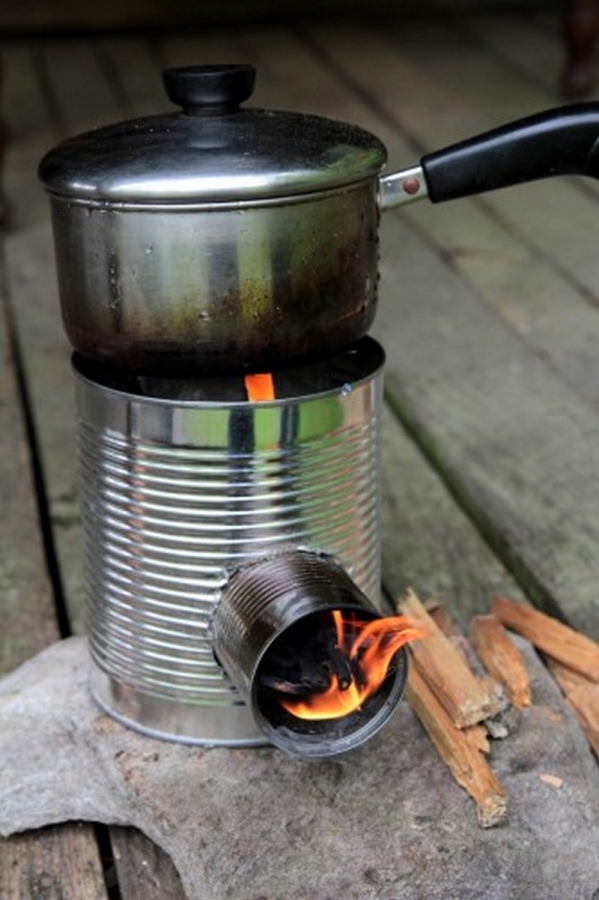
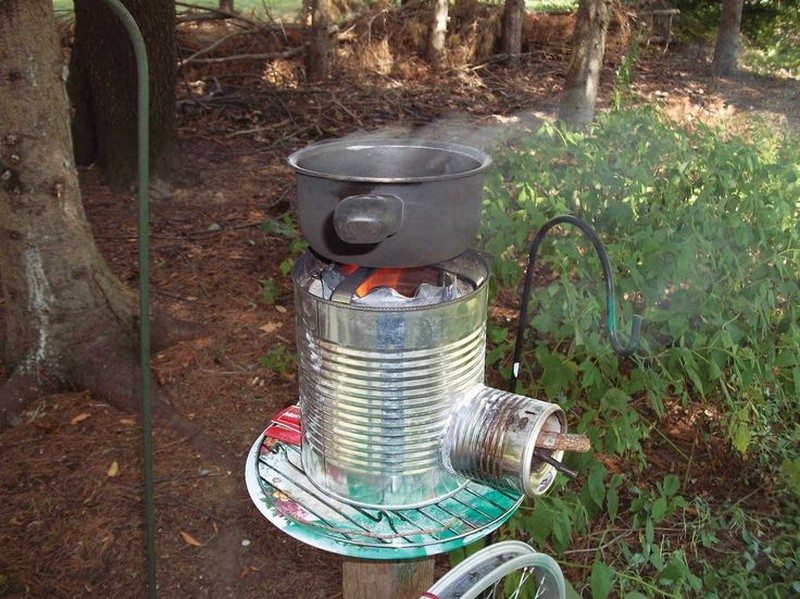
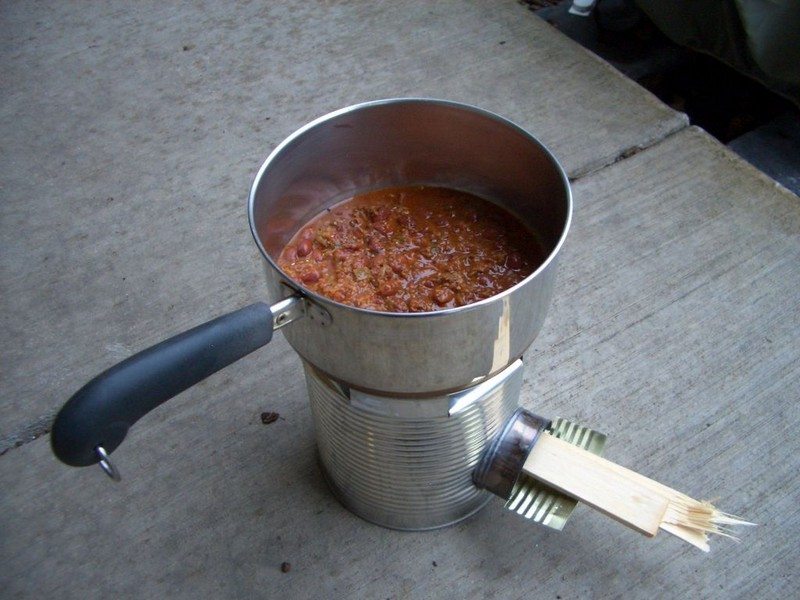
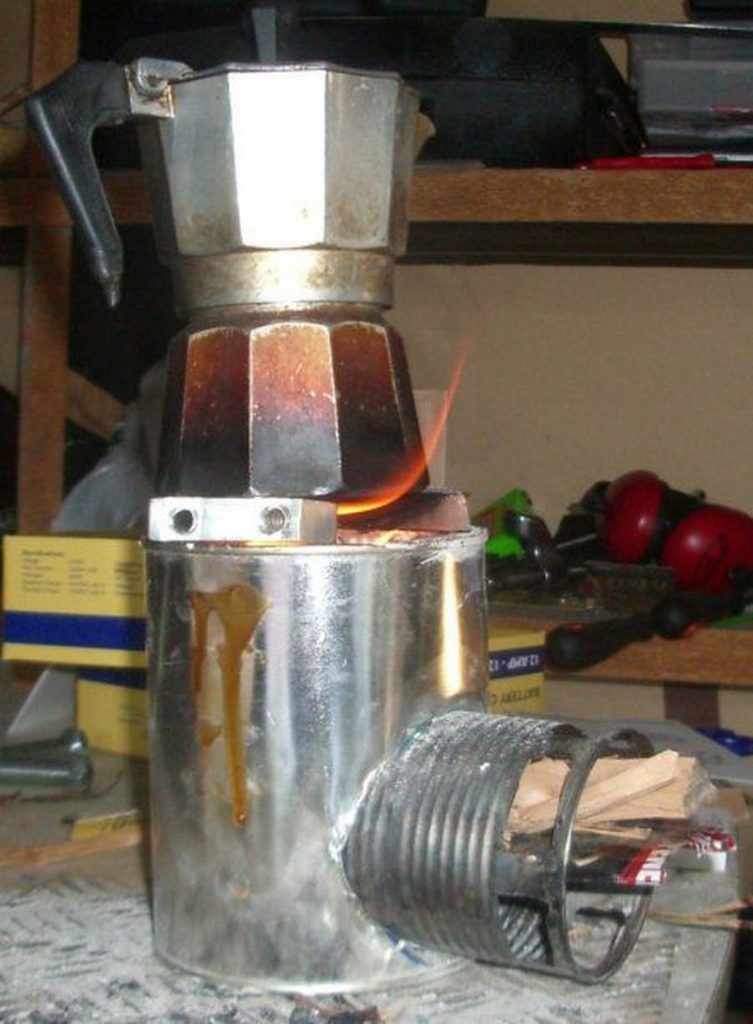
Place a Pot on Top – Once the fire is stable, place a small pot or pan on top to start cooking.
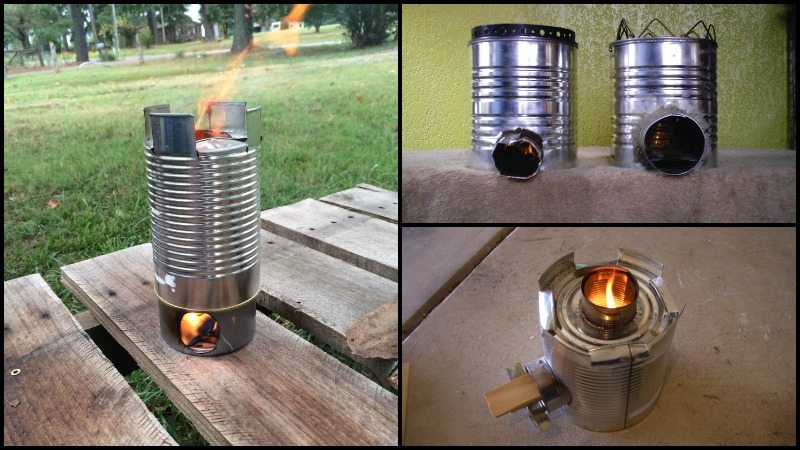
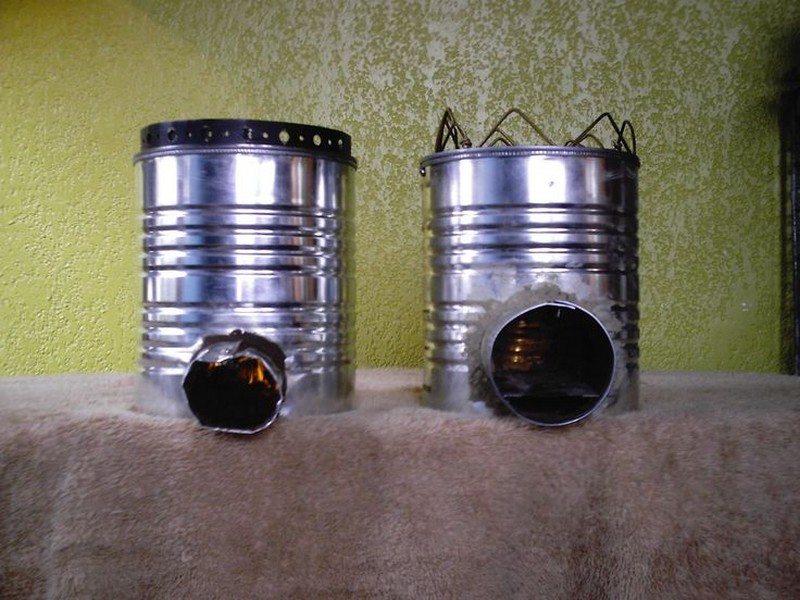
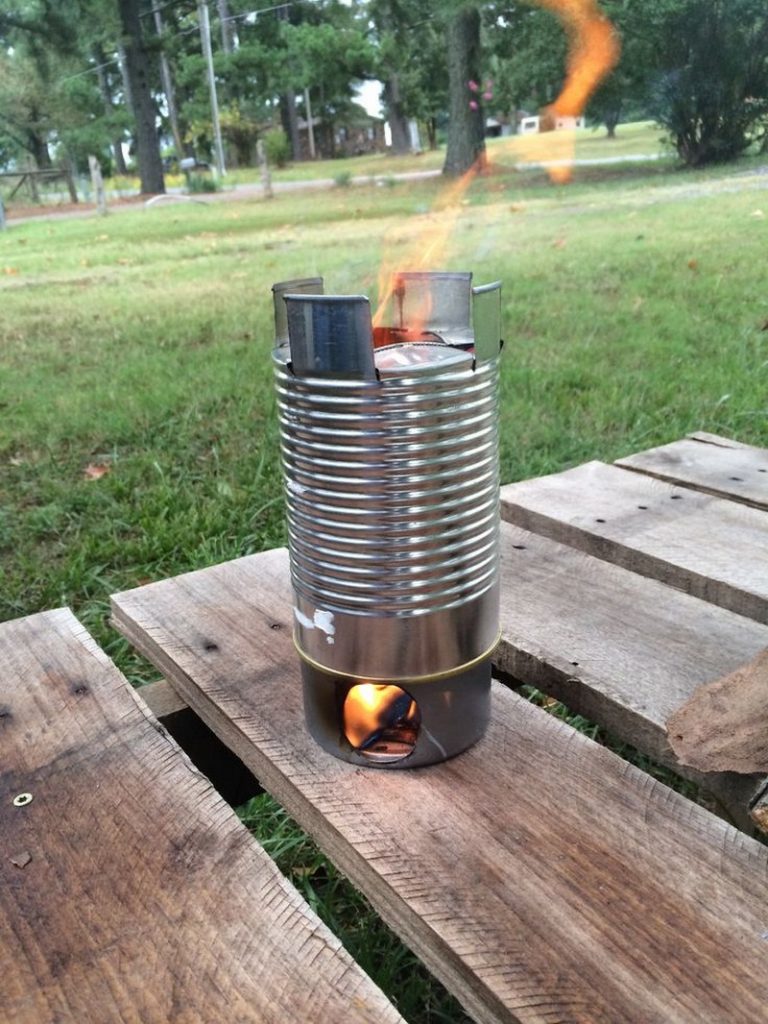
Below are images of great ideas for your Portable Tin Can Rocket Stove.
Click on any image to start the lightbox display. Use your Esc key to close the lightbox. You can also view the images as a slideshow if you prefer 😎

The Science Behind Rocket Stoves: Why They Are So Efficient
Rocket stoves are known for their high efficiency and minimal fuel consumption. Unlike traditional open fires or bulky wood stoves, a rocket stove maximizes combustion while directing heat precisely where it’s needed. This makes it a popular choice for campers, survivalists, and eco-conscious builders. But what makes a rocket stove so efficient? The answer lies in its design and how it optimizes airflow, fuel combustion, and heat retention.
The Rocket Effect: Maximized Airflow and Combustion
At the core of a rocket stove’s efficiency is the “rocket effect,” which is achieved by its unique L-shaped or J-shaped combustion chamber. The horizontal fuel chamber allows sticks and twigs to burn at the bottom, while the vertical chimney-like section draws in oxygen and directs the flames upward. This creates a powerful draft that continuously feeds oxygen to the fire, ensuring a more complete burn. The result is a hotter, cleaner flame with minimal smoke and waste.
Complete Combustion: Less Smoke, More Heat
A well-built rocket stove burns fuel so efficiently that it produces very little smoke. Traditional fires often suffer from incomplete combustion, where wood burns inefficiently, leaving behind unburned carbon in the form of smoke and soot. The insulated burn chamber in a rocket stove keeps temperatures high enough to burn almost all the fuel completely. This means less pollution, more heat output, and a longer-lasting fire with fewer emissions.
Minimal Fuel, Maximum Heat
The lowest fuel consumption of a rocket stove is among its main benefits. Small sticks, twigs, even dry leaves may last a powerful fire because to their effective burning. The design guarantees gradual and complete fuel burning, optimizing the energy extraction from every piece of wood. For off-grid cooking, emergency readiness, and ecological living, rocket stoves are a perfect fit.
Heat Concentration and Retention
Unlike a bonfire, a rocket stove’s vertical chimney points heat upward in a concentrated column instead of spreading it. Greater fuel economy and quicker cooking times made possible by this focused heat allow for further help to maintain heat and stop needless energy waste, such as insulation around the burn chamber—such as ashes in a tin can rocket stove. The outcome is a small, high-temperature burn producing consistent, under-control heat production.
Why Rocket Stoves Are the Future of Sustainable Cooking
Rising issues with air pollution, deforestation, and poor cooking techniques call for a straightforward yet powerful answer in rocket stoves. They cut bad smoke emissions, need less wood, and offer a simple method of cooking using sustainable biomass. A rocket stove is a great tool that provides maximum heat with minimum waste whether your camping, off-grid living, or emergency planning.
How to Use a Tin Can Rocket Stove Safely
A tin can rocket stove is a highly efficient and eco-friendly cooking solution, but like any open-flame device, it requires proper handling to ensure safety. Whether you’re using it for camping, emergencies, or backyard cooking, following these safety guidelines will help prevent accidents and maximize its performance.
Choose a Safe Location
Always set up your tin can rocket stove on a stable, non-flammable surface like dirt, sand, or a concrete slab. Avoid placing it near dry grass, leaves, or any combustible materials that could catch fire. A wind-sheltered area is best to prevent embers from spreading.
Wear Protective Gear
Before lighting your rocket stove, wear heat-resistant gloves and safety goggles. The metal body can become extremely hot, and sparks may fly when adding fuel. Loose clothing should be avoided to prevent accidental burns.
Use the Right Fuel
Stick to dry twigs, small sticks, or wood pellets for the best burn. Avoid treated wood, painted scraps, or plastics, as these release toxic fumes when burned. Keep fuel pieces small to maintain a steady fire without overloading the stove.
Start the Fire Safely
Use natural fire starters like waxed paper, dry leaves, or small twigs to ignite the stove. Avoid flammable liquids like lighter fluid or gasoline, as these can cause dangerous flare-ups. Light the fuel inside the burn chamber and gradually add small sticks to build heat.
Monitor the Fire at All Times
Never leave your rocket stove unattended while it’s burning. Since it operates with an open flame, an unexpected gust of wind or tipping can lead to potential hazards. Always keep a bucket of water or a fire extinguisher nearby in case of emergencies.
Control Airflow and Heat
The tin can rocket stove relies on proper airflow to burn efficiently. Avoid blocking the air intake or chimney opening, as this can cause excessive smoke or incomplete combustion. Add fuel gradually and maintain a controlled fire to prevent overheating.
Keep Children and Pets at a Safe Distance
Since the metal gets extremely hot during use, keep children and pets away from the stove. Teach kids about fire safety and establish a clear boundary to avoid accidental burns.
Properly Extinguish the Fire
Once you’re done cooking, let the fire burn down naturally. Do not pour water directly into the stove, as sudden cooling can weaken or warp the metal. Instead, sprinkle ashes or sand over the embers to smother them, then wait until the stove is completely cool before handling it.
Store the Stove Safely
After use, clean out any remaining ashes and store the tin can rocket stove in a dry, covered area to prevent rusting. If left outdoors, exposure to moisture can weaken the metal over time. Proper storage ensures it remains in good condition for future use.
By following these safety tips, you can enjoy the efficiency and convenience of a tin can rocket stove while minimizing risks.
Conclusion
Crafting a tin can rocket stove is a simple yet effective way to create a portable, fuel-efficient cooking solution using recycled materials. Its smart design maximizes heat while minimizing fuel consumption, making it perfect for camping, emergencies, or sustainable living. With proper safety precautions and maintenance, this DIY stove can serve as a reliable, eco-friendly alternative to traditional cooking methods.
If you liked this project, you will also like viewing these outdoor kitchen ideas…


