If you happen to be on a serious budget right now but need a piece of furniture to keep your front entrance in order, this could be the project for you. This project proves that you don’t need to spend heaps of money on extra storage space.
We all know what it’s like to walk through the front door to find a mess right at the entry.
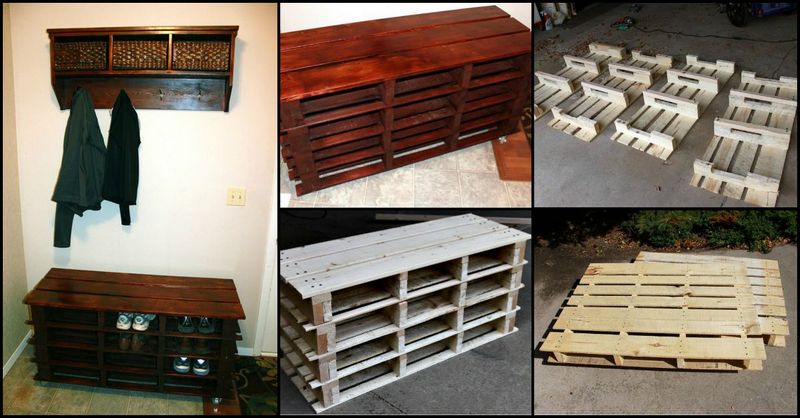
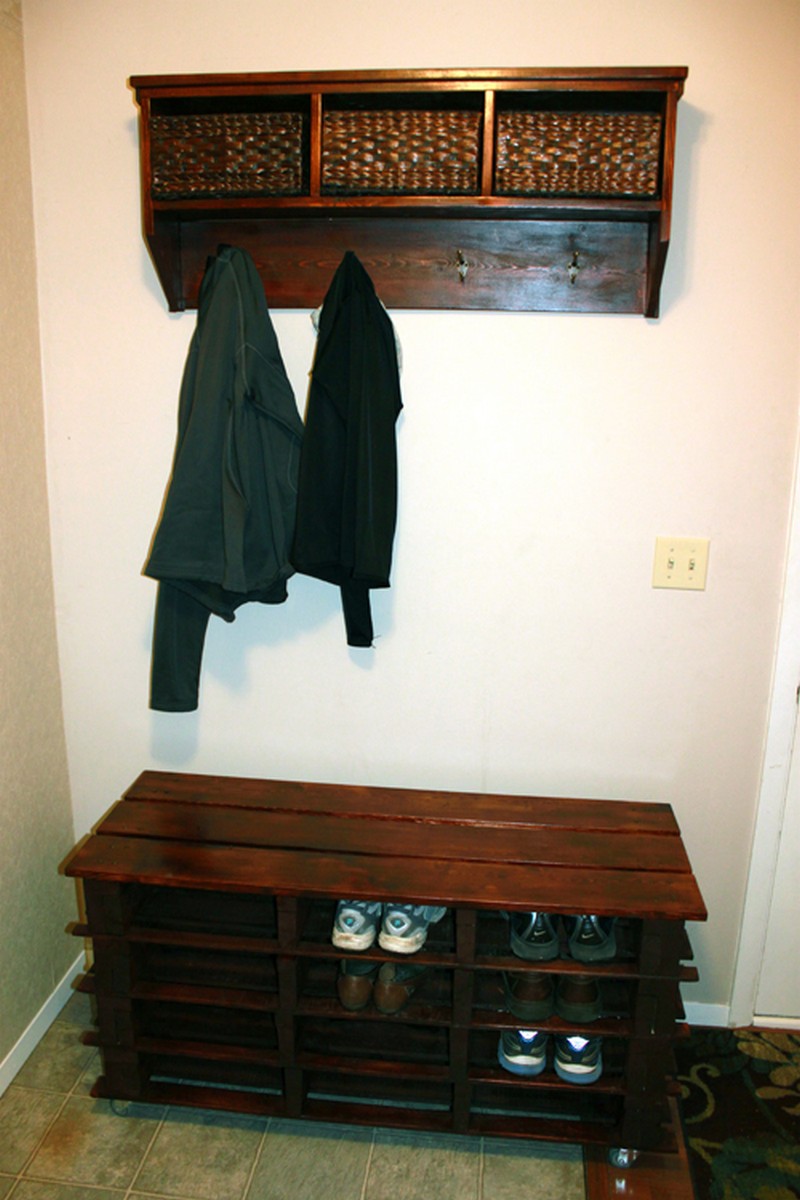
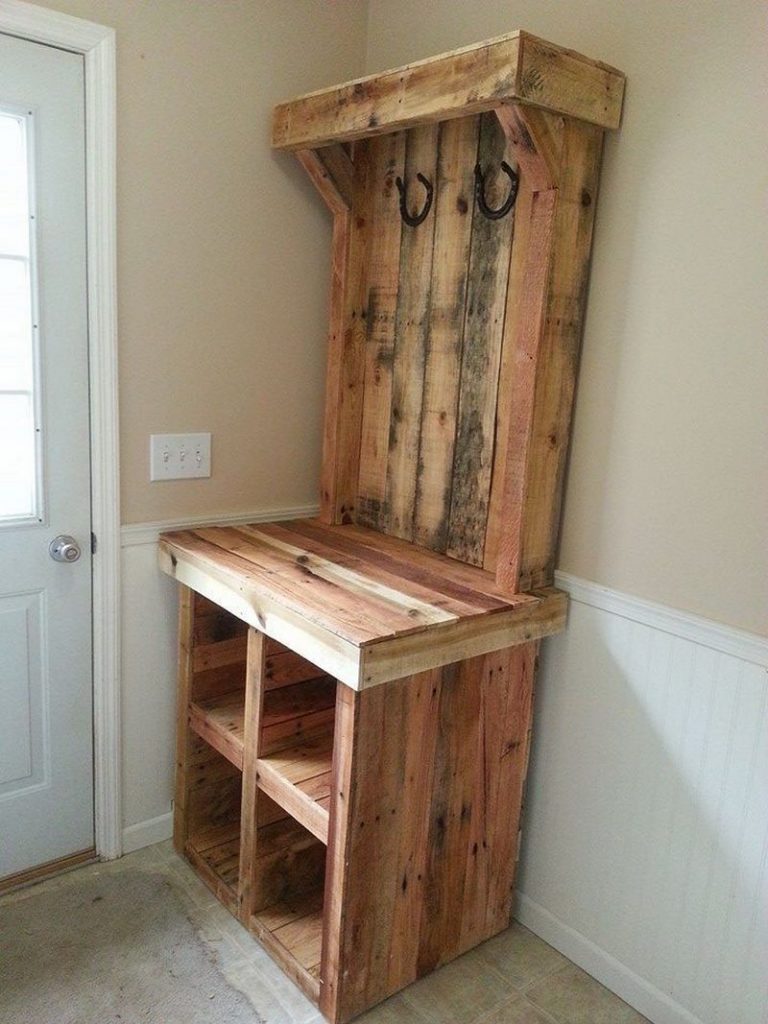
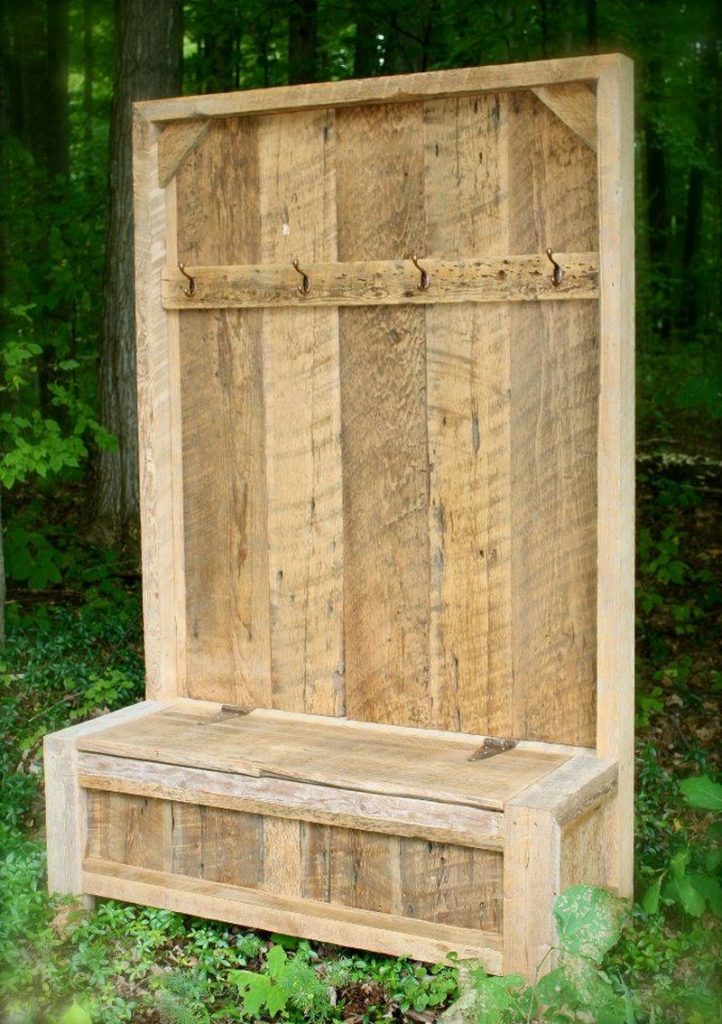
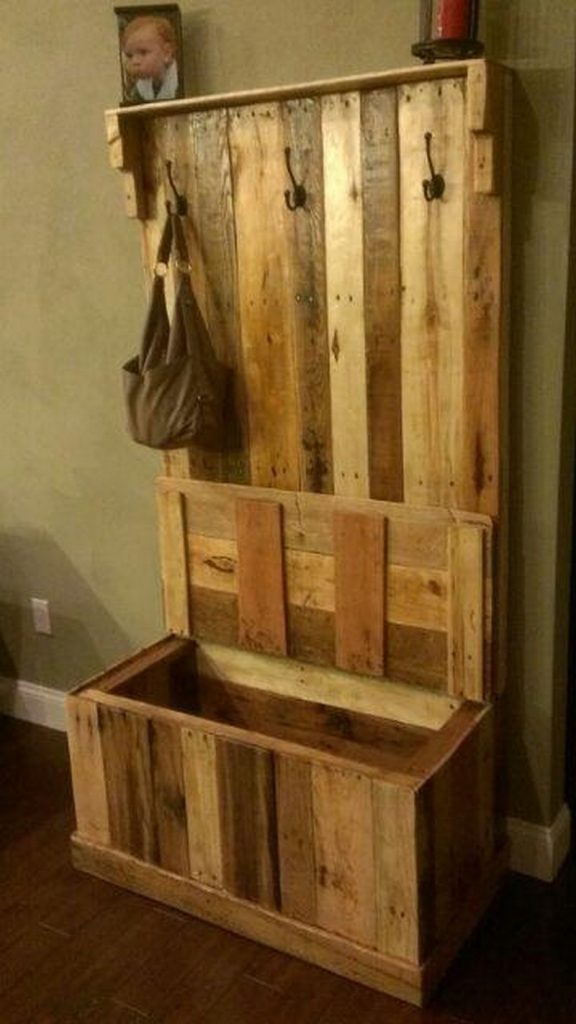
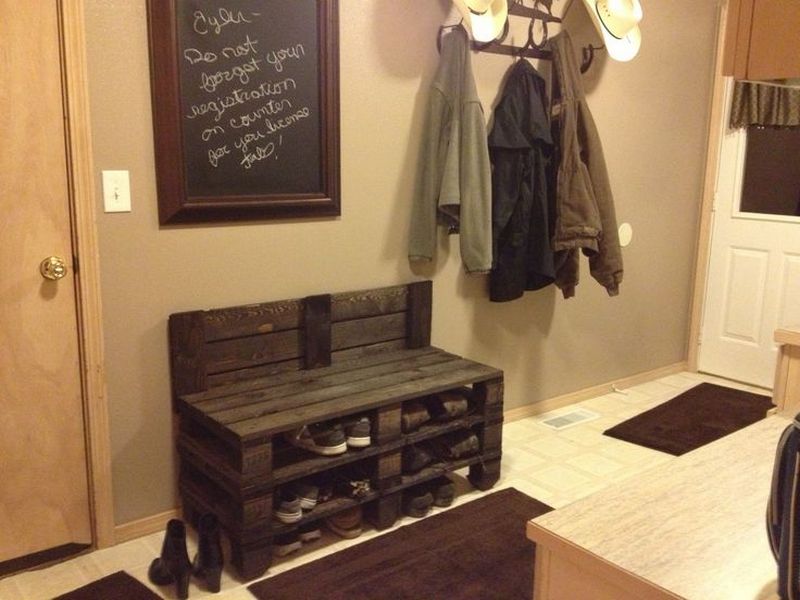
Made from recycled pallets, a pallet entryway bench will give you a place to store the shoes, bags, and everyday clutter that accumulates at the front door. 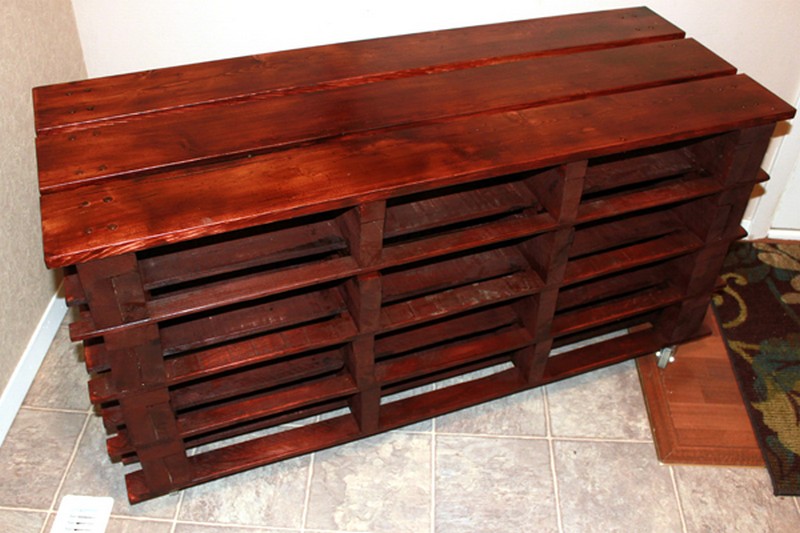
Want to know where to get pallets? You can get all the details in this post: Pallets – where do you get them?
If you’re not sure which pallets are safe to use, you can get all the facts – and instructions on how to dismantle a pallet, in this post: Pallets – fact, and fiction (or how to tell a safe pallet from a toxic one)…
Making a Pallet Entryway Bench
Be aware that branded pallets are not single-use. Always ask before taking any pallet.
Materials
- 2 Pallets
- 3 pieces 1″x6″ cut to 48″ lengths for the top
- 8 pieces 2″x4″ cut to 18″ lengths for center supports (ripped down the middle of the pallet)
- 8 pieces 2″x4″ cut to 18″ lengths for side supports
- 8 pieces 2″x3″ cut to 18″ lengths for bottom side supports
- Wheel Casters
- Wood Stain and Seal
- Screws
- Nails
Tools
- Tape Measure
- Circular Saw
- Drill
- Hammer
- Chisel
- Paint Brush
Instructions
Step 1: Prepare the Pallets
- Start by inspecting and cleaning your pallets to ensure they are free of dirt and debris.
- Use the chisel and hammer to carefully dismantle the pallets. This will provide you with the wood needed for the project while preserving the integrity of the wood.
Step 2: Cut the Wood
- Measure and mark the required lengths on your wood using the tape measure and a pencil.
- Use the circular saw to cut the 1″x6″ boards for the top, and the 2″x4″ and 2″x3″ boards for the supports to the specified lengths.
Step 3: Assemble the Frame
- Lay out the 2″x4″ pieces for the side supports and the 2″x3″ pieces for the bottom side supports on a flat surface to form the rectangular base of the bench.
- Secure the supports together using screws and a drill. Make sure each joint is tight and the frame is squared evenly.
Step 4: Attach Center Supports
- Position the 2″x4″ center supports within the frame for added stability. These should be spaced evenly along the length of the bench.
- Secure each center support with screws, ensuring they are firmly attached.
Step 5: Attach the Top
- Place the 1″x6″ boards across the top of the frame. These should be aligned to cover the frame completely, creating a smooth seating surface.
- Secure the top boards to the supports using screws. For best results, pre-drill the holes to prevent the wood from splitting.
Step 6: Add Wheel Casters
- Flip the bench over to access the bottom.
- Attach one caster at each corner of the bench’s underside using screws. Ensure the casters are tight and roll smoothly.
Step 7: Finishing Touches
- Fill any gaps or screw holes with wood filler, then allow it to dry according to the manufacturer’s instructions.
- Sand the entire bench smoothly to prepare it for staining. Pay special attention to the edges and corners to remove any splinters or rough areas.
Step 8: Stain and Seal
- Apply a coat of wood stain using a paint brush. Choose a color that complements your entryway.
- Once the stain has dried, apply a sealant to protect the wood from moisture and wear. Allow it to dry completely.
Step 9: Final Inspection
- Once everything is dry, inspect the bench to ensure all parts are secure and the finish is even.
- Place the bench in your entryway, ready to be used for storing shoes and other items.
Click on any image to start the lightbox display. Use your Esc key to close the lightbox. You can also view the images as a slideshow if you prefer 😎


Finishing and Customization Tips for Your Pallet Entryway Bench
Creating a pallet entryway bench is not just about building a functional piece of furniture; it’s also an opportunity to showcase your personal style and craftsmanship.
Here are some finishing and customization tips that will help you elevate the aesthetics and functionality of your pallet entryway bench.
Choose the Right Finish
- Stain: Staining your pallet entryway bench can enhance the natural grain of the wood, giving it a richer appearance. Choose a stain that complements the other wood elements or furniture in your entryway. You can opt for a light stain for a more casual look, or a dark stain for a more refined feel.
- Paint: If you prefer a more colorful or modern look, consider painting your pallet entryway bench. Use a high-quality wood paint in a shade that matches your home’s color scheme. Matte, gloss, or satin finishes can drastically alter the bench’s look, so pick one that aligns with your style.
- Sealant: Always apply a sealant after staining or painting to protect the wood from wear and tear, especially if the bench will be used frequently. A good sealant will preserve the finish of your pallet entryway bench and make it easier to clean.
Add Texture and Comfort
- Cushions: Adding a cushion to the seat of your pallet entryway bench not only makes it more comfortable but also allows you to introduce fabric textures and patterns into your entryway. Choose a durable, washable fabric that complements the other elements in your entryway.
- Throws and Pillows: For an extra touch of comfort and style, place some decorative pillows or a throw on your pallet entryway bench. This is an easy way to change the look according to the seasons or your current décor style.
Enhance Functionality
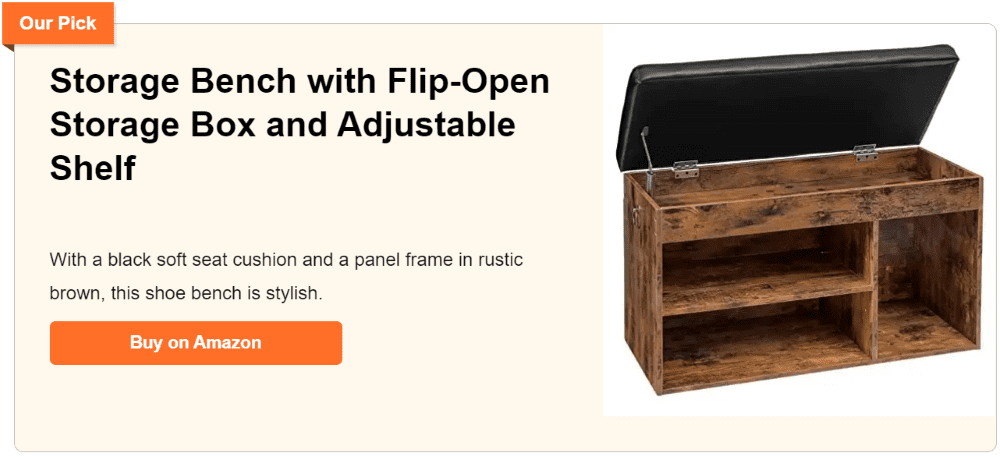
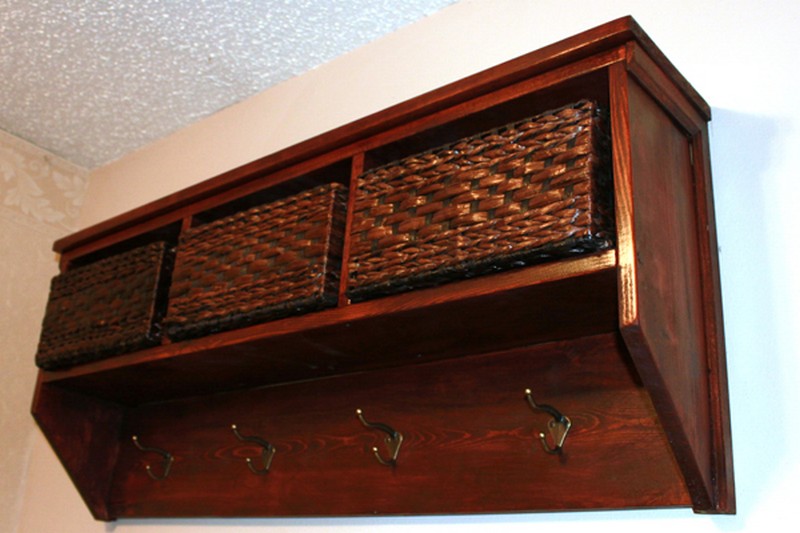
- Storage Options: Consider adding under-seat storage to your pallet entryway bench. This can be achieved by adding a shelf beneath the bench or by using baskets that fit snugly underneath. It’s a great way to keep shoes, hats, and other outdoor essentials organized and out of sight.
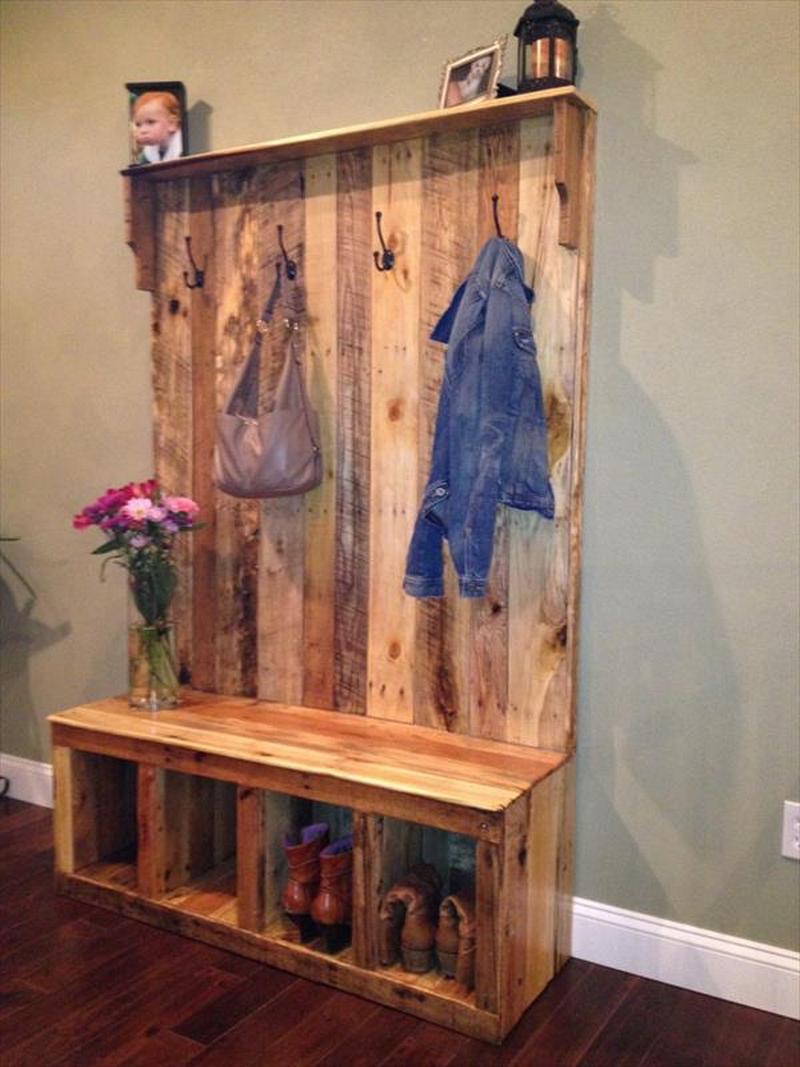
- Hooks and Racks: Attach hooks or a coat rack above the bench to hang coats, scarves, or hats. This turns your pallet entryway bench into a more versatile piece that acts as a complete storage solution for your entryway.
Personalize Your Design
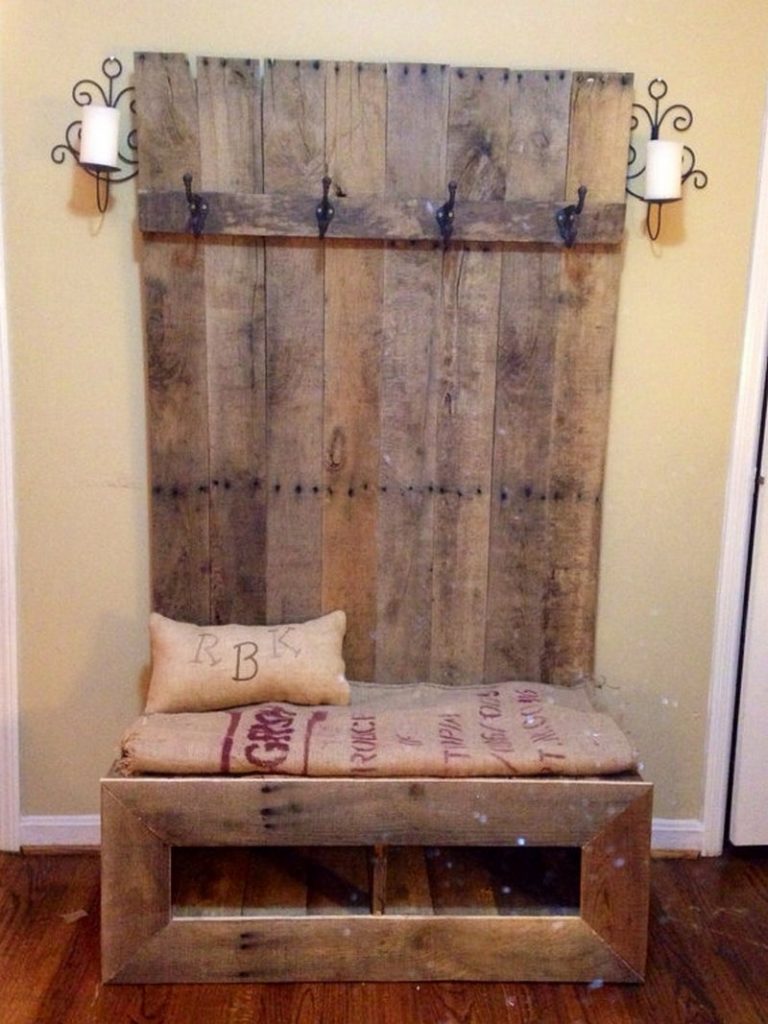
- Decorative Elements: Personalize your pallet entryway bench by adding decorative elements such as wood carvings, stencils, or even a personal inscription. These small touches can make your bench truly unique and a focal point in your home.
- Alternative Designs: Don’t be afraid to modify the basic design of your pallet entryway bench. You could add armrests, a backrest, or change the legs to suit your taste and comfort needs.
By considering these finishing and customization tips, you can transform your pallet entryway bench into a statement piece that not only serves a practical purpose but also reflects your personal style and enhances your home’s overall aesthetic.
Design Variations for Pallet Entryway Benches
A pallet entryway bench is a versatile and stylish addition to any home. By exploring different design variations, you can tailor your bench to meet specific needs and aesthetic preferences. Whether you’re looking for a simple functional piece or a standout item in your foyer, there’s a design that fits every style.
Classic and Minimalist
- Basic Bench Design: The simplest form of a pallet entryway bench involves a straightforward, flat-top bench with no back or arms. This design is perfect for minimalist decor and small spaces, offering clean lines and an unobtrusive presence.
- Floating Bench: For a modern and sleek look, consider mounting your pallet bench to the wall, creating a floating effect. This not only looks stylish but also makes cleaning the floor underneath easier.
Rustic and Charming
- Rustic Farmhouse Bench: Add a backrest and armrests to your bench, and use a distressed wood finish or leave some of the original pallet markings visible for a rustic charm. This style is ideal for a country house or vintage-themed decor.
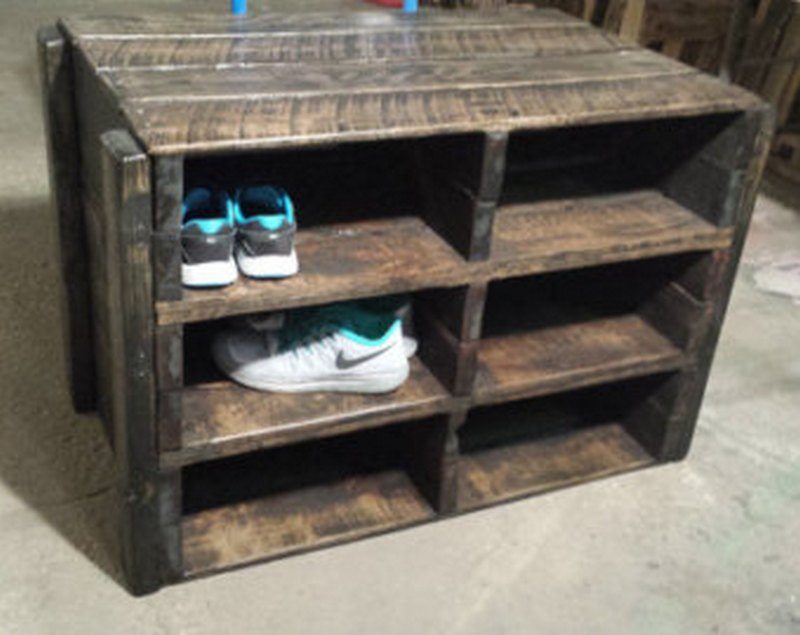
- Bench with Storage Crates: Integrate wooden crates under the seat for easy-to-access storage. These can be painted to match the bench or left in their natural state for an added rustic touch.
Modern and Functional
- Industrial Style Bench: Attach metal legs or casters to a pallet bench for an industrial look. The metal elements contrast nicely with the wooden textures, making the bench a focal point in a contemporary entryway.
- Sectional Bench: Create a larger, L-shaped bench if space permits. This design variation provides ample seating and can be used to define different areas within a larger entryway.
Customized and Decorative
- Carved or Burned Designs: Personalize the pallet entryway bench by carving or wood burning your family name, a meaningful quote, or a decorative motif into the wood. This adds a unique touch that makes the bench more than just a piece of furniture.
- Mosaic or Tiled Bench: For a truly unique look, add a mosaic tile design to the seat top of your bench. This is particularly effective in entryways that already feature tile work and can tie the space together beautifully.
Eclectic and Artistic
- Mixed Materials: Use a combination of materials like wood, metal, and fabric. For example, upholster the seat while keeping the wooden frame visible, or add a metal sheet with cutouts for a creative backrest.
- Bench with Planters: Incorporate built-in planters at either end of the bench or behind it if the bench includes a backrest. This design is perfect for those who love to bring a bit of the outdoors inside and adds a lively touch to your entryway.
These design variations for pallet entryway benches allow you to creatively adapt and style your bench to suit your home’s decor and your functional needs. Whether it’s the simplicity of a classic bench or the bold statement of an artistic piece, your pallet bench can be tailored to make a welcoming impact right at your front door.
Conclusion
Creating a pallet entryway bench is an excellent way to add both style and functionality to your home’s entrance. With options to customize and adapt the design to fit your specific decor and storage needs, this DIY project offers a rewarding opportunity to craft a unique piece of furniture. By using recycled pallets, you also contribute to sustainable living, making this project as eco-friendly as it is practical.
If you liked this project, you will also like viewing these furniture ideas…