Last Updated on September 12, 2022 by teamobn
A raised garden bed gives you a lot of advantages. The biggest beneficiary is your back. With a raised garden bed, you won’t have to bend over as much to tend to your plants. That means less strain on your back and less risk of pain or injury.
Raised garden beds also make it easier to control the quality of your soil. You can add amendments and compost to your soil without having to dig up your entire garden. And, if you choose the right materials, raised garden beds can also help to insulate your plants from extreme temperatures.
But other advantages include being able to arrange your garden the way you want it, making watering easy and adding visual appeal to your garden.

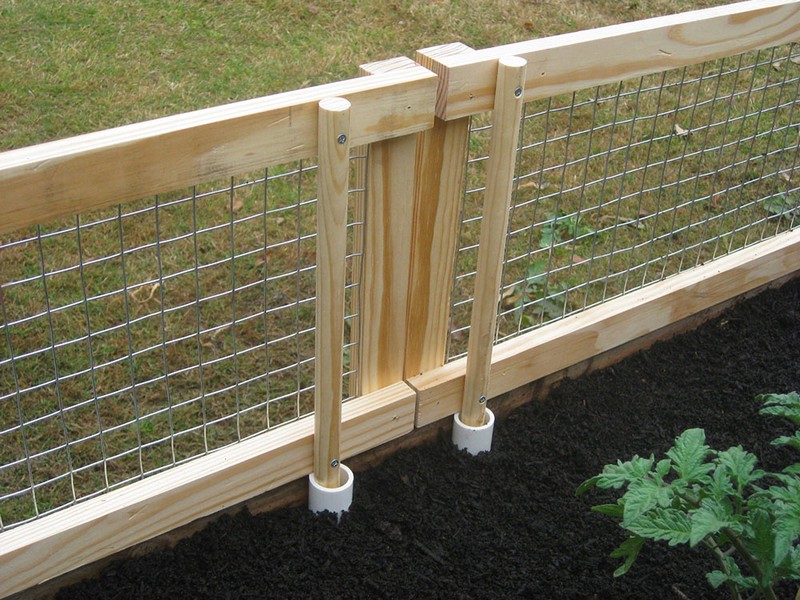
The screened raised garden bed featured here has an added pest ‘gate’ that helps you to keep critters away from your produce. This screened raised garden bed can be easily built and added to your pre-existing raised garden bed.
The bonus is that it’s easy to uninstall when not needed. This is an easy and inexpensive project to protect your plants and ensure a bountiful harvest.
Materials
- 2 pcs – 1inch x 2inches x 8-foot wood furring strips
- 2 pcs – wood dowels 2-foot; 5/8 diameter
- 1 pc – PVC pipe 1inch diameter 2-foot
- 8 pcs – 1 and a half inch wood screws (you can use #6 or #*)
- 8 pcs – 3/4 inch wood screws (#6)
- 2 pcs – 1inch plastic conduit brackets
- hardware cloth 1foot x 4-foot
Tools
- Cordless drill and drillbits that are the same size as the screws
- Saw
- Tape Measure
- Metal wire cutting pliers
- Staple gun and staples
- Stain or waterproof coating
How to build your own screened raised garden bed?
Gather all materials
Gathering all the materials and tools you need for screened raised garden bed project before you start can save you a lot of time. Not having to stop in the middle of your work to look for a particular tool or material can help you stay focused and on track.
In addition, having everything you need on hand before you start will help you avoid making mistakes that could cost you time and money.
The Screen Wall
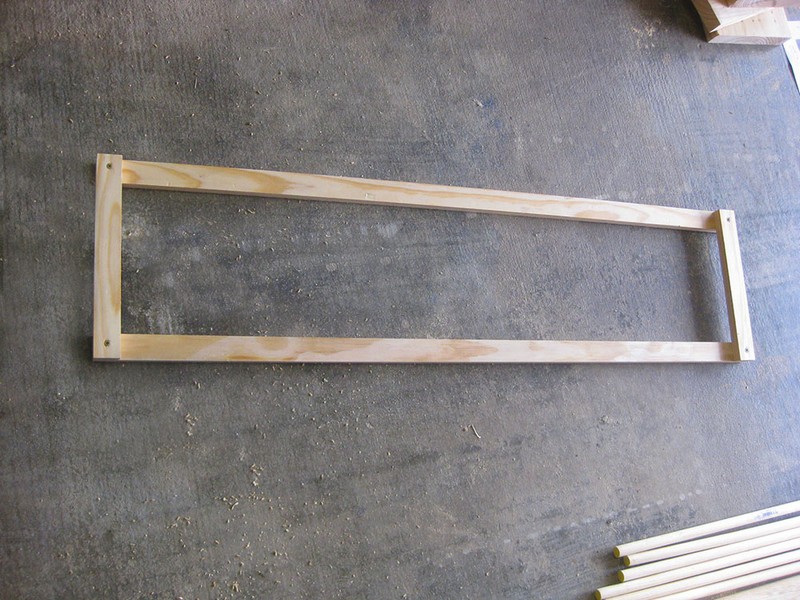
If you already have an existing raised garden bed, you can now proceed to build the screen wall of your raised garden bed. But if you don’t, you can start by building your raised garden bed. Then you need to start building your screen wall by deciding how tall you want your screened raised garden bed.
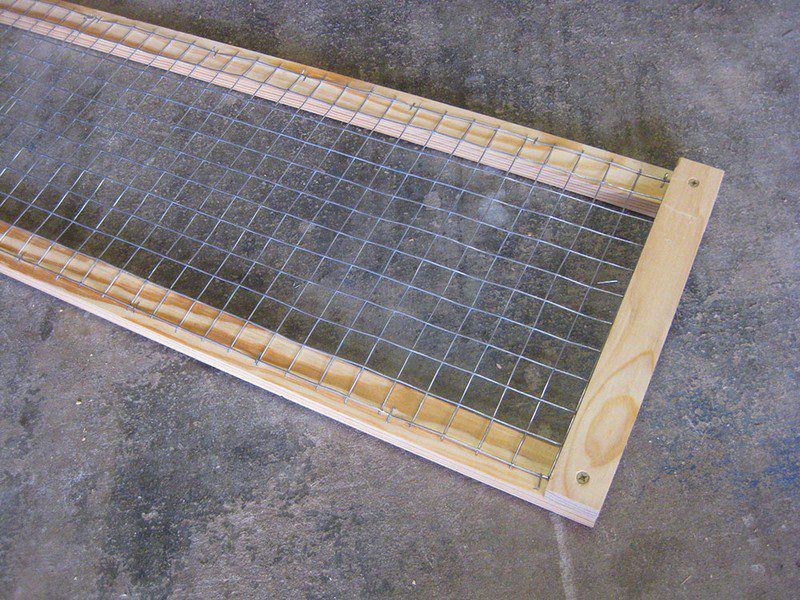
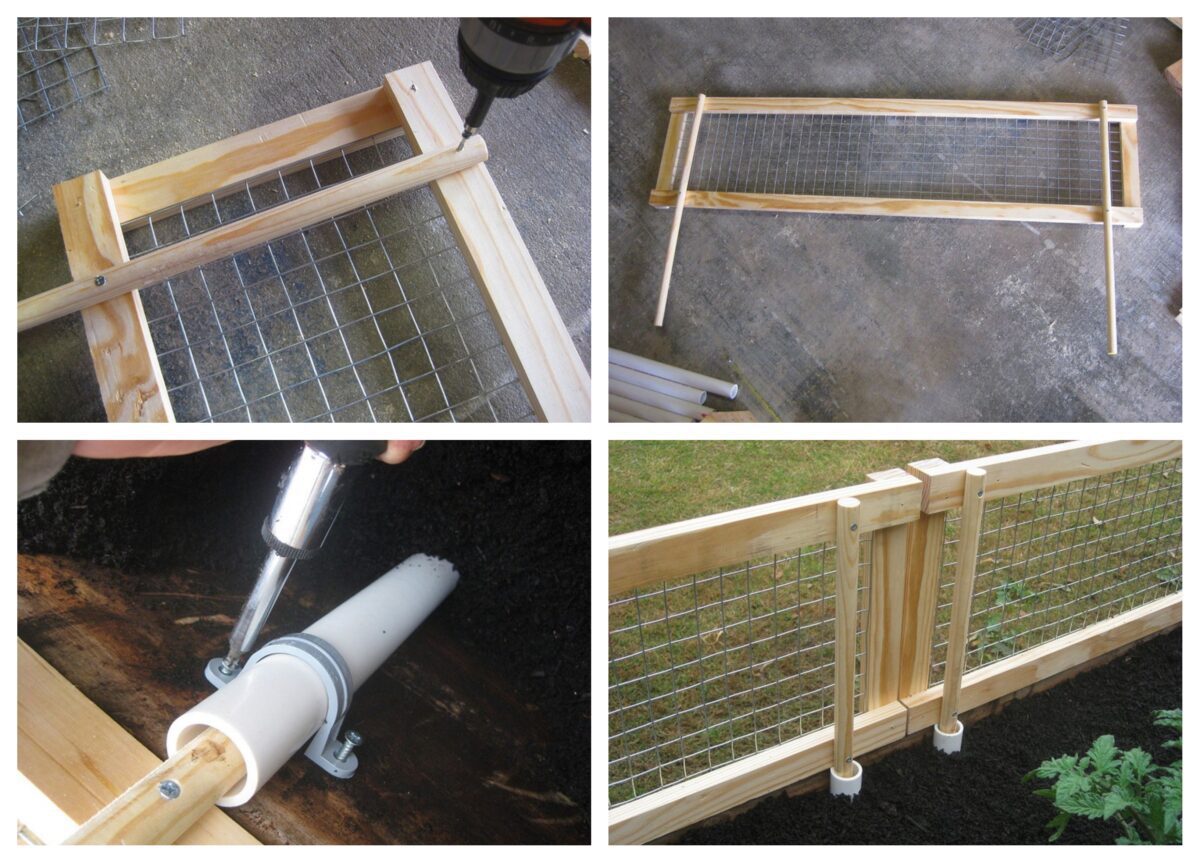
When you already have all the measurements, start by cutting the wood furring strips according to the length of your raised garden bed. Then create a platform to which you will attach the hardware cloth. This should look like the one below.

Attaching the hardware cloth
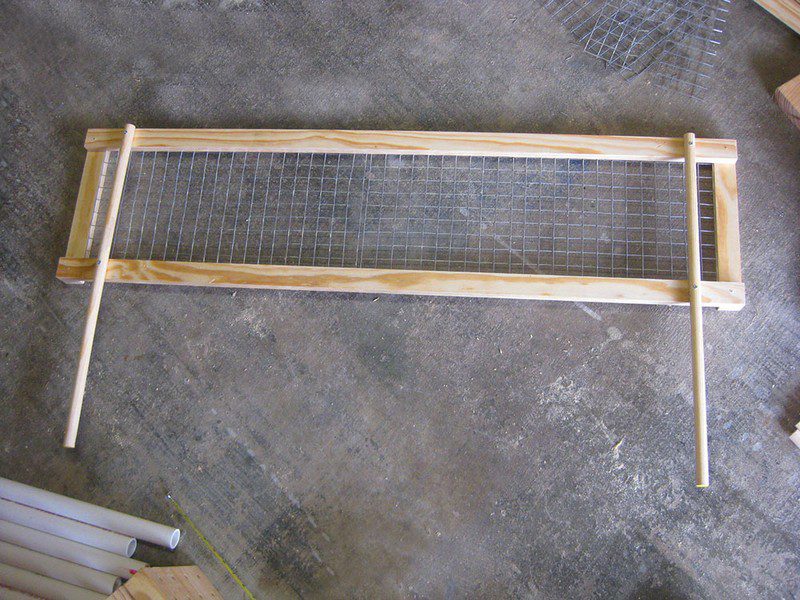
Once you finished the platform, you can now start adding the hardware cloth. you can attach it using a staple gun and staple wire. This part can be tricky, but once you get the hang of it, it’s a simple task. You basically attach one side of the hardware cloth to the frame and staple the wire down. It will then look like the one below. follow the same process to complete all sides of your raised garden bed.
Attaching the dowels
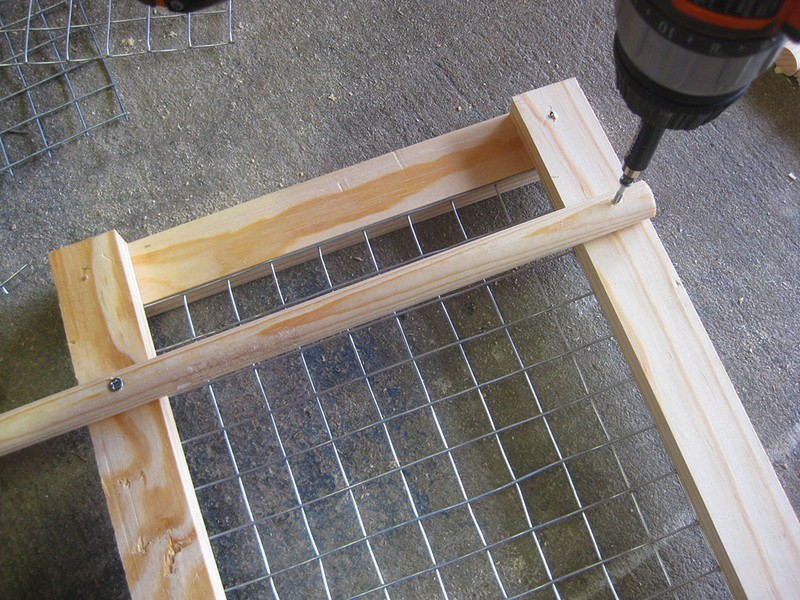
Once the screen is attached to the platforms, the next step is to attach the dowels. The dowels will act as a support for the screen when attached to the screened raised garden bed. This will help to keep the screen in place and prevent it from sagging or falling over time.
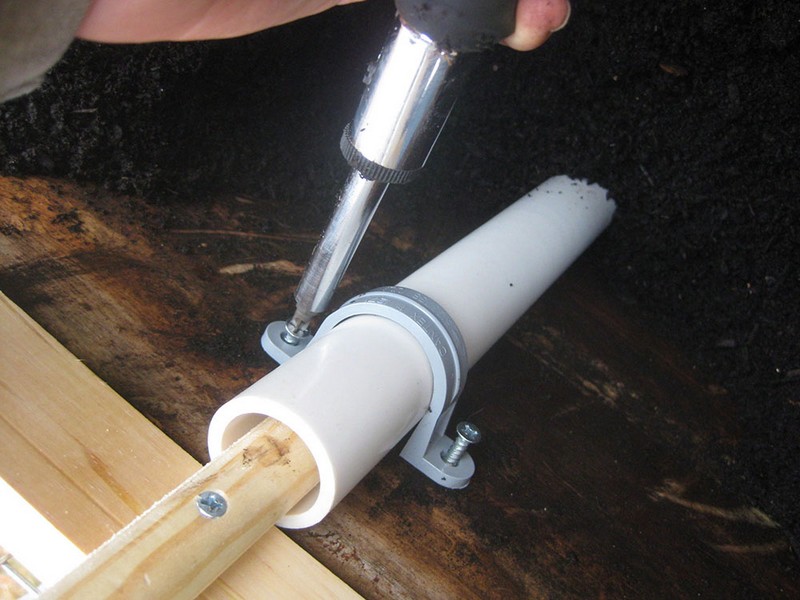
To ensure a successful raised garden bed, securely attach the PVC pipes to the inner part of the bed. This will provide support for the dowels which will in turn support the plants and soil. Make sure the pipes are firmly in place to avoid any damage to the bed or plants.
What do you think of this screened raised garden bed? Will you build a screen wall for your raised garden bed to protect it from pests?
Click on any image to start the lightbox display. Use your Esc key to close the lightbox. You can also view the images as a slideshow if you prefer 😎