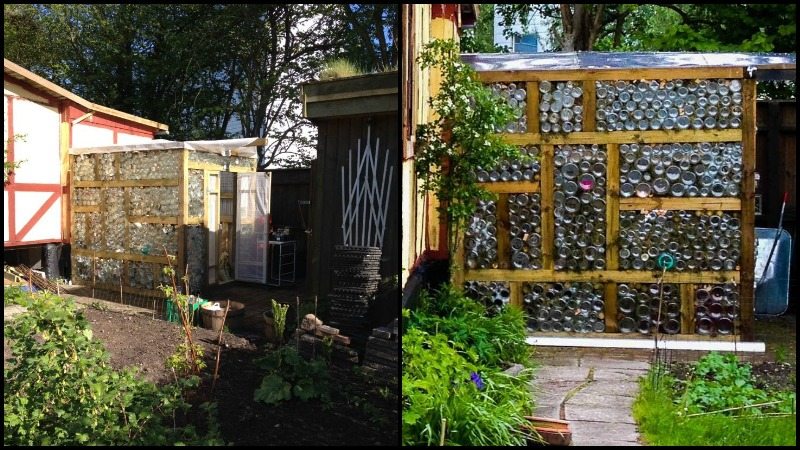
Want to build a greenhouse in your backyard? If you have access to plenty of glass jars, you can use them for a very cheap glass jar greenhouse!
A glass jar greenhouse is a structure used to raise plants under controlled conditions. Greenhouses allow plants to be grown in places where it is too cold, too hot, dry, or humid to grow plants.
Many tropical plants cannot be grown outdoors, so a greenhouse will usually have to be heated in order for the plants to survive.
The jars will let in sunlight, and the greenhouse will trap heat, creating the perfect environment for your plants! By controlling the amount of sunlight and heat that your plants receive, you can ensure that they thrive.
Start asking your friends and neighbors for empty jam jars. You can also ask your local restaurants and take-aways to keep bottles for you! This glass jar greenhouse costs almost nothing depending on the materials you already have.
We’ve been collecting glass jars for quite some time now without any purpose in mind. When we came across this idea we’re glad we’re already halfway through getting enough glass jars for this greenhouse project!
We think this is a great idea since you can even use the largest glass jars to start some seeds — mini-greenhouses inside a greenhouse!
The only thing missing in this greenhouse is the permanent roof. If you were to build one, what roofing are you going to use?
Read on to see how DIY-er can be further improved!
Would you like to build your own version of a glass jar greenhouse? 🙂
Materials and tools you need to build a glass jar greenhouse…
You’ll need these materials:
- 10 x 10cm Fence Posts
- Glass Jars with Lids
- Moss
- Cement
- Fine Gravel
- Wheelbarrow
- Door Hinges and Handle
- Screen
And these tools:
- Shovel
- Measuring Tape
- Drill
Steps:

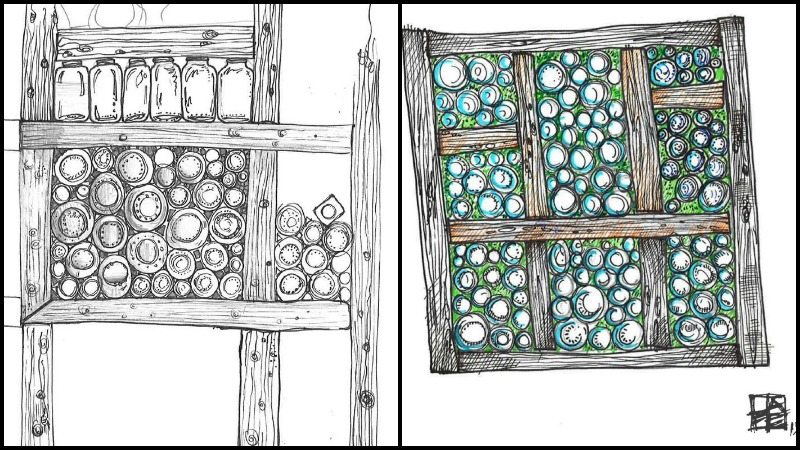
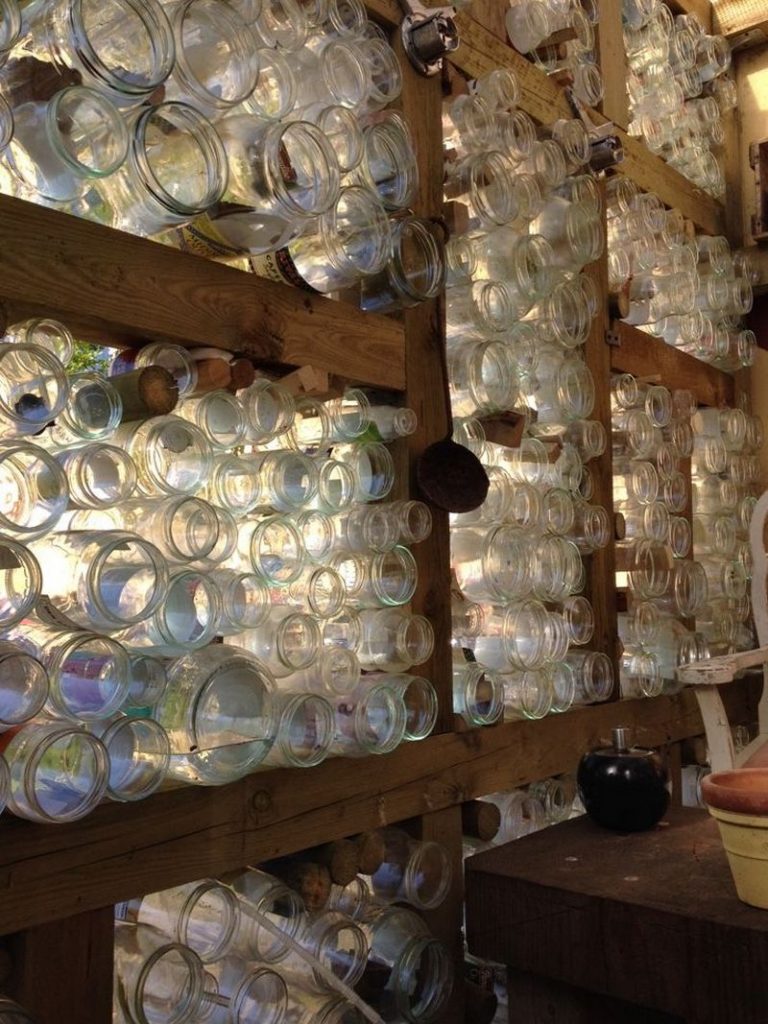
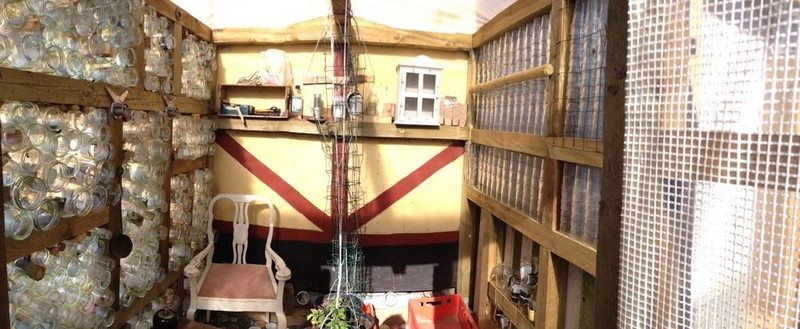
I used 10cm x 10cm “fence” posts for the frame which worked out quite nicely with the average height of my glass jars.
My glass jar greenhouse is “free-standing” but I guess it would be best to have some sort of foundation if building on grass – the final structure is quite heavy. I don’t want my greenhouse to fall over and crush my plants!
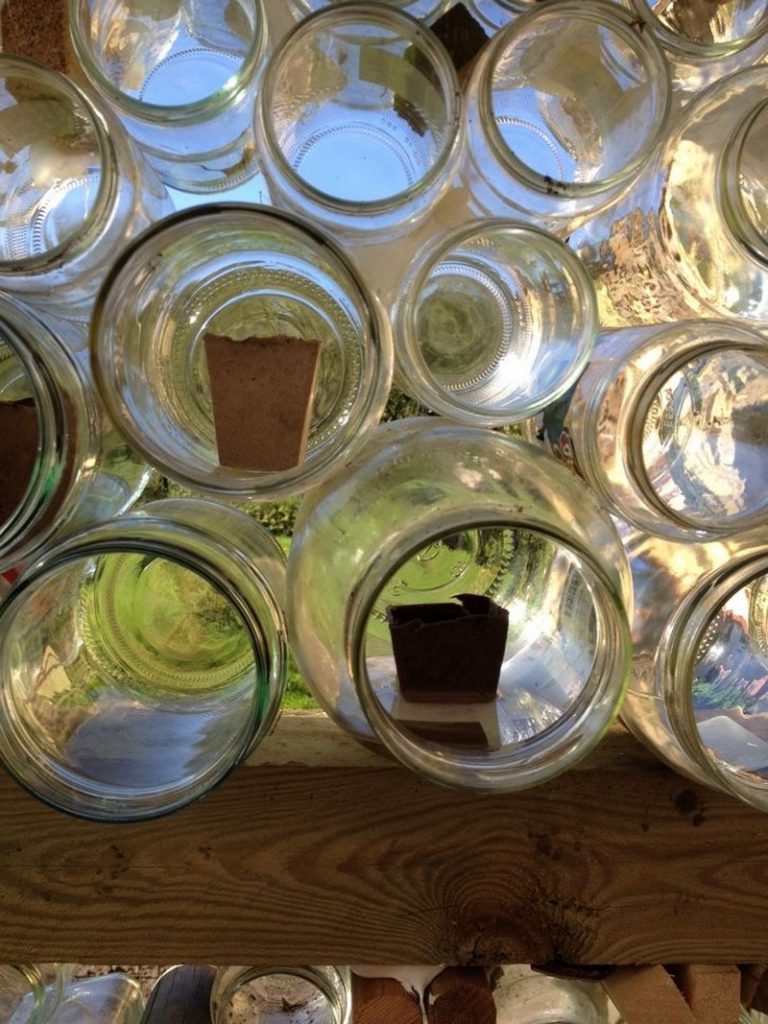
It is important not to make the spaces between the posts – too large, stacking the glasses can be tricky – and if they are high up can be dangerous.
My greenhouse is roughly 2m square – and when it’s finished will probably have used about 1000 jam jars. (and I have only filled 3 out of 4 walls). I asked all my neighbors and colleagues to bring me their jars. The canteen at work was also great for getting oversized jars – the big jars can have multiple uses.
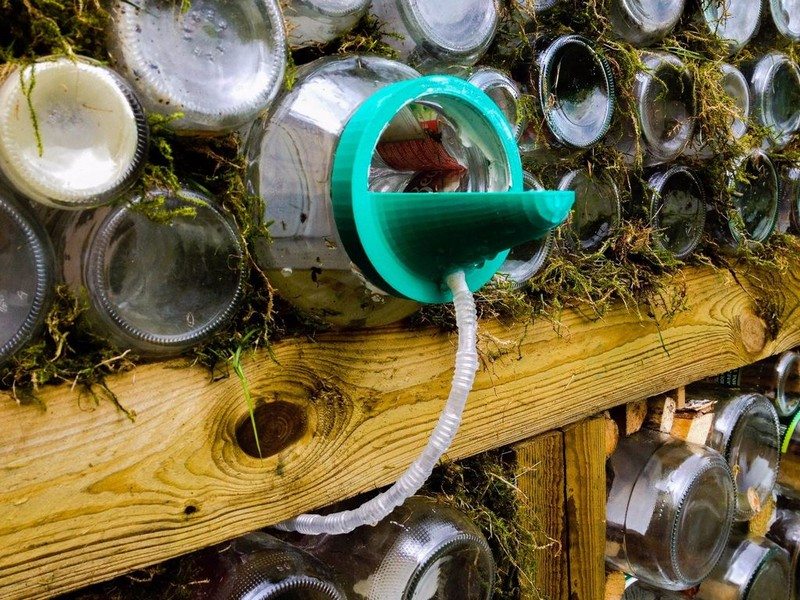
I 3D printed the adapter to collect rainwater. The files are available from thingiverse.
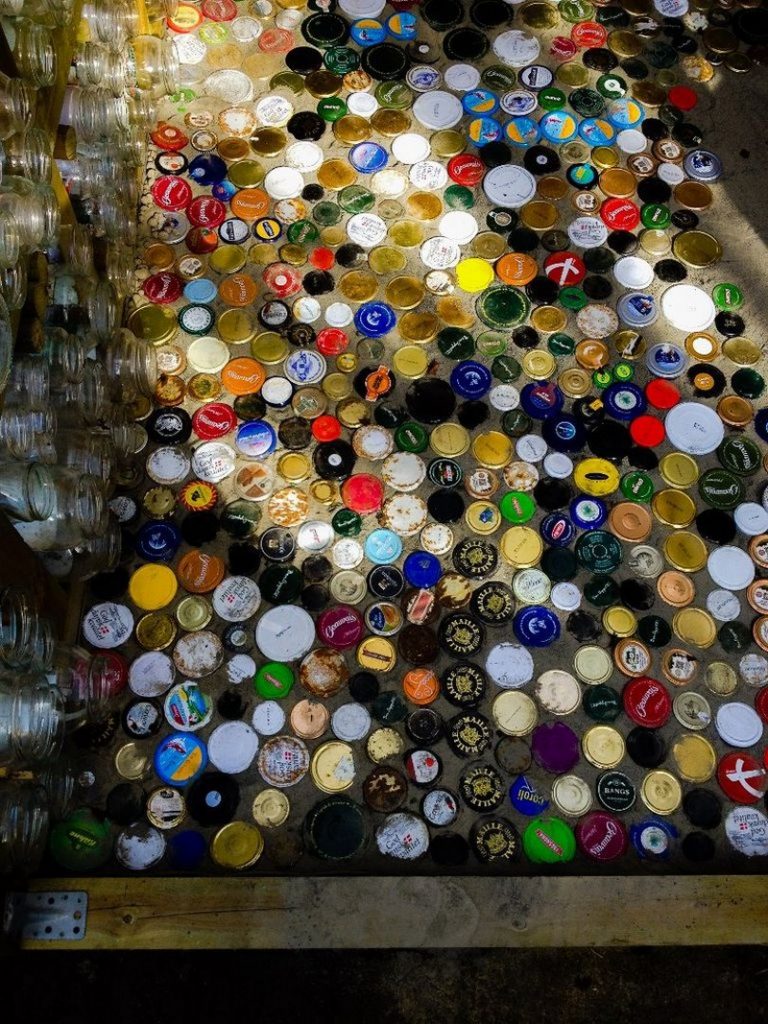
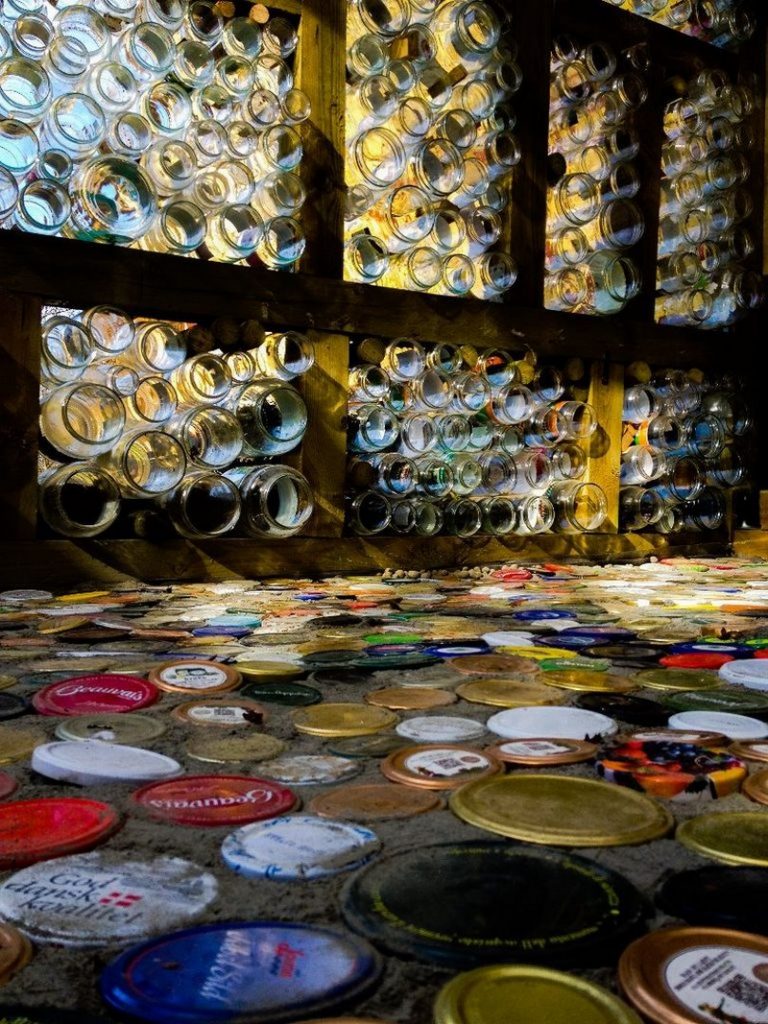
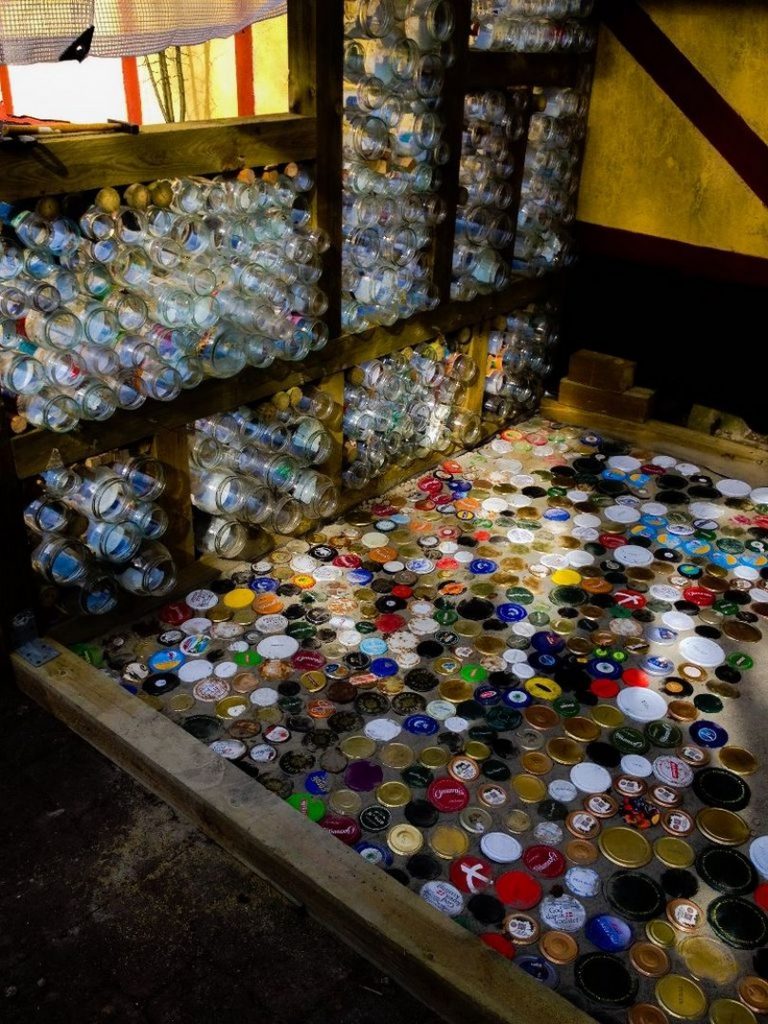
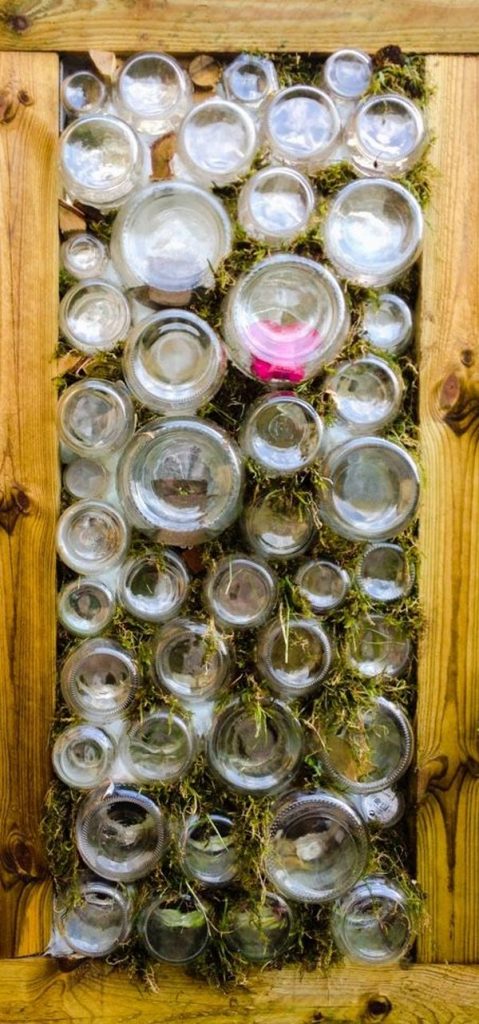
I mixed some fine gravel and a bag of cement (no water) – I spread the mixture on the floor about 1cm deep. I then pressed in the lids, trying not to think about the order and colors. I like the random look. After a few days, the gravel/cement mixture had absorbed moisture from the air and had set.
TIP: I was amazed at how many lids were required to tile the floor. You might want to make sure you have enough lids before you start setting them in cement. I would have thought that a few lids would have been sufficient, but I was wrong. It took a lot of lids to tile that floor, and I’m glad I had enough.
Thanks to