Last Updated on October 2, 2025 by teamobn
Most DIY projects and all building sites end up with random length offcuts. Even with the best planning and purchasing, it’s almost impossible to finish a project with all your materials used up.
So what do we do with these leftovers?

Here are some beautiful ideas to help you use excess wood planks in your storage. Some of these use off-cuts that are too short for most furniture pieces. Some, on the other hand, are ideal for excess wood planks you haven’t used in your previous DIY projects.
If you’re looking at this post knowing your timber bin is empty, just head to your nearest building site. Ask if you can go through the skip bin. You might just be amazed at what you find there!
Click on any image to start the lightbox display. Use your Esc key to close the lightbox. You can also view the images as a slideshow if you prefer.
Check out these DIY projects that will help you use excess materials from old projects!

Timber Offcut Projects You Can Build Today
A timber offcut doesn’t belong in the bin. Turn leftover lengths into stylish, useful builds with basic tools. Below are eight fast projects that stretch materials, skills, and workshop time.
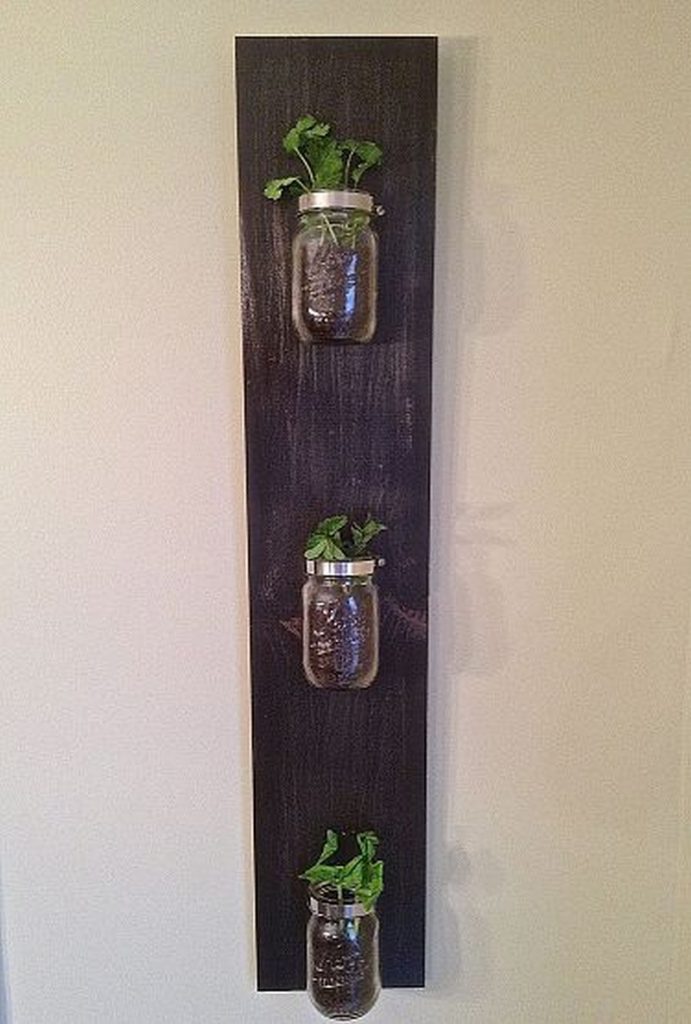
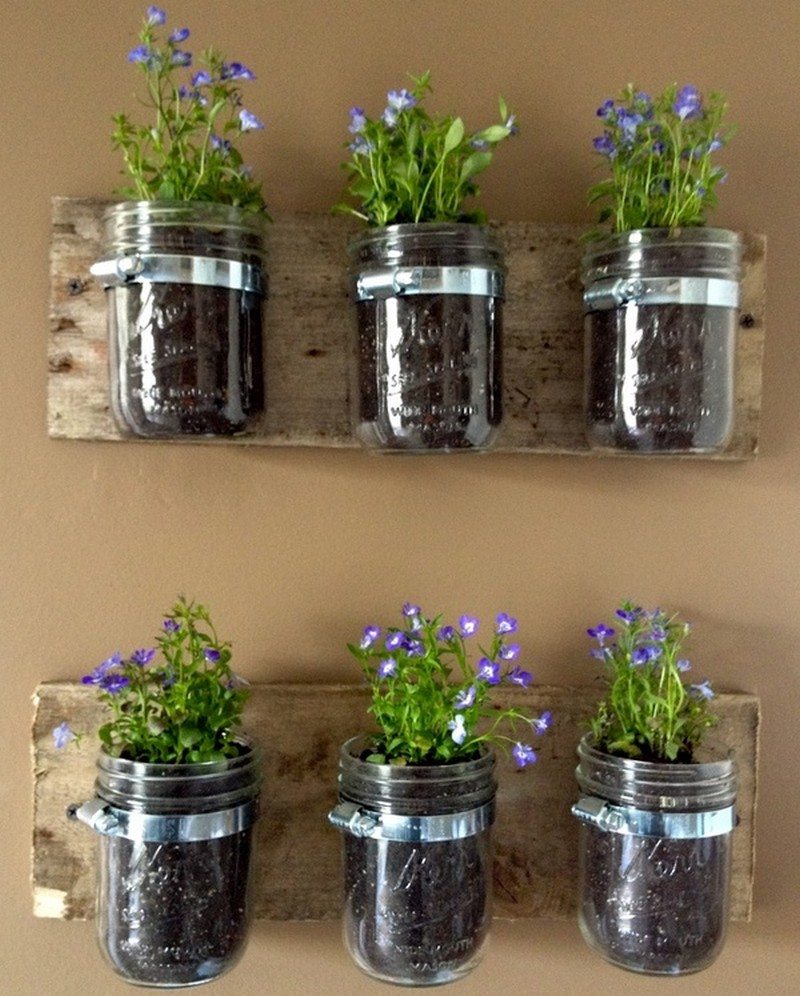
Wall Planter
Transform a timber offcut into a wall planter that keeps herbs nearby. Use one or two planks, sand the faces, and seal to resist splashes. Mark studs and plan jar spacing for light.
Attach stainless hose clamps with short screws. Drill pilot holes to prevent splitting. Tighten each clamp around a mason jar, then add pebbles for drainage. Hang the board level with anchors when studs aren’t available.
Short offcuts also shine in an artificial plant feature. Arrange pieces in a chevron or brick pattern for texture. Mix stains for contrast, or paint a single tone for calm. Mount each block on a plywood backer and finish with clear coat. This timber offcut idea adds depth without watering.
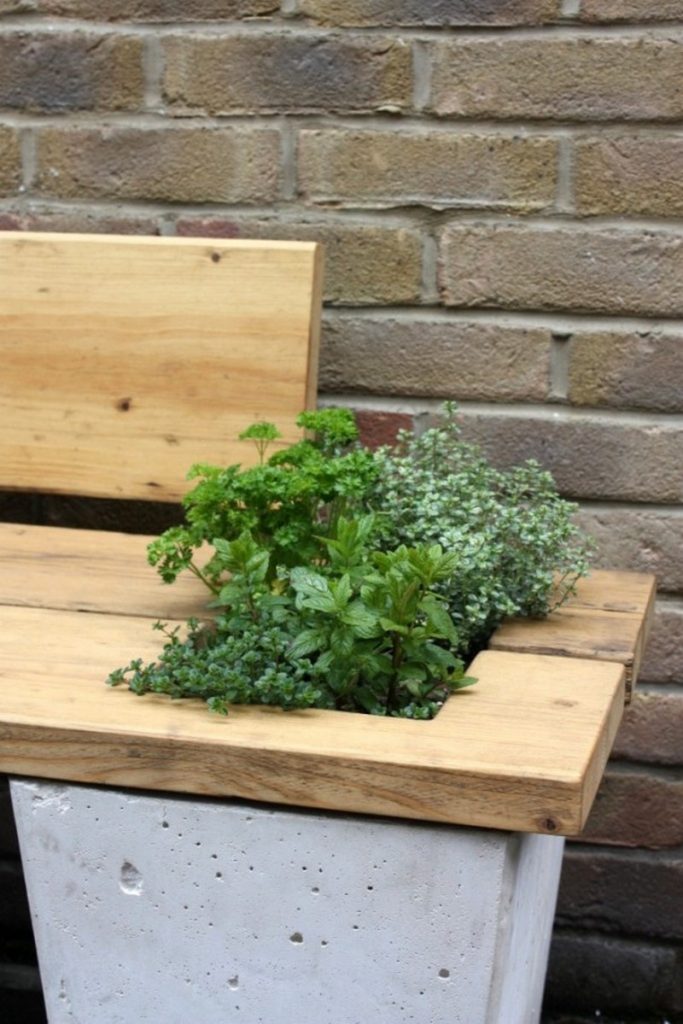
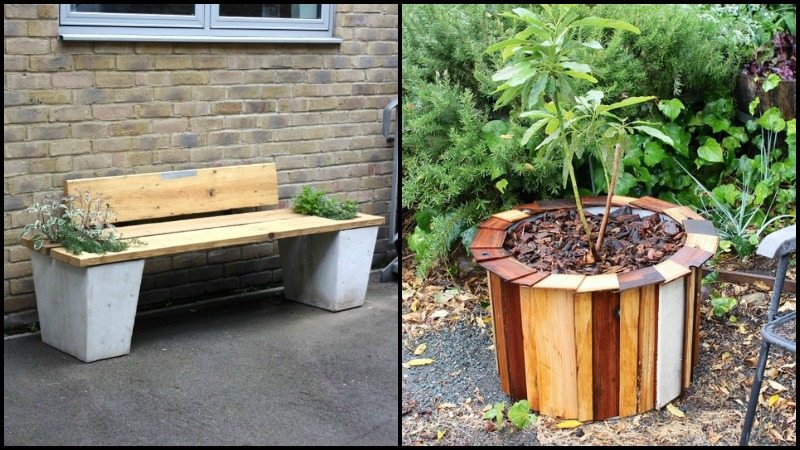
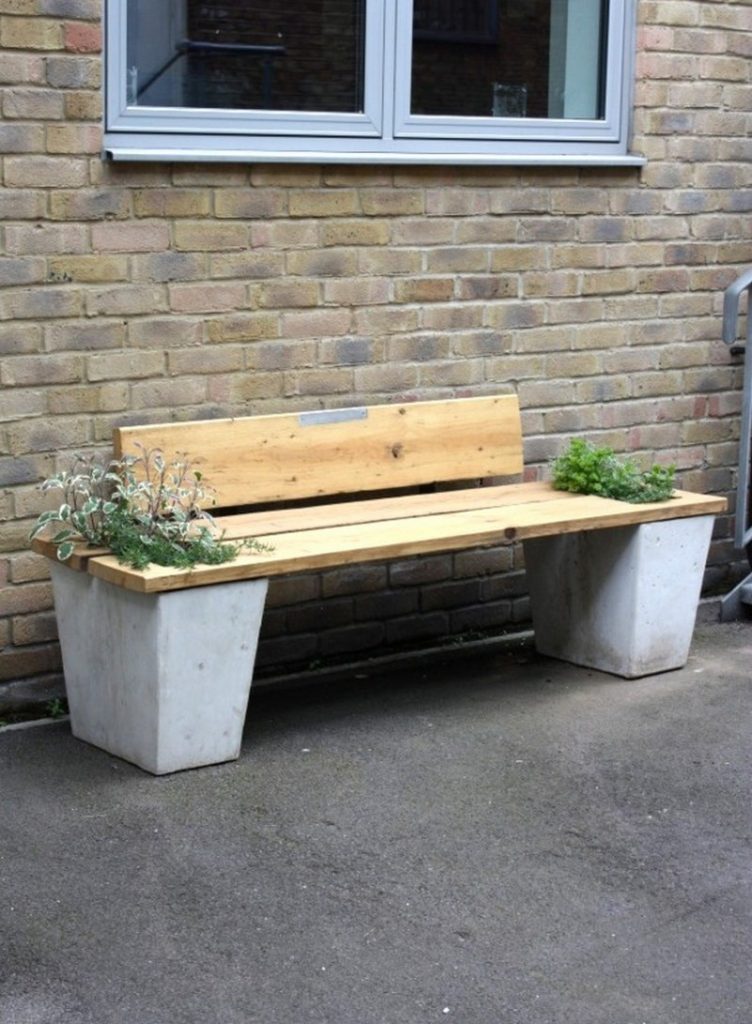
Garden Bench
Turn two straight planks into a sturdy garden bench with simple joinery. Aim for a 1,200–1,500 mm length and a 430–460 mm seat height so it feels natural. Ease sharp edges and sand to 180 grit for comfort.
Build the legs from a timber offcut or two. A box frame with a center stretcher resists racking better than single posts. Predrill and use exterior screws. Add pocket holes or angle brackets where the legs meet the top. Space seat boards 3–5 mm for drainage.
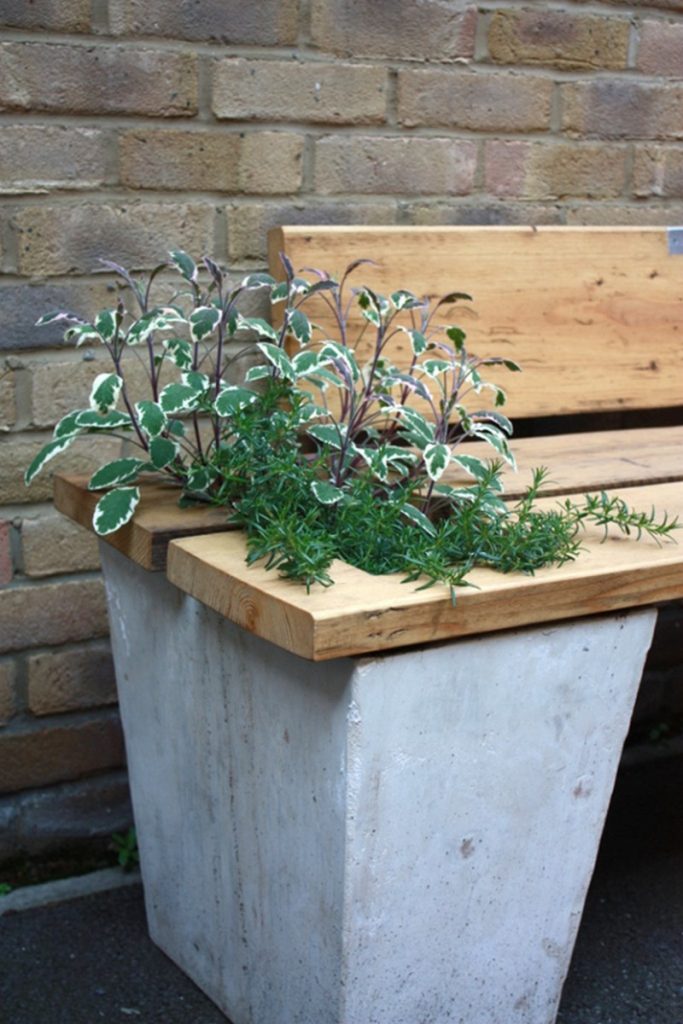
Lift the bench off paving with nylon feet or hidden pads to slow rot. Seal end grain first. Finish with an exterior oil or spar varnish that offers UV protection.
Test stability by pressing down and wiggling side to side before final coats. This quick build, inspired by Ryan Frank’s clean lines, turns that last timber offcut into durable seating that comfortably welcomes two people.
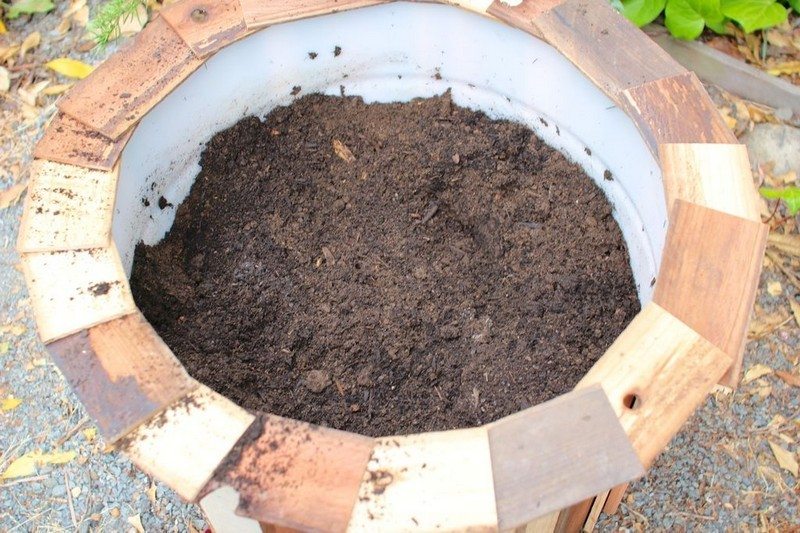
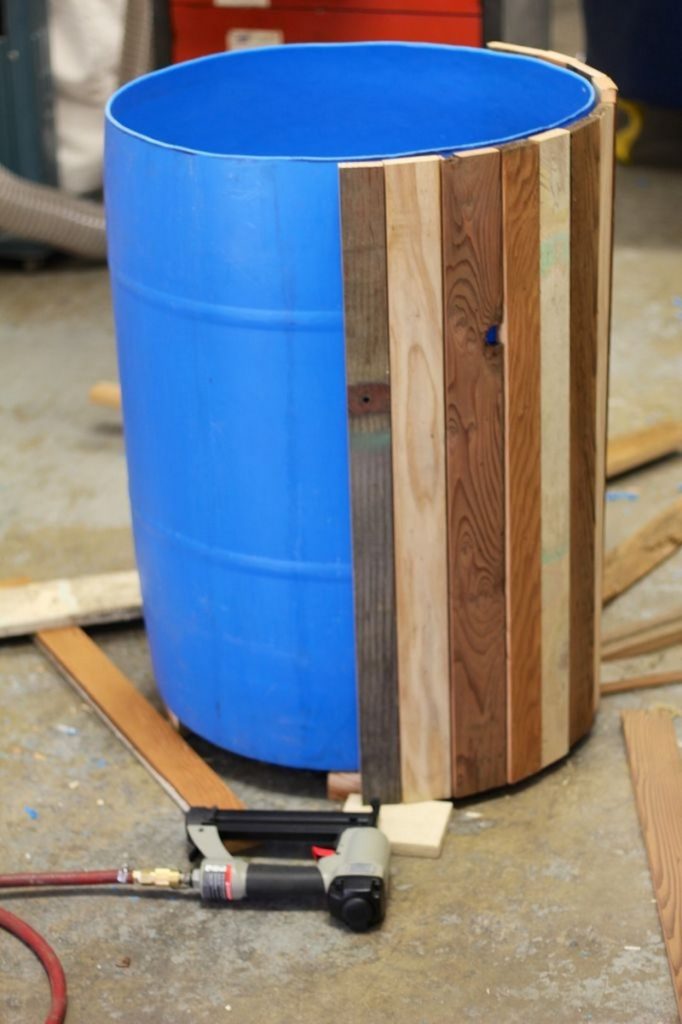
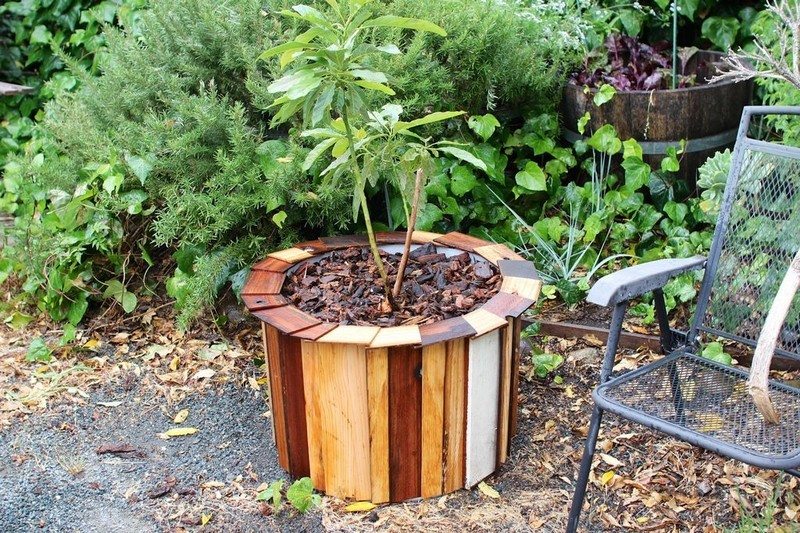
Drum Barrel Planter
Turn a tired drum or half barrel into a standout planter by cladding it with mixed offcuts. Clean and de-rust the barrel, then drill several 10–12 mm drainage holes in the base. Line sharp rims with edge trim so hands stay safe during planting and maintenance.
Cut your timber offcut slats to a consistent length. Aim for a width between 35–60 mm so color and grain variation reads as a pattern, not visual noise. Sand faces to 120–180 grit. Break the arris lightly on edges for a softened look. Pre-finish with exterior oil, stain, or paint washes in two or three tones to amplify contrast.
Add two or three vertical cleats around the barrel using construction adhesive and short screws. These give the slats a flat bearing surface. Glue and pin the slats to the cleats, holding consistent gaps with a 3 mm spacer for drainage and seasonal movement. Wrap the outside with stainless hose clamps or thin flat bar to echo old cooper bands. Tighten just enough to seat the slats without crushing fibers.
Raise the planter on nylon feet or pavers. Add a 50 mm layer of gravel, then a circle of landscape fabric to keep soil from clogging the holes. Fill with a free-draining mix and plant drought-tolerant herbs or ornamentals. This mixed-slat skin turns leftovers into a durable accent that reads custom, not cobbled.
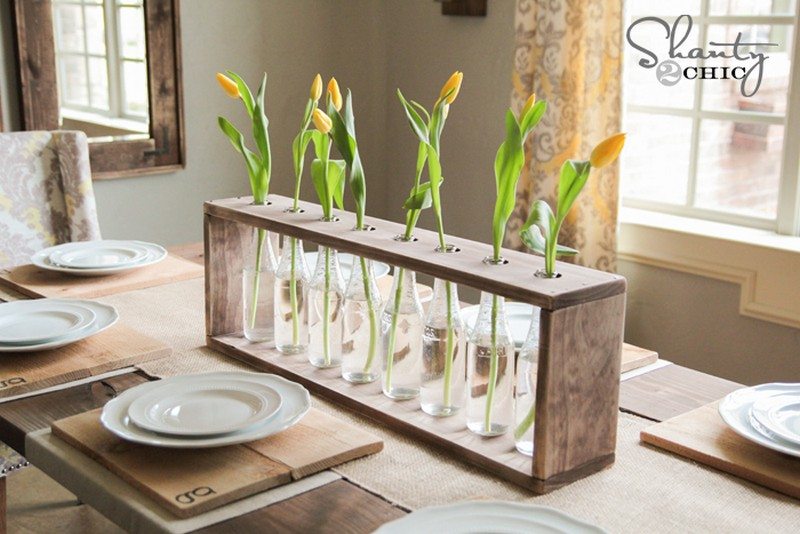
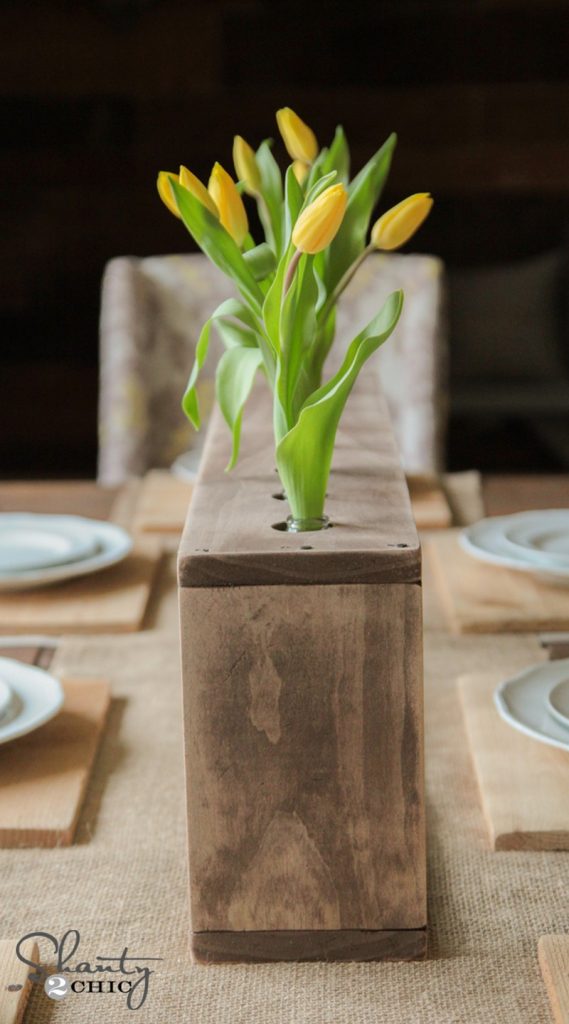
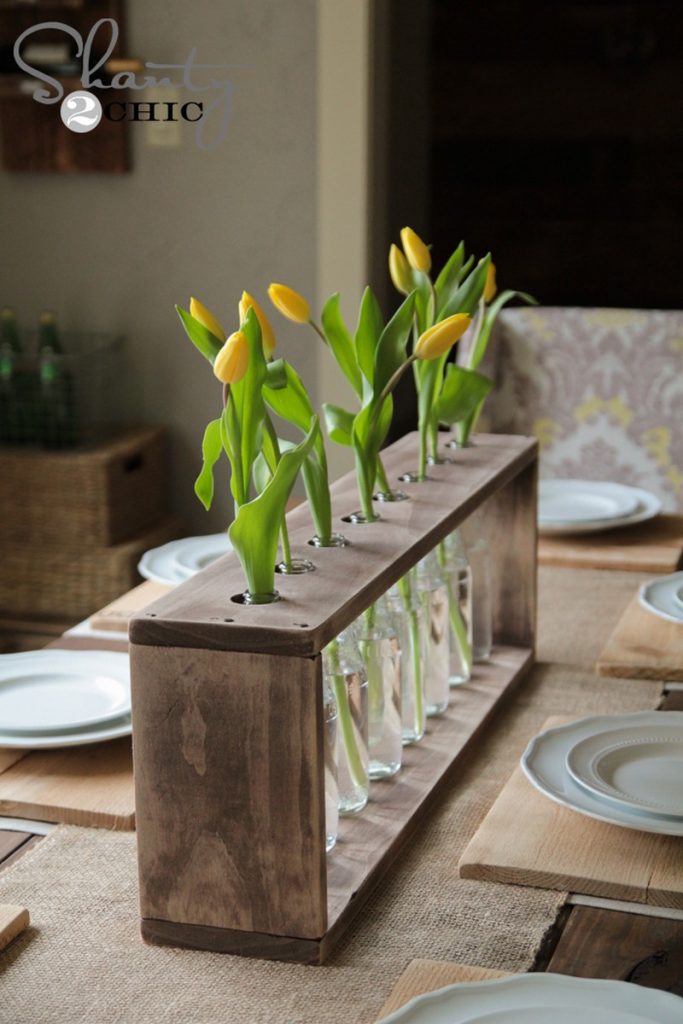
Dining Table Centerpiece
Turn a timber offcut into a clean, low-profile dining table centerpiece. Keep lines simple so it works year-round. You’re building a movable tray that gathers candles, jars, and greenery without blocking conversation.
Cut the board to 600–900 mm. Plane or sand edges until they meet neatly. Add two underside battens to prevent cupping, or use pocket screws to join short strips into a wider panel. Ease corners with a small roundover.
Fit discreet rubber feet or felt pads to protect the table. Optional strap handles make lifting easy for meals. Keep the profile under 60 mm so small rooms feel larger and sightlines stay clear.
Finish for dining use. Wipe-on poly gives durable sheen, while hardwax oil or mineral oil keeps a natural feel. Anchor candle cups, use cork discs for heat, and refresh the styling with the seasons.
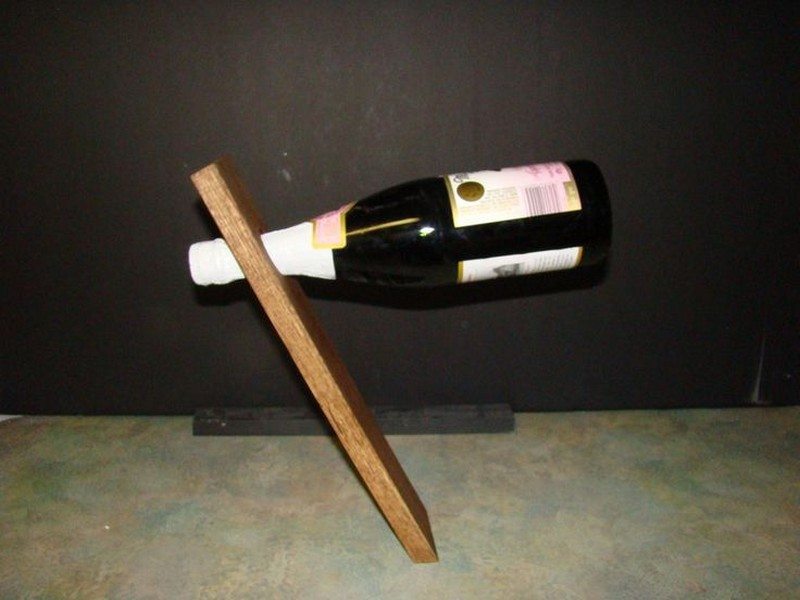
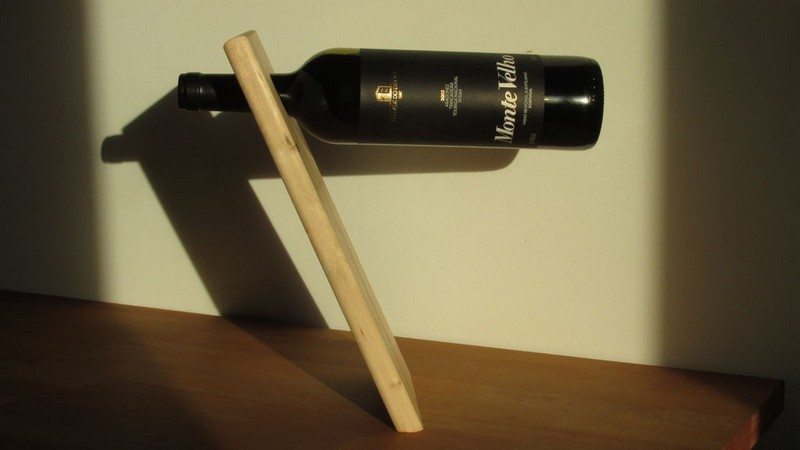
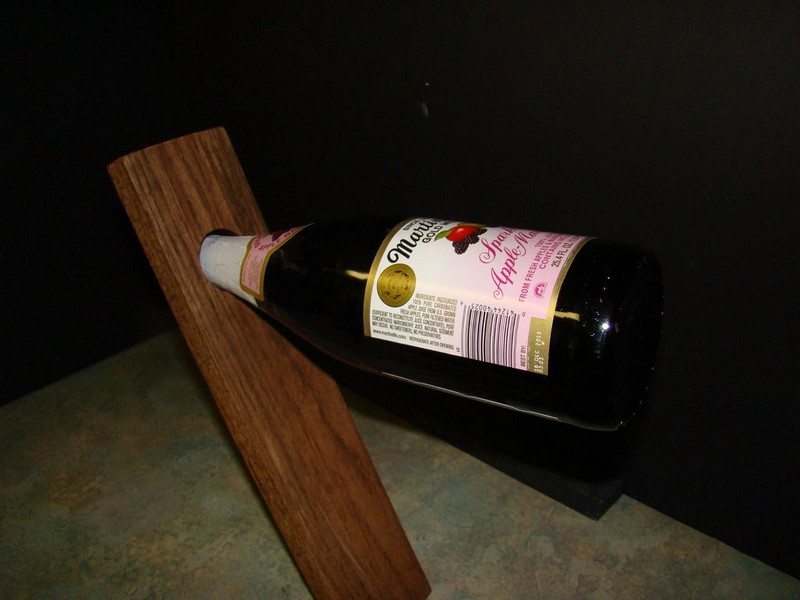
Floating Wine Bottle Holder
Why not make a DIY wine bottle holder for your wine-loving friends? Who doesn’t love wine? These DIY projects will be the envy of your friends.
This floating wine bottle holder is one of those cool things that you never knew you needed, but once you get it you’ll be amazed at the potential for awesome that it unlocks in your life.
We all know that wine is best when it is served at the right temperature, but keeping it at the right temperature can be a challenge. This floating wine bottle holder is simple and elegant, and it helps you keep your wine at the perfect temperature.


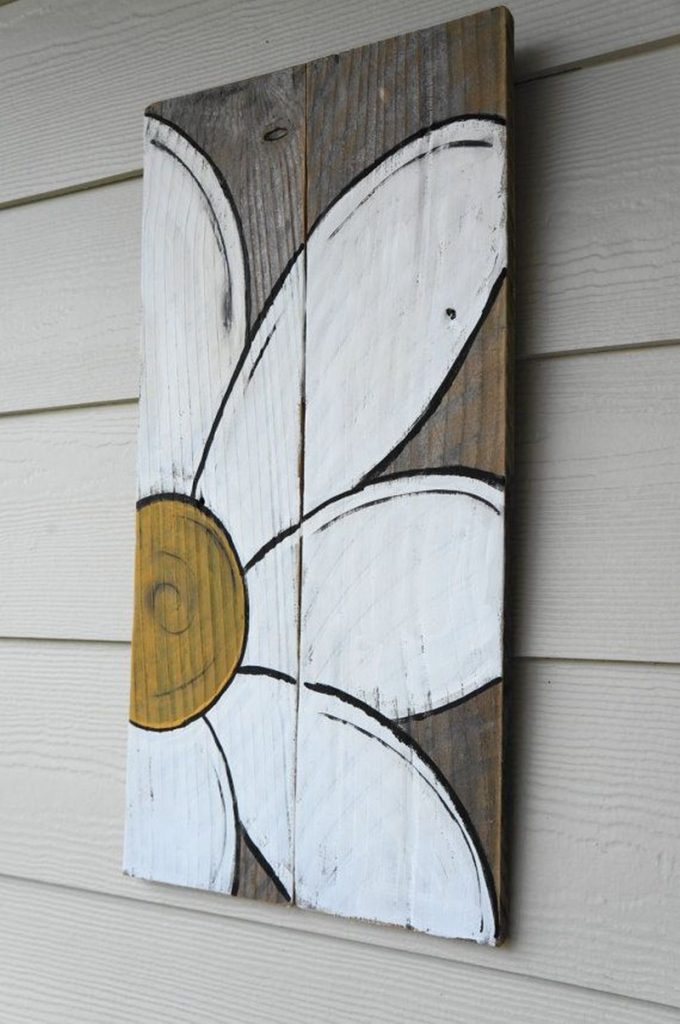
Wall Decor
Turn a timber offcut into simple wall art that adds texture without clutter. Rip narrow slats or keep a single board. Sand the face and ease the corners for a soft, finished look.
Lay out a grid, chevron, or staggered blocks on a plywood backer. Glue and pin for clean lines. Keep spacing even with a coin or 3 mm shim.
Add keyhole hangers or a French cleat for safe mounting. Keep weight centered and check level before fixing to the wall.
Finish to suit the room. Use stain for grain, paint for contrast, or a wash for a muted tone. Seal with matte poly so dust wipes off easily. Refresh with seasonal accents like small frames or dried stems.
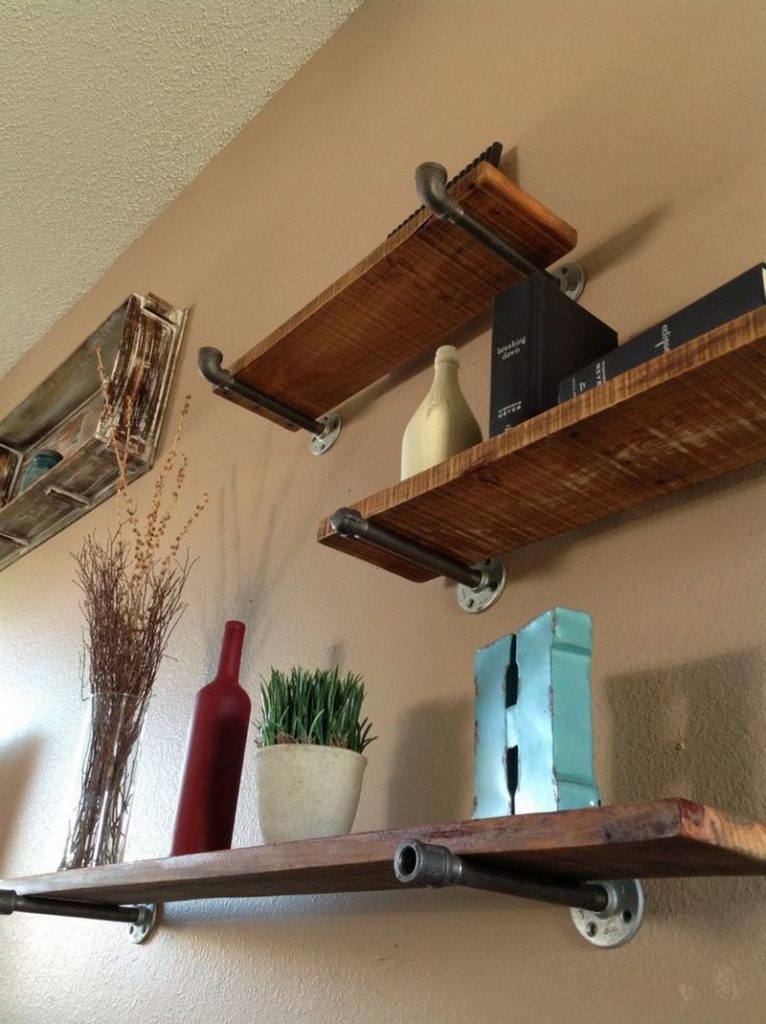
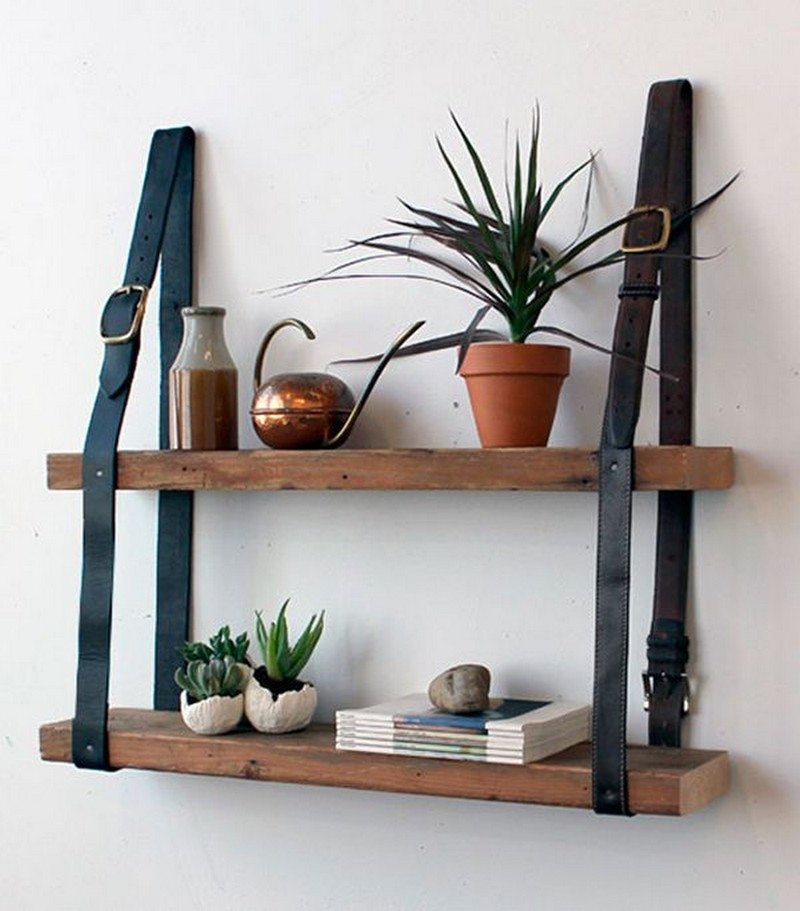
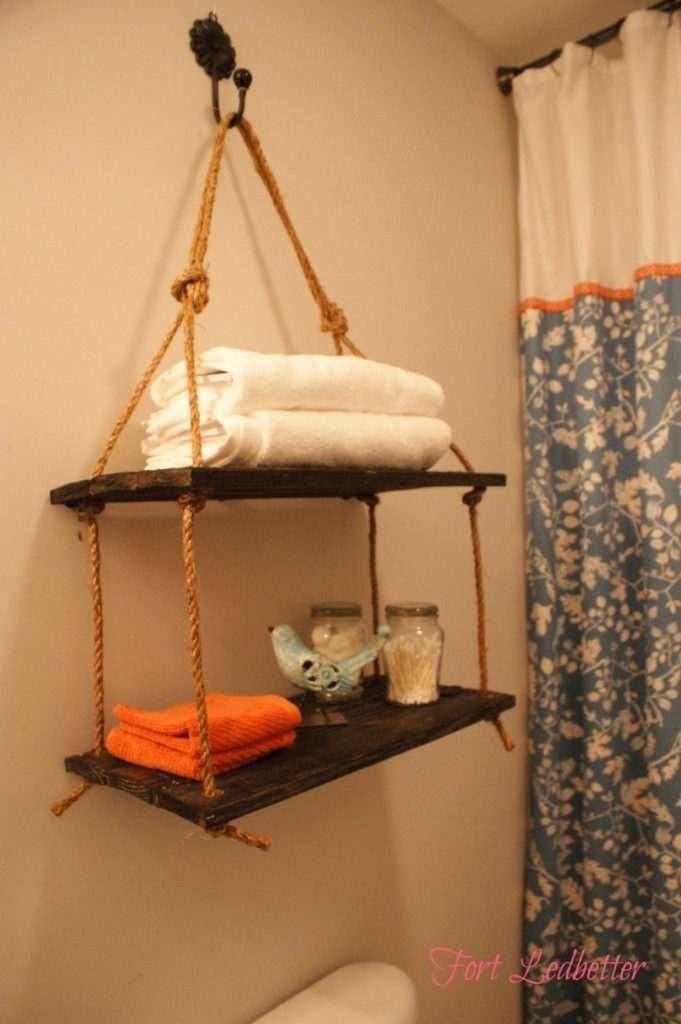
Hanging Shelf
Turn a timber offcut into a rustic hanging shelf that looks intentional. Aim for 200–300 mm deep and 600–900 mm long so it feels balanced. Sand edges smooth and ease the corners.
Choose your hangers with the load in mind. Leather belts bring warmth. Add washers behind the screws and punch fresh holes so buckles sit flat. Ropes give a coastal feel. Drill paired holes near each end, round the edges, and tie figure-eight stoppers under the shelf. Finish the top with a bowline or clove hitch on wall hooks. Metal tubes read industrial. Use pipe flanges into studs and check for level before tightening.
Mount safely. Hit studs or use rated anchors and spread the load with two points. Keep 300 mm from cooktops and 200 mm from heaters. Seal with hardwax oil or matte poly so cleaning is easy. Felt pads on the back prevent wall marks. This simple build turns a spare timber offcut into storage that doubles as décor.
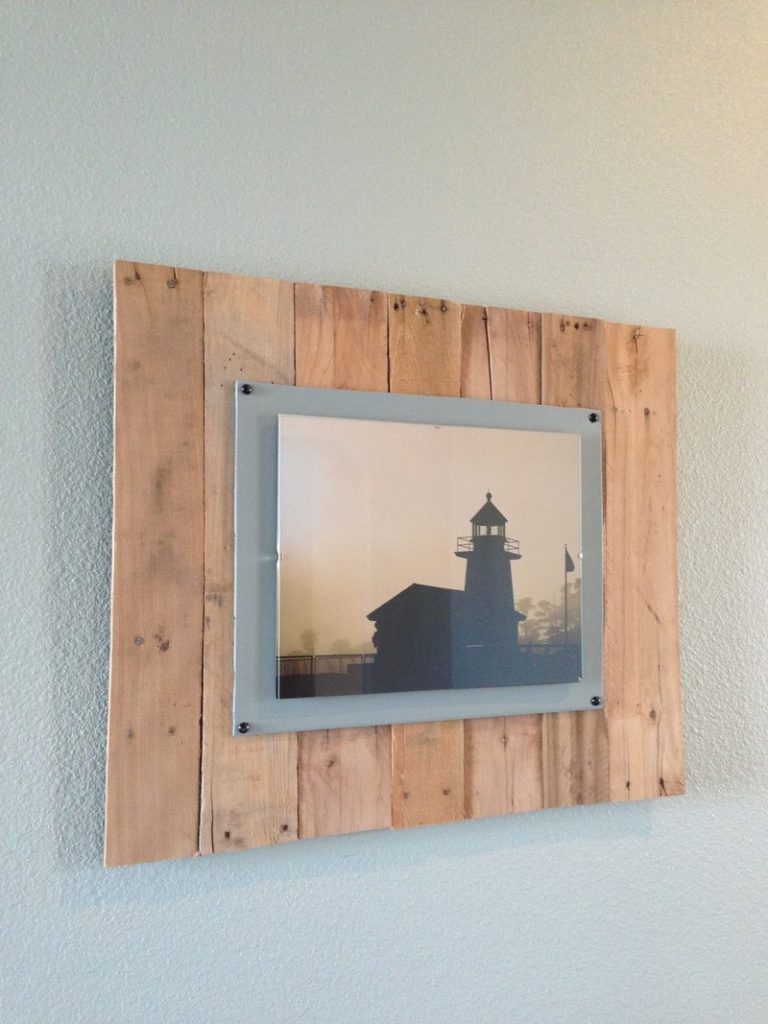
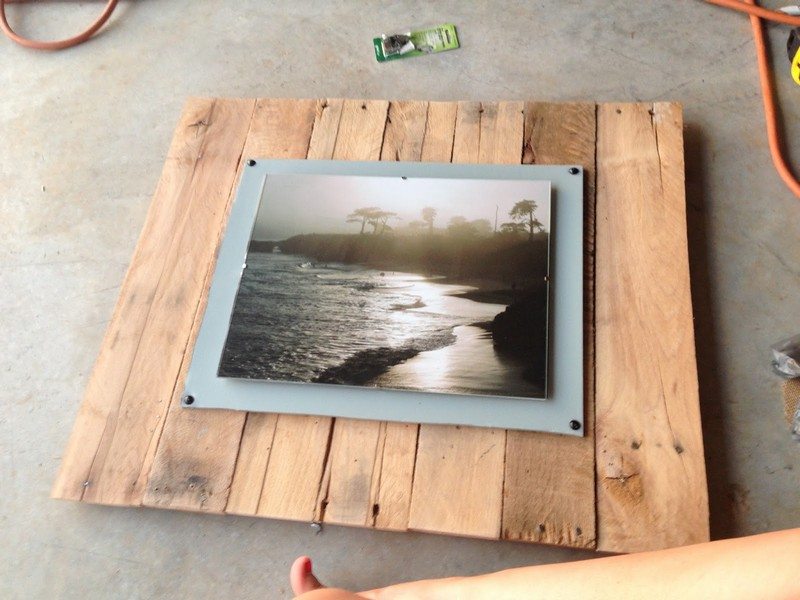
Picture Frame
Go minimal with a slot frame. Cut a shallow kerf along the top face to hold a printed photo or postcard. Add a second, deeper kerf if you want acrylic to protect the image. Keep the base wide enough so it won’t tip.
Prefer a clamp look. Fix two low-profile bulldog clips to the board and hang the photo. Center the clips, predrill, and use short screws so you don’t pierce the face. You’ll swap images in seconds.
Make it freestanding with a scrap stand. Drill a blind hole at the back and glue a short dowel at a slight angle, or attach a wedge block. Finish with wipe-on poly or hardwax oil to bring out grain. This timber offcut project turns memories into simple, tactile décor.
Make Offcuts Work Harder: Prep, Finish, And Mount Like A Pro
Good projects start with smart prep. Treat each timber offcut like stock. Use the finishes, joinery, and hardware so shelves stay straight, planters stay safe, and décor hangs for years.
Food-Safe And Kid-Safe Finishes
Choose finishes that match use. For trays and centerpieces, stick to mineral oil, beeswax blends, or hardwax oils with full cure times listed by the maker. Water-based polyurethane offers tough protection on shelves. Avoid boiled linseed because of metallic dryers. Keep heat away from soft oils under candles and tealights.
Joinery That Controls Wood Movement
Wood moves across the grain, so plan for it. Secure wide panels with figure-eight fasteners or Z-clips rather than glue across the width. Use elongated screw holes in battens on a timber offcut centerpiece. For outdoor pieces, choose exterior PVA or polyurethane glue and leave small gaps for drainage.
Wall Anchors And Load Basics
Mount into studs whenever possible. When you can’t, use rated toggle or sleeve anchors that match the wall type and expected load. Spread weight with a French cleat on heavier décor. Keep shelves short, keep loads near the brackets, and respect the manufacturer’s weight limits printed on the packaging.
Acclimation And Storage That Prevents Warp
Let wood acclimate a few days in the room where it will live. Store offcuts flat or stickered with spacers so air moves evenly. Keep them off damp floors. Seal end grain to slow moisture exchange. Quick habits like these mean straighter stock and faster, cleaner builds.
Cut Smarter, Build Faster: Offcut Sizing, Jigs, And Safety
Dial in your workflow before you cut. Standard sizes, simple jigs, and sharp blades make offcuts shine. You’ll cut straighter, sand less, and keep a small shop safe and tidy.
Standard Sizes That Save Time
Pick two or three go-to lengths, like 300, 450, and 600 mm. Most shelves, trays, and frames fit these ranges, so measuring gets quicker and waste drops. Label bins with those sizes and species. Keep a cardboard template for common widths. Consistent sizing turns any timber offcut into predictable parts.
Jigs And Stops For Repeatability
Set a stop block on your miter saw for identical parts. Use a crosscut sled for square cuts on short stock. Add a drilling jig for handles or clamp points. Mark a centerline on the bench for fast layout. Repeatable setups reduce layout time and errors, especially on small batches.
Blade And Bit Choices
Use a sharp 40-tooth combination blade for clean crosscuts. Switch to a rip blade when sizing thick stock. A flush-trim bit refines edges after glue-ups. Roundovers soften corners on trays and shelves. Sand with 120 to 180 grit before finish. Predrill and countersink screws to prevent splits in dry offcuts.
Shop Safety And Cleanup
Clamp small pieces so hands stay clear. Push sticks and featherboards control narrow cuts. Skip risky cuts if a piece is too short. Use a track saw or handsaw instead. Collect dust with a shop vac and mask up when sanding. Store oily rags in a lidded metal can to prevent fires.
Conclusion
We hope this helped you with ideas you can finally make with excess wood planks filling your storage. If you have another good idea, don’t hesitate to share it with us in the comments section below! 🙂
If you liked these projects, you might also like these home decorating ideas…