They are miniature gardens that sing with magic. Minute houses, tiny chairs, lawns, and ponds – fairy worlds that you can create in any space inside or out. They are so small that, you can fit one anywhere: the corner of a flower bed, under a tree, or in a pot on the patio.
Whether you’re making it for old or young, a fairy garden can provide an enchanted haven they’ll surely enjoy. And you’ll find that making it yourself is more satisfying than buying one.
Fairy gardens are a great way to create a magical space for children. It’s a good activity to get them involved and interested in gardening, appreciate the environment, and stimulate their imagination. Give them a spot in the garden where they can create their own fairy garden.
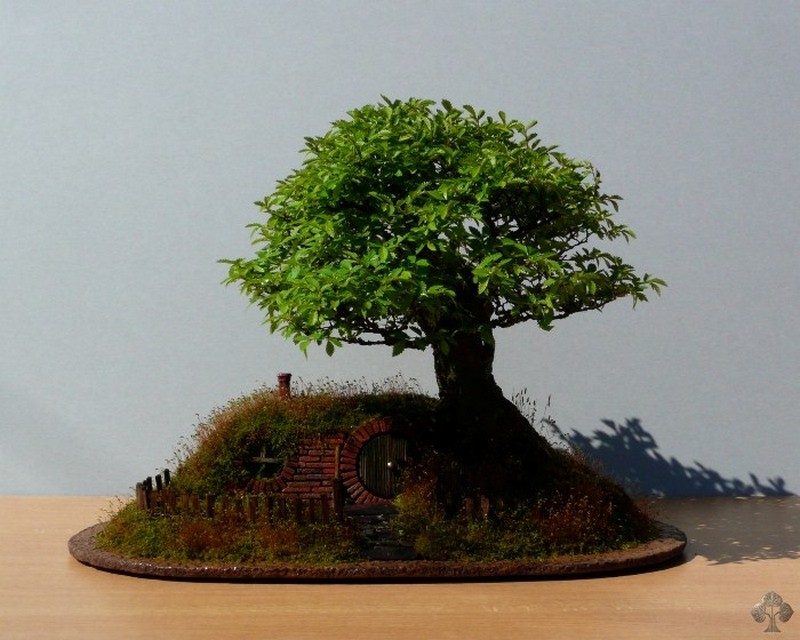
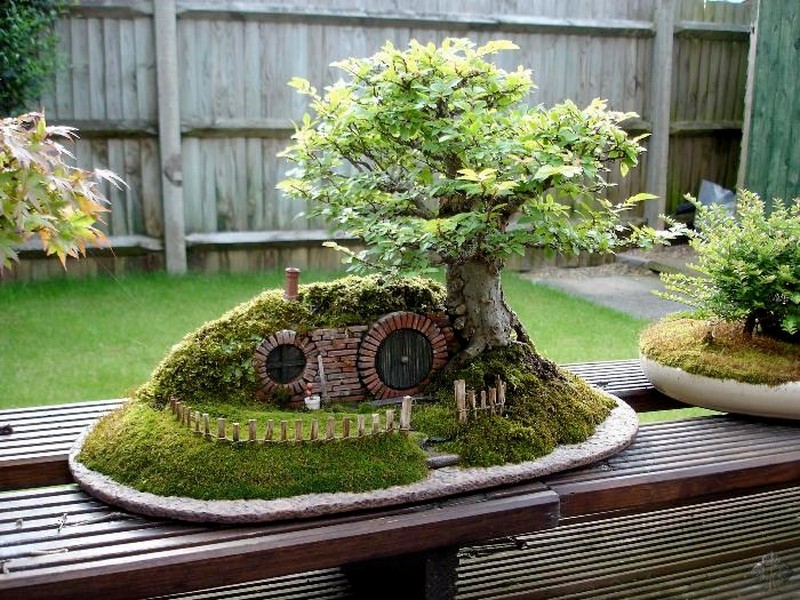
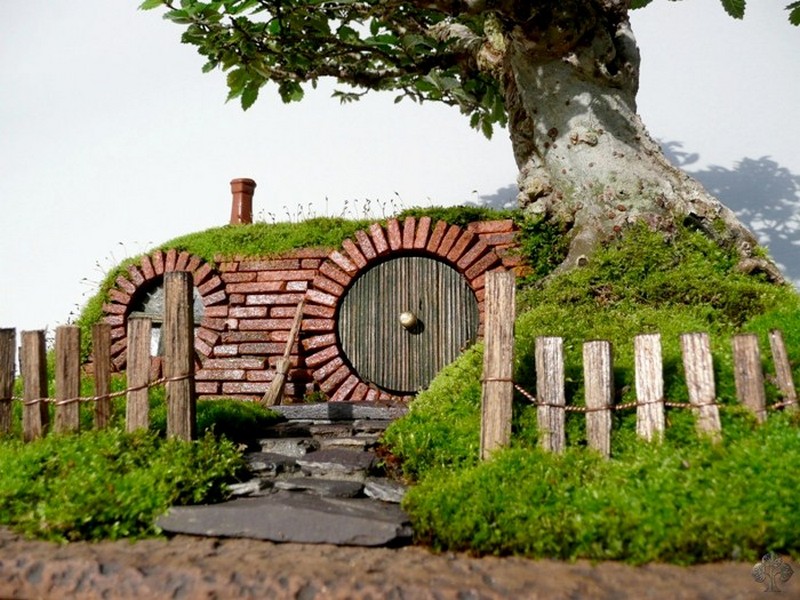
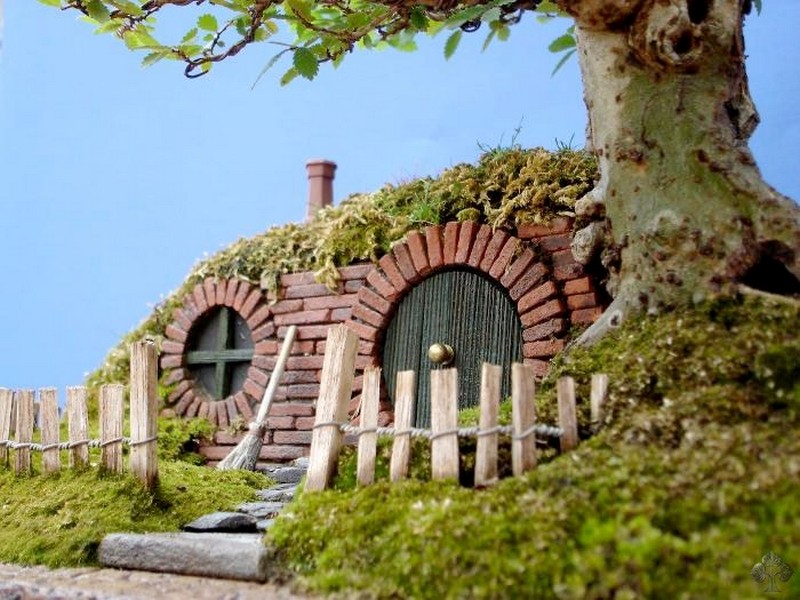
When making a fairy garden, your imagination is your limit. This miniature hobbit hole is the perfect example. It’s very easy to make, and materials are easy to find in your local craft and gardening store.
Making a Miniature Hobbit Hole
Would you like to attract fairies to your garden? Then this project is for you!
You’ll need the following materials and tools to make your DIY miniature hobbit hole.
Materials:
- Slab of Wood
- Sand Paper
- Emery Paper
- Wire Wool
- Thin Wood Planks
- Meranti wood
- Black Plastic (glossy)
- Green Cuprinol
- Dark Wood Stain
- A small golden round object for the Door Knob (button)
- Akadama Soil
- Peat/Clay Muck
- Plastic Mesh
- Roofing Tile – cut into small bricks
- Quick-dry Cement
- Aluminum Tie Wires
- Anodised Aluminium Wire
- Florist’s Oasis
- Moss
Tools:
- Small Metal Lathe
- Dremel
- Tweezer
- Cutter
Instructions
Step 1: Prepare the Base
- Start by smoothing your slab of wood using sandpaper and emery paper. This will serve as the base of your hobbit hole.
- Apply dark wood stain to the base for a rustic look. Allow it to dry completely.
Step 2: Forming the Structure
- Use the Dremel to carve out the basic shape of the hobbit hole in the Meranti wood. Think of a half-sphere or a rounded door shape.
- Sand the edges with wire wool to ensure there are no sharp or rough edges.
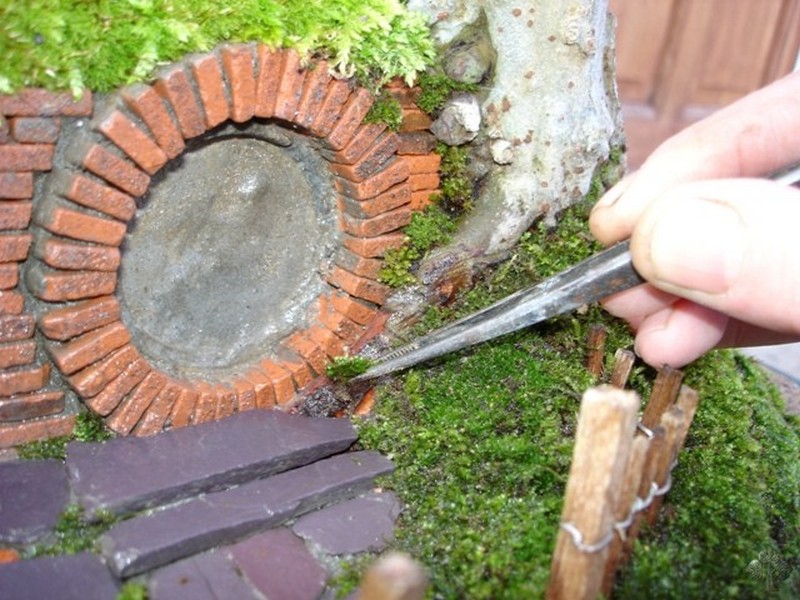
Step 3: Construct the Walls and Door
- Attach thin wood planks around the carved hobbit hole shape using aluminum tie wires, creating the walls. Use the small metal lathe if necessary to adjust the sizes of the planks.
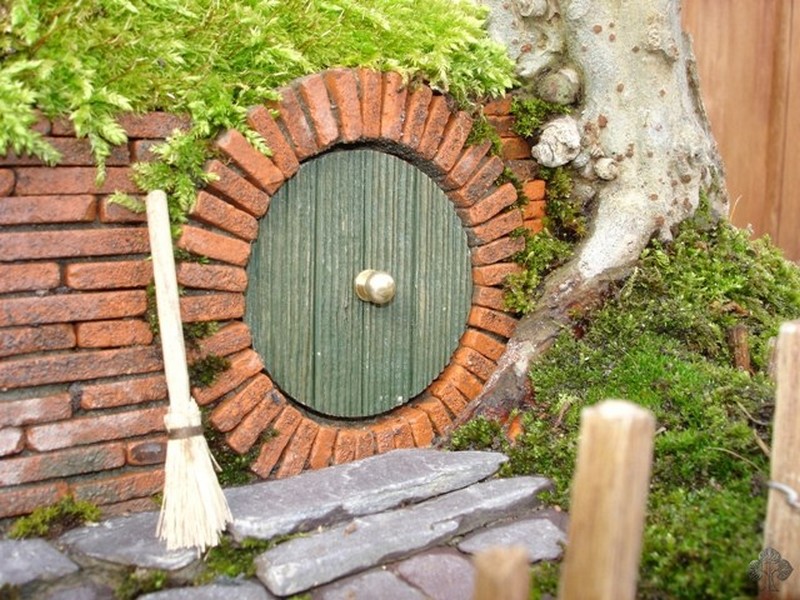
- For the door, cut a smaller piece of Meranti wood, sand it, and attach the small golden round object as a doorknob using the tweezers.
Step 4: Roof and Exterior Details
- Lay the plastic mesh over the roof area. This will help to support the small roofing tiles.
- Attach the roofing tiles carefully onto the mesh with quick-dry cement. Allow it to set.
- Apply green Cuprinol to the wood planks to mimic the look of moss and blend into a garden setting.
Step 5: Landscaping
- Spread a layer of Akadama soil around the base of your hobbit hole.
- Mix peat/clay muck with moss and press it around the structure, creating a natural, overgrown look.
- Use florist’s oasis to plant small plants or additional moss to enhance the fairy-tale appearance.
Step 6: Finishing Touches
- Drape some glossy black plastic at the back of the hobbit hole to create the illusion of depth, like a dark, inviting interior.
- Place any additional decorative elements like miniature furniture or figurines.
Step 7: Maintenance
- Regularly mist the moss and surrounding plants to keep them lush and vibrant.
- Check periodically for any repairs or touch-ups, especially after harsh weather.
Click on any image to start the lightbox display. Use your Esc key to close the lightbox. You can also view the images as a slideshow if you prefer 😎

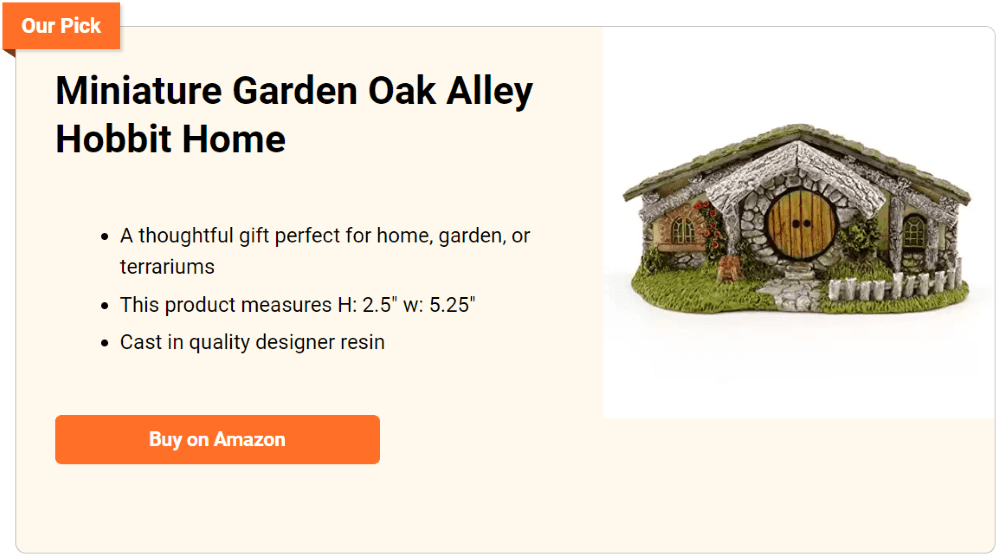
Amazon has an extensive range of fairy garden pieces starting from just $3.00.
Thanks to Bonsai Empire for more step by step instructions here.
Design Ideas and Creative Variations
Creating a miniature hobbit hole offers an exciting opportunity to unleash your creativity and bring a touch of whimsy to your garden or home. Whether you’re a fan of Tolkien’s Middle-Earth or just love enchanting garden features, designing your own miniature hobbit hole allows for endless personalization and charm.
Here are some design ideas and creative variations to inspire your project:
Classic Hobbiton Style
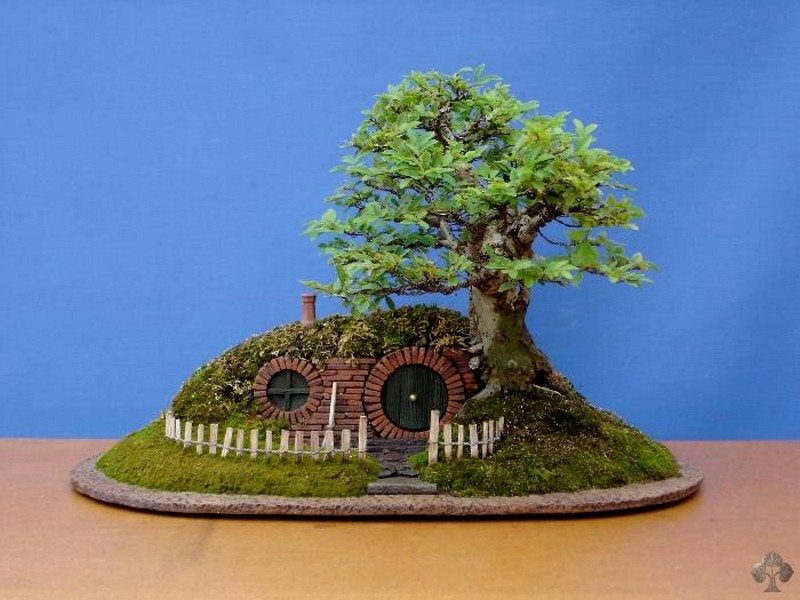
Emulate the classic look from the Shire with rounded doors and circular windows. Use lush green moss and flowering plants atop the roof to mimic the iconic hobbit holes seen in “The Lord of the Rings” and “The Hobbit.” This design emphasizes coziness and integration with the natural surroundings, perfect for those looking to create a traditional hobbit ambiance.
Modern Miniature Hobbit Hole
Incorporate modern elements into your miniature hobbit hole for a contemporary twist. Think sleek lines, geometric shapes, and minimalist color palettes. Use materials like polished stone or metallic finishes for the door and windows. This design suits those who appreciate a modern aesthetic but still want a touch of fantasy.
Woodland Retreat
Design your miniature hobbit hole to blend seamlessly into a wooded area of your garden. Use darker woods and stains, and incorporate elements like tree bark and leaves. Design the roof to hold a layer of natural debris, blending it with the forest floor. This variant is perfect for a more secretive, hidden-away hobbit hole that looks like it’s been part of the landscape for ages.
Fairy-Tale Fusion
Combine elements of fairy-tale architecture with your miniature hobbit hole. Include ornate wooden carvings around the door and windows, add whimsical touches like a thatched roof or tiny lanterns that light up at night. This design is perfect for those who love a more decorative and fantastical approach, inviting fairies and sprites into your garden.
Water Feature Integration
Integrate a water feature around or even through your miniature hobbit hole. Construct the hobbit hole beside a small pond or have a stream that flows over the roof. This design not only adds a unique element to your garden but also creates a serene ambiance with the soothing sound of running water.
Edible Garden Hobbit Hole
Turn the roof or surrounding area of your miniature hobbit hole into an edible garden. Plant herbs, small vegetables, and edible flowers that you can harvest. This practical variation not only enhances the beauty of your hobbit hole but also contributes to your kitchen.
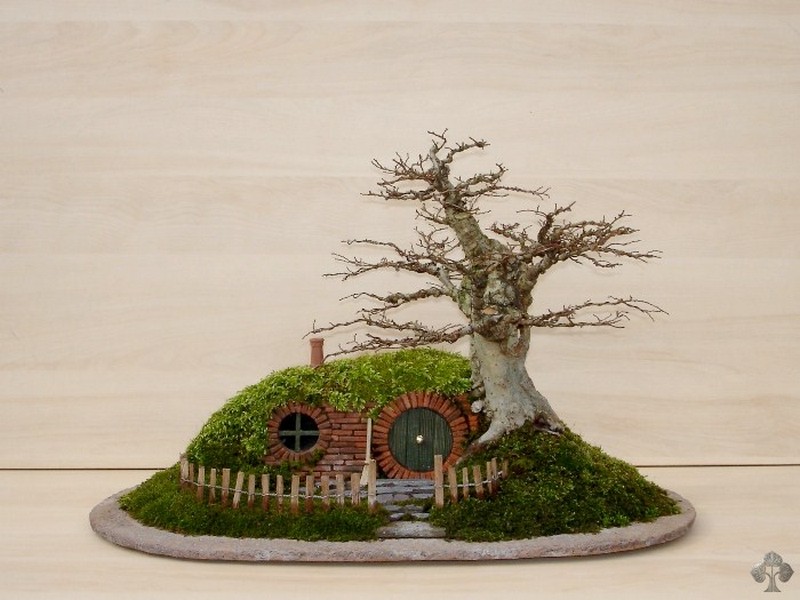
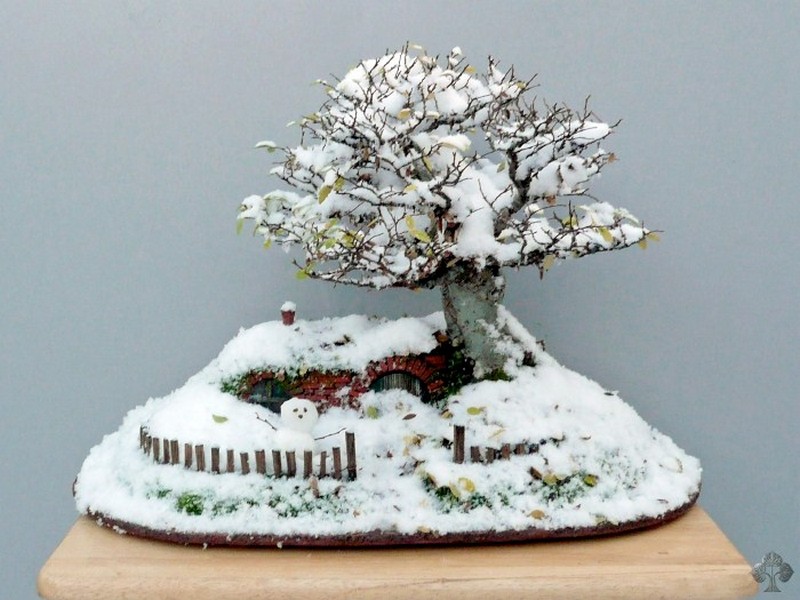
Seasonal Themes
Adapt your miniature hobbit hole to reflect seasonal changes. Decorate with snow-like cotton in winter, vibrant flowers in spring, warm-toned leaves in autumn, and bright sunflowers in summer. This approach keeps your hobbit hole engaging and dynamically integrated with the passing seasons.
By exploring these design ideas and creative variations, you can customize your miniature hobbit hole to perfectly fit your personal style and garden environment. Each design offers a unique way to celebrate the charm and magic of hobbit architecture in your own space.
Landscaping and Surrounding Environment
Landscaping around your miniature hobbit hole not only enhances its visual appeal but also integrates it into your garden seamlessly, creating a whimsical and inviting environment. Thoughtful landscaping can transform your miniature hobbit hole into a central feature of your garden, providing a magical escape.
Here are several ideas to help you design the surrounding environment of your miniature hobbit hole.
Naturalistic Embedding
To truly make your miniature hobbit hole part of the landscape, mimic the natural surroundings. Use local stones, native plants, and natural mulches to blend the hobbit hole with your garden’s existing ecosystem. Plant low-growing ground covers like creeping thyme or moss around the hobbit hole to give it an age-old look, as if it has been there for centuries.
Enchanted Garden Path
Create a small, winding path leading to the miniature hobbit hole using pebbles, wood chips, or stepping stones. This not only adds charm but also invites visitors to explore the hobbit hole up close. Along the path, plant colorful flowers and small shrubs to guide the eye and enhance the fairy-tale feel.
Water Features
Incorporating a water feature near your miniature hobbit hole can significantly enhance its mystical quality. Consider a small pond, a flowing creek, or even a tiny waterfall made with real or faux rocks. The sound of water adds a serene atmosphere, making the hobbit hole’s setting more tranquil and magical.
Illumination Effects
Proper lighting can make your miniature hobbit hole come alive at dusk and into the evening. Use low-voltage landscape lighting to highlight the hobbit hole and the path leading to it. Solar-powered lights designed like lanterns can also add a warm glow, enhancing the magical evening ambiance around your hobbit hole.
By carefully designing the landscaping and surrounding environment, you can create a stunning and cohesive setting that complements your miniature hobbit hole, making it a standout feature in your garden. Each element should work harmoniously to evoke a sense of wonder and charm, inviting everyone to step into a tiny, magical world.
Conclusion
Creating a miniature hobbit hole is a delightful project that brings a touch of magic to any garden or home space. It invites both young and old into a world of imagination and whimsy, enriching your outdoor environment. With the right materials, tools, and a bit of creativity, you can craft a beautiful, enchanting retreat that everyone can cherish.
If you liked this project, you may also like these Hobbit Playhouses and Wheelbarrow Fairy Garden.