Last Updated on August 1, 2024 by teamobn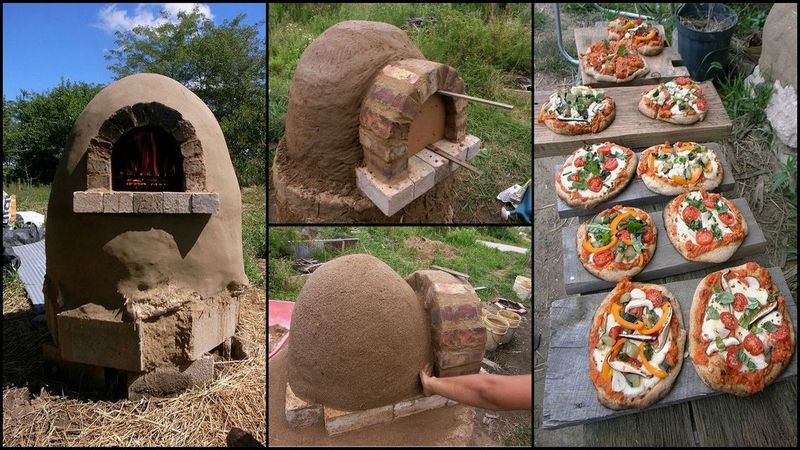
If you love freshly baked bread and pizza, and you love baking them yourself, then this DIY cob pizza oven is for you! This easy-to-build oven will let you bake delicious bread and pizzas in your own backyard.
There are many reasons why pizza is so popular. Humans are attracted to foods that are sweet, rich, fatty, and complex. Pizza is all of those things, and more. It’s also easy to eat on the go, which makes it a great choice for busy people.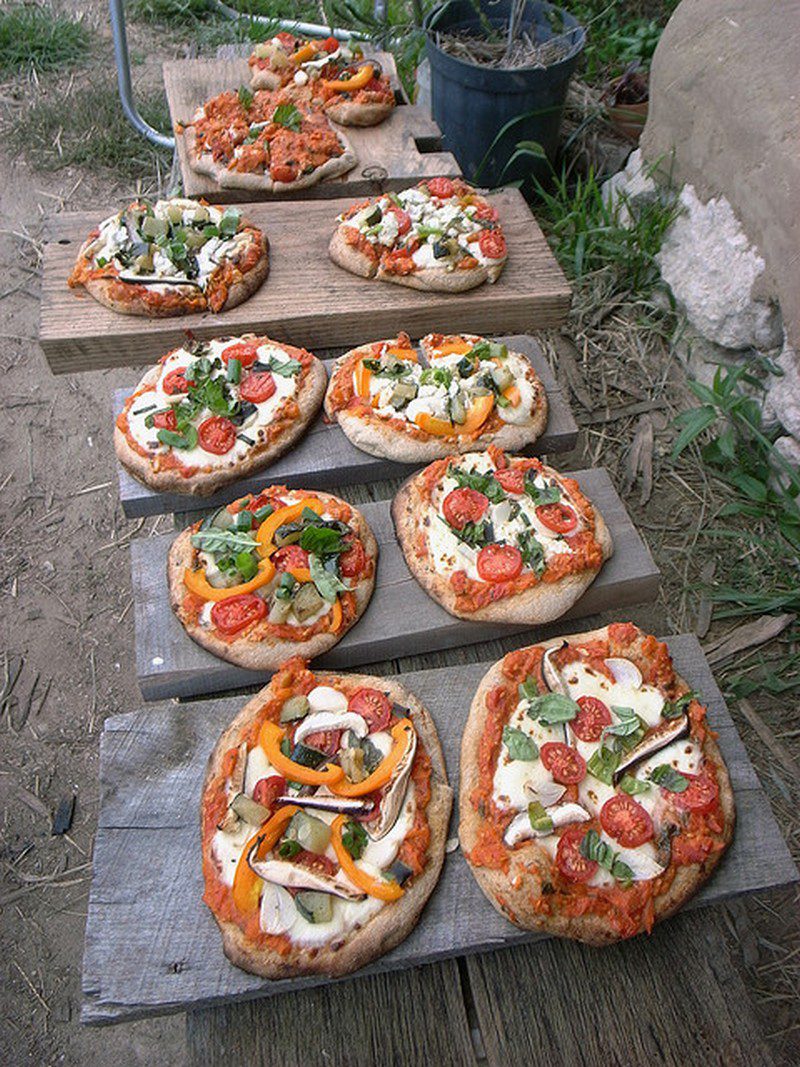
Pizza is a dish that is often overloaded with ingredients. Cheese is fatty, meat toppings tend to be rich, and the sauce is often sweetened with sugar.
Pizza toppings are also packed with a compound called glutamate, which can be found in tomatoes, cheese, pepperoni, and sausage. When glutamate hits our tongues, our brains get excited we crave more of it. This compound actually causes our mouths to water in anticipation of the next bite.
This relatively cheap cob pizza oven will definitely improve your backyard. It’s a great way to entertain guests during summer, and even during winter.
A cob pizza oven is a home-built oven that uses mud bricks as a base. Cob, or cobb, is a mixture of clay, sand, and straw. This mixture is used to create craft projects, such as vases, decorative boxes, or planters. The cob is mixed together, wetted, and then formed into the desired shape.
Once it dries, the cob is very hard and durable and can last for years. 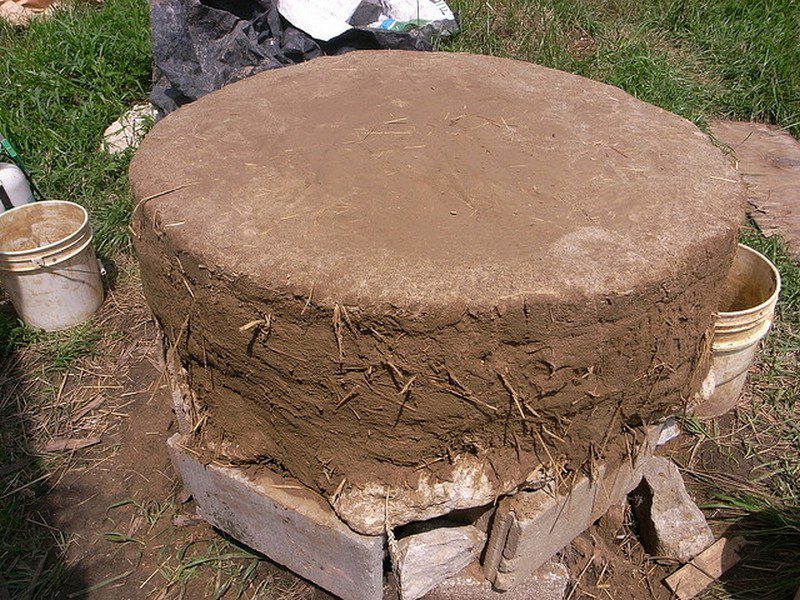
What is a Cob?
Cob is a building method that has been around for thousands of years. It is made from clay, sand, and straw by layering these materials and forming them into bricks. The bricks are then laid in a line and plastered in a mixture of water, clay, straw, and sand.
Cob can also be combined into bricks and blocks, and baked into cooking ovens called cob pizza ovens. These ovens are easy to make and use and, because of their design, they can be converted into a hearth to cook on as well. 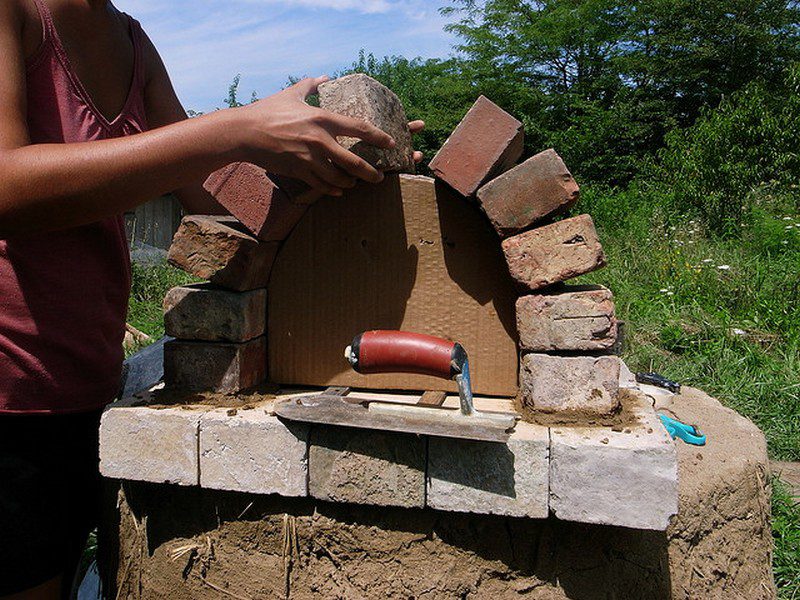
A cob pizza oven can get as hot as 800 degrees Fahrenheit. This makes them perfect for baking bread, pizzas, and other items that require a high cooking temperature.
If you’re looking for a unique and impressive way to cook your food, then a Cob pizza oven is a great choice. Not only will it look amazing as a centrepiece in your kitchen or backyard, but it will also allow you to bake delicious homemade bread and pizza, as well as slow-cooking meats.
There’s nothing quite like cooking with a Cob pizza oven, so if you’re looking for a truly special cooking experience, then this is the oven for you.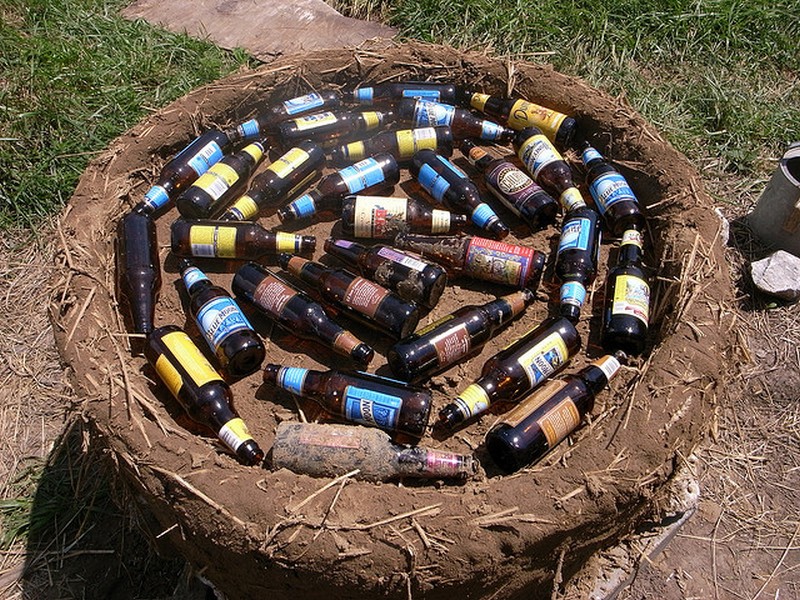
This project is so easy that even new DIYers can accomplish it. But don’t just take our word for it, ask your friends and relatives to help you out. They’ll be more than happy to lend a hand and make the workload even easier.
After all, they’ll be around eating the bread and pizzas of your labour 🙂
Want some freshly baked wood-fired pizza? Build this cob oven!
Building a Cob PIzza Oven
Materials
- Clay Mortar
- Sand
- Sawdust
- Recycled Beer Bottles
- Old Cinder Blocks
- Reclaimed Red Bricks
- Newspaper
- Cardboard
Tools
- Trowel
Instructions
Step 1: Foundation Setup
- Location: Choose a level spot for your cob oven that is safe and convenient for cooking.
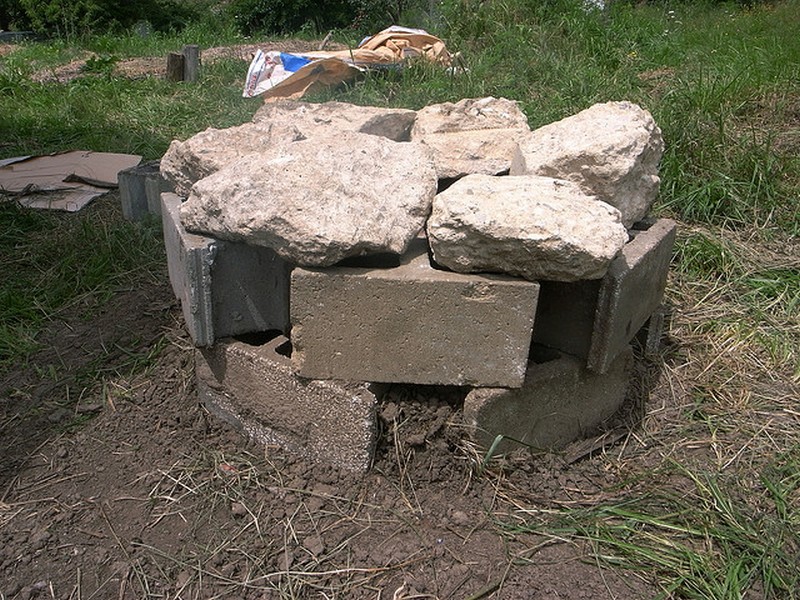
- Base: Lay down old cinder blocks to create a stable, level base. Ensure the blocks are closely aligned and secure.
Step 2: Building the Oven Floor
- Layering: On top of the cinder block base, arrange the reclaimed red bricks as the oven floor. Ensure they are flat and fit snugly together to provide a solid, even surface.
Step 3: Creating the Oven Dome
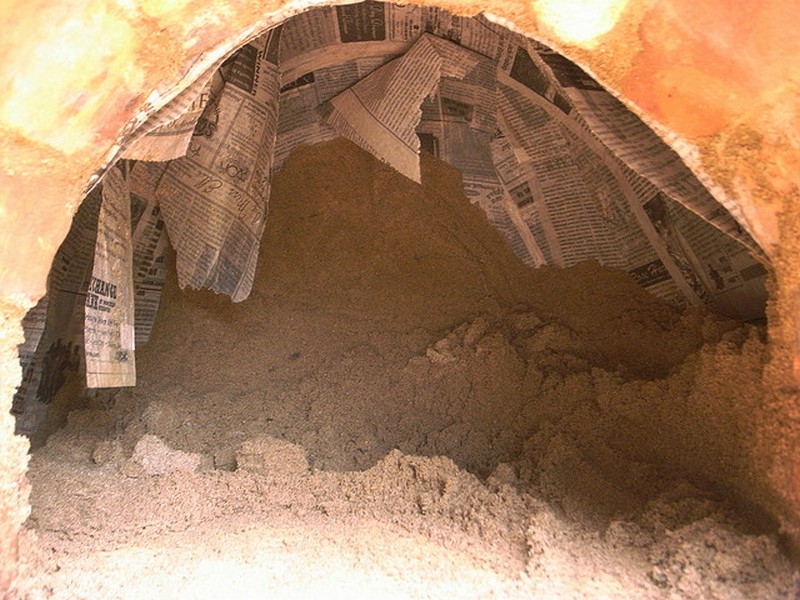
- Forming the Sand Dome: Mix sand with water until you have a damp, moldable consistency. Build a dome-shaped mound on the brick floor. This will act as a form for your cob oven’s dome.
- Covering with Newspaper: Layer wet newspaper over the sand dome. This creates a barrier that will later help you remove the sand easily.
Step 4: Constructing the Cob Mixture
- Mixing Cob: In a large container, mix clay mortar, sand, and sawdust. Aim for a consistency that holds together well but is not too wet. The sawdust helps in heat insulation.
Step 5: Applying the Cob
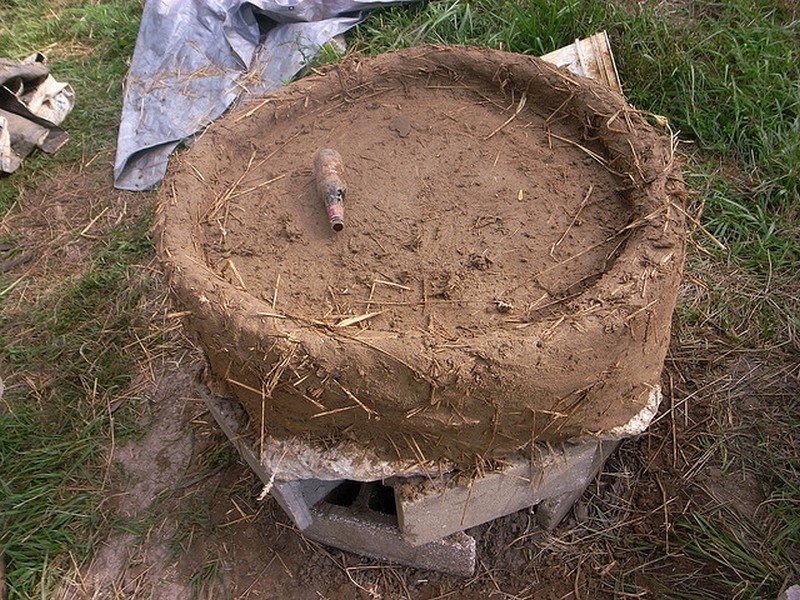
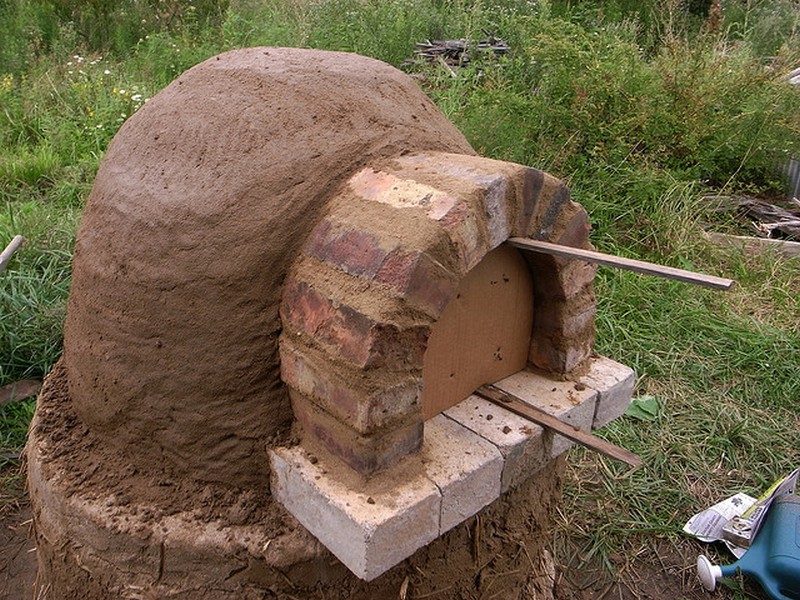
- Building the Dome: Using the trowel, apply the cob mixture over the newspaper-covered sand dome. Start from the base and work your way up, ensuring an even thickness of about 4-6 inches.
- Smoothing: Use the trowel to smooth the cob as much as possible for better heat retention and aesthetics.
Step 6: Creating the Oven Opening
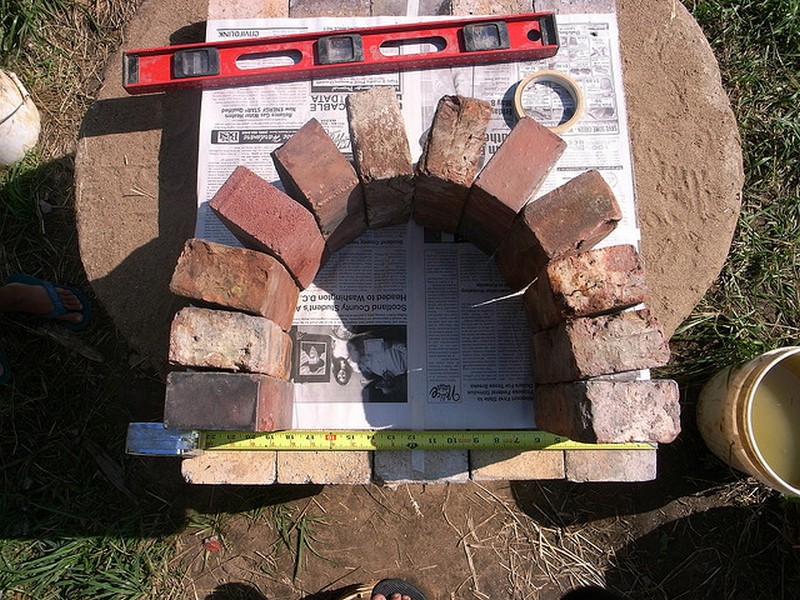
- Cutting the Door: Before the cob hardens, outline and cut the oven door. It should be large enough to fit your largest dish but small enough to retain heat. Save the cut-out cob piece to create the door.
Step 7: Inserting Recycled Beer Bottles (Optional)
- Insulation Layer: For additional insulation, embed recycled beer bottles into the cob walls, necks facing inward. Ensure they do not compromise the structure’s integrity.
Step 8: Drying and Curing
- Initial Drying: Allow the cob dome to dry for at least a week, depending on the weather. It needs to be dry to the touch and free from moisture.
- Removing Sand: Once the dome is dry, carefully remove the sand from inside the oven by digging it out and pulling out the newspaper.
Step 9: Finishing Touches
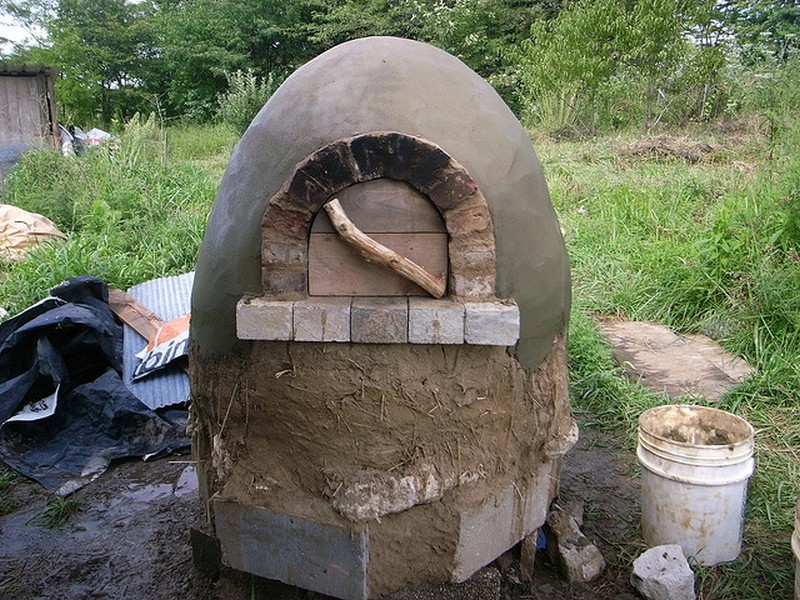
- Sealing Cracks: As the oven dries, small cracks may appear. These can be sealed with more cob mixture.
- Aesthetic Touches: You can plaster the outside with a mixture of clay and sand for a smoother finish or decorate as desired.
Step 10: First Firing
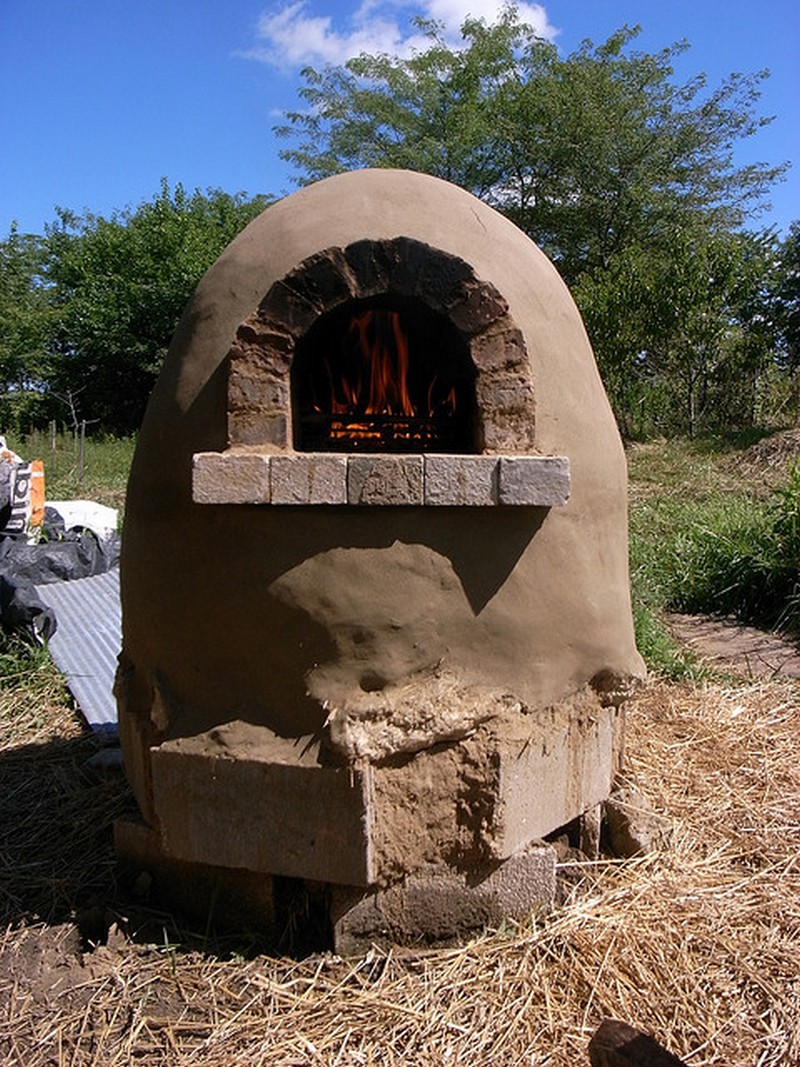
- Curing the Oven: Slowly heat the oven with a small fire to temper the cob. Gradually increase the heat over several firings. This process will help to harden the structure and prepare it for regular use.
Step 11: Enjoy Your Cob Pizza Oven
- Cooking: Once fully cured, your cob pizza oven is ready to use. Enjoy baking pizzas, bread, and other dishes with the unique flavor that only wood-fired cooking can provide.
Click on any image to start the lightbox display. Use your Esc key to close the lightbox. You can also view the images as a slideshow if you prefer 😎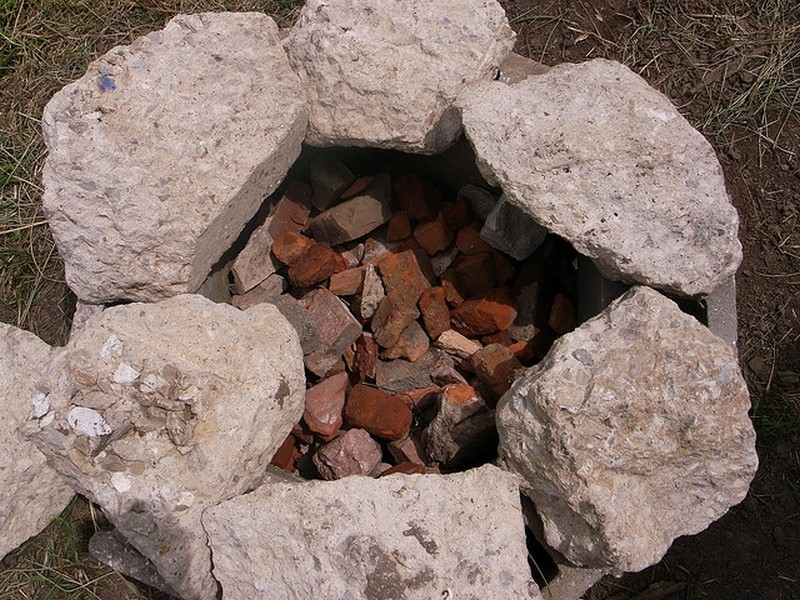




You can get more details about this project here…
Maintenance and Care for Cob Ovens
Maintaining your cob pizza oven is crucial to ensure its longevity and optimal performance. Cob ovens, made from natural materials, require some specific care techniques to continue functioning effectively and safely. Regular maintenance not only preserves the oven’s structural integrity but also enhances the flavor and quality of the food cooked in it.
Here’s a comprehensive guide on how to care for your cob pizza oven.
Regular Inspection
Regularly inspecting your cob pizza oven is essential for early detection of potential issues. Check for any cracks or structural weaknesses, especially after heavy use or severe weather conditions. Small cracks are normal and can be easily fixed, but larger cracks may indicate a more serious problem that needs immediate attention.
Cleaning After Use
Always clean the cob pizza oven after each use. Allow the oven to cool down completely before sweeping out the ashes and debris from the inside. Use a hand broom or a small brush for this task. Removing ash is important as it can draw moisture, which might lead to damage over time.
Dealing with Cracks
Cracks can form in the cob over time due to thermal expansion and contraction. Here’s how to manage them:
- Small Cracks: Fill small cracks with a mixture of the same cob material used to build the oven. This helps maintain consistency and ensures the filled areas have similar thermal properties.
- Large Cracks: Larger cracks might require a more thorough repair. Remove loose material around the crack, dampen the area slightly, and fill it with fresh cob. It may be necessary to create a patch or use a mesh to reinforce the area.
Weatherproofing
Protecting your cob pizza oven from extreme weather is crucial, especially if located in an area with harsh climate conditions.
- Covering: Use a waterproof, breathable cover to protect the oven when not in use. This keeps rain and snow out while preventing condensation inside.
- Sealants: Apply a natural lime wash or other suitable natural sealants to the exterior of the oven. This helps in waterproofing while allowing the cob to “breathe.”
Seasonal Maintenance
Adjust your maintenance routine based on the seasons:
- Winter: If you’re in a region that experiences freezing temperatures, it’s vital to keep the cob pizza oven dry before winter. Moisture inside the cob can freeze and expand, leading to significant damage.
- Summer: In hot, dry climates, keep the oven covered to protect it from direct sunlight, which can cause the cob to dry out and crack.
Regular Firing
Regular use of the cob pizza oven is not just for cooking; it’s also part of its maintenance. Regular firing helps to keep the cob dry and hard. However, it’s important to avoid overheating the oven, as this can cause unnecessary stress and lead to cracking.
Longevity Tips
To extend the life of your cob pizza oven:
- Avoid Rapid Temperature Changes: Do not heat the oven too quickly. Gradual heating reduces stress on the cob material.
- Use Proper Firewood: Hardwoods, such as oak or maple, burn hotter and cleaner than softwoods. They produce less smoke and soot, keeping the oven cleaner and functioning better.
Professional Check-ups
Consider having a professional inspect your cob pizza oven annually. They can offer expert advice and help with any repairs that might be too complex to handle yourself.
By following these maintenance and care tips, you can ensure that your cob pizza oven remains a functional and beloved part of your outdoor cooking arsenal for many years. Regular care not only preserves the oven’s structure but also the quality and taste of the food it produces, making every pizza night a special occasion.
If you liked this project, you will also like viewing these outdoor kitchen ideas…


