Last Updated on July 1, 2025 by teamobn
Pens are an essential part of any office. They are used for writing, drawing and for other tasks. There are different types of pens available in the market, and each has its own advantages and disadvantages.
Ballpoint pens are the most popular type of pen. They are affordable and easy to use. However, they can sometimes leak and their ink can smudge.
Fountain pens are a bit more expensive than ballpoint pens, but they offer a smoother writing experience. They are also less likely to leak and their ink doesn’t smudge as easily. Gel pens are another popular option. They provide a smooth writing experience and their ink dries quickly, making them ideal for left-handed writers.
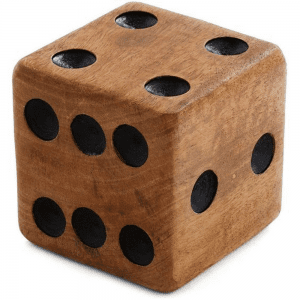
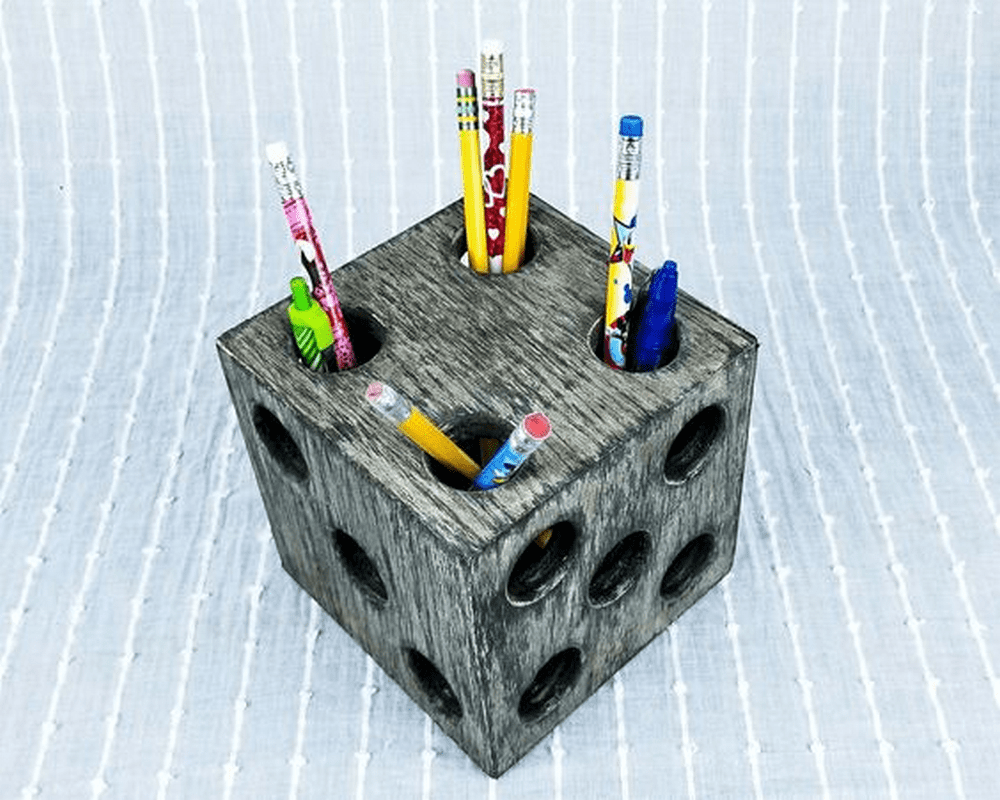
My husband recently attended a one-day woodworking workshop where he learned how to make a dice pen holder. He was very pleased with the end result and it now proudly sits on our desk. He said they were asked to make one as part of the activity. I was pretty much impressed considering it was his first time making one.
You can make several pen holders and give them out to your kids’ teachers!
A few weeks later, my daughter was looking for something special to give her teachers for Teacher Appreciation Day. She saw the dice pen holder her dad had made and asked him if he could make several. Since he had some time, her dad happily agreed and made a batch of dice pen holders for her to give to her teachers.
When everything was done, we personalized it with each teacher’s name. I must say those were great gifts. They were a big hit, and her teachers loved them!
Assuming you have the required woodworking skills, this project is relatively easy. The most challenging part is cutting the wood into square pieces and drilling holes into them. Once that’s done, the work gets easier.
Contents
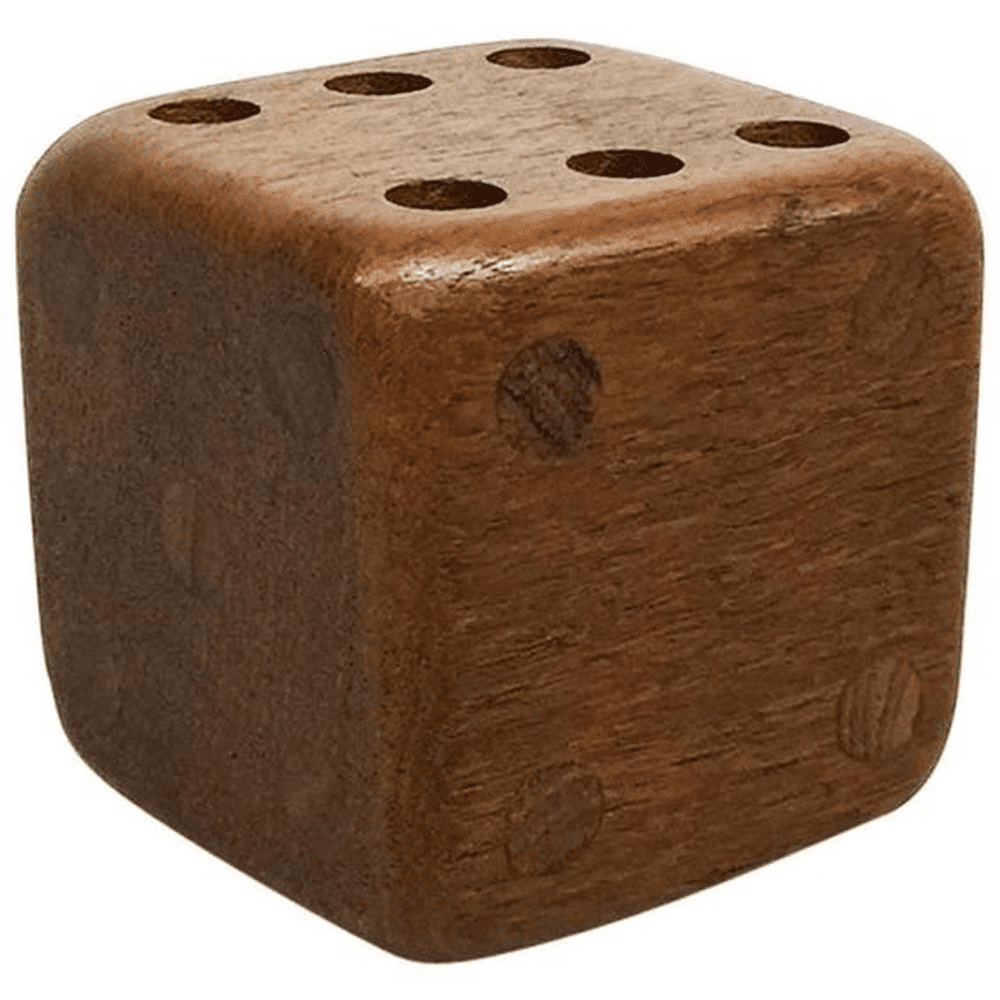
Crafting a Dice Pen Holder
This is a really worthwhile project. It’s nice to have something ready when you’re suddenly in need of gifts. Plus, it’s a great way to show your friends and family how much you care about them.
Materials:
- Wooden board cut to size
- White Paint
- Boiled Linseed Oil
- Titebond Wood Glue
- Black Craft Paint
- Blue Painter’s Tape
Tools:
- Dewalt Planer
- Micro jig GRR-Ripper
- Table Saw
- Kreg Trak and Stop (table saw sled)
- X-Acto Knife
- Ice Pick
- Jet Drill Press
- Forstner Bit Set
- Digital Angle Gauge
- Acid Brushes
- Foam Brushes
- Spindle Sander
Steps:
- Plane the wooden board until both faces sit flat and the thickness is even. Use the Dewalt planer for quick passes and check progress often.
- Adjust the Micro-jig GRR-Ripper and set the table-saw fence. Rip the board into strips matching your cube dimension plus a small allowance for sanding.
- Move to the Kreg Trak sled. Cross-cut six perfect squares. The stop block guarantees identical pieces.
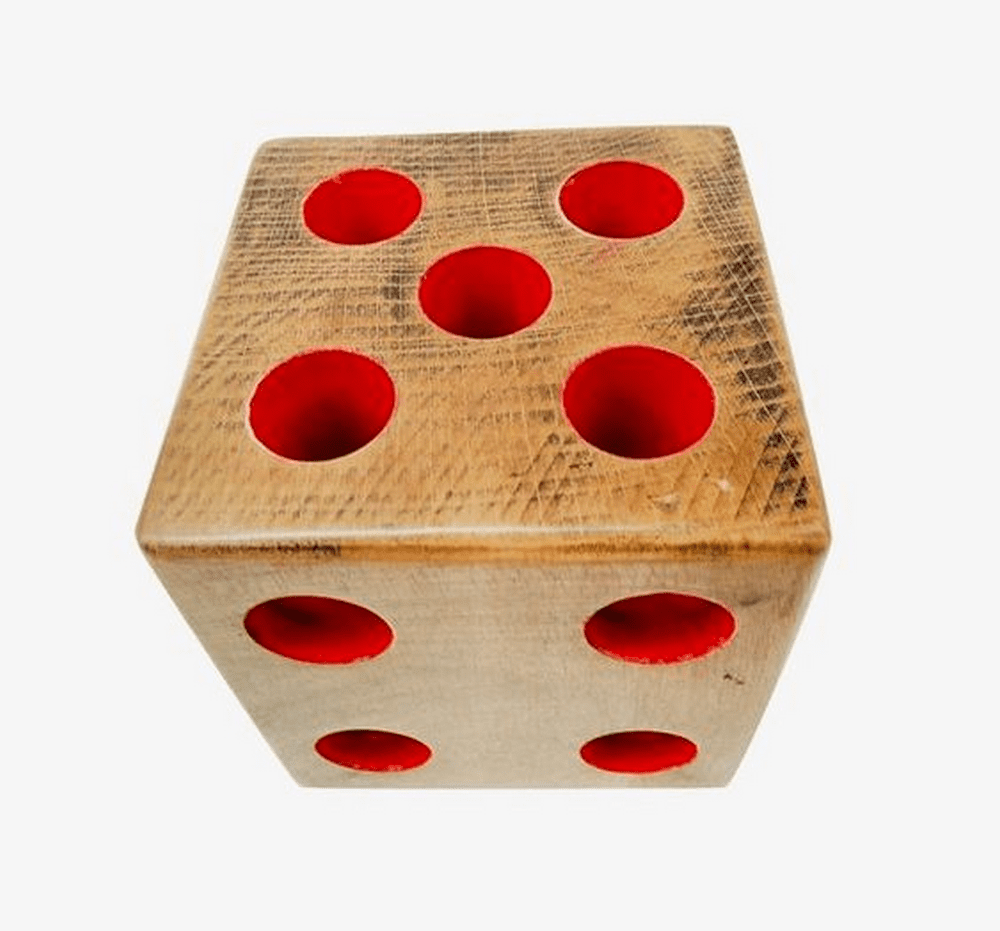
- Mark the pip layout on each face with blue painter’s tape and an X-Acto knife. Cut neat windows so the wood shows only where the holes will go.
- Stick the squares to a sacrificial backer. Level the drill-press table with the digital angle gauge.
- Center an ice pick on every target. Drill clean holes with the Forstner bit, pulling the bit out often to clear chips.
- Sand all faces on the spindle sander. Knock down sharp edges so the cube feels smooth.
- Dry-fit the six panels. Check grain direction and swap pieces until every corner lines up.
- Spread Titebond glue on the edges. Tape the faces together like a box, then tighten the tape to clamp. Let the cube cure overnight.
- Peel the tape and sand the seams. The block should now look like one solid piece.
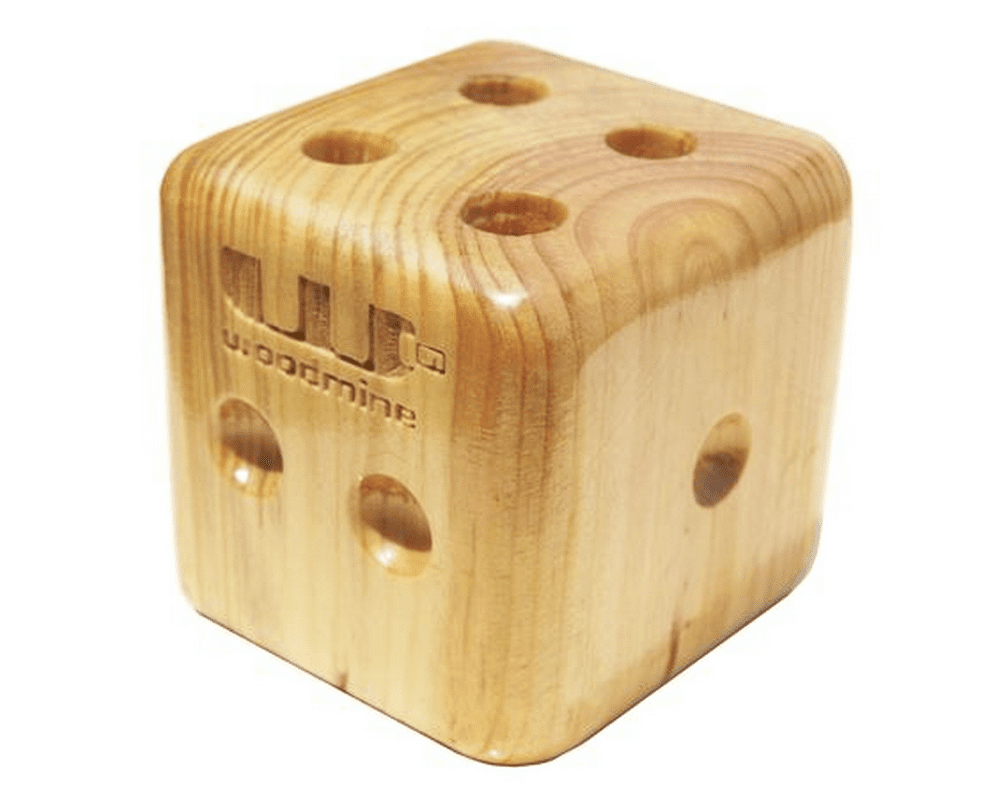
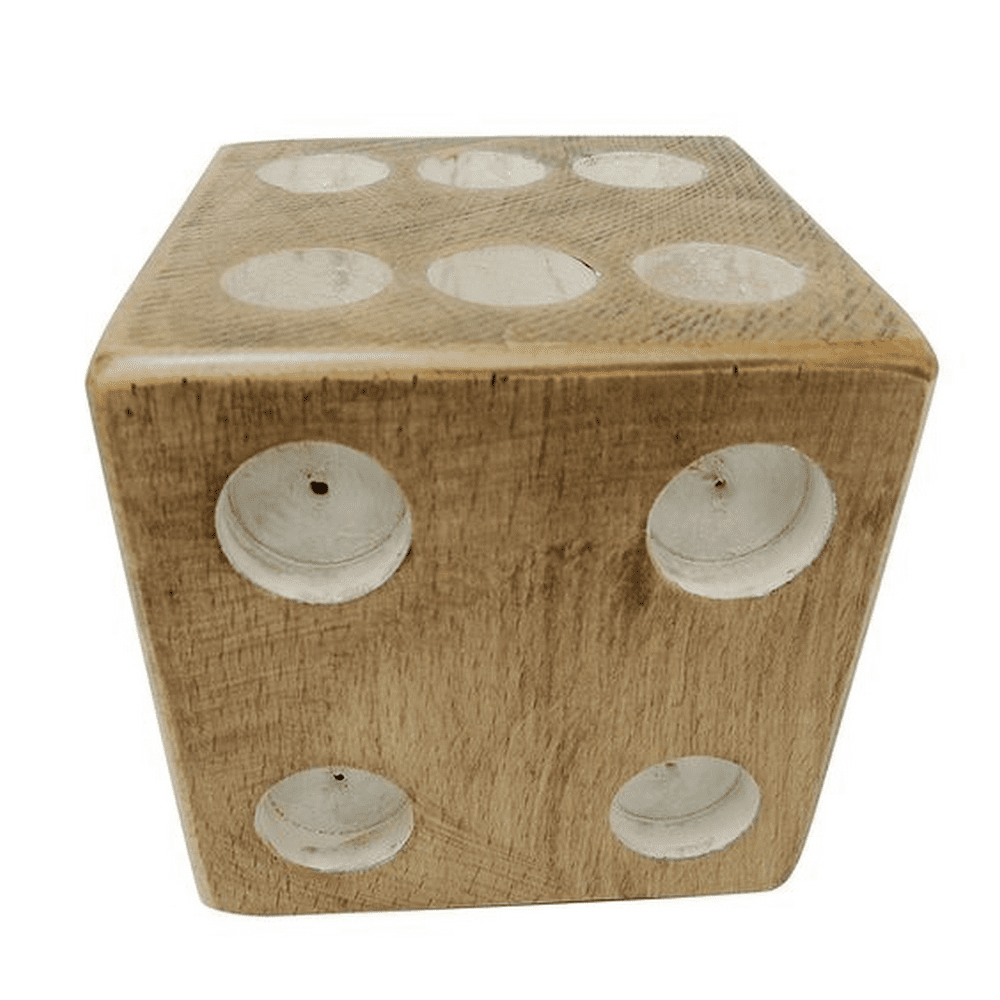
- Brush two even coats of white paint over the entire cube with a foam brush. Allow each coat to dry fully.
- Dip an acid brush in black craft paint. Fill every drilled recess to create crisp, dark pips. Wipe stray paint before it dries.
- Once the paint hardens, flood the cube with boiled linseed oil. The oil seals the wood and deepens the finish after the paint has cured.
- Let the pen holder sit for a full day. The oil soaks in and the surface dries to a gentle sheen.
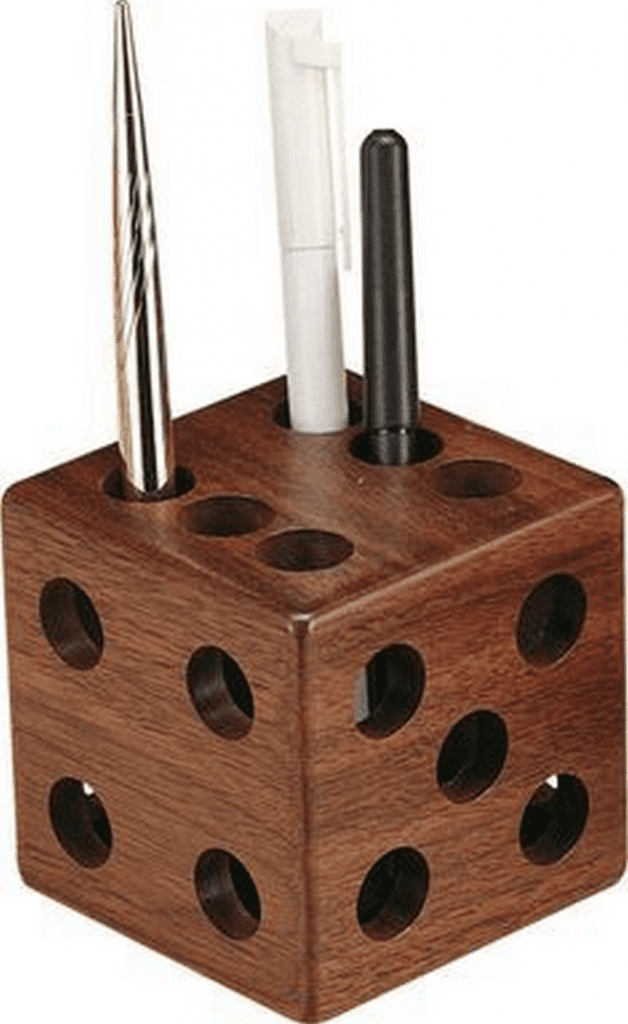
- Drop pens, styluses, or craft knives into the holes. Your handcrafted dice pen holder is ready for daily use or gift giving.
Choose the Perfect Timber for a Dice Pen Holder That Lasts
Your timber pick decides how strong and stylish your dice pen holder becomes. Compare hardwood and softwood traits so you can cut, drill, and finish with confidence.
Grain Strength and Daily Wear
Hardwoods like maple or cherry resist dents from dropped staplers and stray rulers. The tight grain keeps edges crisp after repeated sanding. Softwoods such as pine feel lighter and cut faster, yet the open pores crush under pressure.
If your desk hosts heavy handed writers, hardwoods guard against early damage. Softwood works if the piece sits on a shelf and holds only a few pencils. Match grain to expected stress so a dice pen holder stays sharp for years.
Weight Versus Stability
Dense hardwood cubes stay put when you yank out a pen in a rush. The mass dampens vibration from typing and keeps the block upright. Pine or spruce weigh less, so the holder may slide unless you add felt pads.
On a glass desk that shows scratches, lighter wood reduces scuff risk. Test both by setting blank cubes on your surface. Pick the one that feels solid yet friendly to your workspace.
Finishing Absorption and Color Pop
Hardwoods drink boiled linseed oil slowly. The sheen deepens over several hours and highlights subtle figure. Softwoods soak up finish fast and can blotch. Use a pre-seal coat of thinned glue to even absorption.
White paint reads brighter on hardwood because sap may bleed through softwood knots. If you want two-tone pips on a natural field, hardwood yields cleaner contrast.
Cost and Sustainability Factors
Local pine often costs half the price of imported walnut. That lets you practice on budget stock before tackling a premium dice pen holder gift. Look for Forest Stewardship Council stamps on either option. Reclaimed off-cuts from cabinet shops shrink your carbon footprint even more.
Whichever board you select, keep waste small and repurpose offcuts into sanding blocks or jig spacers. Responsible choices save money and respect the planet while still giving you a resilient dice pen holder.
Align Every Pip Perfectly on Your Dice Pen Holder
A neat pip pattern turns a simple cube into a polished desk star. Use these layout tricks to drill holes that look factory crisp on every face.
Print Templates for Consistency
Download a vector file sized to your cube. Print on card stock and cut out the square. Spray a light mist of adhesive on the back so the sheet hugs the wood without slipping. Center the guide by measuring equal borders on all sides.
Press tight with a small roller. You now have target circles that match casino standards, saving hours of guesswork when crafting multiple dice pen holders.
Marking and Tape Tricks
Layer blue painter’s tape across each face before sticking the template. The tape prevents splinter tear-out as the drill exits. Outline each circle with a sharp X-Acto knife, lift the cut ring, and reveal clean wood rings.
The exposed spots guide your drill bit lip while the surrounding tape shields the finish. This combo also lets you paint pips later without bleed. A little preparation produces flawless dots that elevate dice pen holders from hobby grade to gift shop quality.
Drill Press Setup for Repeat Accuracy
Set your Jet drill press table dead level using a digital angle gauge. Clamp a right-angle fence so each cube edge nests against the same surfaces. Choose a Forstner bit that matches pen barrel diameter with a millimeter to spare.
Bring the spinning bit down slowly until the rim touches tape. Pull back, set depth stop, then drill every pip in one plunge. Clearing chips between strokes keeps holes true and walls smooth, a must for professional dice pen holders.
Quick Clean-Up for Sharp Edges
Remove tape the moment drilling ends. Sand each rim lightly with 220-grit wrapped around a dowel. Touch up any fuzzy fibers with a sharp chisel paring cut. Wipe dust away with a tack cloth.
The holes now look burned in by a laser yet feel silky to the touch. Small details like this convince recipients that their dice pen holder came from an artisan shop, even if it was your weekend project.
Dice Pen Holder Gallery
Click on any image to start the lightbox display. Use your Esc key to close the lightbox.


Turn Off-Cut Timber Into Mini Dice Pen Holder Gifts
Leftover scraps stack up fast in any shop. Turn those small blocks into charming mini dice pen holders and hand them out as desk treats at school or work.
Sorting Off-Cuts for Matching Cubes
Dig through the off-cut bin and group pieces by thickness. Plane the thinnest board until all match. Crosscut to square using a sled so every side mirrors the next.
Mixed woods can look eclectic when paired wisely. A walnut face next to maple stripes creates a fun patchwork effect that stands out among standard dice pen holders.
Batch Cutting for Speed
Set your table saw fence once and rip multiple strips without moving it. Flip the GRR-Ripper between cuts to keep fingers safe and pieces steady. Shift to the Kreg Trak stop and slice identical squares in rapid succession.
Lay them out like a puzzle and swap parts until grains flow around corners. Gluing several cubes together at once maximizes clamp time and reduces waiting. Efficient batching lets you finish a dozen mini dice pen holders before lunch.
Finishing Fast Without Sacrificing Quality
Dip foam brushes in white paint and line up cubes on painter’s pyramids. Swipe one coat on every side, rotate, and move down the line. By the time you reach the last block, the first coat is dry.
Apply black craft paint into pips with an acid brush while the white shell cures. Flood each cube with boiled linseed oil in one shared tray. Wipe excess after ten minutes. Assembly-line rhythm keeps quality high and cuts total project hours, critical when gifting many dice pen holders.
Packaging Ideas for Classroom or Office Gifts
Slip each mini holder into a kraft window box. Add a note card that explains the hand-built story and lists wood species used. Tie twine around the box and tuck in two fresh gel pens. Teachers and coworkers appreciate a present that marries function with personal effort.
Keep a stash ready for birthdays or thank-you moments. The modest size still screams custom craft, and seeing multiple dice pen holders together sparks conversation about your woodworking skills.
Conclusion
Building a dice pen holder proves that precise work and creative flair can coexist. Each finished cube organizes your pens and brightens the desk. The project sharpens measuring, drilling, and finishing skills without pricey materials. Friends will appreciate a handcrafted gift that feels personal and lasts. Keep experimenting with wood species and colors to refine your next batch.
There are more creative gift ideas for your friend or co-worker. Check out our The Butt article next!