Last Updated on November 7, 2025 by teamobn
Contents
At a Glance:
Build a sturdy DIY tripod camping stool in 2-3 hours using three 24″ birch dowels, brass hardware, and leather or canvas for the seat. This lightweight, portable stool requires basic woodworking skills and costs approximately $30-40 in materials. The tripod design provides excellent stability on uneven terrain, making it perfect for camping, hiking, and outdoor activities.
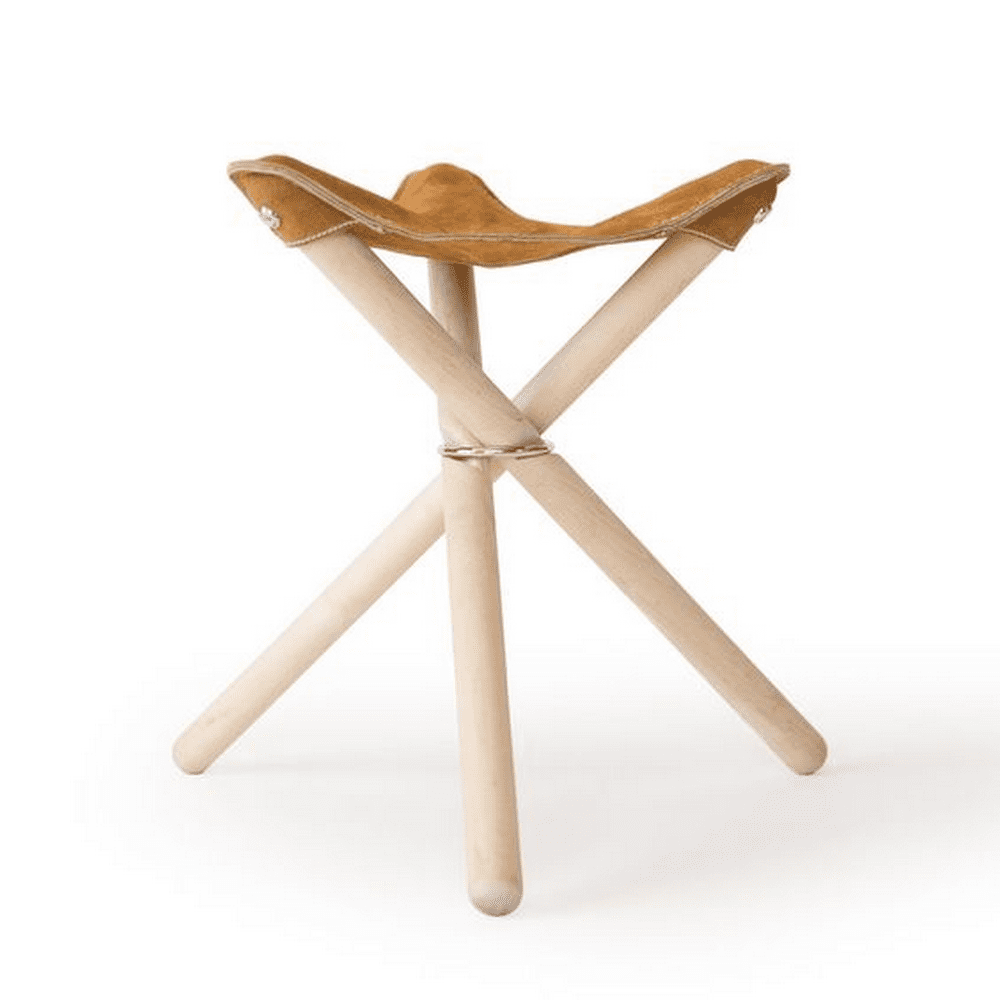
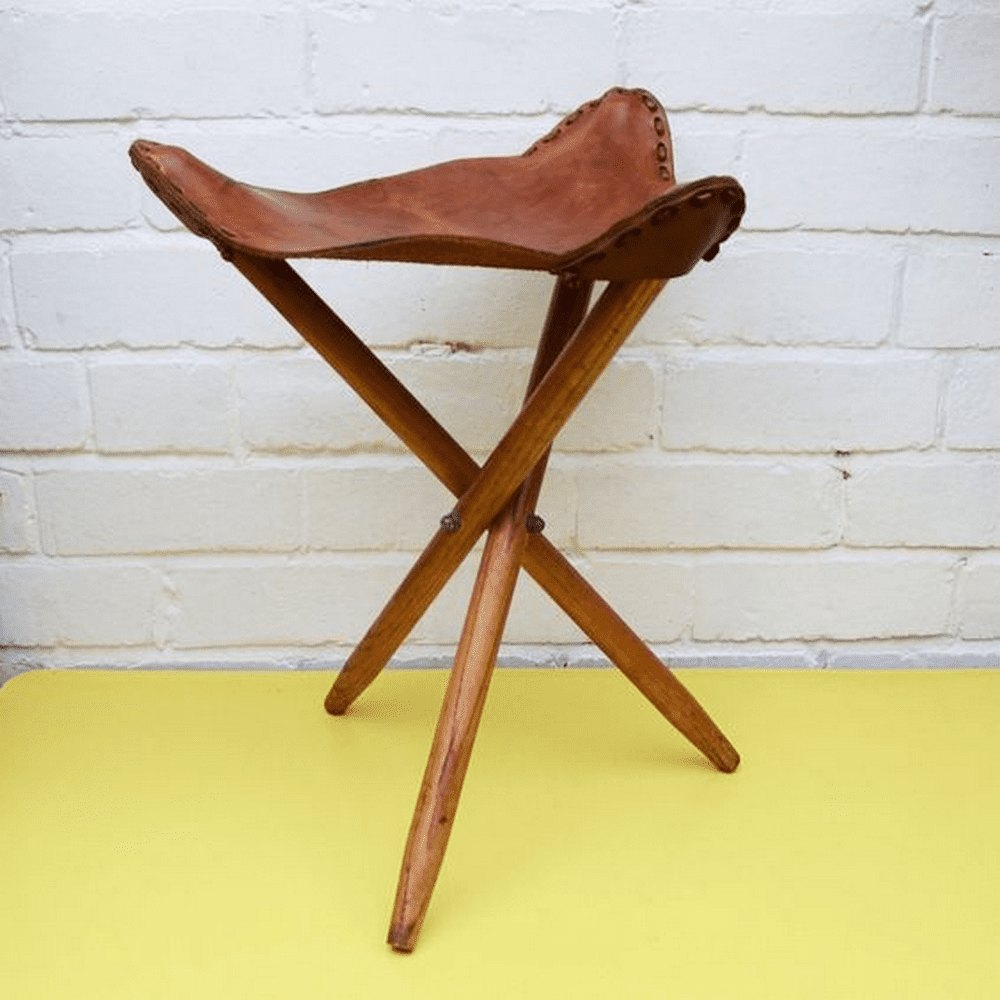
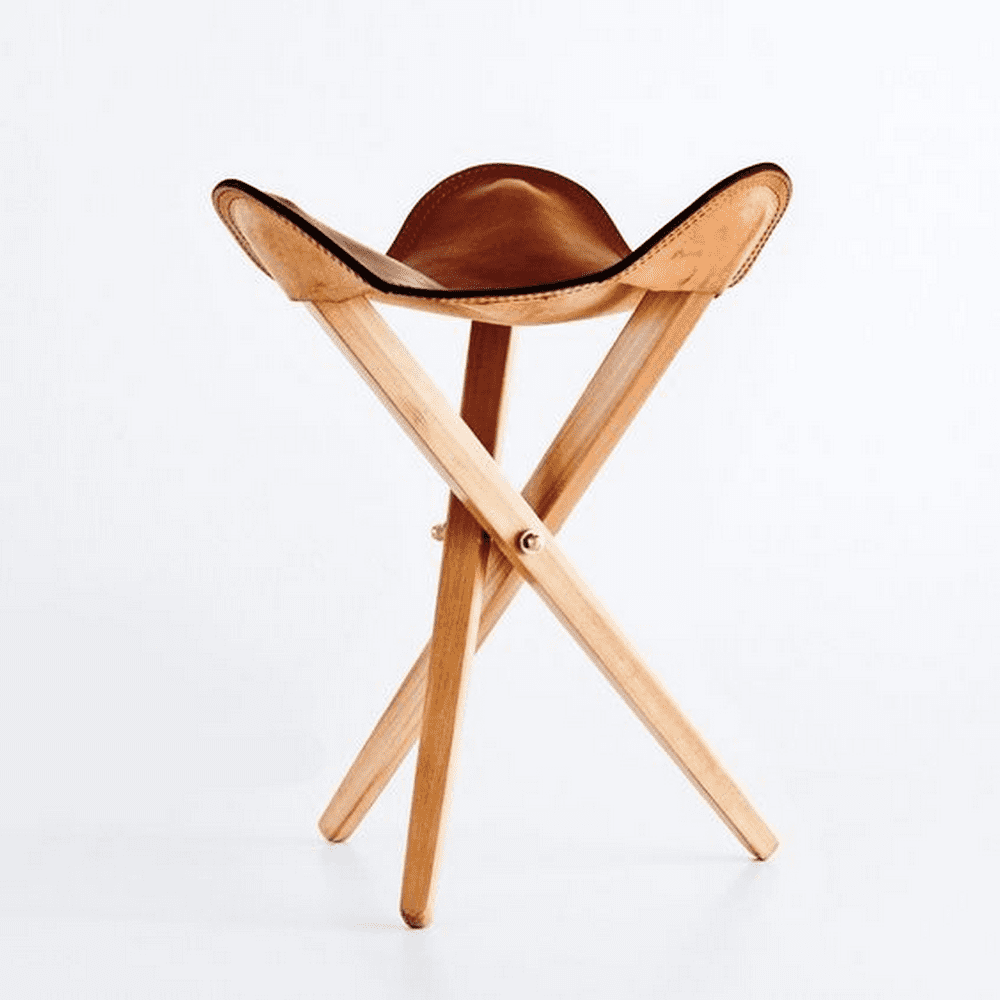
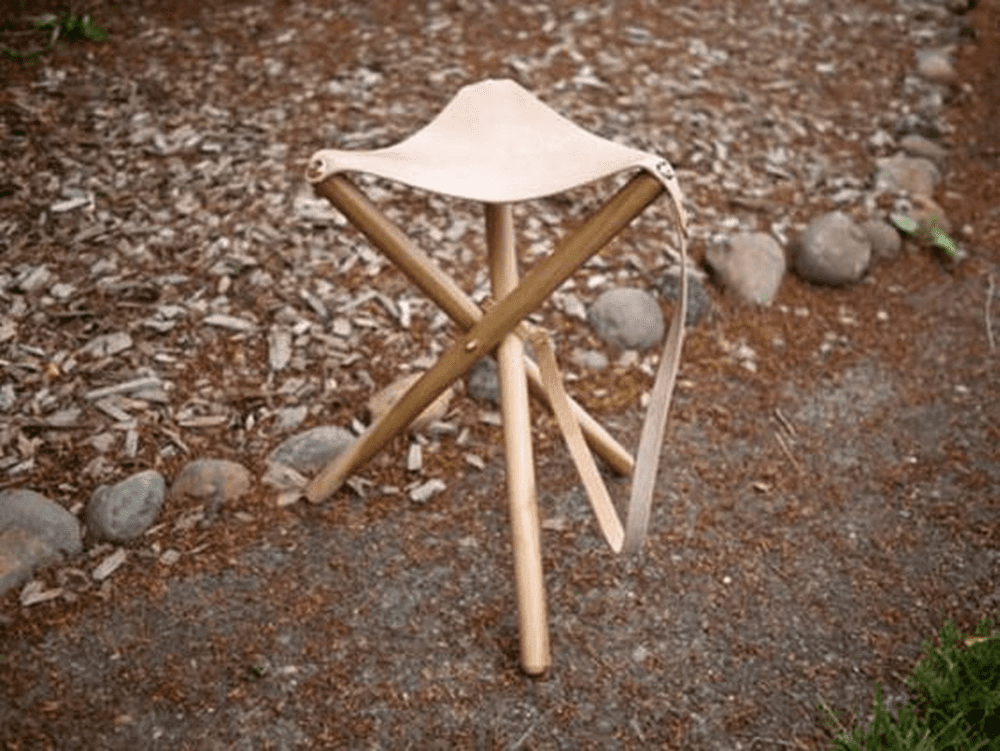
Now, you can camp in style in this DIY tripod camping stool.
When you’re ready to get away from the hustle and bustle of city life, there’s no better way to do it than by going camping. Not only will you get to enjoy the peace of nature, but you’ll also get to experience all the wonderful things that come with spending time outdoors. From fresh air and exercise to bonding with family and friends, camping is the perfect way to relax and recharge.
My family and I love to go camping instead of spending time at theme parks. We hike up mountains and after about an hour, we reach a clearing with an incredible view. This is our favourite way to spend time together and bond as a family.
I, on one hand, have never really enjoyed camping before. However, I learned that the secret to enjoying it is minimalism. It isn’t practical to carry around huge stuff because hey, it’s tiring. Plus, you never know when you’re going to need to set up camp in a hurry and you don’t want to be lugging around a bunch of unnecessary stuff. So, I’ve compiled a list of the bare essentials that I need in order to enjoy camping.
If you’re looking to go camping, you’ll need a few essential items. A mini version of these essentials can help make your camping trip more enjoyable. Some of the essentials you’ll need include a tent, sleeping bag, camp stove and of course, a stool to sit on when you’re tired.
One of the issues that I faced as a newbie camper was the lack of seating. I couldn’t just sit anywhere because I have a bad back, and I didn’t want to sit on the floor for extended periods. So my husband made me a tripod camping stool. It was a great solution because I could take it with me wherever I went, and it was easy to set up and take down.
This tripod camping stool is also both sturdy and lightweight, making it perfect for hikes and camping trips. Its small size means it can easily be carried in a backpack, and it’s perfect for sitting around the campfire or enjoying a scenic view.
The tripod camping stool project was a hit. The kids loved it, everyone in our camping group loved it, and I loved it! Today, my husband had made several of these tools because we give them away as gifts, especially during Father’s Day. This project has been a great success and we are so happy that we can share it with others. It’s a simple project that doesn’t cost so much. You should definitely give it a try.
What Materials Do You Need to Build a Tripod Camping Stool?
To build a tripod camping stool, you’ll need:
Wood Components:
- 3 pieces of 1 1/8″ birch hardwood dowels (24″ each)
Hardware:
- 1 brass 2.75″ bolt
- 1 brass 1.5″ eye-hole bolt
- 2 brass acorn nuts
- 3 brass washers
- 3 brass finishing washers
- 3 brass 1″ wood screws
Seat Material:
- Leather or heavy canvas fabric (approximately 12″ x 12″)
Tools Required:
- Drill with appropriate bits
- Sander
- Screwdriver
- Small socket wrench
- Center-finder (optional)
- Sharp knife or awl
Click on any image to start the lightbox display. Use your Esc key to close the lightbox.
How Do You Build a Tripod Camping Stool? (Step-by-Step)
Building a sturdy DIY tripod camping stool is not only a practical endeavour but also a rewarding one. With the right strategies and materials, you can create a reliable and comfortable seating option for your outdoor adventures.
Step 1: Prepare the Legs
Sand all three dowels smooth, paying special attention to the ends. Use a center-finder to mark the exact center point at the top of each leg where you’ll drill the bolt hole.
Step 2: Create the Lashing Groove
Carve a slight indentation (or “neck”) approximately 1-2 inches from the top of each leg. This groove helps secure the lashing rope and prevents slipping. According to woodworking best practices, this technique significantly improves joint stability.
Step 3: Drill the Pivot Holes
Drill through the center point of each leg using a bit that matches your bolt diameter. Ensure holes are aligned properly for smooth leg movement.
Step 4: Assemble the Tripod Frame
Thread the 2.75″ bolt through all three legs, using washers between each leg to reduce friction. Secure with an acorn nut, but don’t overtighten — legs need to pivot freely.
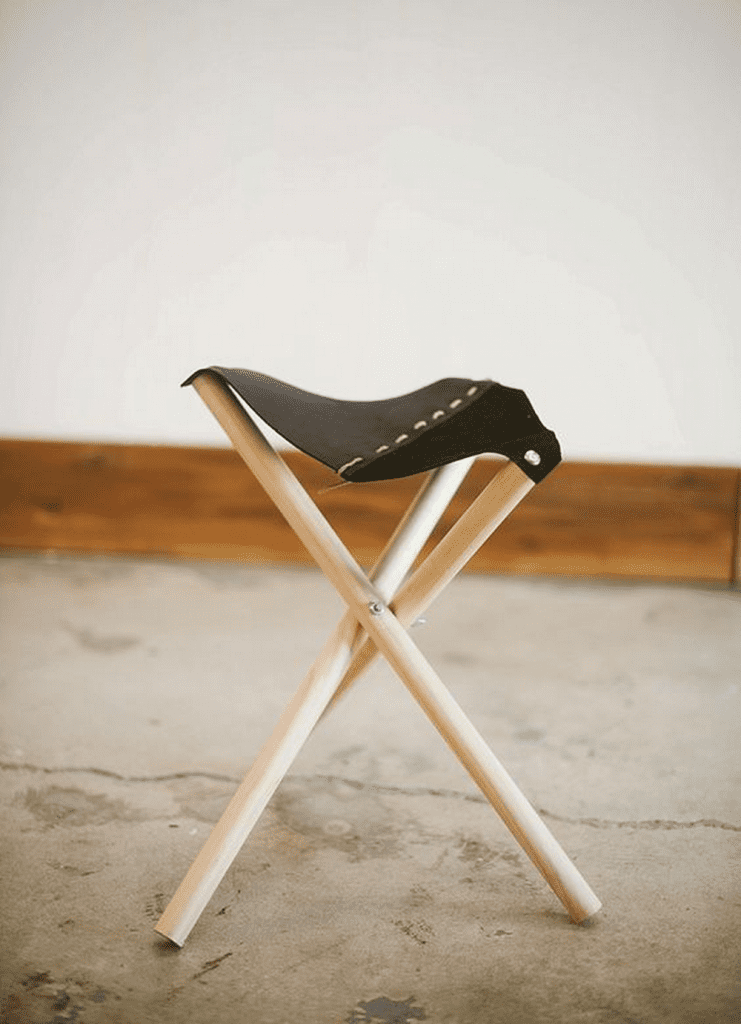
Step 5: Attach the Seat
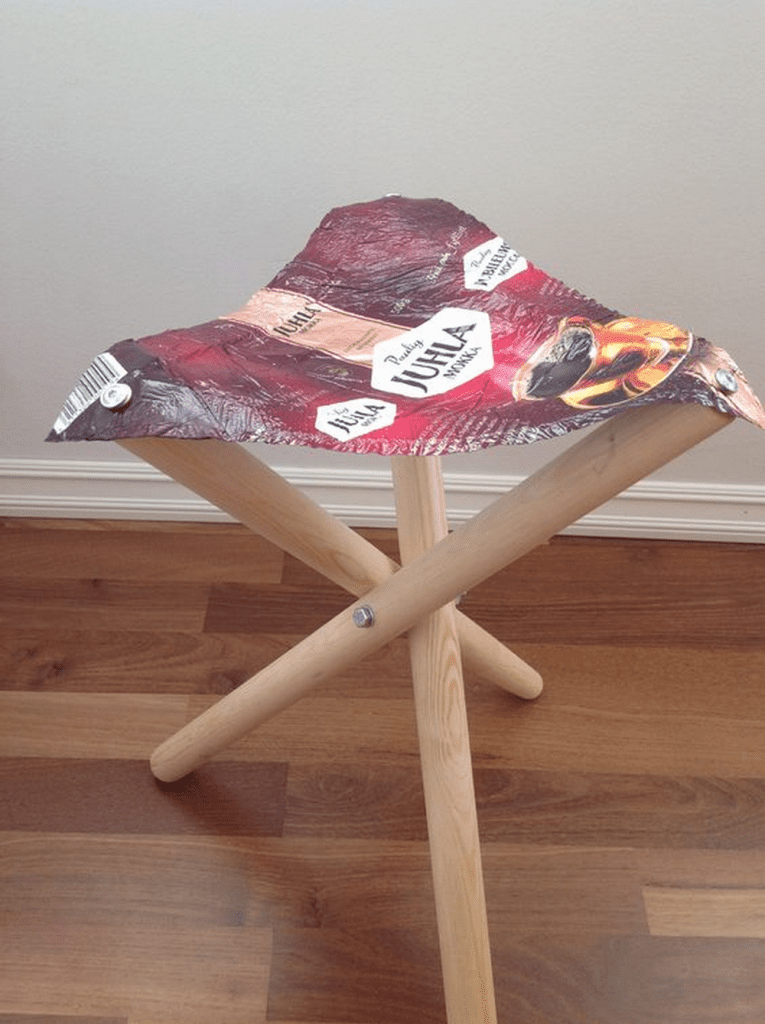
Cut your leather or canvas into a triangular shape with rounded corners. Attach to each leg using the eye-hole bolt and wood screws with finishing washers. Position approximately 12-14 inches from the ground for comfortable seating height.
Step 6: Apply Finish and Test
Apply your chosen wood finish (oil, varnish, or polyurethane) and allow to dry completely. Test the stool’s stability and adjust leg spread as needed.
How Long Does It Take to Build a Tripod Camping Stool?
Building a tripod camping stool typically takes 2-3 hours for someone with basic woodworking skills. This includes cutting, sanding, drilling, assembly, and applying a finish. DIY projects of this complexity generally require minimal experience and can be completed in a single afternoon.
What Are the Key Techniques for a Sturdy Tripod Stool?
1. Choose the Right Materials
Use hardwood dowels (birch, oak, or maple) rather than softwood. Hardwoods provide better durability and weight capacity. Select brass or stainless steel hardware to prevent rust during outdoor use.
2. Design for Stability
The tripod design naturally distributes weight evenly across three points. Ensure legs spread to approximately 18-20 inches at the base for optimal stability on uneven terrain.
3. Reinforce Stress Points
The joint where legs meet is the primary stress point. Use quality brass hardware and ensure the bolt hole is precisely centered. Reinforcing joints with proper hardware significantly extends the stool’s lifespan.
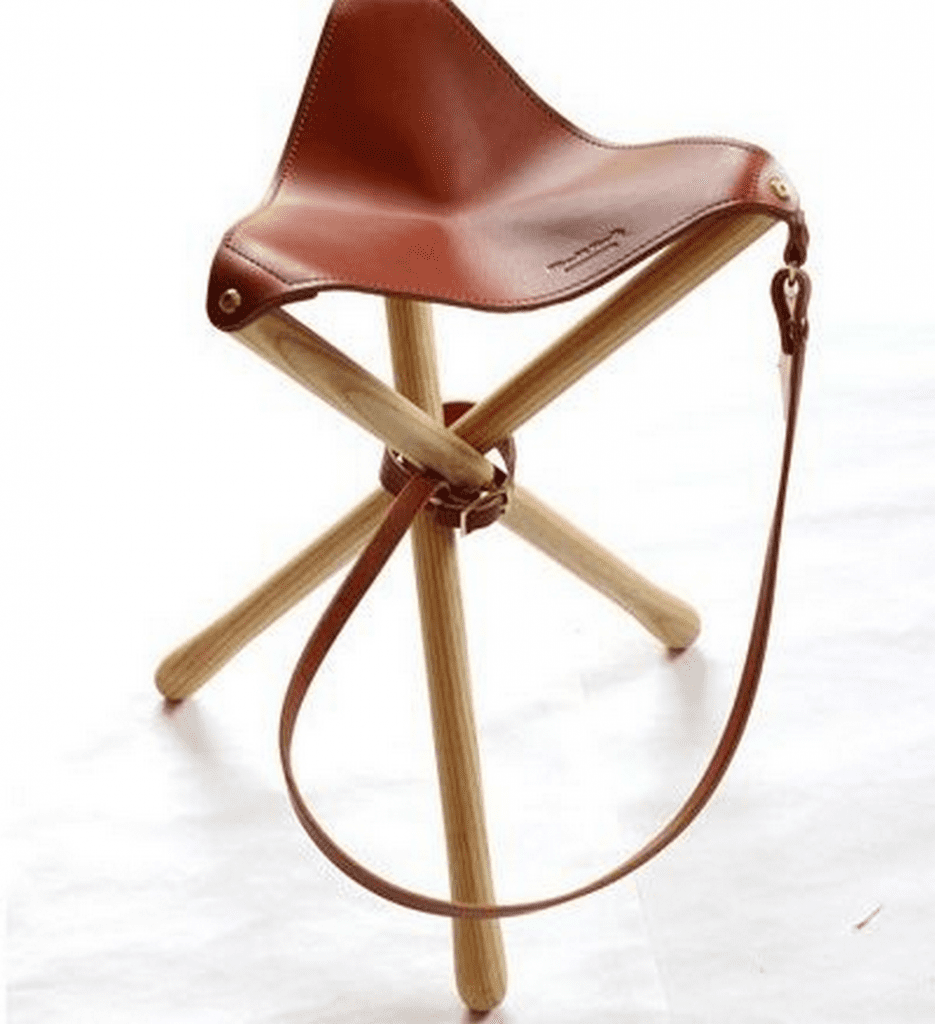
4. Secure the Lashing Knot
The carved neck on each leg creates a recessed area that locks the rope in place. Wrap lashing around the necks multiple times before securing the knot for maximum stability.
5. Strengthen Leg Joints Using an Awl
Create small guide holes with an awl before inserting screws. This prevents wood splitting and ensures fasteners stay secure, improving overall structural integrity.
Do you want to learn how this tripod camping stool was made? Watch this video to see the entire process, from start to finish. You’ll see how the materials are cut and assembled to create a sturdy, comfortable stool that’s perfect for camping, tailgating, or any other outdoor activity.
How to Secure The Lashing Knot Of Your DIY Tripod Stool
When you’re putting together a stool, making sure the lashing is tight and secure is crucial for stability. One effective technique is to carve a slight indentation, or ‘neck,’ into each of the three legs of the stool. This simple adjustment helps the rope grip better, creating a more secure hold.
- Carving the Neck
- Use a knife to carefully whittle around the top portion of each leg, forming a recessed area. Aim for a smooth finish to prevent the rope from slipping.
- Pulling it All Together
- Once each leg has a neck, arrange the legs in a tripod formation. Position them so that the carved areas are aligned.
- Securing the Knot
- Wrap the lashing around the necks multiple times. The shaped necks work to lock the rope into place, ensuring stability and durability.
This technique not only provides extra grip, but it also adds to the overall safety and longevity of your stool.
How Much Weight Can a DIY Tripod Stool Support?
A well-constructed tripod camping stool using 1 1/8″ hardwood dowels can typically support 200-250 pounds. Weight capacity depends on wood quality, joint construction, and the strength of the seat material. Always test your stool before taking it on camping trips.
What Are the Benefits of a Tripod Design for Camping Stools?
Tripod stools offer several advantages for outdoor use:
- Stability on uneven ground: Three legs adapt to irregular terrain better than four-legged designs
- Lightweight and portable: Typically weighs 2-3 pounds when using hardwood dowels
- Compact when collapsed: Legs fold together for easy transport in a backpack
- Simple construction: Fewer parts mean less can go wrong and easier repairs
- Cost-effective: Materials cost $30-40, significantly less than commercial camping stools
Frequently Asked Questions
- Can you customize the design of your DIY tripod camping stool?
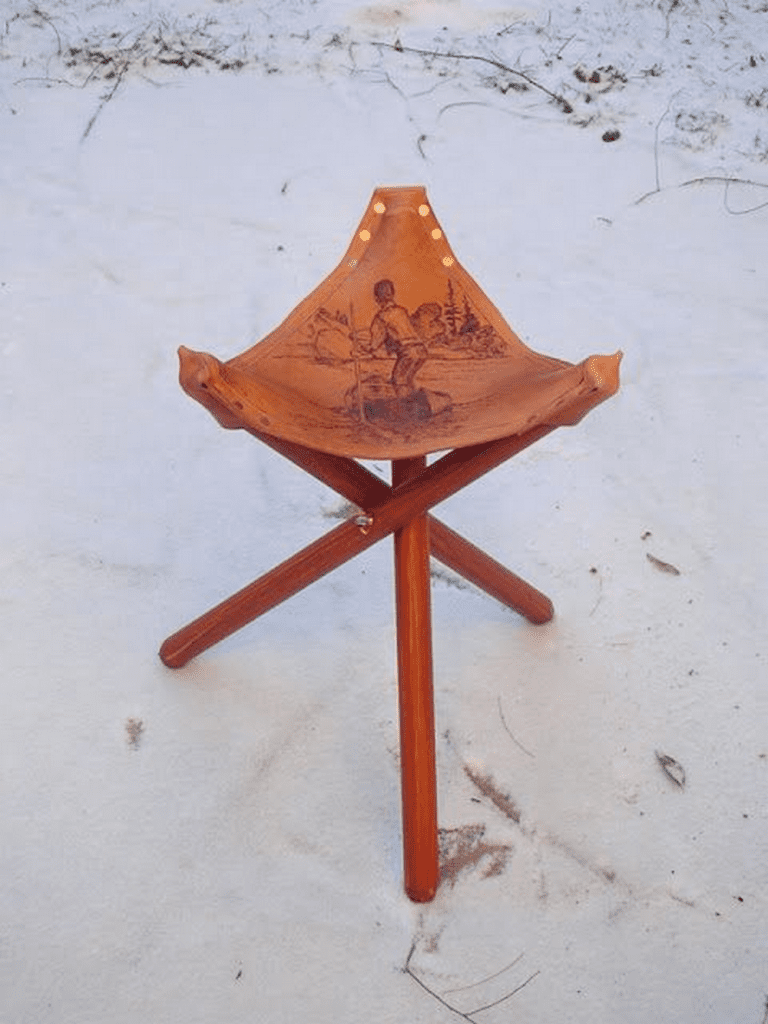
- Yes, you can adjust the height (standard is 16-18 inches), choose different wood types, use various seat materials (leather, canvas, or synthetic), and add decorative elements like wood burning or staining patterns.
- How long does it take to build a DIY tripod camping stool?
- With proper preparation and materials ready, expect 2-3 hours for construction plus drying time for finishes (typically 24 hours).
- Are DIY tripod camping stools comfortable to sit on?
- When properly constructed with a well-positioned seat (12-14 inches high), tripod stools provide comfortable seating for extended periods. Leather seats offer more comfort than canvas.
- Can you use your DIY tripod camping stool indoors?
- Absolutely. These stools work well as extra seating, plant stands, or decorative furniture pieces in small spaces.
- What’s the best wood finish for outdoor use?
- Marine-grade spar varnish or outdoor polyurethane provides the best weather protection. Apply 2-3 coats for maximum durability.
- How do you maintain a tripod camping stool?
- Periodically check and tighten hardware, reapply finish annually if used outdoors frequently, and store in a dry location when not in use to prevent wood deterioration.n significantly enhance the overall structural integrity of your stool.
Wrapping It Up
Building your own camping stool offers practical and personal benefits. You’ll save money compared to commercial options, gain valuable woodworking experience, and create a customized piece that fits your specific needs. According to outdoor gear experts, DIY camping gear often outlasts mass-produced alternatives when built with quality materials.
The project is beginner-friendly, requires minimal tools, and makes an excellent gift for outdoor enthusiasts, especially for Father’s Day or birthdays.