Last Updated on December 9, 2025 by teamobn
A picnic table gives you a place to eat, relax, and enjoy the outdoors. It is a simple way to make any yard, deck, or patio feel like an extra room. Picnic tables come in many sizes and designs, so it is usually easy to find one that fits your space.
A 2 in 1 picnic table and bench goes one step further. It is a piece of outdoor furniture that can change from a full picnic table with seats into a single bench. With this DIY design, you can flip between table and bench in just a few seconds without lifting or dragging the whole piece across your yard.
This project is a straightforward 2 in 1 design that uses basic 2 by 4 timber, hinges, screws, and a simple locking mechanism. It is simpler to build and use than some other convertible picnic tables. The footprint stays the same whether you use it as a table or a bench, which is ideal for small yards, narrow patios, or tight spaces along a fence.
If you like eating outside but do not have room for separate benches and a large table, this 2 in 1 picnic table and bench is a smart solution.
Contents
- 1 Building a 2-in-1 Picnic Table and Bench
- 2 Safety And Maintenance Tips For A 2-In-1 Picnic Table And Bench
- 3 Design Customization Ideas For 2-In-1 Picnic Tables
- 4 Space Saving Tips For Small Yards
- 5 Conclusion
2 In 1 Picnic Table And Bench At A Glance
- Main use: Outdoor dining and seating in small spaces
- Seats: About four adults at a standard 5 foot length
- Materials: 2 by 4 timber, hinges, wood screws, glue, simple top lock
- Build time: A weekend project for most DIYers
- Skill level: Intermediate beginner with basic power tools
- Best location: Patios, decks, small yards, narrow side yards or along fences
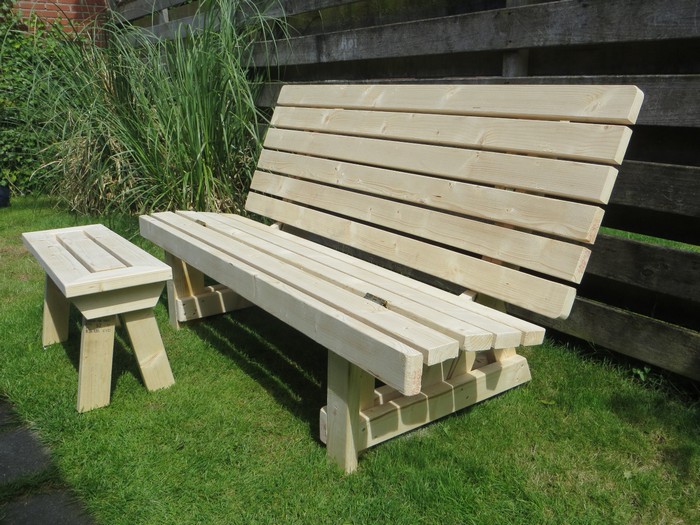
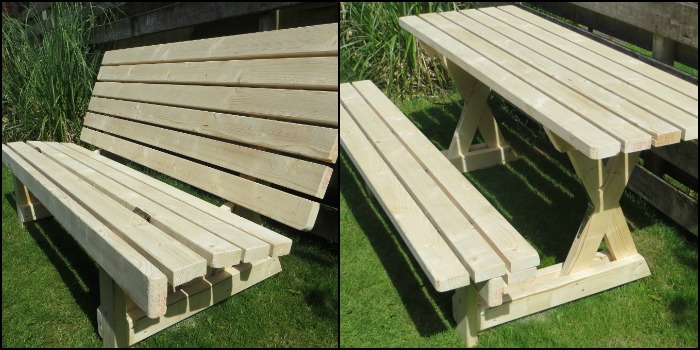
Building a 2-in-1 Picnic Table and Bench
This design creates a sturdy frame that can serve as both a picnic table and a bench. One side forms the main bench. The other side flips over to act as either the table top or the backrest, depending on how you position it.
Materials
- 2×4 Timber
- Hinges
- Wood Glue
- Wood Screws
- Custom Top Lock (made from scrap metal)
Tools
- Measuring Tape
- Wood Clamps
- Compound Miter Saw
- Cordless Drill
How to Build a 2-in-1 Picnic Table and Bench: Step-by-Step Instructions
Step 1: Design and Planning
- Decide the final size of your table and bench. A standard length of about 5 feet usually seats four adults comfortably.
- Sketch your design on paper. Mark which side will be the fixed bench and which side will flip to become the table top or backrest.
- Note the positions of all hinges and the locking mechanism in both positions, so you know where to attach them later.
Step 2: Cutting the Timber
- Use the compound miter saw to cut your 2 by 4 timber to length. You will need pieces for the table top, seat, legs, and cross supports.
- For a typical 5 foot table and bench, you might cut:
- 5 pieces for the table top, each 60 inches long
- 4 pieces for the seats, each 60 inches long
- 8 leg pieces, each around 28 inches long
- Several shorter pieces for cross supports and diagonal braces, cut to fit your drawing
- Label each piece lightly with a pencil so you know where it belongs when you start assembling.
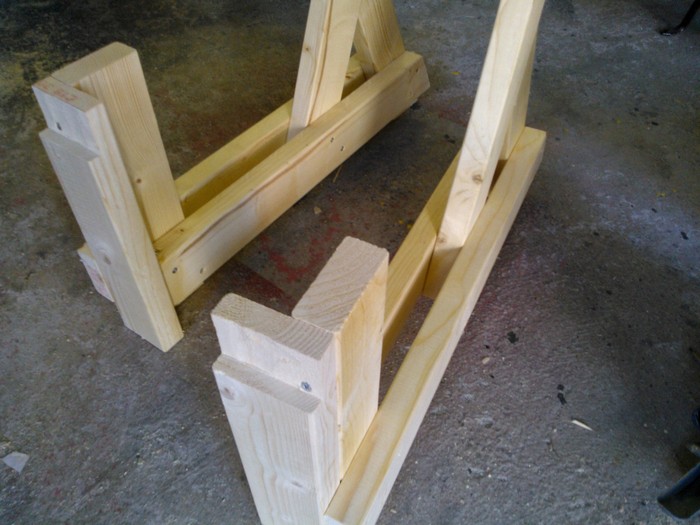
Step 3: Assembling the Table Frame
- Lay out the leg pieces on a flat surface and form two side frames. Each frame should support a bench seat and a section of the table top.
- Attach horizontal cross supports between the legs using wood screws and wood glue. This will give you two strong rectangular frames.
- Add extra braces across the frames where the hinges and lock will be fixed. These points will carry an extra load when people sit and lean on the bench or table.
Step 4: Attaching the Tabletop and Bench Seats
- Place the table top boards across the upper parts of the frames that will form the table surface. Space them evenly and secure them with wood screws.
- On the opposite side, attach the boards that will become the bench seat. These will be lower and closer to the ground when in table mode.
- Check that all boards are straight and flush. A flat, even surface will feel more comfortable and look better in both positions.
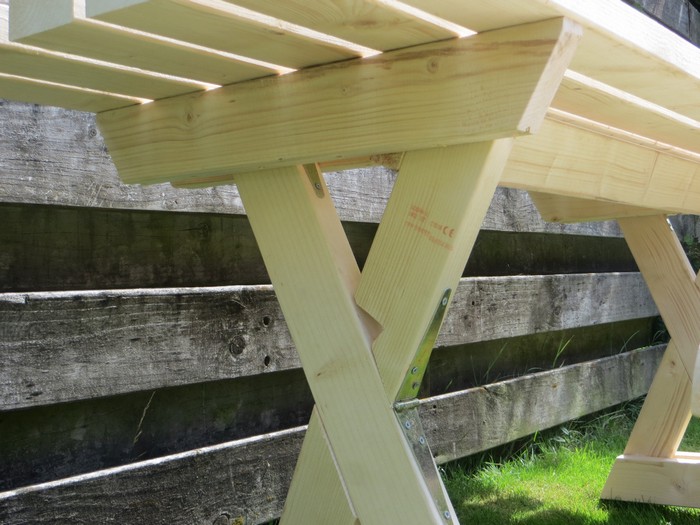
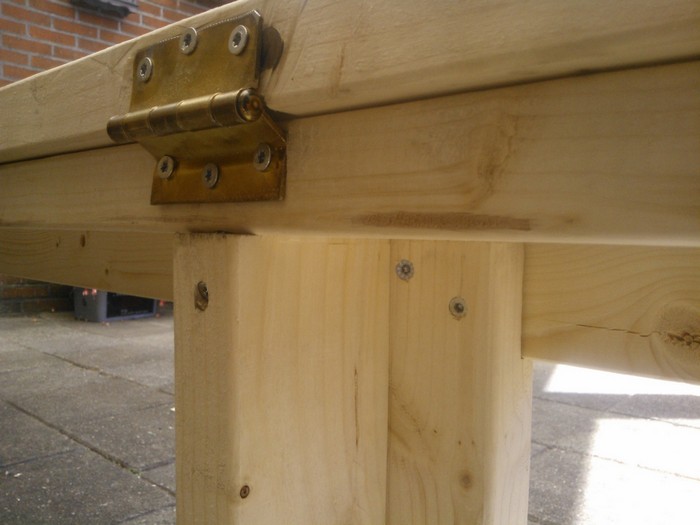
Step 5: Installing Hinges
- Fit sturdy outdoor-rated hinges at the connection points where the table top section will flip and rest as a backrest when in bench mode.
- Attach the hinges loosely at first. Move the structure carefully between table position and bench position to see how the top swings and where it rests.
- Once you are happy with the motion and alignment, tighten the hinge screws fully and confirm the moving parts do not bind or scrape.
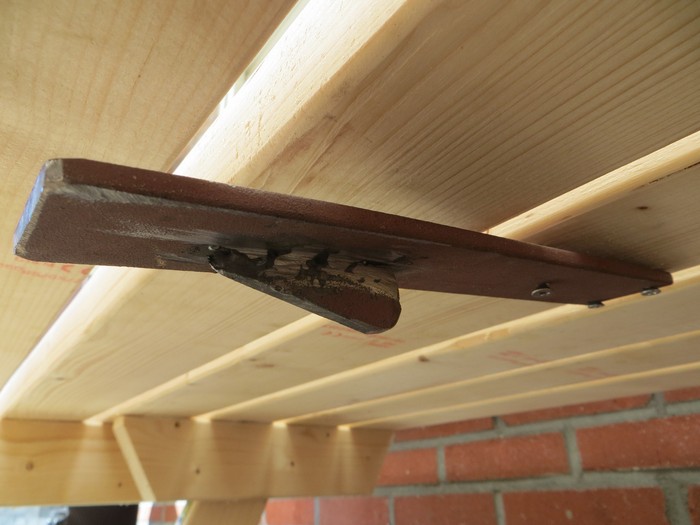
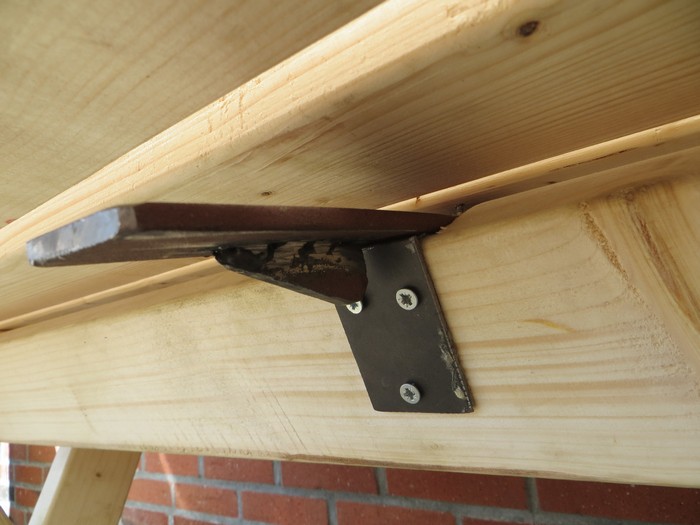
Step 6: Building and Attaching the Lock Mechanism
- Make a simple locking mechanism from scrap metal or strong hardware. This can be a rotating metal tab, a sliding bolt, or another simple catch.
- The lock should hold the table top firmly when it is in bench position, so it does not flip back if someone leans on it.
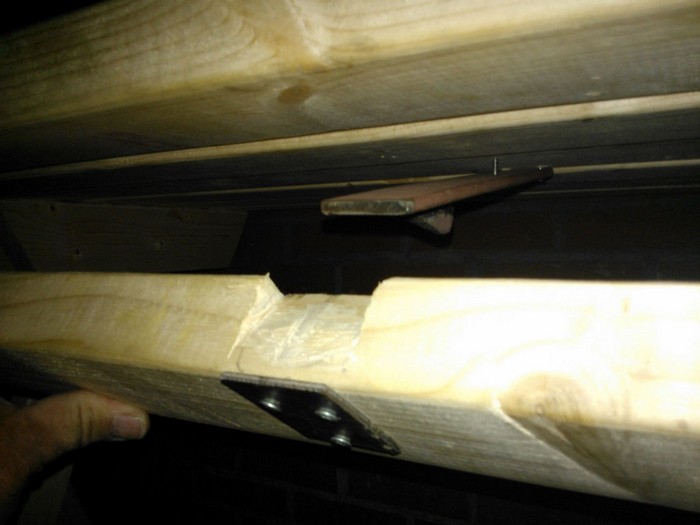
- Attach the lock on the side where the top and bottom parts meet when in bench mode. Test it several times, switching between the table and bench and engaging the lock each time.
Step 7: Finishing Touches
- Sand all surfaces and edges to remove splinters and rough spots. Focus on places where people will place their hands or legs.
- Wipe away dust, then apply an outdoor-rated paint, stain, or clear sealer to protect the wood from sun and moisture.
- Let the finish dry fully. Check all screws, hinges, and the lock one more time to make sure everything feels solid and smooth.
Step 8: Final Assembly
- Move your new 2-in-1 picnic table and bench to its final location in your yard, on your deck, or on your patio.
- Test the conversion a few times. Try it in table mode and in bench mode, and have a couple of people sit in each position to check comfort and stability.
- Make any small adjustments needed, then enjoy how quickly it flips from a family table to a comfortable bench.
Click on any image to start the lightbox display. Use your Esc key to close the lightbox. ![]()


For more step-by-step instructions on how to build a 2-in-1 picnic table, check out this tutorial from André B.
Safety And Maintenance Tips For A 2-In-1 Picnic Table And Bench
A 2-in-1 picnic table and bench is a moving piece of furniture, so safety and regular checks are important.
- Use sturdy, outdoor-rated hinges and hardware that can support the weight of several adults.
- Tighten all screws, hinges, and the locking mechanism regularly, especially after the first few weeks of use. Wood can settle, and hardware can loosen over time.
- Do not allow children to climb or play on the moving parts while you are switching between the table and the bench. Only an adult should flip the furniture between positions.
- Recoat the timber with outdoor paint, stain, or clear sealer every year or two to protect it from moisture, sunlight, and wear.
- If any boards crack or any hardware bends or breaks, replace the damaged parts before using the table again.
Design Customization Ideas For 2-In-1 Picnic Tables
A 2 in 1 picnic table and bench is already a clever piece of furniture, but you can customize it to better match your outdoor space and your style.
Color And Finish
One of the easiest ways to personalize your 2 in 1 picnic table and bench is with color and finish. You can let the natural wood show through with a clear stain, or choose a bold color that stands out on your patio.
Use exterior grade paints or stains that offer protection from weather as well as style. A gray or whitewash stain can give the table a rustic, weathered look that suits cottage or coastal gardens.
Artistic Touches
You can add personality with small artistic details. These might include simple wood carvings on the legs, stenciled patterns on the table top, or a border design around the edge of the bench.
Families with children might enjoy turning the table top into a chalkboard surface using special paint. This gives kids a reusable space to draw and play while adults relax nearby.
Functional Add-ons
To make your 2 in 1 picnic table and bench even more useful, think about adding hidden storage or extra features. For example, you can design a small storage space under the seat for outdoor cushions, or fit a removable cooler box in the center of the table top.
These add ons turn your table and bench into more than just seating. They support outdoor meals, games, and gatherings and help keep your yard organized.
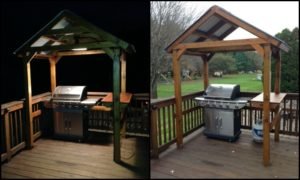
Lighting Solutions
Good lighting helps you use your outdoor furniture after dark. You can add small solar lanterns that hang from the sides of the table or place them on top when in table mode.
You can also attach low voltage or solar powered lights under the table edge or bench edge so the furniture glows gently in the evening. This makes the area feel cozy and helps people see where to sit and walk.
Eco Friendly Materials
If you are thinking about sustainability, consider building with reclaimed timber or recycled plastic boards. Reclaimed wood gives your picnic table and bench a story and a unique look. Recycled plastic lumber is low maintenance and stands up very well to weather.
Choosing eco friendly materials reduces waste and can make your project feel even more rewarding.
Space Saving Tips For Small Yards
Small yards can be hard to plan, but the right furniture and layout can make even a tiny space feel welcoming and useful. The 2-in-1 picnic table and bench is especially helpful because it offers both dining and seating in a single footprint.
Here are some tips for getting the most from a small outdoor space with a 2-in-1 picnic table and bench.
Choose Multipurpose Furniture
Select pieces that serve more than one role. The 2-in-1 picnic table and bench is a good example because it works as both a bench and a full picnic table without taking extra room.
This kind of furniture is ideal for small patios and courtyards where every square meter matters and you do not want separate pieces competing for space.
Use Vertical Gardening
Free up floor space by growing plants vertically. Use wall-hung planters, trellises, or hanging baskets instead of large pots on the ground.
This keeps the area around your 2-in-1 picnic table and bench open while still giving your yard color and life. You get more room to move chairs, flip the furniture between positions, and walk around it.
Choose Foldable Or Stackable Extras
If you need extra chairs or a side table, look for items that fold or stack. You can bring them out only when you have guests and store them the rest of the time.
This keeps your everyday layout simple and leaves plenty of space around the 2-in-1 picnic table and bench for easy use.
Place Furniture Strategically
When you are not using the table, push the 2-in-1 picnic table and bench against a wall, fence, or corner. This keeps the center of your yard or patio clear for other activities.
When you want to eat outside, simply pull it forward into a central spot, then slide it back when you are done.
Use Reflective Elements
Mirrors and glossy surfaces can make a small space seem larger. A weather-safe mirror on a fence behind your 2-in-1 picnic table and bench can reflect light and greenery.
This simple trick adds depth and makes the area feel less closed in without taking up any extra floor space.
With these space-saving ideas, even a small yard can feel open, practical, and inviting. The 2-in-1 picnic table and bench adjusts easily to your needs and your available room, which makes it a smart choice for compact outdoor areas.
2 In 1 Picnic Table And Bench FAQ
- How many people can a 2 in 1 picnic table and bench seat?
A typical 5 foot 2 in 1 picnic table and bench can seat about four adults comfortably. You can adjust the length if you want to seat more or fewer people, but remember that a longer table takes more space to flip. - Is a 2 in 1 picnic table and bench good for small yards?
Yes. It is ideal for small yards and narrow patios because it keeps the same footprint in both bench and table positions. You do not need extra room to swing out separate benches. - What kind of wood should I use for this project?
Most builders use 2 by 4 timber, often in treated pine or a durable hardwood that is suitable for outdoor use. Make sure the wood is straight and dry, and always seal or paint it for added protection. - How hard is it to build a 2 in 1 picnic table and bench?
This project suits an intermediate beginner who is comfortable using a saw and drill and can measure carefully. The cuts are fairly simple, but you need patience to get the hinges and lock lined up so the conversion feels smooth. - Can I leave my 2 in 1 picnic table and bench outside all year?
You can leave it outside if you use outdoor rated finishes and hardware, but it will last longer if you cover it or move it under shelter in very wet or snowy seasons. Regular cleaning and re sealing will help it stay strong and good looking.
Conclusion
Any outdoor area may be improved in both use and beauty with the satisfying do-it-yourself effort of building a 2-in-1 picnic table and bench. Because it offers both dining and sitting options in a single, simplified form, this adaptable piece lets you maximize small spaces. Once finished, your new two-in-one picnic table and bench will be a useful and fashionable center point for outdoor entertainment and family get-togethers.