Last Updated on September 12, 2025 by teamobn
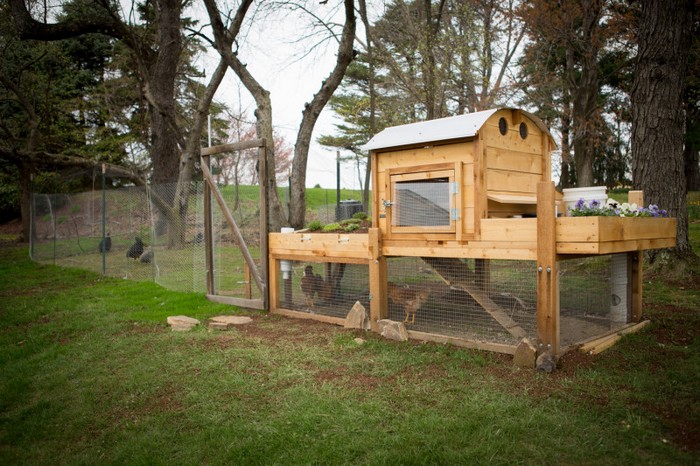
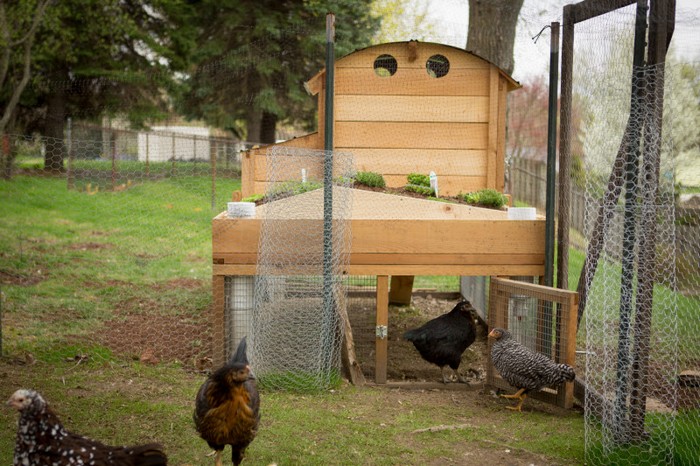
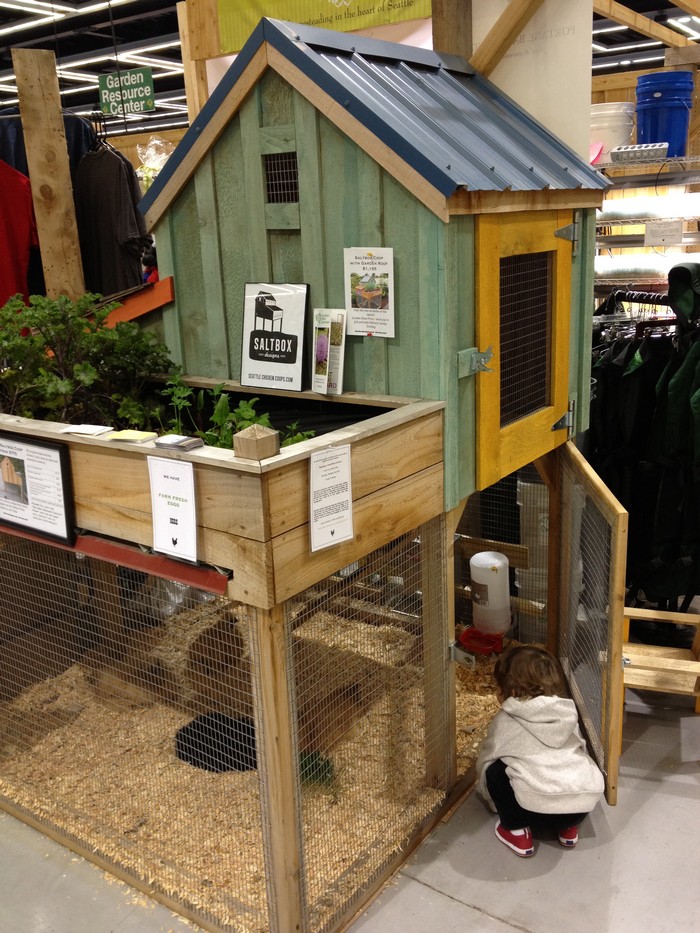
If you’re looking for an interesting and unique project for your backyard chickens, why not try building a green roof for their coop?
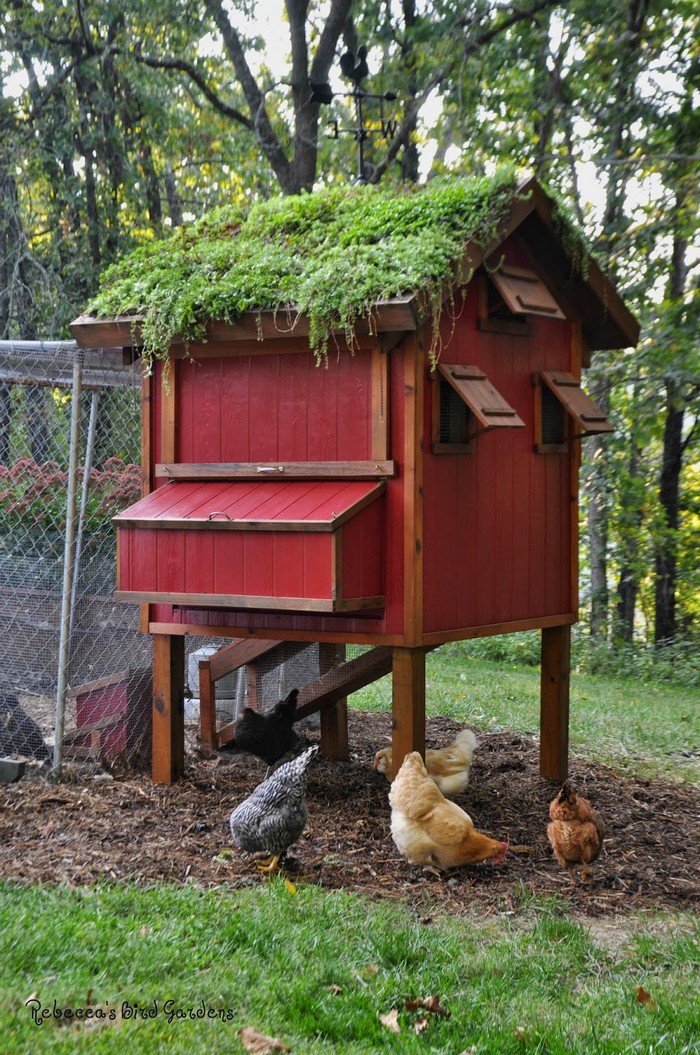
Not only will this chicken coop with green roof provide them with some much-needed extra space, but it’s also a great way to add some greenery to your property.
The importance of a chicken coop in your own backyard is often underestimated. Many people are unaware of the many benefits that come with owning a chicken coop. One of the most obvious benefits of owning a chicken coop is that you will have a constant supply of fresh eggs. Store-bought eggs can often be expensive, and they are not always as fresh as you would like them to be.
When you have your own chickens, you can be sure that your eggs are always fresh and delicious. Chickens are also natural pest control experts. They love to eat insects, grubs, and other pests that can damage your garden or yard. How much more if you incorporate it with a green roof?
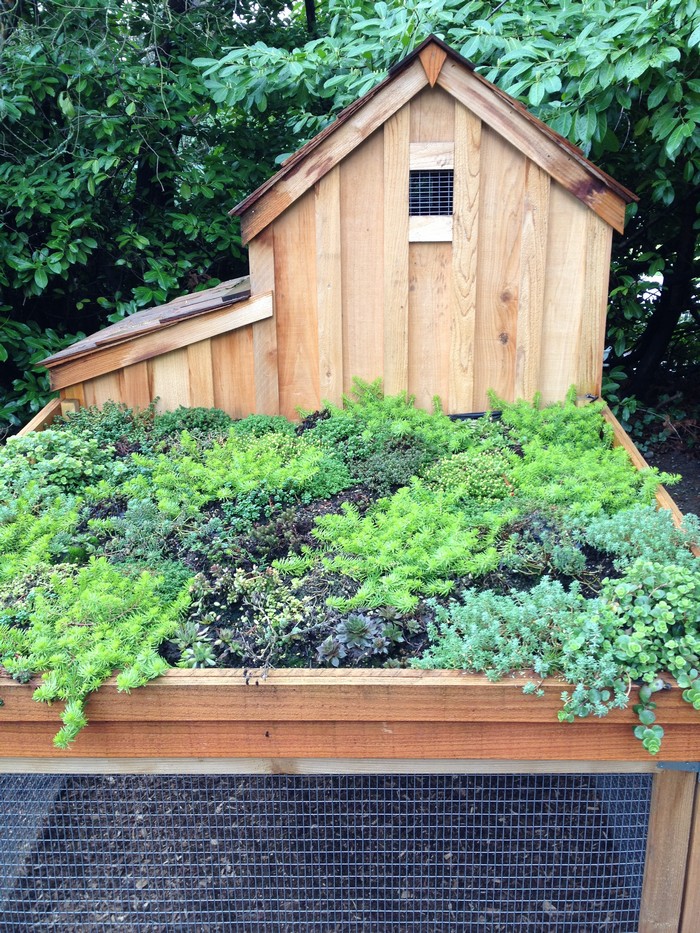
A chicken coop with green roof can provide a number of benefits for your chickens. The living roof chicken coop will help to insulate the coop and keep the chicken’s environment cooler in the summer and warmer in the winter. The vegetation on the roof will also help to filter out dust and other airborne particles, providing your chickens with a cleaner, healthier environment. In addition, the green roof will add aesthetic appeal to your chicken coop, making it a more pleasant place for both you and your chickens.
A way to add some extra space to your backyard is to consider investing in a chicken coop with green roof. Not only will this provide a home for your chickens, but it can also be a great way to add a bit of greenery to your outdoor space.

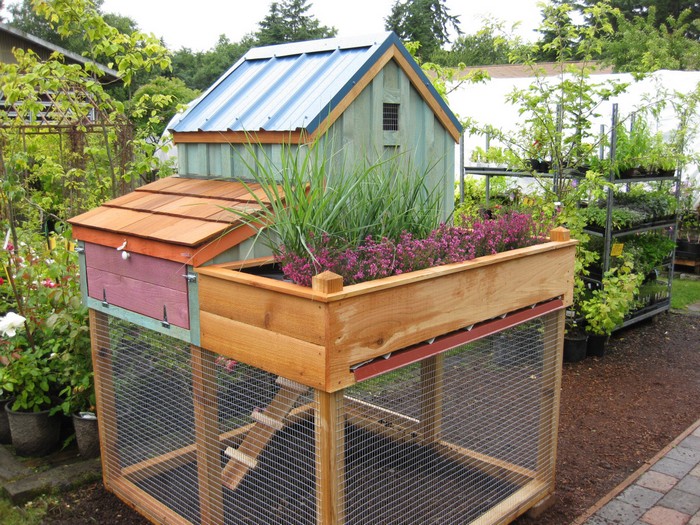
Whether you use it for a vegetable garden, a few potted plants, or a beautiful flower bed, a green roof can make a world of difference in the look and feel of your backyard. Not only will you enjoy the aesthetic benefits of having plants in your backyard, but you’ll also get to reap the rewards of fresh air and improved mental and physical health.
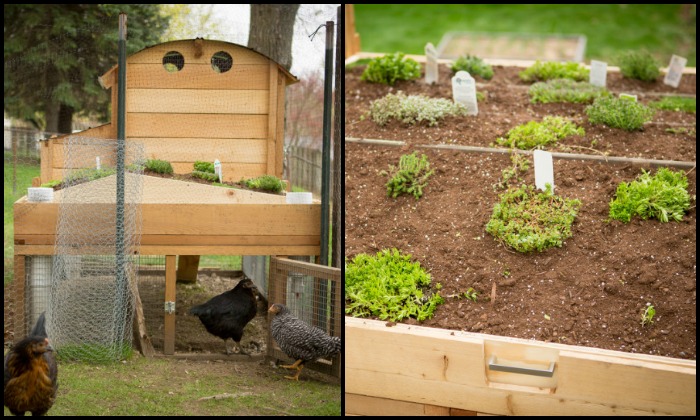
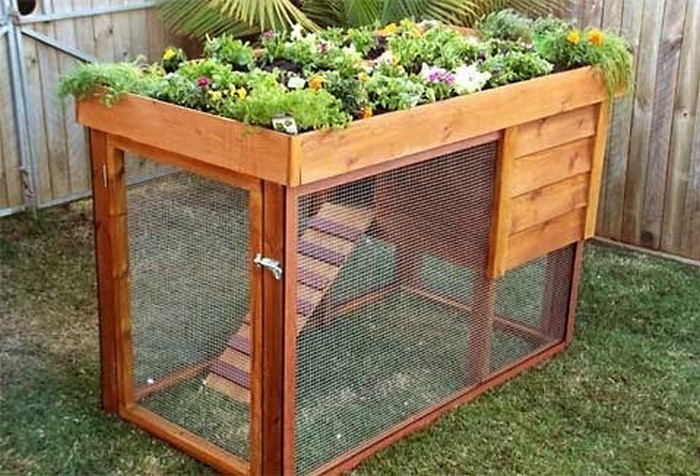
Even if you already have chickens dominating a large part of your yard, you can still add more greens to your garden with this chicken coop with green roof. The roof of your chicken coop is a nice extra spot for growing plants. By adding some soil and some plants, you can create a little oasis for your chickens – and yourself. Not only will it look nice, but it will also provide your chickens with some fresh vegetation to eat.
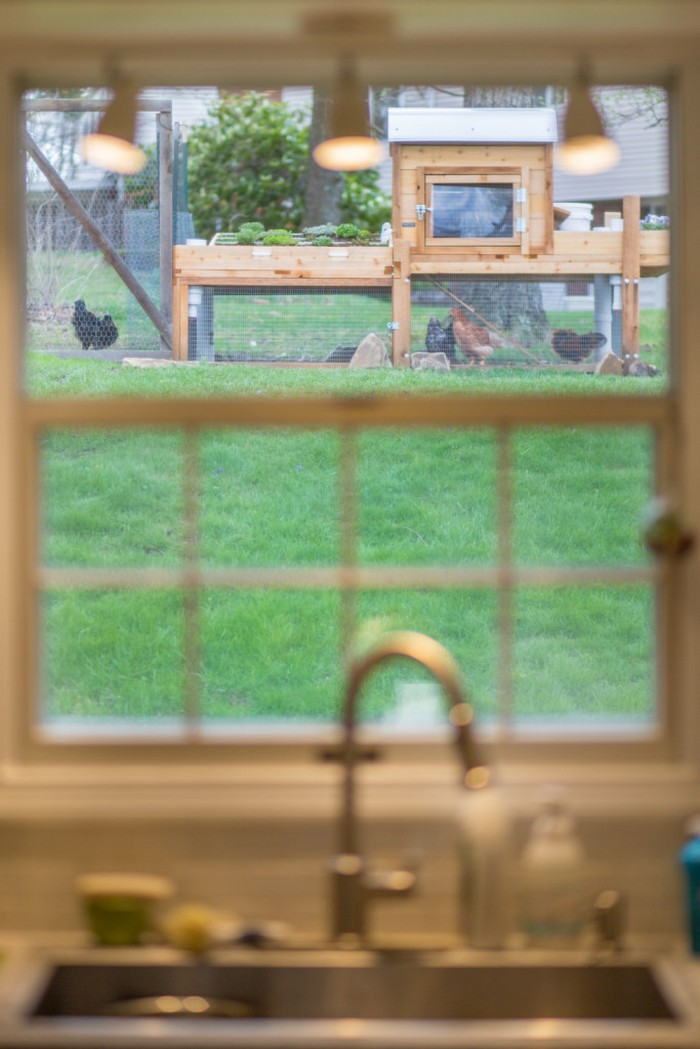
And as mentioned it serves more than just one purpose! Aside from being able to add more varieties of plants in your yard, you are also giving your chooks better protection against extreme weather as the green roof is an excellent insulator. As a bonus, It also makes your chicken coop more pleasing to the eye thus enhancing the look of your entire backyard. ?
Contents
Building a Living Roof Chicken Coop
You’ll need these materials:
- Sheet of Plywood
- 1 x 10 x 10 Board
- Basic Potting Soil
- PVC Tubes and Fittings
- Plastic Sheeting
- 4 Drawer Handles
- Nails and Screws
And these tools:
- Circular Saw
- Drill
- Hammer
- Cutter
- Measuring Tape

Steps:
Step 1 – Lay out the footprint
Measure the area where the coop will sit with your tape. Mark a rectangle on the plywood sheet for the floor, leaving at least 1 ft of overhang on every side to catch runoff and shade the walls.
Step 2 – Cut the major panels
Use the circular saw to cut the plywood floor, four wall panels, and a pitched roof frame. Check each cut with the measuring tape before you move the saw to keep joints tight.
Step 3 – Assemble the base frame
Screw the 1 × 10 × 10 board into a box that matches the floor size. Drop the plywood floor in place and secure it with nails every 6 in along each edge. This rigid base stops wobble when the living roof chicken coop sits on uneven soil.
Step 4 – Stand the walls
Hold the front wall panel upright. Drill pilot holes, then drive screws through the floor and into the wall studs. Repeat with the back and side panels. Tap everything square with a hammer handle before snugging the screws so doors hang straight later.
Step 5 – Frame the pitched roof
Cut two rafters from leftover board stock. Angle the top ends to meet at a ridge. Drill pocket holes and screw the pair together. Fasten each rafter to the side walls. The gentle slope pushes rainwater toward one end of the living roof chicken coop.
Step 6 – Add the roof deck
Cut a second sheet of plywood to fit over the rafters. Leave a 2 in lip on all sides to stop soil spills. Screw the deck down firmly. Double-check that the roof feels rock solid because it will hold wet soil and mature plants.
Step 7 – Install waterproof layers
Unroll plastic sheeting over the deck. Let it climb 4 in up every edge to create a basin. Staple it down lightly so you avoid punctures. Trim excess with a cutter. A watertight layer keeps droppings below from soaking your soil mix above.
Step 8 – Fit the PVC drainage frame
Cut PVC tubes to line all four edges of the roof tray. Drill ⅛ in holes along the side that faces the soil. Push elbows and tees on the corners to form a low manifold. The small holes weep extra rain away so roots never sit in a swamp.

Step 9 – Add root barrier and soil
Lay a second sheet of plastic or landscape fabric over the PVC frame. This barrier stops roots from reaching the waterproof layer. Dump 3-4 in of basic potting soil across the roof. Level it with a scrap board. Keep weight under 15 lb per square foot to preserve the coop structure.
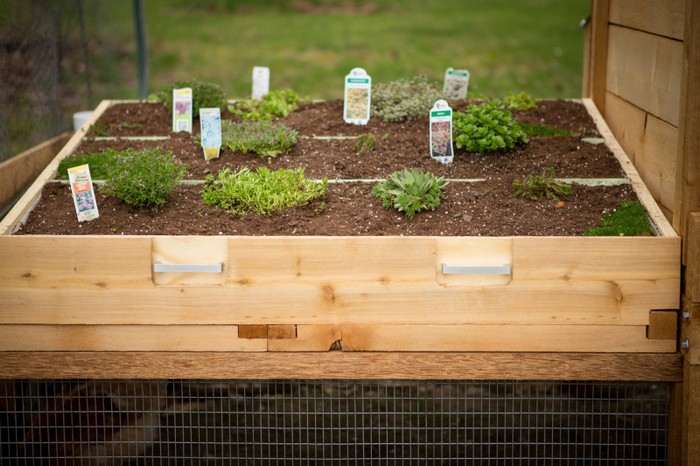
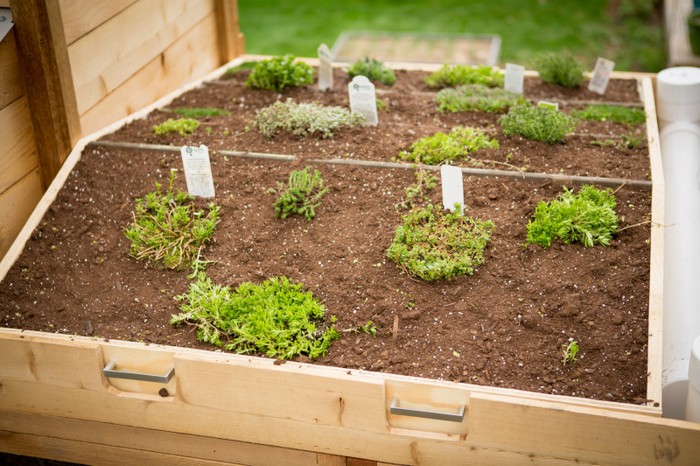
Step 10 – Plant hardy, low-growing species
Tuck in sedums, creeping thyme, or native grasses. They shrug off heat, need little water, and stay short. That means less maintenance while the living roof chicken coop keeps its tidy look.
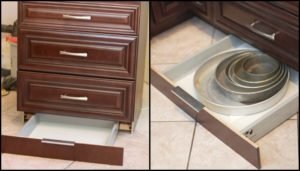
Step 11 – Mount functional hardware
Screw the four drawer handles to the clean-out door and nest-box lids. Handles give fast access for egg collection and daily coop chores without disturbing the plants overhead.
Step 12 – Inspect and maintain
Check the PVC outlets after heavy rain. Clear leaves so water drains freely. Add compost every season to feed the roof garden. A quick glance each week keeps the living roof chicken coop thriving and your hens comfortable year-round.
Plant selection and soil depth that thrive on a living roof chicken coop
Successful vegetation on a living roof chicken coop depends on smart plant choices and soil depth. Pick species and layers that match your climate and structural limits.
Light and climate matching
Sun exposure on the roof often runs hotter and drier than ground level. Pick drought-tough sedums, creeping thyme, and low clover if you bake under full sun. If your coop nestles beneath partial shade, go for shade-tolerant mosses, ajuga, or dwarf fescue.
Check your USDA zone and rainfall pattern before you buy plugs. Hardy varieties will root fast and resist heat spikes that happen above warm bird quarters. A mix of three to five species spreads risk and keeps the roof green even when one plant falters.
This blend also adds color changes through the seasons and draws pollinators close to the run. The living roof chicken coop then doubles as a tiny habitat patch, boosting backyard biodiversity.
Soil mix composition and depth guidelines
Green roofs thrive on engineered soil that stays light when wet. Blend eighty percent expanded shale or pumice with twenty percent compost. That ratio gives roots air pockets yet holds enough moisture for dry weeks.
Keep depth at three inches for sedums or thyme. Bump it to five inches for edible greens such as spinach or pak choi. Deeper soil means more weight, so verify the frame rating before pouring. Work slow and spread the mix evenly to avoid roof dips that collect standing water.
Add a thin mulch of coconut coir on top; it curbs evaporation and stops lightweight soil from blowing away in sudden gusts.
Edible greens versus ornamental cover
Ornamental succulents need almost no care once settled, freeing you to focus on chores inside the coop. Edible greens invite weekly harvest and keep hens supplied with vitamin-rich trimmings.
You can even grow calendula or nasturtium. Their flowers garnish salads and lure beneficial insects that curb mites near the roost. Plant edibles toward the low edge of the slope so you reach them without stepping on fragile ornamentals higher up.
Rotate crops every season to prevent nutrient drain. Side-dress with worm castings rather than synthetic fertilizer. That gentle feed avoids chemical runoff onto birds and soil below.
Seasonal care and replanting strategy
Spring brings explosive growth, so thin crowded clumps early. Clip spent blooms and compost them. Summer heat dries edges first; irrigate with a hose set to mist for five minutes before noon.
Autumn rains might leach nutrients, so top up compost once leaves turn. In colder zones, cover tender herbs with frost cloth till snow melts.
Replace any winterkill as soon as soil thaws. Regular light maintenance keeps roof weight stable and prevents root mats from lifting waterproof layers.
Drainage, waterproofing, and root barriers that keep the timber dry
Moisture above the roost can rot timber before you notice. Reliable drainage, waterproofing, and root barriers guard a living roof chicken coop from expensive damage.
Choosing a durable waterproof membrane
Start with a single-piece EPDM rubber or heavy-gauge pond liner. Both stretch with thermal movement and resist puncture from stray nails. Lay it over the plywood deck with six inches of upstand on every edge.
Smooth wrinkles by hand and add a bead of exterior sealant under corners. Fasten only at the perimeter to avoid unwanted holes. A dark membrane absorbs heat, but the soil layer above shields hens below from temperature swings.
Building a free-flowing drainage layer
A living roof chicken coop stays healthy when excess water escapes within minutes. Lay recycled plastic drainage mats or half-inch washed pea gravel across the membrane. Slope the deck at one inch per eight feet toward a PVC scupper.
Insert a leaf guard over the outlet to block soil grains. Connect the scupper to a downpipe that feeds a rain barrel. Hens enjoy cool collected water, and you waste none of the runoff.
Root barrier materials and placement
Roots chase moisture and will push through seams if you skip a barrier. Roll out high-density polyethylene sheeting directly on top of the drainage layer. Overlap seams by twelve inches and tape them with UV-stable flashing tape.
Turn the material up along parapet edges to form a continuous tray. This barrier weighs little yet stops aggressive sedum runners and keeps woody herb roots from burrowing into plywood joints. It also simplifies replanting because mats lift off cleanly when renewal time comes.
Inspection, cleaning, and quick repairs
Set a monthly reminder on your phone. Lift one soil corner and feel the membrane. It should feel dry on the underside. Remove any seedling trees that sprout from wind-blown seeds; their taproots puncture fast.
After storms, clear the scupper and check for pooled water rings. Patch nicks with EPDM repair tape as soon as you spot them. That five-minute fix adds years to the coop roof and keeps hens comfy below. The living roof chicken coop rewards vigilance with lower long-term costs.
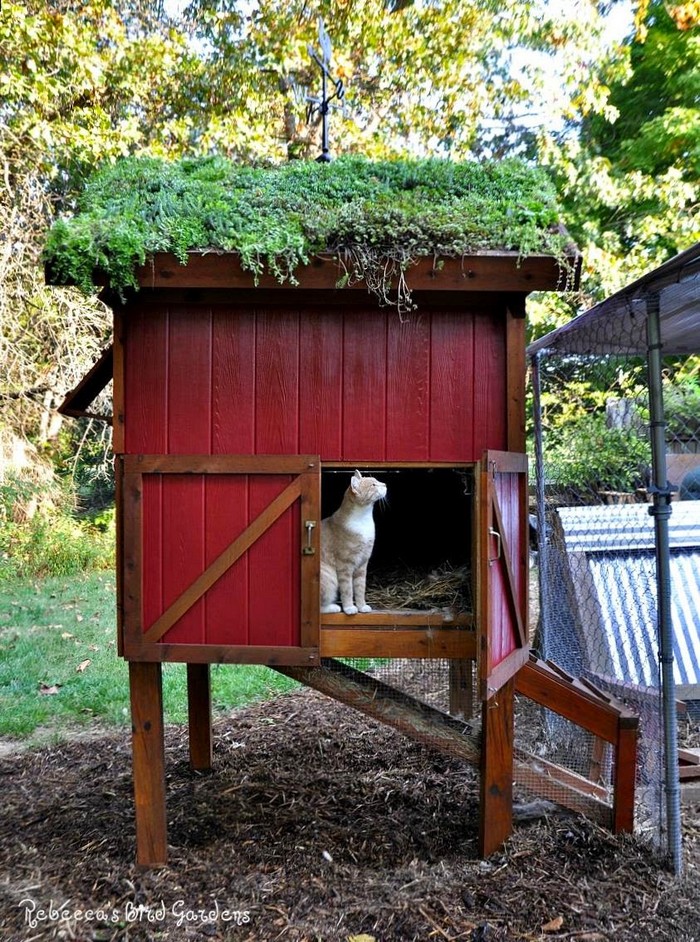
Living Roof Chicken Coop Gallery
Click on any image to start the lightbox display. Use your Esc key to close the lightbox. ![]()
Framing upgrades that carry the extra roof load without sagging
Plants and wet soil weigh far more than shingles. Upgraded framing lets a living roof chicken coop carry that load safely through storms and years of pecking.
Estimating live and dead load on rafters
Dead load is the permanent weight of soil, plants, and framing lumber. Live load includes snow, rain, and you kneeling for weeding. Calculate ten pounds per square foot for a three-inch soil bed and fifteen for five inches.
Add regional snow load from local codes. Sum both, then factor in safety at forty percent. That final figure guides lumber size and spacing.
Rafter spacing and lumber grade choices
For small spans under six feet, two-by-four rafters spaced twelve inches on center may handle three-inch soil. Longer spans or deeper soil need two-by-sixes or even two-by-eights.
Choose kiln-dried structural pine graded #2 or better. Straight grain reduces twist, and kiln drying lessens later shrinkage that could loosen fasteners. Tight spacing lowers deflection, so the soil surface stays level and water drains correctly.
Reinforcement with gussets and sister joists
Add plywood gussets at every rafter joint. They spread load and stop splitting. If you retrofit an older coop, screw a sister joist alongside each rafter. Glue between faces with exterior construction adhesive and clamp overnight.
This quick upgrade doubles bending strength without dismantling the roof. Consider steel angle brackets under the ridge beam where both rafters meet. Metal spreads compressive force and keeps the peak crisp.
Fasteners, connectors, and corrosion control
Galvanized screws hold better than nails under vibration from flapping wings and wind. Use structural screws rated for outdoor use. Coat cut ends of lumber with copper-based preservative.
Flash all wall-to-roof joints with self-adhesive butyl tape before laying membrane. Stainless steel washers under screw heads stop them from digging into soft pine over time. With these steps, the living roof chicken coop frame resists rot, sag, and rust while supporting lush growth overhead.
Conclusion
Building a living roof chicken coop adds beauty and resilience to your yard. The green layer cuts heat in summer and holds warmth in winter. Good framing, drainage, and plant care keep the structure sound. Your hens stay healthier under stable temperatures and cleaner air. The coop becomes a focal point that blends utility with sustainable design.
Winter can be a harsh time for you chickens. Keep them warm without using electricity with our DIY guide!