Last Updated on October 29, 2025 by teamobn
Outdoor kitchens have gained massive popularity in recent years for many reasons. They allow homeowners to cook, entertain, and dine outdoors without making too many trips indoors. Additionally, outdoor kitchens can increase the value of your home and make entertaining guests much more enjoyable.
As your guests move out onto the deck, the barbecue grill gets fired up. They saunter towards the balcony doors and sit on balcony chairs to take in the fresh air. The smell of grilling meats and vegetables wafts through the air, making everyone’s mouths water. The view from the deck is stunning, and the conversation flows easily as everyone enjoys the food and the company.

You don’t have to miss spending quality time with your friends and family just because you’re busy cooking in the kitchen. An outdoor kitchen allows you to entertain your guests while still being able to cook for them.
You don’t even have to spend a fortune to build one! Just use some imagination and creativity, and you can easily create a beautiful and functional outdoor kitchen on a budget.
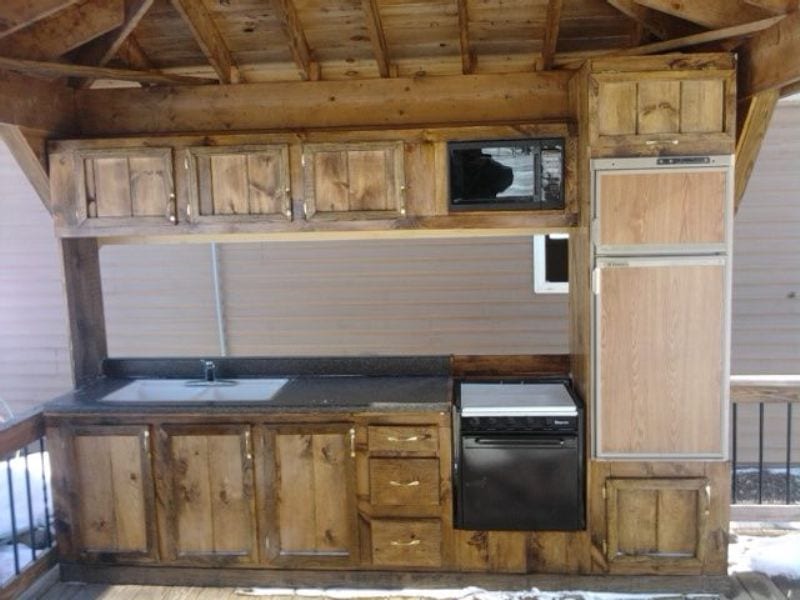
This deck kitchen is a great example of how to upcycle and recycle old materials to create something new and beautiful. The owner didn’t spend a lot of money building it as most of the parts came from a 1993 camper.
The sink, fridge, stove, and drawers were all reused from the old camper. With a little bit of creativity and some elbow grease, this kitchen was brought to life – proving that you don’t always need to buy new things to get the look and feel you want.

Contents
Building a Deck Kitchen
You’ll need these materials:
- 2” Wood – for framing
- 18 inch 60-pound Drawer Slides
- Drawer Handles
- Hinges
- 1×4 Ship Lap Boards
- 1×6 Ship Lap Boards
- 3/4” Plywood
- Old Countertop
- Old Sink
- Old Drawer Fronts
- Screws
- Wood Stain and Seal
- Wood Glue
- Silicone Sealer
- 3% Hardener
- Polyester-based Resin
- Painter’s Tape
And these tools:
- Tape Measure
- Table Saw
- Jigsaw
- Drill
- Brush
- Belt Sander
- Caulking Gun
- Putty Knife
Steps:
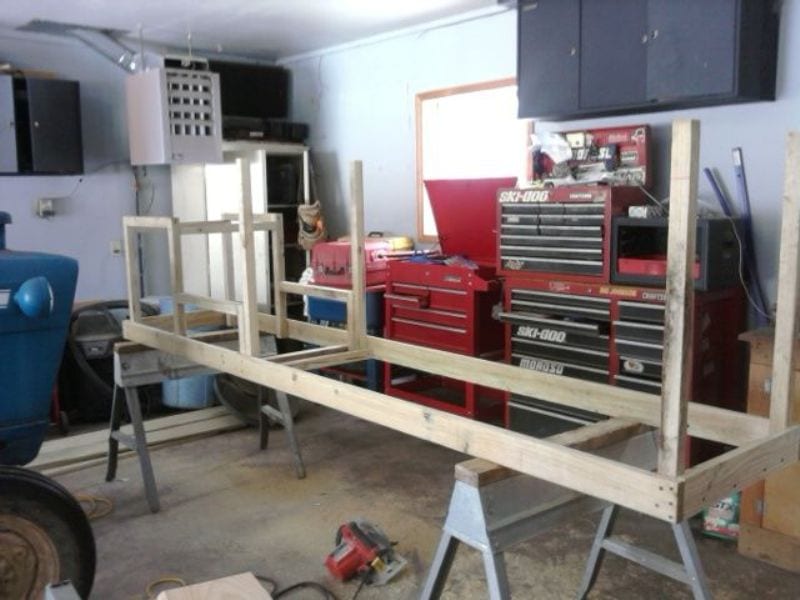
This is the 2-foot wide by 10-foot long frame.
I made doors from 1by4 pt and 1 by 6 shiplap boards. Here is also the framework for the drawers. Stained provincial.

Here are the 3 drawers I made with 18 inches 60-pound drawer slides

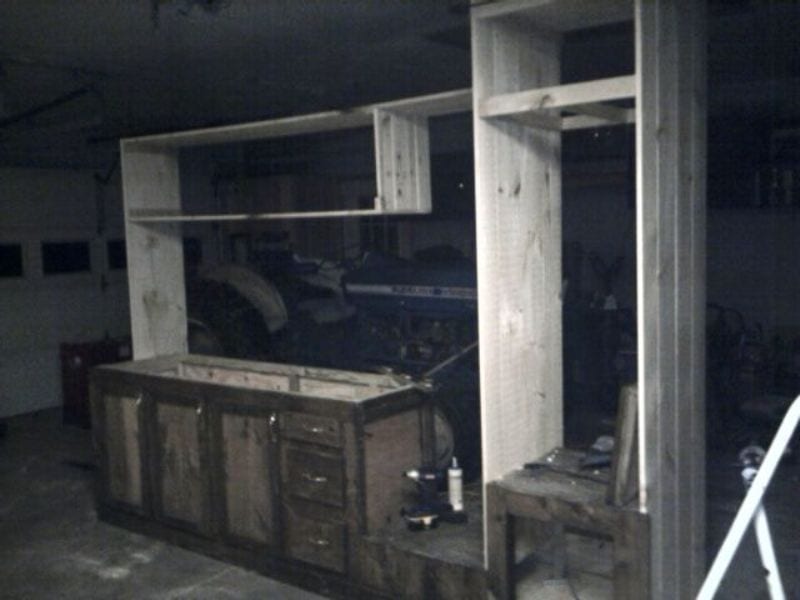
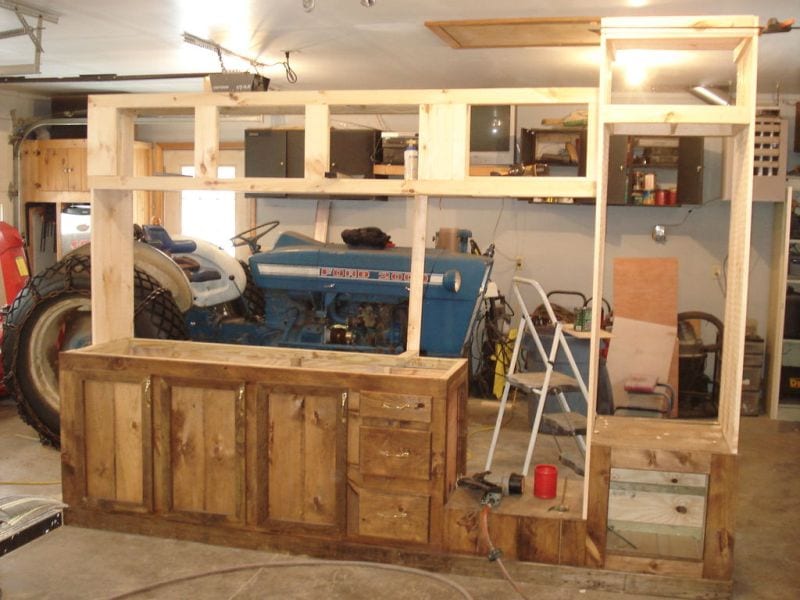
Here I am starting the fridge cabinet and upper cabinets. It is exactly the same size as the kitchen that was in the camper.
Here are all the spacers for the doors complete.

The sides are on and all braced up, giving the structure a sense of solidity. It’s ready for the next phase of construction.

As I cut through the upper and lower fridge cabinet openings, I can’t help but feel a sense of excitement. I’m creating something new, something that didn’t exist before. It’s a thrilling feeling, and I can’t wait to see the finished product.
I installed the countertop and sink for the first time! It was pretty nerve-wracking at first, but I’m glad I went for it. Came out pretty good for a first-timer, if I do say so myself. Might have to get used to this whole DIY thing…
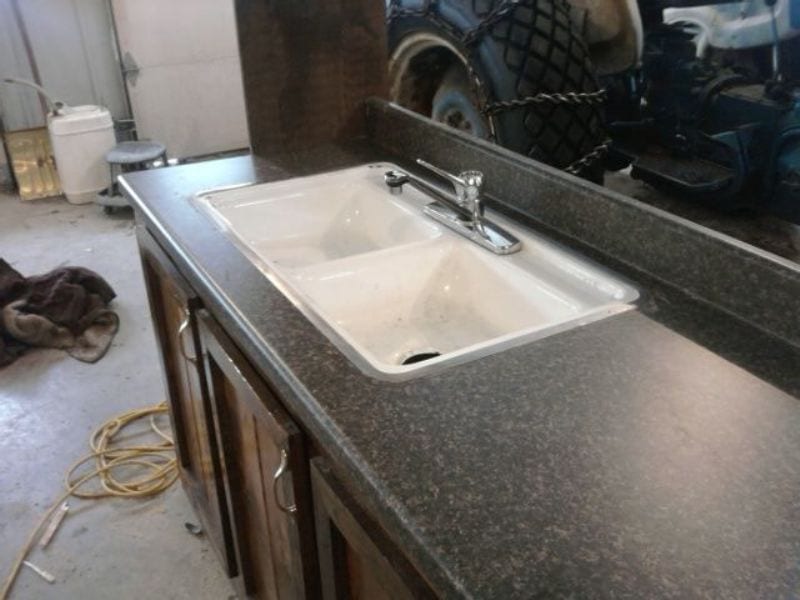
Here it is all done and put on the deck….
Although an outdoor kitchen seems to be a luxury, you don’t have to break your bank to build one. Look around you and find alternative materials you can use to build your own outdoor kitchen.
Thanks to coolbeansbaby68 for this great tutorial!
Deck Kitchen Layouts and Traffic Flow
Smart deck kitchen layouts keep cooks safe and guests comfortable. Plan clear zones, right-sized aisles, and paths. Smooth traffic flow prevents collisions, smoke drift, and spills when everyone arrives hungry.
Work Zones: Prep, Cook, Serve
Divide the deck kitchen into prep, cook, and serve zones. Keep the sink and main counter contiguous for safe knife work and quick cleanup. Place the grill or cooktop away from the primary prep edge to limit cross traffic. Add a landing space next to every appliance. Keep trash and recycling reachable but out of the aisle. Label storage so helpers can find tongs and trays without hovering over the heat.
Aisle Widths and Clearance
Plan 36 to 42 inches for single-cook aisles. Bump to 48 inches if you expect two people cooking or passing with trays. Maintain 24 inches of clear counter on at least one side of each appliance. Leave 18 inches beyond stair openings so doors and drawers don’t pinch. Keep fridge and grill doors from colliding by swinging them away from the main path.
Appliance Placement, Wind, and Smoke
Put the grill on the deck edge with wind at its back to carry smoke away from seating. Avoid corners that trap heat. Keep open flames at least 24 inches from combustible rails and posts or use approved heat shields. Store propane under shade and outside work aisles. Give the fridge shade too. Warm compressors cycle more and shorten service life.
Guest Flow, Seating, and Sightlines
Separate the cook lane from guest seating by a clear path. Place a serving counter or pass-through between zones so friends can chat without blocking the tongs. Avoid seating directly behind grill doors. A small beverage station near the stairs lets kids and visitors grab drinks without entering the cook triangle. Keep views open by stepping tall cabinets down near railing lines.
Water and Drainage: Sinks, Graywater, and Freeze Protection
Water planning keeps a deck kitchen durable. Provide safe supply, smart drainage, and freeze protection. A well-placed sink speeds prep and cleanup. Good graywater design supports plants and satisfies codes.
Supply Lines, Backflow, and Filtration
Run PEX or copper with shutoffs inside the house. Include a vacuum breaker or backflow preventer on outdoor taps that feed the sink. Add braided stainless connectors and flexible loops to absorb movement. Use a sediment strainer and a compact carbon filter to improve taste. Insulate exposed lines and protect them with UV rated coverings. Label hot and cold at the manifold for easy service.
Drainage Slope, Traps, and Venting
Keep the drain line sloped at one quarter inch per foot toward the house or an approved receptor. Install a standard P trap under the sink to block odors. Vent the line with a code approved air admittance valve if tying to a distant vent is impractical. Provide a cleanout at the cabinet base. Add a removable basket strainer to capture food scraps and keep wildlife away.
Graywater Options and Compliance
Graywater can irrigate ornamentals when local rules allow it. Route sink discharge to a mulch basin, not to edible beds. Exclude meat grease and harsh cleaners that harm soil biology. Add a grease trap or interceptor if cooking produces heavy fats. Include a diverter valve to send flow to the sanitary system during winter or parties. Post clear labels so guests know what can go down the drain.
Freeze Protection and Seasonal Shut-Down
Protect the system before freezing weather. Place isolation valves with drain ports inside conditioned space. After closing them, open the outdoor faucet to let lines empty. Consider heat trace cable on vulnerable runs and wrap with insulation. Use a deep, frost proof sillcock where possible. Blow out lines with compressed air at low pressure for seasonal shutdown. Leave cabinet doors cracked to dry.
Deck Kitchen Gallery
Click on any image to start the lightbox display. Use your Esc key to close the lightbox. You can also view the images as a slideshow if you prefer 😎


Load Limits and Framing Reinforcement for a Deck Kitchen
Deck kitchens carry heavy loads. Verify structure before adding appliances, stone tops, or masonry. Reinforcing joists and posts ensures safety and stability, even when parties and fridges pack the space.
Assess the Existing Structure
Start with a deck inspection. Confirm beam sizes, joist spans, ledger attachment, and footing dimensions against local span tables. Identify weak spots like notched posts, undersized joist hangers, and decayed members. Map where heavy items will sit. Note snow or live load requirements in your area. If anything looks marginal or unknown, bring in a qualified pro. A short consult can prevent sagging and costly rework.
Concentrated Loads Under Appliances and Counters
Outdoor appliances, stone counters, and masonry islands create point loads. Spread them over multiple joists with continuous plywood and blocking. Land islands directly over beams or new footings when possible. Avoid cantilevered edges for heavy pieces. Keep water features and ice makers off spans that already carry stair loads. Record actual weights before finalizing placement so upgrades match structural capacity.
Reinforcement Methods: Sistering, Blocking, Posts
Sister joists with full-length members fastened per code to boost stiffness. Add solid blocking or struts to transfer appliance loads to beams. Install new beams under islands and run new posts to properly sized footings. Upgrade the ledger with approved fastener patterns and flashing. Verify rail posts remain independent of island framing so safety loads stay intact.
Fasteners, Hardware, and Corrosion Control
Use hot-dipped galvanized or stainless hardware on treated lumber. Match metal types to avoid galvanic corrosion. Upgrade to structural screws where lag bolts once went. Add post bases and beam caps that separate wood from standing water. Seal all cuts and bores with preservative. Strong connections keep kitchens quiet, resist racking, and hold calibration on drawer slides and appliance doors.
Conclusion
Building a deck kitchen turns outdoor space into a daily-use cook zone. Plan zones, clear aisles, and safe grill clearances before buying gear. Verify loads and reinforce joists so stone, appliances, and traffic feel solid. Choose weatherproof materials and simple maintenance routines to keep the space looking new. Start small, use upcycled components, and expand as budgets and hosting needs grow.


