Last Updated on May 28, 2024 by teamobn
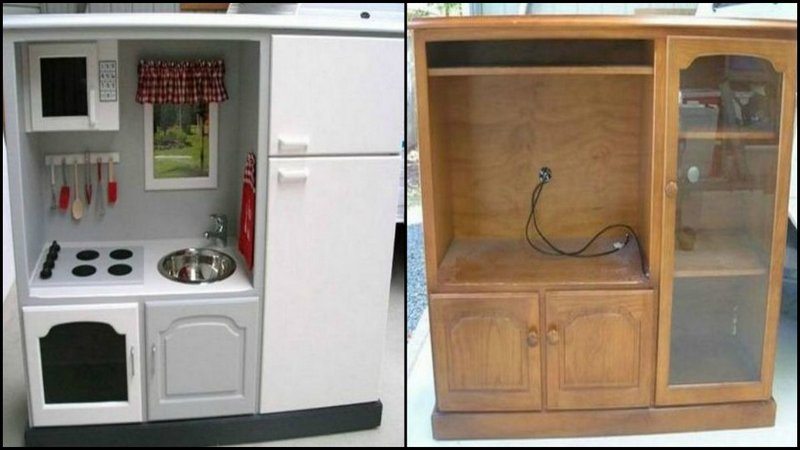
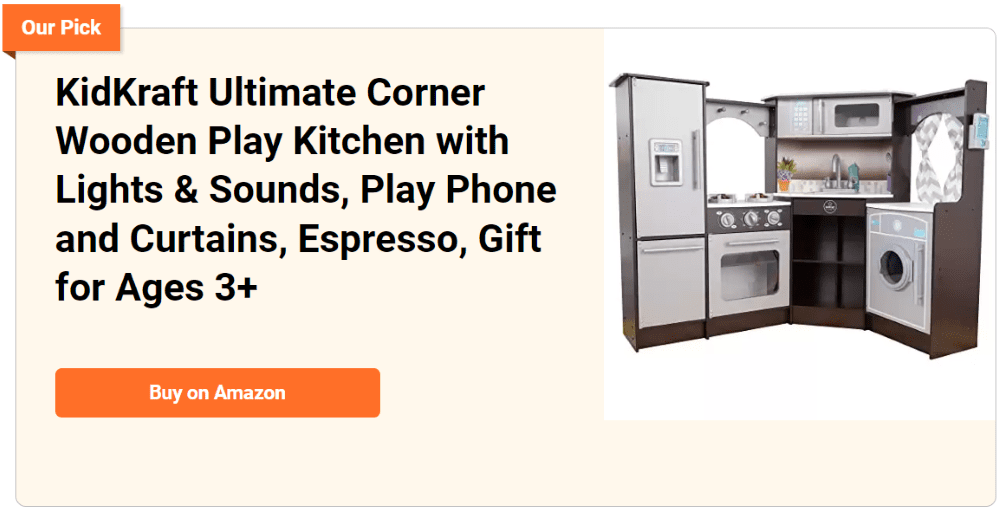
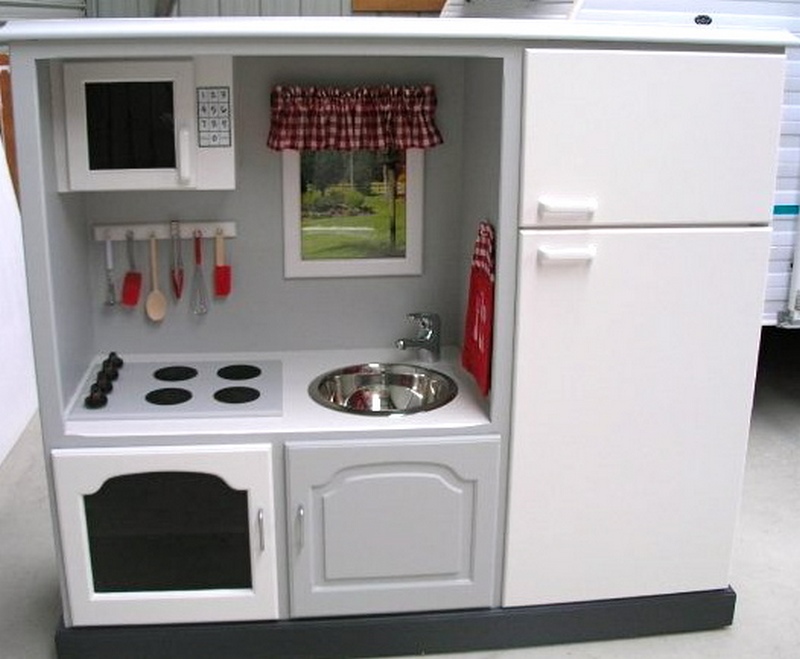
Have you ever thought of buying your daughter an exciting play Kitchen but you’re on a tight budget? well, if you have an old TV cabinet, why not turn it into a DIY TV cabinet play kitchen for your precious daughter.
We’ve all had that same difficult experience of trying to move an old, boxy, heavy TV set. But did you know that trying to get rid of the clunky TV cabinets they once occupied can be just as laborious?
Most of us have tried to sell them, give them away, or even put them out on the curb, only to find that no one wants them. And even if you’re lucky enough to find someone who will take them off your hands, getting rid of them can be a huge hassle.
So what’s the best way to get rid of an old TV cabinet? The answer may surprise you: recycling! Many recycling centers will take old TV cabinets and recycle them into your daughter’s play kitchen.
A DIY play kitchen is more stable and hard-wearing than commercially sold plastic versions. They are typically more sturdy and durable than their plastic counterparts. They can be customized to fit your child’s specific interests and needs.
And have you checked playset prices in toy stores lately? Playset prices have been on the rise in recent years, making a DIY option much more budget-friendly.
Building your daughter a DIY play kitchen is a fun activity that you and your child would surely enjoy. You can bond with your daughter while you work together to build the play kitchen.
For sure she’ll be thrilled to have a new toy to play with when it’s finished. Plus, it’s a great way to teach her some basic carpentry skills!
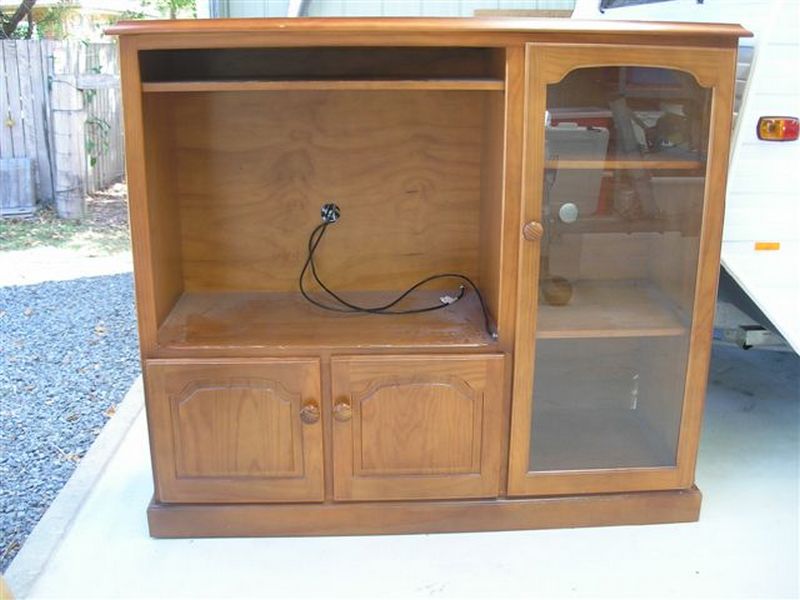
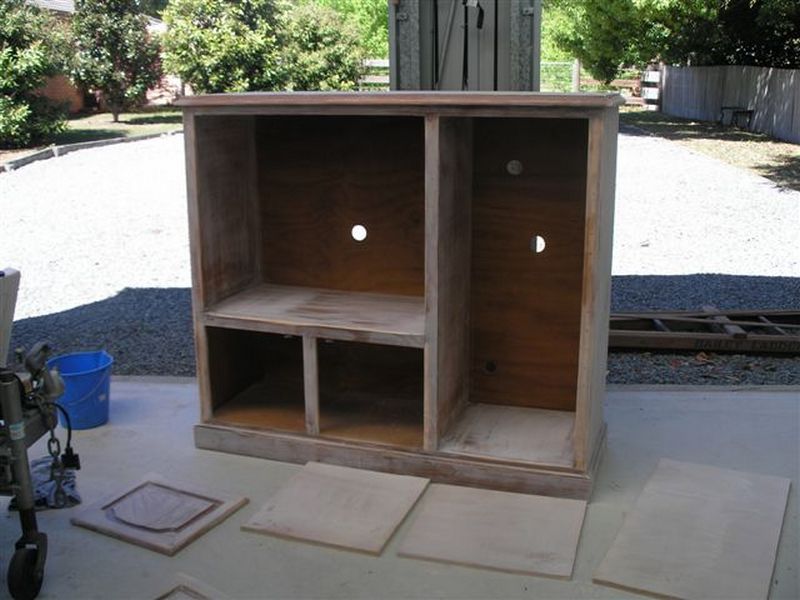
To create a play cabinet for your child is to start with an old TV cabinet. First, you will need to clean it out. You may want to remove any old electronics or other items that are inside.
Once it is empty, you can start painting it to your child’s colour preference. This will help them feel like they are a part of the process and allow them to have a say in how their play kitchen looks.
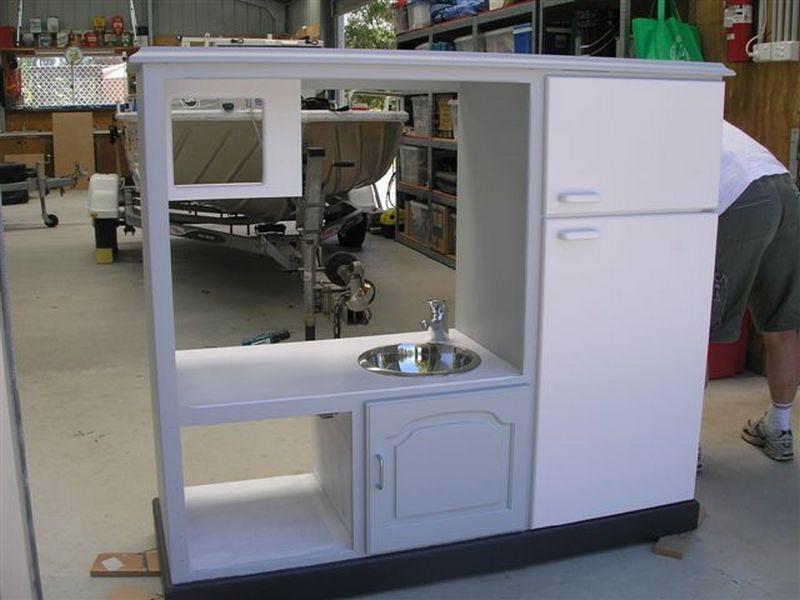
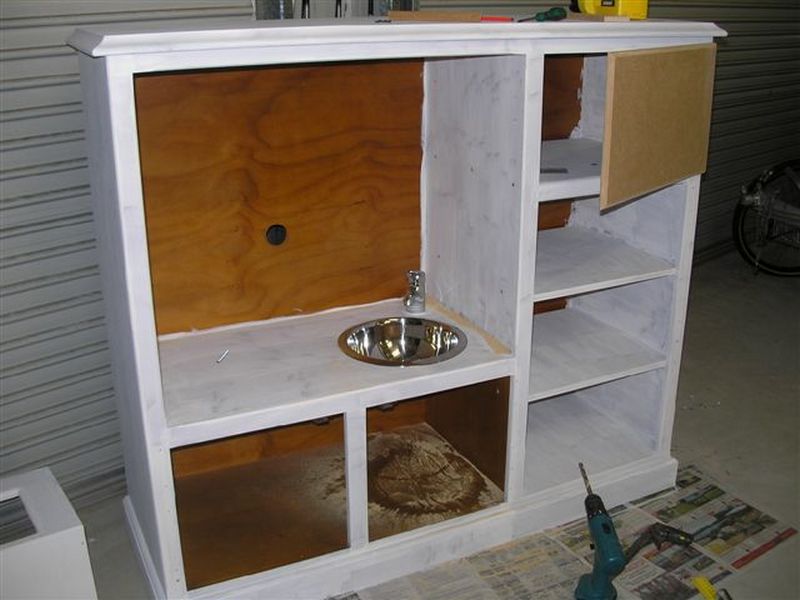
Then continue working on the interior of your DIY play kitchen, you can start by fitting a sink. This can be a fun and easy project that will really make your play kitchen will stand out.
You can find sinks at most hardware stores, or even online. Be sure to measure the space you have available before purchasing a sink so that you know it will fit properly.
Once you have the sink installed, you can then add countertops, cabinets, and ‘appliances’ to complete the look of your DIY play kitchen.

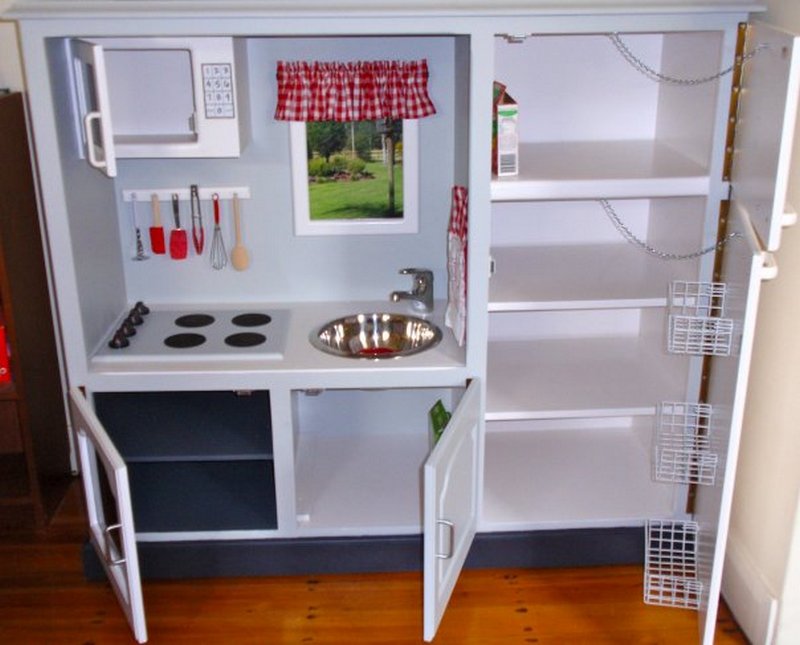
Your kids are sure to love it if you add some accessories to your DIY play kitchen. They’ll have a blast pretending to cook and clean just like mom and dad.
Plus, it’s a great way to teach them about responsibility and taking care of their own things.
DIY Play Kitchen is also closer to real kitchens than many other play kitchens on the market. We say it’s a gift for kids they will surely love because it’s more realistic and closer to the real thing.
This will help them learn and explore their creativity while they play.

Building a TV Cabinet Play Kitchen
Materials
- Old TV Cabinet
- Extra Wood Boards/Pieces
- Undercoat Paint
- Jig Saw
- Sink Set
- Dark Perspex
- Kitchen Accessories (curtains, towels, etc.)
- Knobs and Coasters – for stove
- Drawer Pull/Cabinet Handles – for microwave and cabinets
- Little Baskets/Racks – for fridge interior
- Hinges
Tools
- Saw
- Sander
- Drill
Instructions
Step 1: Preparation
- Clean the TV Cabinet: Start by cleaning the TV cabinet thoroughly to remove dust and debris.
- Sand the Surface: Use the sander to smooth out all surfaces of the cabinet, paying special attention to edges and corners to make them child-friendly.
Step 2: Cutting and Modifying
- Modify the Structure: If necessary, use the saw to cut the cabinet to your desired size or shape. Remove any components that are not needed.
- Create Appliance Spaces: Use the jig saw to cut out areas for the sink, microwave, and fridge. Ensure the cuts are smooth and fit the accessories you plan to install.
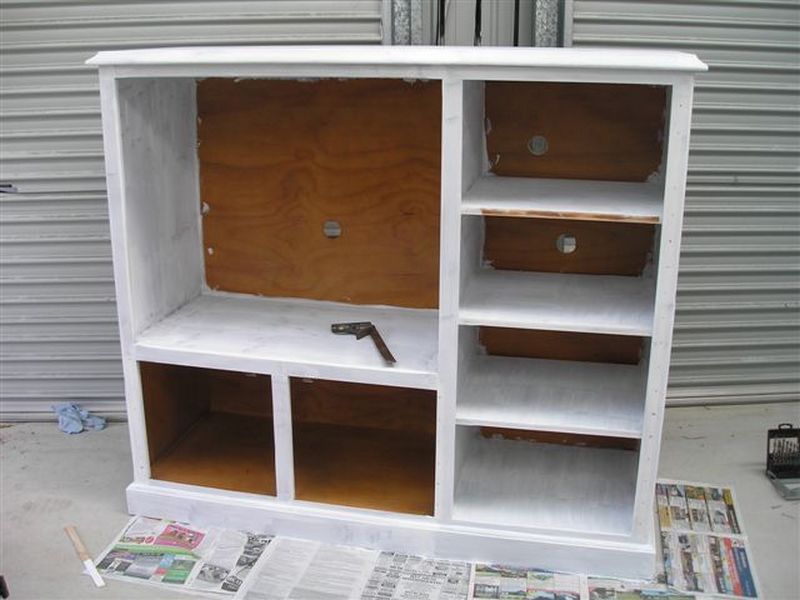
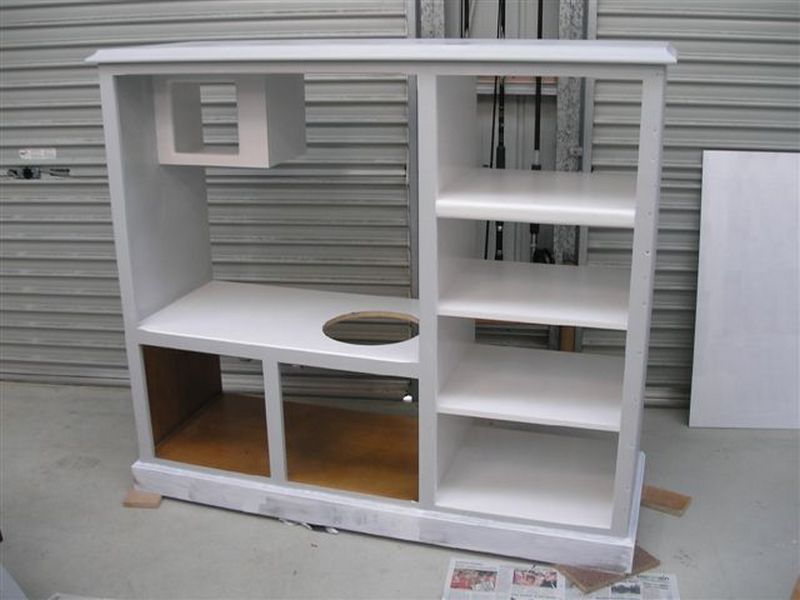
Step 3: Painting
- Apply Undercoat: Paint the entire cabinet with undercoat paint to prepare the surface for the final paint layers. This step is crucial for ensuring an even and durable finish.
- Final Painting: Once the undercoat is dry, apply your chosen color of paint. Let it dry completely.
Step 4: Installing Fixtures
- Install the Sink: Place the sink set into the cut-out area made for it. Secure it using screws and the drill.
- Attach the Perspex: Cut the dark Perspex to fit the oven window and any other areas where a glass-like material is suitable. Attach it using a suitable adhesive or small screws.
Step 5: Adding Details
- Install Knobs and Handles: Attach knobs and coasters to the front of the cabinet to mimic stove controls. Use the drill to secure drawer pulls or cabinet handles where the microwave and cabinets are designated.
- Fit Hinges: If you’ve created doors or moving parts, fit hinges to ensure they open and close smoothly.
Step 6: Accessorizing
- Decorate with Accessories: Place kitchen accessories like curtains, towels, and other decor items to give the play kitchen a homey feel.
- Organize the Interior: Use little baskets and racks inside the ‘fridge’ and cabinets for storage, mimicking a real kitchen setup.
Step 7: Final Touches
- Safety Check: Go over every part of the kitchen to ensure all screws are tight and there are no sharp edges or loose parts.
- Clean Up: Clean the entire setup to remove any dust or debris from the building process.
Click on any image to start the lightbox display. Use your Esc key to close the lightbox. You can also view the images as a slideshow if you prefer 😎


You can find more step by step instructions here…
Safety Modifications for Kid-Friendly Play Kitchen
Transforming an old TV cabinet into a play kitchen is a wonderful project that can provide endless hours of fun for children. However, safety is paramount when creating a TV cabinet play kitchen to ensure that it is a secure environment for kids to explore their creativity.
Here are essential safety modifications you should consider to make the TV cabinet play kitchen both safe and enjoyable.
Smooth and Secure Surfaces
The first step in modifying a TV cabinet play kitchen is to ensure that all surfaces are smooth and free of splinters or sharp edges. Use a sander to smooth down wood surfaces, paying special attention to corners and edges.
Additionally, applying a layer of child-safe sealant can help protect against splinters and make the surfaces easier to clean.
Sturdy Construction
Ensure that the TV cabinet play kitchen is stable and won’t tip over. Secure it to a wall if necessary, especially if the cabinet is tall or if children are likely to climb on it. Check all shelves and attachments to ensure they are fastened securely and can withstand the weight and force of children playing.
Non-Toxic Materials
When painting or decorating the TV cabinet play kitchen, use non-toxic paints and finishes that are safe for children. Check that all materials used in the play kitchen, including fabrics and adhesives, are free from harmful chemicals. Opting for natural or certified child-safe materials can prevent health risks associated with toxic substances.
Safe Accessories
All accessories and modifications, such as knobs, handles, and taps, should be securely attached to the TV cabinet play kitchen to prevent them from becoming choking hazards. Avoid small parts, and ensure that everything is appropriately scaled and robust enough to handle rough play without breaking off.
Soft-Close Mechanisms
Install soft-close hinges and drawer slides on all doors and drawers of the TV cabinet play kitchen. These mechanisms prevent fingers from getting pinched and reduce the risk of doors slamming shut unexpectedly. They also help maintain a quieter play environment.
Secure Openings and Closures
Ensure that any openings or enclosures, like oven doors or refrigerator sections, are easy for children to open and close without trapping fingers or causing injuries. Rounded handles and push-to-open mechanisms can be safer alternatives to traditional knobs and pulls.
Electrical Safety
If the TV cabinet play kitchen incorporates electrical elements, like battery-operated lights or sound effects, ensure all wiring is hidden and securely insulated. Battery compartments should be screwed shut to prevent access by young children, reducing the risk of battery ingestion.
Anchoring Heavy Elements
For TV cabinet play kitchens that include heavy elements such as a faux stone countertop or a large sink, anchor these securely. This prevents the components from shifting or detaching under pressure or during vigorous play, ensuring the kitchen remains safe and intact.
Visibility Features
Increase the visibility inside the TV cabinet play kitchen by adding adequate lighting. LED strip lights or stick-on LED lights can be installed under counters or inside dark compartments. This not only makes playing safer but also enhances the realism of the kitchen.
Implementing these safety modifications in the TV cabinet play kitchen will not only make it safer for children but also give parents peace of mind as their kids engage in imaginative play. These adjustments are crucial in turning an ordinary TV cabinet into a delightful and secure play area that children will cherish.
Customization Ideas to Spark Creativity in a TV Cabinet Play Kitchen
Creating a TV cabinet play kitchen is not just about converting old furniture into a new toy; it’s also an opportunity to unleash creativity and personalize the play space to your child’s interests. Here are several customization ideas that can transform a standard TV cabinet play kitchen into a unique and inspiring play area for your child.
Theme Selection
Start by choosing a theme for the TV cabinet play kitchen that resonates with your child’s interests. Whether it’s a diner at Sesame Street, a galactic refueling station canteen, or a Thomas the Engine train cafe, a theme can guide the choice of colors, accessories, and layout. This thematic approach not only makes the play experience more immersive but also tailors the TV cabinet play kitchen to your child’s imagination.
Interactive Elements
Enhance the TV cabinet play kitchen with interactive elements that mimic real-life functions. Install buttons that make clicking sounds when turned, add a bell for the oven timer, or incorporate lights that children can switch on and off. These interactive features enrich the sensory experience and encourage active, engaged play.
Artistic Touches
Give your child the freedom to decorate some parts of the TV cabinet play kitchen. This could include painting the backsplash area, designing food labels, or creating artwork for the refrigerator door. Providing a space for artistic expression allows children to personalize their kitchen and feel a sense of ownership over the project.
Educational Add-ons
Incorporate educational elements into the TV cabinet play kitchen to stimulate learning. For example, you can include play clocks for teaching time, menus for literacy skills, and play money for math activities. These educational add-ons make the play kitchen a tool for both fun and learning.
Sensory Play Areas
Integrate various textures and materials into the TV cabinet play kitchen to enhance sensory play. Use fabrics like felt or velvet for curtains, include a chalkboard for writing menus or shopping lists, and add different knobs and handles to explore textures. Sensory play is crucial for cognitive development and keeps children intrigued and exploring.
By customizing the TV cabinet play kitchen with these creative ideas, you not only enhance the play value of the kitchen but also create a stimulating environment that encourages creativity, learning, and growth. These personal touches make the play kitchen not just a toy, but a hub of creativity and joy.
Conclusion
Building a TV cabinet play kitchen transforms an unused piece of furniture into a vibrant and educational playground for children. This project not only promotes creativity and learning through play but also teaches valuable skills as children engage with their custom-designed kitchen. Ultimately, a TV cabinet play kitchen provides a unique, cost-effective solution for parents looking to enrich their child’s playtime with a touch of imagination and personal flair.
If you liked this project, you will also like viewing these projects for kids…