The Owner-Builder Network

Delightful Sweater Dog Bed

Last Updated on June 10, 2025 by teamobn

DIY Sweater Pet Bed
How to turn a sweater into a pet bed

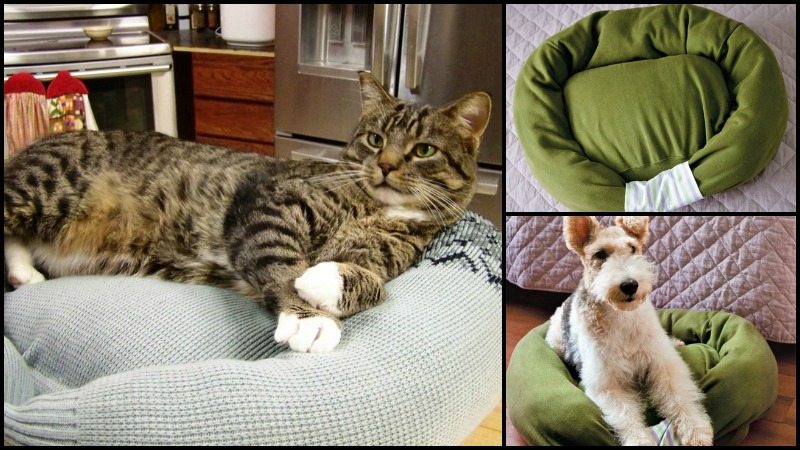
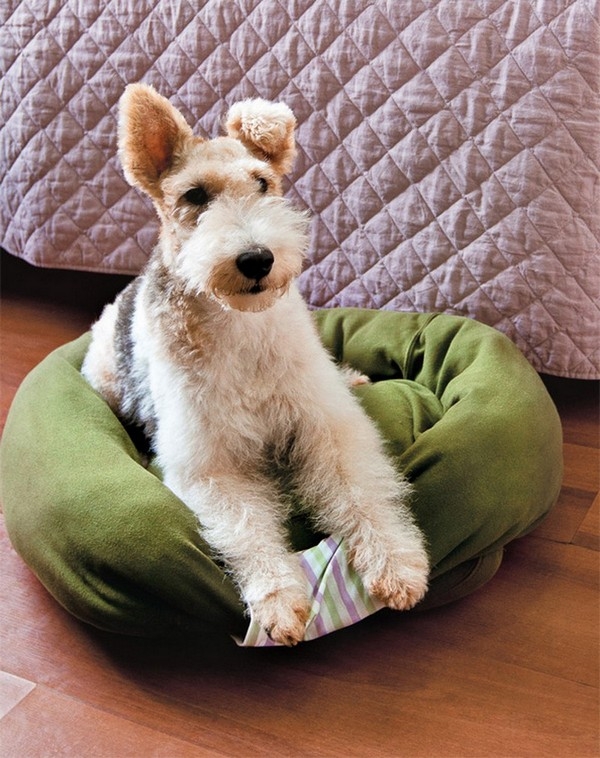
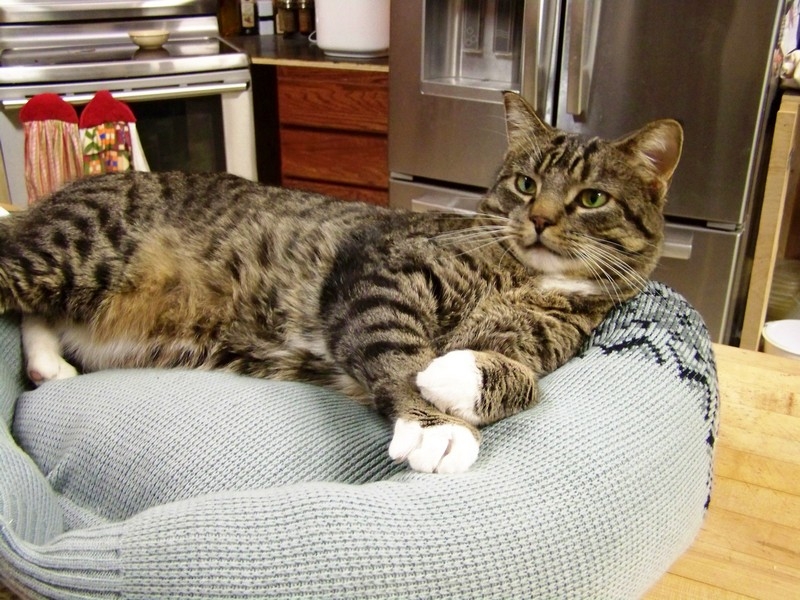
Does your pampered feline or pooch need a cozy bed? Here’s a quick way of making a sweater dog bed that they’ll find difficult to get off from!

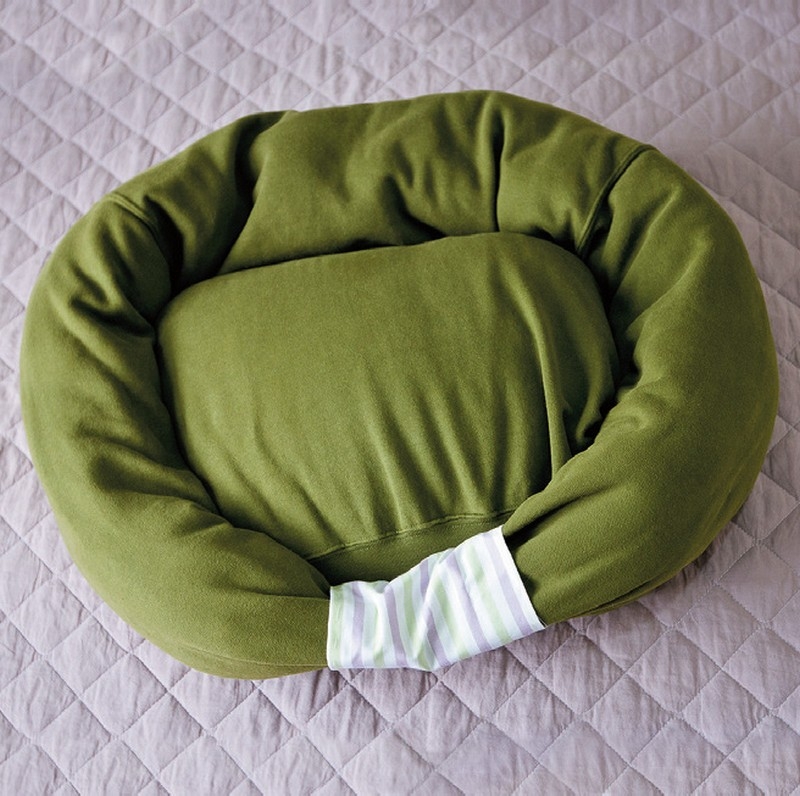
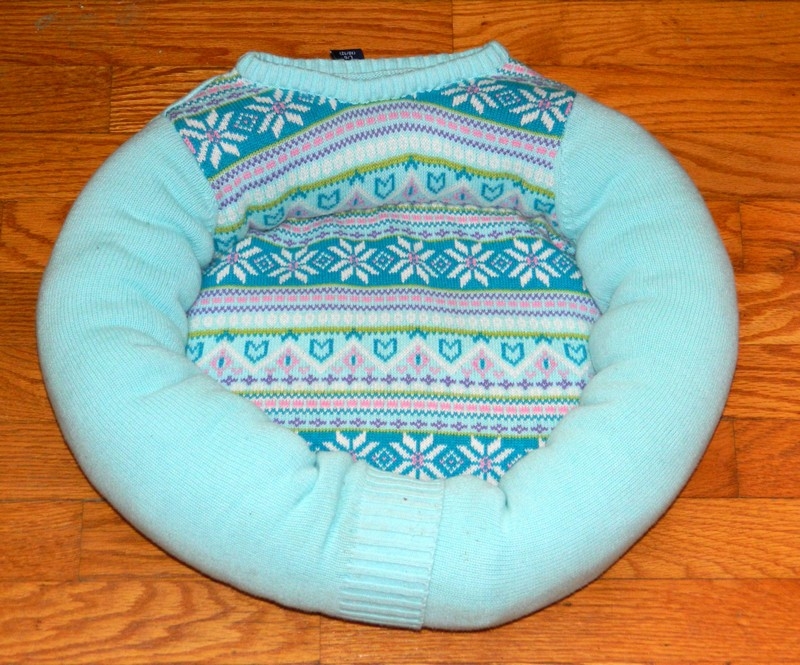
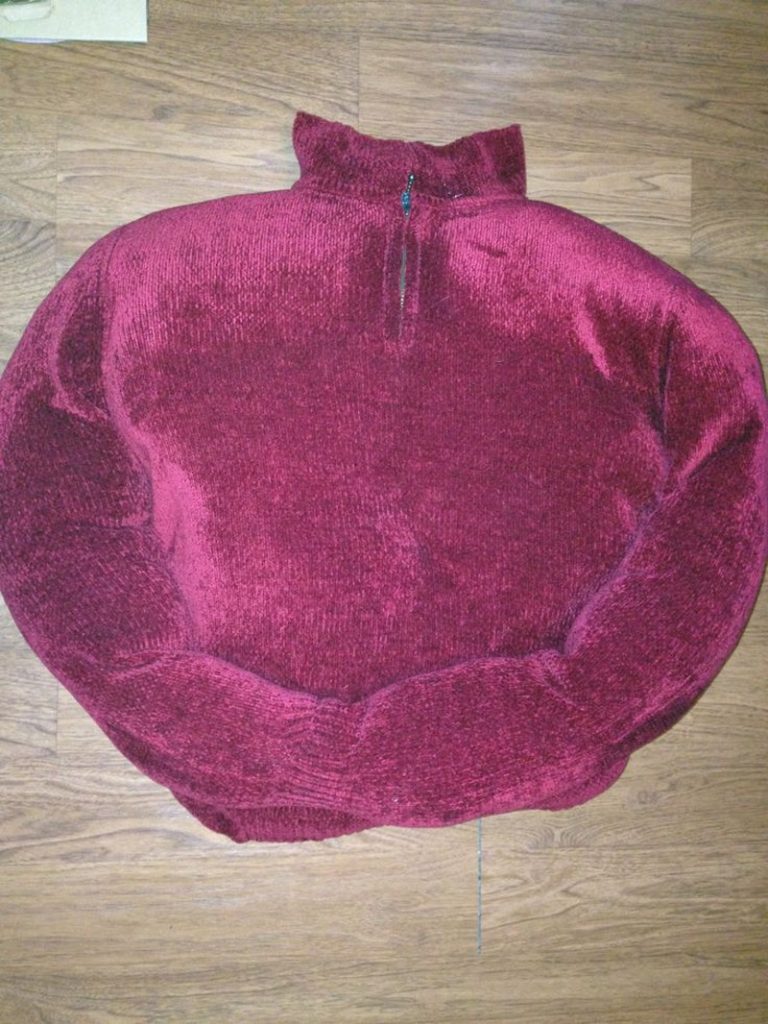
An old sweater and a small pillow — that’s all you need to make this cute and comfortable pet bed! This idea is proof that being pretty and functional doesn’t always mean costly.

A sweater is typically a knitted garment that covers the torso and arms, with the sizes and shapes of different sweaters varying across cultures.

Sweater Pet Beds

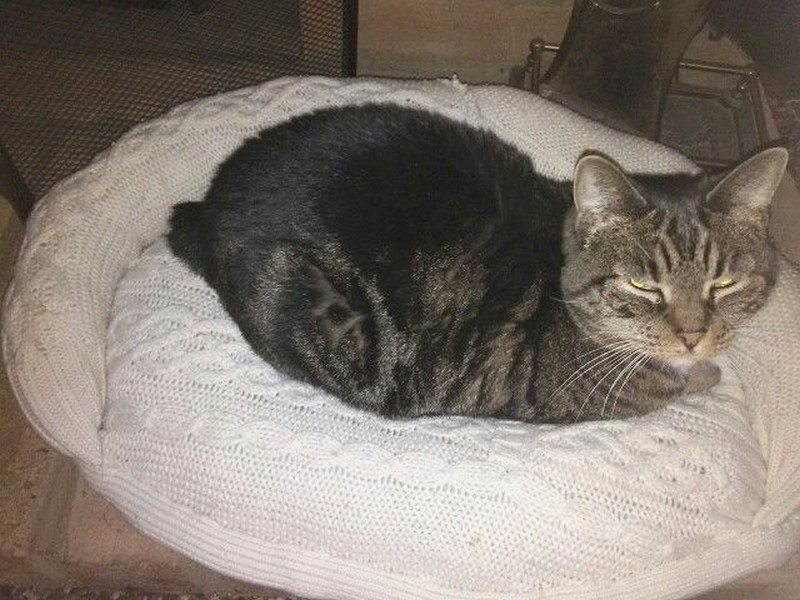
Sweaters became popular in the early 19th century as a unisex garments worn by sailors and fishermen in the United States and were adapted into women’s fashion in the late 19th century as they were discovered to be ideal for layering.

Sweaters are the most necessary clothing article in the winter. In the winter, the temperature is low, the air is dry and the wind is strong. It is important to wear them to keep ourselves warm and protect us from the cold.

But what if, you already have a lot of them in your closet and you are thinking of disposing of them. Wait! You can use it as a relaxing bed for your fur babies.

sweater pet beds

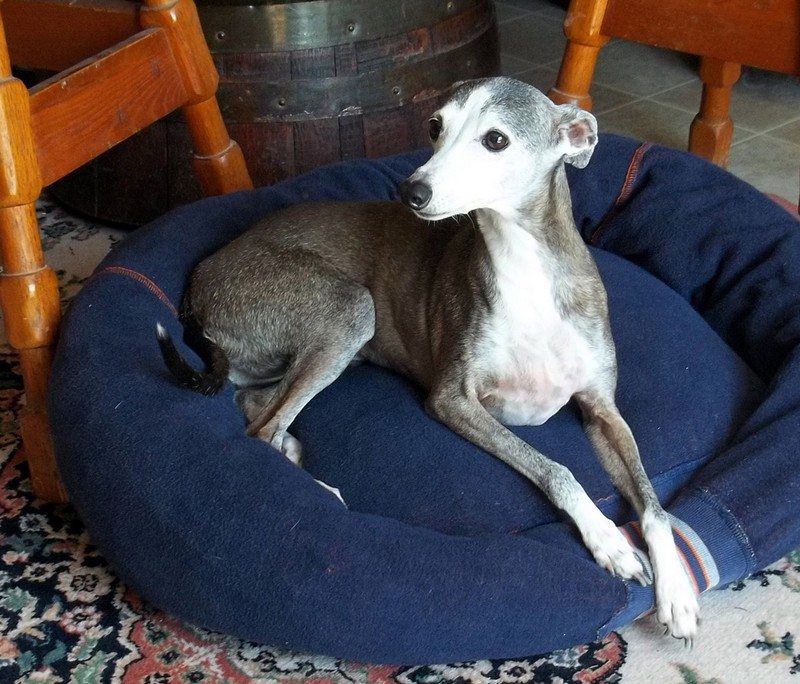
Crafting a Comfy Pet Bed Made From Sweaters

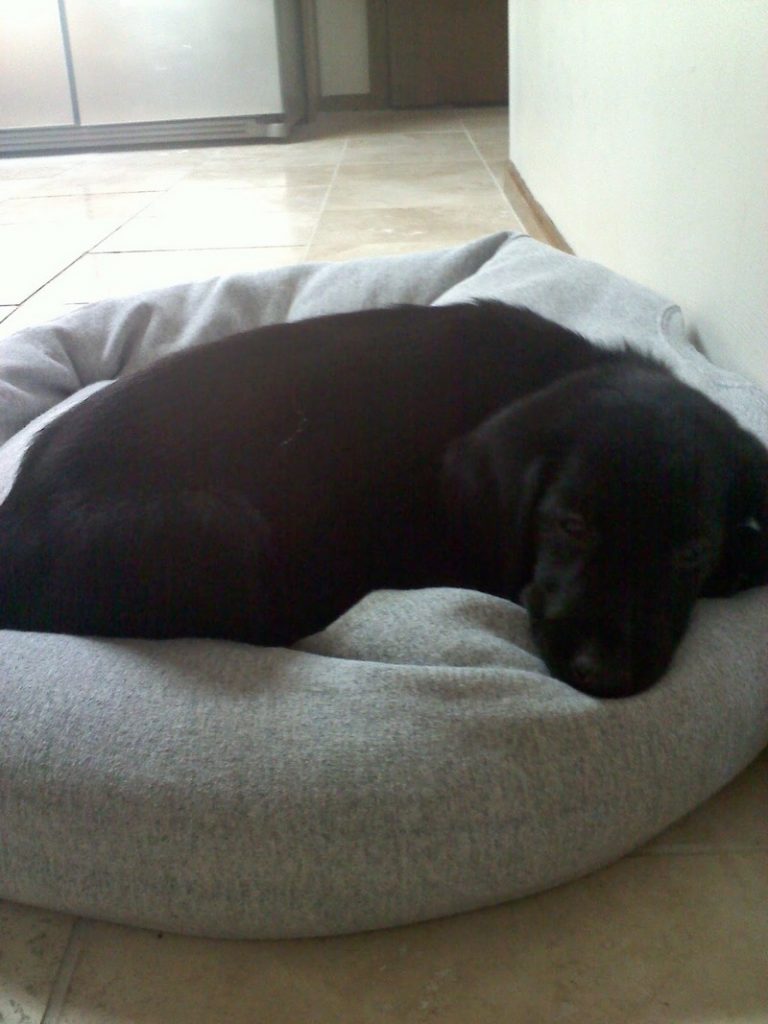
Every pet owner knows the obsession with pet beds. We have to admit that pet beds are the cutest and most adorable thing you can ever give to your fur babies but why do we spend so much money on them?

The answer is simple, pet beds are really important for your pet. They are a perfect way to make your pet feel more comfortable at home and cozy.

Pet beds are an investment that will bring you benefits in long term. First of all, they will help your pet to feel more comfortable and relaxed. But as mentioned, this doesn’t mean that we have to spend so much on pet beds.

sweater pet beds

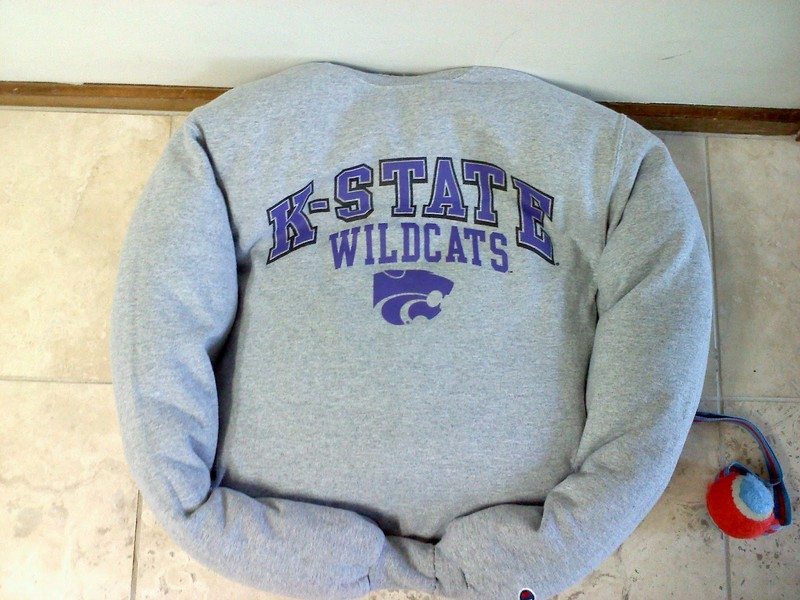
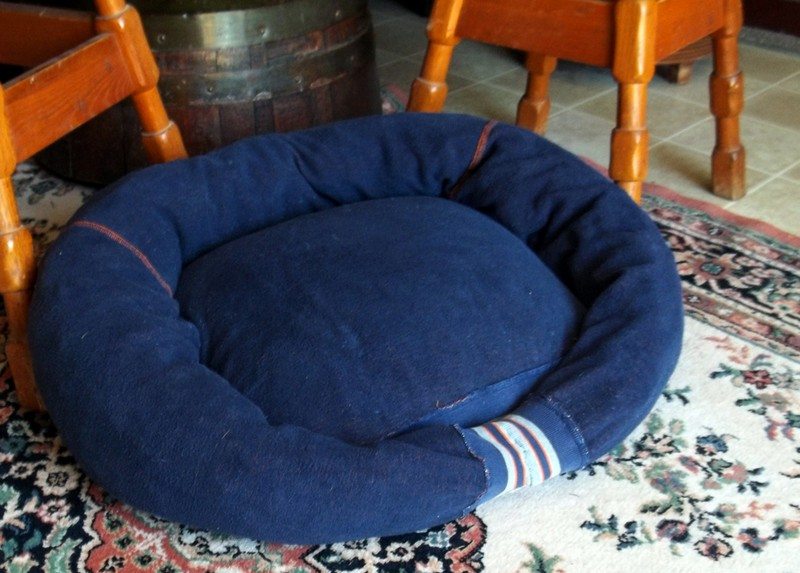
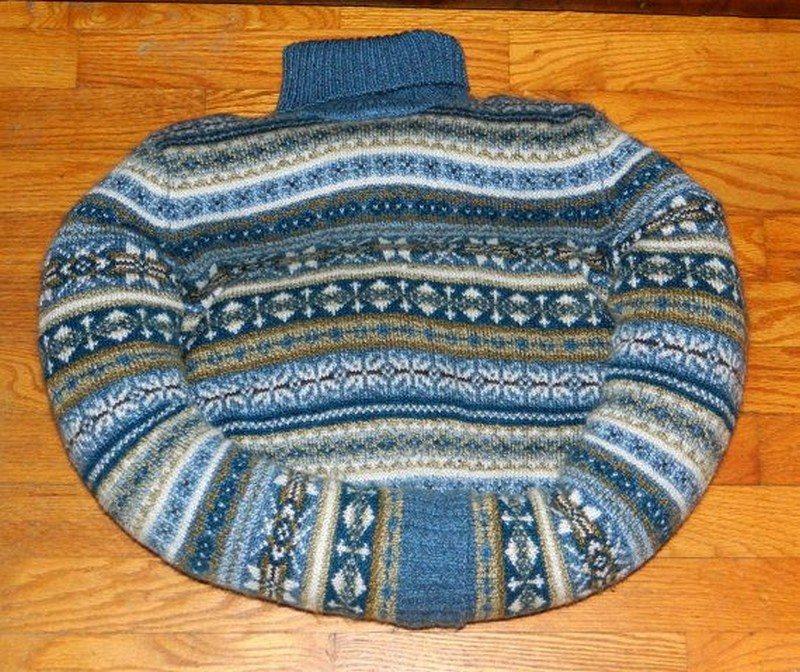
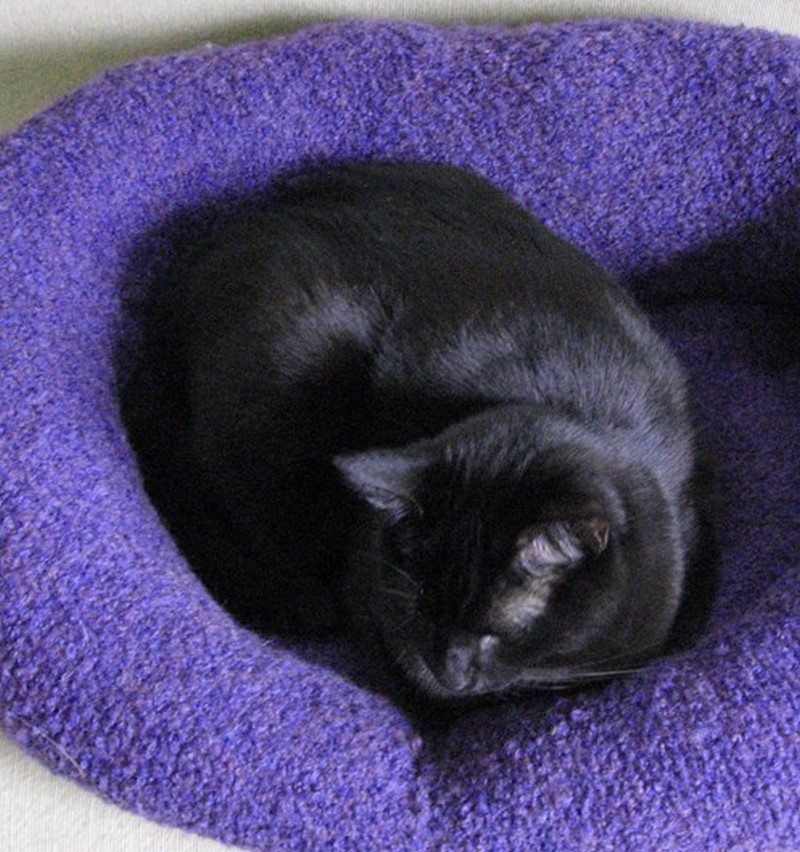
Using old sweaters as pet beds would be a great alternative. This will not only save your favourite sweaters from ending up in the dumpsters but will also pamper your feline.

You can transform them into pet beds with the help of pillows, all you need is sewing skills.

This pet bed is a great way to make use of your kids’ little sweaters or even the old ones you have in your closet! This also makes an inexpensive gift for the animal lover in your life 🙂

Do you think your furry friend will enjoy this pet bed?

Crafting a Sweater Dog Bed

Materials:

  • Old Sweater
  • Small Pillow

Tools:

  • Basic Sewing Kit

Steps: 

Step 1: Choose and Clean Your Sweater

Pick an old sweater that’s clean, soft, and free from damage. Wash and dry it to ensure it’s fresh and won’t shrink later. Sweaters made of cotton, fleece, or wool-blends work best for comfort and durability.

Step 2: Turn the Sweater Inside Out

Lay the sweater flat on a table and turn it inside out. This helps hide the stitching and gives the bed a neater finish. Smooth out any wrinkles or folds before moving to the next step.

Step 3: Sew the Neckline Closed

Thread your needle and stitch the neckline shut using a tight running stitch or backstitch. This will keep the stuffing from leaking out. Knot the thread securely once the neckline is completely closed.

Step 4: Stitch Across the Shoulder Area

To shape the bed and form a backrest, sew from one underarm seam to the other. This separates the sweater’s body from the sleeves, which will later become the bolster or edge. You’ll be left with a U-shape around the chest and arms.

Step 5: Insert the Pillow

Slide a small pillow into the sweater’s main body through the bottom hem. Adjust and flatten the pillow so it fills the torso area evenly. This forms the soft center where your dog will rest.

Step 6: Sew the Hem Closed

After inserting the pillow, sew the bottom hem of the sweater shut. Use a strong, even stitch to secure the pillow in place. Tug gently to check if the seal holds firm.

Step 7: Fill the Sleeves

Stuff each sleeve with fabric scraps, extra pillow filling, or poly-fil. Distribute the filling evenly so both sleeves are plush and firm. These will serve as armrest-style bolsters along the sides of the bed.

Step 8: Join the Sleeves at the Front

Curve the filled sleeves around the front of the bed and stitch the cuffs together. You can sew them end to end or overlap slightly for a thicker front bumper. This creates a continuous, padded border for your dog to lean against.

Step 9: Anchor the Sleeves to the Body

Secure the sleeves to the sweater’s main body by stitching them along the sides. This prevents the sides from shifting and helps the bed keep its shape. Make sure your stitches are tight but not too visible from the outside.

Step 10: Test for Fit and Finish

Give the bed a light fluff and press. Check for any loose seams or thin spots that may need reinforcement. Once everything feels sturdy, your homemade sweater dog bed is ready for your furry friend to enjoy.

Choosing the Best Sweater Fabric for Your Sweater Dog Bed

Not all sweaters make equally cozy dog beds. The right material will improve comfort, safety, and how well the bed holds up after repeated use.

Cotton and Cotton Blends

Cotton sweaters are soft, breathable, and easy to clean. They’re gentle on your dog’s skin and won’t trap heat, making them ideal for warmer climates or pets with sensitive coats. If your dog tends to chew or scratch, cotton blends with a small amount of spandex or polyester add strength without sacrificing comfort.

Wool and Wool-Blend Sweaters

Wool offers excellent insulation and retains warmth, which is great for colder environments. It’s soft but tends to shrink, so it’s important to prewash the sweater before making the bed. Choose wool blends with synthetic fibers to reduce itchiness and avoid excessive felting during cleaning.

Fleece Sweaters

Fleece is lightweight yet warm, perfect for cuddly pets who enjoy nestling into soft textures. It resists pilling and retains shape well after washing. Fleece is also less likely to fray at the seams, which is helpful when sewing your sweater dog bed by hand.

Knitted Acrylic Sweaters

Acrylic knits are common and affordable but may not be the most breathable choice. They hold up well to repeated washing but can attract pet hair more easily. If using acrylic, make sure to line the inside with a more breathable fabric like cotton or muslin.

Avoid Embellishments and Loose Weaves

Skip sweaters with beads, zippers, or large buttons. These can pose a choking hazard or cause discomfort. Loose weaves can unravel quickly and lose shape after a few washes, reducing the durability of your sweater dog bed.

Sweater Dog Bed Gallery

Click on any image to start lightbox display. Use your Esc key to close the lightbox. You can also view the images as a slideshow if you prefer  😎

Preparing Your Sweater for Upcycling

Before turning your old sweater into a dog bed, it’s important to prep the garment properly. This ensures hygiene, shape retention, and smooth sewing.

Wash and Dry Thoroughly

Start by washing the sweater in hot water with mild detergent. This removes dirt, pet dander, and any lingering scents. Dry it completely to check if the fabric shrinks or loses shape. This step helps you avoid surprises after the bed is sewn and used.

Inspect for Wear and Damage

Examine the sweater for holes, pilling, or thinning fabric. High-wear areas like the elbows or underarms often need reinforcement. Trim away loose threads and decide whether any parts should be reinforced with a backing fabric to extend the life of the bed.

Mark Your Cutting Points

Lay the sweater flat and decide where you’ll make your cuts. Typically, the body of the sweater forms the base, while the arms can be repurposed as a border. Use tailor’s chalk or fabric pens to sketch lines where you’ll sew or trim. Planning early reduces waste and gives the dog bed a polished look.

Turn the Sweater Inside Out

Flipping the sweater inside out before sewing helps hide seams and gives the finished bed a cleaner appearance. Pin or baste the openings to hold the sweater in place while working, especially around the neck and waist areas.

Pre-Stitch Loose Sections

If you notice fraying or weak spots, pre-stitch these areas before beginning the main construction. Reinforcing early reduces the risk of unraveling after your dog starts using the bed. Use tight, short stitches to help the fabric hold under pressure.

Conclusion

Crafting a sweater dog bed is a simple, meaningful way to upcycle and care for your pet. With just basic tools and an old sweater, you can create a cozy space that reflects love and sustainability. It’s affordable, personalized, and surprisingly durable when stitched well. Your dog gets a comfortable resting spot, and you get the satisfaction of a handmade project. It’s a win for both your pet and your creativity.

If you liked this project, you will also like viewing these DIY projects for pets

|

Search All Projects:

Get-our-free-newsletter-resized
Screenshot-2021-03-16-094452.jpg

Your details will never be shared with any third party. Unsubscribe at any time with a single click.

The posts on this site sometimes contain an affiliate link or links to Amazon or other marketplaces. An affiliate link means that this business may earn advertising or referral fees if you make a purchase through those links.