Last Updated on July 2, 2024 by teamobn

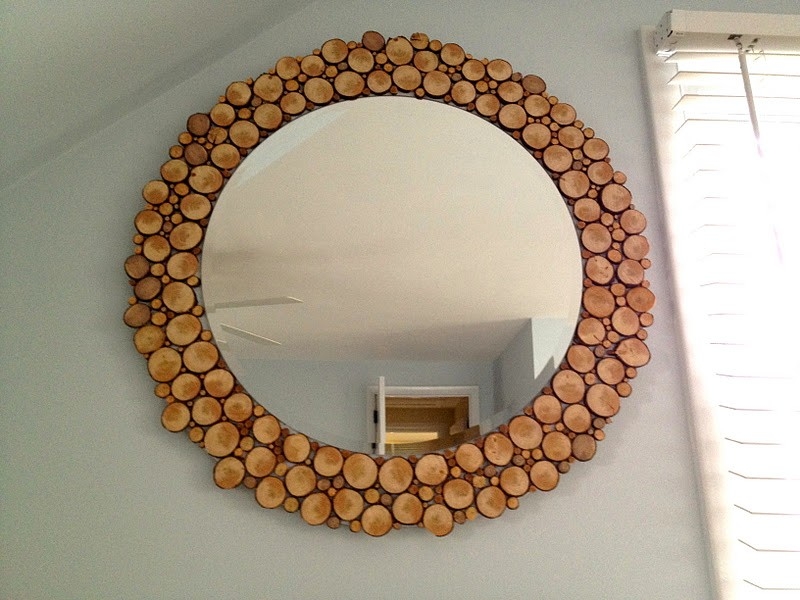
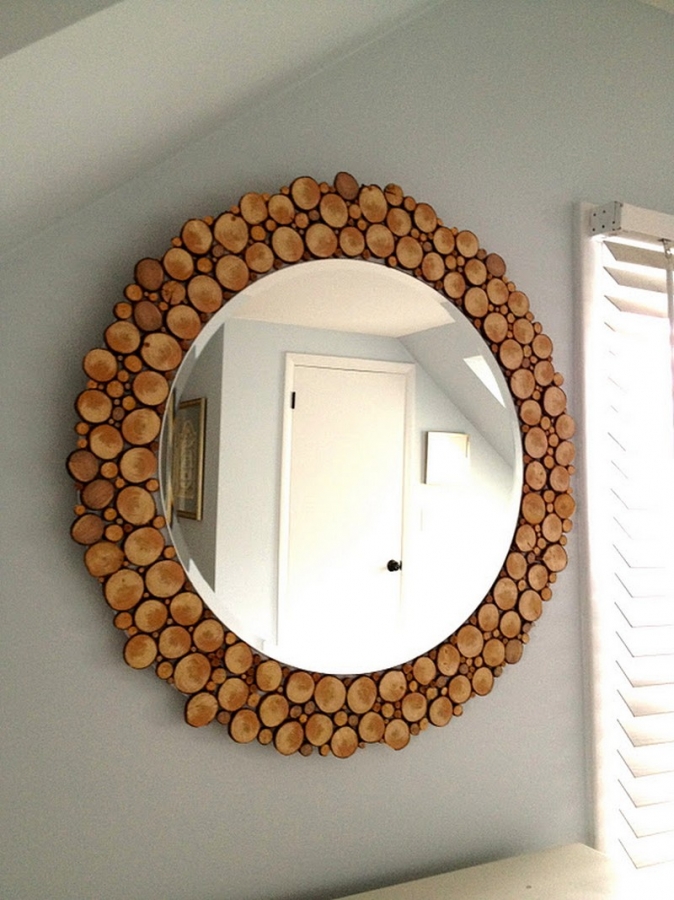
Looking for a weekend DIY project? Then this DIY wood slice mirror could be for you!
A mirror is a device that reverses the image and shows you what you look like. It is only a reflection of your image. However, as humans, we tend to look at the reflection in the mirror and think that it is the true representation of ourselves.
But, we can never see ourselves exactly as we are, only reflections. Do you want a unique mirror for your living area, bedroom, or hallway? This mirror might be the one you are looking for.
Mirrors have been a part of human civilization since early antiquity. They were highly regarded by ancient cultures, particularly in the Mediterranean, where bronze and silver were common luxury items and were decorated with valuable materials such as gold and precious stones, much like fine jewellery.
There are numerous types of mirrors available in the market that you can decorate and use in our house. The designs are vast and different, so there is a wide range of choices available.
It can be used to decorate our house as well as our bathrooms, dressing rooms, and bedroom. It is widely used everywhere in our houses as they are useful in various aspects.
Mirrors are widely used by women in their bedrooms to apply make-up and to check the fashion of their clothes.

Materials:
- Round Mirror
- 3/8” Plywood
- ¾” Plywood Scrap
- Cleat
- Wood Glue
- Fallen Tree Branches – various sizes
- Primer & Paint
- Liquid Nails
- Sand Paper
- Wood Finish
Tools:
- Caulking Gun
- Paintbrush
- Hand Saw
- Jigsaw
- Tape Measure
- Marker
- Drill

How to Create DIY Wood Slice Mirror?
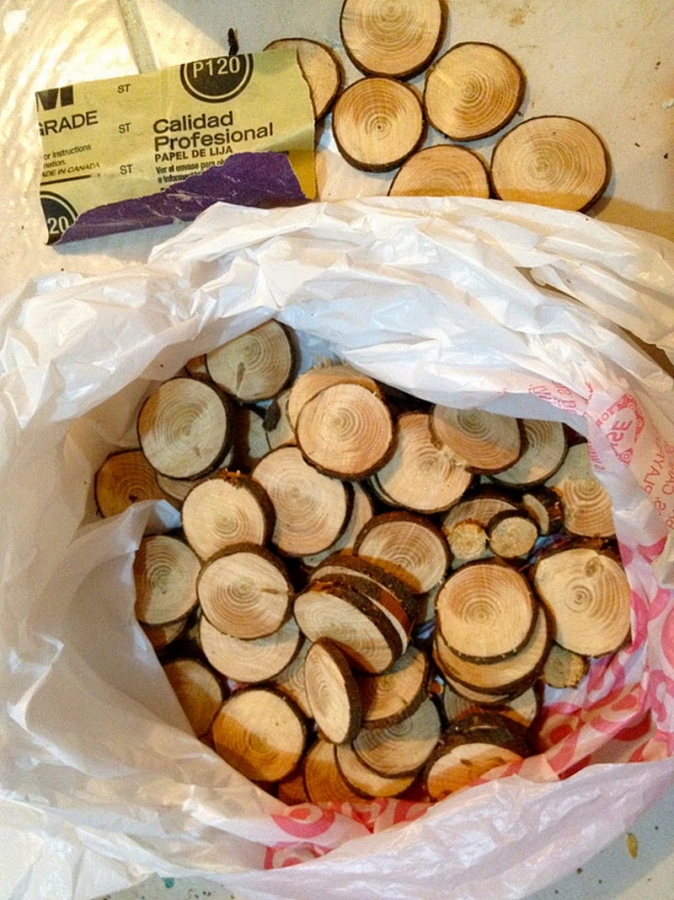
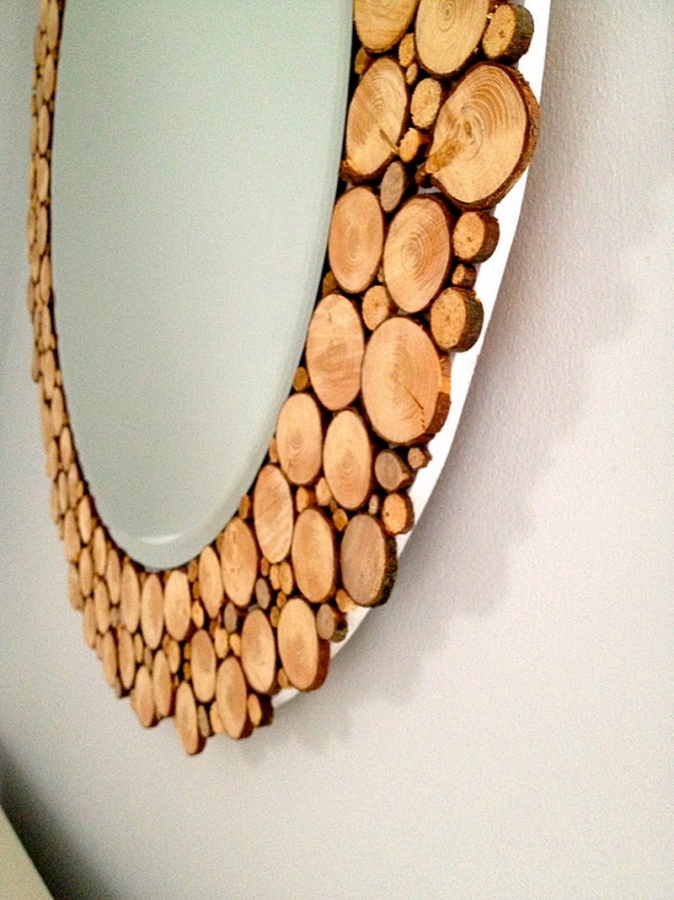
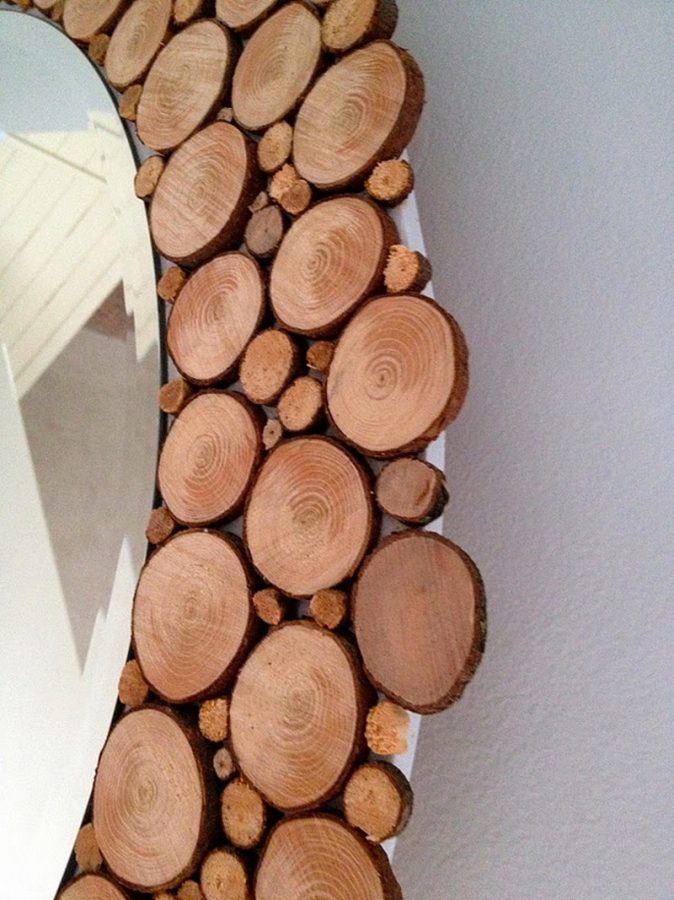
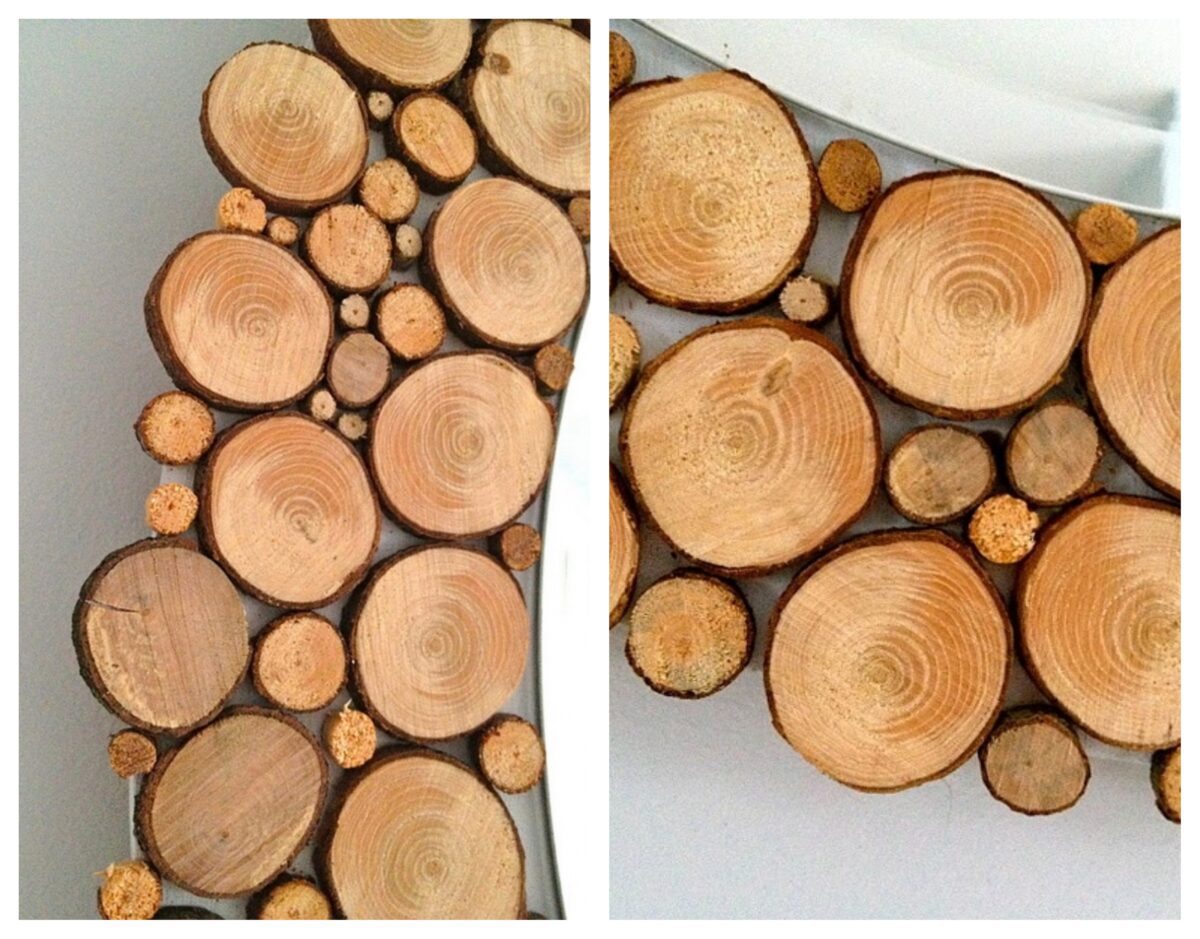
The Fallen Tree Branches
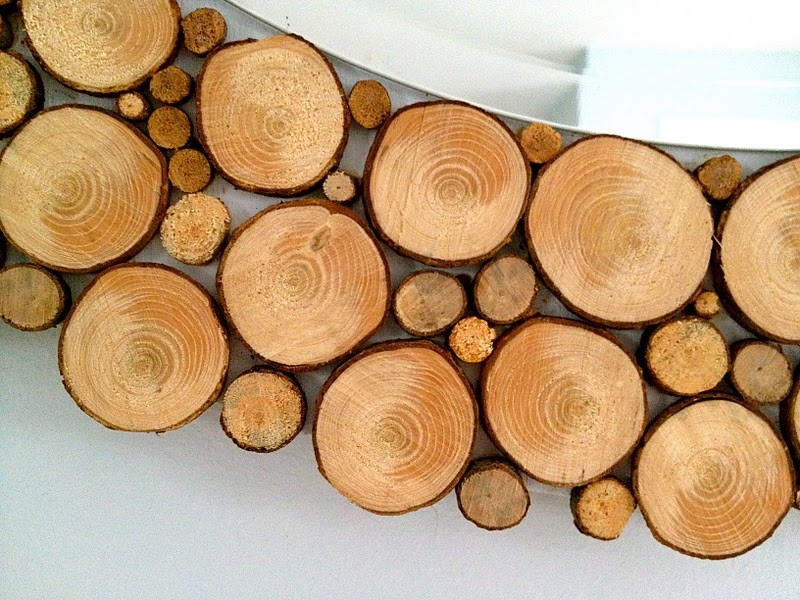
For this project to be successful, you need to gather fallen tree branches of different sizes. These branches need to be cut into equal thicknesses.
All branches should be cut in a similar length so that you can have a flat design. Make sure that all branches that you use in your design are level with each other.
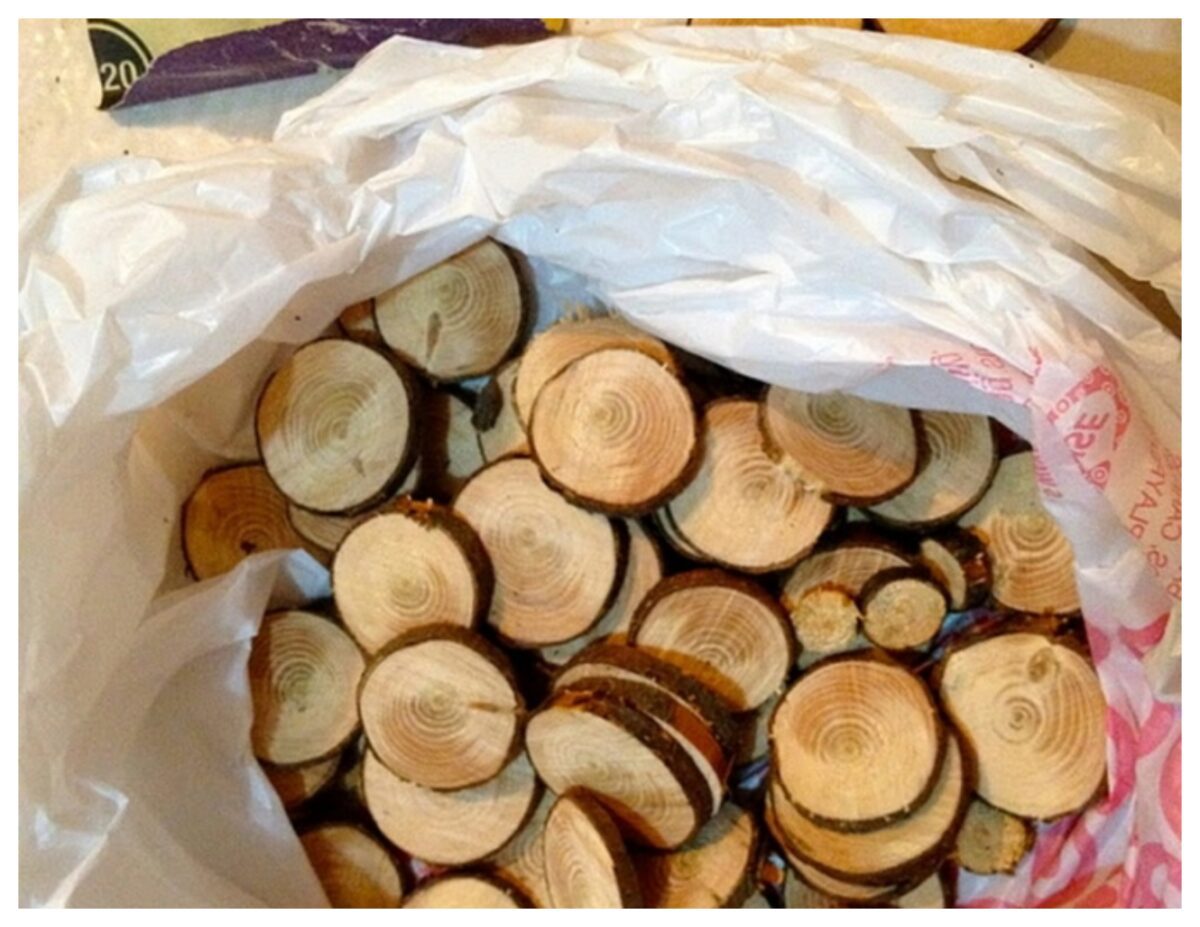
After cutting the fallen tree branches into equal thicknesses, you can start sanding each of its surfaces to achieve a smooth surface.
Then give it a good wood finish, shellac would be best to preserve its rustic trait. Shellac can be used to seal furniture or floors to help preserve the wood.

The Frame
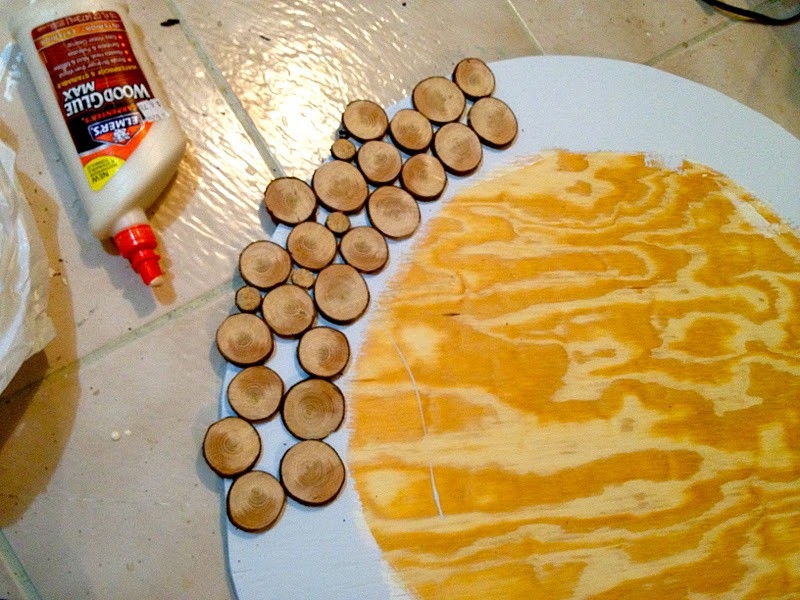
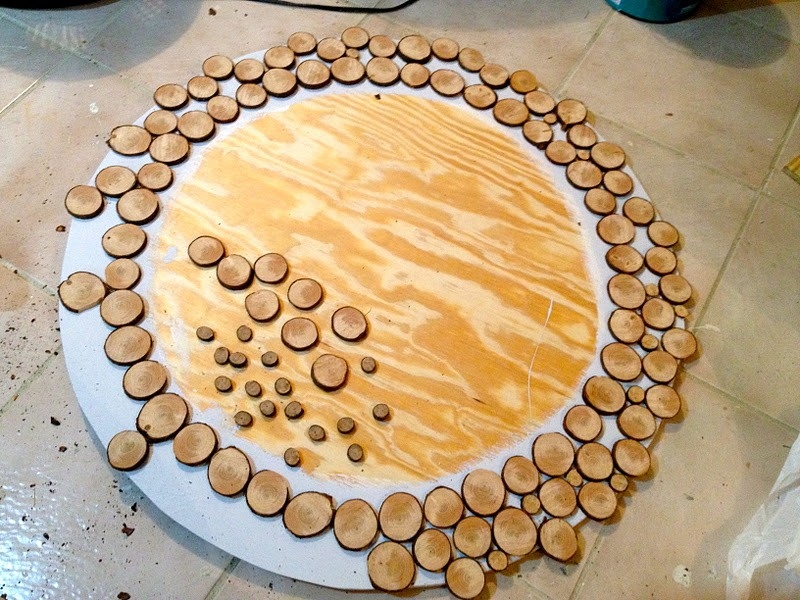
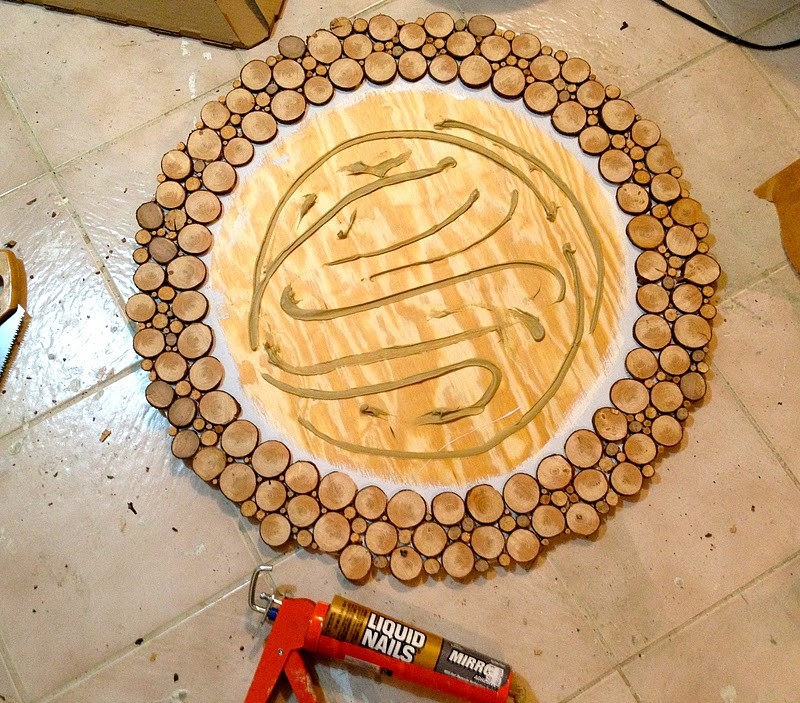
Trace your round mirror on the surface of the 3/8″ plywood with a pencil. You can add an extra 3 to 4 inches of space to accommodate your wood slices. Then attach the 3/4″ scrap plywood for your frame.
With the use of wood glue, carefully attach your wood slices to the frame. You can also use liquid nails for this. If you use liquid nails, make sure to use a caulking gun so you won’t have a hard time squeezing it.
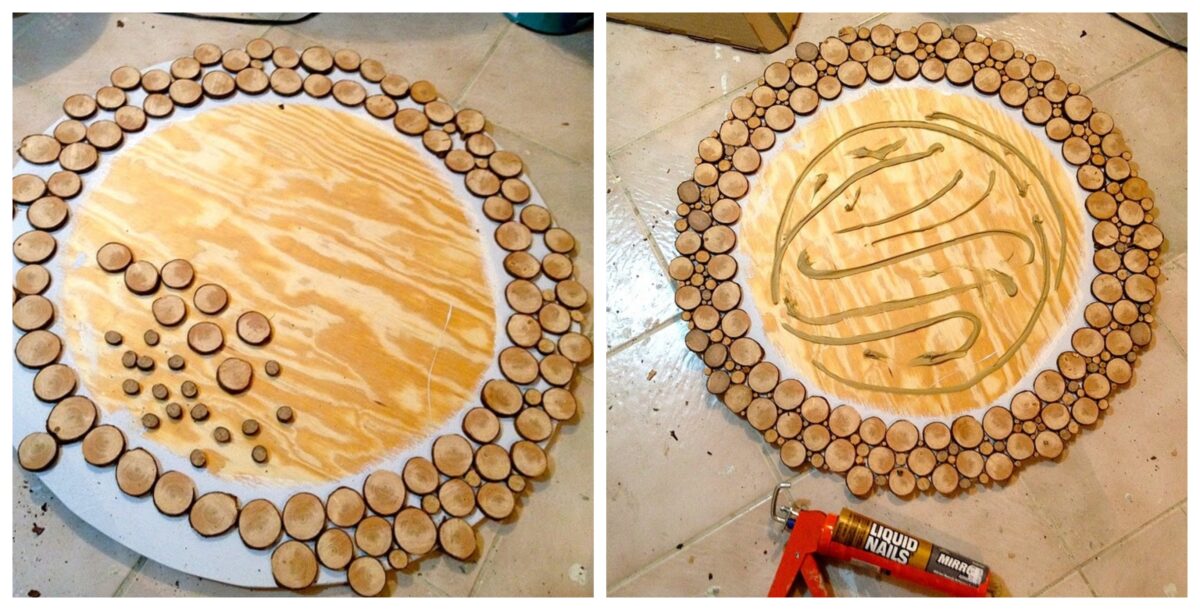
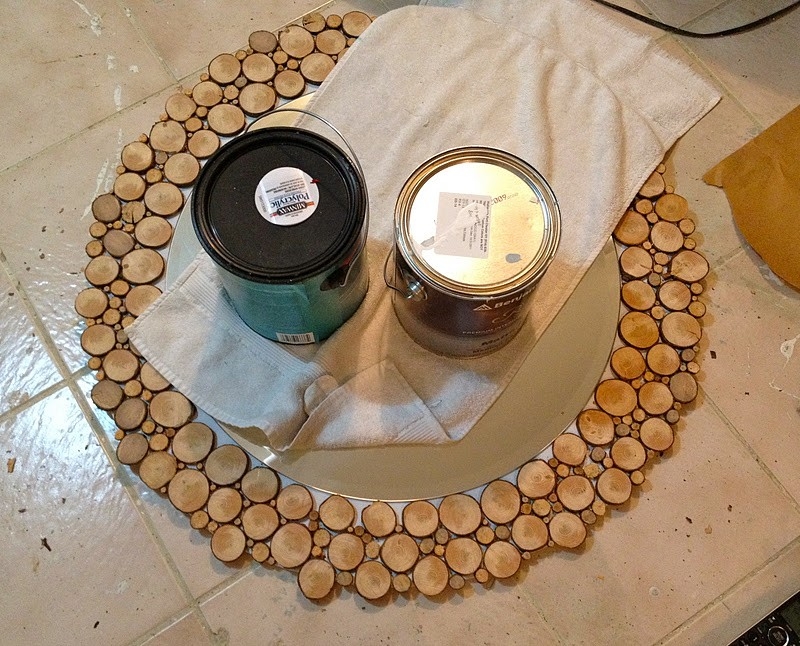
After creating a stunning pattern of wood slices on the frame, you can now attach the mirror, still with the use of liquid nails.
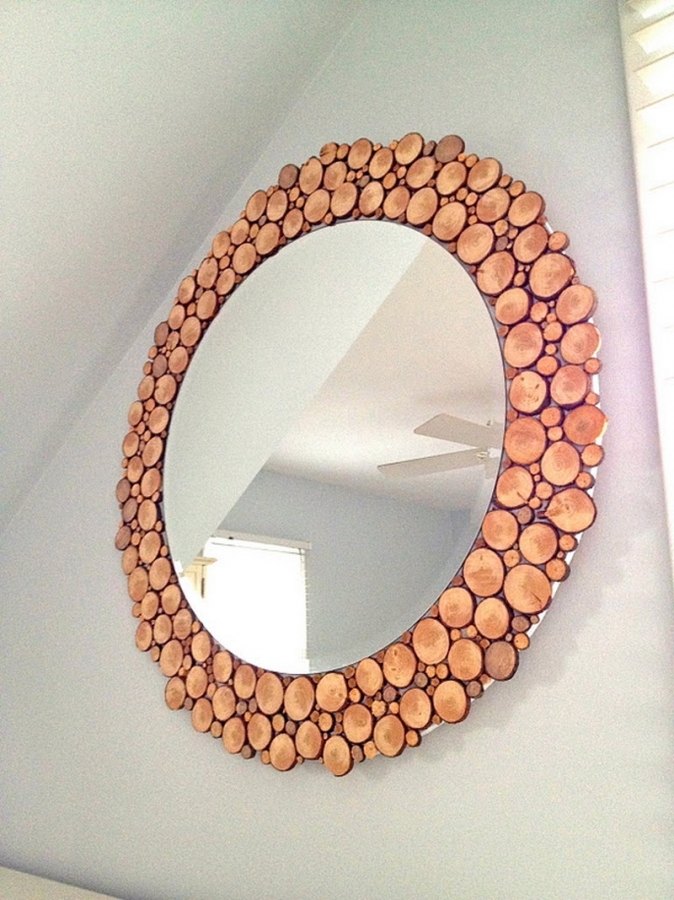
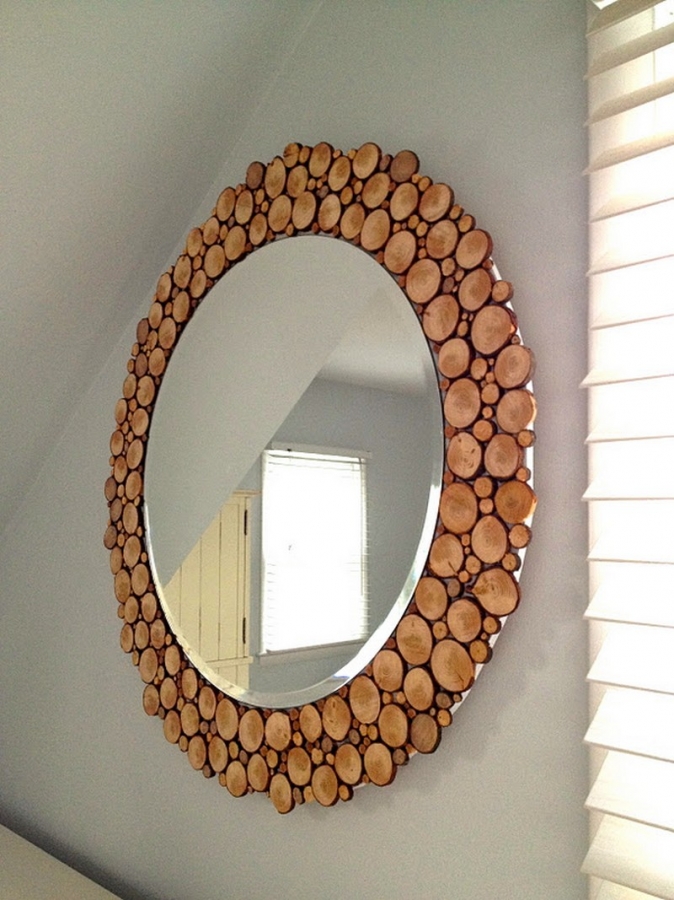
Finally, if you are hanging the mirror yourself, drill a hole in the back of the frame and screw the cleat into place. You may need someone to hold it while you do this.
If you have someone else hanging it, they will use the holes in the cleat to line up the frame and then screw the cleat into place with the screws provided. Once the cleat is secured to the frame, hang the mirror.
Click on any image to start the lightbox display. Use your Esc key to close the lightbox. You can also view the images as a slideshow if you prefer 😎