Last Updated on March 20, 2025 by teamobn
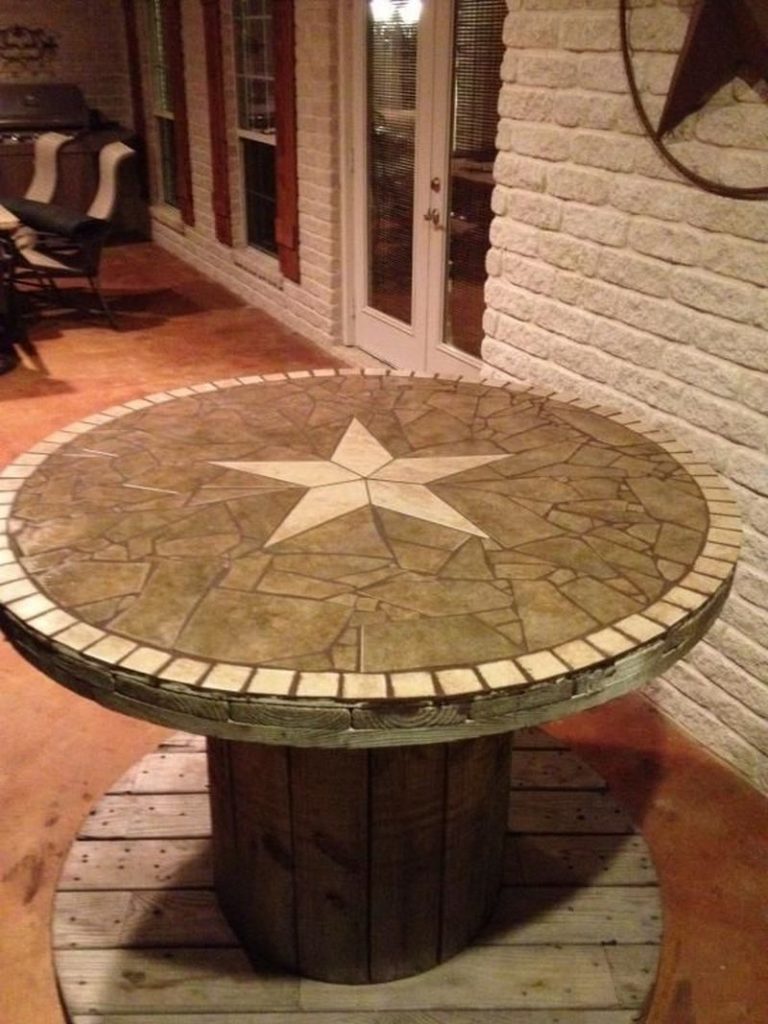
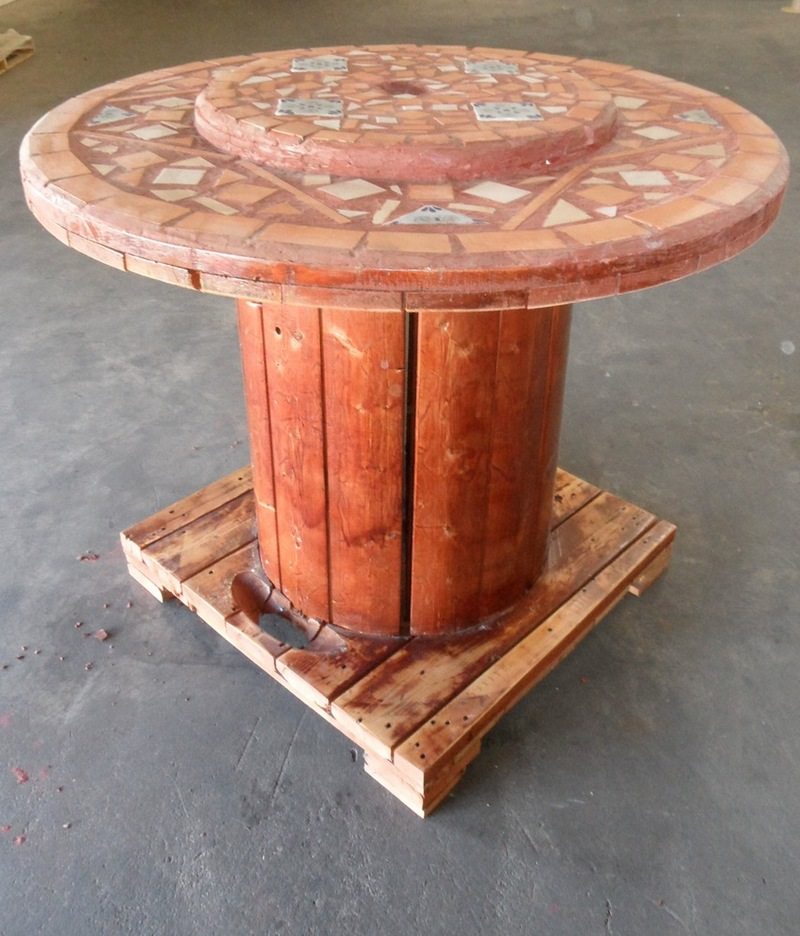
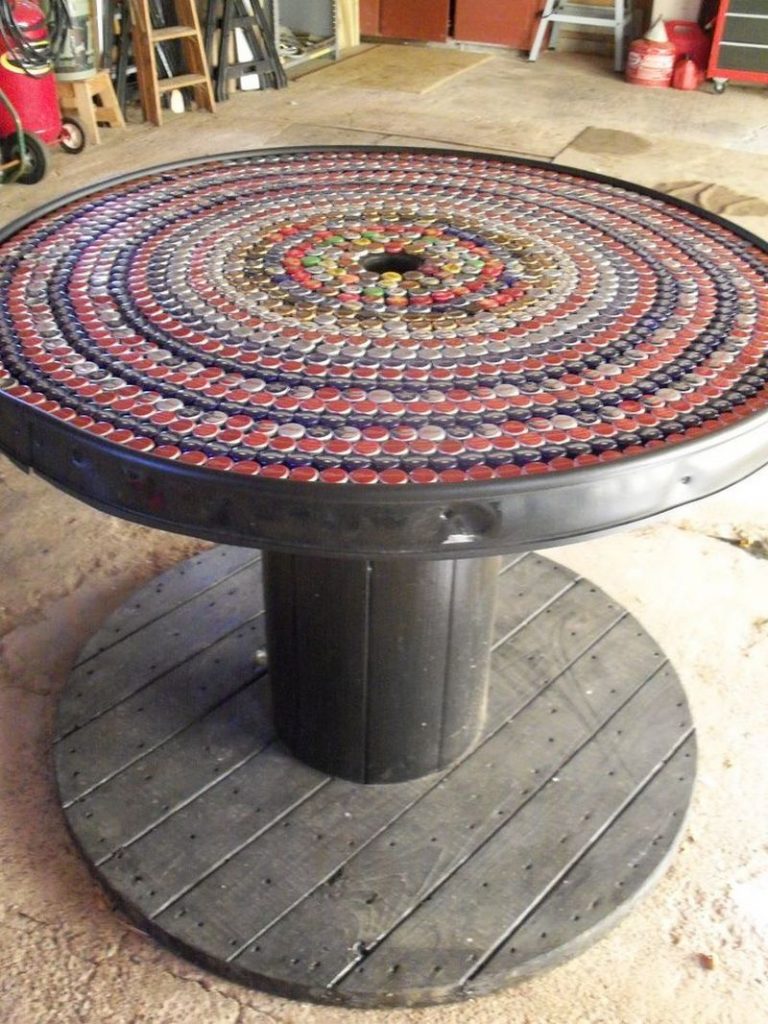
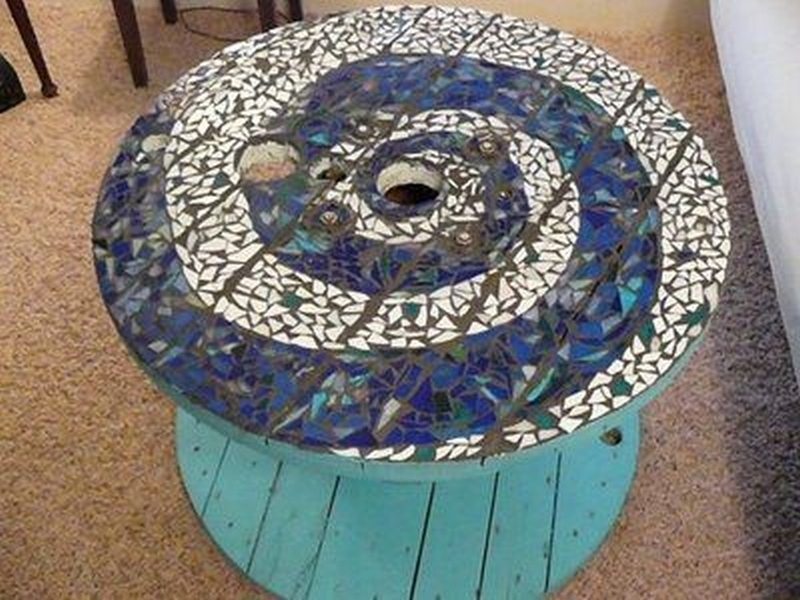
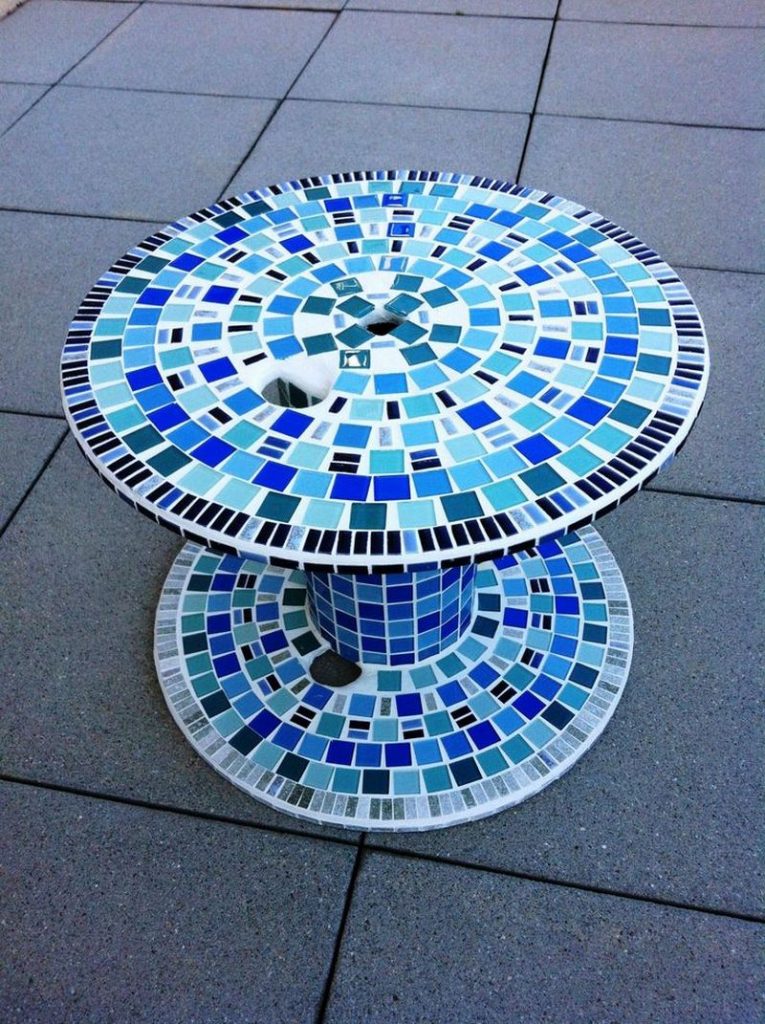
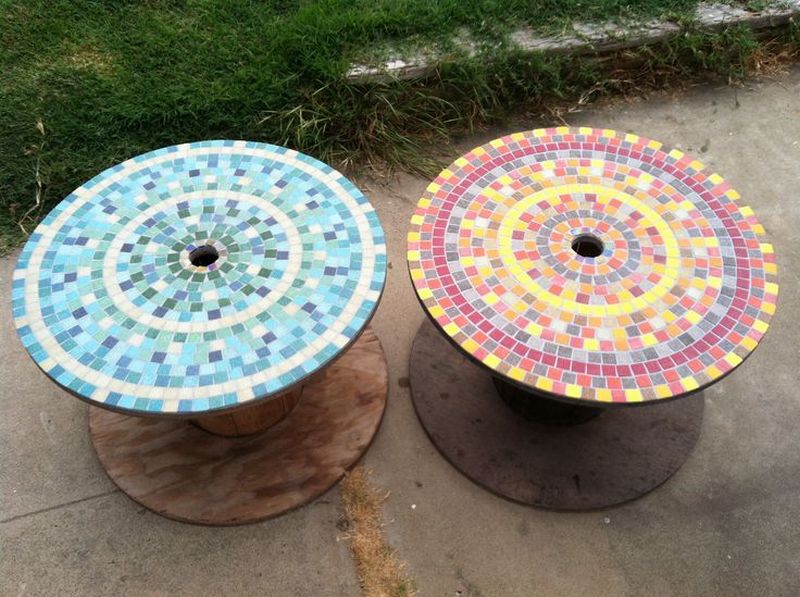
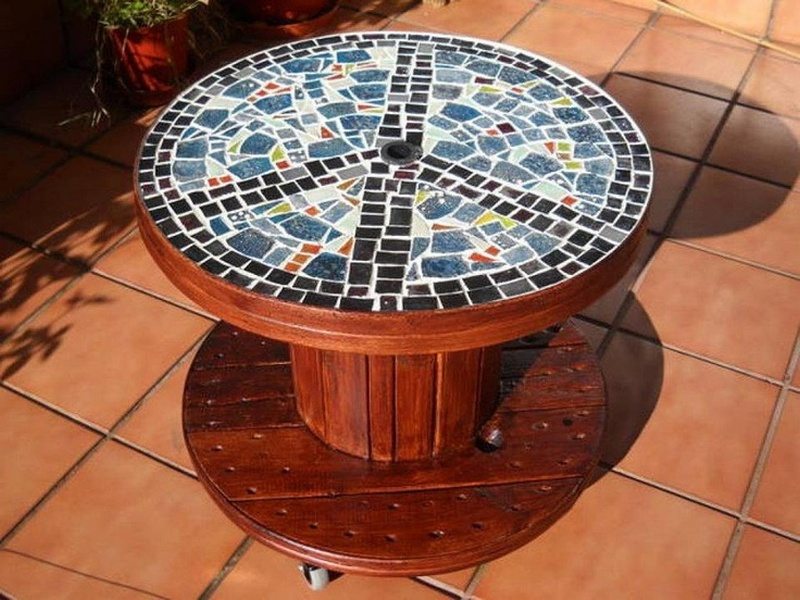
Repurpose! These timber spools end up in landfills. Give one a new life by turning it into a great-looking mosaic table!
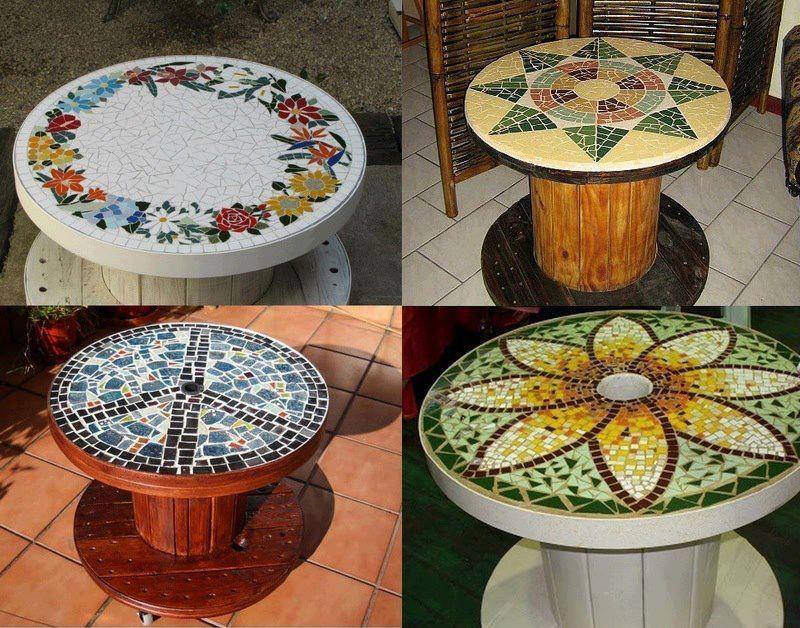
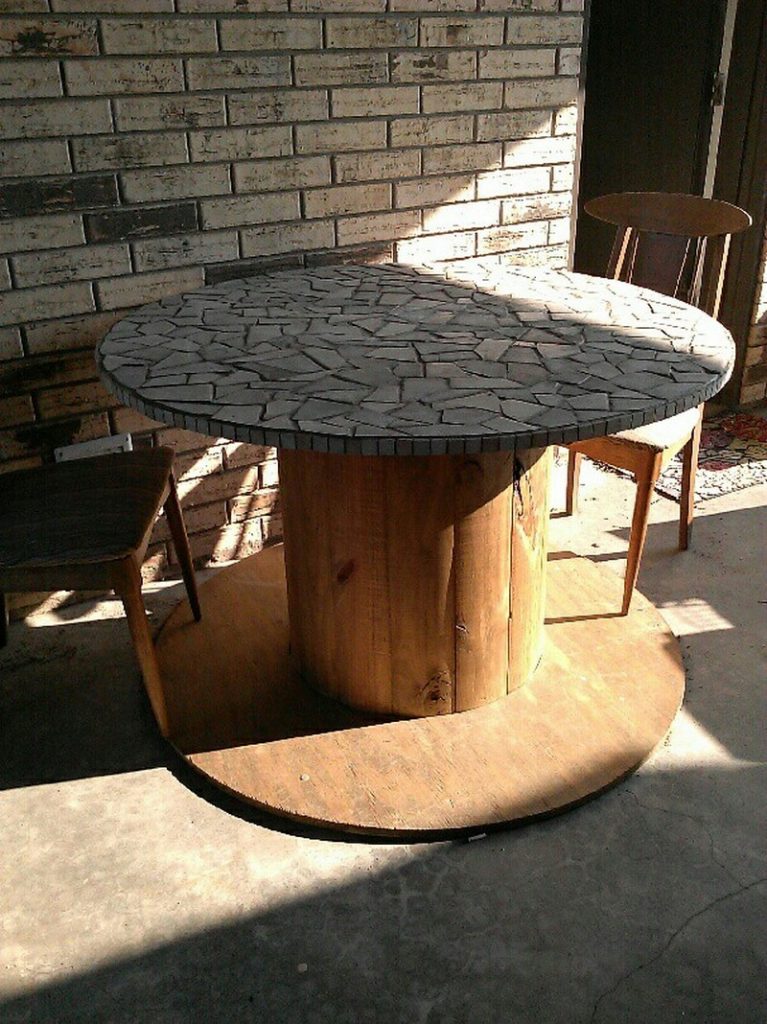
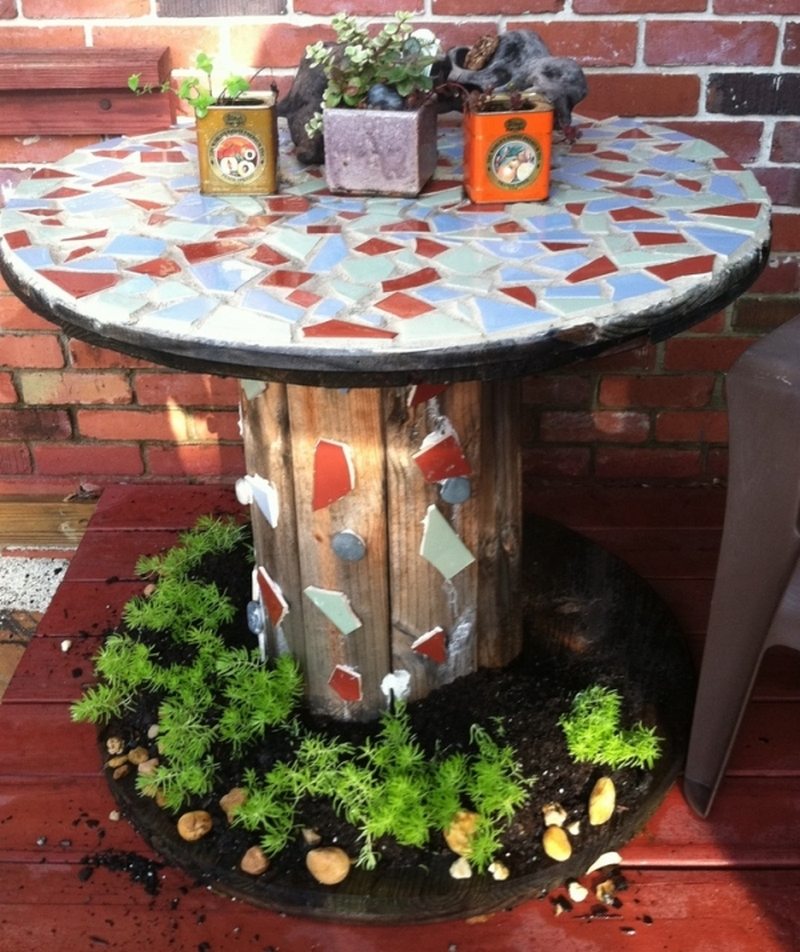
Use old, excess, or unwanted materials for your mosaic design such as china, colored tiles, or glass. You could also add some wheel casters under for easier mobility.
Mosaic tiles are mostly made from pieces of stone, colored glass, or other materials. They are small, flat, multi-colored, roughly square pieces. We frequently see them set as designs in rooms.
But among our favorite applications of mosaics tables are on furniture.
In fact, this piece of furniture would be perfect as a center table for your outdoor living area.
What are the materials needed to create a mosaic table?
From an old table that you have lying around the house, you can create your own mosaic table top. Prepare the tabletop and design the mosaic. Once your tiles are attached to your table, you can enjoy your unique new mosaic table.
What would your mosaic table look like?
Upcycling A Wheel Spool Into a DIY Mosaic Table
Materials:
- Ceramic/Glass for Mosaic
- Glue
- Wheel Casters
- Iron Plate
- Screws
- Paint
Tools:
- Sander
- Drill
Steps:
Step 1: Prepare the Table Surface
Start by cleaning the table thoroughly to remove dust, dirt, or grease. Use a damp cloth and let it dry completely. Once clean, use the sander to smooth the table surface. This helps the glue stick better. If there’s old paint or varnish, sand it down until you reach bare wood.
Step 2: Plan Your Mosaic Design
Lay out your ceramic or glass pieces on the table without gluing them yet. Arrange them in your desired pattern or design. Play around with different layouts until you’re happy with the look. This step makes it easier to follow the design when you start gluing.
Step 3: Glue the Mosaic Pieces in Place
Once you’re satisfied with the design, start gluing each piece onto the table surface. Apply glue to the back of each tile or glass piece, pressing it firmly onto the surface. Work in small sections to avoid disturbing already placed pieces. Leave small gaps between each piece for grouting later (if you plan to grout). Let the glue dry completely according to the product’s instructions.
Step 4: Attach the Iron Plate for Support (Optional)
If your table needs reinforcement or you want to add extra stability, attach the iron plate to the underside of the table. Position it where it gives the best support, then use the drill and screws to secure it in place.
Step 5: Install the Wheel Casters
Flip the table upside down. Mark the placement for the wheel casters at each leg or the base of the spool. Pre-drill holes if needed, then screw the casters into place. Make sure they’re securely attached and rotate smoothly. This will make your mosaic table easy to move around.
Step 6: Paint the Table Base
Paint the base and sides of your table, including the legs or spool body, to match or complement your mosaic top. Choose outdoor paint if the table will stay outside. Apply at least two coats for even coverage, allowing each coat to dry thoroughly.
Step 7: Seal the Mosaic Surface (Optional but Recommended)
Once all the glue is fully cured and the mosaic pieces are secure, you can apply a clear sealant over the mosaic surface. This helps protect it from moisture, stains, and weather if the table will be used outdoors.
Step 8: Final Touches and Inspection
Check that all pieces are firmly attached, the paint is dry, and the casters roll smoothly. Clean off any excess glue or dust. Your mosaic table is ready to use!
Best Materials for DIY Mosaic Tables: What Works and What Doesn’t
Creating a DIY mosaic table is a rewarding project. The materials you choose will affect its durability, appearance, and how easy it is to maintain. Some materials are perfect for mosaics, while others can lead to frustration or poor results. Here’s what works—and what doesn’t—when designing your own DIY mosaic table.
Ceramic Tiles
Ceramic tiles are one of the most popular choices for DIY mosaic tables. They come in a variety of colors, shapes, and finishes. You can easily cut them to size with tile nippers. Ceramic is durable and weather-resistant when properly sealed. This makes it an excellent option for both indoor and outdoor mosaic table projects.
Glass Tiles and Stained Glass
Glass tiles and stained glass add a bright, colorful touch to any DIY mosaic table. They reflect light beautifully and can give your table a stunning, artistic look. Glass pieces can be sharp, so always wear protective gloves when cutting or handling them. Once sealed, glass is highly durable and holds up well outside, especially on tables exposed to sunlight.
Broken China and Porcelain
Repurposing broken china or porcelain plates is a creative and eco-friendly choice. These materials add a vintage, whimsical feel to a DIY mosaic table. However, they can be tricky to work with since they don’t always break into neat shapes. Use tile nippers to control the size and shape of each piece as much as possible. Seal them well to protect against moisture.
Natural Stone and Pebbles
Natural stones, like slate or marble, and small pebbles bring an earthy, rustic vibe to a mosaic table. They are heavy and weatherproof, which makes them ideal for outdoor use. However, their irregular shapes can make installation more time-consuming. Be sure the table structure is strong enough to handle the weight of stone materials.
Mirror Pieces
Mirrors can make a DIY mosaic table sparkle and stand out. They reflect light, making your table a focal point in any space. However, mirror glass is thin and can be fragile. If you use mirrors, make sure they’re securely glued down, and seal them to protect against chipping or moisture.
What Doesn’t Work Well
Not every material is suited for a DIY mosaic table. Thin plastic pieces, for example, may not adhere well and can warp over time. Unsealed wood pieces are prone to swelling, cracking, and rot, especially on outdoor tables. Soft materials like foam or fabric don’t hold up under glue and grout and aren’t durable enough for table surfaces. Avoid these if you want your mosaic table to last.
Choosing the right materials for your DIY mosaic table can make all the difference. Ceramic, glass, stone, and even broken china are all solid options. Stay away from materials that won’t stand up to daily use or weather exposure. A well-made mosaic table not only adds charm but can last for years with the right choices.
DIY Mosaic Table Gallery
Click on any image to start the lightbox display. Use your Esc key to close the lightbox. You can also view the images as a slideshow if you prefer 😎
How to Prepare and Seal Your Mosaic Table for Outdoor Use
A DIY mosaic table can be a beautiful addition to your garden, patio, or balcony. But if you’re placing it outdoors, preparation and sealing are essential. Without proper sealing, moisture, sunlight, and temperature changes can damage your hard work. Here’s a simple guide to preparing and sealing your DIY mosaic table so it stays in great condition for years.
Clean and Smooth the Surface
Start by cleaning your DIY mosaic table thoroughly. Use a damp cloth to wipe away any dust or debris. If it’s an old table, sand the surface to remove old paint or varnish. A smooth surface helps the tiles and adhesive bond better. Let the table dry completely before moving on.
Secure All Mosaic Pieces
Check that all the mosaic tiles, glass, or ceramic pieces are glued down firmly. If you notice any loose pieces, reapply glue and let them dry. Any gaps can let in moisture, which can weaken the adhesive over time. Taking this extra step ensures your DIY mosaic table stays solid even in harsh weather.
Apply Grout and Clean the Surface
If your design includes grout, apply it between the tiles. Outdoor grout is recommended because it resists moisture and temperature changes. Once the grout is applied, wipe away any excess with a damp sponge before it hardens. Let it cure fully—usually for at least 24 to 48 hours—before sealing.
Seal the Grout and Tiles
Once the grout is completely dry, it’s time to seal your DIY mosaic table. Use an outdoor-grade tile and grout sealer. Apply it with a foam brush or cloth, following the manufacturer’s instructions. Make sure the sealer covers all tiles and grout lines evenly. Two or three coats may be necessary for outdoor use. Allow each coat to dry before applying the next.
Seal the Table Base and Legs
Don’t forget the rest of the table. Paint or seal the table base and legs to protect them from moisture and UV damage. Outdoor wood sealants or waterproof paint work well. This helps prevent the wood or metal from warping, rusting, or rotting.
Routine Maintenance for Outdoor Protection
Even after sealing, your DIY mosaic table will need some upkeep. Clean it regularly to prevent dirt buildup. Inspect the grout and sealer once or twice a year. Reapply the sealer if you notice any wear or dullness. Cover the table or move it indoors during extreme weather to extend its life.
Following these steps, your DIY mosaic table will stay vibrant and durable outdoors. Proper preparation and sealing protect your design from the elements, keeping your mosaic table looking its best year after year.
Conclusion
Making a DIY mosaic table from a wheel spool is an interesting and satisfying endeavor that turns trash into a useful artwork piece. Using the correct tools, high-quality materials, and some imagination will help you create a table that accentuates your space’s character and color. Your mosaic table will be a lasting and striking accent to your house or garden once completed and correctly sealed.
If you liked this project, you will also like viewing these recycled upcycled and repurposed…