Last Updated on December 5, 2025 by teamobn
If you are raising chickens for eggs, nesting boxes are essential. Hens need a safe, cozy place to lay. You can buy ready made nesting boxes in many farm stores, but there is often a better option for backyard chicken keepers. You can repurpose common items and turn them into chicken nesting boxes that work just as well for a fraction of the cost.
These DIY chicken nesting box ideas are:
- Cheaper than most store bought options
- Easy to build with basic tools
- Simple to clean and maintain
- Comfortable and private for your hens
Use this guide to learn the basic rules for nesting boxes, then pick the repurposed design that fits your coop and budget.
Quick Guide: Chicken Nesting Box Size, Number, and Placement
If you want reliable egg production, giving your hens the right nesting setup is a must. The good news? You don’t need fancy store-bought boxes to make your flock happy. With a few basic guidelines and some creative repurposing, you can build nesting boxes that are comfortable, low-cost, and surprisingly durable.
Use this quick guide to understand the essentials, then explore smart DIY ideas that fit your coop, your budget, and your hens’ quirks.
What size should a chicken nesting box be?
For most standard hens, a good size is:
- About 12 inches wide
- 12 inches deep
- 12 inches high
For very large breeds such as Buff Orpingtons or Jersey Giants, aim for 12 inches deep, 14 inches wide, and 12 inches high. Smaller bantam breeds can use boxes that are around 10 inches high and 10 inches deep.
How many hens per nesting box?
Most backyard chicken keepers plan for:
- 1 nesting box for every 3 to 4 hens
Even if your hens love one favorite box, giving them enough options helps reduce fighting and stress.
How high off the ground should nesting boxes be?
- Mount boxes about 18 to 24 inches off the coop floor
- Make sure the roosts are higher than the nesting boxes so hens sleep on the roosts, not in the boxes
Where should nesting boxes go in the coop?
- Place them in a quiet, dim part of the coop
- Avoid high traffic areas and spots directly under roosts
- Keep them away from strong drafts and direct sunlight
What do you put in a chicken nesting box?
- Add a 2 to 3 inch layer of straw, hay, wood shavings, hemp bedding, or nesting pads
- Keep bedding clean and dry to protect eggs and prevent odors
Why Chicken Nesting Boxes Matter
Chicken nesting boxes are not only convenient for you. They are also good for your hens and your eggs.
- They encourage natural nesting behavior in a safe space
- Eggs are protected from breakage and dirt
- Eggs stay cleaner and crack less often
- You spend less time hunting for eggs
- Hens feel relaxed and less stressed when laying
When you combine good basic design with clever, low cost materials, you get nesting boxes that keep both you and your chooks happy.
DIY Chicken Nesting Box Ideas Using Repurposed Items
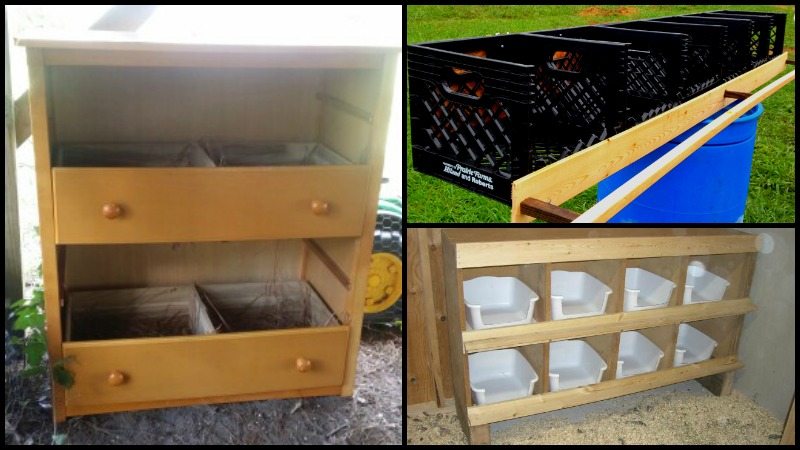
Below are six creative ways to build nesting boxes with items you may already have. Each idea includes what you need and simple steps.
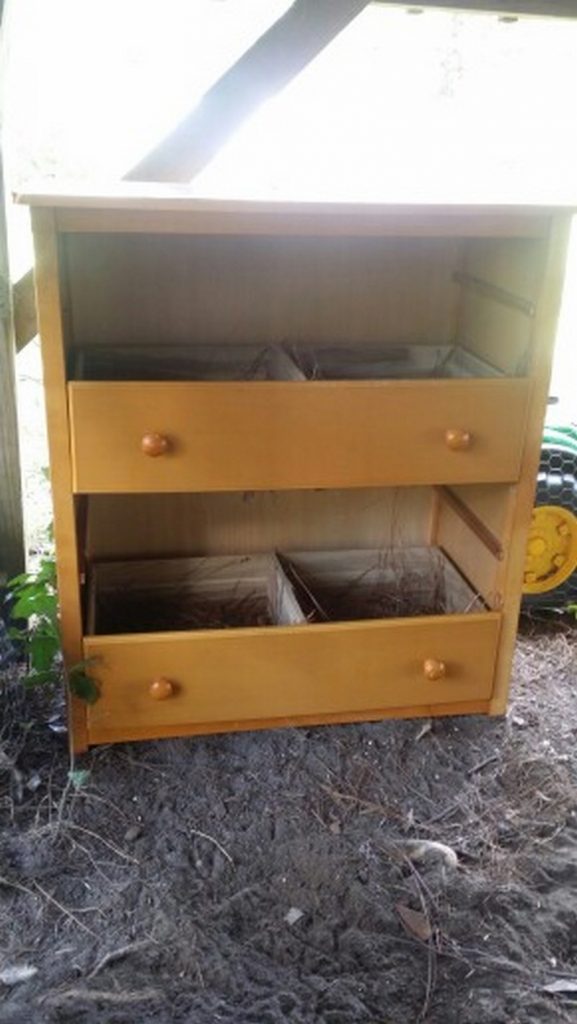
Old Dresser Chicken Nesting Box
Instead of throwing out an old dresser, you can turn it into a bank of nesting boxes for your hens. This is a great option if you want several boxes in one unit with very little building work.
Best for:
Medium to large flocks, coops with enough wall space, rustic or “shabby chic” style
What you will need to repurpose an Old Dresser into a Chicken Nesting Box
- Old wooden dresser or chest of drawers
- Straw, hay, or shavings for bedding
- Saw and screwdriver if you plan to remove some dividers or hardware
- Sandpaper to smooth any rough edges
How to build it
- Choose a dresser made from solid, non treated wood if possible. Avoid pieces that are moldy or falling apart.
- Remove any drawers you do not need. Keep the ones that sit at a comfortable height for hens to hop into.
- If the drawers are very deep, you can leave them as is or shorten the fronts to make the opening larger for the hens.
- Sand rough spots and remove sharp handles or hardware that could injure a hen.
- Position the dresser inside the coop so the drawers you will use sit about 18 to 24 inches off the floor. Make sure it is against a stable wall and cannot tip.
- Line each drawer with a 2 to 3 inch layer of bedding.
- Keep the rest of the dresser top free from roosting or place a sloped board on top so birds do not sleep there and soil the boxes.
This simple setup creates several roomy, private nests in almost no time.

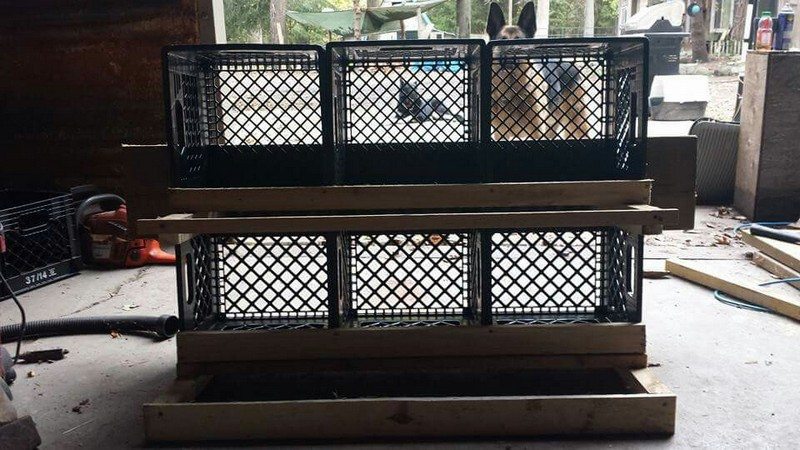
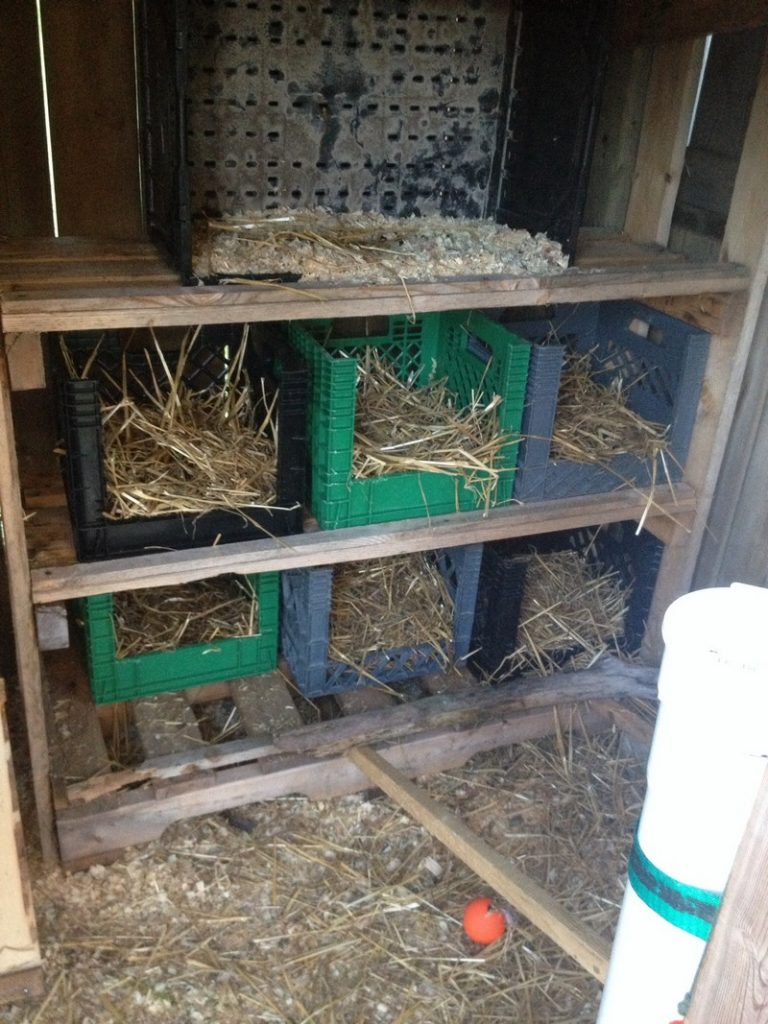
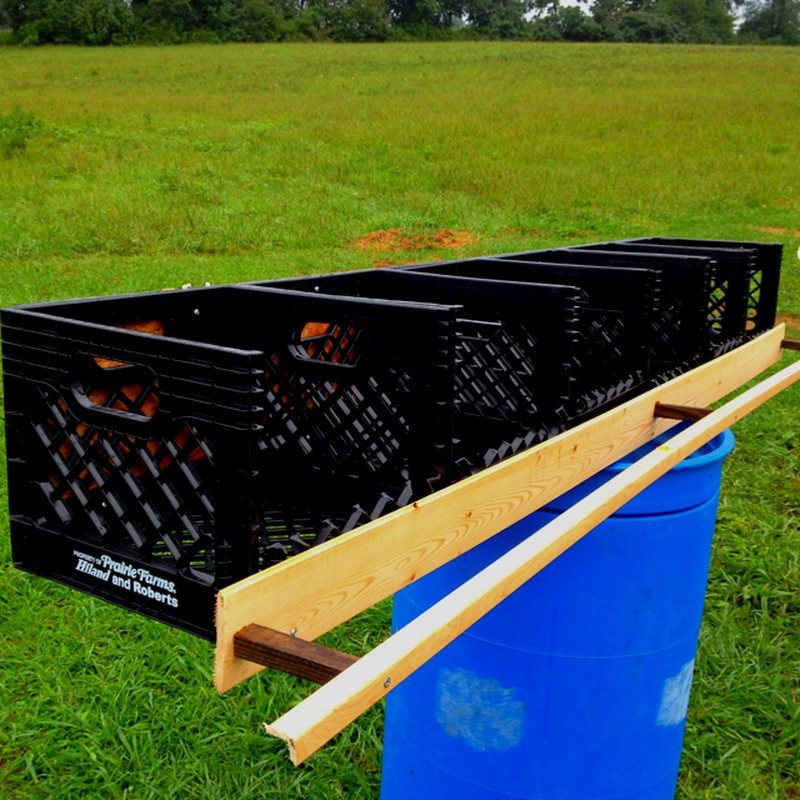
Milk Crate Chicken Nesting Boxes
If you have access to a few milk crates, you can turn them into strong, easy to clean nesting boxes in just a short time.
Plastic milk crates are strong, cheap, and easy to clean. They are one of the easiest DIY nesting box options. You can even stack or hang them to save space.
Best for:
Small and medium flocks, flexible layouts, coops that need vertical storage
What you will need to build Milk Crate Chicken Nesting Boxes
- Plastic milk crates
- Scrap wood or boards for a frame or shelf
- Screws or nails
- Piece of plywood or cardboard for the bottom of each crate
- Bedding
How to build it
- Build a simple wooden shelf or frame along the coop wall that holds the crates firmly in place about 18 to 24 inches off the floor.
- Lay a piece of plywood, cardboard, or another flat material inside the bottom of each crate so bedding does not fall through the holes.
- Slide each crate onto the frame with one open side facing out to be the entrance.
- Add 2 to 3 inches of bedding to each crate.
- If you are tight on space, stack crates in two rows, but make sure each row is easy for hens to reach and for you to clean.
Milk crate nesting boxes are very easy to remove, hose out, and rearrange when your flock grows or your coop changes. This uncomplicated approach can yield excellent results, providing an accessible and comfortable chicken nesting box for your poultry.
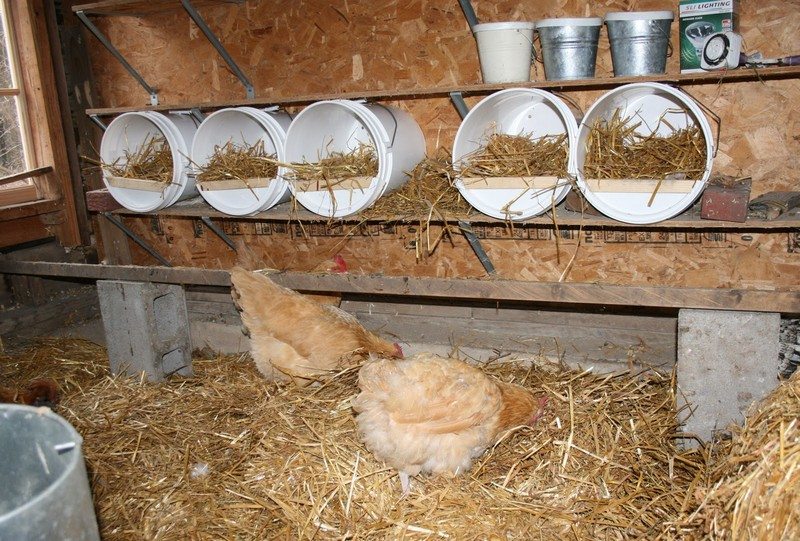
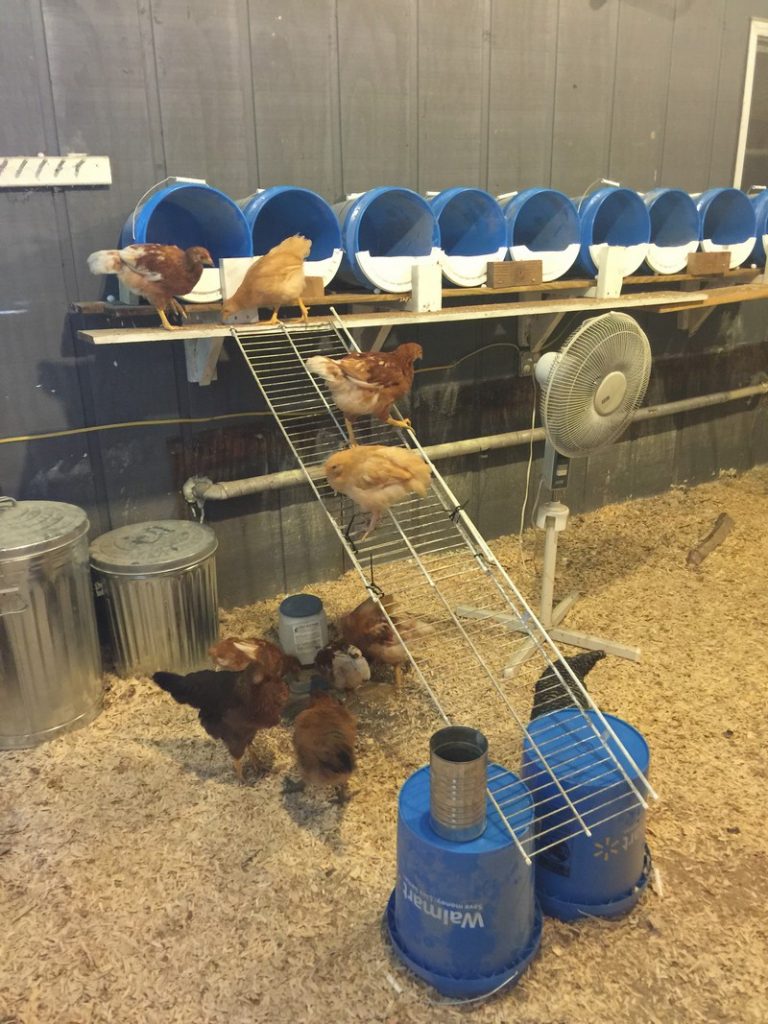
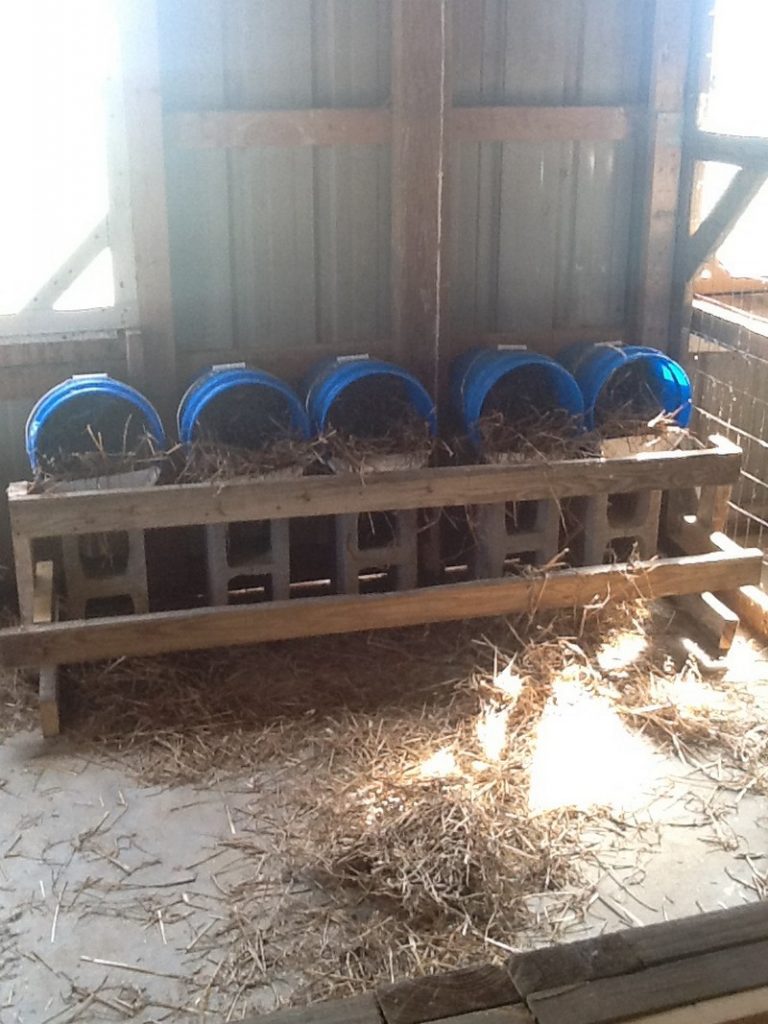
Gallon Bucket Nesting Boxes
Five-gallon buckets are common in many homes and farms. With a few quick changes, you can turn them into durable, easy-to-clean nesting boxes.
Best for:
Any flock size, people who want low maintenance and quick cleaning
What you will need for this Gallon Bucket Nesting Boxes
- Clean 5-gallon buckets with lids
- Saw or sturdy cutting tool
- Screws or brackets to mount buckets
- A wooden board to act as a lip in front
- Bedding
How to build it
- Clean the buckets well and remove any old paint, chemicals, or food residue.
- Cut a wide opening on the side of each bucket. The opening should be large enough for a hen to enter comfortably but high enough to hold bedding inside.
- Place the lid back on each bucket. The lid becomes the back of the nest and helps keep bedding from falling out.
- Mount the buckets on their side along a coop wall using brackets or by resting them on a sturdy shelf. The openings should be 18 to 24 inches above the floor.
- Attach a short board across the bottom front of each bucket to act as a perch and to hold bedding in place.
- Add 2 to 3 inches of straw, shavings, or other bedding.
These bucket nests are simple to pull out and spray clean, which keeps both hens and eggs healthier.
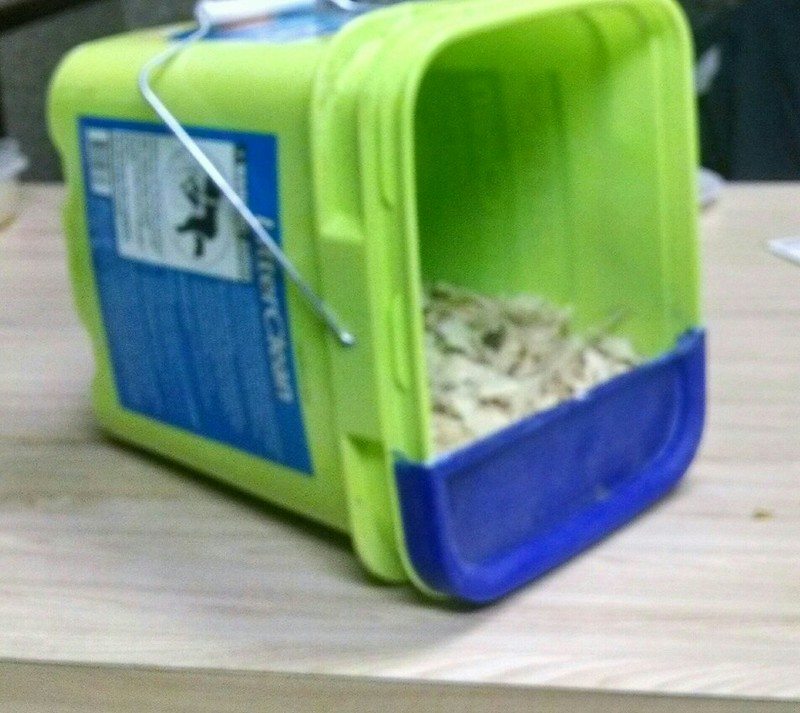
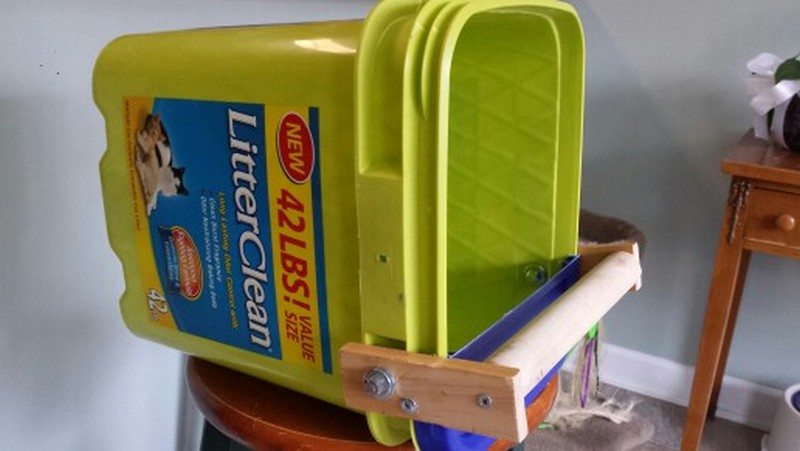
Kitty Litter Bucket Nesting Boxes
Don’t like the gallon buckets? How about these square containers? These square containers will help you stack.
Square kitty litter buckets are another great nesting box base. The square shape makes them easier to stack and line up neatly than round buckets.
Best for:
Small coops where space efficiency matters
What you will need for this Kitty Litter Bucket Nesting Boxes
- Square plastic kitty litter buckets (thoroughly cleaned)
- Saw or sharp utility knife
- Screws or brackets for mounting
- Short boards for perches or lips
- Bedding
How to build it
- Wash buckets very well with hot, soapy water and rinse thoroughly. Let them dry.
- Cut a large entrance hole in the front of each bucket. Leave a few inches of plastic at the bottom to hold bedding.
- Mount the buckets on their sides along a coop wall or on a shelf.
- If you want to stack them, make sure the lower row is strong enough to support the weight and that each entrance stays clear.
- Attach a short perch in front of each opening if hens need extra help getting in.
- Fill each bucket with 2 to 3 inches of bedding.
Because these containers are square, they fit together well and waste very little space in a compact coop. If you do not buy cat litter yourself, ask friends or neighbours to save empty buckets for you.
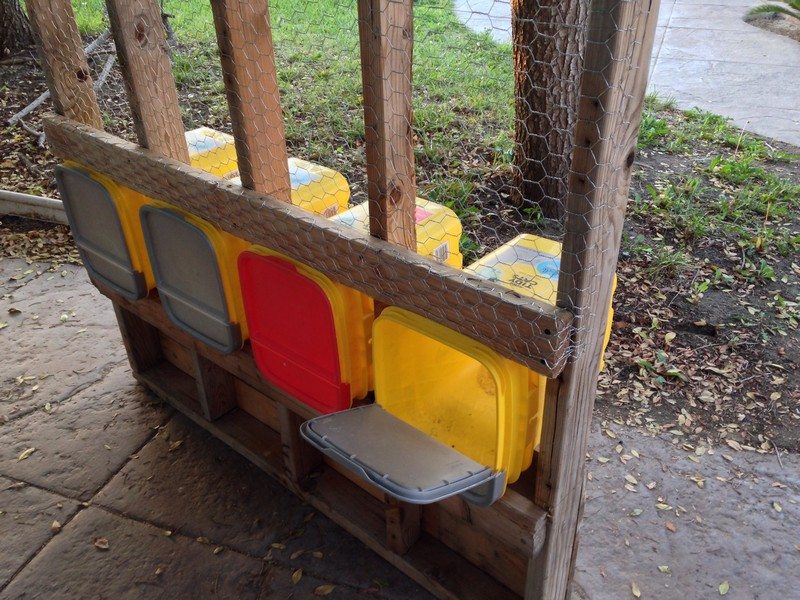
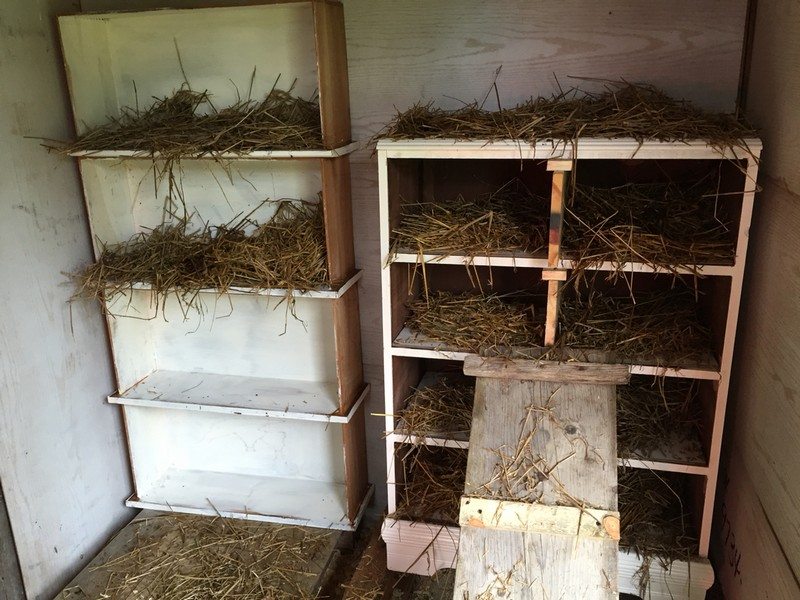
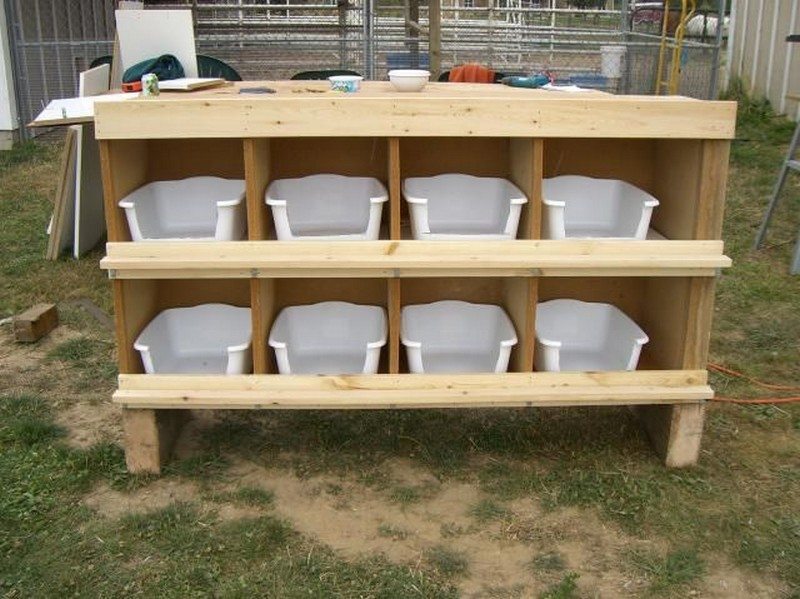
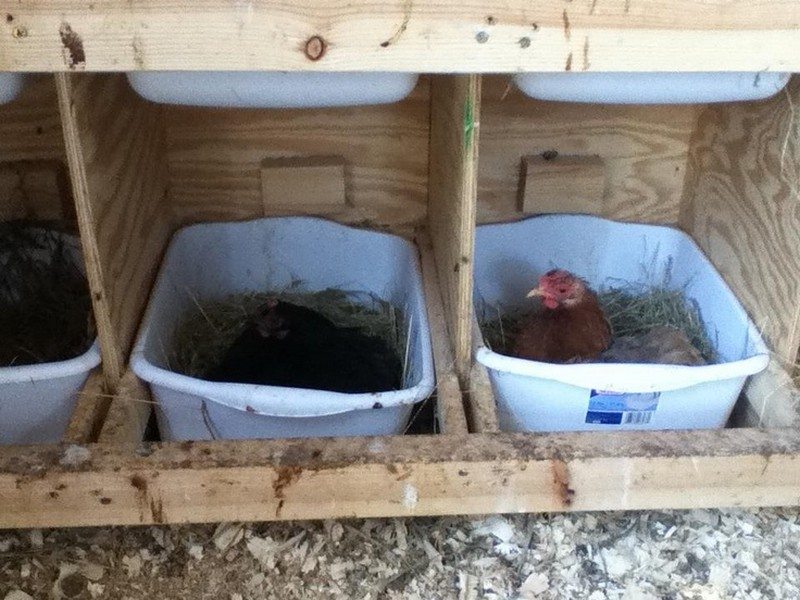
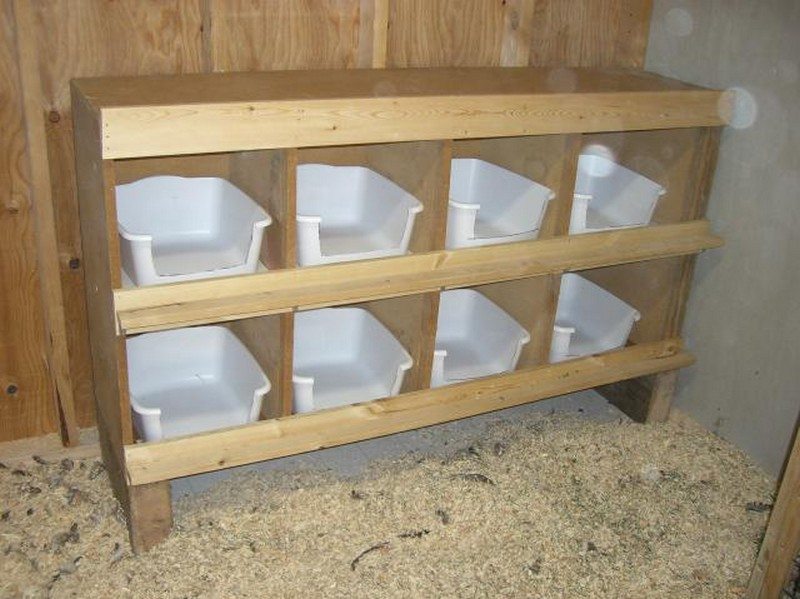
Dollar Store Plastic Bin Nesting Boxes
Here’s another easy-to-clean chicken nesting box idea. Just take them out and wash them quickly if needed. And if one breaks, you can always replace it without feeling bad for your wallet!
Inexpensive plastic storage bins from the dollar store or discount shops can make excellent nesting boxes. If one cracks or breaks, it is affordable to replace.
Best for:
Very tight budgets and easy cleaning
What you will need for this Dollar Store Plastic Bin Nesting Boxes
- Plastic bins or tubs large enough for a hen to turn around in
- Wood to build a simple platform or shelf
- Screws or nails
- Bedding
How to build it
- Measure your bins. Make sure each one is at least 12 inches wide and deep for standard hens.
- Build a sturdy platform or shelf along a wall of the coop that supports the bins so the lip sits about 18 to 24 inches off the floor.
- Place the bins on the shelf with the open side facing out. If the bins are very deep, you can cut a lower entrance in the front.
- Add a 2 to 3 inch layer of straw, hay, or wood shavings to each bin.
- To clean, simply lift out the bin, dump the old bedding, rinse if needed, dry, and refill.
These bins are one of the easiest options to maintain. You can also color-code or label them if you want to track which nests your hens like best.
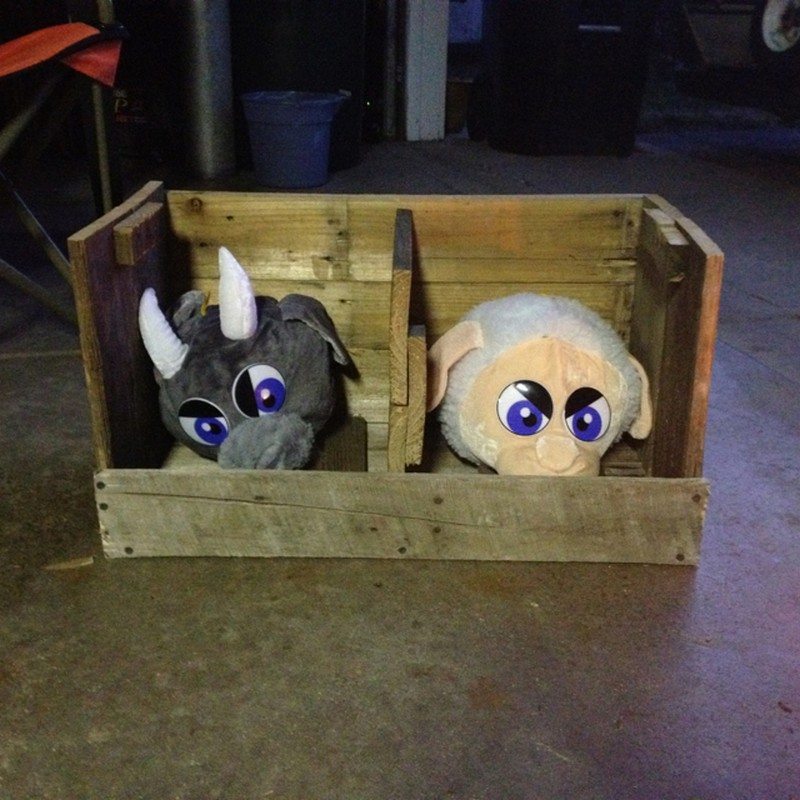
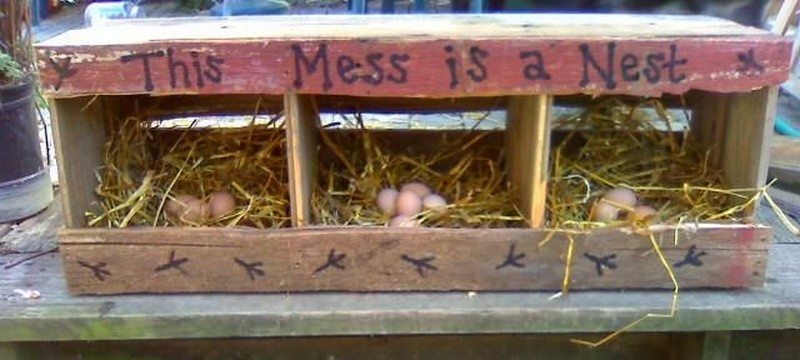
Old Pallet Wood Nesting Boxes
Did you think we forgot all about pallets? If you’ve got small excess/scrap from a previous pallet project, you might still be able to make a chicken nesting box out of them.
If you have leftover pallet wood from a past project, you can build traditional-style wooden nesting boxes with a rustic look.
Best for:
Permanent, sturdy installations and people who like woodworking
What you will need to build Old Pallet Wood Nesting Boxes
- Pallet boards or other scrap lumber
- Saw, hammer or drill, and nails or screws
- Measuring tape and pencil
- Sandpaper
- Bedding
How to build it
- Take apart pallets carefully and remove all nails. Choose boards that are not heavily treated and do not show signs of rot or mold.
- Plan each box to be about 12 inches wide, 12 inches deep, and 12 inches high for standard hens.
- Cut boards for the base, sides, back, and top. Cut a short front board about 4 inches high to hold bedding in place.
- Assemble the box with nails or screws. Sand any rough edges to prevent splinters and injuries.
- Mount the boxes along a coop wall in a row or stack. Keep them 18 to 24 inches off the floor and below the height of the roosts.
- Add 2 to 3 inches of bedding to each box.
Palet based boxes are customizable. You can build as many as you need and arrange them to fit your coop layout.
Simple comparison of nesting box ideas
Nesting box idea Best for Cost level Cleaning difficulty Old dresser Larger coops, many boxes at once Low Medium Milk crates Small to medium flocks, modular setups Very low Easy 5 gallon buckets Any flock size, quick cleaning Very low Easy Kitty litter buckets Small coops, stackable layouts Very low Easy Dollar store plastic bins Tight budgets, simple replacement Very low Very easy Pallet wood nesting boxes Permanent, rustic installations Low Medium
DIY Tips That Make Any Nesting Box Work Better
No matter which design you choose, these strategies help hens feel safe and keep eggs clean.
- Design for durability and easy cleaning
- Avoid toxic treatments and rough, splintery wood. Pick materials that you can scrub, hose out, or wipe clean easily. Simple designs are often the most practical in the long run.
- Use repurposed materials wisely
- Old crates, barrels, shelves, and boxes can all become nesting boxes. Make sure anything you reuse is sturdy, clean, and free from harmful chemicals or sharp metal.
- Optimize space in the coop
- Tuck boxes along walls or into corners so hens have floor space to move. Stack or hang boxes where possible, but always keep them easy to reach for both hens and humans.
- Focus on easy access
- Hens should be able to hop in and out with no trouble. You should be able to collect eggs without crawling or bending into awkward positions. Hinged lids, removable bins, and outside access doors all help.
- Provide good ventilation and drainage
- If you use solid plastic or metal containers, drill a few small holes in the back or sides to improve airflow. Slightly slope the floor or add small drainage holes so moisture cannot pool under the bedding.
- Choose comfortable nesting material
- Straw, hay, wood shavings, hemp bedding, or nesting pads all work well. Use what is easy to get and stays dry in your climate. Replace bedding when it looks damp or dirty.
- Create multiple compartments for larger flocks
If you have many hens, build banks of boxes with dividers. This reduces competition and stress when several hens want to lay at the same time.
Safety Tips For DIY Chicken Nesting Boxes
Good nesting boxes should be safe for both you and your hens. Keep these precautions in mind when building and installing them.
- Choose safe materials
- Use untreated wood, food safe plastic, or galvanized metal whenever possible. Avoid old lumber with flaking paint, visible mold, or signs of chemical treatment.
- Smooth sharp edges
- Sand or file rough corners, cut edges, and nail heads. Check regularly for new splinters or cracks.
- Build sturdy structures
- Make sure boxes and frames cannot tip, sag, or collapse. Use strong fasteners and check them as part of your regular coop inspections.
- Provide the right amount of space
- Boxes should be large enough for a hen to enter, turn around, and sit comfortably, but not so large that several hens pile in and crush eggs.
- Maintain good ventilation
- Add small openings or slats where needed so air can move and moisture does not build up. Clean any vents that become clogged with dust or bedding.
- Avoid overcrowding
- Plan for about 1 box for every 3 to 4 hens. If you see hens lining up or fighting to use one box, add more options.
- Inspect and clean boxes regularly
- Look for loose hardware, cracked plastic, or broken boards. Remove damp bedding, droppings, and feathers. Fresh, dry bedding keeps eggs cleaner and hens healthier.
- Place boxes in safe locations
- Keep boxes away from strong drafts, leaky roofs, and direct sun. In very hot weather, check that boxes do not overheat, and add shade or extra airflow if needed.
How To Encourage Hens To Use Your Nesting Boxes
Most hens will find and use nesting boxes on their own, but sometimes they need a little help.
- Make sure the boxes are in a quiet, dim area that feels safe
- Provide enough boxes so hens do not have to compete
- Place a fake egg, golf ball, or ceramic egg in each box to signal that it is a good place to lay
- Keep hens in the coop until mid morning, when most eggs are laid, so they learn to use the boxes instead of hidden outdoor spots
- Keep boxes clean and dry so they feel pleasant and smell fresh
Unleash your inner DIY enthusiast and elevate your chicken coop with these six imaginative chicken nesting box ideas. From a repurposed dresser to the ingenious use of a milk crate, these clever solutions provide both comfort and functionality for your feathered friends.
Whether you’re seeking simplicity or a touch of rustic charm, there is a chicken nesting box idea here to suit your coop’s unique needs. Transform your coop into a haven where your hens can safely lay their eggs, all while adding a dash of creativity to your poultry paradise.
Looking to build a chicken coop but don’t want to spend a fortune? Check out our free chicken coop plans here…
If you liked this, you would also like viewing these chicken coop ideas…
Frequently Asked Questions
What materials do I need to build a chicken nesting box?
For a simple wooden box you will need wood, nails or screws, basic tools, and bedding such as straw or shavings. For repurposed designs you can use items like milk crates, buckets, kitty litter buckets, plastic bins, and pallet boards, as long as they are clean and safe.
How big should my chicken nesting box be?
For most standard hens, a 12 inch wide by 12 inch deep by 12 inch high box works well. Large breeds can use boxes that are 12 inches deep and 14 inches wide. Bantam breeds are comfortable in boxes that are about 10 inches deep and 10 inches high.
How many nesting boxes do I need for my flock?
Plan for one nesting box for every 3 to 4 hens. For example, if you have 6 hens, 2 boxes are usually enough. If you have 10 to 12 hens, aim for 3 or 4 boxes.
What is the best bedding for chicken nesting boxes?
Straw, hay, wood shavings, hemp bedding, and nesting pads all work well. Choose a material that is soft, absorbent, and easy to replace. Avoid bedding that stays damp or molds quickly.
How often should I clean nesting boxes?
Check nesting boxes every time you collect eggs. Remove any broken eggs, droppings, or wet bedding right away. A light clean every 1 to 2 weeks works for most flocks. Do a deeper clean and full bedding replacement at least once a month.
How do I stop hens from roosting and sleeping in nesting boxes?
Mount roosts higher than the nesting boxes, because hens prefer to sleep in the highest safe place. Avoid flat box tops that invite roosting or add a sloped board on top. If hens do sleep in boxes, clean them more often and adjust roost height and placement.
Final Thoughts: Simple, Creative Nesting Boxes For Happy Hens
You do not need expensive equipment to create good nesting boxes. With a bit of creativity, you can turn old dressers, milk crates, buckets, plastic bins, and pallet wood into comfortable, safe nests that your chickens will love.
Start by following the basic rules for size, number, and placement. Then choose the DIY nesting box idea that fits your space, tools, and budget. Your hens will enjoy cozy, private spots to lay, and you will enjoy cleaner, easier egg collection from nesting boxes you built yourself.