Last Updated on November 11, 2025 by teamobn
Why Build a Pallet Wall?
A pallet wall instantly adds warmth, character, and rustic charm to any room — whether it’s a cozy bedroom, a home office, or your living room accent wall. It’s an affordable, eco-friendly way to give plain walls new life while reusing old materials.
I built mine over a weekend and was amazed by how dramatic the transformation was. Even if you’ve never done woodworking before, this is an easy project that makes a big impact.
At a Glance
- Time Needed: 4–8 hours for a small accent wall, 8–12 hours for first-timers. Disassembly, sanding, and finishing add significant time.
- Skill Level: Beginner-friendly
- Estimated Cost: $30 – $80 (using reclaimed pallets and including construction adhesive, screws/brads, sandpaper, stain/sealer, box extenders, and a few replacement boards.)
- Main Materials: Pallets, screws, sandpaper, wood glue, wood stain
- Safety Tip: Always wear gloves, goggles, and a dust mask when cutting or sanding pallets.
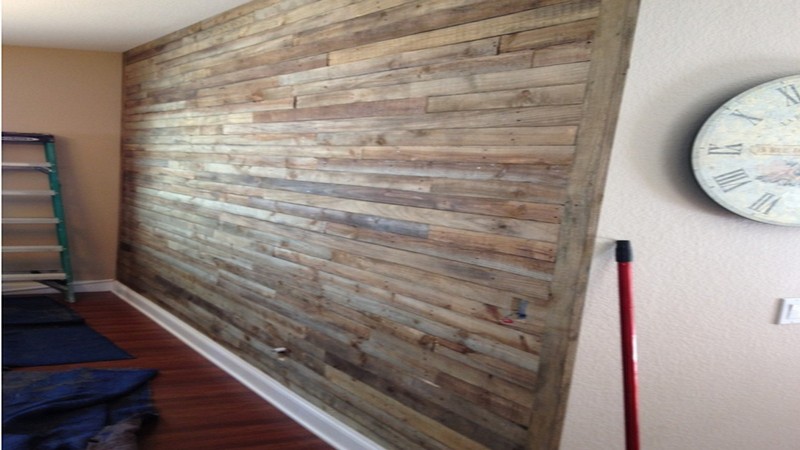
A pallet wall DIY project. A wood feature wall is among those versatile details that look good just about anywhere. While a feature wall typically adds visual interest to a room, it is also a great way to add warmth and texture.
The best feature walls are made of natural materials, such as wood, stone, or brick. For example, reclaimed wood or a DIY Pallet wall can be a great alternative to stone, especially if you are working with a budget.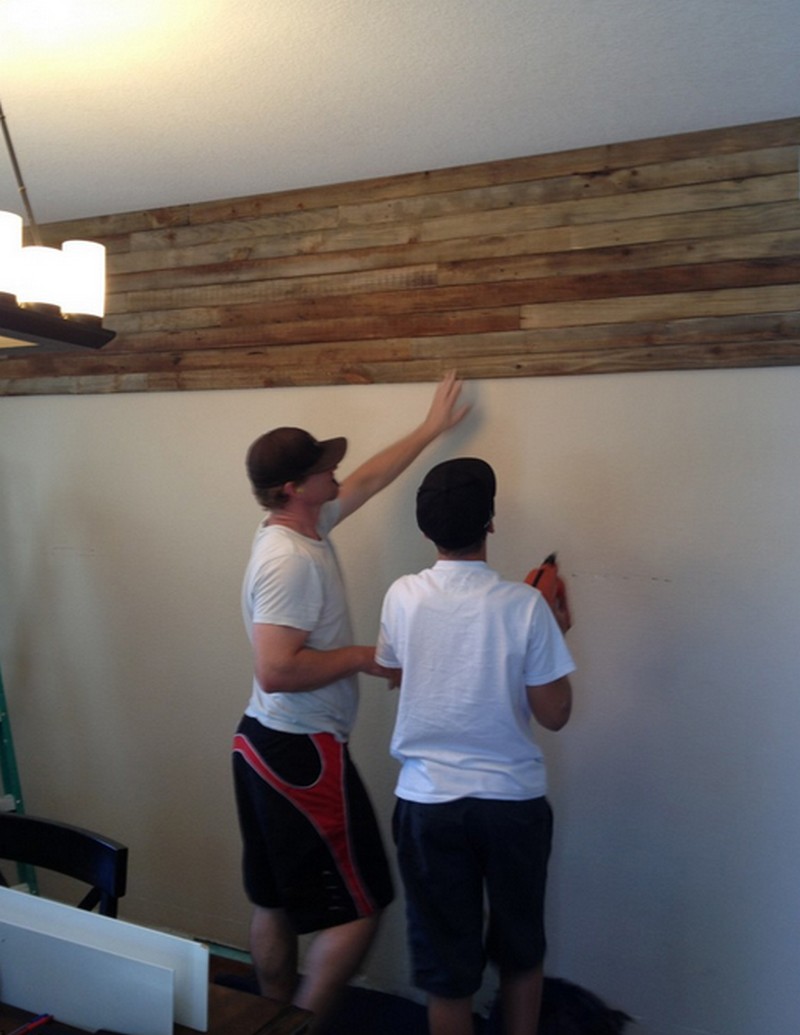
They exude a strong – but never overbearing – presence and add rustic sophistication to traditional interior design schemes. Rustic and industrial furniture styles are surging in popularity as more and more homeowners embrace the unapologetic beauty of a well-crafted, imperfect piece of wood.
But what about the upkeep? It’s not difficult to maintain the beauty of your favourite rustic pieces, especially the DIY pallet wall accent. A little polish and furniture wax, the occasional light sanding, and you’ll be set.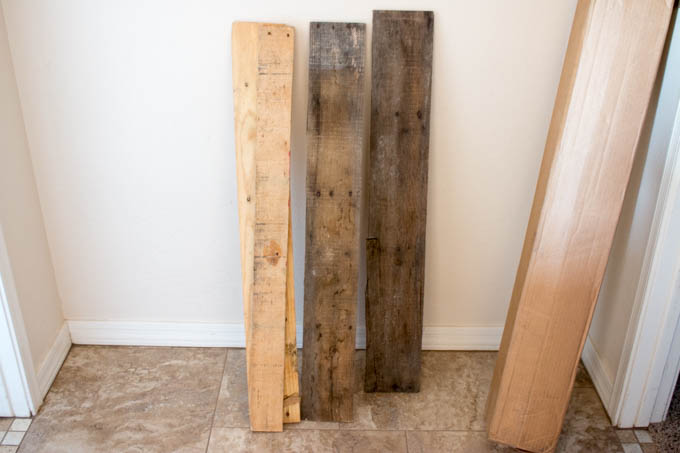
The natural patina of the wood is very calming whether it be on reclaimed, whitewashed, painted, or -yes – even wood pallets.
If you like the idea of creating a timber feature wall, why not make it out of recycled pallets? This DIY Pallet wall will give a significant accent to any of your rooms. If you’re going for a rustic, relaxed look in your living space, then this project could be for you.
Building a DIY Pallet Wall Project
This is a simple project that you should be able to complete in a weekend or two, as long as you have all the required materials, hardware, and tools. And if you’re a new DIYer, get some help from your experienced friends or relatives. Not only do you get an awesome wall, but you also learn new skills!
Like the idea of an inexpensive and easy-to-build timber feature wall? Then this project might be for you!
What materials are needed to build a DIY Pallet Wall?
- Pallets – enough to cover your wall
- Wood Stain – for a darker finish
- Paint – taupe or brown
- Box Extenders
- Screws
What tools are needed for this project?
- Reciprocating Saw
- Table Saw
- Nail Gun
- Screw Driver
How to Build a DIY Pallet Wall?
Step 1: Prepare your wall (10–20 minutes)
Goal: Clean surface and find strong anchor points.
- Clear the area: Move furniture away and cover the floor.
- Remove obstacles: Take out nails, hooks, picture hangers, and any loose paint chips.
- Mark studs: Use a stud finder to locate studs. Mark a vertical line from floor to ceiling every time you find one (use light pencil marks).
- Quick clean: Wipe the wall with a dry cloth so the adhesive bonds well.
Safety note: If you have electrical outlets on the wall, turn off the power at the breaker before working near them. You’ll remove and reattach the faceplates later with board cutouts around them.
Success check:
- The wall is dust-free and ready.
- You can see straight vertical pencil lines where your studs are.
Step 2: Disassemble and prep the pallets (45–90 minutes)
Goal: Turn pallets into safe, smooth boards ready to install.
- Choose safe pallets
- Look for “HT” (heat-treated) stamped pallets. Avoid any with strong odors, stains, or “MB” stamps.
- Disassemble:
- Easiest: Use a reciprocating saw to cut through the nails along the stringers.
- Manual: Use a pry bar and hammer gently to lift boards without splitting them.
- Remove all nails
- Check each plank carefully and pull out or grind down leftover nails.
- Sand the boards:
- Start with medium grit (80–120) to remove splinters.
- Finish with fine grit (180–220) to smooth the surface.
- Stain or seal:
- For natural look: Use a clear, water-based polyurethane or matte sealer.
- For color: Apply stain, wipe off excess, then seal after it dries.
Pro tip: Mix a few light and dark boards for a rich, reclaimed look.
Success check:
- No protruding nails. Finishes are dry before handling.
- Boards are smooth to the touch (won’t snag a cloth).
Step 3: Plan your layout (15–30 minutes)
Goal: Decide the pattern and avoid surprises before you attach anything.
- Dry fit on the floor:
- Lay boards in rows to test your pattern and color mix.
- Choose a pattern:
- Horizontal: Classic, fastest to install.
- Vertical: Modern, makes ceilings feel taller.
- Herringbone/Chevron: Designer look, takes more cutting.
- Find your starting line:
- If your floor is level: You can start from the floor.
- If the floor is slightly uneven: Draw a perfectly level line on the wall 1 board-height up and start from that line.
Pro tip: Keep small offcuts handy for staggering seams; aim to avoid vertical seams lining up in consecutive rows.
Success check: You know your pattern, your starting line, and your first two rows are planned.
Step 4: Attach the boards (60–120 minutes)
Goal: Secure boards evenly and safely with a straight, clean look.
Setup
- Remove outlet faceplates and keep screws in a small container.
- Have your level and pencil within reach.
Row 1 (Critical for straight lines)
- Apply adhesive: Run a thin zigzag bead of construction adhesive on the back of the first board.
- Place and level: Set it on your starting line (or floor if level). Check with the level.
- Secure with screws: Use 2–3 screws per board, aiming to hit studs whenever possible.
Rows 2 and up
- Stagger joints: Start the next row with a board that’s at least one-third shorter than the first to avoid seam lines.
- Keep gaps tight: Aim for no more than 1–2 mm between boards. If needed, use a thin spacer (like a credit card) for consistency.
- Check as you go: Every 2–3 rows, use the level to keep everything straight.
Around outlets and edges
- Outlets: Hold a board in place, mark where the outlet sits, cut out a neat rectangle, then install the board. Later, reinstall the faceplate; use outlet extenders if needed.
- Edges: Cut boards to length for a clean corner or leave a slight overhang if you’ll add trim.
Screw tips
- Use wood screws about 1.25–1.5 inches long for most drywall-over-stud walls.
- If you miss a stud, use a wall anchor for extra hold or rely more on adhesive.
Success check:
- The first row is perfectly level.
- Seams are staggered, gaps are minimal, and boards feel solid when pressed.
Step 5: Finishing touches (15–45 minutes)
Goal: Make the wall look polished and protect the wood.
- Light sand: Gently sand any sharp edges or spots that feel rough after installation.
- Final seal: Wipe with a dry cloth, then add a final coat of clear sealer if needed for protection.
- Reinstall faceplates: Ensure they sit flush; use extenders if the wall is now thicker.
- Add trim (optional): Finish edges and top with a thin trim or molding for a framed, professional finish.
- Clean up: Remove dust and step back to admire your work.
Success check:
- No strong odor from finishes (a sign that everything has dried properly).
- The wall looks even, smooth to the touch, and the outlets/edges are tidy.
Quick Troubleshooting
- Boards won’t sit flat: You may have a bowed board—swap it out or cut into shorter pieces.
- Visible gaps: Nudge boards tighter as you go; for small gaps, blend with a matching wood filler before sealing.
- Slightly uneven top line: Cap with a slim trim piece for a clean finish.
- Adhesive smear on finished face: Wipe immediately with a damp cloth; dried adhesive can be carefully scraped, then lightly sanded and resealed.
Creative Layout Patterns for Your Pallet Wall
A pallet wall DIY project doesn’t have to follow a basic horizontal layout. One of the best parts about working with pallet wood is the freedom to experiment with visual patterns. The way you arrange your boards can completely transform the feel of a room — whether you’re going for subtle charm or bold design. Below are some creative layout ideas that can take your pallet wall DIY project to the next level.
- Classic Horizontal Layout
- This is the most common pattern for a pallet wall and for good reason. It’s simple, clean, and brings a rustic warmth that complements almost any decor style.
- Boards are placed in rows, one on top of the other, either staggered like bricks or aligned edge to edge. This layout is ideal if your goal is to create a cozy, understated backdrop.
- Vertical Plank Layout
- Placing pallet boards vertically can make your walls appear taller, adding height and a sleek, unexpected twist to traditional wood paneling.
- This works well in narrow spaces like entryways or hallways. It’s also a great choice for a more contemporary take on the pallet wall DIY project.
- Chevron and Herringbone Patterns
- If you want your pallet wall to stand out, consider a chevron or herringbone design. These angled layouts require more precision and cutting, but the payoff is huge in terms of visual impact.
- A chevron pattern forms a repeating “V” shape, while herringbone mimics a zigzag. Both are elegant options that can add sophistication to a rustic material.
- Random Patchwork Style
- This pattern uses pallet boards of different lengths, widths, and tones, arranged in no particular order. The result is a casual, artistic look that adds depth and texture.
- It’s ideal for a bohemian or eclectic interior and gives you the freedom to use up odd-sized boards without much waste.
- Framed Inlay
- In this layout, a border is created around a central section of boards laid in a different direction or style. For example, you might frame a herringbone center with horizontally placed planks.
- This style adds structure and drama to the pallet wall, making it feel more like a statement piece than a backdrop.
Choosing the right pattern for your pallet wall DIY project depends on the room, your design goals, and how much time you want to spend on cutting and fitting boards. No matter which layout you go with, the finished wall will bring texture, style, and a custom feel to your space.
How to Choose the Right Pallet Wood for Indoor Use
Not all pallet wood is created equal, especially when it comes to indoor projects. When building a pallet wall DIY project, choosing the right type of wood isn’t just about looks—it’s about safety, durability, and ease of installation. Before you start cutting and staining, take time to select pallets that are safe and suited for the indoor environment.
Look for Heat-Treated Stamps
The first thing to check on a pallet is how it was treated. Look for the “HT” stamp, which stands for heat-treated. This means the wood was treated with heat instead of chemicals, making it safe for indoor use. Avoid pallets marked “MB” — that indicates methyl bromide, a toxic pesticide not suitable for home projects. A safe pallet is the foundation of any good pallet wall DIY project.
Avoid Damaged or Moldy Wood
Inspect the condition of each pallet before bringing it inside. Cracks, heavy splinters, stains, or visible mold are all red flags. These imperfections aren’t just cosmetic—they can affect the structural integrity of your wall and pose health risks. Choose boards that are solid, dry, and free from discoloration.
Mind the Origin and Purpose
Pallets used for food, chemicals, or industrial parts might carry residues or contaminants. If you can trace the origin of your pallets—say, from a local grocery store or furniture shop — you’ll have a better idea of what they carried. Choose pallets with a known, clean history for indoor projects, especially in living spaces.
Stick with Hardwood When Possible
While many pallets are made of softwood like pine, some are constructed from oak or maple. These hardwoods are more durable and will stand up better over time, especially in high-traffic areas. They’re also less likely to warp, which helps keep your pallet wall DIY project looking great for years.
Clean and Sand Thoroughly
Even the best pallets need prep. Use a stiff brush to remove dirt and debris. Then give the boards a thorough sanding to eliminate splinters and prepare the surface for paint or stain. Prepping your wood properly ensures a smoother finish and helps your project come together more professionally.
Selecting the right pallet wood is the first real step in any pallet wall DIY project. By choosing clean, heat-treated boards in good condition, you’re setting yourself up for a safer, longer-lasting, and better-looking result.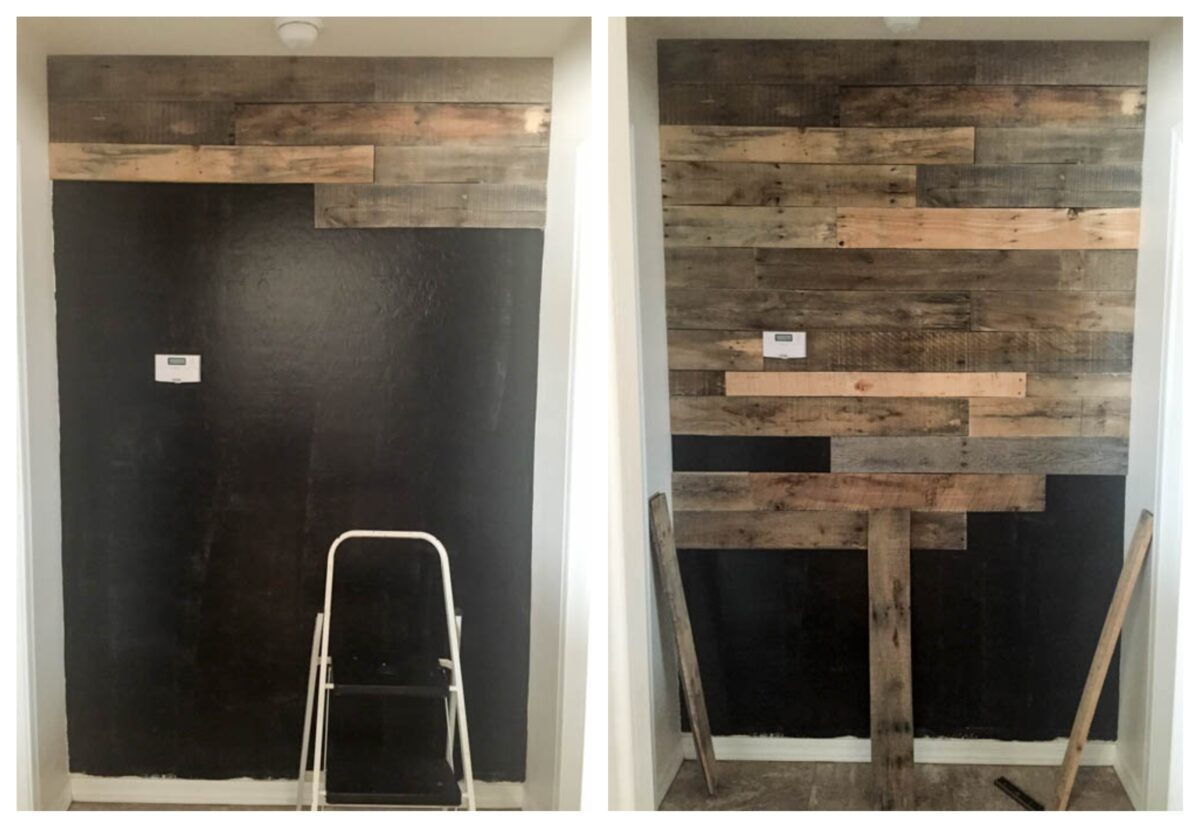
Frequently Asked Questions
- Are pallets safe to use indoors?
- Yes — if you choose the right ones. Use pallets stamped HT (heat-treated). Avoid any marked MB (methyl bromide). Skip pallets with stains, strong odors, mold, or unknown origin.
- How can I tell if a pallet is safe?
- Look for an HT stamp. KD or DH are also acceptable. If there’s no stamp, try to verify the source and inspect carefully. When in doubt, don’t use it indoors.
- How many pallets do I need?
- Depends on wall size and usable wood per pallet. As a rough guide, a typical 11 ft x 8 ft wall can require around 15–20 pallets after accounting for waste. Plan extra.
- How should I prep pallet wood?
- Remove all nails, clean thoroughly, let dry, sand to remove splinters, then stain or seal. For indoor use, a clear, water-based polyurethane or matte sealer works well.
- What’s the best way to install a pallet wall?
- Mark studs, start from a perfectly level reference line, use construction adhesive behind each board, and secure with screws into the studs. Stagger seams and check the level every few rows.
- How do I handle outlets and switches?
- Turn off the power. Remove faceplates, mark and cut openings in boards, install box extenders if needed, so faceplates sit flush after the wall thickens, then reattach faceplates.
- How much will it cost and how long will it take?
- If pallets are free, expect to spend mostly on screws, adhesive, sandpaper, and sealer—often around $20–$40. Time varies by size and pattern: plan about 2–6 hours for a small-to-medium accent wall, longer for herringbone or chevron.
Conclusion
A pallet wall DIY project adds character, warmth, and rustic charm to any room. With the right materials and layout, it becomes a standout feature in your home. Take your time with prep and installation to create a finished wooden wall feature that’s both durable and beautiful.