Last Updated on June 12, 2024 by teamobn

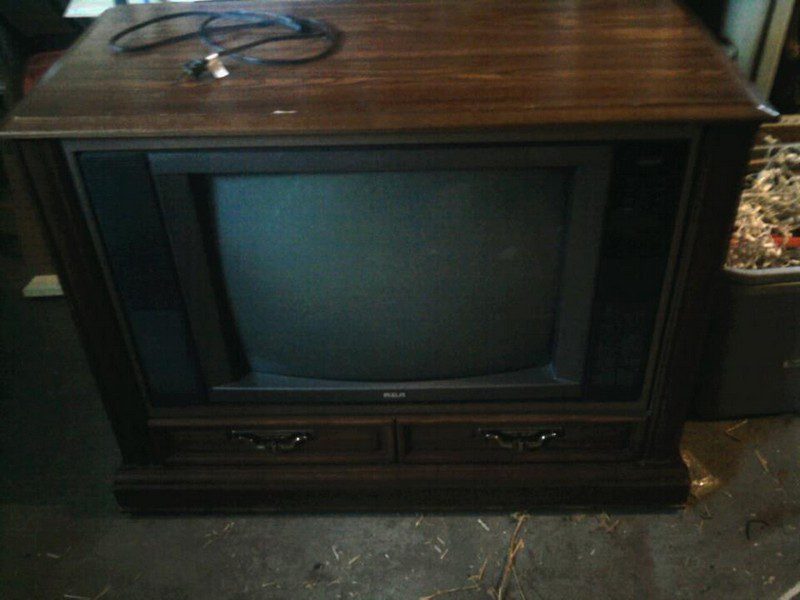
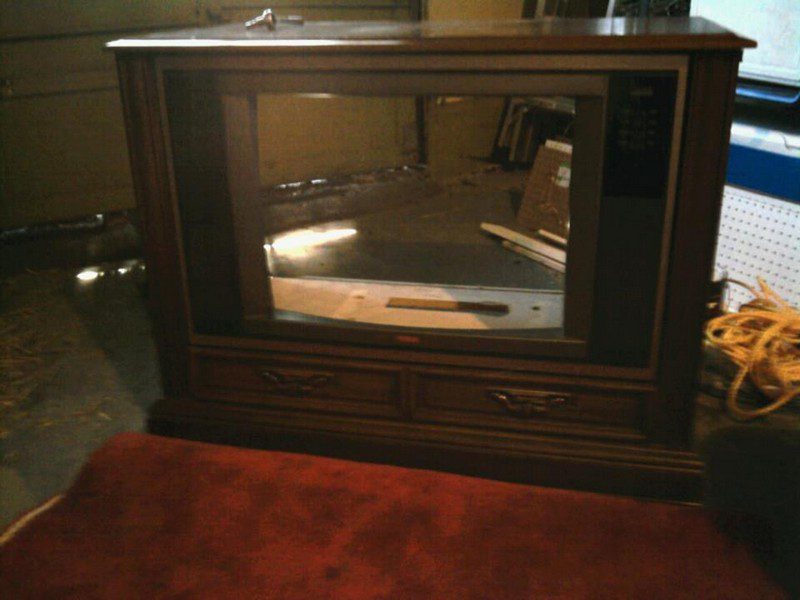
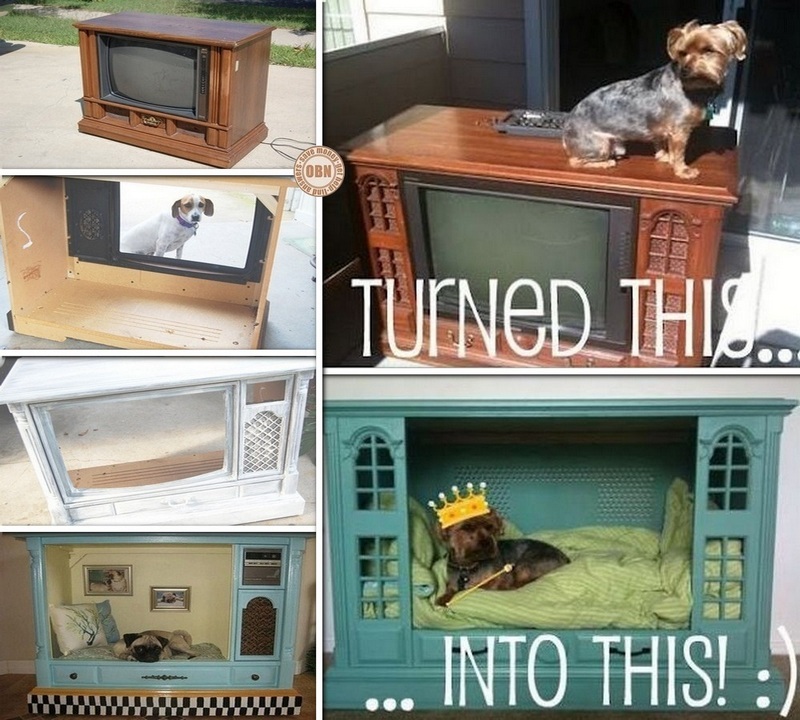
An old TV console is a piece of furniture that was traditionally used to house an old-fashioned television and other AV equipment. Today, you can use it to house your media players, gaming consoles and media accessories. Or here’s a project your pets would surely appreciate! astounding
Turning an old TV console into a pet bed is an easy conversion project you can accomplish within the weekend. All it takes is a little dismantling, sanding, painting and sewing.
An old TV dog bed is indeed better than building a pet bed from scratch!
The sleeping habits of dogs are very important to their health and well-being. Dogs need about 12 to 20 hours of sleep a day.
Experts have found that dogs who don’t receive adequate sleep have lower immune systems and tend to become anxious and depressed. This can lead to a series of problems for the dog and for the owner.
Dogs can sleep anywhere. In a corner of your room, in front of the television, on the couch and even in the kitchen. But when you have a dog, you create a comfortable and cozy bed for it so it can enjoy and have a good time. But a good bed will be better.
Adding your pet’s favourite toys will be a plus.
Do you think this will keep them out of your bed?

Building an Old TV Dog Bed
Materials:
- Old TV Console
- Primer
- Paint
- Batting
- ¼” Elastic
- Safety Pins
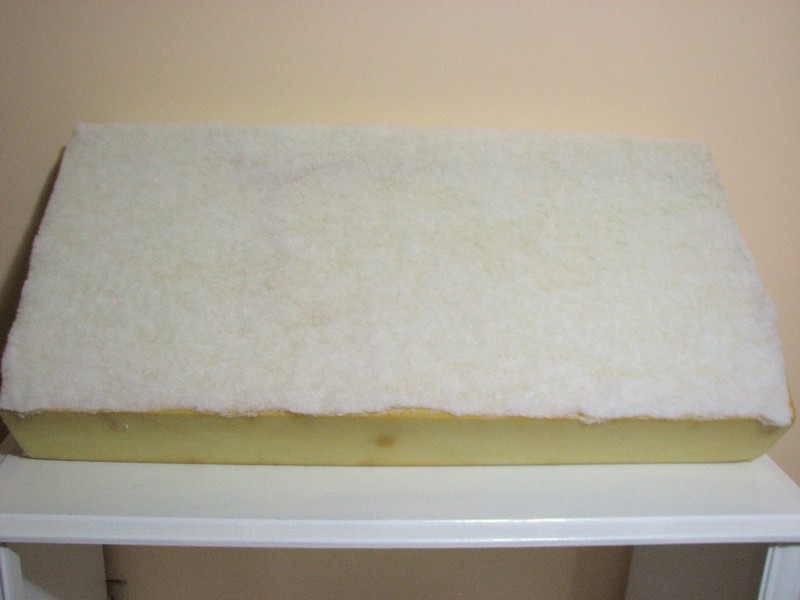
- Old Crib Mattress/Foam – about 3” thick
- Spray Adhesive
- Sewing Machine/Materials
Tools:
- Sander
- Electric Knife
Instructions
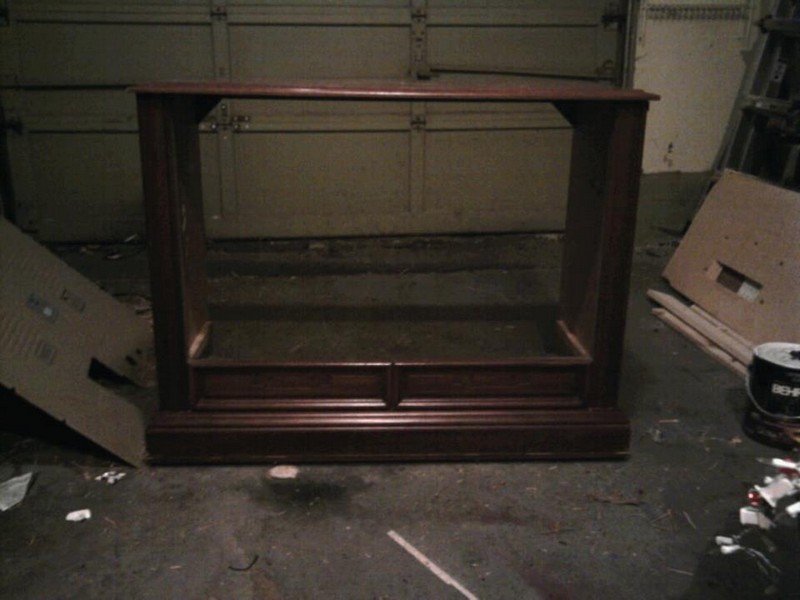
Step 1: Preparing the TV Console
- Safety First: Wear gloves and eye protection to avoid injuries.
- Removing the CRT: Carefully extract the cathode ray tube and other electronic components from the TV console. Be sure to dispose of the CRT properly due to its harmful chemicals.
- Cleaning the Console: Wipe down the console with a damp cloth to remove dust and debris.

Step 2: Sanding and Priming
- Sanding: Use the sander to smooth all surfaces of the TV console, paying special attention to edges and corners to prevent any harm to your pet.
- Applying Primer: Coat the sanded console with a layer of primer to ensure better paint adhesion and to block any stains or residual odors. Allow it to dry completely.
Step 3: Painting
- Paint Application: Paint the console with your chosen color. It’s best to use a pet-safe paint to avoid any health risks. Apply multiple coats if necessary, allowing each coat to dry thoroughly.

Step 4: Preparing the Bedding
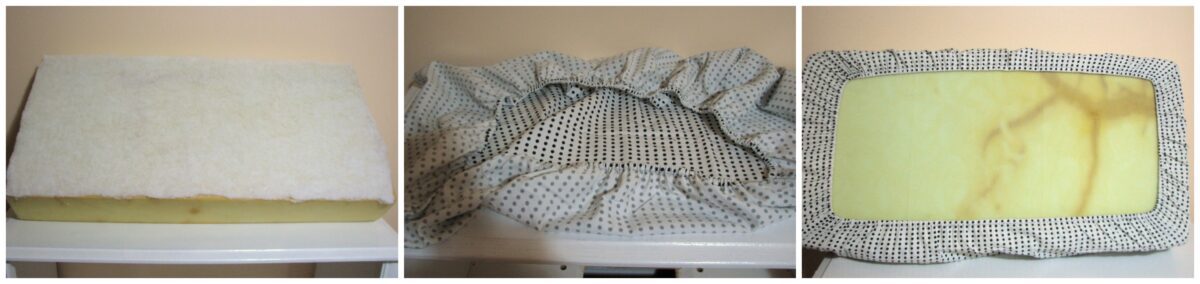
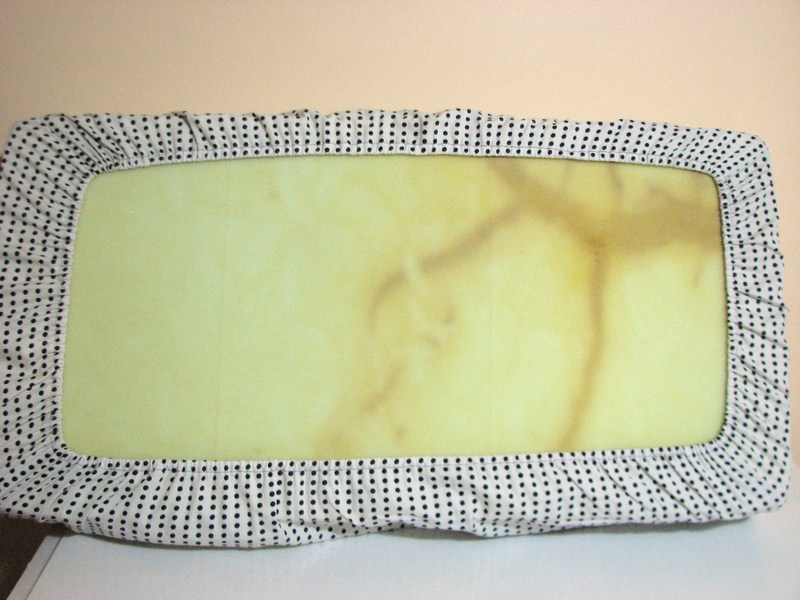
- Measuring Foam: Measure and cut the old crib mattress or foam to fit inside the console cavity using an electric knife.
- Covering Foam: Wrap the foam with batting for extra comfort. Secure the batting with safety pins or sew it into place.
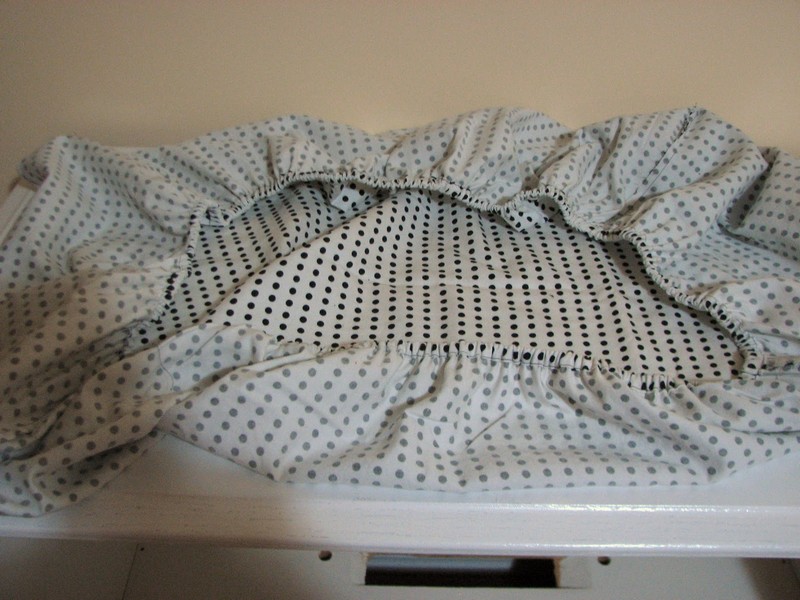
- Sewing the Cover: Using the sewing machine, sew a removable cover for the foam. Incorporate the ¼” elastic around the edges to ensure the cover stays in place.
Step 5: Assembling the Bed
- Attaching the Foam: Place the covered foam inside the painted TV console. If needed, use spray adhesive to keep the foam from shifting.
- Securing Everything: Make sure everything is securely attached and there are no loose parts or sharp edges.
Step 6: Adding Final Touches
- Decor and Toys: Add decorations such as painting designs or themes on the outer parts of the console. Consider sewing additional pillows or cushions for extra coziness.
- Place Favorite Toys: Put some of your pet’s favorite toys inside the bed to make it inviting.
Step 7: Final Inspection
- Check for Safety: Inspect the bed to ensure there are no sharp edges, loose batting, or toxic residues. Make sure the bed is stable and safe for your pet.

Step 8: Introduction to Your Pet
- Introduce the Bed: Encourage your pet to explore and get comfortable with their new bed. It may take a little time for them to get used to it.
Click on any image to start lightbox display. Use your Esc key to close the lightbox. You can also view the images as a slideshow if you prefer 😎


You can get more step by step instructions here…
Safety Considerations for DIY Old TV Dog Beds
Creating a DIY dog bed, such as converting an old TV console into a cozy sleeping spot for your pet, requires attention to safety at every step. Ensuring the security and comfort of your furry friend is paramount. Here are some crucial safety considerations to keep in mind when crafting an old TV dog bed.
Materials Safety
When selecting materials for your old TV dog bed, opt for non-toxic, pet-safe options. Paints and finishes should be labeled as non-toxic, as pets might chew on their beds. Also, when using materials like batting or foam, ensure they are free from harmful chemicals that could off-gas and affect your pet’s health.
Structural Stability
An old TV dog bed must be structurally sound to ensure it doesn’t collapse or tip over while your pet is using it. Reinforce any weak spots in the TV console and check that all modifications maintain the structural integrity of the original piece. It’s essential to remove any old nails, screws, or sharp objects that could pose a risk to your pet.
Edge and Corner Safety
Smooth out all edges and corners of the old TV dog bed to prevent injuries. Dogs often jump in and out of their beds with great enthusiasm, and sharp corners could cause cuts or scrapes. Sand down these areas thoroughly and consider adding a strip of soft padding around edges and corners for additional safety.
Secure Components
Ensure all components of the old TV dog bed are securely attached. This includes the base where the cushion or mattress lies, any decorative elements, and covers. Check regularly for any loose parts that your pet might pull off and swallow. Use strong, pet-safe adhesives or fasteners to keep everything firmly in place.
By keeping these safety considerations in mind, you can create a secure and comfortable old TV dog bed that your pet will enjoy for years to come. Always prioritize the health and well-being of your pet during your DIY projects.
Design and Decor Tips for Personalizing Your Pet’s Bed
Personalizing your pet’s bed not only makes the space comfortable and inviting but also allows it to blend seamlessly with your home décor. An old TV dog bed offers a unique canvas for creativity, allowing you to turn a mundane item into a stylish and functional pet haven.
Here are some design and decor tips to help you personalize an old TV dog bed.
Choose a Theme
Selecting a theme for your old TV dog bed can guide your color choices and decorative accents. Whether you prefer a vintage look to match the era of the TV or a modern design to contrast it, a theme can make the design process more cohesive. Consider themes like nautical, floral, or even a minimalist black and white palette.
Color Coordination
When painting your old TV dog bed, choose colors that complement your home’s interior. Neutral tones can blend well with any room, while bold colors can make a statement piece. Use pet-safe paints to ensure that the bed is both stunning and safe for your furry friend. You can also add patterns or hand-painted designs to give the bed a personal touch.
Add Textural Elements
Enhancing the old TV dog bed with various textures can increase your pet’s comfort and add visual interest. Consider soft fabrics like fleece or velvet for the cushion cover, and you might add a plush throw or a small quilt for extra coziness. Textural contrasts will make the bed more inviting and comforting.
Personalized Accents
Adding personalized elements to your old TV dog bed can make it truly unique. Consider stenciling your pet’s name on the exterior or adding decals that reflect their personality or your interests. These small details can turn a simple dog bed into a treasured piece of your home décor.
Lighting and Accessibility
Consider the placement of the old TV dog bed in your home. Adding a small, LED push light inside the console can make it easier for your pet to see at night and adds a warm glow that enhances the bed’s charm. Ensure the bed is easily accessible, with a low entry point if necessary, especially for smaller or older pets.
By applying these design and decor tips, your old TV dog bed will not only provide comfort to your pet but also enhance your living space. Personalizing your pet’s bed allows you to express creativity while catering to the needs and safety of your beloved companion.
Conclusion
Creating an old TV dog bed is a rewarding project that transforms an outdated item into a cozy retreat for your pet. This DIY endeavor allows you to customize a unique sleeping space that enhances your home decor while prioritizing the comfort and safety of your furry friend. Ultimately, building an old TV dog bed is a fulfilling way to give a second life to an old console and provide your pet with their own special spot.
If you liked this project, you will also like viewing DIY projects for pets…