Last Updated on March 5, 2024 by teamobn

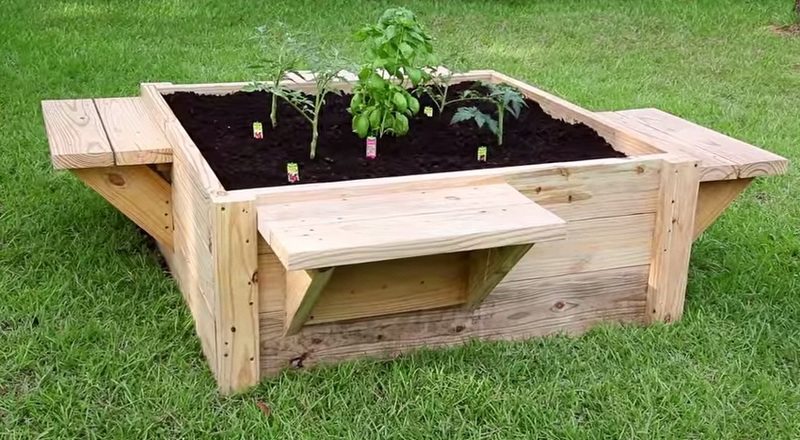
Gardening is relaxing, but can also be a pain in the back. Most gardening activities require kneeling or bending to tend to your plants. Raised garden bed with benches is a great way of making gardening accessible to everyone in your house.
The simplest solution is to have a raised garden bed. With a raised garden bed your plants are elevated to a comfortable height, keeping you from kneeling or hunching over.
Improve your raised garden bed by adding benches! This makes gardening easier and more comfortable. Aside from being handy when you’re gardening, these benches are also a great spot to hang out. And making one won’t cost you a lot of money and time.
Building a Raised Garden Bed with Benches
Materials
- 1 – 2x2x8 board
- 3 – 2x4x8 boards
- 8 – 2x6x8 boards
- 2 – 2x8x8 boards
- 3 – 1-lb boxes 2 1/2 inch deck screws
- 1 – 1lb box 3-inch deck screws
Tools
- Miter saw or circular saw
- Drill/driver
- Clamps
- Square
- Measuring tape
How to build the best raised garden bed with benches?
1. Prepare the Boards
You can do-it-yourself the cutting of these boards or you may prefer to purchase your woods from hardware, where they have the cutting services and you might just want them to cut these boards for you at the store, as this may make the procedure much quicker.
These are the boards we need for this project:
- 8 brackets – 1.5 x 5.5 x 15.5
- 8 bench slats – 1.5 x 1.5 x 20.5
- 8 side slates – 1.5 x 5.5 x 45
- 8 inner posts – 1.5 x 3.5 x 14
- 4 bracket supports – 1.5 x 5.5 x 16
- 4 bottom side slates – 1.5 x 7.25 x 45
- 4 bench cleats – 1.5 x 1.5 x 20.5
- 4 outer posts – 1.5 x 3.5 x 16.5
When you buy these all cuts, then the assembly will be a lot easier.
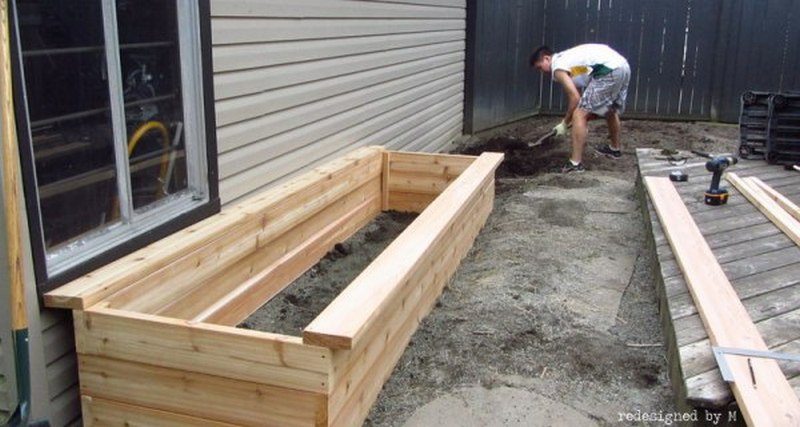
2. Assemble
Put 2 internal posts in from the end of one bottom slat and two side slats, then screw them. Redo this step four times. Mount the bracket support to the sides.
Afterwards, mount the bracket by flushing the ends with the bracket support. Make sure these won’t swing. Connect the external posts to this set using 2.5″ screws, similar to the first set of assembly
3. Attach the bench slat
Put a bench slat on each of the bench assemblies that don’t have an external post. Tighten up the side slat to the brackets. Connect a bench cleat after marking this line. Use additional 2.5″ screws to secure a bench slat to the bracket.
A second bench slat should be positioned on the body and attached to the brackets. Mount the bench slats opposing the brackets and side of the bench assembly.
Attach the sides to the external posts using one side assembly with an outer post and one without an outer post. Ensure they are firmly attached with 3″ screws. Do this step to other side assemblies. These will serve as the garden bed’s corners.
Ensure that the side slats are flush up against the outer posts so that there will be no gaps between the side assemblies. Use 3” screws to tighten them. There should be no wiggle in the garden bed at this time, and all corners should be flush.
4. Add soil
Once the raised garden bed is constructed, you can now fill in with good quality soil. Before filling the garden bed with soil, place a weed barrier or old newspaper on the ground to prevent weeds from growing.
Now that your raised garden bed with bench is complete, it’s time to add your beautiful plants! Make sure to choose plants that will thrive in your climate and soil type. Once you’ve selected your plants, it’s time to get them into the ground. Be sure to dig a hole that is twice the width of the plant’s root ball and just as deep. Gently loosen the roots before placing the plant in the hole. Backfill the hole with soil, being careful not to bury the plant’s stem. Water your plants well and mulch around them to help retain moisture. With a little love and care, your garden will soon be blooming!
Thanks to Bonnie Plants for this great project.
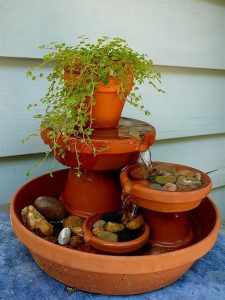
If you liked this project, you will also like viewing these vertical planters…
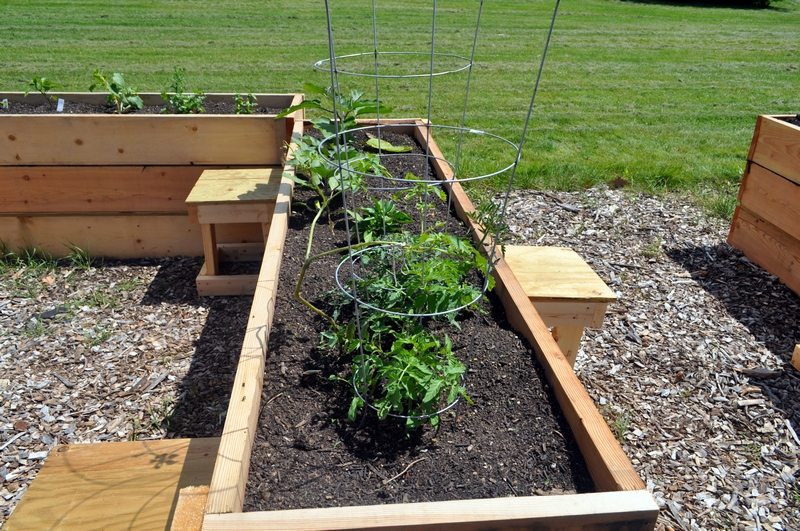
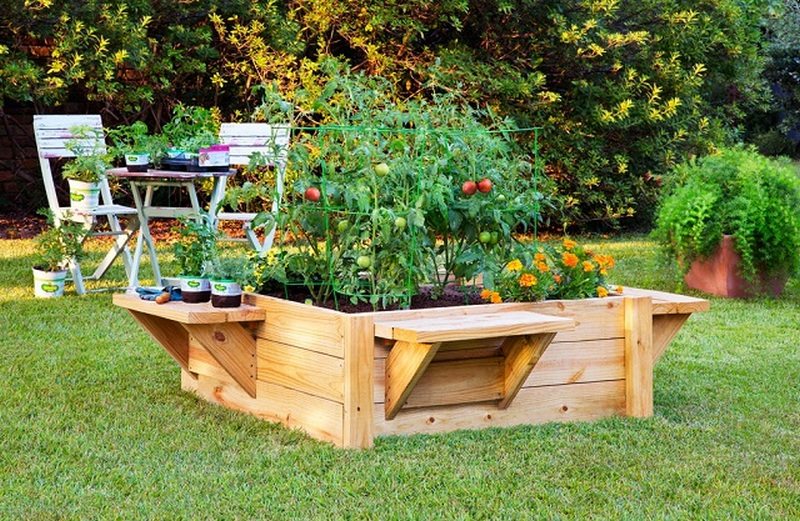
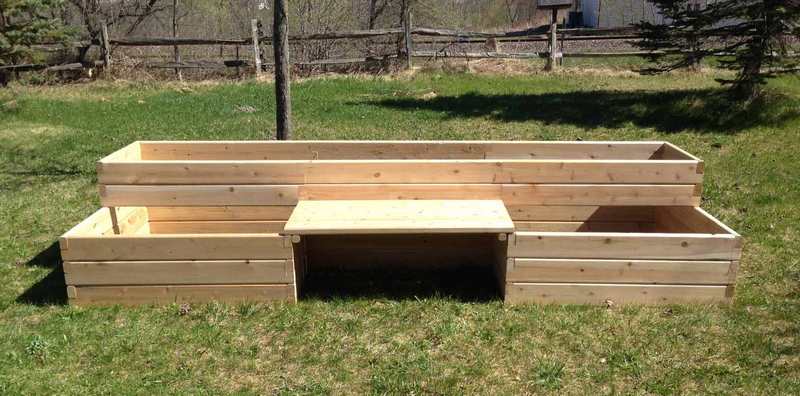
Best raised garden bed with benches.
Click on any image to start the lightbox display. Use your Esc key to close the lightbox. You can also view the images as a slideshow if you prefer 😎


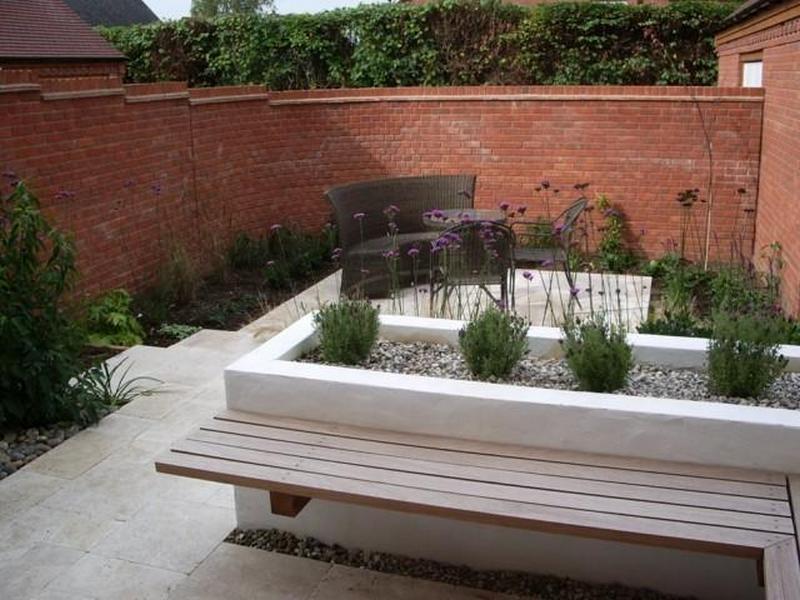

Landscaping and Aesthetic Enhancements
Integrating a raised garden bed with benches into your outdoor space is not only a practical solution for comfortable gardening but also a fantastic opportunity to enhance the aesthetic appeal and functionality of your landscape. This feature combines the joys of gardening with the pleasure of relaxing outdoors, offering a unique focal point that is both beautiful and utilitarian.
Below, we explore various landscaping and aesthetic enhancements that will elevate the charm and enjoyment of your raised garden bed with benches.
Harmonious Plant Selection
The strategic selection of plants for your raised garden bed with benches can significantly elevate the aesthetic and sensory experience of your garden. By carefully choosing a variety of annuals, perennials, and edible plants that are well-suited to your climate, your raised garden bed becomes a living artwork, showcasing a rich palette of colors, textures, and aromas.
To achieve a layered look that adds depth and visual interest, start by planting taller species towards the back of the raised garden bed. This could include vibrant sunflowers, towering foxgloves, or graceful ornamental grasses. These taller plants serve as a lush backdrop for what comes in front.
Moving forward, medium-height plants like coneflowers, zinnias, and bush tomatoes can fill the middle space, providing a burst of color and variety. The frontmost layer should feature ground-cover and low-growing varieties such as creeping thyme, lobelia, or leaf lettuce, which spill gently over the edges of the raised garden bed, softening the boundaries between the garden bed and its surroundings.
Incorporating plants that bloom in different seasons ensures that your raised garden bed with benches remains a dynamic and inviting space throughout the year. Spring bulbs like tulips and daffodils can give way to summer blooms such as lavender and black-eyed Susan, followed by autumn favorites like chrysanthemums and ornamental kale. This continuous bloom cycle not only provides ongoing interest but also supports local pollinators.
Strategic Placement
The thoughtful placement of your raised garden bed with benches significantly influences its impact on your outdoor living space. Optimal positioning is key to maximizing sunlight exposure, ensuring a healthy and vibrant garden. A location that benefits from several hours of sunlight daily is ideal for nurturing a wide variety of plants, from sun-loving vegetables to radiant flowers.
Consider the view from within your home when deciding where to place your raised garden bed with benches. A scenic placement, visible from your living room window or patio, can create a visual link between your indoor and outdoor spaces, inviting you to step outside and engage with nature.
Strategically situating the raised garden bed with benches as a centerpiece in your garden or along a frequented walkway can significantly enhance the charm and appeal of your outdoor area. This not only makes it a focal point of beauty and interest but also integrates it seamlessly into the landscape, making the garden an extension of your living space.
Whether you’re passing by for a moment of contemplation or settling down on the bench to enjoy the fruits of your gardening labor, the raised garden bed with benches invites interaction, relaxation, and enjoyment.
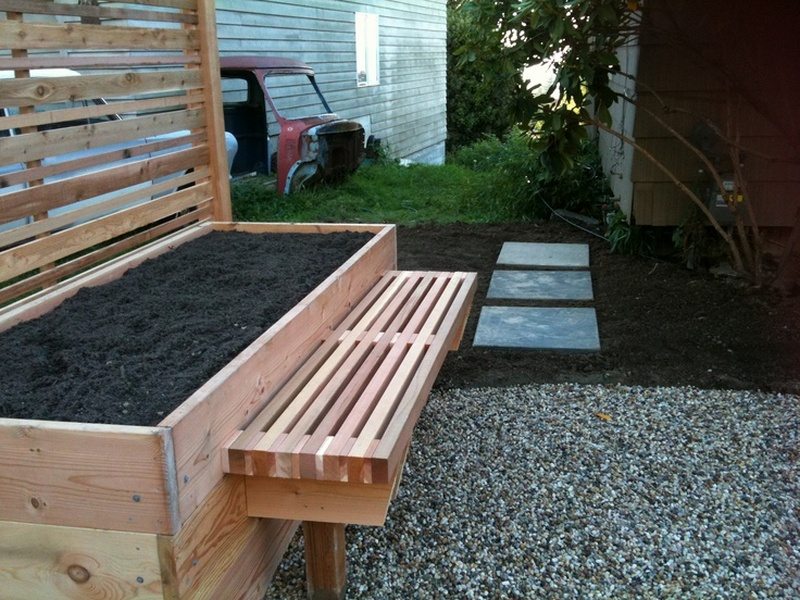
Complementary Hardscaping
The integration of hardscaping elements around your raised garden bed with benches not only directs attention to this gardening highlight but also significantly enhances its accessibility and overall aesthetic. By thoughtfully incorporating stepping stones, gravel paths, or decorative borders, you create a visual and physical pathway that invites exploration and interaction with the garden. These elements guide the eye and feet towards the raised garden bed with benches, making the journey to your garden both intentional and inviting.
Choosing materials that harmonize with the design and color scheme of your raised garden bed with benches is crucial for achieving a unified and attractive landscape. For instance, natural stone stepping stones or rustic wooden borders can complement a wooden raised garden bed, creating a seamless flow between the garden bed and its surroundings. Similarly, a gravel path in shades that echo the color of your garden bed or benches can tie the whole garden together, adding texture and contrast while maintaining a cohesive look.
Incorporating hardscaping not only improves the visual appeal but also enhances the functionality of the space around your raised garden bed with benches. It can define the gardening area, prevent soil erosion, and improve drainage, ensuring that your garden remains healthy and accessible regardless of the weather.
Thoughtful placement of these elements can transform your garden into a meticulously planned outdoor room. A raised garden bed with benches can be both the centerpiece and the most cherished gathering spot.
Lighting for Ambiance
Effective lighting plays a pivotal role in elevating the nighttime ambiance and functionality of your raised garden bed with benches. The strategic placement of lights can transform your garden into an enchanting nighttime oasis, extending the hours you can enjoy the beauty and tranquility of your outdoor space.
Soft, solar-powered lights offer an eco-friendly solution to illuminate pathways leading to your raised garden bed with benches, ensuring safe passage and adding a magical touch to the garden at dusk. These lights can be staked into the ground along the path or embedded into the surrounding hardscaping, creating a softly lit trail that invites evening strolls or quiet moments near the garden.
Spotlights positioned to highlight specific plants, flowers, or the architectural details of the benches can accentuate the unique features of your raised garden bed, drawing attention to the textures and colors that might go unnoticed during the day. This targeted lighting not only showcases the garden’s beauty but also adds depth and dimension to the outdoor space at night.
Adding lights under the bench of your raised garden bed can create a subtle, warm glow that enhances the coziness and allure of the area. This ambient lighting makes the benches an inviting spot to sit and relax after sunset, whether you’re enjoying a quiet moment alone or gathering with loved ones. The illuminated raised garden bed with benches becomes a focal point in the garden, offering a serene and beautiful spot to unwind at the end of the day.
Accessorizing for Personal Touch
Enhancing your raised garden bed with benches through personalized accessories can transform it into a space that truly reflects your unique style and passions. Adding elements such as garden ornaments, statues, or even whimsical wind chimes introduces a layer of personal flair to the gardening experience. These decorative items not only serve as focal points but also infuse your space with charm and character, making your raised garden bed with benches a reflection of your personality.
Consider the addition of a birdbath near your raised garden bed with benches, which can attract birds, adding a lively and dynamic component to your garden. The sound of birds chirping and water splashing creates a serene ambiance, enhancing the tranquility of your garden space.
Installing a trellis directly behind or near the benches can significantly impact the aesthetic appeal of your raised garden bed. Climbing plants like clematis, morning glories, or even grapevines can use the trellis as support, creating a verdant backdrop that not only beautifies the bench area but also provides shade and privacy. This vertical element adds height and depth to your garden, making the space around your raised garden bed with benches feel more enclosed and intimate.
Incorporating these personal touches not only elevates the visual appeal of your raised garden bed with benches but also enhances your connection to the space, making gardening an even more enjoyable and meaningful activity.
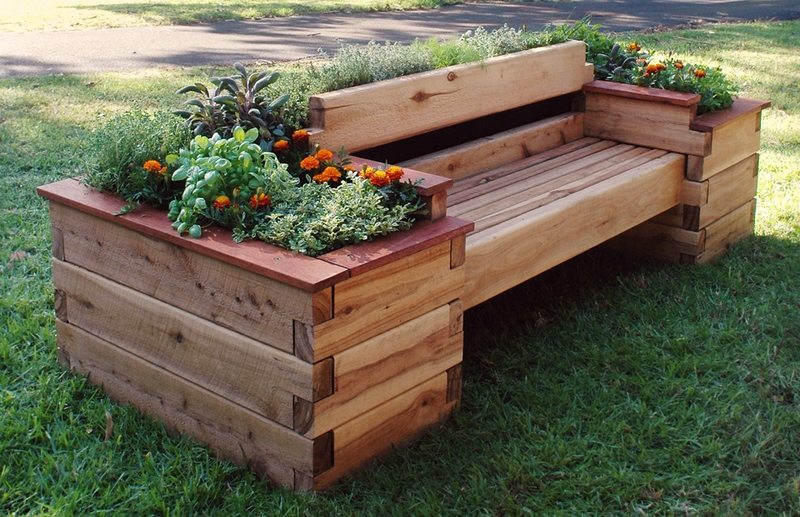
Multifunctional Planting
By embracing multifunctional planting in your raised garden bed with benches, you can create a space that is not only beautiful but also bountiful. Integrating edible plants alongside ornamental ones allows you to enjoy a visually appealing garden while harvesting fresh produce right from your backyard. This approach to planting can add an unexpected and delightful variety to your garden, blending aesthetics with practicality.
Herbs such as basil, thyme, and mint are not only culinary staples but also add fragrance and texture to your garden. Their compact nature makes them ideal companions to flowers in your raised garden bed with benches. Leafy greens like spinach, kale, and lettuce can be interspersed among flowers, adding lush, vibrant greenery that contrasts beautifully with colorful blooms.
Incorporating compact vegetables, such as cherry tomatoes, bell peppers, and eggplants, among ornamental plants not only maximizes the use of space in your raised garden bed with benches but also introduces an element of surprise and delight as fruits begin to form amidst the foliage.
This multifunctional approach to planting encourages a sustainable lifestyle, providing a fresh and organic source of produce right at your doorstep. It also serves as an excellent educational tool for children, offering hands-on learning opportunities about the growth cycle of plants and the importance of caring for the environment. Gardening alongside your raised garden bed with benches becomes a family activity that nurtures both the garden and the bonds between its caretakers.
Integrating a raised garden bed with benches into your landscape design offers endless possibilities for enhancing both the beauty and usability of your outdoor space. With thoughtful planning and creative touches, this versatile feature can become a cherished part of your garden, providing a comfortable and attractive setting for relaxation and gardening.
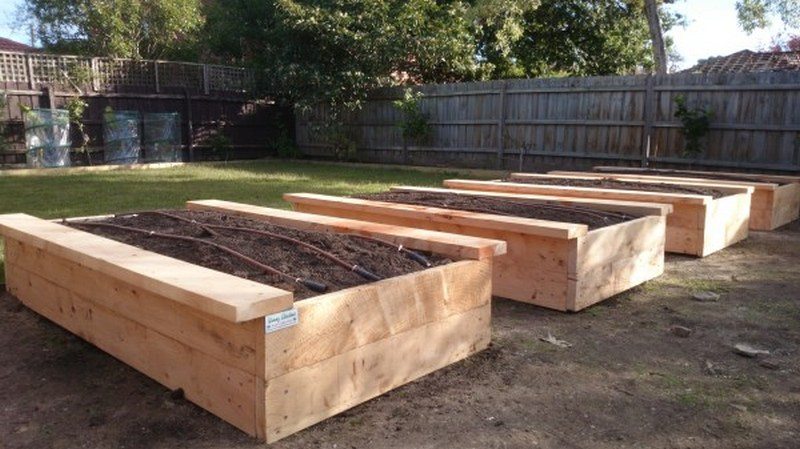
Irrigation Solutions for Raised Garden Beds
Irrigation is a crucial aspect of maintaining a thriving garden, especially when it comes to raised garden beds with benches. These elevated gardening spaces can dry out more quickly than in-ground beds due to their improved drainage and exposure to air. Efficient watering practices ensure that your plants receive the moisture they need without wasting water or causing harm due to over or under-watering.
Here, we explore effective irrigation solutions tailored for raised garden beds with benches, ensuring your gardening efforts are both productive and environmentally conscious.
Drip Irrigation Systems
Drip irrigation is an ideal solution for raised garden beds with benches, delivering water directly to the base of each plant. This method minimizes evaporation and water runoff, ensuring that water goes exactly where it’s needed.
Installing a drip irrigation system in your raised garden bed with benches allows for the slow release of water, which encourages deep root growth and reduces the likelihood of soil erosion or plant diseases associated with wet foliage.
Soaker Hoses
Soaker hoses offer a simple and effective way to water your raised garden bed with benches. These porous hoses can be laid out across the soil surface, allowing water to seep out slowly and reach the plant roots directly.
You can easily snake a soaker hose around plants or bury it under a thin layer of soil or mulch to reduce evaporation further. This setup is particularly beneficial for raised garden beds with benches, as it ensures even watering across the entire bed, keeping all your plants happy and hydrated.
Automated Irrigation Systems
For gardeners seeking convenience and efficiency, automated irrigation systems are a game-changer for raised garden beds with benches. These systems can be programmed to water your garden at specific times, ensuring that your plants receive a consistent amount of moisture, even when you’re away.
Incorporating timers, moisture sensors, and adjustable nozzles allows you to tailor the watering schedule and volume to the specific needs of your raised garden bed with benches, promoting optimal plant health and growth.
Rainwater Harvesting
Utilizing collected rainwater to irrigate your raised garden bed with benches is an environmentally friendly and cost-effective irrigation solution. By setting up rain barrels or a rainwater collection system, you can capture and store rainwater for future use in your garden.
This not only conserves municipal water but also provides your plants with chemical-free water that is ideal for their growth. A simple gravity-fed system can be sufficient for raised garden beds with benches, making this a practical option for sustainable gardening practices.
Implementing these irrigation solutions for your raised garden bed with benches not only ensures that your plants receive the hydration they need but also contributes to water conservation and garden sustainability. With the right system in place, you can enjoy a lush, productive garden with minimal effort and maximum reward.
Conclusion
Building a raised garden bed with benches combines the practicality of elevated gardening with the comfort of outdoor seating, creating a multifunctional space that enhances any garden. This innovative approach not only makes gardening more accessible by reducing strain on the back and knees but also transforms the garden into a serene retreat for relaxation and enjoyment. The inclusion of benches encourages longer periods of interaction with nature, fostering a deeper connection to the environment and the joy of gardening.