Last Updated on March 15, 2024 by teamobn

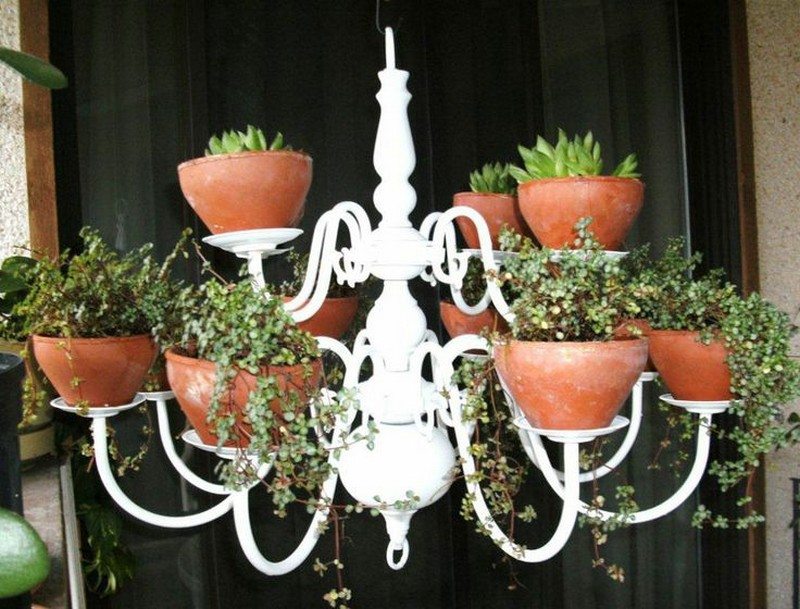
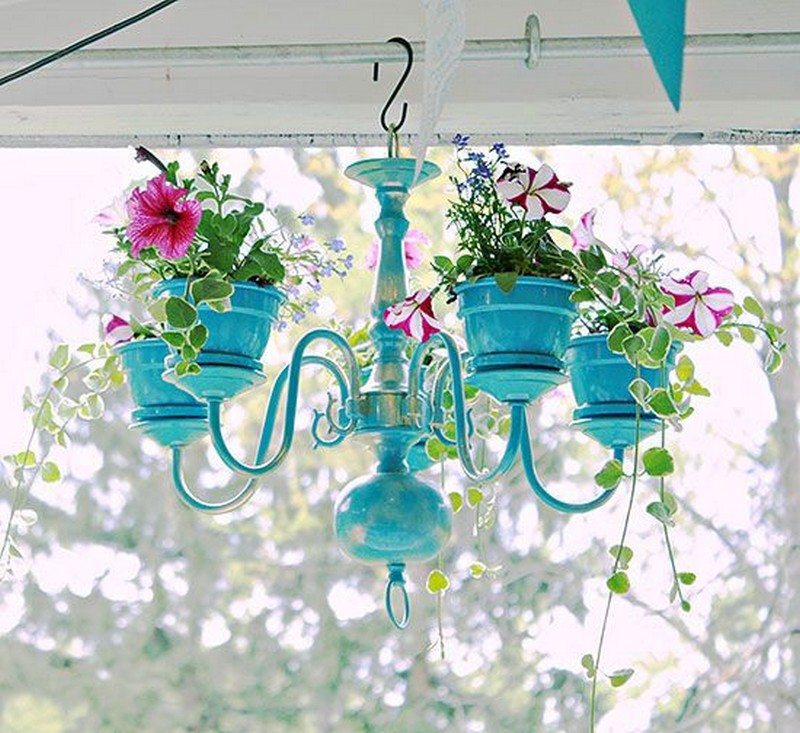
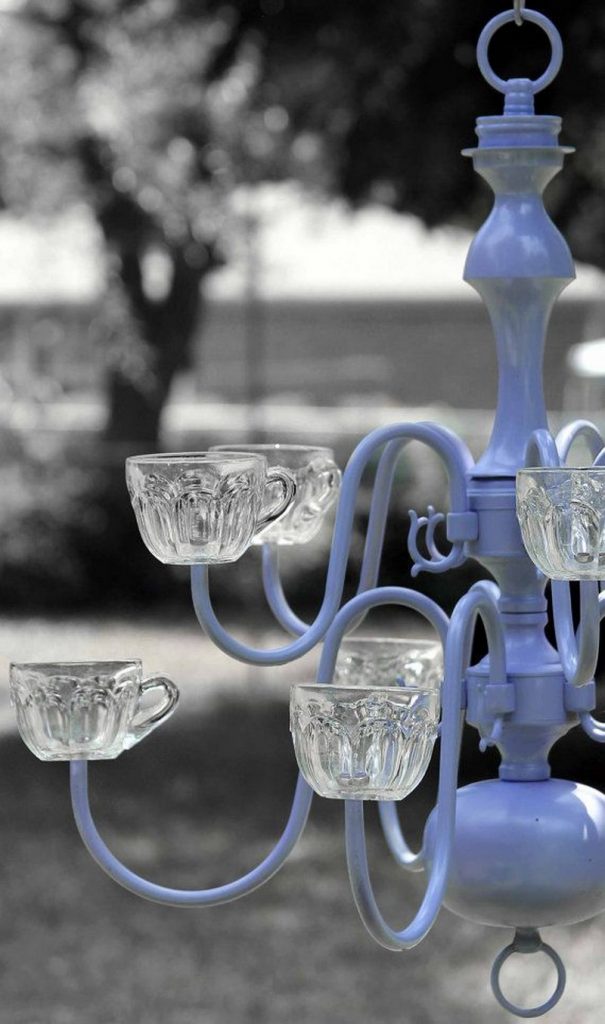
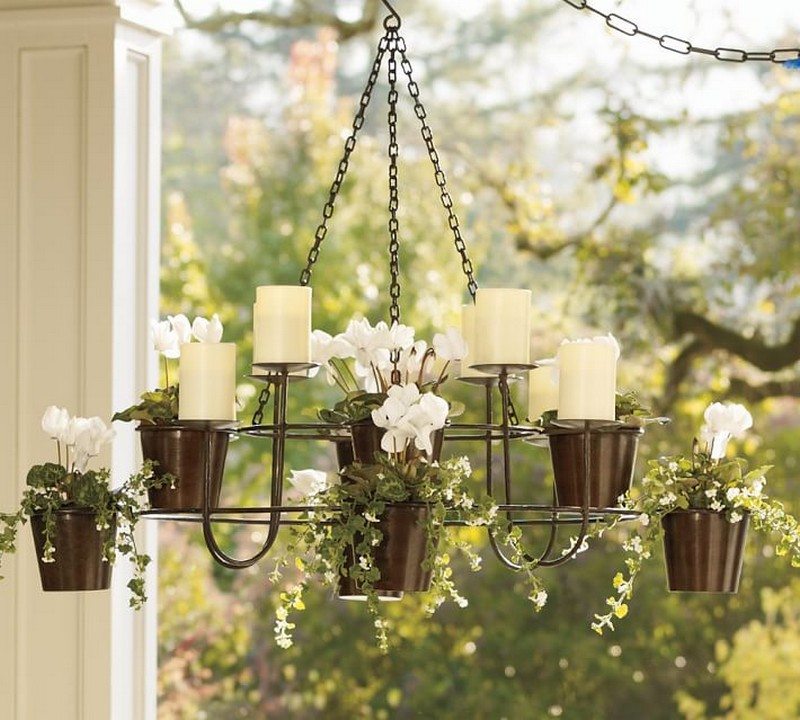
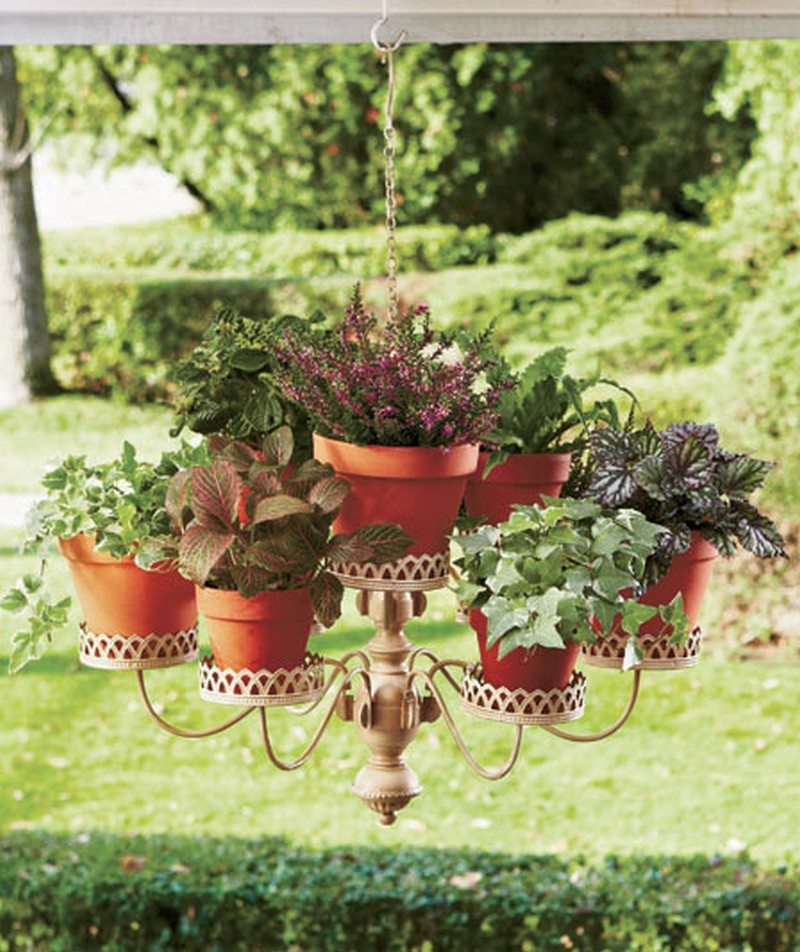
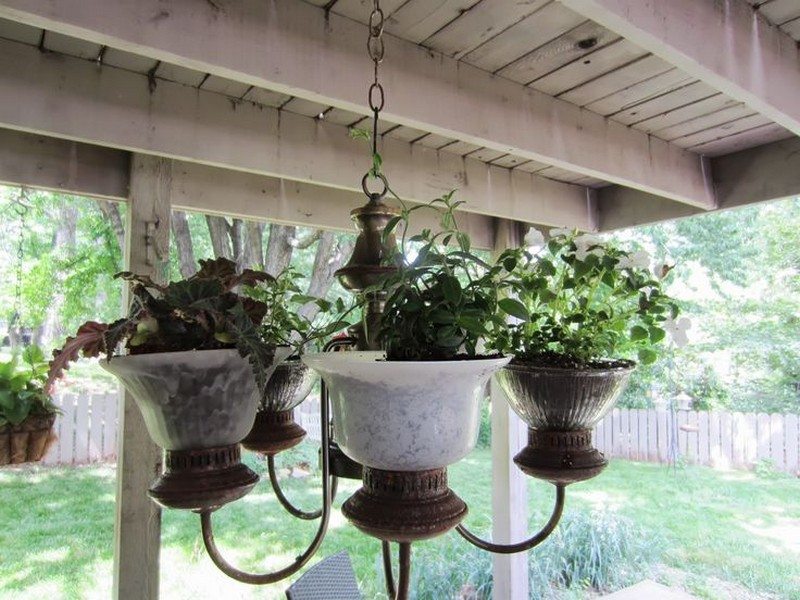
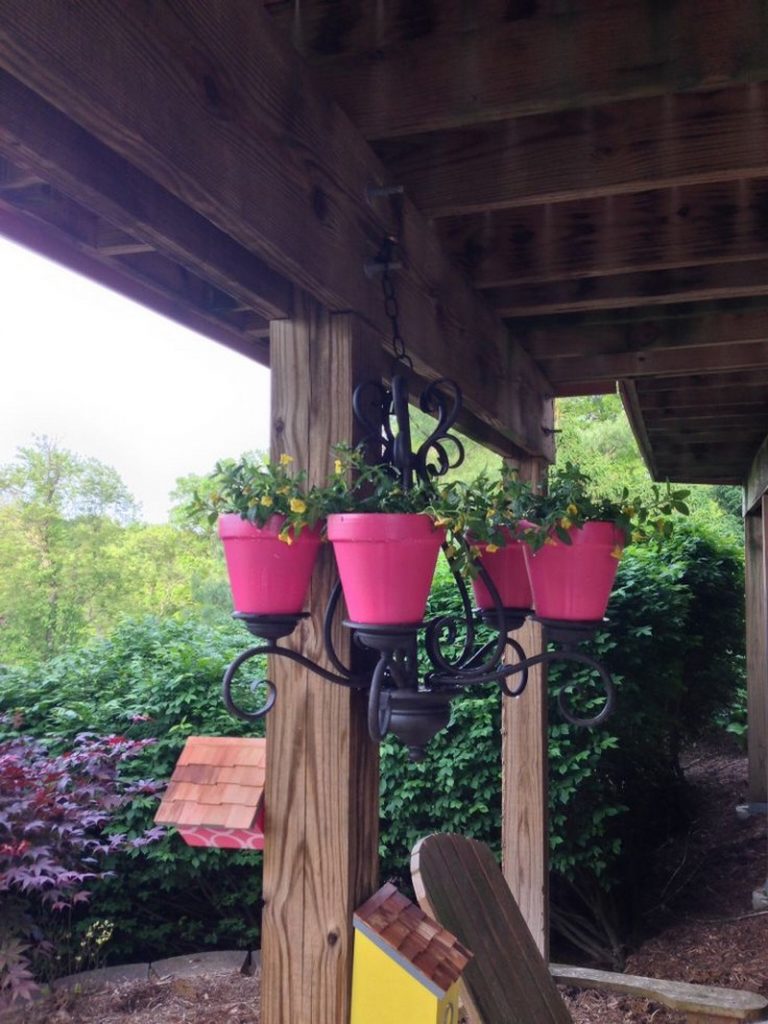
If you’re looking for a beautiful way to hang your plants, an old chandelier might come in handy. A chandelier planter lets you display your prized plants and give them an optimized growing space.
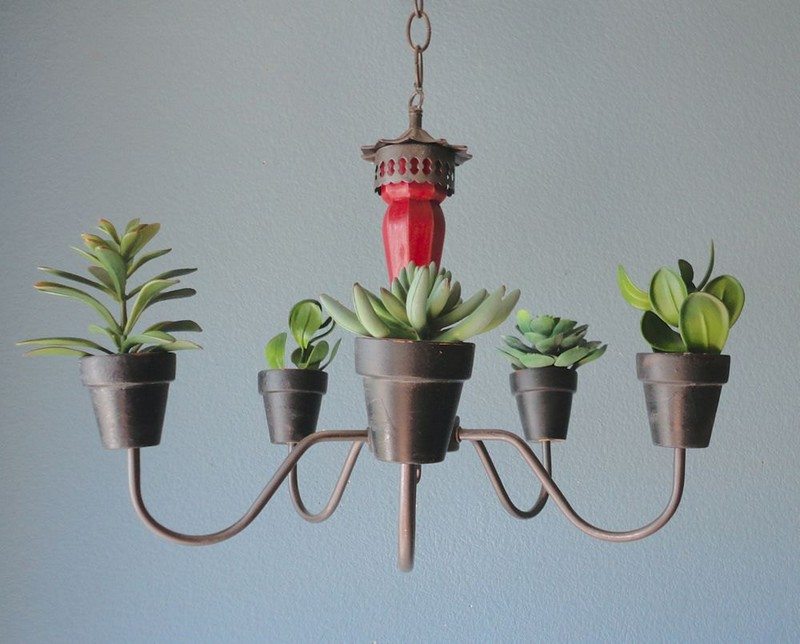
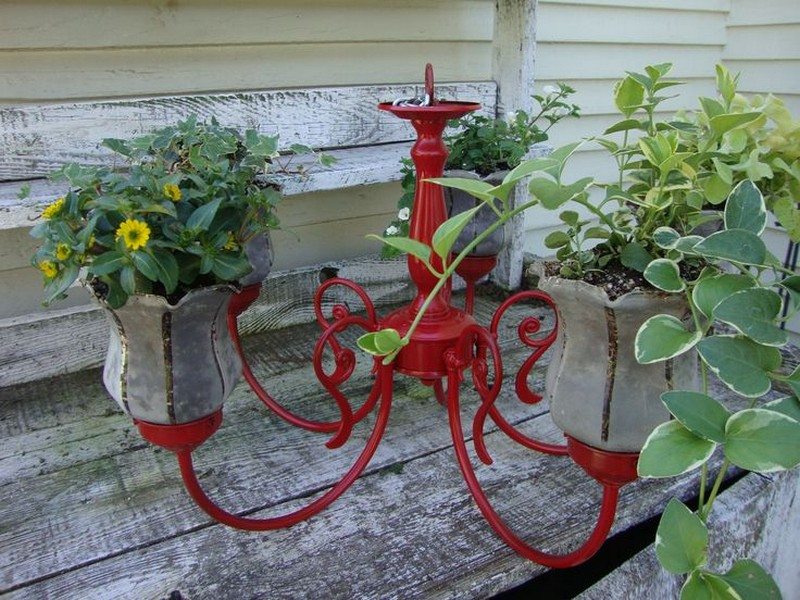
You can simply repaint the chandelier with the color of your choice, fix small pots at the end of each arm and hang them in your outdoor area.
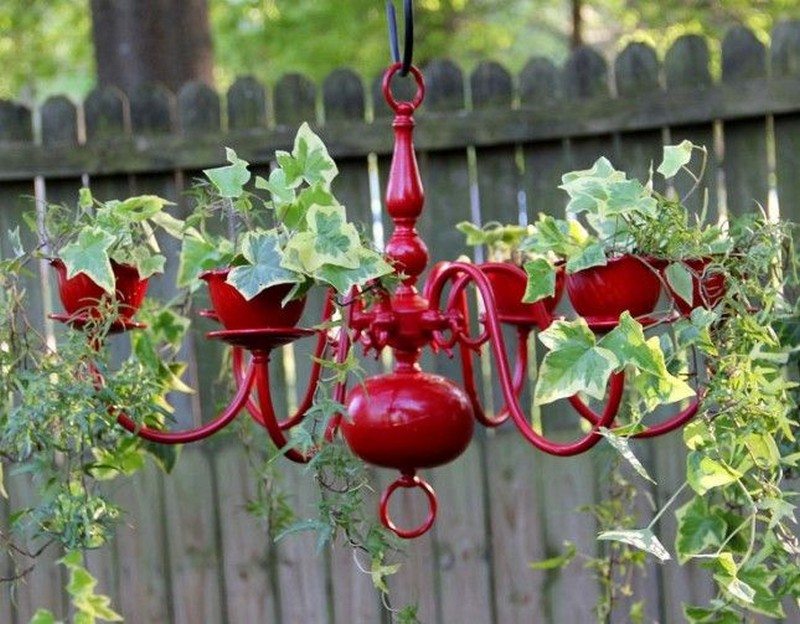
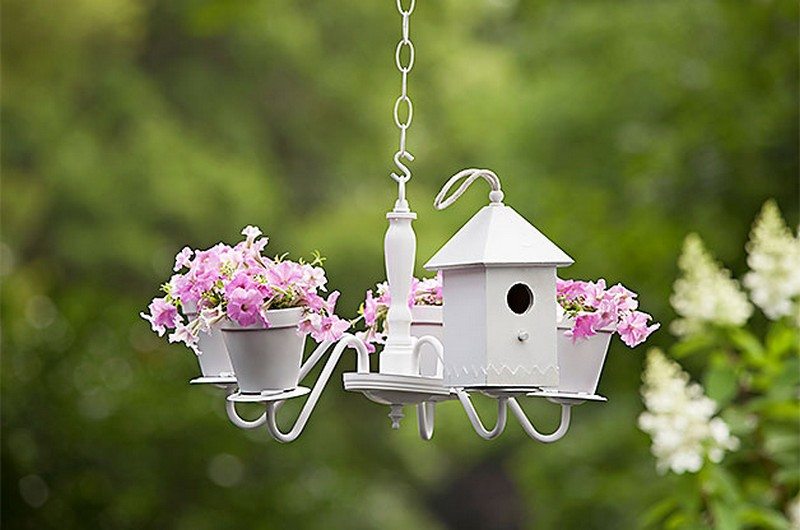
Some people choose to replace pots and upcycle more unused items such as teacups. You can add other items such as a birdhouse (if you plan to hang it outdoors) or candles (just make sure the plants won’t catch fire!).
Making a DIY Chandelier Planter?
Be creative and use whatever material you think would go well with your planter. Take a look at the examples featured below for more inspiration! 🙂
Materials
- Old/Used Chandelier
- Terra Cotta Pots and Saucers or Plastic Pots (same quantity as the “arms” of the chandelier)
- Spray Paint
- Waterproof Glue
- Plumber’s Epoxy Putty
- Flowers / Plants
- Moisture Control Potting Mix
- S Hook
- Protective Mask
Tools
- Wire Cutters
- Garden Trowel
Instructions
1. Prepare Your Work Area
- Lay down newspaper or a drop cloth to protect your work surface.
- Wear a protective mask to avoid inhaling dust or spray paint fumes.
2. Disassemble and Clean the Chandelier
- Use wire cutters to remove any electrical wiring. Safety first: ensure the chandelier is not connected to any power source.
- Clean the chandelier thoroughly to remove dust and grease, ensuring the paint will adhere properly.
3. Paint the Chandelier
- Apply spray paint to the chandelier, covering it evenly. You might need to do several coats to achieve the desired color and finish. Let it dry completely between coats.
4. Attach the Pots
- Apply waterproof glue to the rim of each saucer (if using) or directly to the area of the chandelier where the pot will sit.
- Use plumber’s epoxy putty to reinforce the bond between the pots/saucers and the chandelier arms. Mold the putty according to the product instructions for a firm hold.
- Allow the glue and putty to cure as per the instructions on the products, ensuring a secure attachment.
5. Prepare and Plant the Pots
- Fill each pot with moisture control potting mix, using the garden trowel. This type of mix helps retain water, which is beneficial for hanging plants that may dry out more quickly.
- Plant your chosen flowers or plants in the pots. Consider the weight of the plants and the strength of the chandelier structure.
6. Hang the Chandelier Planter
- Attach the S hook to a secure hanging point where the chandelier planter will be displayed.
- Carefully hang the chandelier planter by the chain or top loop of the chandelier onto the S hook. Ensure it’s securely fastened and evenly balanced to prevent tipping.
Best Plants for Chandelier Planters
Creating a chandelier planter is a unique way to showcase greenery in your home or garden. When selecting plants for your chandelier planter, consider factors like the plant’s growth habit, sunlight requirements, and how much care they need.
Here are some of the best plants to turn your chandelier planter into a stunning living piece.
Succulents
Succulents are ideal for chandelier planters due to their low maintenance and minimal water requirements. Their variety in color, texture, and shape allows for a visually appealing arrangement. Since chandelier planters are often hung at a height, succulents’ slow growth and lightweight nature make them perfect candidates. Consider varieties like Echeveria, Sedum, or Sempervivum for an eye-catching display.
Air Plants (Tillandsia)
Air plants are another excellent choice for chandelier planters, especially if you’re aiming for a low-maintenance garden. They don’t require soil to grow, obtaining moisture and nutrients through their leaves. This makes them incredibly versatile and easy to arrange in a chandelier planter. Their unique forms and ability to thrive in indirect light will complement the aesthetic of any space.
Trailing Plants
For a dramatic effect, include trailing plants in your chandelier planter. These plants grow over and down the sides, creating a lush, cascading look. Varieties like English Ivy, String of Pearls (Senecio Rowleyanus), or Creeping Jenny (Lysimachia nummularia) are perfect for adding elegance and movement to your chandelier planter. Ensure these plants receive adequate light and trim them regularly to maintain the desired shape.
Herbs
If you’re looking for a functional yet beautiful addition to your kitchen, consider using herbs in your chandelier planter. The likes of basic and thyme go well with basic bolognese pasta sauce or various Italian soups.. Most herbs require plenty of sunlight, so position your chandelier planter in a bright area for the best growth.
Flowering Plants
Incorporating flowering plants can add a splash of color to your chandelier planter, creating a focal point in any room or outdoor space. Opt for compact varieties such as Petunias, Pansies, or Begonias that thrive in container settings. These plants will need more frequent watering and care, especially during the blooming season, to keep your chandelier planter looking vibrant.
Choosing the right plants for your chandelier planter can transform it into a captivating feature. Whether you prefer the low maintenance of succulents and air plants, the elegance of trailing plants, the utility of herbs, or the beauty of flowering plants, there’s a perfect plant match for your chandelier planter. Consider the environment where your chandelier planter will reside, and select plants that will thrive in those conditions for the best results.
Click on any image to start the lightbox display. Use your Esc key to close the lightbox. You can also view the images as a slideshow if you prefer ![]()

Seasonal and Thematic Chandelier Planter Ideas
Creating a chandelier planter offers a unique opportunity to display plants in an eye-catching way. With the change of seasons or for special occasions, these planters can be easily transformed to reflect the current theme or season.
Here are some seasonal and thematic chandelier planter ideas to inspire creativity and add a personal touch to your living space or outdoor area.
Spring Refresh
Spring is a time of renewal and growth. Enhance your chandelier planter with a selection of bright, flowering plants that symbolize the season’s fresh start. Pansies, with their cheerful faces, come in various pastel shades and are perfect for the cooler early spring weather. Violas and primroses add depth with their delicate forms and vibrant colors.
To truly capture the essence of spring, weave in Easter-themed decorations such as pastel-colored eggs nestled within the foliage or small bunny figurines peeking out from between the pots. These additions create a playful and festive springtime display in your chandelier planter, inviting the joy and lightness of the season into your space.
Summer Vibrance
Summer calls for bright colors and vibrant life. Transforming your chandelier planter into a tropical haven brings the essence of sunny days and warm nights indoors or to your outdoor living spaces. Petunias, with their wide range of colors and ability to thrive in the heat, make a stunning addition.
Marigolds and geraniums offer durability and vibrant blooms that will last all summer long. Elevate the tropical theme with decor elements like miniature flamingos that add a whimsical touch, or colorful lanterns that can illuminate your evenings. This lush, tropical setup in your chandelier planter celebrates summer and creates a lively focal point for gatherings or peaceful moments at home.
Autumn Harvest
As the season shifts, your chandelier planter can mirror the rich, warm hues of autumn. Chrysanthemums offer a burst of color, ranging from deep reds to golden yellows, encapsulating the essence of fall.
Ornamental kale provides a unique texture and color gradient that complements the fall theme, while pansies can bring a softness with their gentle hues. Accentuate the autumnal feel with mini pumpkins and acorns that evoke the feel of a walk through the woods. Consider adding faux autumn leaves that bring the outside in.
This autumn harvest theme for your chandelier planter not only celebrates the beauty of fall but also adds a cozy, inviting touch to your home decor.
Winter Wonderland
Winter transforms your chandelier planter into a festive showcase. Adorning it with evergreens creates a lasting green backdrop reminiscent of winter’s endurance. Holly adds bright pops of red with its berries, and poinsettias, with their traditional holiday colors, bring festive cheer. Incorporating fairy lights can turn your chandelier planter into a glowing centerpiece, while small ornaments reflect the light, creating a magical effect.
Ribbons in holiday colors or patterns can be woven through the greenery for an extra touch of whimsy. This winter wonderland theme brightens the shorter days and serves as a unique and enchanting holiday centerpiece, bringing warmth and joy to any room.
Thematic Ideas
- Fairy Garden Fantasy: Create a fun fairy garden theme for your chandelier planter. Use small succulents, moss, and miniature fairy garden accessories to craft a magical scene. This theme is perfect for adding a touch of enchantment to your home or garden year-round.
- Herbal Haven: For those who love cooking and fresh herbs, turn your chandelier planter into a hanging herb garden. Plant a variety of herbs like basil, thyme, and mint. Not only will this chandelier planter look green and vibrant, but it will also be practical, providing fresh herbs at your fingertips.
- Beach Escape: Bring the beach home by transforming your chandelier planter into a seaside retreat. Use air plants and succulents to mimic sea vegetation, and decorate with shells, starfish, and sand to evoke beach vibes. This theme is perfect for summer or for anyone dreaming of the sea.
Adjusting the plants and decorations in your chandelier planter with the seasons or for special themes, you can keep your decor fresh and engaging all year round. These ideas serve as a starting point, but the possibilities are limited only by your imagination. Enjoy crafting your ever-changing, eye-catching chandelier planter displays!
Conclusion
Crafting a chandelier planter is a creative journey that transforms an ordinary item into a stunning display of natural beauty. Each season offers a new opportunity to update its look, ensuring it remains a focal point in any space. This project not only recycles old materials but also brings the joy and tranquility of gardening into your home in a unique and stylish way.
If you liked this, you might also like these easy DIY projects…