Last Updated on August 12, 2026 by teamobn
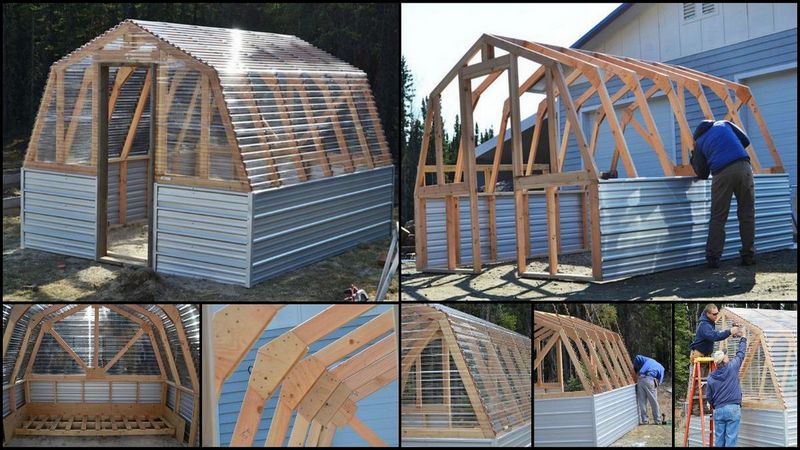
A well-designed greenhouse lets you control the weather. That means you can grow food or flowers all year round. Many of these we’ve shown are meant only to last two or three seasons, but this one is designed and built to last a lifetime. If you’re looking for a serious greenhouse model to base yours on, this could be it.
And remember, growing your own vegetables is not only good for you, but it’s also good for the environment too!
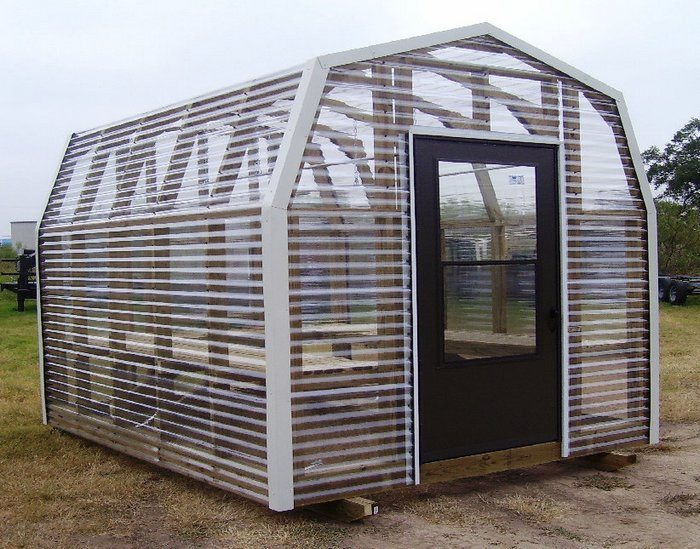
Best DIY Barn Greenhouse Designs
Not sure where to start? Check out these best barn greenhouse designs! These handy structures are perfect for starting your own garden or providing a protected space for your existing plants. Turn Carport Into Barn Easy. Plus, they’re relatively easy to build, so you can get started right away!
So what are you waiting for? Get started on your very own barn greenhouse today!
Click on any image to start the lightbox display. Use your Esc key to close the lightbox. You can also view the images as a slideshow if you prefer 😎
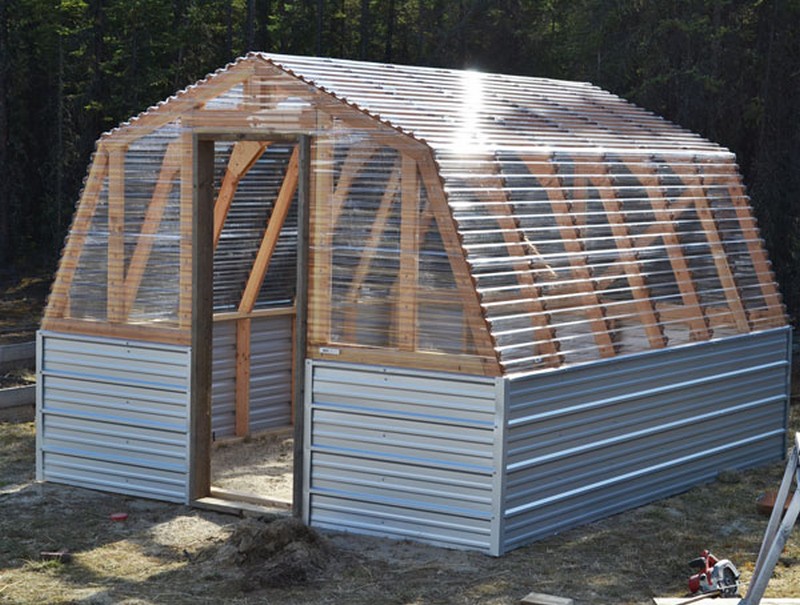
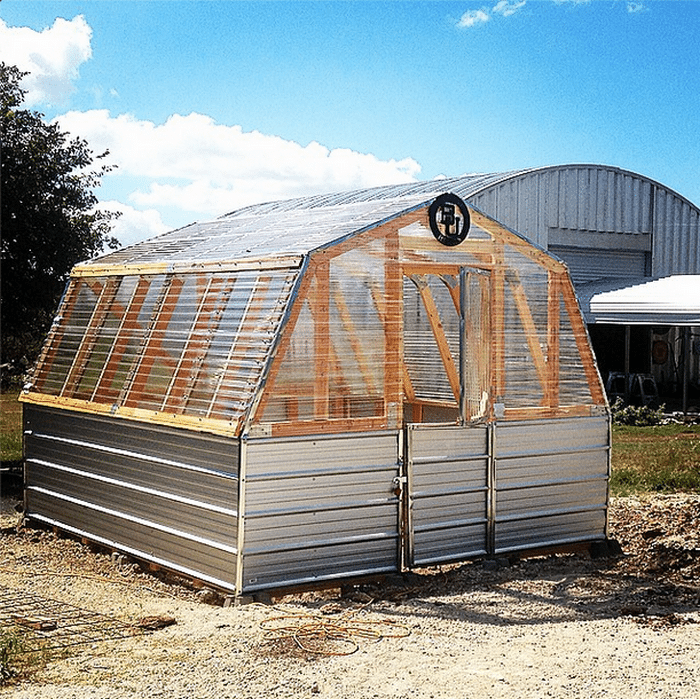
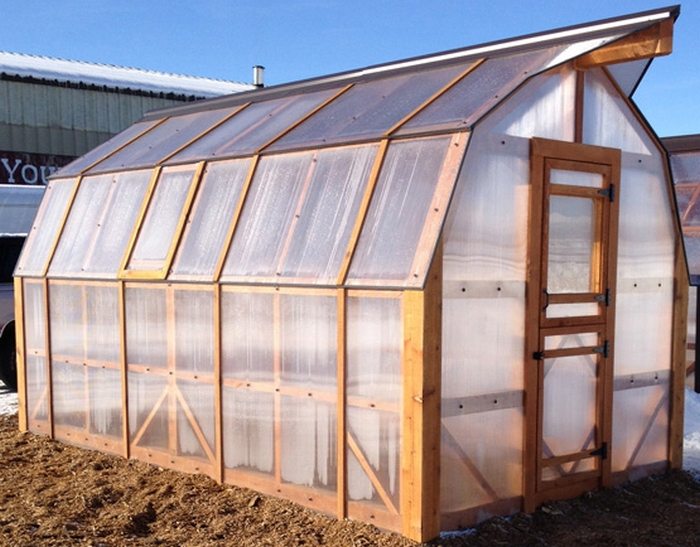
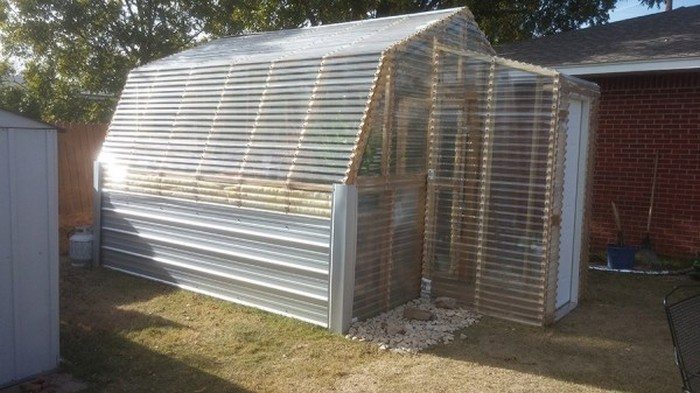
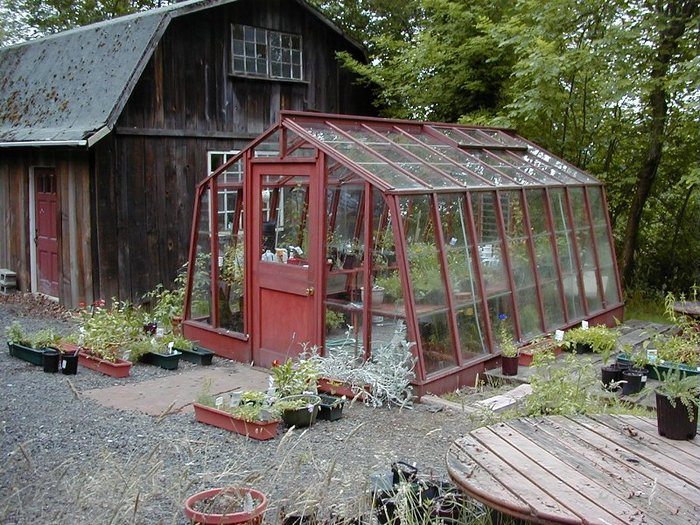
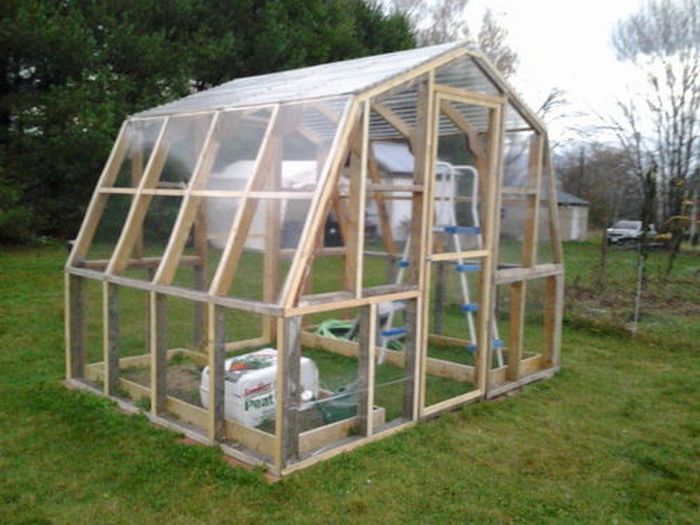
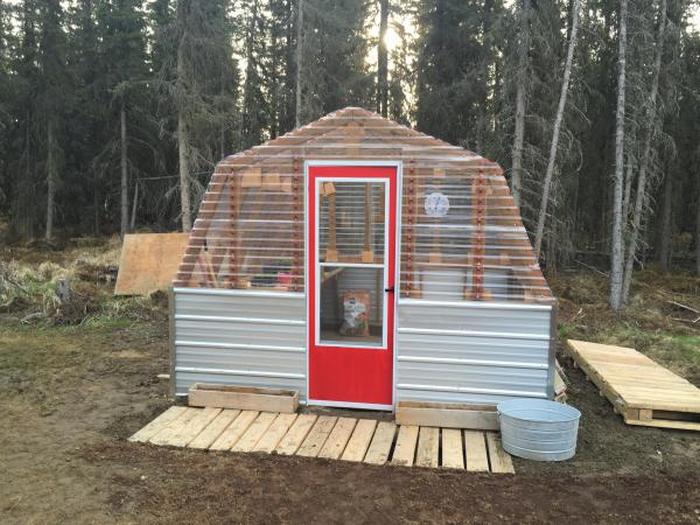
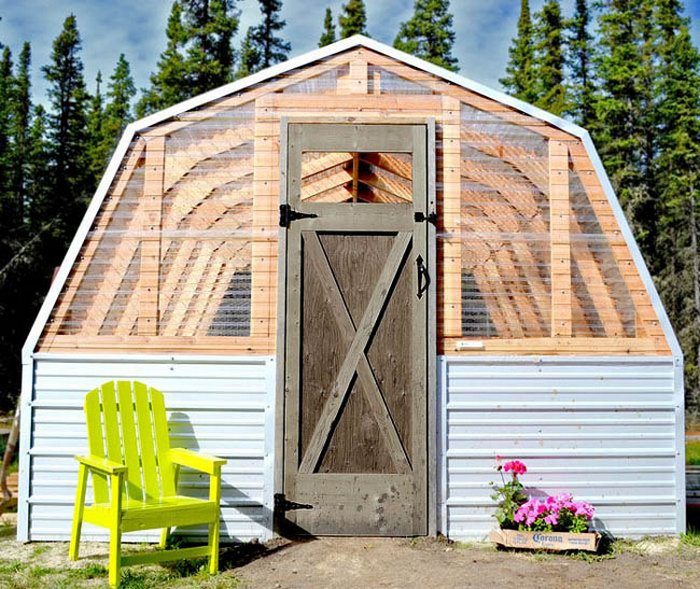
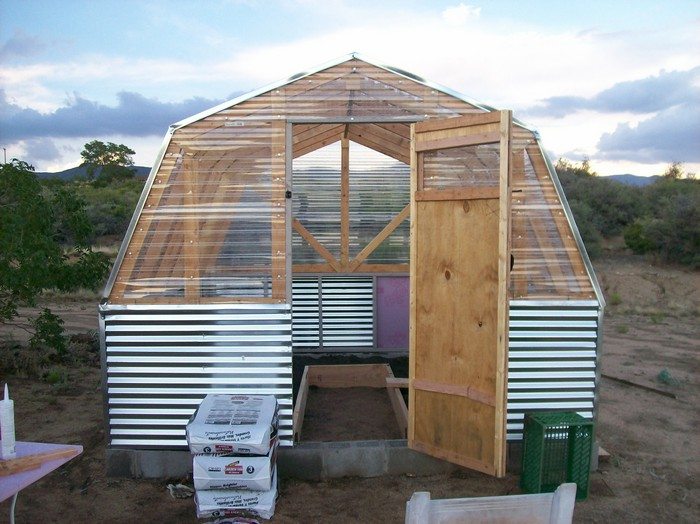
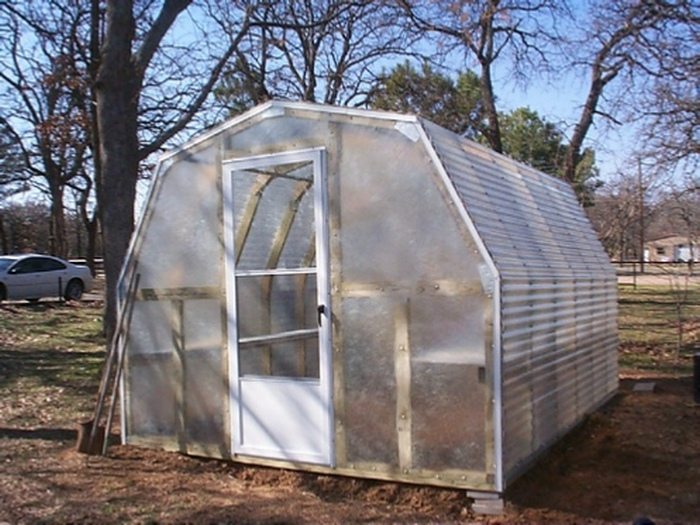
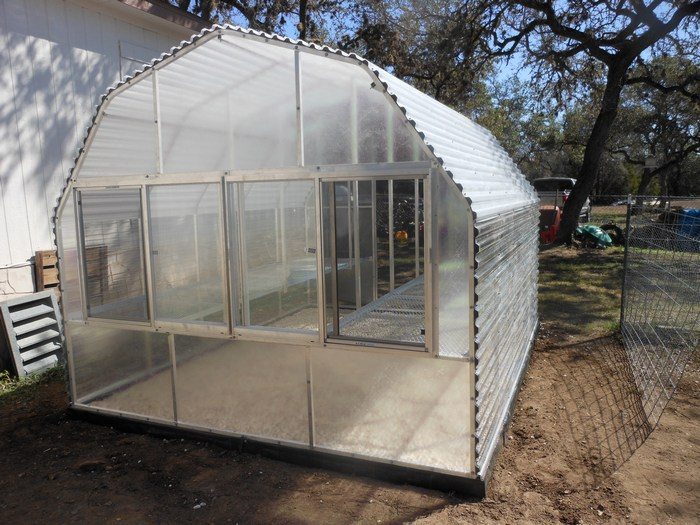
Building a Barn Greenhouse
You’ll be needing the following supplies to get started.
Materials:
- 3 pcs 2×4 10’ long Cedar Wood – for the back wall
- 5 pcs 2×4 12’ long Lumber – for sides/ridgepole; do not cut
- 32 pcs 2×4 8’ long Lumber
- 11 pcs 12’x26” Corrugated Plastic Greenhouse Panels
- 1 pc 8’x26” Corrugated Plastic Greenhouse Panel – for door side
- 3 pcs 12’ long Tin Panels – for sides and back
- 1 pc 8’ long Tin Panel – for front
- 28 pcs 4’ long Ribbing Strips
- L Flashing – optional, for corners
- Tin Screws
- 3” Screws
- Metal Gussets
- Wood Glue
Tools:
- Measuring Tape
- Square
- Marker
- Hammer
- Drill
- Circular Saw
- Compound Miter Saw
- Carpenter’s Level
- Countersink Drill Bit
- Safety Glasses
- Hearing Protection
Steps:
This guide will show you how to do it yourself, step by step. Building a barn greenhouse is a great way to extend your growing season and protect your plants from the elements. Plus, it can be a fun and rewarding project to take on with the family.
Spring is the perfect time to start planning your very own DIY barn greenhouse! Here’s how to do it:
1. Frame the back wall
Framing for the back wall of your barn greenhouse. You can use 3″ screws or nails to connect the pieces. Here’s how to cut 2x4s: 2 pieces of 2×4 @ 118 3/8” and 6 pieces of 2X4 @ 32”.
2. Two side walls
Construction of 2 side walls: 4 pieces 2X4 @ 144” and 14 pieces 2X4 @ 32”.
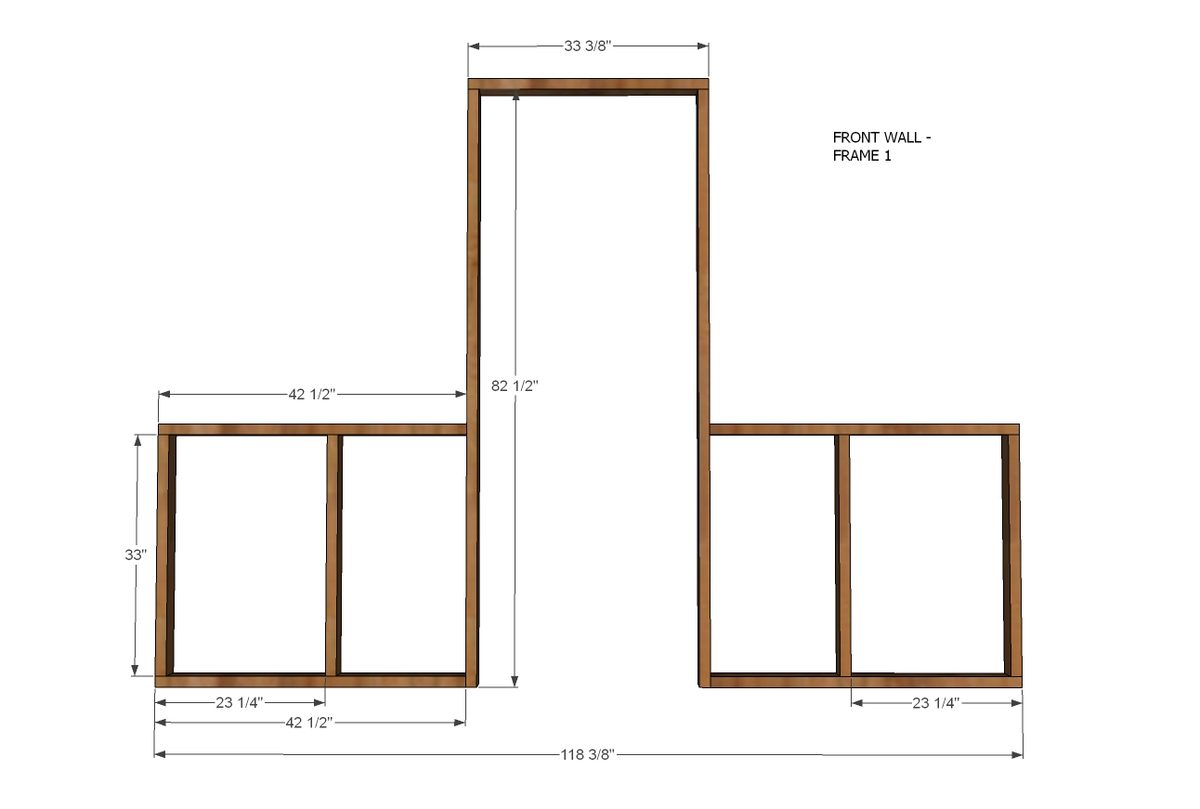
3. Frame the front wall
Frame for the front wall: 4 pieces 2X4 @ 32”; 4 pieces 2X4 @ 42 ½”; 2 pieces 2X4 @ 81 ½”; 1 piece 2X4 @ 33 3/8”.
As shown below, construct the front walls.
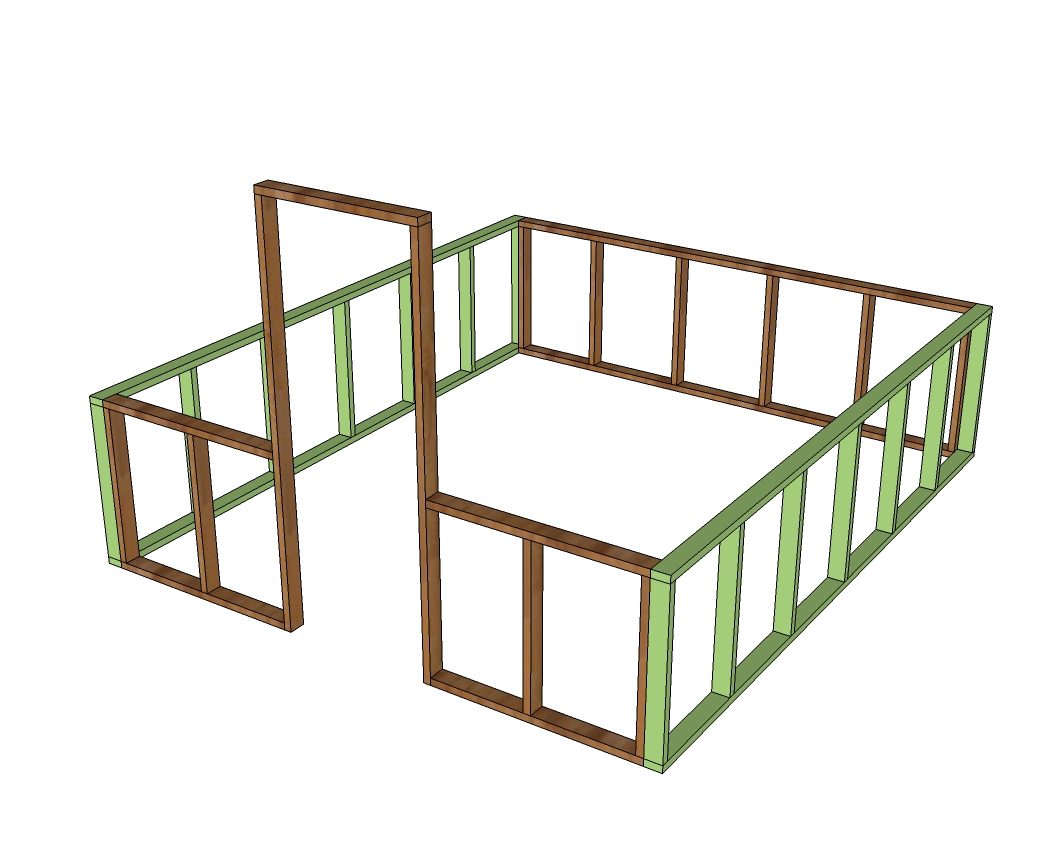
4. Assemble the four walls
Use 3″ screws at the corners to assemble the four walls. Make sure the walls are flush with each other before screwing them together.
5. Construct the roofing
Now that the framing is complete, it’s time to start working on the roof. This is one of the most important parts of the house, so it’s important to get it right.
There are a few different options when it comes to roofing materials, so be sure to do your research before making a decision. Once you have the materials, it’s time to start construction.
If you’re not familiar with roofing, be sure to consult with a professional before starting.
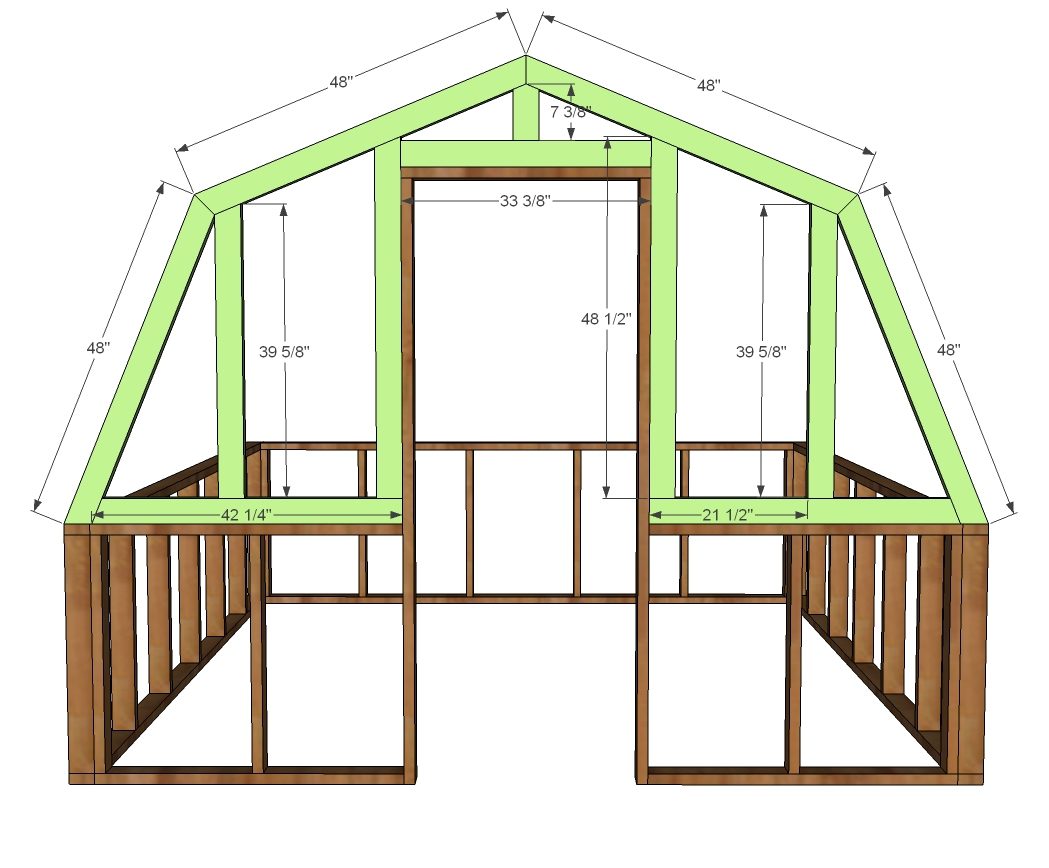
5.1 Front and back truss
As with the front truss, the back truss is also built.
4 pieces 2X4 @ 48”; cut both ends @ 22.5°, not parallel
1 pieces 2X4 @ 117 7/8”; cut both ends @ 22.5°, not parallel
1 pieces 2X4 @ 55 ⅜; cut top part dogeared point @ 22.5°
2 pieces 2X4 @ 55 ¼”; cut top part dogeared point @ 45°
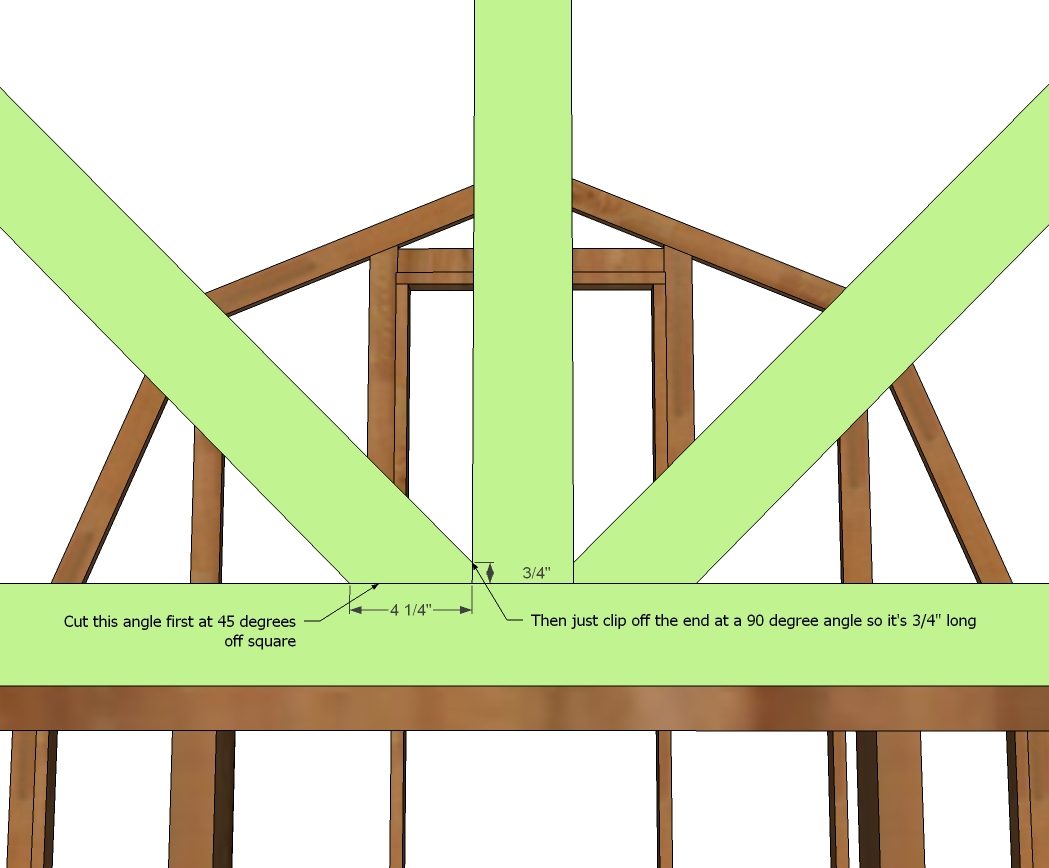
The centre cuts are shown in the next step.
5.2 Cut the board
When I first saw this board, I thought it might be tricky to cut. But after I practised a few times, I got the hang of it. So, if you’re thinking of trying this board, my best advice is to go for it – but be sure to practice first!
5.3 Add the ridgepole
Adding the ridgepole is the next step in constructing your barn greenhouse. This horizontal beam will provide support for the roof, so it’s important to make sure it’s level and securely in place.
You’ll need 1 piece of 2X4 @ 141” to make the ridgepole.
First, cut a beam to the desired length. You’ll want it to be slightly longer than the width of your cabin so that it extends past the walls by a few inches on each side. Then, Place the beam on top of the logs, making sure it’s level. Finally, secure the beam in place by nailing it to the logs.
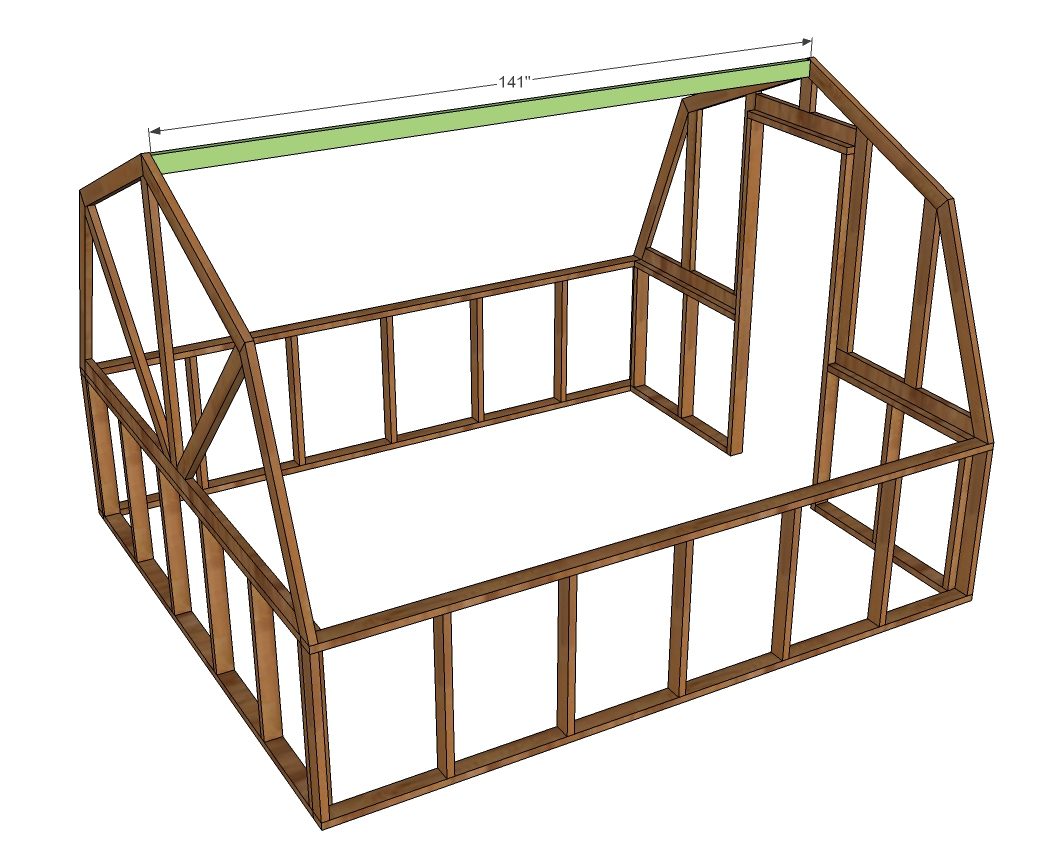
NOTE: Ridgepole length will be affected if you use gussets – we used 1/2″ plywood.
6. Make the rafters
10 2X4 @ 48” (both ends are cut at 22 ½ degrees, not parallel)
10 2X4 @ 47 1/4″ (both ends are cut at 22 12:30 degrees, not parallel) – shorter rafters go up to meet the ridge pole. I marked all shorter rafters to avoid confusion.
To save money, we used plywood gussets for the common rafters of this barn-style greenhouse. The quick and easy way to cut gussets – I learned to do it in less than a minute after cutting quite a few.
In each rafter joint, gussets were glued and screwed on both sides. All the small trusses were made on the ground first, then stacked on the ridgepole and attached to the studs. For each gusset, eight screws were used. The rafters are usually installed flush to the outside of the side walls and flush to the top of the ridge pole. It was necessary to “toenail” the screws in – meaning they were screwed in at an angle. Both sides were screwed with 3″ screws and glue.
7. Seal the frame
You’ll be able to complete the framing process with the plan.
To seal the frame, you can use plastic paper, Lexan glass panels, or whatever you like.
In order to install the corrugated plastic panels, we used the details provided earlier. Lateral support will be necessary if you don’t use panels to keep the greenhouse from swaying. You might want to try 2x4s that are 12 feet long.
8. Apply wood fillers
The wood filler should be applied to all holes and allowed to dry. The wood filler should be applied in additional coats as necessary. When the wood filler is completely dry, sand it with 120-grit sandpaper in the direction of the wood grain. The sanding residue was vacuumed off the project after it had been vacuumed sanded. Sanding residue should also be removed from work surfaces. Make sure the project is clean by wiping it with a damp cloth.
Ensure colour evenness and adhesion by applying a test coat on a hidden area or scrap piece. Use wood conditioner if necessary.
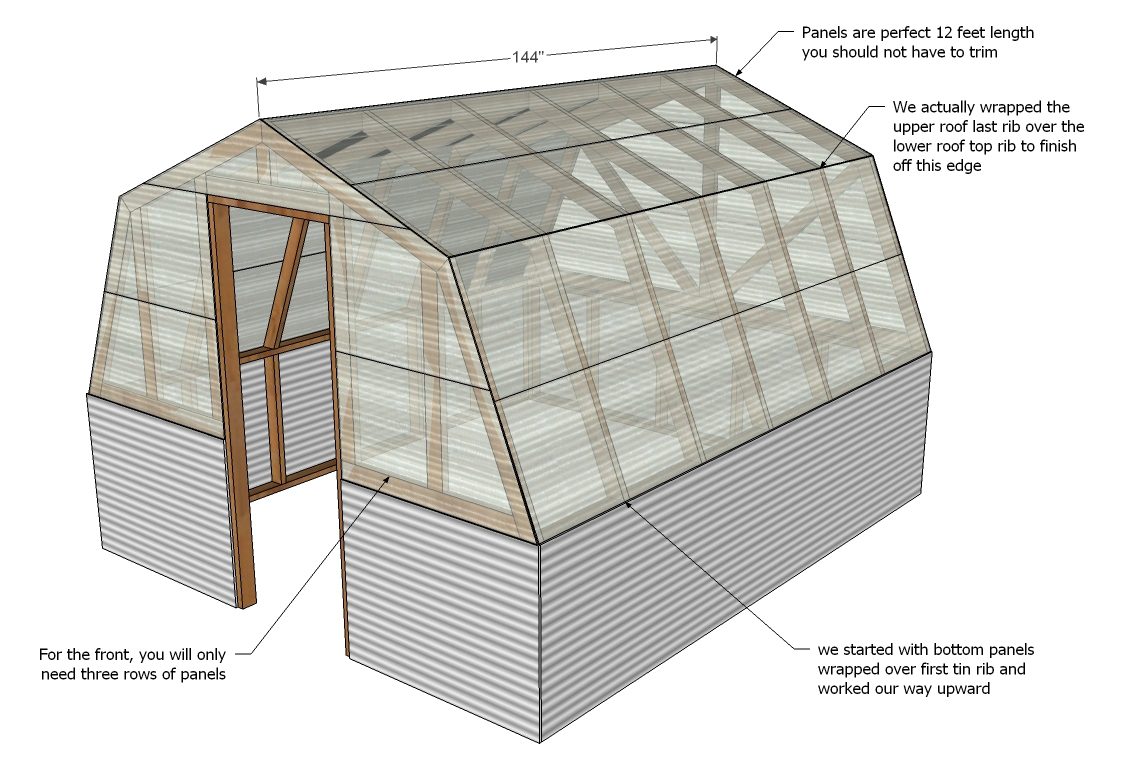
Now that your barn greenhouse is complete, enjoy all the benefits that come with it! You’ll be able to extend your growing season, protect your plants from harsh weather, and have a beautiful space to enjoy. Make the most of your new barn greenhouse by filling it with plants that thrive in the greenhouse environment. With a little care, your barn greenhouse will provide you with years of enjoyment.
Thanks to Ana White for this great project. You can get the full tutorial here…
Climate Control and Ventilation in a Barn Greenhouse
Dialing in temperature and airflow keeps plants vigorous. A barn greenhouse needs balanced vents, fans, and shading. Good control saves energy, curbs disease, and steadies yields across shifting seasons reliably.
Passive Ventilation Layout
Cross-ventilation starts with high ridge vents and low side inlets. Warm air rises and escapes as cool air enters, keeping temperatures even without constant power. Space operable windows evenly along the long walls. Add insect screens and adjustable props. With a barn greenhouse, orient the gable to prevailing winds so breezes sweep the aisle and prevent dead zones that invite mildew and heat stress.
Active Air Movement and Fans
Use circulation fans to break up hot pockets and keep leaves gently moving. Mount horizontal airflow fans above head height, pointing the stream along the length of the house. Exhaust fans paired with thermostats pull heat fast during spikes. In a barn greenhouse, size airflow to exchange the full volume every one to three minutes. That rhythm limits condensation, discourages disease, and steadies transpiration.
Managing Heat and Cold
Shade cloth reduces summer radiation and keeps tender crops from scorching. Roll-up sides dump heat quickly on still days. For cold snaps, add thermal mass like water barrels and close night curtains early. A small heater with a reliable thermostat protects seedlings. Your barn greenhouse benefits from staged setpoints, so systems ramp in steps instead of overshooting and shocking roots with big swings.
Humidity and Disease Prevention
High humidity fuels botrytis and powdery mildew. Vent early to release overnight moisture before sunlight hits leaves. Keep paths dry with gravel and avoid flooding benches. Use drip lines, not overhead sprays, to water roots precisely. In a barn greenhouse, pair a hygrometer with automatic vents or fans. Hold humidity near crop targets so flowers set cleanly and foliage stays resilient.
Best Plants to Grow in a Barn Greenhouse
Picking crops maximizes space and light. A barn greenhouse lets cool greens thrive early and tomatoes shine later. Match varieties to microclimates inside your barn greenhouse to harvest steadily year-round.
Cool-Season Staples
Seed lettuce, spinach, bok choy, and radishes for crisp, fast harvests. Keep daytime temps mild and vent early to prevent tip burn. Use shade cloth on bright days and close at dusk to trap warmth. In a barn greenhouse, succession sow every two weeks. That cadence fills gaps and keeps salads coming while nights are still cold outside.
Warm-Season Workhorses
Tomatoes, cucumbers, peppers, and eggplants love heat and controlled airflow. Train vines vertically to free floor space and boost light exposure. Prune to one or two leaders and tie regularly. Feed with balanced nutrition to support fruit set. Your barn greenhouse stabilizes temperatures, so pollination stays reliable and blossom drop declines, giving larger, cleaner yields through the shoulder seasons.
Herbs and Perennial Flavor
Basil, cilantro, parsley, thyme, and chives thrive with steady moisture and bright light. Stagger plantings to avoid bolting and pinch often to keep leaves tender. Add everbearing strawberries or dwarf citrus for fragrance and winter snacks. A barn greenhouse gives herbs shelter from hard rain and wind, so oils concentrate and flavors sharpen for fresher, more intense harvests.
Flowers and Beneficials
Marigolds, nasturtiums, calendula, and alyssum attract hoverflies and lacewings that hunt aphids. Edible petals add color to salads and bouquets lift morale during gray weeks. Tuck compact varieties at bed edges and under trellises. Rotate trays for uniform light and deadhead weekly. Healthy ornamentals keep pollinators visiting and create a balanced environment that supports heavy fruiting crops nearby.
Conclusion
A barn greenhouse turns seasonal gardening into year-round production with smart planning. Solid framing, good glazing, and tight seals protect crops when weather swings. Venting, heat, and shade keep the climate steady so plants stay healthy. Drip lines, benches, and tidy paths make daily care fast and consistent. Build once, maintain well, and your barn greenhouse will pay back in harvests for years.
If you liked this project, you will also like viewing these easy DIY projects…