Last Updated on May 31, 2024 by teamobn
When it comes to going on the road for an extended overland adventure, you can opt for add-on solutions like vehicle rooftop tents and portable kitchens or a full-blown, tricked-out RV. Somewhere in between is the camper trailer, which allows the family a small – but efficient – home on the go.

If you love the idea of your own camper trailer but don’t like the price tag, you can always build your own.
Not everyone enjoys camping in a tent. Some of us prefer to have the basic amenities a home offers. A camper trailer is perfect for this as it has everything you need in a home while you’re enjoying the great outdoors.
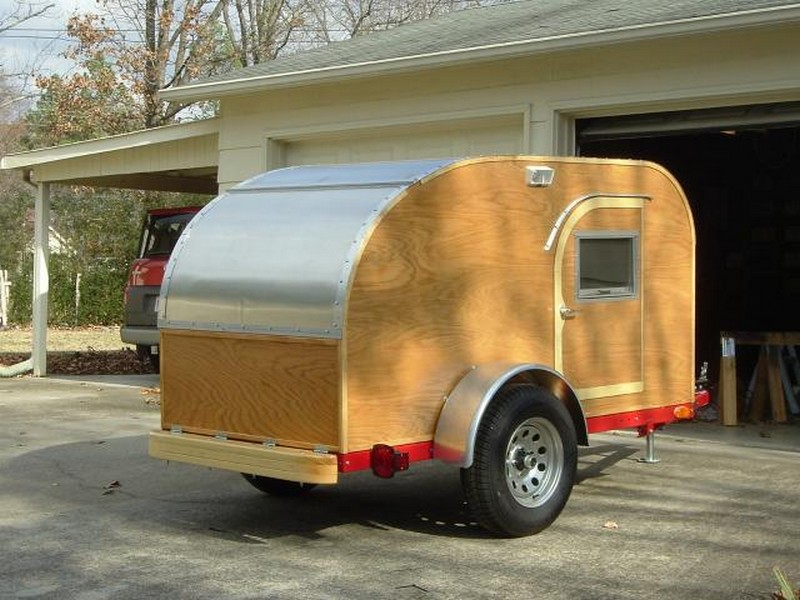
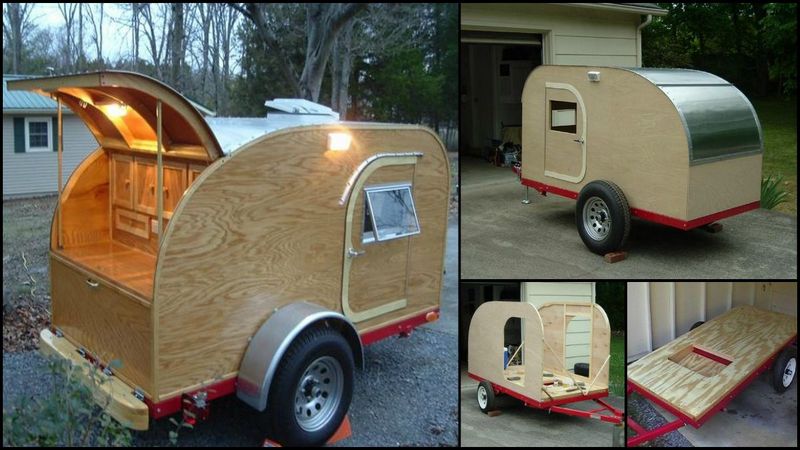
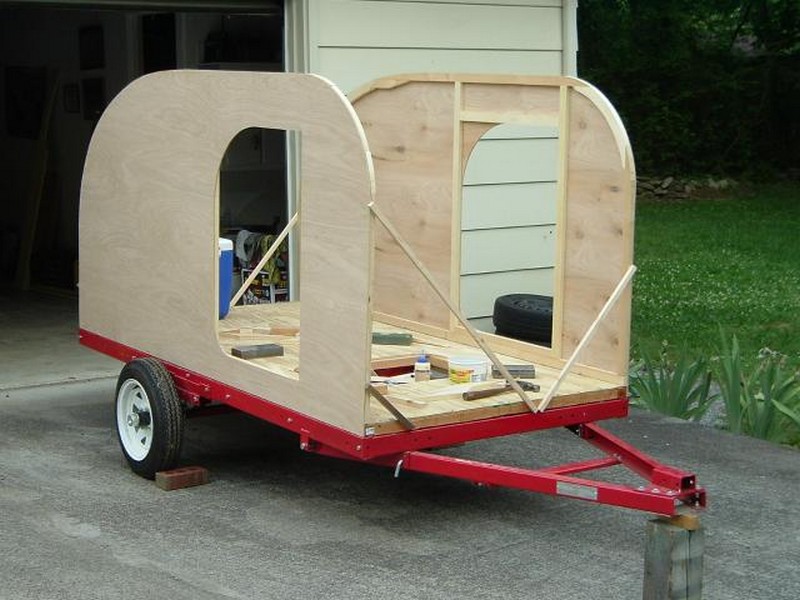
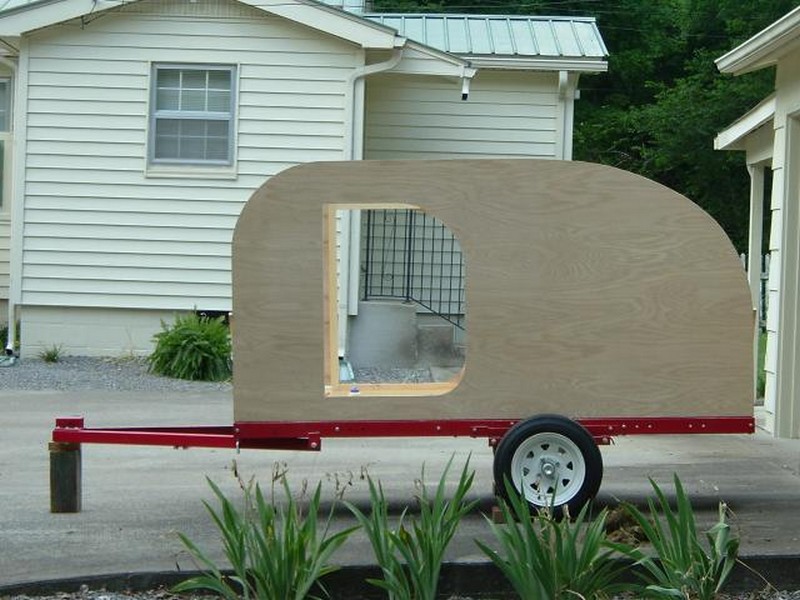
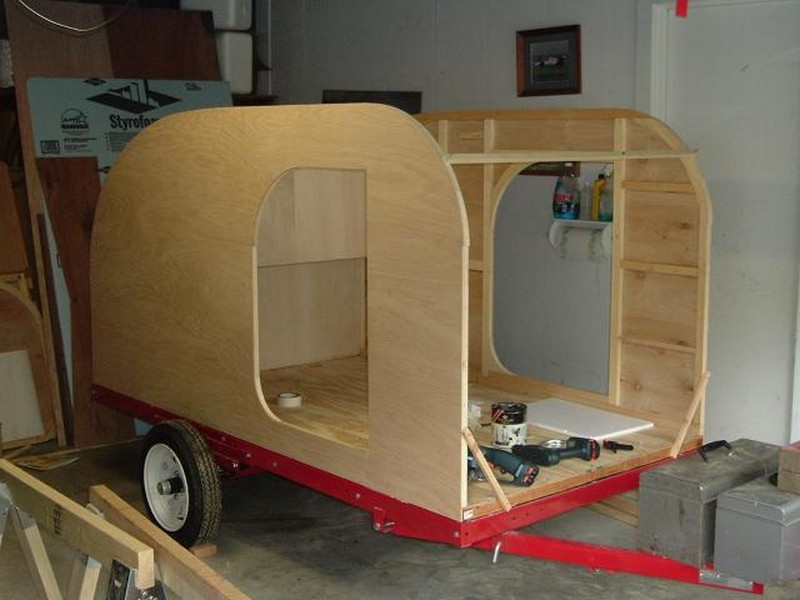
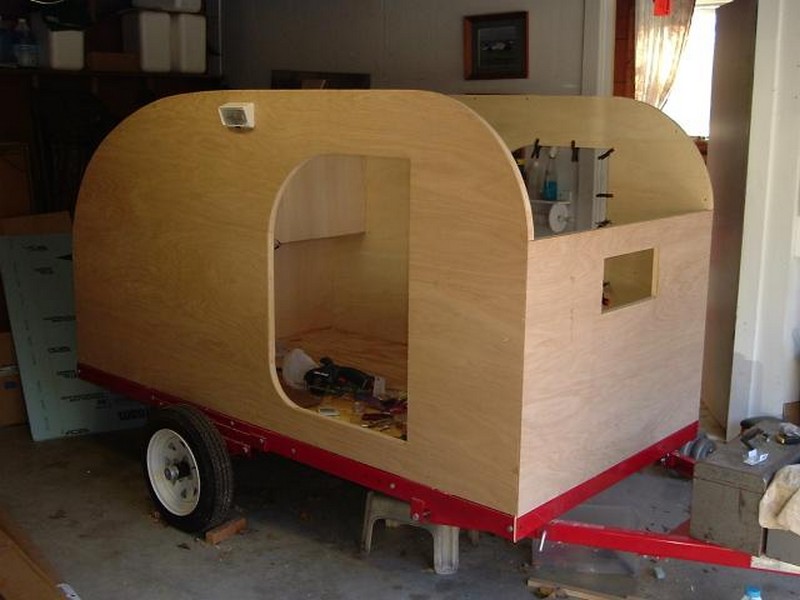
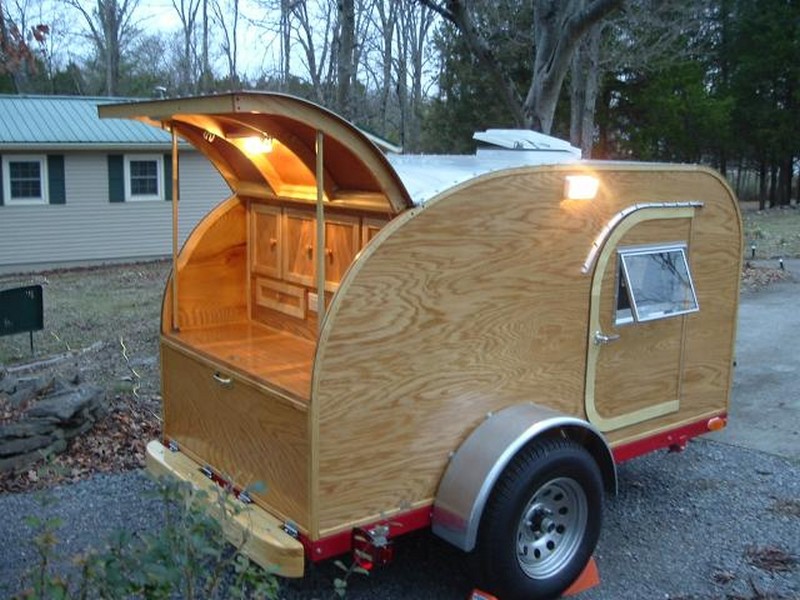
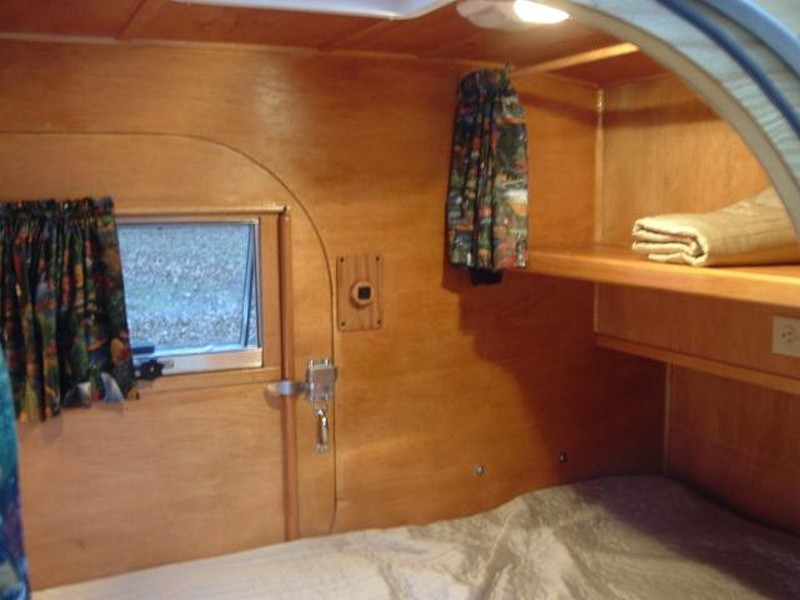
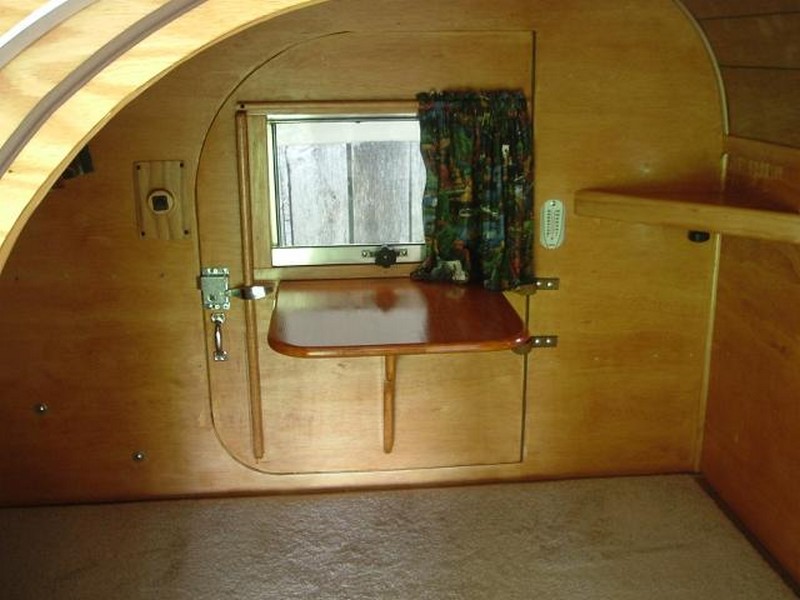
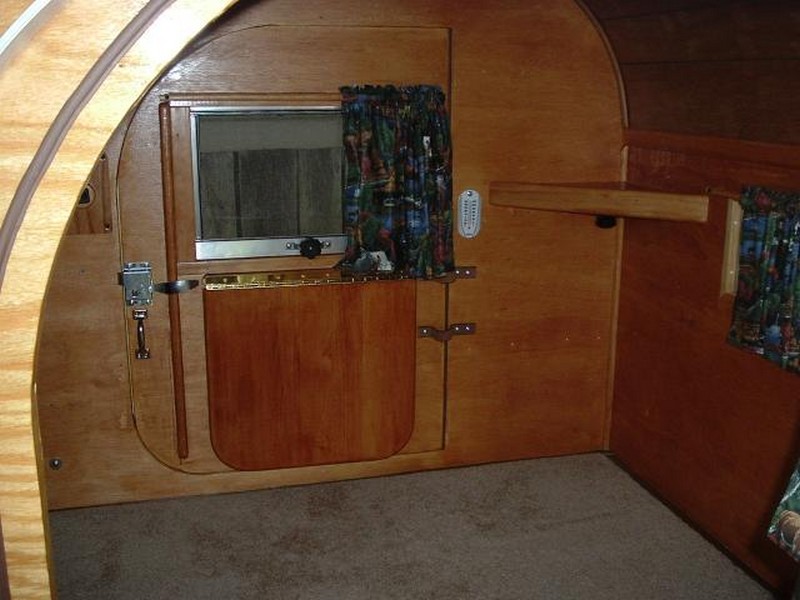
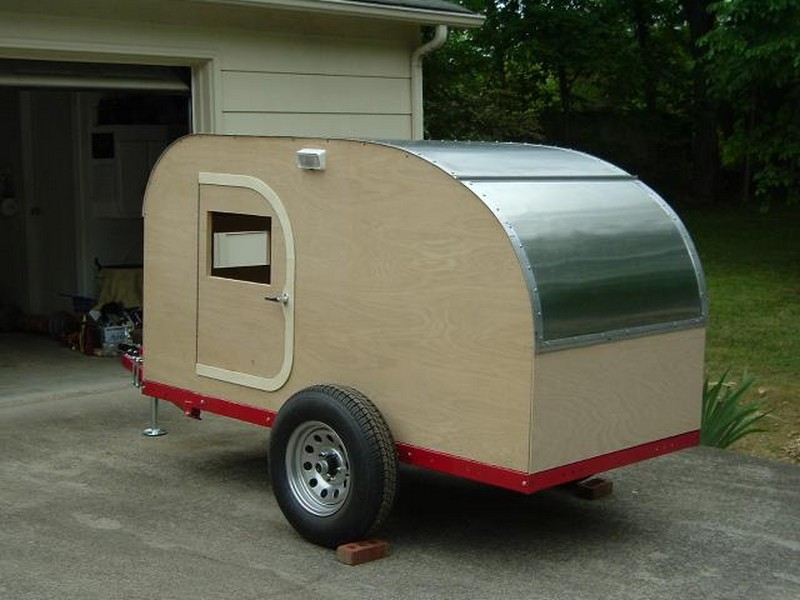
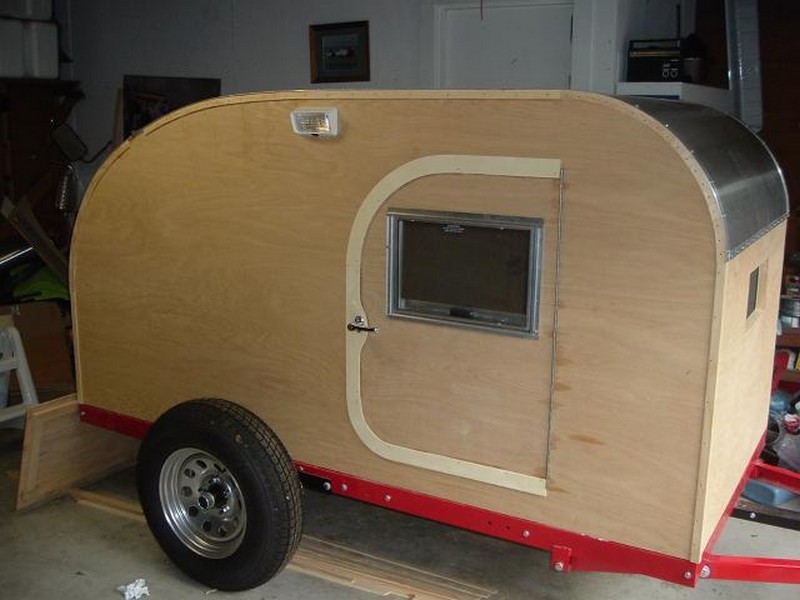
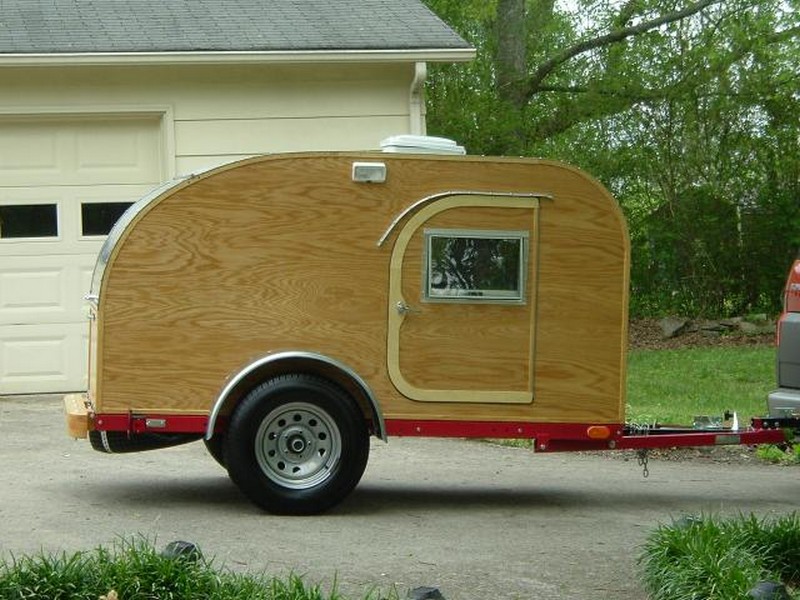
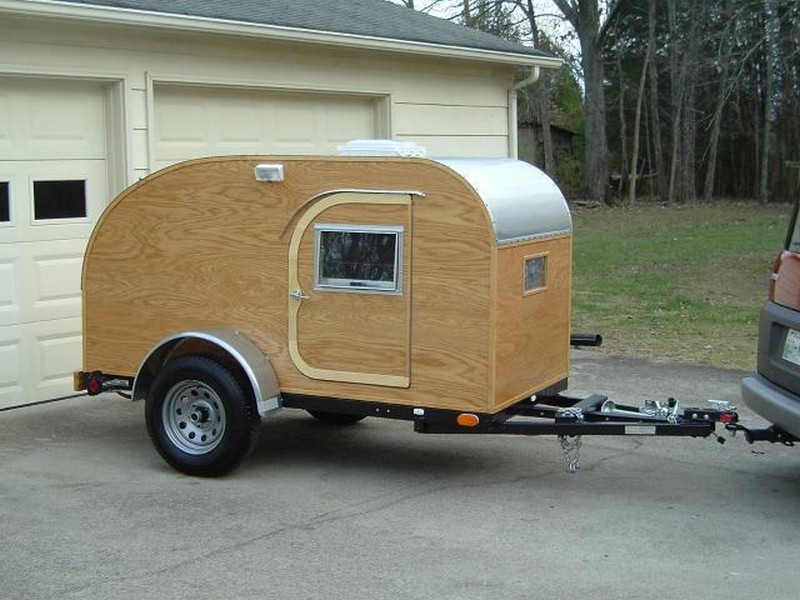
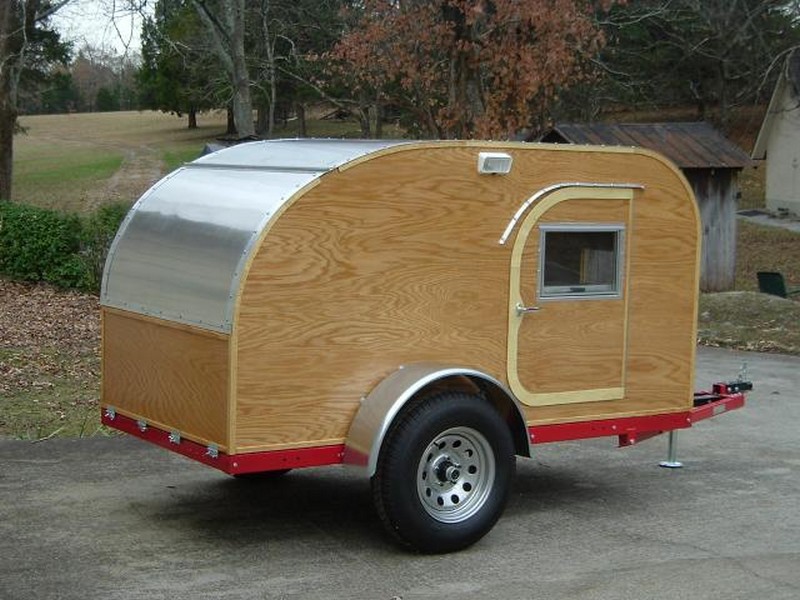
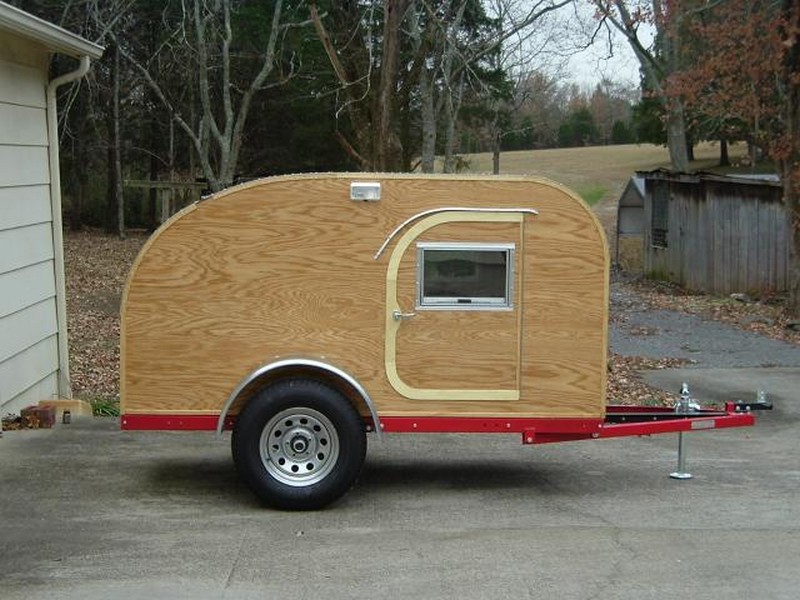
This teardrop trailer measuring 4×8′ can accommodate two people for sleeping. What’s nice about this is that it can be towed by just about any car because of its lightweight design.
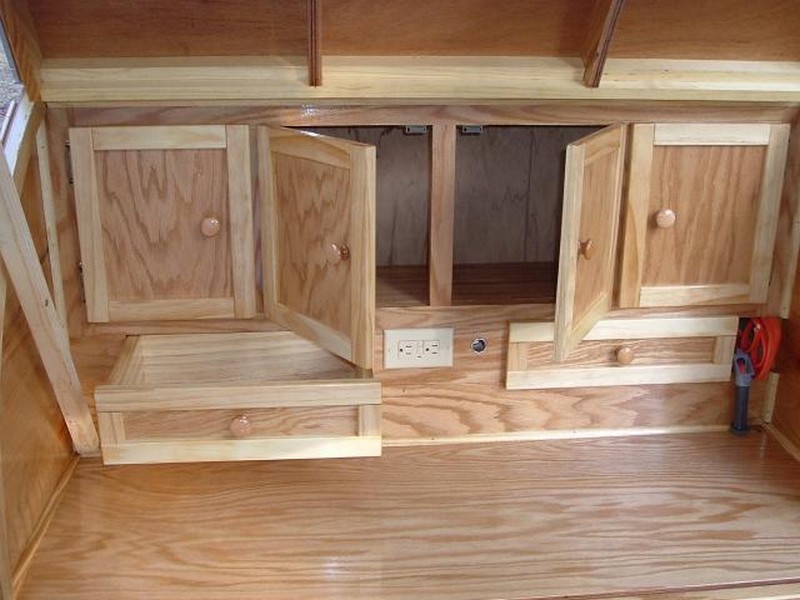
And it’s not just sleeping quarters as it has a galley at the back, too! It could also contain a small DVD player, refrigerator, etc. As always, the best part about making your own is that it can be custom-built for your special requirements.
Thinking of building one? Here are some of the basic materials that you will need…
Building a Teardrop Trailer
Materials
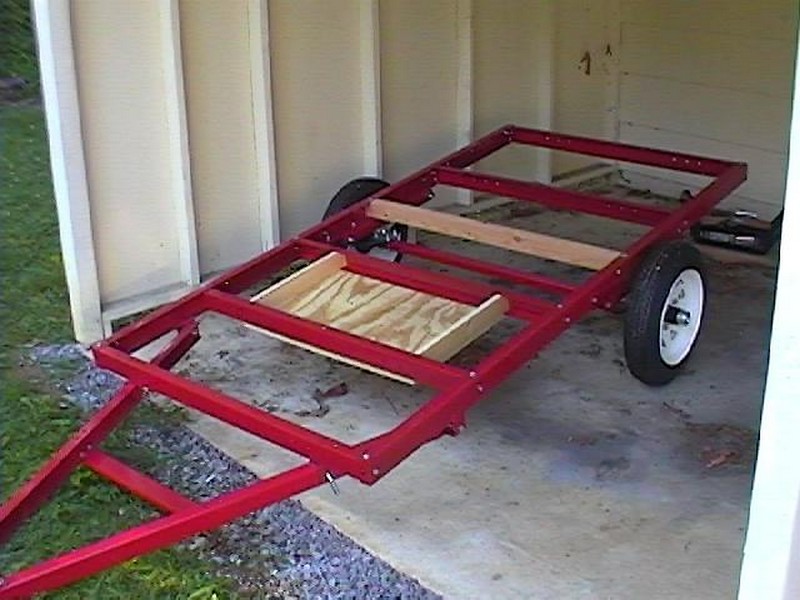
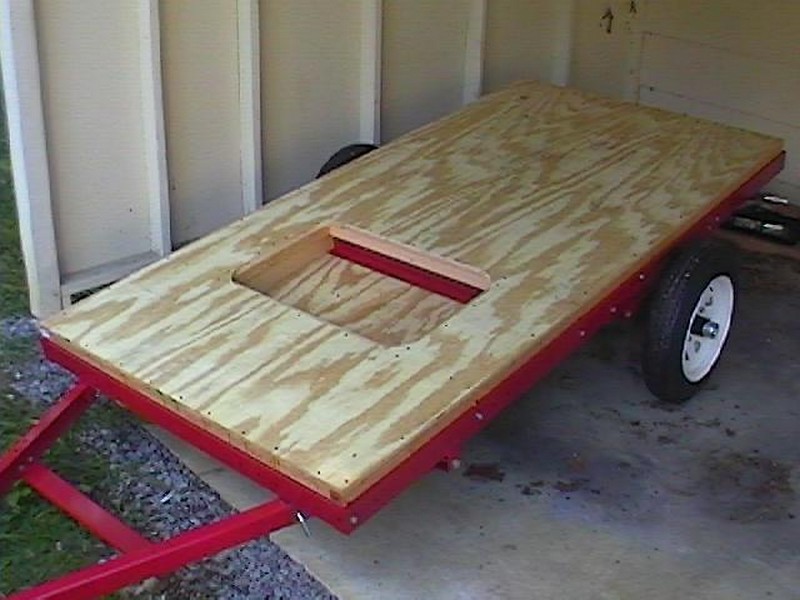
- Trailer Bed
- Aluminum Sheet
- ¼” Oak Plywood
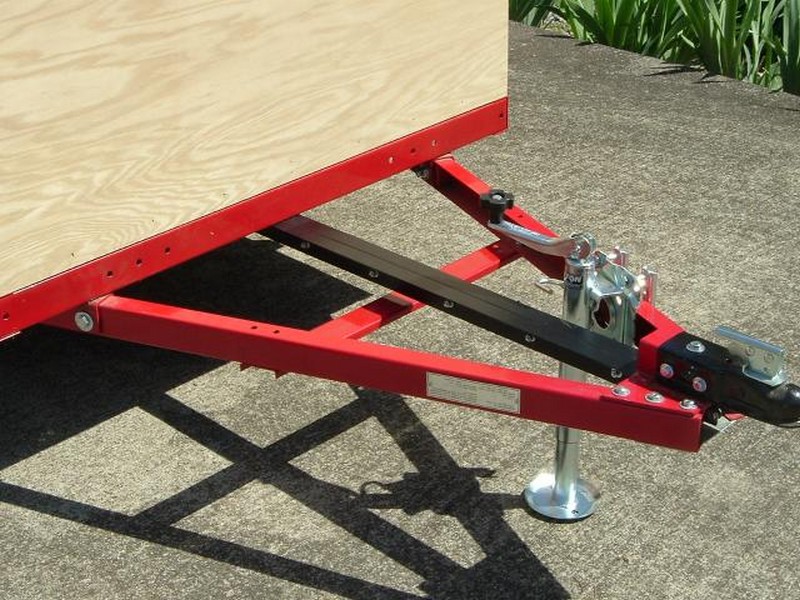
- Torsion Axle
- 14” Wheels
- Bolts and Nuts
- Wood Varnish
- Lighting Fixtures
- Exhaust Fan
- Hinges and Door Knobs
- Outlet Covers and Wiring
- Clamps
- Screws
Tools
- Caulking Gun
- Power Drill
- Pliers
- Hammer
- Table Saw
- Jig Saw
Instructions
1. Measure and gather the materials
Determine the size of the teardrop trailer you need and gather all needed materials
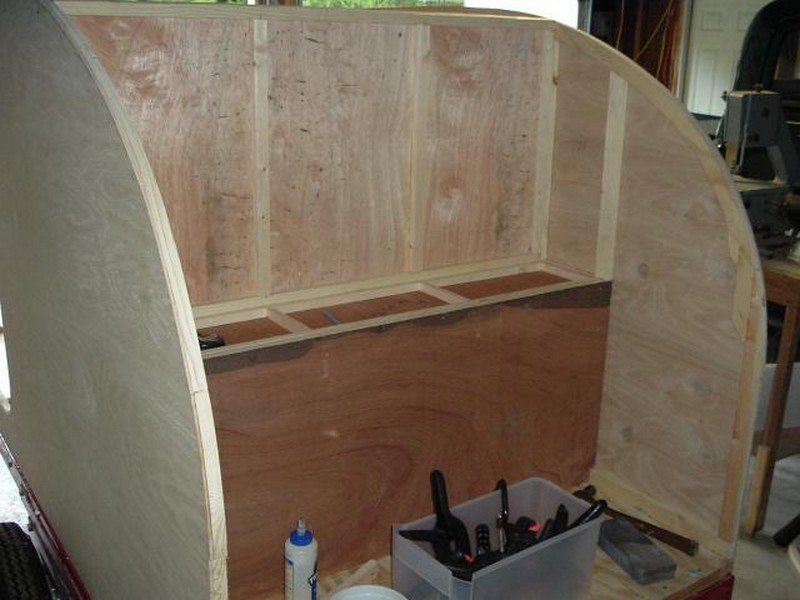
2. Install a decking foundation on your trailer
Before installing the deck to your trailer’s floor, measure the deck, drill holes, prep the base, set the frame, then insulate the floor.
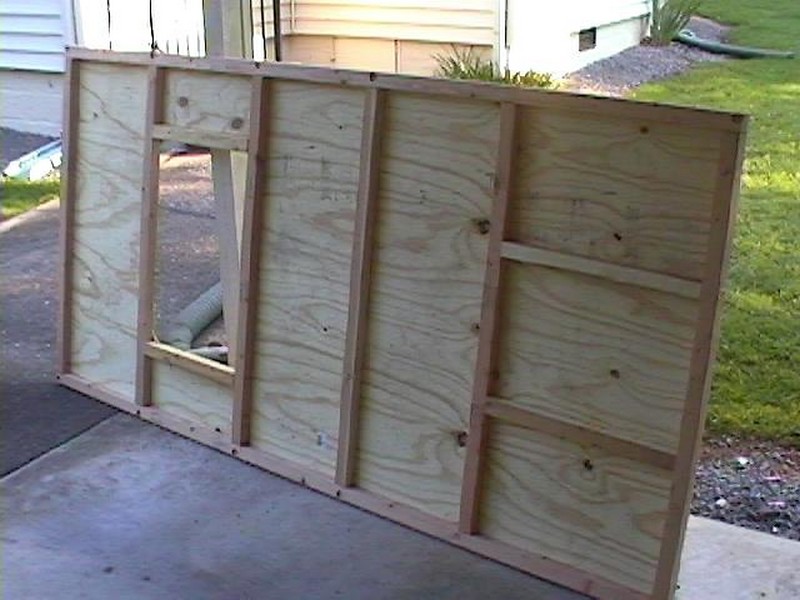
3. Create a design for your walls before construction
Make sure there is enough room for airflow.
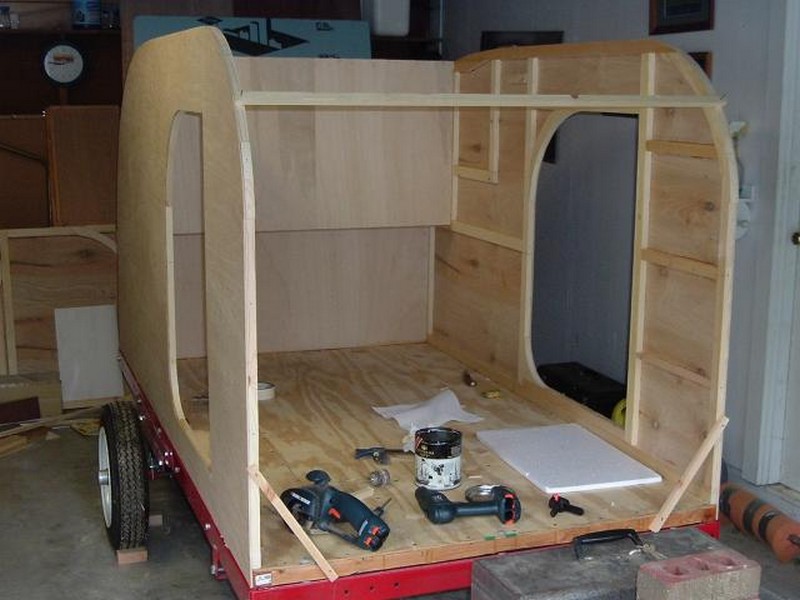
4. Add frames to your walls
Start by cutting the inner wall, cut the side walls on the driver & passenger’s area, make some measurements on your trailer floor, and mark them so we can anchor the outer walls.
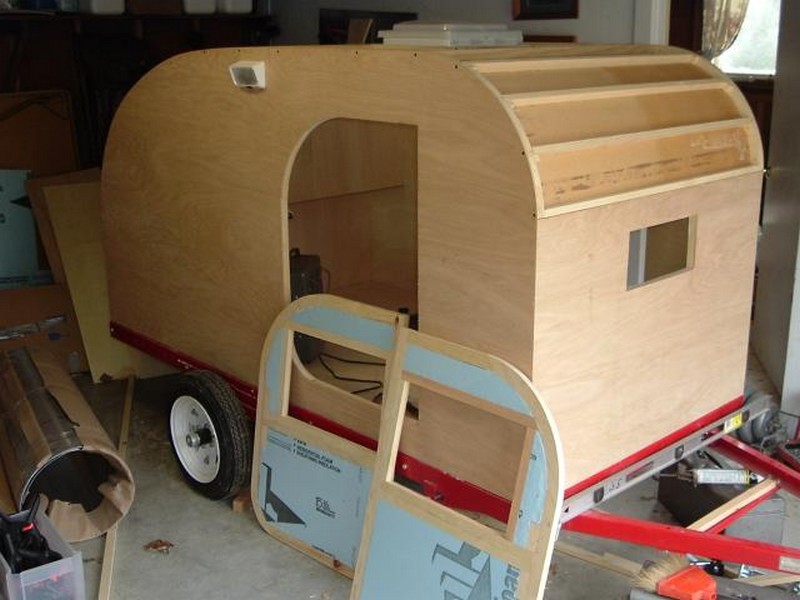
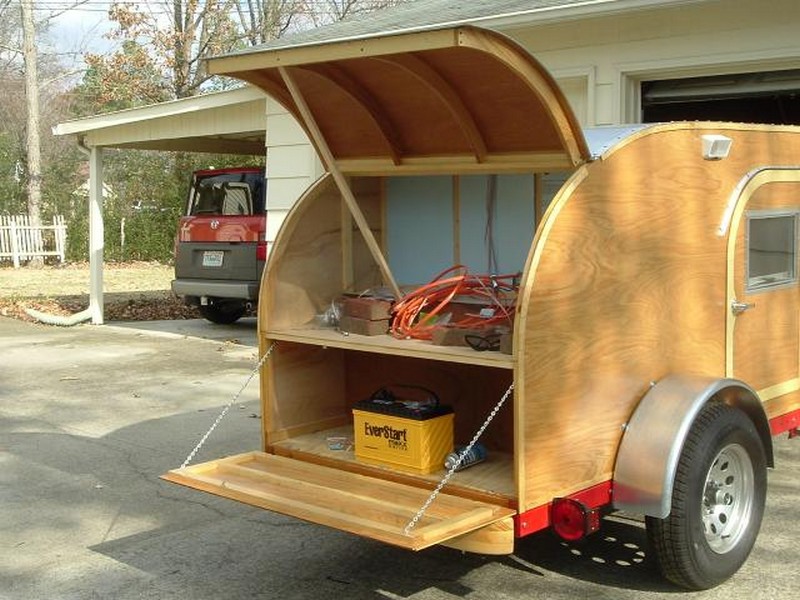
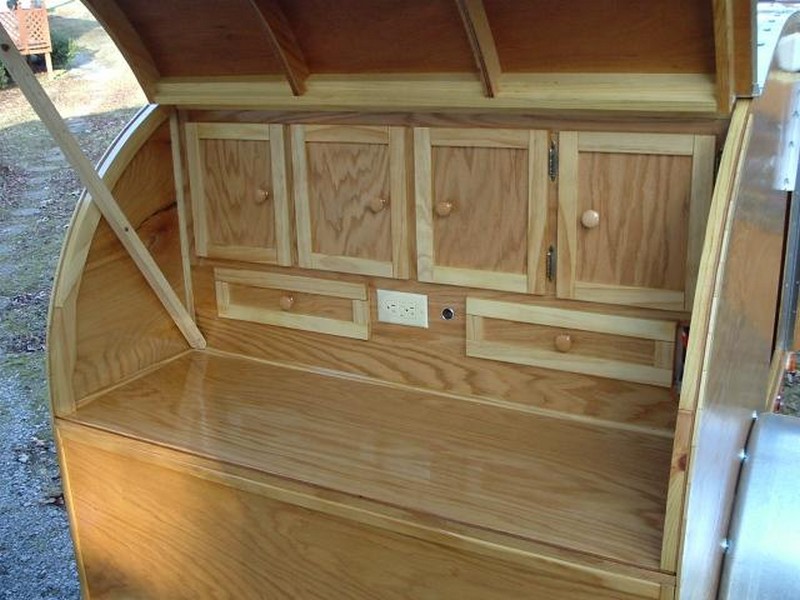
5. Construct your hatch area
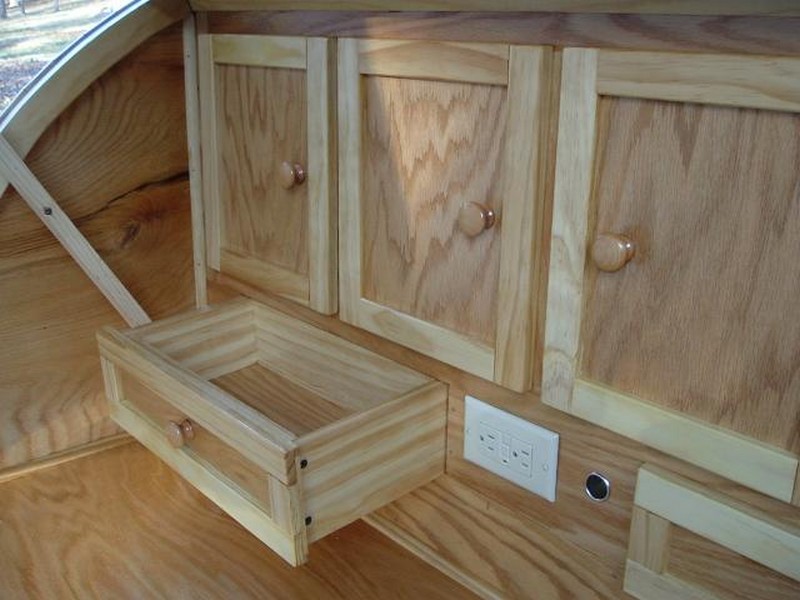
Build, and install the shelf, sink, stovetop, and countertop.
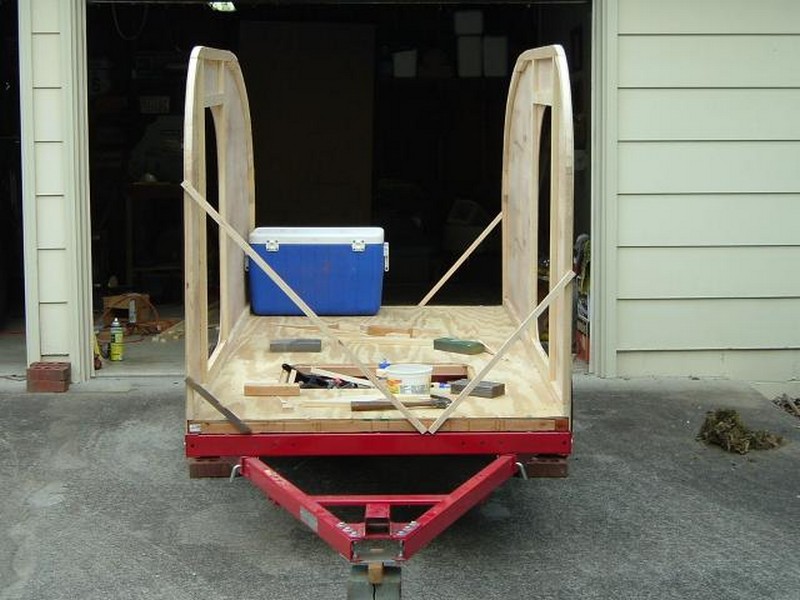
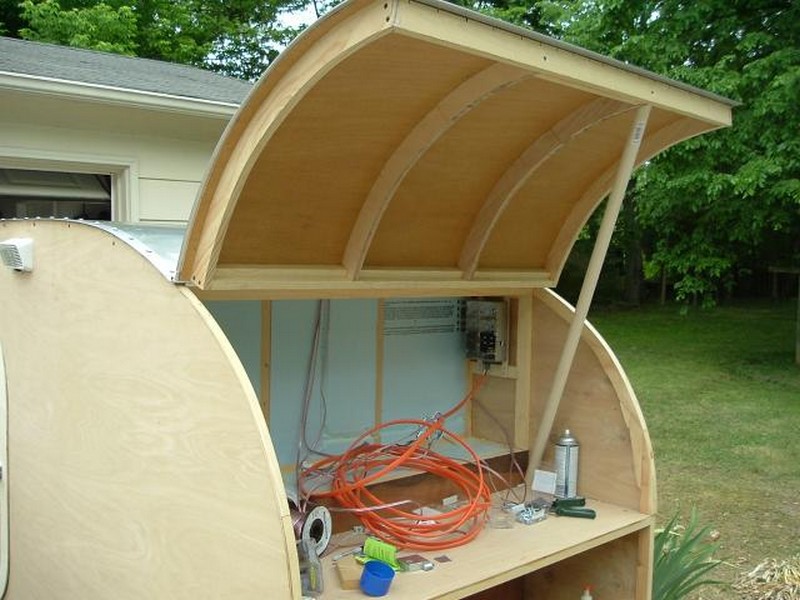
6. Create your hatch gussets
Layout cut, and bind. Gussets are described as the wooden structure that holds the spars (cross boards) and the exterior of your teardrop hatch. Gussets are usually customized.
7. Create your hatch door framing
Once hatch door framing is created and gussets and spars are ready, attach them together, withdraw the top spar, and spread a sealant on all three sides of the openings of the gussets. Then return the spar to its place and attach it in place using wood screws on the gussets. The same process will be applied to the bottom of the spar and finally to the center of the spar.
8. Hatch door assembly
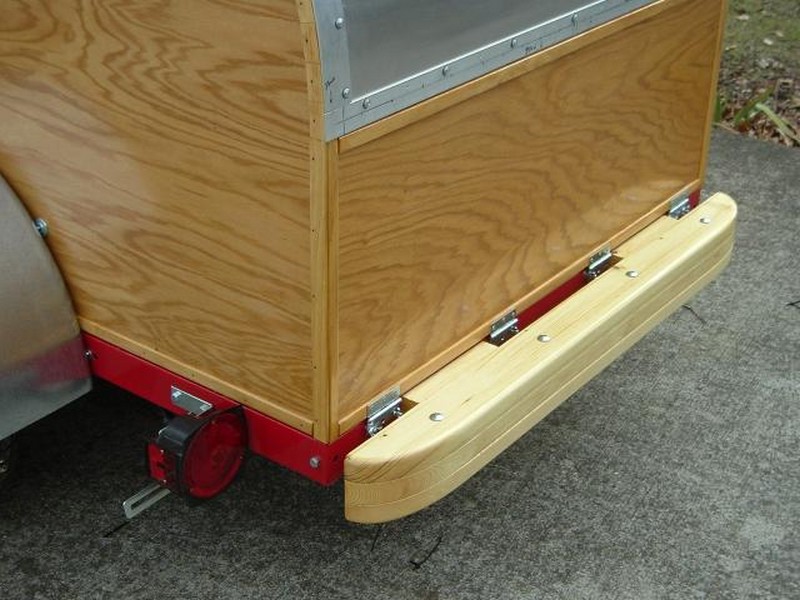
Measure, cut, add layers, install, and seal your hatch door’s outer skin. Make sure to varnish and polyurethane the exterior.
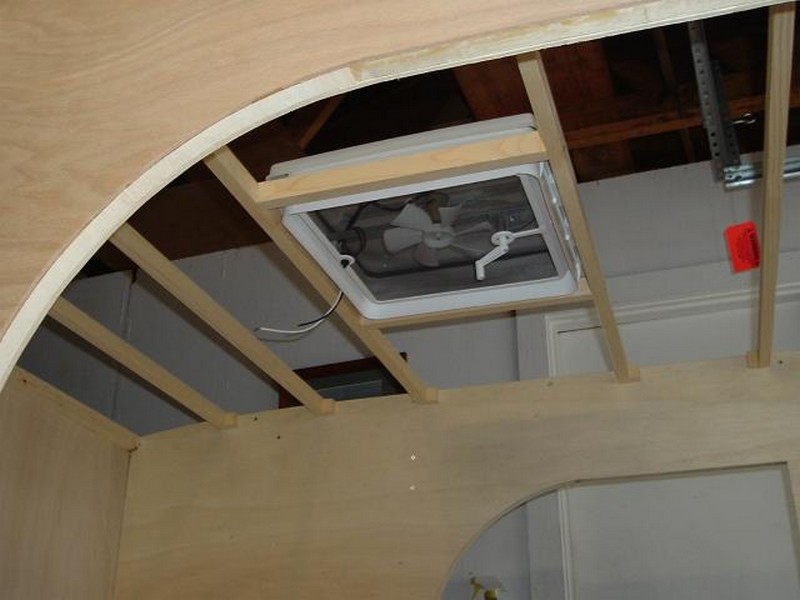
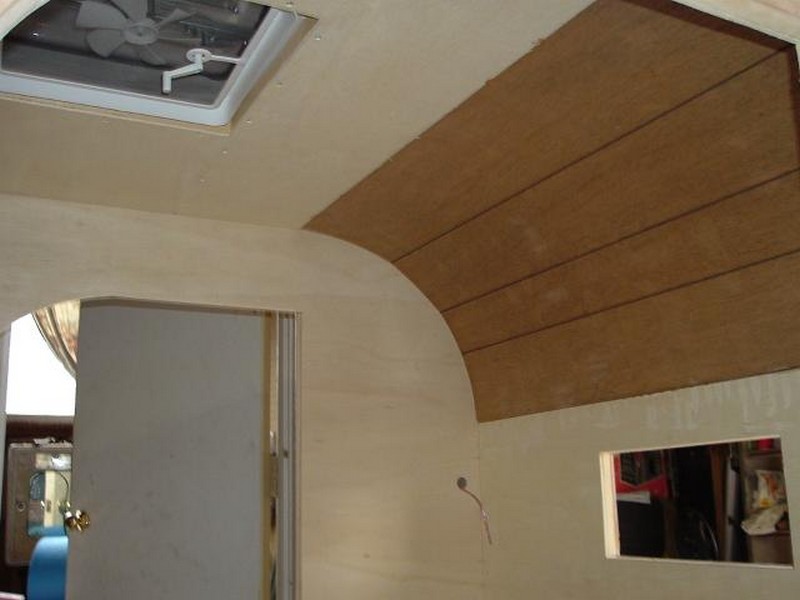
9. Roof assembly
Similar to the hatch door assembly, except that we need to add a sheet metal layer for the outer skin, a hurricane hinge to install your hatch door to the stationary skin, and a “T-rail” (or “J-Rail”) along the roof to manage the water flow and drainage.
10. Wirings
Installation of the wirings for the lighting & living space.
11. Finalize the project
Finally, sealing and finishing the woodwork.
Click on any image to start the lightbox display. Use your Esc key to close the lightbox. You can also view the images as a slideshow if you prefer 😎


Thanks to Truck with a Heart for this great project. You can get more details about this project here…
You can get the detailed step-by-step for this project here…
Choosing the Right Materials for Durability and Weight
When you’re building a teardrop trailer, picking the right materials is crucial. You need to find a balance between durability and weight, which will affect everything from towing ease to fuel economy. Here’s a breakdown of the best materials to use that meet both these needs.
Frame Materials: Finding the Balance
The frame is essentially the skeleton of your teardrop trailer. Aluminum is often the go-to choice because it’s lightweight and doesn’t rust, which is perfect for the frame and exterior. If you need something a bit sturdier, steel is a great option. It’s super strong, although it’s heavier and you might need to treat it to prevent rust.
Walls and Insulation: Keeping It Cozy and Sturdy
For the walls, ¼” oak plywood is commonly used because it’s strong and easy to work with. But if you’re looking to cut down on weight, think about using composite panels. They’re lighter and also good at keeping out moisture, which is a plus for insulation.
Speaking of keeping things cozy, good insulation is key. Materials like polystyrene or polyurethane foam are light and keep the inside temperature steady, which is exactly what you need when you’re out camping in different climates.
Flooring: Tough Yet Light
The floor of your teardrop trailer has to put up with a lot, so it needs to be tough. Marine-grade plywood is a top choice because it’s durable and moisture-resistant. If you’re looking for something lighter, consider vinyl flooring. It’s not only lighter but also easy to clean and comes in various styles to match your interior.
Roofing and Exterior: Shielding Your Trailer
Lastly, the roof needs to withstand all sorts of weather. Aluminum sheets are popular for roofing because they’re strong yet light. If you’re okay with a bit more weight and want to save some money, fiberglass or reinforced plastic are also good choices, though they are a bit heavier.
Choosing each material carefully not only impacts the individual parts of your teardrop trailer but also how well it functions as a whole. The right materials will make sure your trailer is not only a cozy place to sleep but also ready to handle whatever your adventures throw at it.
Electrical System Setup and Solar Integration in Your Teardrop Trailer
When custom-building a teardrop trailer, setting up an efficient electrical system and integrating solar power can greatly enhance your off-grid capabilities and independence. This setup not only powers essential appliances but also ensures that you have a sustainable and reliable energy source wherever your travels take you. Let’s explore how to equip your teardrop trailer with a robust electrical system and solar integration.
Planning Your Electrical System
Before you start wiring, plan out the electrical needs of your teardrop trailer. Determine what appliances you’ll need to power, like lights, a refrigerator, and charging stations for devices. This will help you understand the capacity requirements for your battery and solar system. Make sure to design a system that can handle your peak energy usage, especially if you plan to be off-grid.
Choosing the Right Battery and Inverter
For a teardrop trailer, a deep-cycle battery is ideal because it’s designed for prolonged use and can be discharged and recharged many times. Pair this with a powerful inverter that can convert DC power from the battery to AC power for regular household appliances. Ensure the inverter can handle the total wattage of all your appliances simultaneously.
Installing Solar Panels
The game-changer for maintaining power in your teardrop trailer are solar panels. Pick panels with adequate wattage to cover your daily energy needs and that suit your trailer’s roof. One compact approach to use solar energy is to install flexible solar panels that fit the roof of your trailer. Think about using a charge controller as well to control the voltage from the solar panels to the battery and avoid damage and overcharging.
Wiring and Safety Measures
Safe and efficient operation of your teardrop trailer depend on proper wiring. Select strong, premium wire that can be used in cars and outdoors. Direct cables away from moving components and wet locations. Put in circuit breakers or fuses to stop any fires and electrical overloads. Accidents can be avoided and everything can run well with routine inspections and maintenance of the wiring.
Monitoring and Maintenance
Once your teardrop trailer’s electrical and solar systems are in place, implementing a monitoring system will help you keep track of energy consumption and battery health. Regular maintenance checks are essential to ensure all components are functioning correctly and to optimize the system’s efficiency and lifespan.
Integrating a well-planned electrical and solar system in your teardrop trailer not only provides comfort and convenience but also makes your travel sustainable and eco-friendly. With these systems, you can enjoy the great outdoors without sacrificing the comforts of modern living.
Conclusion
A fulfilling undertaking that adds a little uniqueness to your travels is building your own teardrop trailer. Everything from choosing the appropriate materials to putting in cutting-edge electrical systems all helps to create a useful and cozy living area on wheels. Along with gaining a travel companion, building a trailer gives you priceless design and craftsmanship abilities. Your handcrafted teardrop trailer will be prepared to go on many unforgettable adventures with you once it is finished.
If you liked this project, you will also like viewing these easy DIY projects…