Last Updated on November 25, 2025 by teamobn
Project at a Glance
Towing: Lightweight design – can be towed by many small cars
- Project: DIY 4×8 teardrop trailer
- Skill level: Intermediate DIY (basic carpentry + simple wiring)
- Time required: Around 4–6 weekends (80–120 hours)
- Typical cost: ~2,500–5,000 depending on materials and features
- Sleeps: 2 adults comfortably
Why Build Your Own Teardrop Trailer?
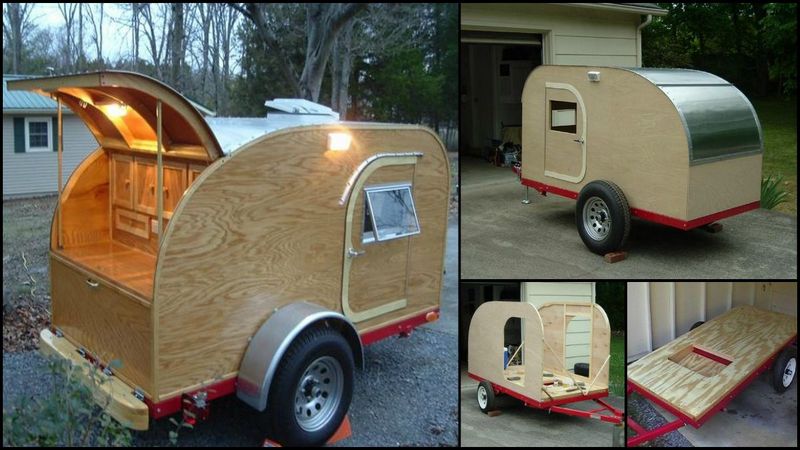
When it comes to road trips and overland adventures, you have lots of options: rooftop tents, simple trailers, or a fully‑equipped RV. A teardrop trailer sits right in the sweet spot. It gives you a compact, comfortable sleeping space and a small outdoor kitchen, without the cost or bulk of a big RV.
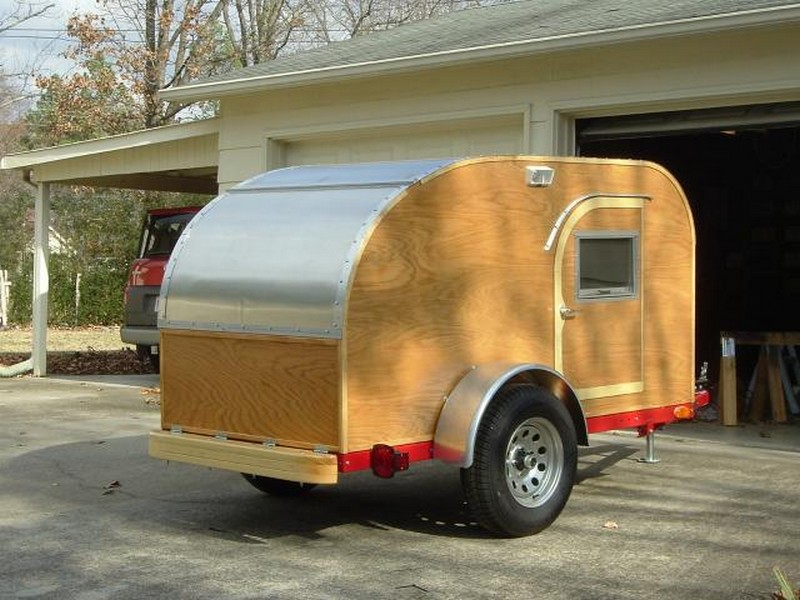
If you love the idea of a tiny home‑on‑wheels but don’t like the price tag, building your own teardrop trailer is a fantastic project. This 4×8 teardrop design sleeps two people, includes a rear galley, and is light enough to tow with many family cars.
In this guide, we’ll walk you through:
- The materials and tools you’ll need
- 11 clear build steps from bare trailer to finished camper
- How to choose the right materials for strength and weight
- Basics of electrical and solar setup
- Answers to the most common DIY teardrop questions

Building a Teardrop Trailer From Scratch
What Materials Do You Need to Build a Teardrop Trailer?
Here are the basic materials you’ll need for a typical 4×8 teardrop trailer build. You can adjust based on your design and budget.
- Trailer bed/utility trailer frame (4×8 ft)
- Aluminum sheet for exterior skin and/or roof
- ¼″ oak plywood (or similar quality plywood) for interior and exterior walls
- Torsion axle (sized to your weight – many builds use around 2,000 lb)
- 14″ wheels and suitable tires
- Bolts, nuts, and washers (grade‑8 or stainless)
- Wood varnish and/or exterior polyurethane
- Rigid insulation for floor and walls (polystyrene or polyurethane foam)
- Lighting fixtures (interior and exterior)
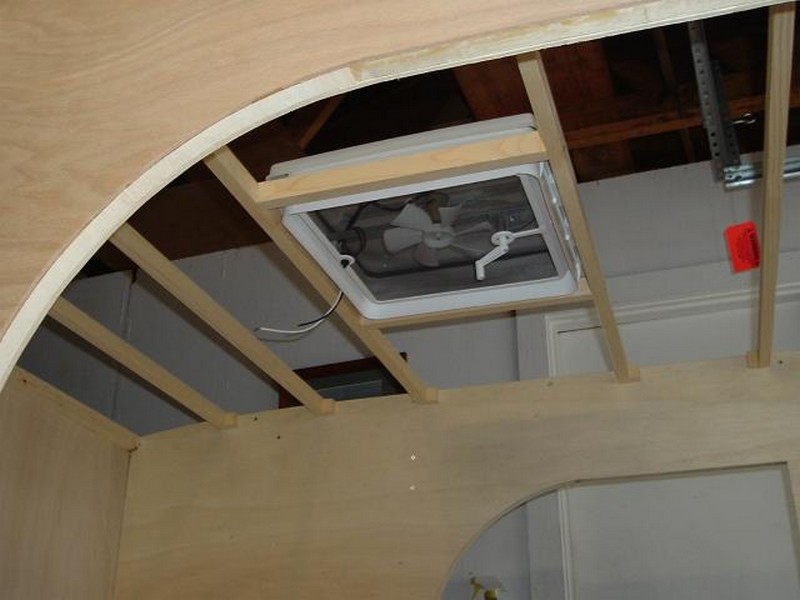
- Small exhaust fan/roof vent
- Hinges and door hardware
- Outlet covers, switches, and electrical wiring
- Sealants and weatherstripping
Tools You’ll Use
- Measuring tape, square, and marker
- Caulking gun
- Power drill and bits
- Pliers, wrenches, and screwdrivers
- Hammer
- Table saw or circular saw
- Jig saw for curves
- Clamps and sanding tools
- Safety gear (gloves, eye and ear protection)
Step‑by‑Step: How to Build a Teardrop Trailer From Scratch
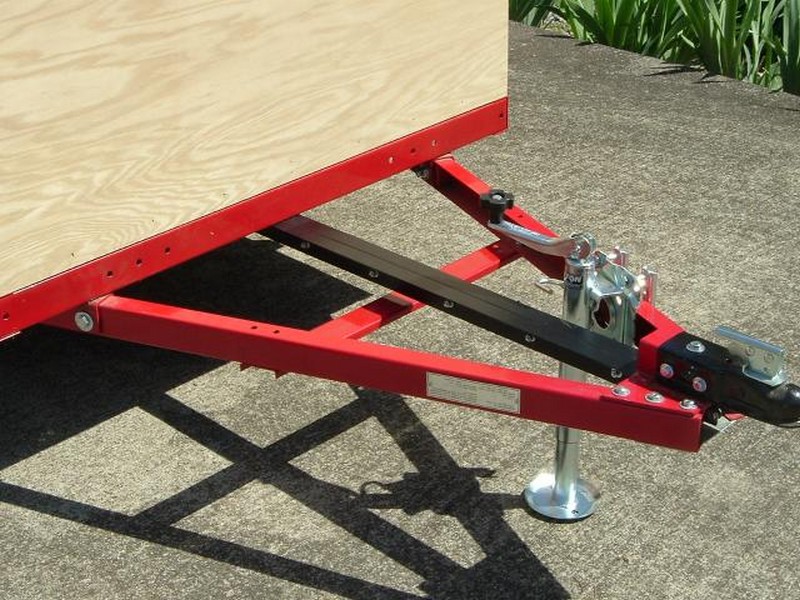
Step 1: Measure Your Trailer and Plan the Build
Before you touch a tool, plan your teardrop.
- Measure the exact dimensions of your trailer frame (length, width, and where cross‑members are).
- Decide the final shape and height of your teardrop sidewalls. A classic profile is a smooth curve from front to back.
- Sketch your interior layout: bed size, storage, and whether you want cabinets or shelves.
- Decide on a basic electrical plan (lights, fan, USB outlets, fridge, etc.).
Good planning here saves a lot of rework later.
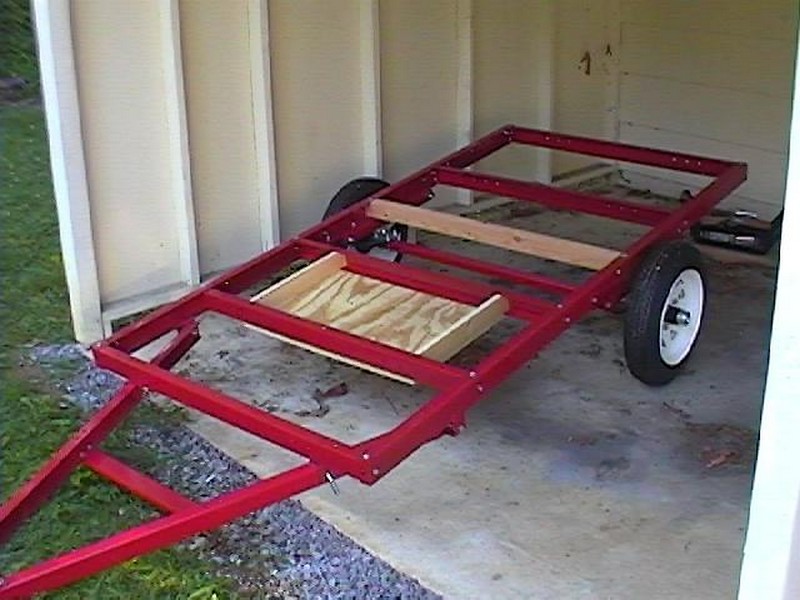
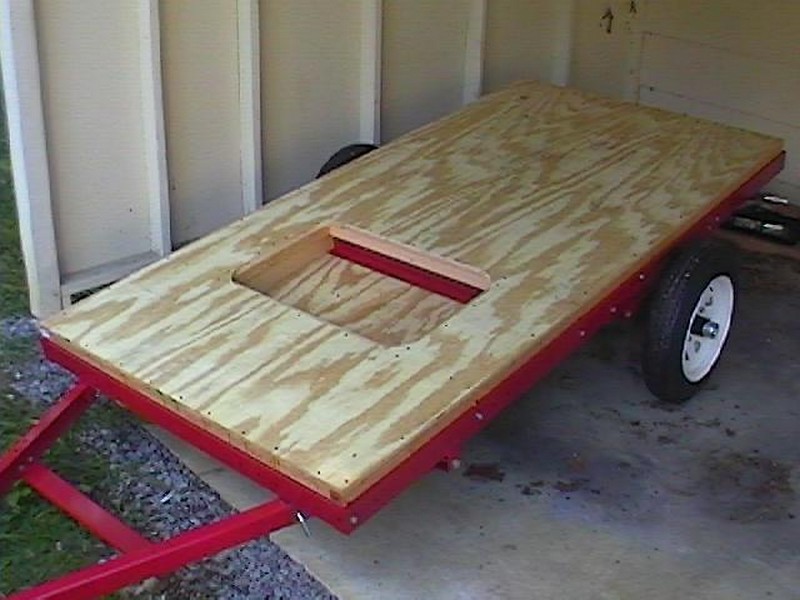
Step 2: Install and Insulate the Floor Deck
Your floor is the foundation of the camper.
- Cut a sheet of marine‑grade or exterior‑grade plywood to match the trailer frame.
- Pre‑drill holes in the plywood so it can be bolted securely to the metal frame.
- Apply rust‑preventing paint or coating to the trailer frame if needed.
- Place rigid foam insulation between the frame members under the floor to keep the cabin warmer and reduce road noise.
- Bolt the floor deck to the frame using strong hardware, making sure it is secure and level.
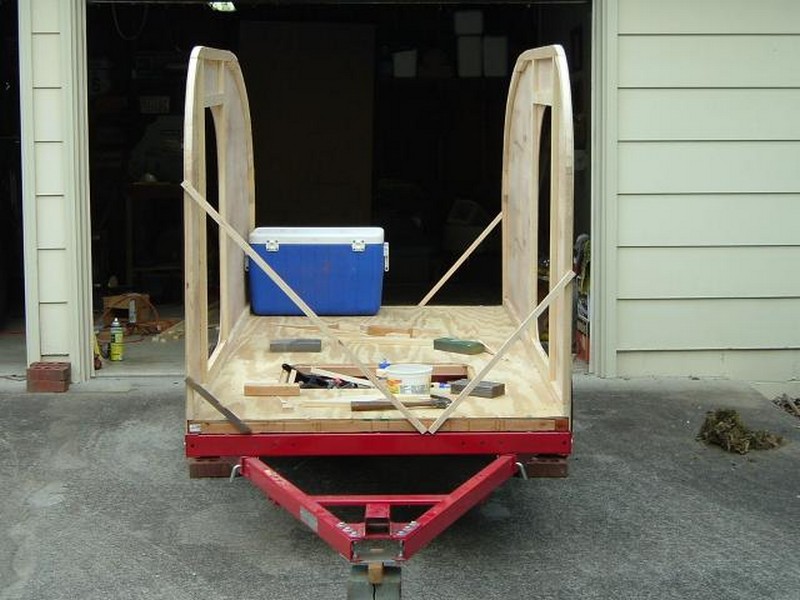
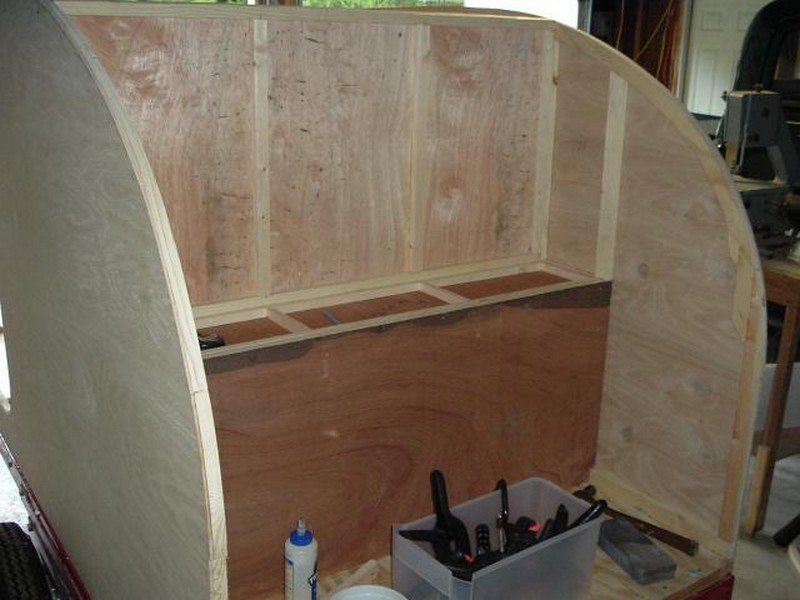
Step 3: Design and Cut the Teardrop Sidewalls
The sidewalls define the look and feel of your camper.
- On ¼″ plywood sheets, draw the full teardrop profile to scale, including door openings.
- Make sure there’s enough interior headroom for sitting and adequate room for airflow and ventilation.
- Cut out the sidewall shapes using a jig saw, keeping your curves smooth and consistent.
- Use the first sidewall as a template to trace and cut the second so they match perfectly.
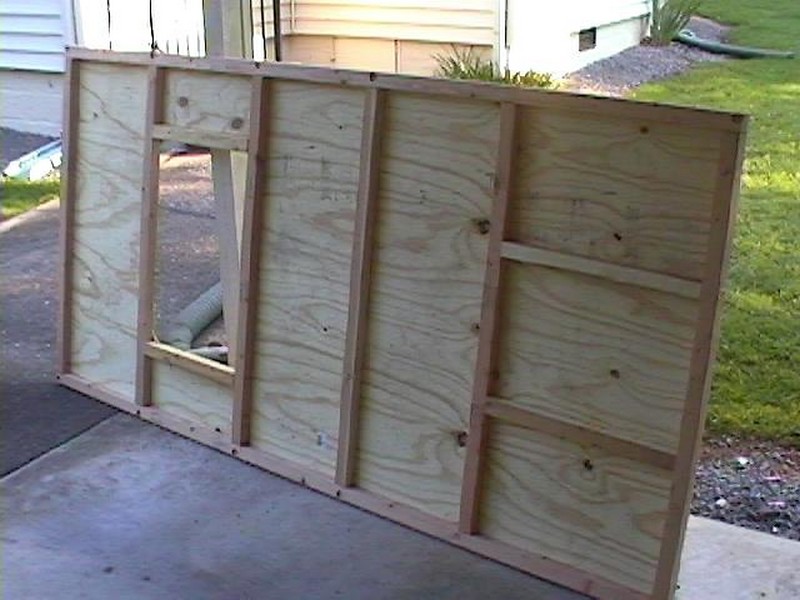
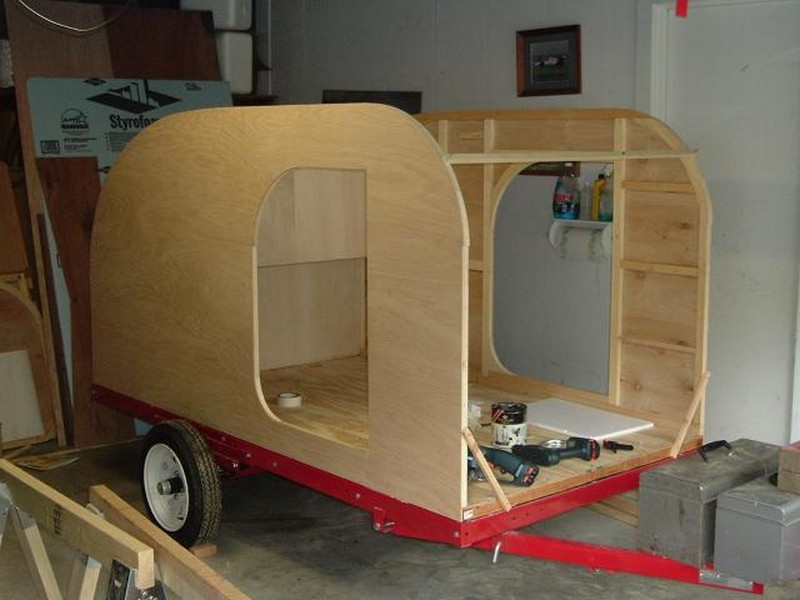
Step 4: Frame and Strengthen the Walls
Once the profiles are cut, it’s time to add strength and structure.
- Attach lightweight framing (such as 1×2 or similar) to the inside of each sidewall to create a cavity for insulation and wiring.
- Plan and mark where studs and blocking will go for doors, windows, cabinets, and shelves.
- Add framing around the door openings for extra strength and a solid place to mount hinges and seals.
- Dry‑fit the walls on the trailer floor to ensure they sit square and plumb.
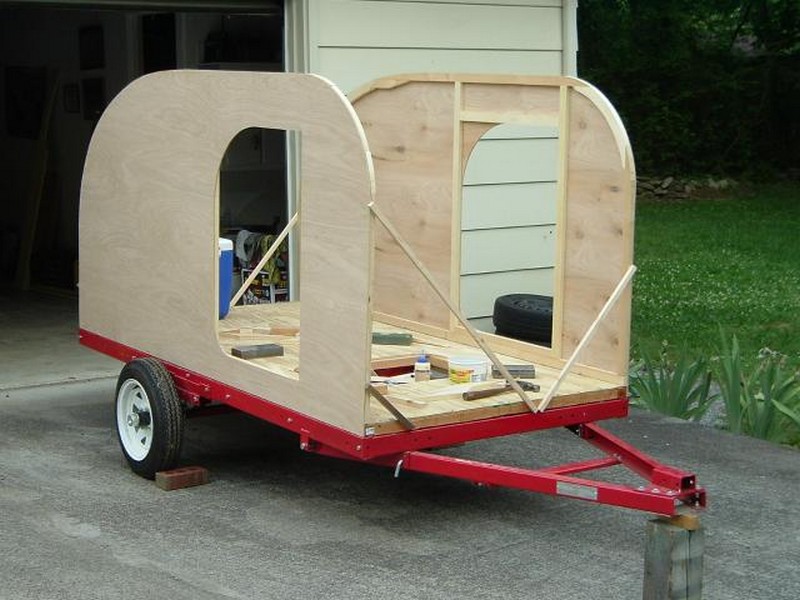
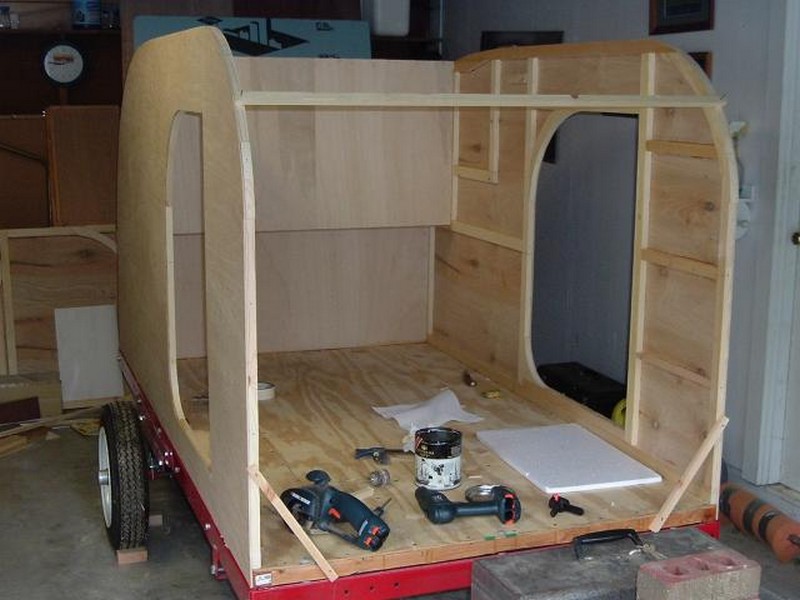
Step 5: Mount the Walls to the Floor
Now your camper starts to take shape.
- Stand each sidewall up on the floor deck and clamp it in place.
- Check for square and alignment front to back and side to side.
- Fasten the walls to the floor using screws or bolts through the framing into the deck.
- Add temporary braces if needed to keep walls stable while you work on the roof and galley.
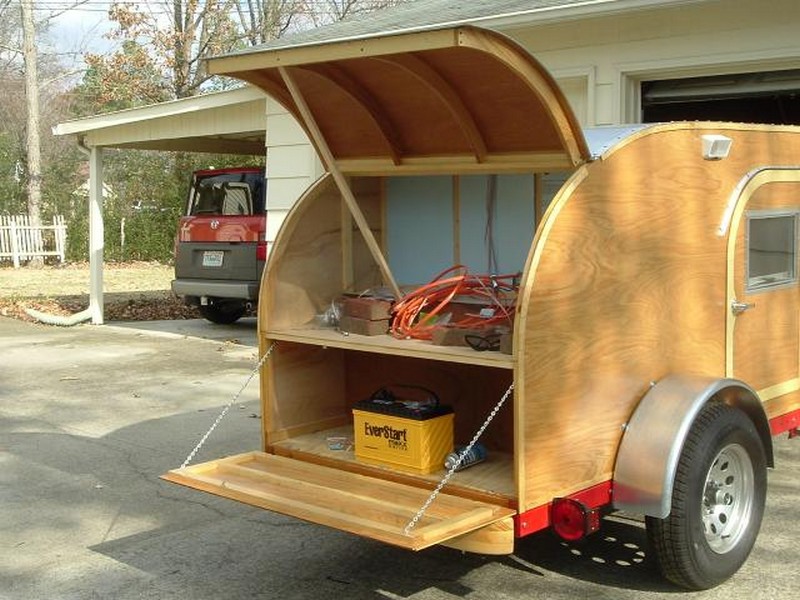
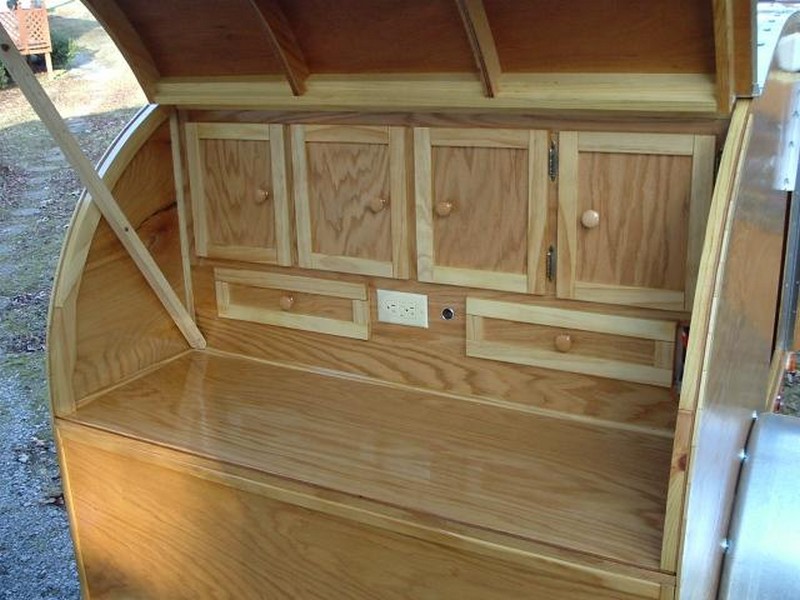
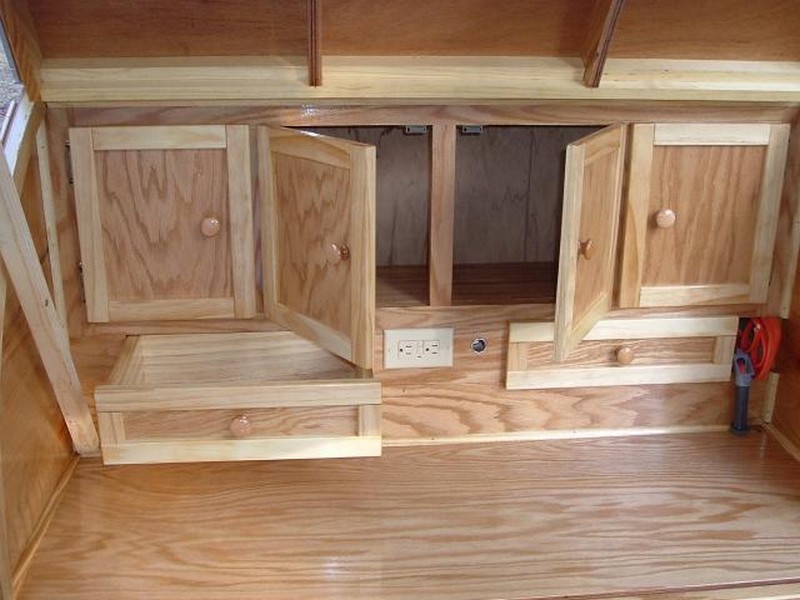
Step 6: Frame the Rear Galley (Hatch Area)
Most teardrop trailers feature a compact kitchen in the back.
- Decide what you want in your galley: shelf space, countertop, sink, stove, or cooler/fridge.
- Build and install a simple frame inside the rear section to support the countertop and storage.
- Set the counter height at a comfortable level for cooking.
- Plan where wiring will run for galley lights and any 12V or 120V outlets.
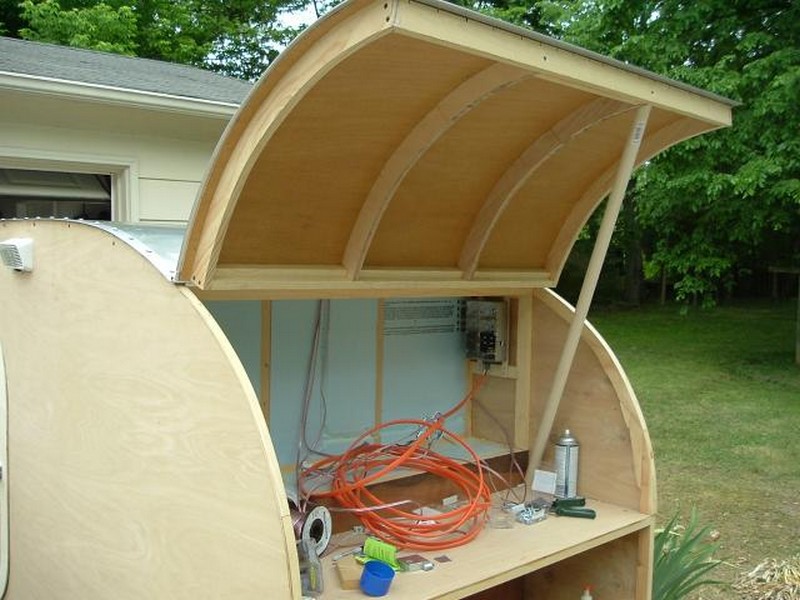
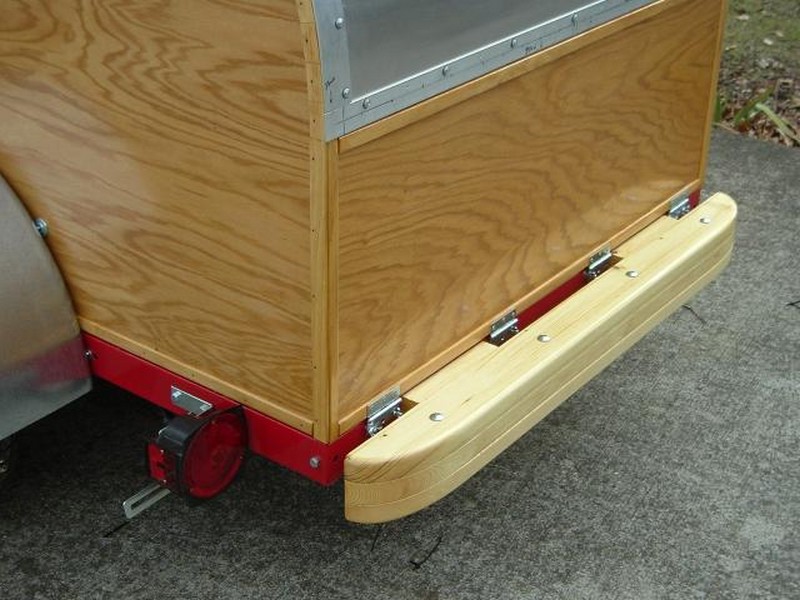
Step 7: Build the Hatch Structure and Gussets
The rear hatch must be strong and well‑supported so it opens and closes smoothly.
- Create hatch ribs or spars (curved cross pieces) that follow the curve of your roof.
- Cut gussets (small triangular or curved pieces) that join the spars to the hatch frame and add stiffness.
- Dry‑fit all spars and gussets so you’re sure the hatch matches the roof profile and closes snugly.
- Once satisfied, assemble the hatch structure with glue and screws.
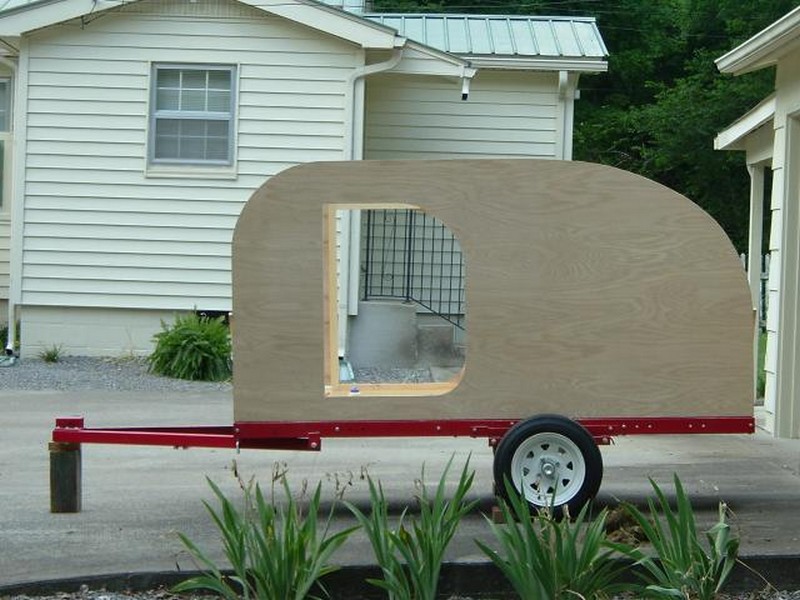
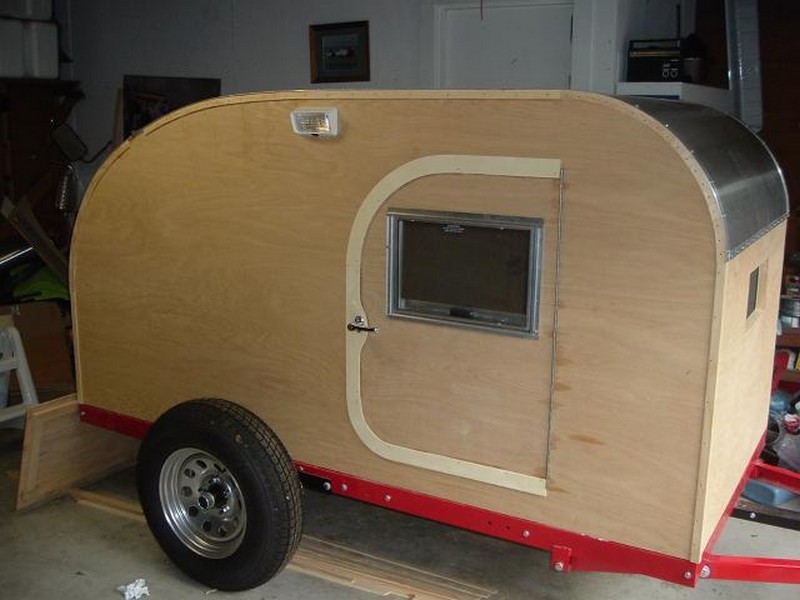
Step 8: Skin and Seal the Hatch Door
Now you turn the hatch frame into a solid, weather‑tight door.
- Cover the outside of the hatch with plywood, carefully following the curve.
- Add an exterior layer of aluminum sheet or other weather‑resistant material if desired.
- Sand the edges smooth and apply sealant along all joints and seams.
- Install weatherstripping around the hatch opening so it seals well when closed.
- Finish the exterior with varnish, paint, or polyurethane to protect against the elements.
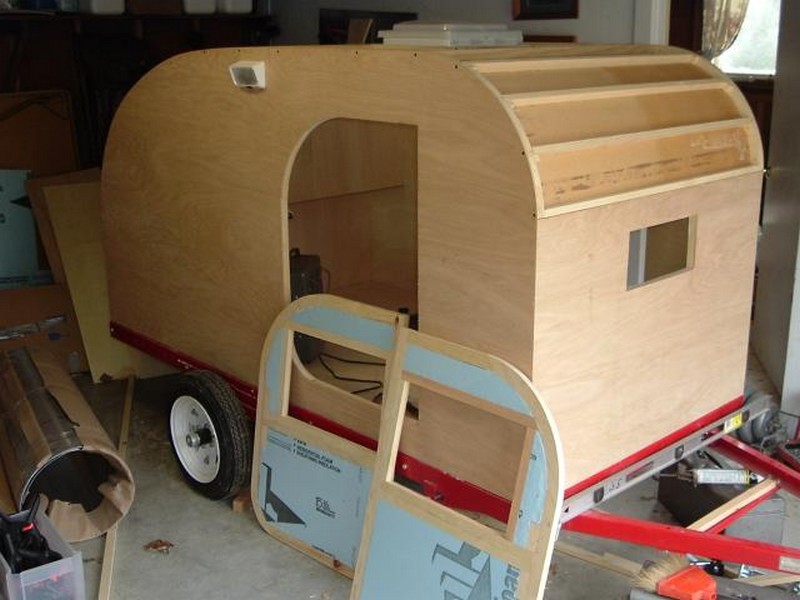
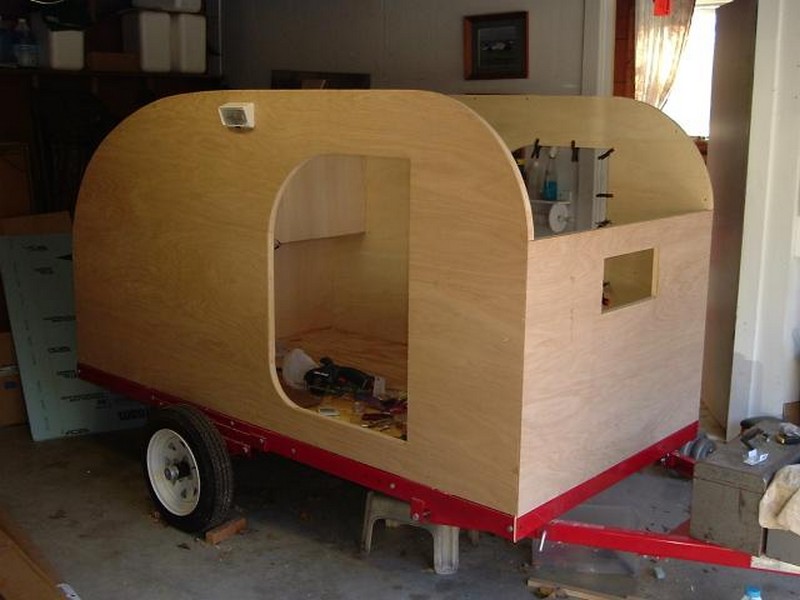
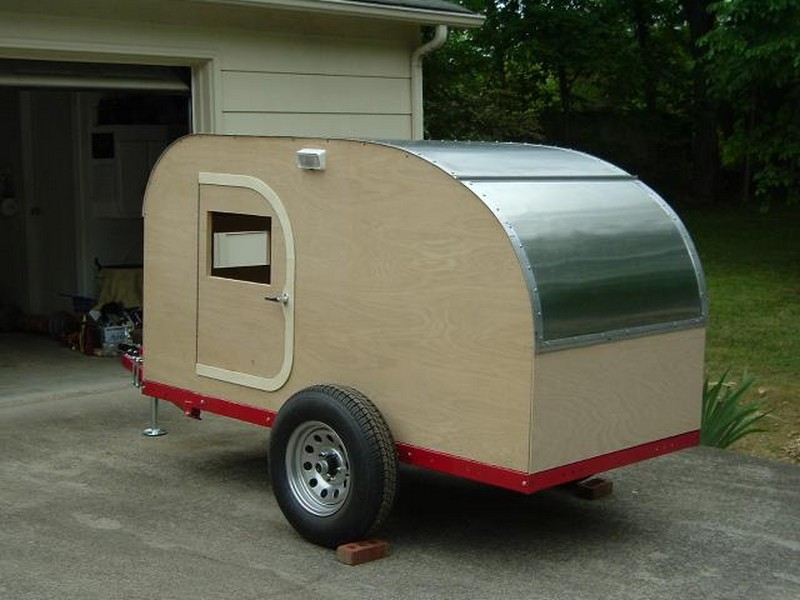
Step 9: Install the Roof and Exterior Skin
The roof ties everything together and protects your work from the weather.
- Install roof spars across the top between the two walls to create the roof structure.
- Add insulation between the spars if you plan on camping in hot or cold climates.
- Bend and attach plywood sheets over the spars to create a smooth, curved roof.
- Cover the roof with aluminum sheet, fiberglass, or another durable skin, fastening carefully and sealing all seams.
- Install a hurricane hinge to attach the rear hatch to the roof so it pivots smoothly.
- Fit a “T‑rail” or “J‑rail” along roof edges to help manage water flow and drainage.
Step 10: Wire the Electrical System and Install Components
A simple, safe electrical system adds comfort and convenience.
- Plan a 12V system with a deep‑cycle battery to power lights, fan, and USB outlets.
- Run automotive‑grade wiring through the wall cavities before closing everything up.
- Install your lights, switches, exhaust fan, and outlets in the cabin and galley.
- If you’re adding shore power or an inverter, mount them in a protected, ventilated location.
- Consider adding solar panels on the roof or a portable setup to keep your battery charged off‑grid.
- Always use fuses or breakers and follow basic electrical safety practices.
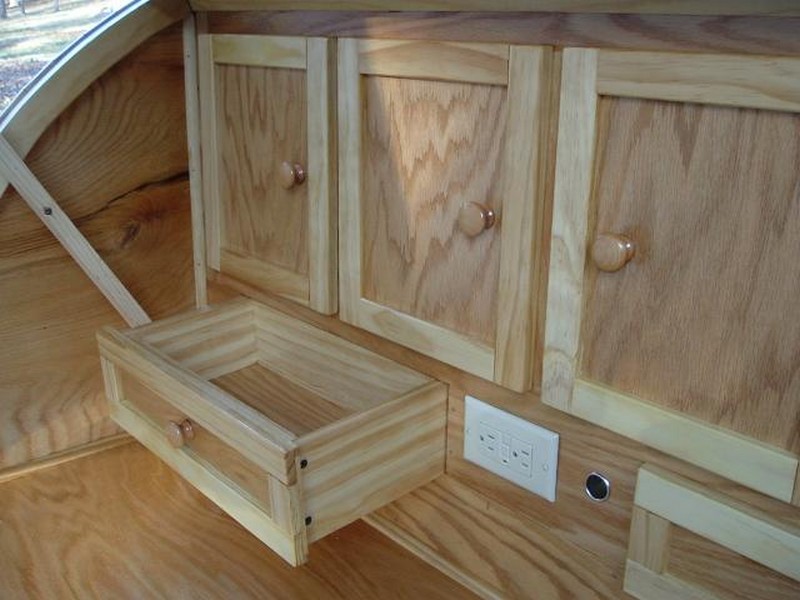
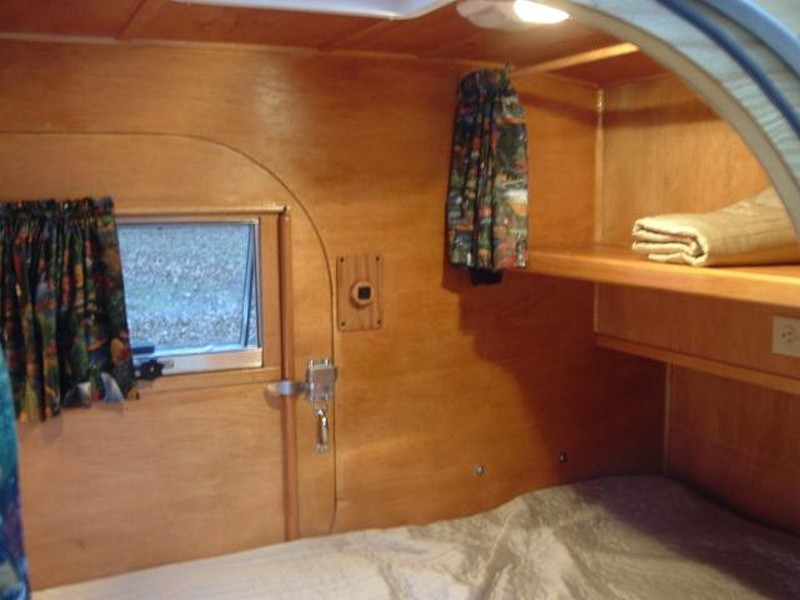
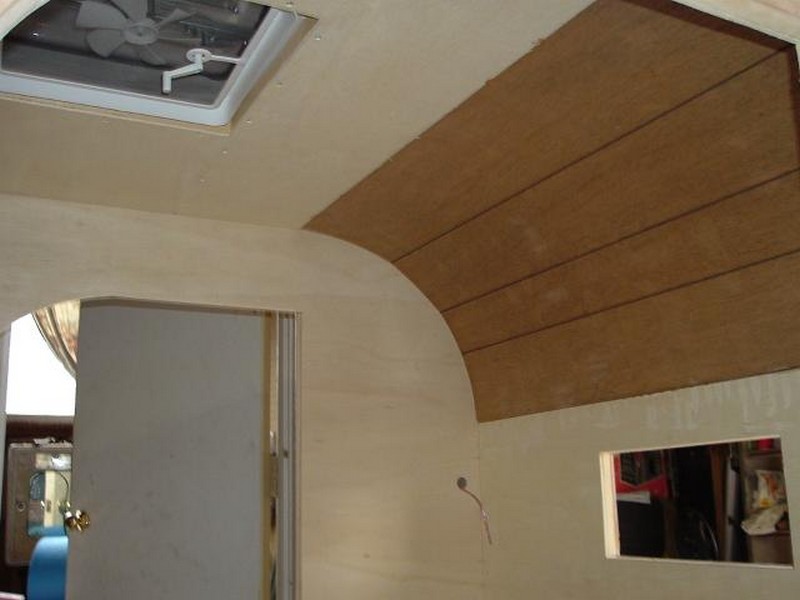
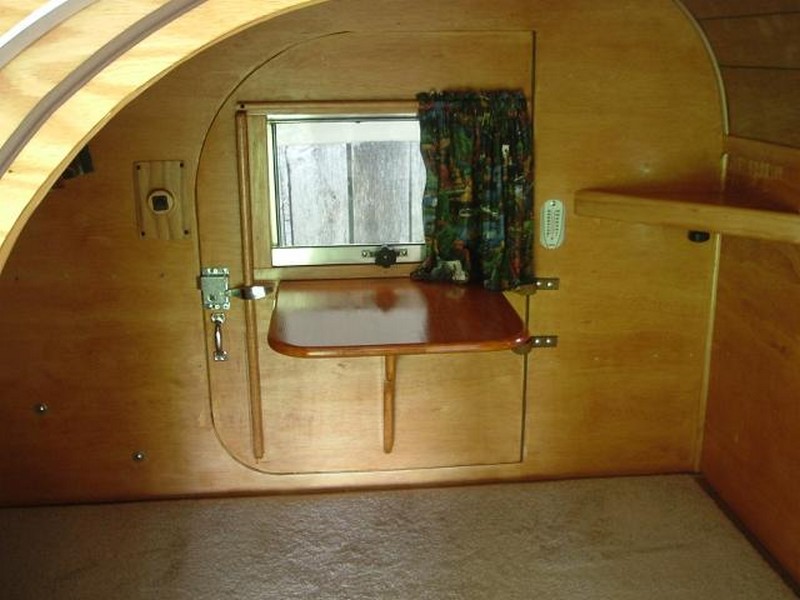
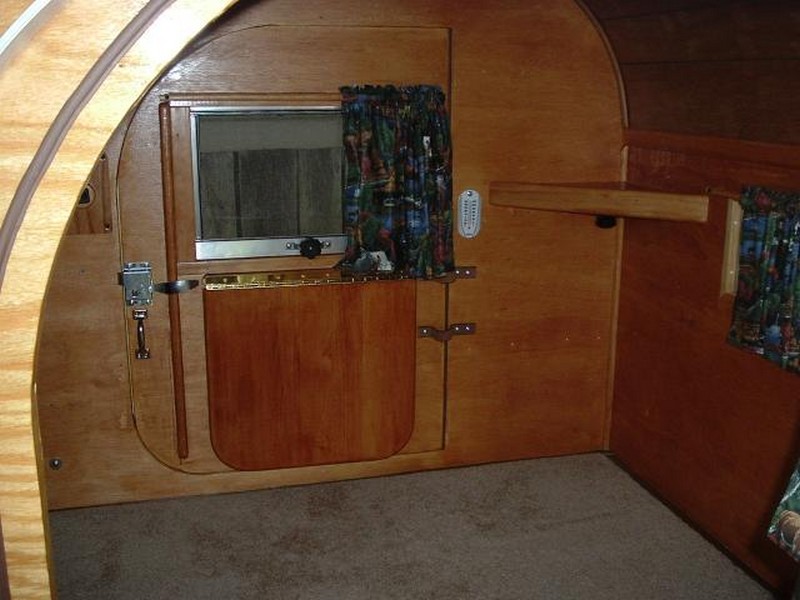
Step 11: Finish the Interior and Final Details
Now it’s time to make the space cozy and road‑ready.
- Install interior paneling over the framed and wired walls and ceiling.
- Build simple cabinets, shelves, and cubbies for clothes, bedding, and gear.
- Add a mattress sized to your 4×8 floor and any trim pieces to cover exposed edges.
- Seal and finish all wood surfaces with varnish or polyurethane for durability.
- Check that the hatch, doors, and windows open, close, and seal properly.
- Do a full safety check: lights, wiring, bolts, latches, and trailer connections before your first trip.
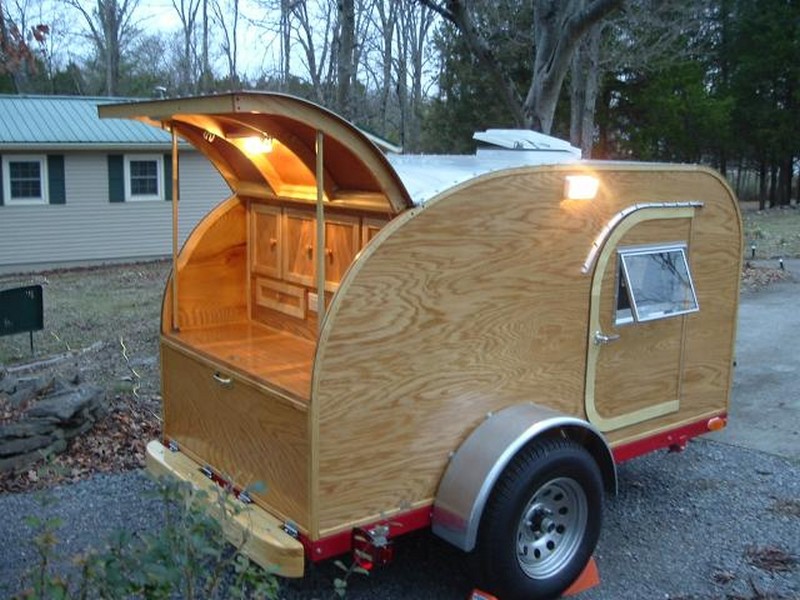
Once you’re done, you’ll have a unique, hand‑built teardrop camper ready for countless adventures.
Click on any image to start the lightbox display. Use your Esc key to close the lightbox. You can also view the images as a slideshow if you prefer 😎


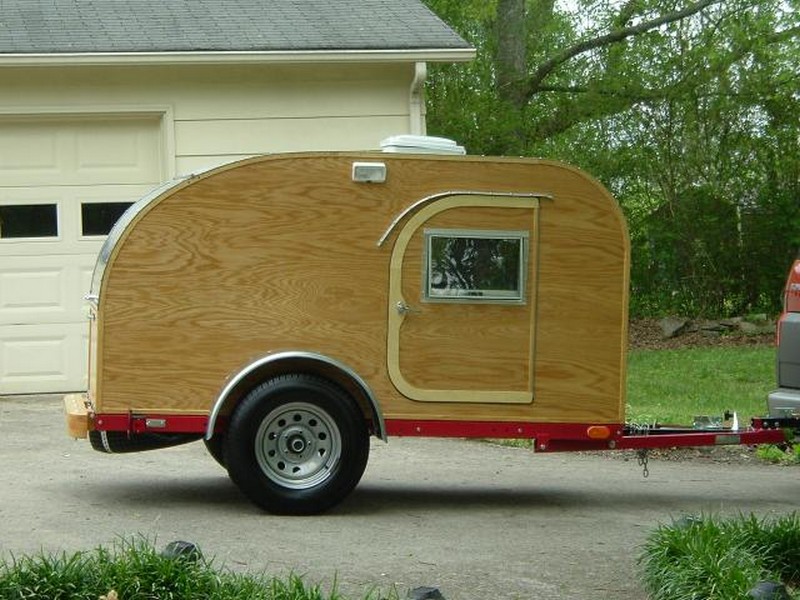
Thanks to Truck with a Heart for this great project. You can get more details about this project here…
You can get the detailed step-by-step for this project here…
Choosing the Best Materials for a Teardrop Trailer
Choosing the right materials is crucial. They affect your camper’s weight, durability, and towing safety.
Frame: Aluminum vs Steel
- Aluminum
- Lightweight, resists rust, great for fuel economy.
- Ideal if your tow vehicle has limited towing capacity.
- Steel
- Strong, often cheaper, commonly used in utility trailers.
- Heavier and needs rust protection (paint, primer, undercoating).
Many DIY builders start with a pre‑built steel utility trailer and then protect it well against rust.
Walls and Insulation
- ¼″ oak plywood or similar is popular for walls because it’s strong and easy to cut and finish.
- Composite panels (plywood + foam + thin skins) can further reduce weight while improving insulation.
- Insulation: rigid foam (polystyrene or polyurethane) is light and helps keep interior temperatures comfortable, reducing condensation and noise.
Flooring
- Marine‑grade plywood is ideal for the floor: very durable and moisture‑resistant.
- On top of the floor, many builders add vinyl flooring or a durable laminate that’s easy to clean and maintain.
Roofing and Exterior Skin
- Aluminum sheet is the classic choice: light, rust‑resistant, and good‑looking.
- Fiberglass or reinforced plastic panels can also work, though they may add a bit more weight.
- Carefully sealed seams and quality coatings are essential for long‑term weather protection.
Hardware, Sealants, and Adhesives
- Use stainless hardware wherever possible, especially in damp climates.
- Prevent corrosion between dissimilar metals with appropriate washers and sealants.
- Seal all joints with quality sealants and tape or trims on roof seams.
- Use strong adhesives suited to wood, foam, and metal for lasting bonds.
Setting Up the Electrical System and Solar for Your Teardrop Trailer
A simple, reliable electrical system can make your tiny camper feel like a tiny home.
Planning Your Power Needs
- List the items you plan to power: interior lights, fan, phone chargers, fridge, water pump, etc.
- Estimate how many hours per day each device will run to get a rough power requirement.
- This will guide your choice of battery size and solar panel wattage.
Battery and Inverter Choices
- A deep‑cycle battery (AGM or lithium) is best because it’s designed to be discharged and recharged many times.
- If you want to run standard household outlets, you’ll need an inverter to convert 12V DC to 120V AC.
- Make sure the inverter’s wattage is higher than the combined load of the devices you’ll run at the same time.
Solar Panel Setup
- Roof‑mounted or portable solar panels keep your battery charged when you’re off‑grid.
- Use a solar charge controller between the panels and the battery to prevent overcharging and damage.
- Flexible panels can work well on curved roofs, while rigid panels are often more efficient and durable.
Wiring and Safety
- Use properly sized wire for all circuits and keep it protected from sharp edges and moving parts.
- Install fuses or circuit breakers close to the battery and on major circuits.
- Regularly inspect connections for corrosion or wear.
A well‑planned electrical and solar setup lets you enjoy lights, cooling, and power for devices without needing a generator.
Conclusion
Building your own 4×8 teardrop trailer is a deeply satisfying project that turns a basic trailer frame into a cozy, mobile retreat. From choosing the right frame and materials, to constructing the walls and hatch, to wiring up lights and solar power, every step teaches valuable skills and lets you tailor the camper to your family’s needs.
With careful planning, realistic expectations about time and cost, and attention to safety, you’ll end up with a compact camper trailer that’s truly yours, ready to follow you on many unforgettable adventures.
Frequently Asked Questions: Building a Teardrop Trailer From Scratch
- Is it cheaper to build or buy a teardrop trailer?
- It’s usually cheaper to build a teardrop trailer than to buy a new one, especially if you already own some tools. A basic DIY build often costs around \2,500–2,500–\\2,500–5,000, while many new teardrops cost significantly more. That said, your total cost will depend on your material choices and how many extras you add.
- How long does it take to build a DIY teardrop trailer?
- Most first‑time builders spend 4–6 weekends (roughly 80–120 hours) from bare trailer to finished camper. Complex electrical systems, custom cabinetry, and high‑end finishes can add more time. Working slowly and safely is more important than rushing.
- What size trailer frame is best for a teardrop camper?
- A 4×8 ft trailer frame is one of the most popular sizes for teardrop builds. It’s easy to tow and park, but still large enough to sleep two adults comfortably. Larger frames (like 5×8 or 5×10) give you more interior room and storage but will weigh more and require a stronger tow vehicle.
- What is the best material for the camper trailer frame?
- Many DIYers start with a steel utility trailer frame because it’s affordable and strong. Aluminum frames are lighter and resist rust better, but are usually more expensive. Whichever you choose, be sure it can safely handle the weight of your finished camper plus gear.
- How can I waterproof my DIY teardrop trailer?
- Waterproofing starts with good design and careful sealing. Use weather‑resistant materials like aluminum or fiberglass on the exterior, quality sealants on all seams and edges, and proper weatherstripping around doors and the hatch. Regularly inspect and maintain these seals to keep water out over time.
- What type of insulation works best for a teardrop trailer?
- Rigid foam insulation (such as polystyrene or polyurethane foam) is a popular choice because it’s light, easy to cut, and offers good thermal performance. It helps keep your camper more comfortable in both hot and cold weather and reduces condensation and noise.
- Can I add solar power to my DIY teardrop trailer?
- Yes. Many DIY teardrop builders add solar panels to keep their battery charged for lights, fans, and devices. A simple system includes one or more panels, a charge controller, a deep‑cycle battery, and an optional inverter. Solar lets you camp comfortably off‑grid without needing hookups.
- What are some common mistakes to avoid when building a teardrop trailer?
- Common mistakes include underestimating weight, not allowing enough ventilation, and doing unsafe wiring. Over‑building with heavy materials can strain your tow vehicle and reduce fuel economy. Poor ventilation leads to condensation and potential mold. Take your time with electrical work and always use fuses, proper wire sizes, and solid connections.
If you liked this project, you will also like viewing these easy DIY projects…