Last Updated on January 31, 2025 by teamobn
Have you ever been in an accident where you thought you won’t be able to recover? Well, check out the inspiring story of Con Trelos.
OBN Member, Con Trelos, was in a major motorcycle accident in March 2010. A truck cut him off on a roundabout. He hit the driver’s side door and landed on the road.
Instead of the truck driver stopping, he attempted to run over the top of Con Trelos to try and escape. Con Trelos ended up with the front driver’s side tyre on his hip, pinning it down and being dragged along the road. Then the driver stopped, reversed, and tried going over the top of him again! In Con Trelos’ own words:
“I was conscious throughout the whole ordeal and did my best to try to stay alive. In total, I was dragged for more than 20 metres as the truck driver tried to escape. Luckily other drivers finally caught up to the roundabout and the truck driver decided to abandon his escape plans but with me still pinned under the wheel!
I spent a week or so in hospital and a further two weeks in rehab trying to learn how to stand up and walk again. I then spent the next two years building up enough strength in my right leg, hip and back to walk up a single flight of stairs. As someone who had a very active life, the most difficult part about the accident was not being able to do the things I use to do without a second thought.
I was constantly pushing the limits of what I was able to do, trying to stay active and productive by fixing up the house bit by bit….. until there was nothing left to do except the front garden. I figured it would be a great idea to not only fix the front garden, but the outside labour would further help get the muscles moving and build up my strength again.

It started off with a crazy idea. I would constantly hear people saying “Build a bridge and get over it” so I figured – Why not actually build one?
I had always been a big fan of Japanese Gardens. There was always something magical about the use of water features, landscaping, and the serenity of it all. I’ve also always been fascinated by ancient civilizations and wanted to try and create a garden that incorporated both elements.
Con Trelos’ bridge and water feature project!
And so, the project began :
Step 1 – Find a neglected front garden 😀
As you can see, mine looked like a bushland area, unusable and completely covering the front of the house. I started off by marking where I wanted to build the bridge, cleared out all the plants, trees and shrubs in its path.

Step 2 – Get all your materials organised
This is my bridge, for my garden. Yours is sure to be different. But once you make the decision on what and where, work out your materials list and negotiate a job price. I got all the material together, sanded it all back, primed and gave it all 2 coats of paint.
It’s easier to touch up after the job than it is to try to paint the finished project. Proper sealing is important given the constant exposure to moisture and humidity.

Step 3 – Dig out the post holes and set the posts in
The pond was originally built by my father years prior. The pond had cracked back in 2009. Take note of the spa bath sitting in the corner. We had renovated the house and pulled the spa bath out as it was no longer wanted. We had taken the fish & water lilies out of the pond and had them in the spa bath for over 3 years. Now I finally got around to fixing the cracks in the pond and filled it all back up.
There is a 3-metre span between the two posts on either side of the pond, so heavy-duty beams were needed to carry the weight of people walking over that span. Each beam is 6 meters long which would go from the front entrance and across the pond.
I had to break some of the bluestone rocks around the pond, otherwise, the bridge would have ended up being too high for the rest of the house. Once the posts were set and the beams were bolted to the posts, I repaired the broken rocks by making some concrete and sealing up the holes left over.


Step 4 – Boxing up the sitting area, put extra posts in the middle with support beams. Fastened the first row of posts over the pond and started on the decking.

Step 5 – The water feature
If you remember the spa bath in the earlier photos….. I cut the rim off the Spa back and set it in place next to the deck area. I screwed the edge of the spa back to the beam of the deck. I then made two triangular blocks, secured those to the beam and screwed the spa bath into those blocks as well. Together with the concrete, I put under the spa bath, it was secure enough in place so that it would not move.
On the left side of the spa back, I bought rocks and built them up from the garden bed so that it looked like a natural rock formation. Altogether, having screwed in the spa to the deck along with the rocks and concrete used to hold it all together, the spa was set in its place for life.
The difficult part was making the front look like a natural rock formation without using actual rocks. I decided to use expansion foam (as you can see above). It took a few attempts to actually fill in the gaps, and build it out as you see above. I also used Slate Tiles to build the water wall you can see behind the spa bath.
I shaped the expansion foam and used the Rubber Tile Glue to give it that rough, rocky look and feel. The rubber glue meant that it would expand and contract throughout the seasons without cracking. You have to be careful with it though as to not put it on too thick. The glue was applied in layers. The photo you see above is after 5 layers of glue/render. I attached a water pump and this is the end result.

And this is the decking area and bridge completed. As you can see, I went for the Japanese-style railing and colour scheme. I left the post sticking up in the background (the one behind the lady sitting down) because I want to find an old-style light fixture to place on top of it. I will also get a solar light to place inside the fixture to provide light during the early nights.

This was an old park bench we found that I ended up restoring. I deliberately made the width of the deck the exact size of that very park bench. I decided to make it the same colour as the deck so that it would blend in. I didn’t want to make it a feature on its own.

I ended up having a problem with the top of the wall feature. It ended up leaking and the water wouldn’t flow the way I wanted it. Instead of flowing down the slates, it would flow over them and water ended up splashing everywhere. I came up with this idea based on the following experiment :
When water comes out of a hose, it shoots upwards because of the pressure of the water. If you attach a bottle to the end of the hose and fill it with water first, the water would flow over the bottle and fall straight back down.
Even if you turn up the pressure, the water still wouldn’t shoot upwards. I decided to box up the top of the wall to create that “bottle” effect. The outflow pipe is hidden in this photo, but the idea was that it would fill up this area and flow down the front of the wall. Once it was finished and put to the test the first time, it actually worked. I increased the water flow to the wall and ended up with a beautiful, relaxing water-running sound.
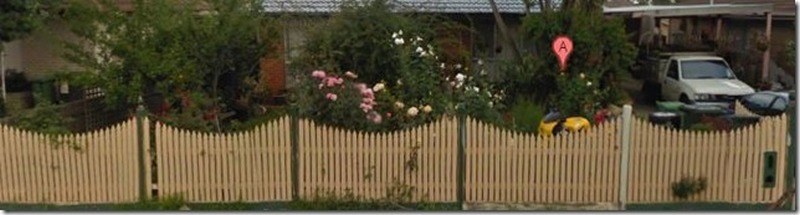
Once I felt it was ready, I pulled down the front fence and opened the garden up to the rest of the world 😀

This is how the front garden looks now. It’s still a work in progress. The pump I have at the moment is too powerful for the water wall. I ended up having to put a ball valve to control the water flow to the top of the wall. At present, it is about 40% of the water going up, with the remaining water flowing directly into the spa bath /rock pool.
I will eventually completely re-do the water-wall feature. Instead of being completely vertical, I will redesign it on a 10-degree back-leaning angle so that I can put 100% of the water flow to the top of the wall and have it all flow downwards from there. It will enhance the acoustic effects. I will also design it in a way that it will look like a natural waterfall, but without the ‘splash’ at the bottom.
All this has taken me just over 18 months so far. I am taking a small break to let the body recover before starting on it again. The finished product will end up having a full waterfall, grass instead of the bark, and an old-style water tap. You can probably see the old-style concrete tap in a few of the photos. It is one of those Tap & Bucket concrete features which I hope to modify and put as a permanent fixture as a front tap. It already has a hose through it to allow water to flow through.
Being concrete (no moving parts), I can fix a nozzle to the front of it to that you can attach a garden hose. I can connect the bottom of the pipe to the existing front pipe to allow water to flow through it. All I need is to figure out a way of installing the actual tap so that we can turn the water on and off. Give me some time and I will come up with a way.
I hope you enjoyed sharing my experience. If you have any questions or suggestions, I’d love to hear from you.
Con Trelos – trlos[at]tpg.com.au


