Last Updated on December 17, 2025 by teamobn
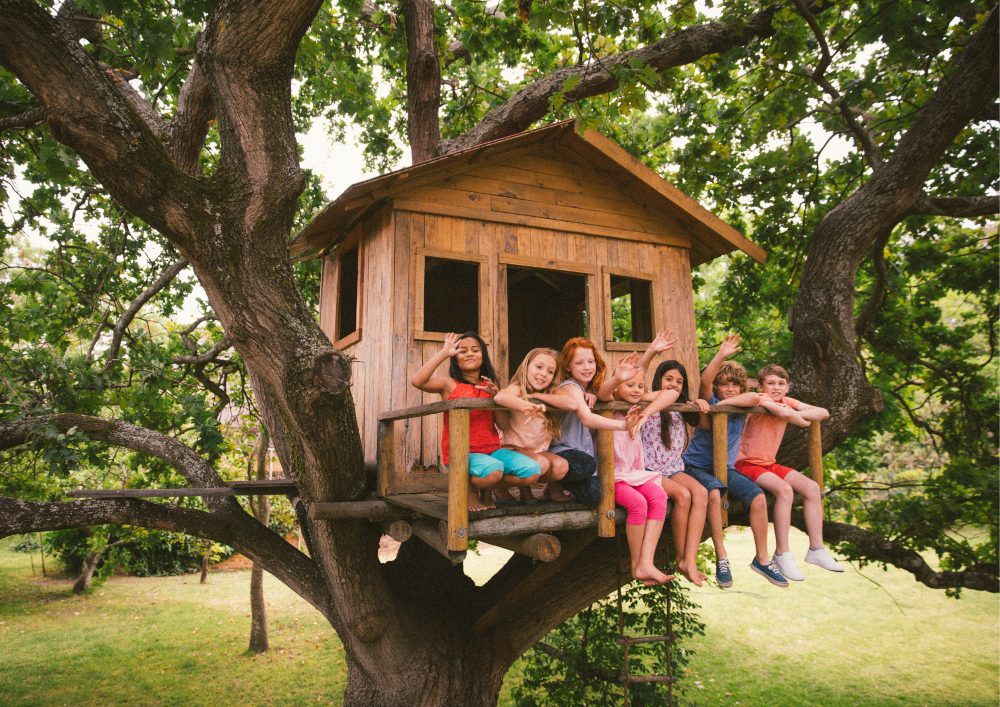
Building a DIY treehouse is like crafting a family heirloom. It’s not just wood and nails; it’s a canvas for childhood memories and a peaceful escape for adults. Imagine the laughter, the quiet moments, and the adventures that await in your backyard retreat.
This guide is your toolbox for turning that dream into a reality. We’ll guide you step-by-step, from the early planning to hanging up the curtains in your finished DIY treehouse. Safety and thoughtful planning are our top priorities to ensure your treehouse is beautiful, safe, and enduring.
Contents
- 1 How to Prepare Before Building a DIY Treehouse
- 2 How to Plan Your DIY Treehouse Design
- 3 How to Build a Strong Treehouse Base
- 3.1 How High Should a Treehouse Be Off the Ground
- 3.2 How to Attach Support Beams to a Tree
- 3.3 How to Level the Base
- 3.4 How to Install Treehouse Floorboards
- 3.5 How to Build Treehouse Walls and Roof
- 3.6 How to Attach Treehouse Walls to the Base
- 3.7 How to Choose the Right Roof Style for a DIY Treehouse
- 3.8 How to Install Treehouse Roofing
- 3.9 How to Waterproof and Insulate a Treehouse
- 3.10 Treehouse Safety: Railings, Access, and Lighting
- 3.11 How High Should Treehouse Railings Be
- 3.12 How to Build a Safe Treehouse Entry and Exit
- 3.13 How to Test Treehouse Structural Integrity
- 3.14 How to Light a Treehouse Safely
- 4 Decorating Your Treehouse
- 5 Treehouse Access Ideas: Slides, Rope Bridges, and Cargo Nets
- 6 Conclusion
Quick Answer: How to Build a DIY Treehouse
- Choose a healthy tree such as an oak or maple with a trunk at least 12 inches (30 cm) in diameter and located away from power lines.
- Check local building codes and get any required permits before you start.
- Plan your design. Decide the platform height, usually 6 to 10 feet off the ground, and how you will access the treehouse such as a ladder, stairs, slide, rope bridge, or cargo net.
- Gather tools and materials. Use pressure-treated lumber, lag screws, support brackets, floorboards, railings, and basic carpentry tools.
- Build the base. Attach strong support beams to the tree, level the platform, and install floorboards.
- Add walls and a roof to protect from wind, rain, and sun. Use weather-resistant materials and a simple pitched roof.
- Install safety features such as secure railings, safe entry and exit, non-slip steps, and good lighting.
- Decorate and personalize the treehouse with a theme, comfortable seating, storage, and play elements like slides, rope bridges, or cargo nets.
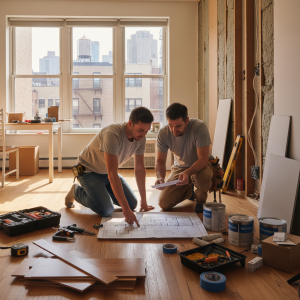
How to Prepare Before Building a DIY Treehouse
Before you grab your hammer, the prep stage lays the groundwork for the entire project. This is where you choose the tree, check legal requirements, plan your design, and gather tools. Being careful now makes the build smoother and helps your DIY treehouse last longer.
How to Choose the Right Tree for a Treehouse
Finding the right tree is like choosing the foundation for your family’s small home in the sky. It sets the stage for everything that follows.
Pick a sturdy, mature tree such as an oak or a maple. These species are usually strong enough to handle the weight of a small backyard treehouse. Aim for a trunk that is at least 12 inches in diameter with solid bark and branches that look straight and strong.
Pay attention to the health of the tree. Signs like discolored leaves, crumbling bark, or large dead branches can signal disease or weakness. This tree is not just scenery. It is a key safety support for your family.
Location also matters. A good tree gives some shade, a pleasant view, and a safe distance from power lines, fences, and neighboring buildings. Make sure you have a clear path to the house for snacks and supervision.
Talking to a local arborist is a smart idea, especially for larger or older trees. An arborist can confirm if the tree is a good match for your project and advise you on how to avoid damaging it.
Do You Need a Permit to Build a Treehouse
Before you start construction, contact your local council or municipality to ask about building codes and permits for treehouses. Skipping this step can sometimes lead to fines or even being told to dismantle the structure.
Rules vary by area, but common requirements may include:
- Limits on height
- Minimum distance from property lines
- Rules about overlooking neighbors
- Structural guidelines similar to those used for small decks
If you need a permit, submit your basic plans and wait for approval before your build weekend.
How to Plan Your DIY Treehouse Design
Designing your treehouse is where you decide what makes it uniquely yours. Start simple. Think about:
- Size of the platform
- Shape of the floor
- Number and size of windows
- Whether you want a balcony or a small deck
- How people will get in and out
Match your design to the shape and size of the tree. A treehouse that fits around the trunk and main branches will feel like a natural part of the tree instead of a heavy add-on.
Begin with a simple sketch on paper, then turn it into a more detailed plan with measurements. This plan will guide your cuts and your materials shopping list. Often, simple designs are easier to build and safer to maintain, and they still feel magical to kids.
Tools and Materials Needed for a DIY Treehouse
Having the right equipment ready saves time and frustration.
Basic materials for a simple DIY treehouse
- Pressure-treated lumber for support beams and floor joists
- Exterior grade plywood or deck boards for the floor
- Framing lumber such as 2x4s for walls and roof
- Roofing material such as metal sheets, asphalt shingles, or similar
- Exterior grade screws, lag screws, and structural brackets
- Railing posts, balusters, and top rails
- Materials for access such as ladder pieces, stair stringers, or slide and rope bridge kits
Essential tools
- Tape measure, carpenter’s level, and framing square
- Handsaw or circular saw
- Power drill and drill bits
- Hammer or nail gun
- Socket set or impact driver for lag screws
- Safety gear such as gloves, safety glasses, and hearing protection
It is important not only to own these tools but also to know how to use them safely. Consider using lighter power tools with ergonomic grips to reduce fatigue and improve control.
How to Allow for Tree Growth
One often overlooked part of building a DIY treehouse is the future growth of the tree. Trees continue to grow outward and upward, which can affect the structure over time.
Plan some space around the trunk and branches so the wood has room to expand. For example, leave a small gap around holes for bolts and do not box the trunk in tightly with boards.
Some builders use adjustable supports or special treehouse attachment bolts that can be adjusted as the tree grows. If you are unsure, talk to an arborist about how your chosen tree species grows and how to build in a way that is kind to the tree.
How to Build a Strong Treehouse Base
With a well-chosen tree and a clear plan, it is time to build the base. This step is the backbone of your project. A strong and level base makes everything else easier and safer.
How High Should a Treehouse Be Off the Ground
Positioning the platform closer to the base of the tree makes the structure more stable and reduces stress on both the tree and the fixings.
For most family treehouses, a height of 6 to 10 feet off the ground is a good range. It feels special for kids, but is not so high that a fall would likely be severe. Always consider the age of the children who will use the treehouse.
Measure carefully and account for uneven ground or roots. Use temporary supports to hold beams in place while you adjust and secure them. Before moving on, double-check that the platform height and level are correct.
How to Attach Support Beams to a Tree
Support beams are what hold your DIY treehouse off the ground, so they must be solid and secure.
- Use strong, pressure-treated beams sized appropriately for the span and load.
- Attach beams to the trunk with large lag screws or specialized treehouse attachment bolts.
- Pre-drill holes to avoid splitting the wood and to make installation easier.
Space the beams evenly and use a level to ensure they are horizontal. Once they are attached, test them by carefully applying your weight or having another adult assist. Any movement or creaking should be fixed before you continue.
How to Level the Base
Even if your main beams look level at first, check carefully with a carpenter’s level.
If you find low or high spots, add extra support pieces or shims to correct them. These must be just as strong as the main beams and securely fixed. Take your time here. A level base is vital for straight walls, a leak-free roof, and a safe treehouse.
How to Install Treehouse Floorboards
After the base is level and strong, you can install the floor.
- Choose robust, weather-resistant wood such as cedar or pressure-treated lumber.
- Lay boards perpendicular to the support beams for maximum strength.
- Use exterior screws and leave a small gap between boards, about one-eighth of an inch, for drainage and expansion.
Check that each board is flush and sits flat. Correcting uneven spots now prevents tripping hazards later. When the floor is down, your DIY treehouse will finally start to feel real.
How to Build Treehouse Walls and Roof
Once you have a solid base, it is time to add walls and a roof. This stage turns the platform into a cozy shelter.
Should You Build Treehouse Walls on the Ground
Building walls on the ground is often easier and more accurate. You can work at a comfortable height and use your tools more safely.
- Cut studs and plates according to your plan.
- Assemble the wall frames with screws or nails.
- Use a square to make sure the corners are at 90 degrees.
- Leave openings where doors and windows will go.
You can even apply a first coat of paint or stain while the walls are still on the ground. It is usually easier to paint flat surfaces than vertical ones.

How to Attach Treehouse Walls to the Base
With the wall frames assembled, lift them into place, one at a time.
- Align each wall with the edge of the platform.
- Secure the bottom plate to the floor.
- Attach the corners where walls meet with strong screws or brackets.
Check for gaps or misalignment and correct them right away. Solid joints and square corners are important for stability and a good fit for doors, windows, and the roof.
How to Choose the Right Roof Style for a DIY Treehouse
The roof affects both the look and the performance of your treehouse.
For most DIY builders, a simple pitched roof is the easiest to construct and sheds rainwater well. If you want a more detailed design, you can consider a gabled or hip roof, but remember that more complex shapes take more time and skill.
Whatever you choose, make sure your base and walls are strong enough to support the roof, especially in wind and bad weather.
How to Install Treehouse Roofing
Start by building a solid roof frame with rafters, then add a roof deck using plywood or boards.
Next, add your roofing material. Popular choices include:
- Metal sheets
- Asphalt shingles
- Wooden shingles or planks
Begin at the bottom edge and work upward, overlapping each layer to prevent leaks. Use nails or screws that are designed for outdoor roofing and seal edges and joints carefully.
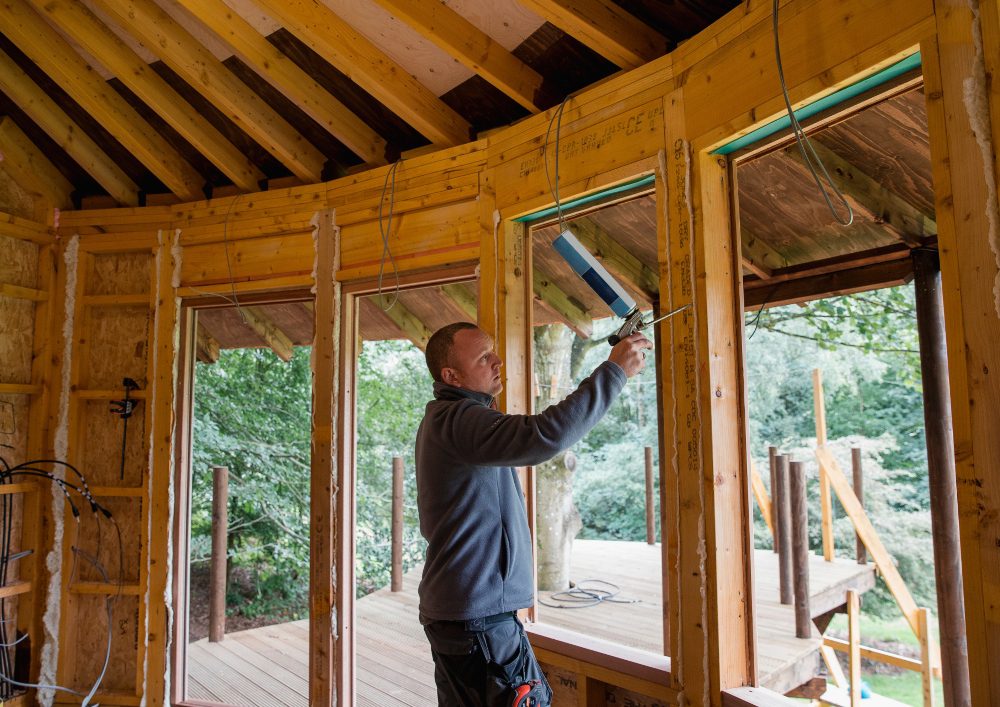
How to Waterproof and Insulate a Treehouse
To make the treehouse more comfortable and durable, take time to seal and insulate it.
- Use a high-quality exterior sealant on joints where walls meet the roof and around windows and doors.
- Add weatherstripping to doors and windows to keep out drafts and rain.
- If you plan to use the treehouse in cooler months, consider insulating the walls and roof with foam boards or fiberglass.
Proper waterproofing and insulation help keep the interior dry, reduce temperature swings, and extend the life of your DIY treehouse.
Treehouse Safety: Railings, Access, and Lighting
Safety is one of the most important parts of any treehouse project. With the structure complete, focus on how people will use the space every day.
How High Should Treehouse Railings Be
Railings are not just a finishing touch. They are a safety must.
- Aim for railing height of at least 36 inches (about 1 meter).
- Make sure gaps between balusters are small enough that a child’s head cannot pass through.
Use strong materials such as wood or metal and secure everything with exterior screws. Once installed, give the railings a firm shake to test their strength. Children will lean, climb, and press on these surfaces, so they must handle rough use.
How to Build a Safe Treehouse Entry and Exit
The way people get in and out of the treehouse affects safety as much as the platform itself.
Some options are:
- Fixed ladder with wide rungs and non-slip surfaces
- Staircase with handrails on at least one side
- Rope ladder for older kids, with clear rules and supervision
Whatever you choose, anchor it securely at the top and bottom and check it regularly for wear, loose screws, or rot. Inspect the access system part of your routine maintenance.

How to Test Treehouse Structural Integrity
Before you let kids loose in the treehouse, test the structure.
- Apply weight to different areas of the platform.
- Push gently on walls and railings to look for movement.
- Listen for creaks or cracking sounds.
For larger or more complex treehouses, some people also consult a structural engineer to confirm that beams, fasteners, and spans are strong enough. This can be especially wise if many adults will use the space.
How to Light a Treehouse Safely
Good lighting reduces trips and falls, especially in the evening.
- Solar-powered LED lights are simple and do not require wiring.
- Battery-powered string lights or lanterns can also work well.
If you want permanent wired lighting, hire a licensed electrician to install it and follow local safety codes. Make sure paths, steps, and the interior are all bright enough to see clearly.
Decorating Your Treehouse
Once your treehouse is structurally sound and safe, you can have fun making it your own. Decorating turns a basic shelter into a special retreat.
How to Choose a Treehouse Theme
A theme turns decorating into storytelling and helps you choose colors and decor.
Ideas include:
- Pirate ship
- Nature hideaway
- Reading nook
- Space station
- Secret club
Choose wall colors, fabrics, and decorations that match your theme. Even simple details such as a flag, sign, or painted window trim can make the space feel like a different world.
How to Furnish a Treehouse for Comfort
Comfortable furniture makes people want to stay longer in the treehouse, but you also need to think about weight and weather.
- Pick lightweight but sturdy pieces such as small benches, outdoor bean bags, or a hammock.
- Use weather resistant fabrics if the furniture may get damp.
- Avoid very heavy items that put too much load on one side of the platform.
A few well chosen pieces are better than a crowded interior. For example, a couple of bean bags, a hammock, a small table, and a shelf are often enough.
How to Add Functional Storage
Good storage keeps the space neat and reduces tripping hazards.
- Install shelves for books, games, and small toys.
- Use hooks for hanging jackets, lanterns, or bags.
- Consider benches with storage space inside.
Anchor heavy shelves and boxes securely to walls or the floor so they cannot tip over. Make sure children can reach commonly used items without climbing on furniture.
How to Create an Outdoor Play Area Around the Treehouse
If you have room, you can turn the ground area around the treehouse into a full play zone.
Ideas include:
- A sandbox at the base of the tree
- A swing hung from a strong branch or separate frame
- A small fire pit for adult supervised evenings
Use soft ground surfaces such as mulch or sand under swings, slides, and climbing nets to reduce injury from falls.
Treehouse Access Ideas: Slides, Rope Bridges, and Cargo Nets
Fun access routes can turn your DIY treehouse into a backyard adventure zone for kids and adults.
How to Add a Slide to a Treehouse
A slide provides a fast and exciting way to exit the treehouse.
- Choose a slide made from durable, UV stabilized plastic or high-density polyethylene.
- Attach the top of the slide to a solid support beam with heavy-duty brackets and galvanized bolts.
- Make sure the bottom ends on a soft surface such as rubber mulch or sand.
Test the slide by applying body weight and checking for movement before letting children use it.
How to Build a Rope Bridge to a Treehouse
A rope bridge can connect your treehouse to another platform or to a hillside.
- Use weather-resistant ropes rated for high loads, often at least 1,500 pounds.
- Attach ropes to solid beams with strong hardware such as eye bolts or shackles.
- Keep plank spacing narrow so that feet do not slip through.
- Add hand ropes at chest height to help with balance.
Ropes stretch over time, so check and adjust tension as part of your regular maintenance routine.
How to Use a Cargo Net for Treehouse Access
A cargo net can turn the climb to the treehouse into a fun challenge.
- Choose a marine-grade nylon or similar material designed for climbing, with knots or intersections that are comfortable on hands and feet.
- Attach the top edge to a strong beam and stake or anchor the bottom to the ground to reduce swinging.
- Keep the spacing between rungs to about 12 inches or less to suit smaller climbers.
Inspect the net regularly for fraying or damage and replace it if it shows signs of wear.
Conclusion
Building a treehouse is a major milestone for many families. It combines practical skills with love and imagination. By choosing the right tree, following local rules, building a strong structure, and focusing on safety, you create a backyard space that people of all ages can enjoy.
Once you add your own decorations and personal touches, your DIY treehouse becomes more than a project. It becomes a family treasure and a place where memories are made for years to come.
If you are interested in a larger getaway, you can explore our guide to log cabin construction next.
Frequently Asked Questions About DIY Treehouse
- Do I need a permit to build a treehouse?
- Often, yes. Check with your local council or municipality for specific rules before building.
- How high should a treehouse be?
- Typically, 6 to 10 feet off the ground for family use. Higher means more complex safety needs.
- What is the best wood for a treehouse?
- Pressure-treated lumber for structural parts. Cedar or other rot-resistant woods for visible areas.
- How much does a DIY treehouse cost?
- A simple DIY treehouse can cost $500 to $2,500 in materials.
- How do I make a treehouse safe for kids?
- Install railings at least 36 inches high, use non-slip steps, and inspect regularly for wear.
- Will building a treehouse harm the tree?
- Not if done correctly. Use specialized bolts, allow for tree growth, and avoid girdling the trunk.