Last Updated on July 30, 2025 by teamobn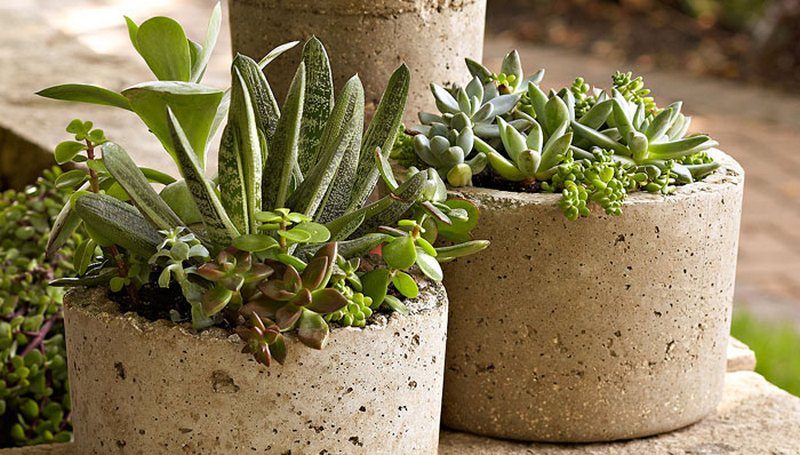
Want something different for your garden? These hypertufa planters could be the right one for you!
The pale gray and ivory monoliths jutting out on the shores of California’s Mono Lake may look like eerie art installations, but they occur naturally and are actually limestone formations.
The limestone is formed by the constant deposition of calcium-rich algae and other minerals in the lake. Over time, the limestone builds up and forms these strange-looking structures.
Tufa is a variety of limestone, and the Mono Lake rock formations are famous for their otherworldly beauty.
Over time, these deposits build up and form the spectacular rock formations that are so beloved by visitors. If you love the look of tufa limestone planters but don’t want to spend a fortune on them, you can make them on your own.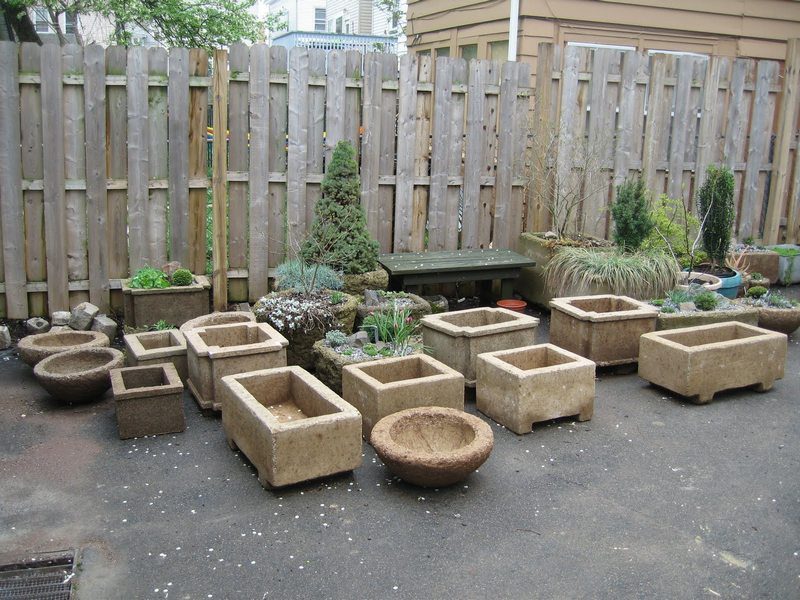
When you create DIY hypertufa planter, you can have it depending on the your desired design, making it a great project for anyone. This is one of the great things about DIY projects.
You can add interest to your garden by creating hypertufa planters in different sizes and shapes, and you can make them extra special by adding your own personal touch. By using different colors and textures of hypertufa, you can create a one-of-a-kind garden that will be the envy of your neighbors.
When you invest in high quality but inexpensive planters, you ensure that your plants will stay healthy and happy for years to come. You can create a hypertufa planter on your own preferences. It could be as huge as a large basin, or as tiny as a cup.
Hypertufa is a permeable substance produced from Portland cement and sphagnum peat moss. It is a mixture of topsoil, cement, and other aggregates and oxides (mineral fragments).
It is common to use hypertufa planter, especially in small garden spaces. These pots help conserve water and are long-lasting and usually less expensive than ceramic pots. It is light and porous, and has a ‘gritty’ texture that retains water well so it will allow your plants to breathe.
Hypertufa is commonly used for succulents, cacti, and orchids because it is produced from a very lightweight material, so it will not weigh down your plants.
Succulents, cacti and orchids all require good quality planters to hold their roots. This not only adds beauty to your home, but also prevents harm to the plant.
Hypertufa planters are a great way to add a touch of style to your home. They’re perfect for indoor or outdoor use, and they offer a unique way to display your plants.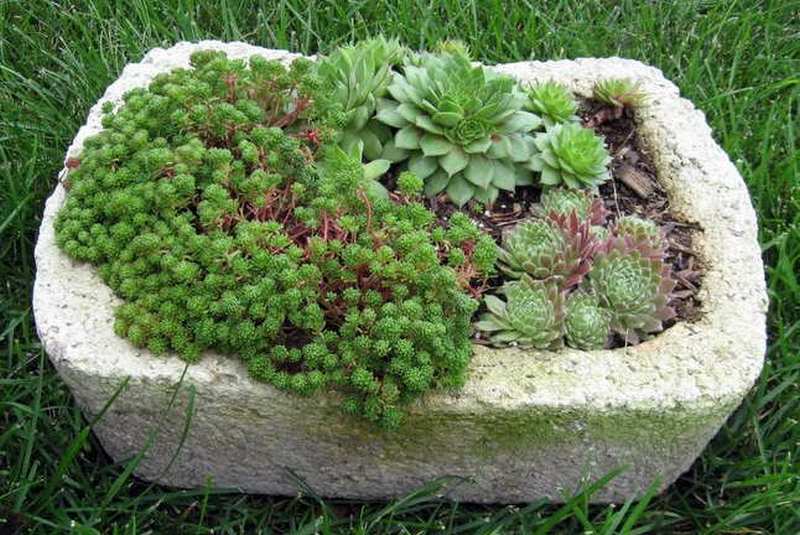
Plus, they’re easy and fun to make. So whether you’re looking for a way to spruce up your yard or add a touch of class to your home, hypertufa planters are a great option.
If you’re looking for some inspiration, you can check out our gallery for your reference. There, you’ll find a variety of different images that might give you some ideas for your own hypertufa planter project.
You can create hypertufa planters that imitate the beauty of real tufa limestone by using the ingredients below.
Crafting Hypertufa Planters
Materials:
- 2 parts Portland Cement
- 3 parts Perlite (or vermiculite)
- 3 parts Peat Moss (or sawdust)
- Water
Tools:
- Measuring Container
- Container for mixing dry ingredients
- Waterproof Gloves
Steps:
Making hypertufa planters is a straightforward project. You only need patience, simple tools, and a clean workspace for mixing. Follow these steps.
1. Prepare your workspace
Lay a plastic sheet or drop cloth on a flat surface outdoors or in a well-ventilated shed. Put on waterproof gloves to protect your hands from cement.
2. Measure the dry ingredients
Fill a measuring container with two parts Portland cement. Add three equal parts perlite or vermiculite. Finish with three equal parts peat moss or sawdust. Accuracy keeps the mix light and strong.
3. Combine the dry mix
Tip all dry ingredients into a larger mixing tub. Use gloved hands to blend until the color looks uniform. Break up any peat clumps so the planter surface stays even.
4. Add water slowly
Pour in a little water and mix. Keep adding small splashes until the blend feels like thick oatmeal that holds its shape when squeezed. Too much water weakens the planter, so go slowly.
5. Prepare the molds
Choose two nesting containers for each planter. A larger one shapes the outside. A smaller one makes the planting cavity. Coat both with a thin film of cooking spray or line them with plastic to stop sticking.
6. Pack the hypertufa mix
Scoop the mixture into the bottom of the outer mold and press it down firmly. Build up the sides to about 4 cm thick, working upward. Keep the top rim level for a neat edge.
7. Create the cavity
Center the inner mold on the fresh mix and push it down until the bottom gap matches your intended planter depth. Weight the inner mold with stones so it stays put. Gently press more mix between the molds if gaps appear.
8. Initial curing
Cover the entire setup with a plastic bag to keep moisture in. Leave it undisturbed for 24 to 36 hours. The surface should feel firm but slightly cool when it is ready to unmold.
9. Unmold and refine
Remove the weights and lift out the inner mold. Turn the planter over and tap the outer container until the hypertufa planter slides free. Trim rough edges with a wire brush or old knife while the mix is still green.
10. Final curing
Wrap the planter in damp burlap or plastic and set it in a shady spot for seven to ten days. Mist it daily to slow drying. Slow curing adds strength and reduces cracking.
11. Rinse and plant
After curing, rinse the planter well to wash off surface lime. Drill a drainage hole in the bottom if the mold did not create one. Let the piece dry, then fill it with potting soil and your favorite succulents or alpine plants.
Your handmade hypertufa planter will continue to harden over the next few weeks. Each planter gains character as mosses and lichens colonize the porous surface, giving your garden a timeless stone look without the hefty weight.
Custom Molds: Shaping Hypertufa Planters with Everyday Household Items
You don’t need specialized forms to sculpt garden art. Common household containers turn raw mix into hypertufa planters that look like weather-worn stone masterpieces.
Repurposed Kitchenware Molds
Old mixing bowls, salad colanders, and loaf pans create elegant curves. Line each piece with a thin grocery bag. The bag stops sticking and adds subtle wrinkles that mimic natural rock fissures.
Thin rims crack when unmolded, so keep wall thickness at least four centimeters. When you invert the finished form, scuff edges with a wire brush. This treatment softens machine-perfect lines and helps creeping moss latch onto hypertufa planters over time.
Plastic Bottle and Bucket Forms
Cut the tops off five-gallon water jugs or ice-cream tubs. Their smooth sides release easily once the mix cures. Spray the interior with cooking oil before packing the blend.
For tall hypertufa planters that hold deep-rooted shrubs, tape a cardboard tube in the center to create a drainage flue. Pull the tube out after a day and wash away any loose grit. Vertical channels direct water and stop winter ice from splitting the walls.
Cardboard and Foam Templates for Organic Shapes
Boxes from online deliveries become quick square molds. Wrap them in clear tape so moisture can’t soften the cardboard during the first cure. If you prefer free-form curves, carve dense packing foam with a bread knife.
Press sheets of foam into gentle waves, then coat them with plastic wrap. These lightweight frames bend without collapsing, letting you craft hypertufa planters that resemble eroded river rocks.
Release Agents That Prevent Sticking
A mist of vegetable oil or a swipe of petroleum jelly works. For rougher textures, roll the mold in dry sand before filling. Sand grains embed in the wall surface and leave tiny voids once rinsed, giving hypertufa planters an antique pock-marked finish. After unmolding, scrub the planter with a stiff brush to knock off loose particles and reveal the mix’s speckled aggregate.
Reinforcing Mixes to Help Hypertufa Planters Survive Freeze–Thaw Cycles
Cold nights create micro-cracks in porous containers. Smart reinforcement keeps hypertufa planters intact through brutal freeze–thaw swings.
Adding Fibers for Flex
Blend a handful of polypropylene or natural coconut fibers into every batch. Fibers bridge micro-gaps before they widen. They also cut weight, so hypertufa planters stay easy to move around patios and decks. Mix well until no loose strands show. That even distribution spreads tensile strength across the whole wall.
Wire Mesh Skeletons
Lightweight chicken wire or galvanized hardware cloth boosts durability. Cut sheets to wrap the cavity, overlap ends, and twist together. Position the mesh midway in the wall—never flush against the inner or outer face.
The cement coats each strand and locks it inside. As temperatures drop below zero, the metal network absorbs expansion stress and spares hypertufa planters from ugly surface flakes.
Air-Entraining Admixtures
A teaspoon of dish soap whisked into the water introduces stable micro-bubbles. These tiny pockets give expanding ice space to grow. They don’t weaken compressive strength because bubbles remain evenly spaced. The trick is gentle folding after adding soap water. Vigorous stirring collapses bubbles. Proper aeration lets hypertufa planters breathe while shrugging off spring thaw damage.
Slow Curing and Moisture Control
Quick drying is the enemy. Wrap fresh pieces in plastic and keep them damp for at least a week. Slow hydration forms strong calcium silicate bonds. After seven days, move the planter into partial shade and mist daily for another week.
Gradual moisture loss closes capillaries that would otherwise suck in rainwater. Well-cured hypertufa planters shed sleet instead of soaking it up, reducing internal ice pressure.
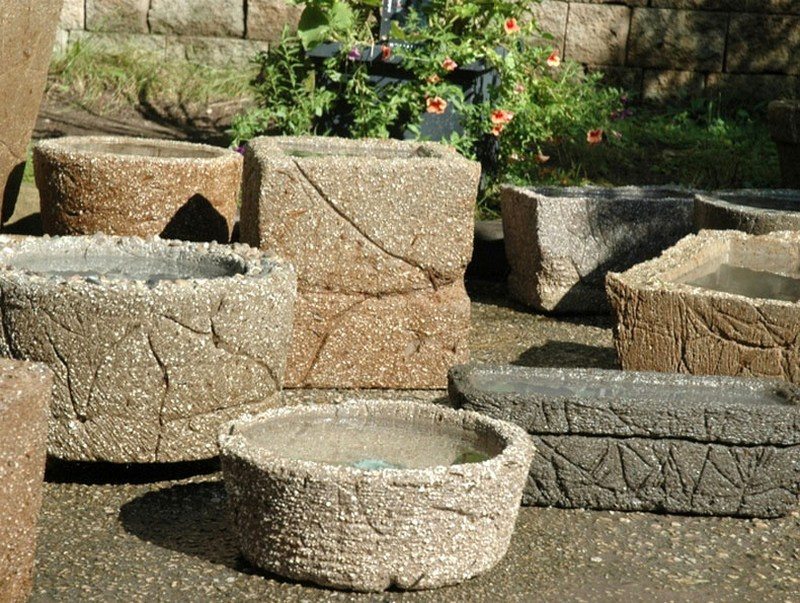
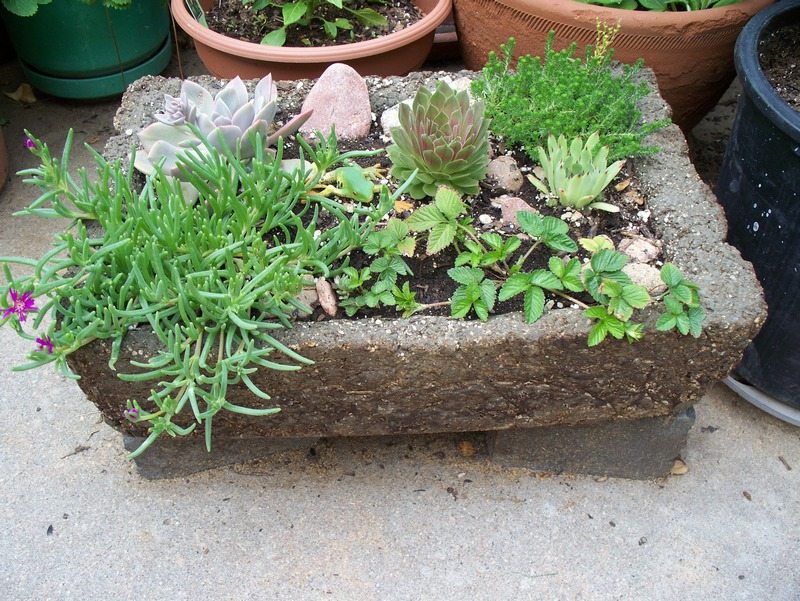
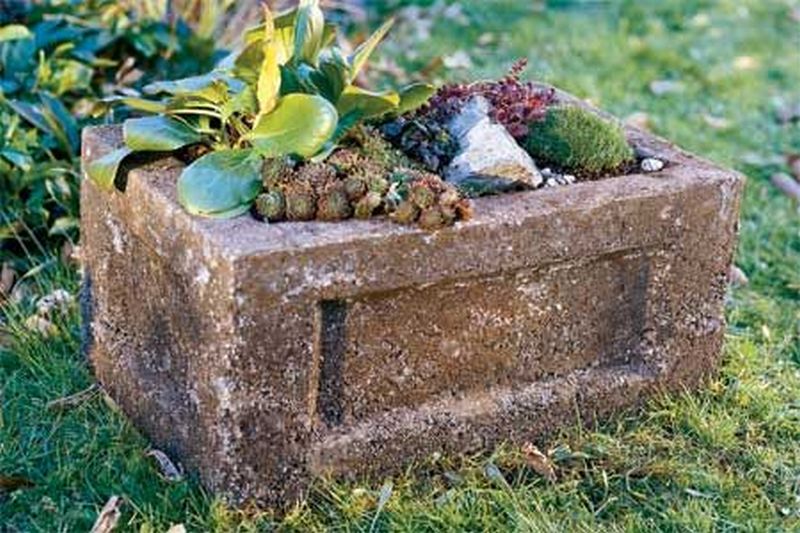
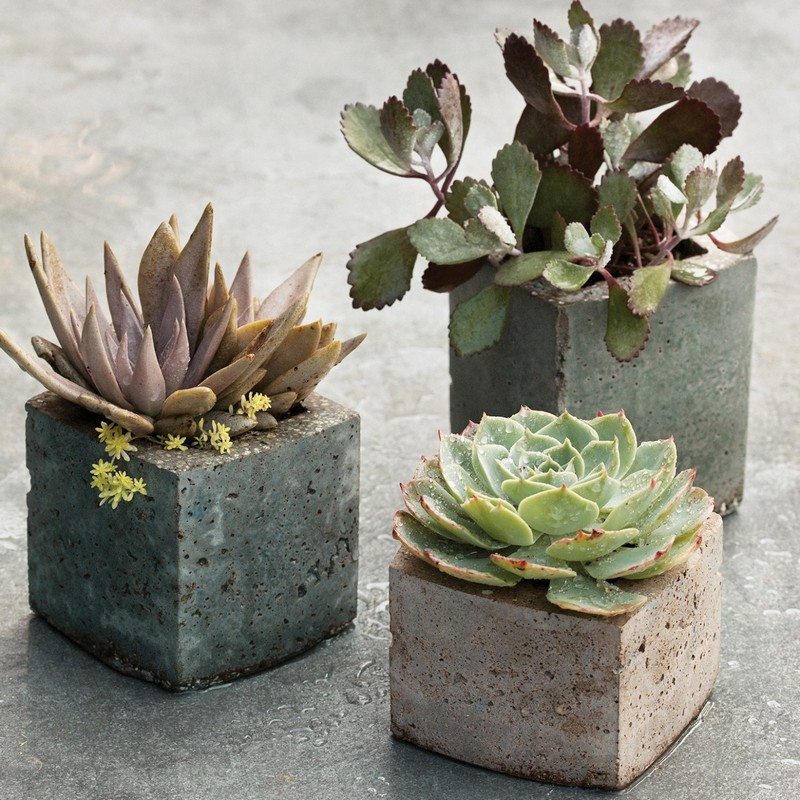
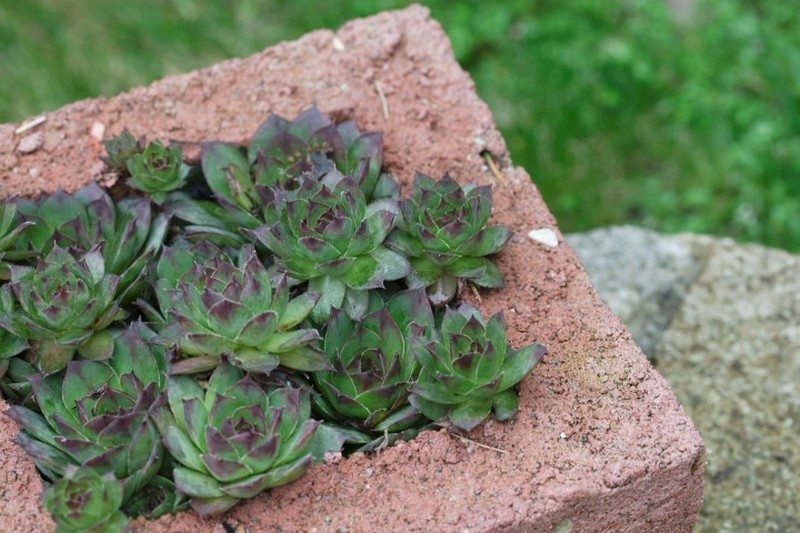
Hypertufa Planters Gallery
Click on any image to start the lightbox display. Use your Esc key to close the lightbox. You can also view the images as a slideshow if you prefer 😎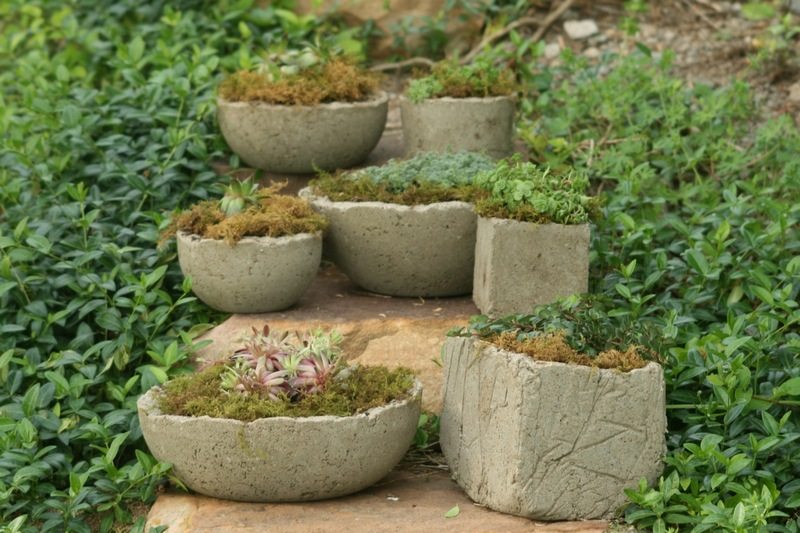


You can get step by step instructions here…
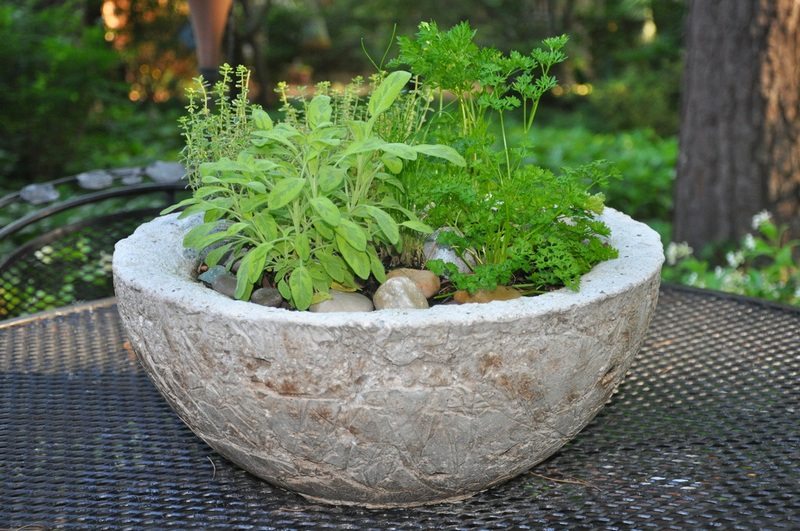
Plants Suited to Hypertufa Planters
Choosing the right flora makes every container a living sculpture. Porous walls and mineral-rich surfaces create micro-habitats that certain plants love.
Drought Lovers: Sedums and Sempervivums
Stonecrop and hen-and-chicks thrive in lean soil. Fill the planter with half grit and half cactus mix. Tuck rosettes into crevices along the rim. Their shallow roots grip the rough surface, and fallen leaves root where they land. A weekly light spray keeps growth tight. Excess water drains fast through hypertufa planters, preventing rot that often kills succulents in glazed pots.
Shade Companions: Miniature Fern Varieties
Dwarf maidenhair and button ferns prefer dappled patios. Blend peat-free compost, fine bark, and perlite for airy moisture. Set plants slightly below the rim to trap humidity. Fern fronds fringe the edge and spill over, softening the rugged exterior of hypertufa planters. A monthly dose of diluted fish emulsion feeds without pushing rank growth.
Cold-Climate Jewels: Saxifrages and Edelweiss
These alpines evolved on windswept scree. Mix crushed granite chips into the top layer for sharp drainage. Prop the planter on bricks so air circulates underneath. Winter snow insulates crowns, while porous walls vent meltwater. Come spring, tight mats flash with starry blooms that sparkle against the gray of hypertufa planters.
Soil Blends and Feeding Schedules
Use mixes that match plant origin. Succulents take a gritty base. Ferns need organic fluff. Alpines want mineral grit. Each season top-dress with fresh material rather than digging, which disturbs roots tucked deep into the porous matrix of hypertufa planters. Feed sparingly. Too much nitrogen invites soft tissue and fungal attack.
Seasonal Care: Watering and Cleaning the Porous Walls
Summer heat dries containers fast. Stick a finger two centimeters deep. If the tip feels cool, hold off watering. In autumn, flush salts by running water through until it drains clear. Brushing the exterior with a soft broom removes algae streaks while keeping the patina intact. Empty spent annuals before frost and let the soil sit exposed; this freeze sanitizes the cavity and keeps hypertufa planters fresh for next year’s display.
These three focus areas show how versatile hypertufa planters can be. Smart mold choices, toughened mixes, and plant pairings turn simple cement blends into long-lasting garden centerpieces that only grow more beautiful with age.
Conclusion
Crafting hypertufa planters blends creativity with practical skill. Careful measuring and slow curing reward you with lightweight, stone-like pots. Adding fibers or mesh strengthens walls against harsh weather. Thoughtful plant choices let each container shine throughout the seasons. Follow these steps and your garden gains lasting texture, character, and charm.
If you liked this project, you will also like viewing these easy DIY projects…