Last Updated on July 22, 2024 by teamobn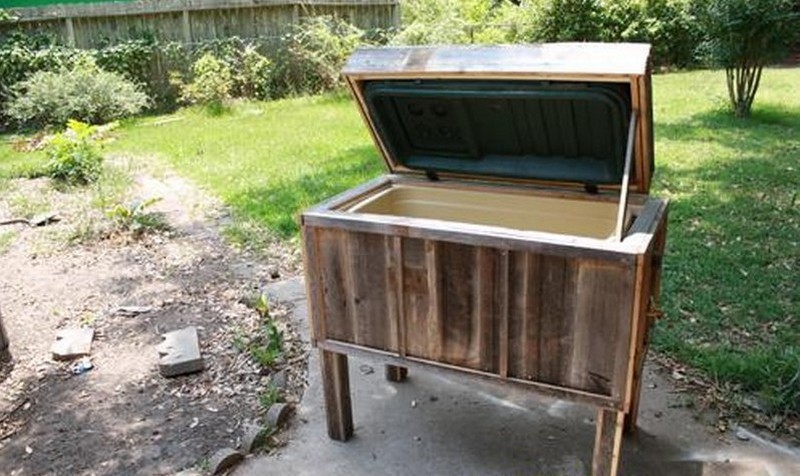
Thinking of buying your own rustic cooler? Why don’t you give your old cooler a new look? With a few simple supplies, you can turn that old, beat-up cooler into something new and exciting. All you need is some paint, pallets, and a little bit of creativity.
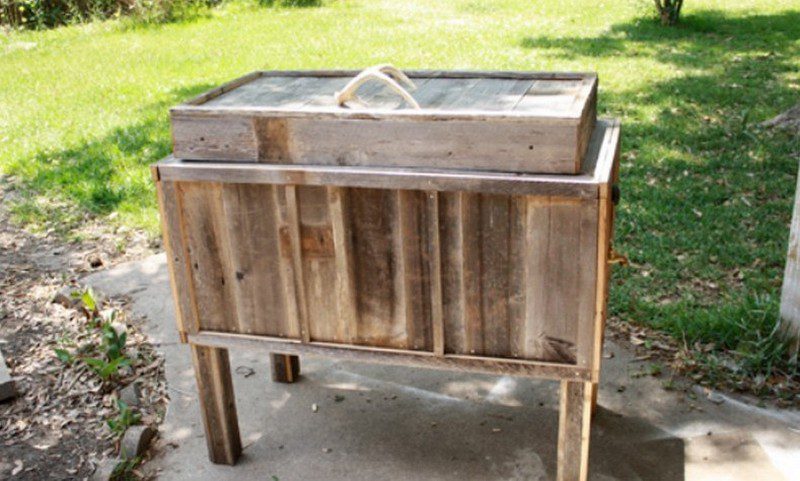
Give your old cooler a makeover and enjoy it for years to come. This rustic cooler is a great addition to your outdoor space, especially for those who love to entertain!
Creating your own DIY Rustic cooler can be a very cost-effective way to have a stylish and unique rustic cooler for your outdoor activities and can be a great way to show off your creative side and impress your friends and family.
Outdoor drink coolers are becoming increasingly popular. That may be because they are a must-have for outdoor gatherings. They add both style and convenience to your cocktail parties or barbeques. And what could be more fun than holding a great outdoor party on the patio with your friends and loved ones?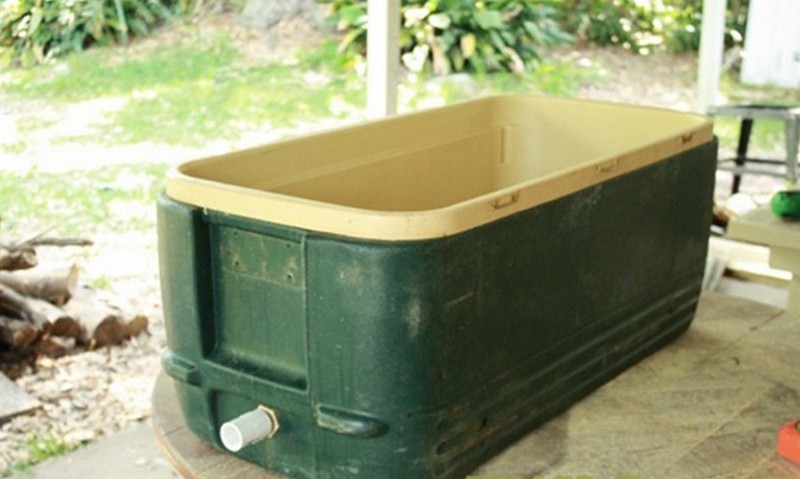
This rustic cooler would also make drink-grabbing easier, especially for those having difficulty reaching down. By following a few simple steps, you can easily create a one-of-a-kind cooler that will keep your drinks cold and your guests happy.
How to build your DIY Rustic Cooler?
- Prepare all of the materials you will need before beginning the project.
- This will save you time and frustration later on. Gather everything you will need and put it in a central location so you can easily find it when you need it.
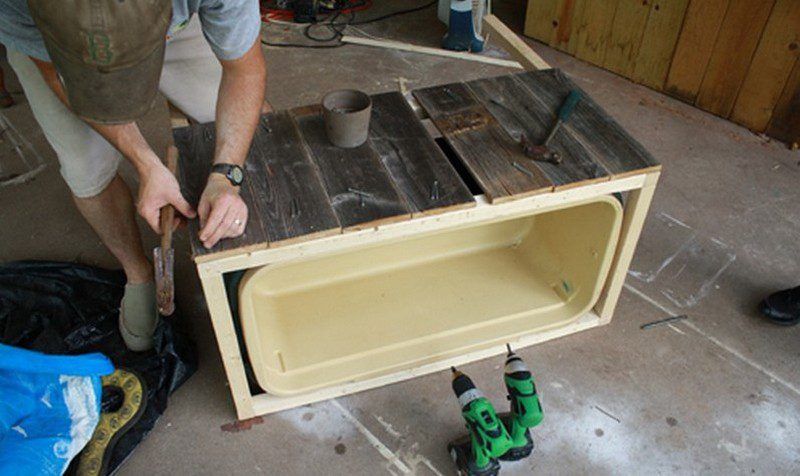
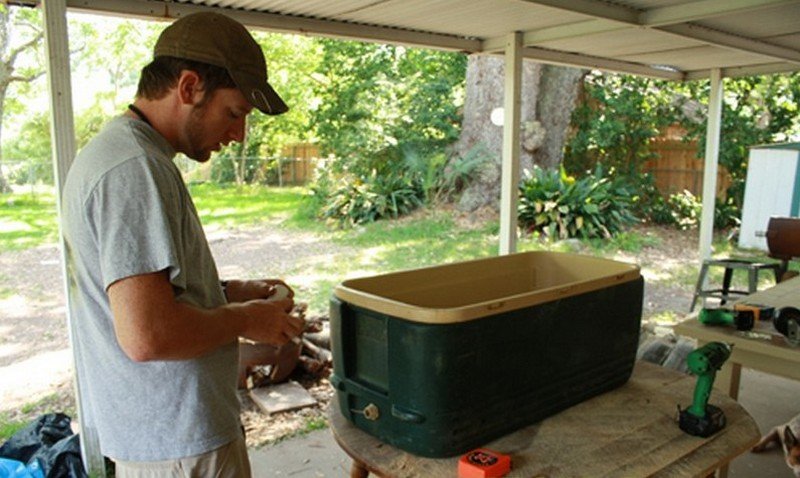
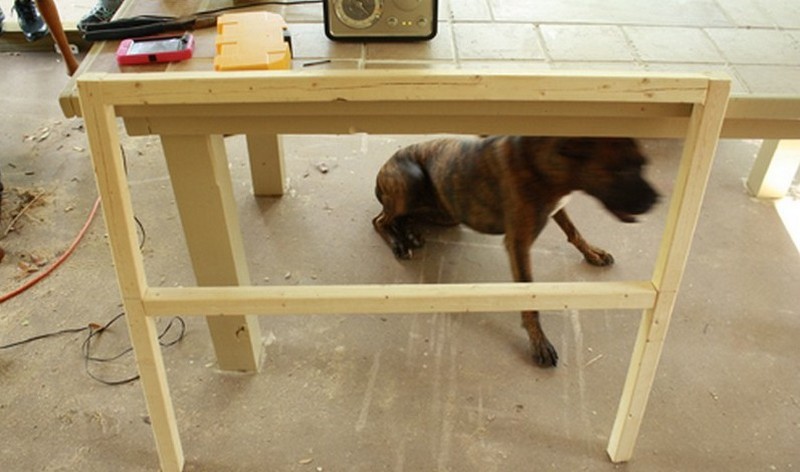
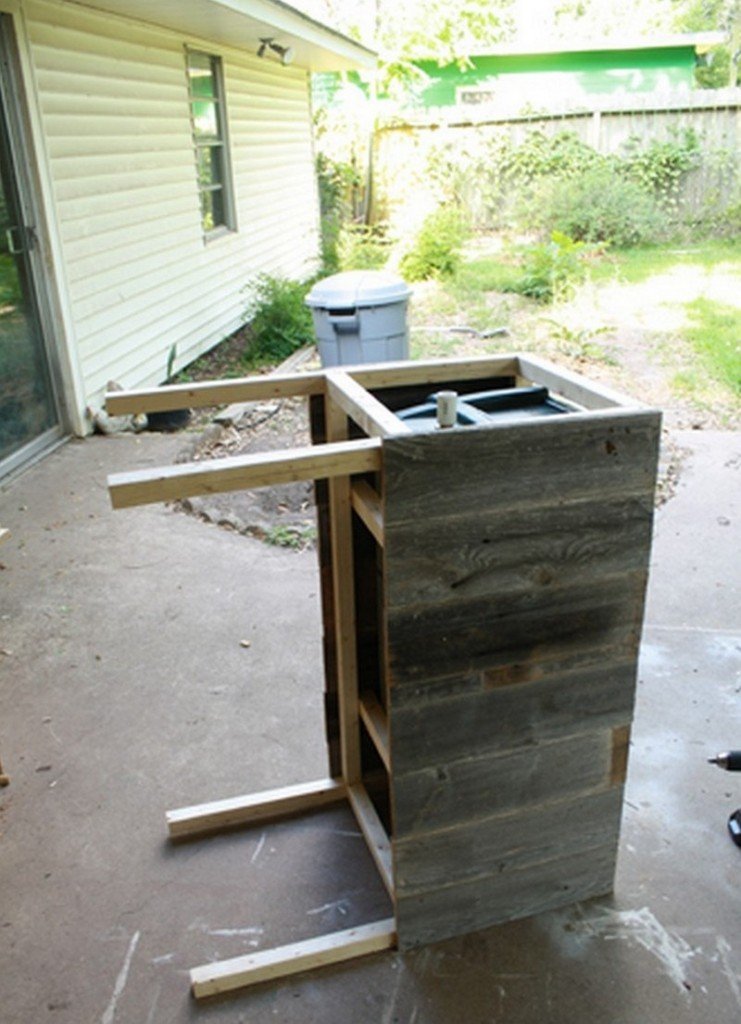
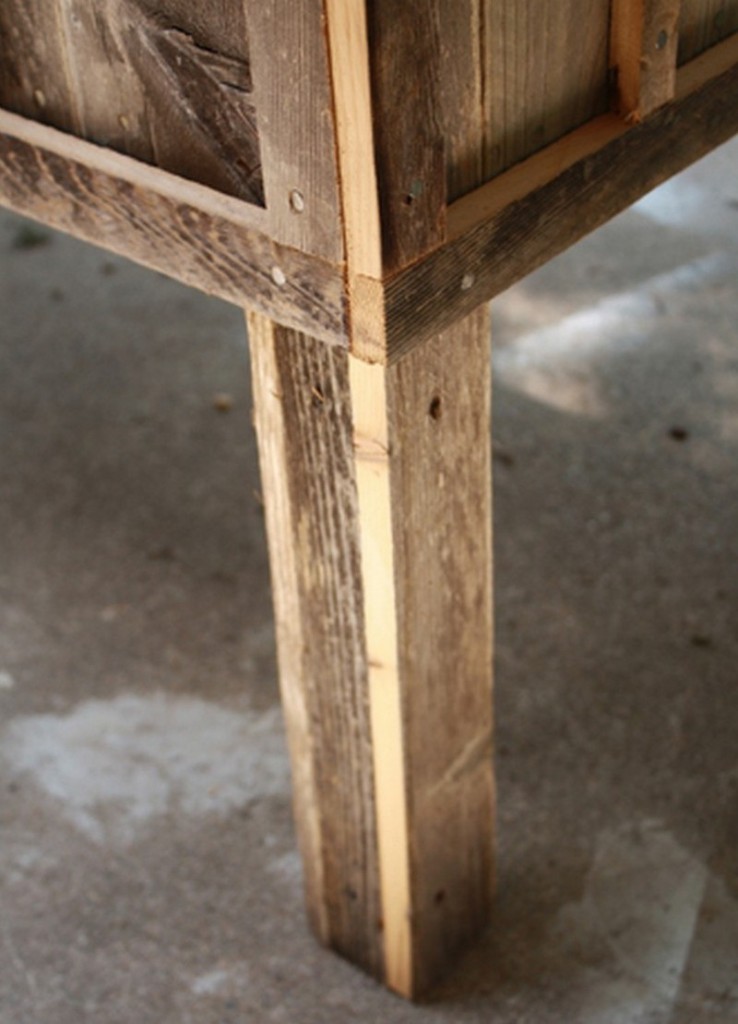
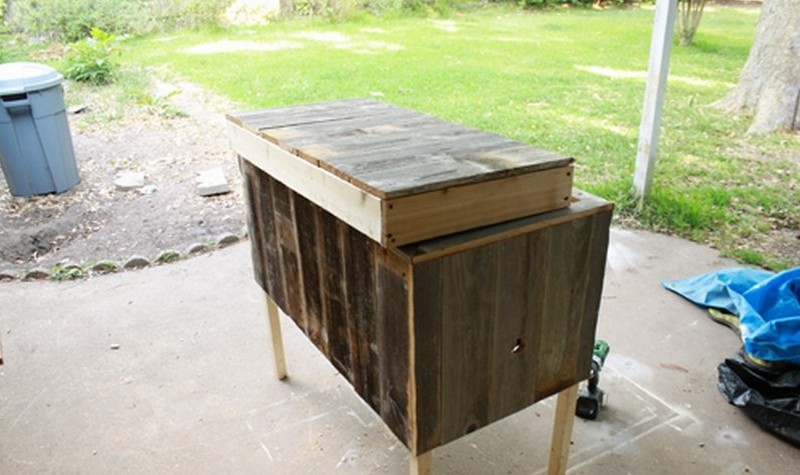
- Start by creating a frame for your old cooler.
- You will need to use some wood and some screws to create the frame. Make sure that the frame is strong enough to support the weight of the cooler.
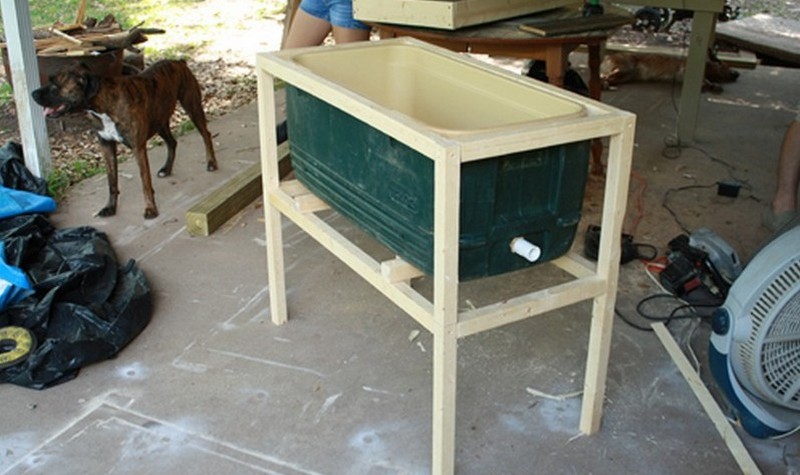
- Once you have created the frame, you can then attach the cooler to the frame.
- Make sure your cooler fits well to your frame. If it is too big or small, it will not work as effectively and you will not be able to keep your food and drinks as cold as you would like.

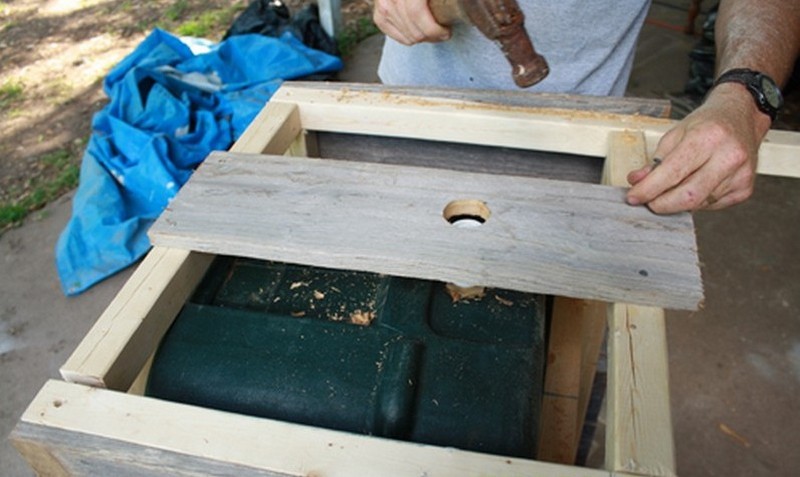
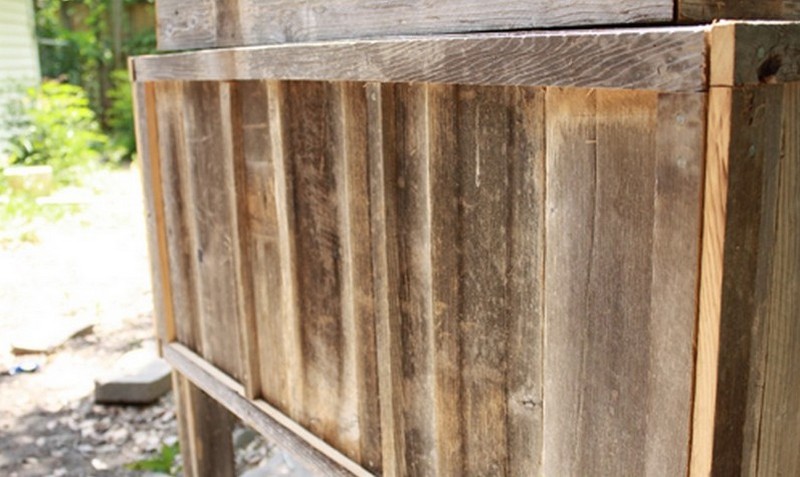
- Then cover your rustic cooler frame with pallets.
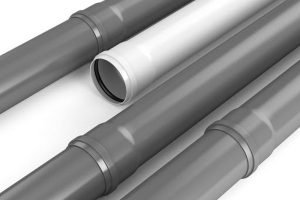
- Make you consider the holes for the pipes. You can add a layer of insulation if you desire.
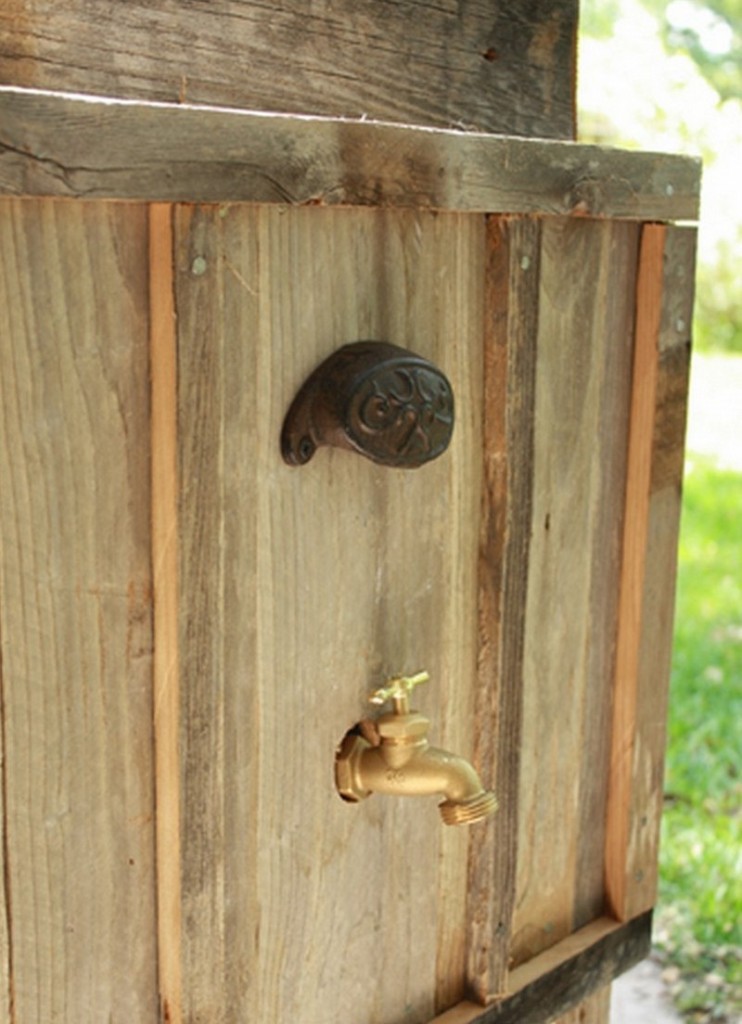
- Attach the drainage pipes for your rustic cooler using pipe coupling if needed.
- Make sure the pipes are properly secured to avoid any leaks. If you are not using a pre-made drainage pipe, make sure to measure and cut the pipe to the correct size before attaching it.
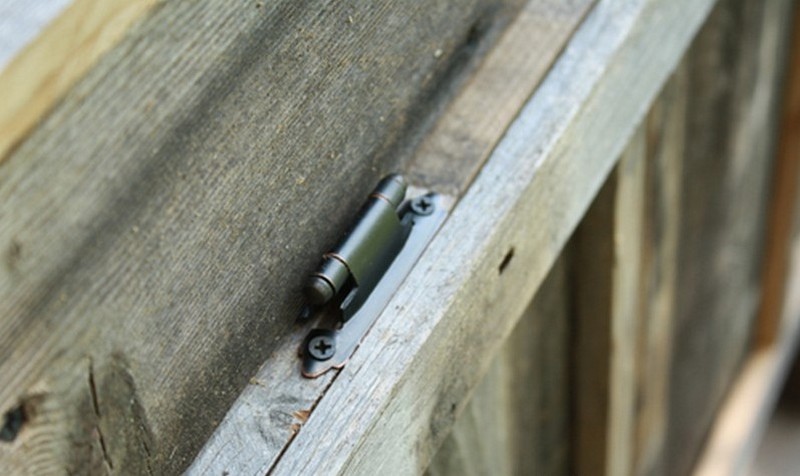
- Attach the cover for your rustic cooler using hinges.
- Make sure that the hinges are properly aligned so that the cover can open and close smoothly. If necessary, use a drill to create pilot holes for the screws. Use screws that are long enough to go through the thickness of the cooler cover and into the cooler body.

- You can add caster wheels to your rustic cooler to make it more mobile and easier to transport.
- This will make it much easier to take your cooler with you when you go camping or picnicking, as you won’t have to carry it. Simply attach the wheel to the bottom of the cooler and you’re good to go!
If you love to entertain in your outdoor space, your friends and family will surely notice this beautiful addition to your yard!
Materials:
- Barn Wood/Old Pallets
- 5 pcs 2×2′s @ 8 feet long
- 1 pc 1×4 @ 8 feet long
- Old Cooler
- 2 1/2 inch Screws
- 2 inch Nails
- 3/4 inch Pipe Coupling
- 3/4 inch Spigot
- Antler Shed Handle – or any handle of your choice
- Side Handles (optional)
- Bottle Opener (optional)
- Iron Decor (optional)
- Wood Glue
- Cabinet Hinges
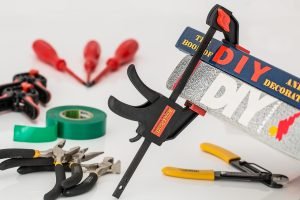
Tools:
- Screwdriver
- Table Saw
- Jigsaw
- Sander
- Drill – with 1 1/2 inch spade bit
Click on any image to start the lightbox display. Use your Esc key to close the lightbox. You can also view the images as a slideshow if you prefer 😎


Maintenance Tips for Rustic Coolers
Keeping a rustic cooler guarantees both its visual appeal and longevity of use. These basic maintenance guidelines can help to keep your outdoor accessories in perfect state:
Regular Cleaning
Regular cleaning is essential for maintaining your cooler in its perfect state and stopping the typical growth of mould and mildew in humid surroundings. Make sure your cooler is empty entirely every time you use it, clearing any ice, water, and residue.
Completely clean every interior and external surface using a soft cloth or sponge dipped in a mild soap solution. To get any soap left off, rinse it under fresh water. Before storing it, let the cooler dry totally in an open, breezy area. This thorough drying eliminates moisture from the cooler, so preventing potential mould and bad smells.
Weatherproofing Your Cooler
Extending the life of your cooler depends critically on weatherproofing, particularly if it is often outside exposed. Every year coat the wood with a premium weather-resistant sealant. This sealant should resist moisture and water, so preventing warping or breaking of the wood from exposure.
Look also for a sealer with UV protection to stop sun-related fading of the wood. Application is simple: make sure the wood is dry and clean; next, uniformly apply the sealer with a brush; let it cure as advised by the product instructions.
Inspect and Repair
Periodic inspections for any possible problems will help to guarantee that your cooler stays in good operating order. Search for evidence of wear including cracked wood, weak joints, or loose screws. As needed, tighten screws and bolts; if joints start to loosen, think about using wood glue to reinforce them.
If you discover broken wood, decide whether it need replacement or if wood filler would be able to cover it. Examine the drainage system of the cooler as well; make sure it is not blocked by trash or silt; a clogged drain can cause water to build up and possible harm could result.
Winter Storage
Especially in places with freezing temperatures, correct winter or off-season storage is absolutely vital. Both moisture and cold can cause your cooler’s components to break down. Keep your cooler in a dry, shaded space, perhaps a garage or shed.
Use a high platform or shelf to avoid direct ground contact. Cover the cooler with a breathable fabric cover—not plastic since plastic can trap moisture and promote mould development. While ensuring that air circulates, this cover will shield the cooler from dust, bugs, and other environmental elements, so maintaining its dry and ready for use in the next season.
Following these maintenance guidelines will help you to prolong the life and improve the look of your rustic cooler, therefore highlighting its unique qualities in your outdoor area for many seasons.
Innovative Features to Add to Your Rustic Cooler
Adding innovative features to your rustic cooler can elevate its functionality and style, making it not just a practical item for chilling beverages but also a standout piece in your outdoor entertainment area. Here are some creative enhancements you might consider to customize your rustic cooler:
Solar-Powered Cooling System
Integrate a solar panel kit to power a small cooling system within your cooler. This eco-friendly addition ensures your drinks stay chilled without the need for continuous ice replenishment, making your cooler more energy-efficient and perfect for sunny outdoor locations.
LED Lighting
Install LED lights inside the lid or around the edges of your rustic cooler. This feature is not only practical, helping you locate drinks in low-light conditions, but also adds a fun ambiance to evening gatherings. Opt for waterproof LED strips that can change colors and are controlled by a remote for added versatility.
Built-In Bluetooth Speaker
For those who love music with their outdoor festivities, incorporating a Bluetooth speaker system into the cooler’s design can be a great touch. Mount the speakers securely and ensure they are weatherproof. This allows guests to enjoy their favorite tunes right from the cooler without the need for additional audio equipment.
Custom Drainage Tap
Upgrade the standard drainage spout to a custom tap system. This makes draining melted ice water easier and more controlled, which is particularly useful during clean-ups after use. A decorative tap can also enhance the rustic look of the cooler.
Adjustable Interior Compartments
Incorporate adjustable dividers inside your cooler to create separate compartments for different types of beverages or to keep food items cool but not wet from melting ice. This organizational feature helps in maintaining order and ensuring that items are easily accessible.
Lockable Lid
Adding a lock to the lid of your rustic cooler can be a practical feature for those who need to secure their beverages in public spaces or at large events. This feature adds a level of security and peace of mind.
Retractable Bottle Openers and Cap Catchers
Mount a retractable bottle opener on the side of the cooler for easy access, and pair it with a cap catcher to keep the area tidy. This feature prevents the hassle of searching for a bottle opener and dealing with loose caps during parties.
If you liked this project, you will also like viewing these easy DIY projects…