Last Updated on November 12, 2025 by teamobn
Contents
Project Summary: Plastic Bottle Greenhouse
- Method: Construct walls by threading cleaned 2-liter PET bottles onto garden canes, then fixing these panels to a sturdy timber frame.
- Scale: Requires approximately 1,500 uniform bottles for a 2m x 3m structure.
- Key Materials: 1,500 x 2-L bottles, 4×4″ treated posts, 2×2″ timber, 8-10mm garden canes, cement, screws, and staples.
- Key Tools: Drill, saw, level, hammer, and spade.
- Commitment: Takes 2-4 days for two people. Total cost is typically $120-$280. This is an intermediate DIY project.
- Core Steps: Collect & clean bottles -> Build frame & set posts -> Drill bottle bases -> Thread bottles onto canes -> Attach panels to frame -> Add roof & ventilation.
- Safety: Always wear eye protection when drilling. Ensure the frame is securely anchored in concrete footings and use cross-bracing for wind resistance.
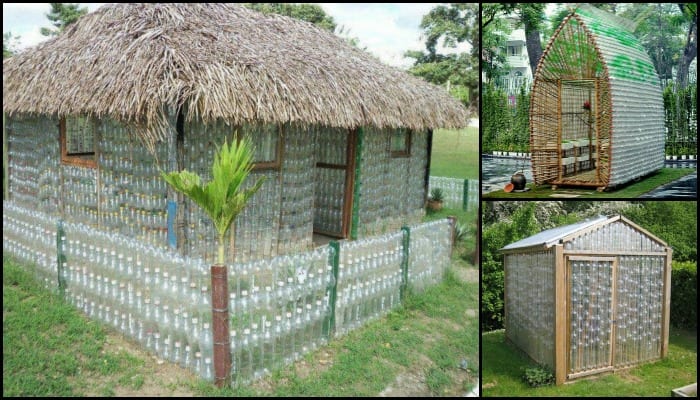
Are you looking for a way to have a small greenhouse in your yard to grow some veggies? Then why not try using plastic bottles to build one? Building your greenhouse from plastic bottles is a great way to recycle and repurpose material that would otherwise end up in a landfill.
Not only is this a great way to be more eco-friendly, but it can also save money on purchasing a traditional greenhouse or greenhouse materials. This project will teach you how to upcycle plastic bottles into something useful for growing food in your garden. This can be a fun project for the whole family.
Plus, it’s a great way to get started with gardening and learn about how plants grow. Not only are you keeping construction expenses to a minimum, but you are also helping save the environment.
To build a large-sized plastic bottle greenhouse, you’ll need around 1,500 pieces of 2-litre plastic bottles. Can you imagine how much waste you’re already keeping away from nature with just a single greenhouse project? Not to mention, you’ll be doing your part to combat climate change.
Building a plastic bottle greenhouse is a great way to reduce your carbon footprint and help the environment. And you’ll get to enjoy fresh fruits and vegetables year-round. So, what are you waiting for? Start your project today! It indeed is a great recycling idea for plastic bottles!
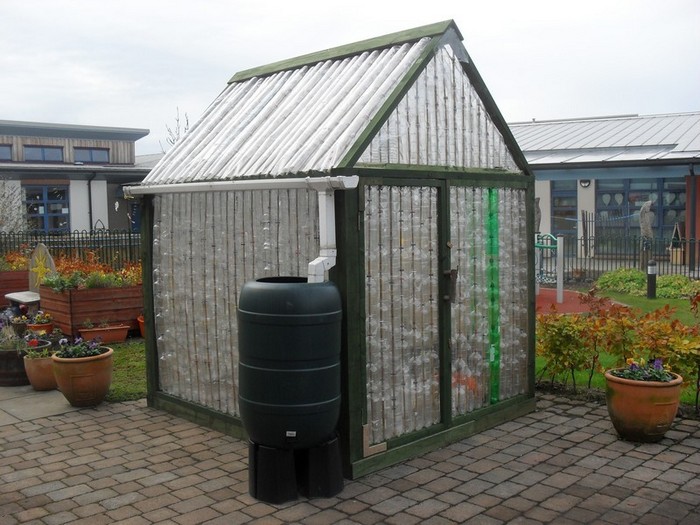
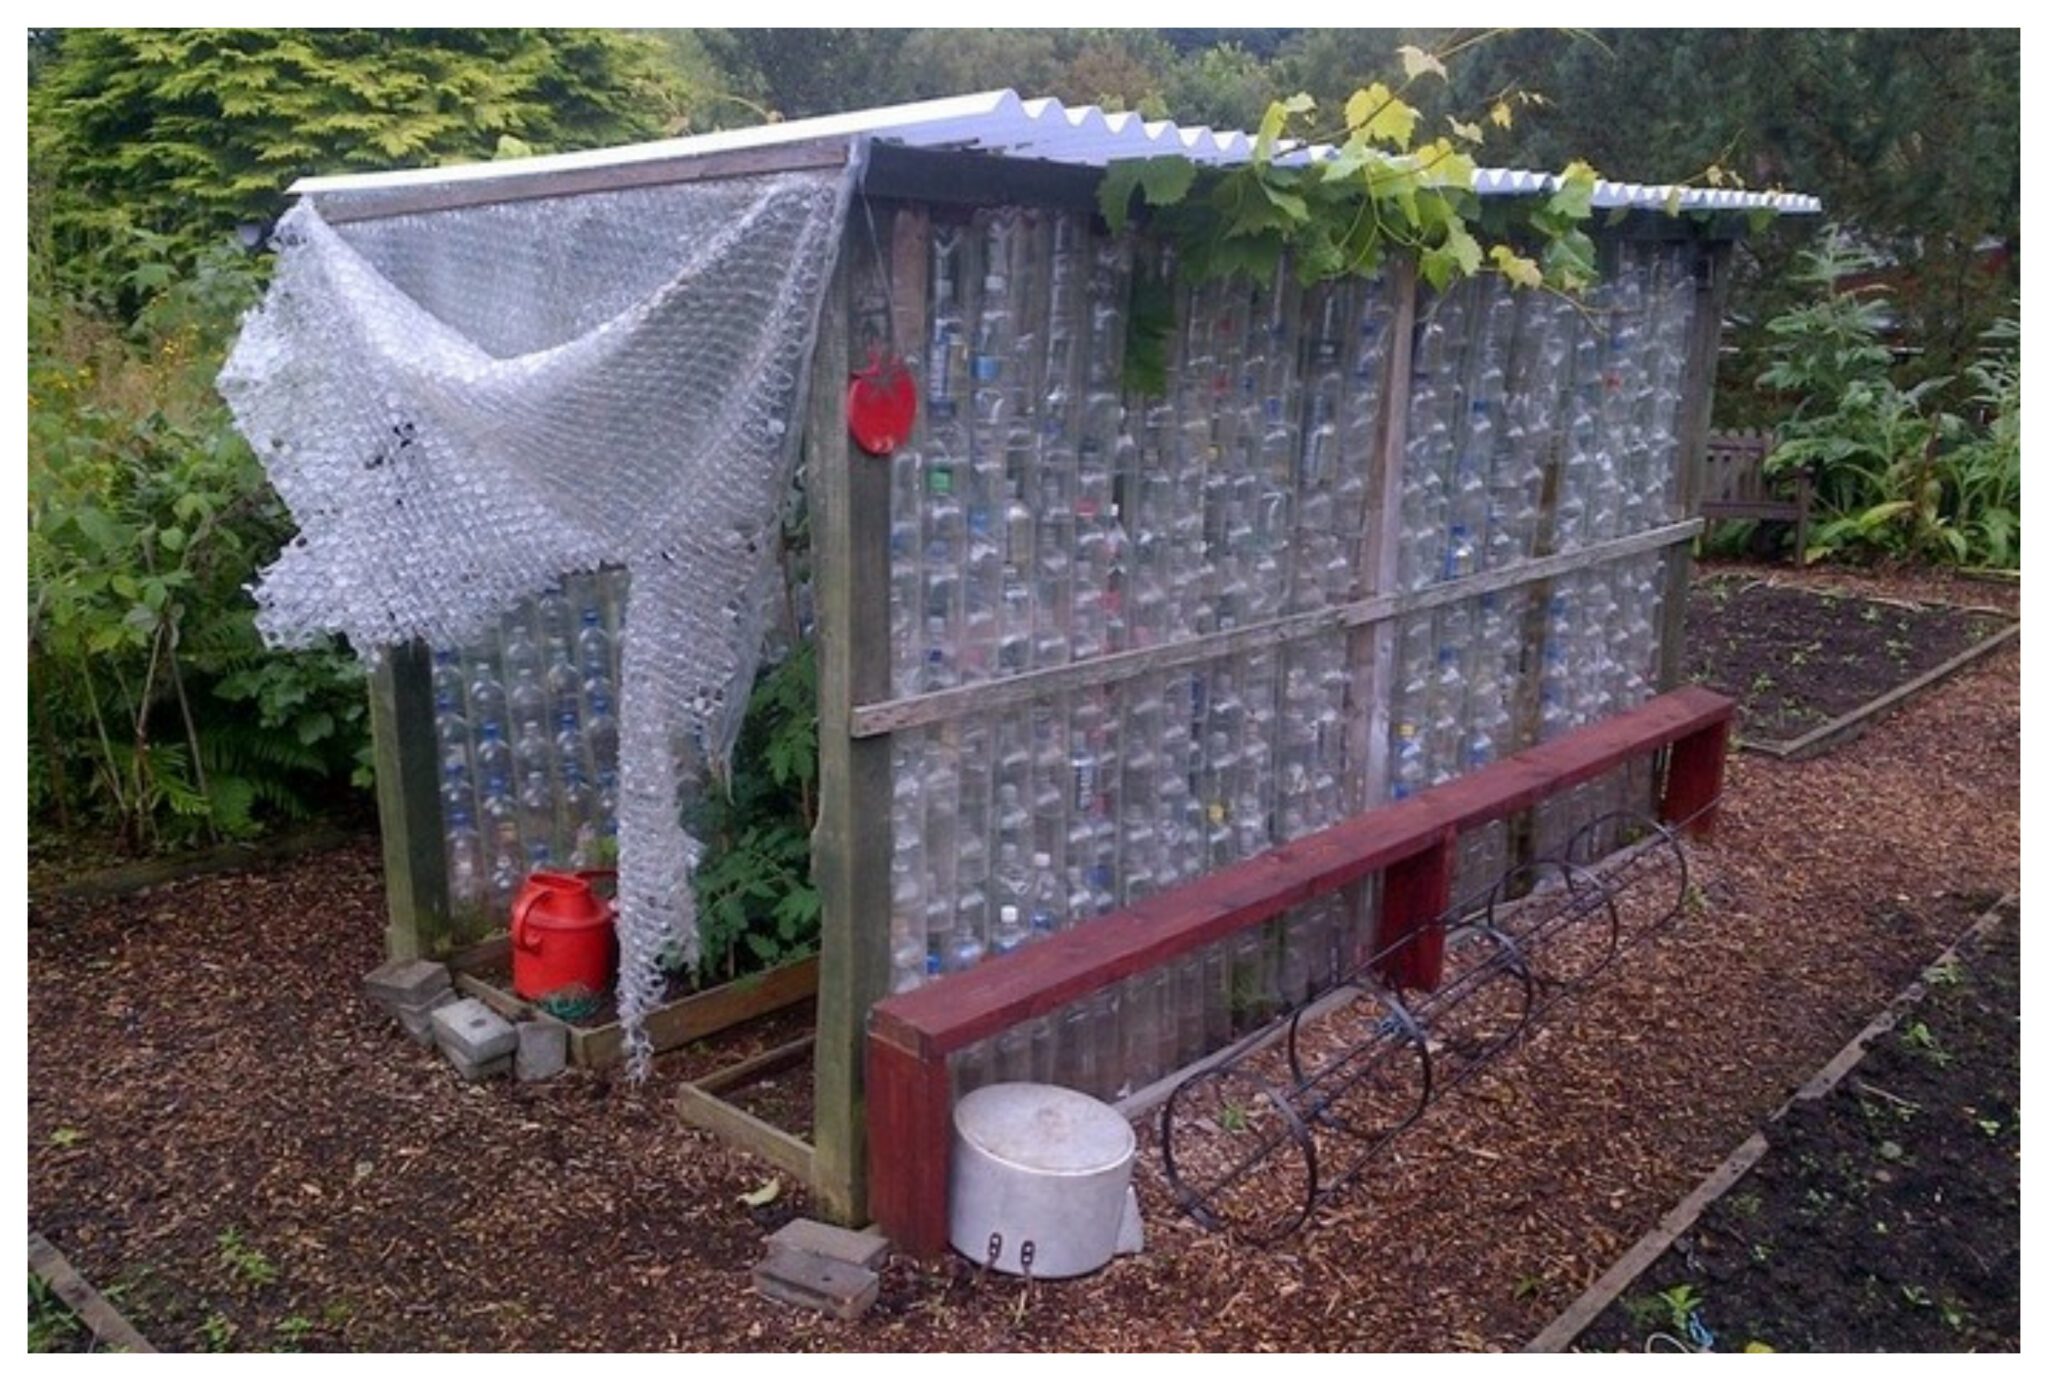
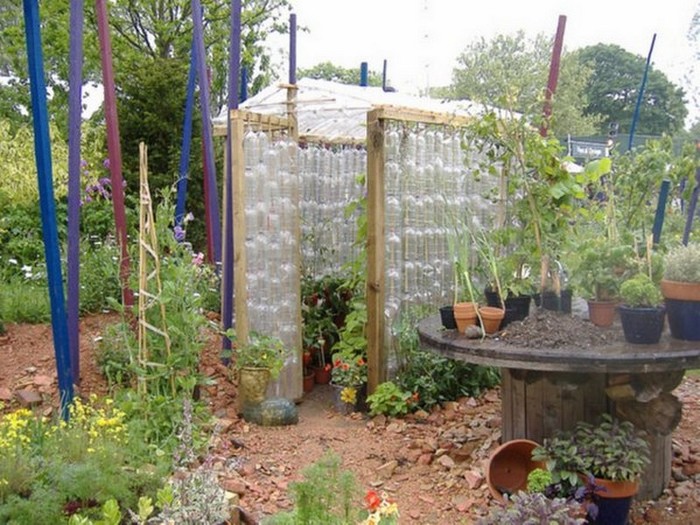
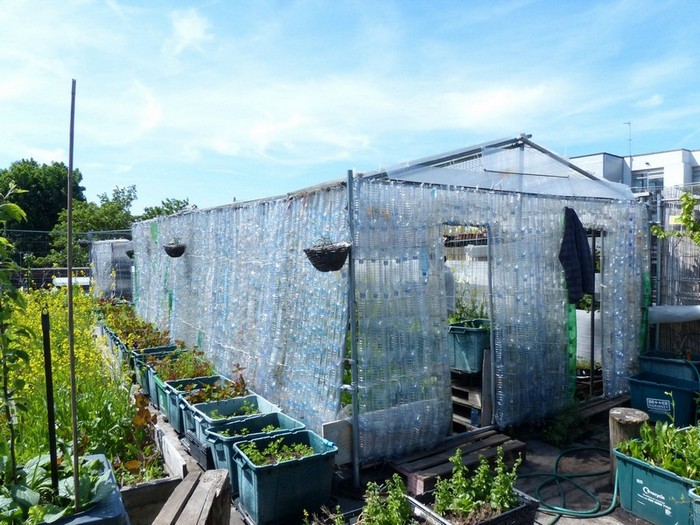
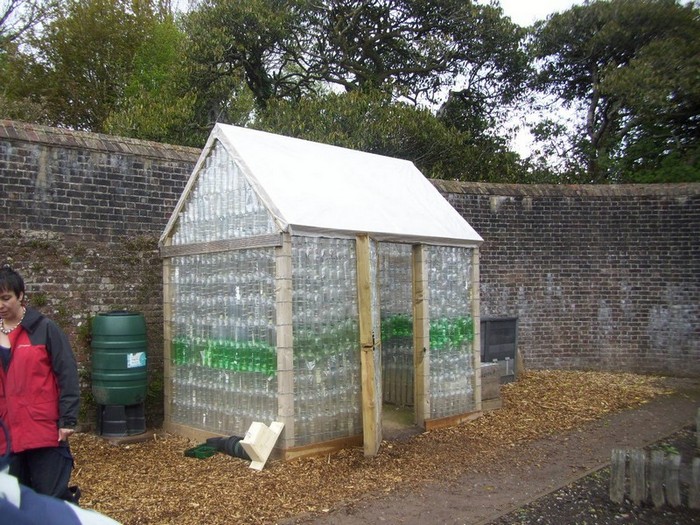
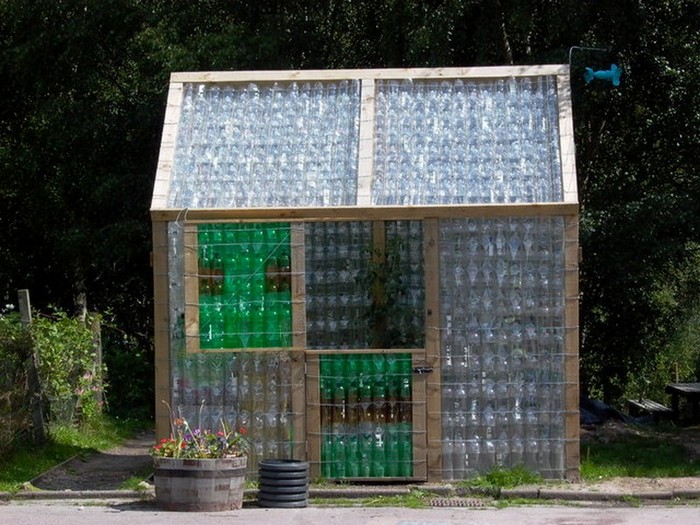
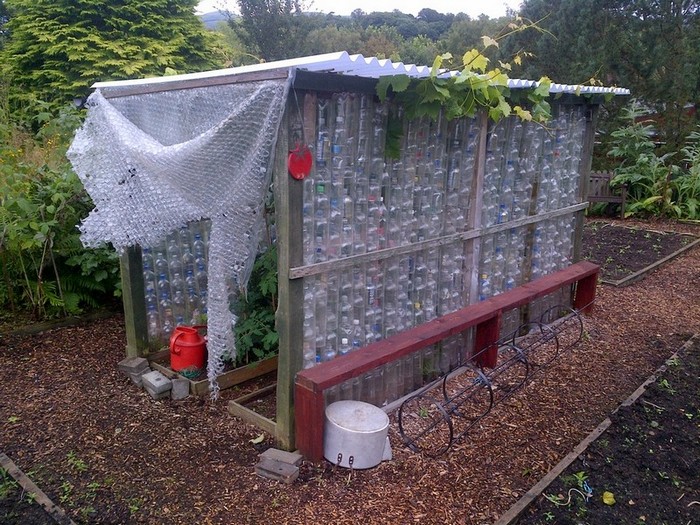
Now it might not look like a robust and effective structure to some, but many DIY-ers have already built their plastic bottle greenhouse. Despite its humble appearance, a plastic bottle greenhouse can be a surprisingly solid and effective structure, as many DIY-ers have already discovered.
And still, this project is continually being shared by different people and organizations in their community. Now that’s a good sign that this idea works in many places worldwide!
If you think this greenhouse idea is perfect for you, then it’s time to collect all those plastic bottles that you will need. 🙂
What are the Advantages of DIY Plastic Bottle Greenhouse?
Creating a DIY plastic bottle greenhouse offers several advantages, making it a popular choice for eco-conscious gardeners and enthusiasts. Here are six key benefits:
- Cost-Effective:
- Building a greenhouse from recycled plastic bottles is an incredibly budget-friendly option. Plastic bottles are readily available and often free, making them an inexpensive alternative to traditional greenhouse materials like glass or polycarbonate panels.
- Environmentally Friendly
- Repurposing plastic bottles for a greenhouse offers a significant environmental benefit by reducing waste and lessening the impact of discarded plastics. Instead of adding to landfills or polluting oceans, repurposing materials for DIY projects like a greenhouse promotes sustainability and eco-friendly practices.
- This approach not only helps to minimize the carbon footprint associated with plastic production but also encourages individuals to take an active role in reducing environmental harm through creative and resourceful solutions.
- 3. Customizable Design
- DIY plastic bottle greenhouses provide versatility in design, enabling builders to tailor the size, shape, and layout to their unique needs and preferences. Whether you’re working with limited space or aiming to accommodate a sizable garden, the greenhouse can be adjusted accordingly.
- This flexibility allows for creative expression and ensures that the structure complements its surroundings while effectively fulfilling its intended purpose. With the ability to customize every aspect of the design, builders can create a greenhouse that reflects their style and maximizes functionality for optimal plant growth.
- Energy Efficiency
- Energy Efficiency: Plastic bottles utilized in greenhouse construction serve as effective insulating panels, adept at trapping heat and establishing a cozy microclimate conducive to plant growth. Their innate insulating properties enable them to regulate temperature fluctuations efficiently.
- Consequently, less external heating is required, especially in cooler seasons, resulting in significant energy conservation. By harnessing this natural insulation, DIY plastic bottle greenhouses offer an environmentally friendly solution that minimizes energy consumption and promotes sustainable gardening practices.
- UV Protection
- UV Protection: Numerous plastic bottles exhibit UV-resistant properties, effectively safeguarding plants against harmful ultraviolet radiation. This UV resistance serves as a protective barrier, shielding plants from potential sun damage and preventing premature degradation of greenhouse components.
- By mitigating the effects of UV exposure, DIY plastic bottle greenhouses ensure the longevity of the structure while safeguarding the health and vitality of cultivated plants.
- Educational Opportunity
- Building a plastic bottle greenhouse offers an educational experience for individuals of all ages. It provides an opportunity to learn about sustainability, recycling, and gardening practices while actively engaging in a hands-on project. Schools, community groups, and families can use the greenhouse as a teaching tool to promote environmental awareness and foster a deeper connection with nature.
DIY plastic bottle greenhouses combine affordability, sustainability, and creativity, making them a practical and eco-friendly solution for cultivating plants while minimizing environmental impact.
How to Make a Plastic Bottle Greenhouse
What materials are needed to build a Plastic Bottle Greenhouse
- 1,500 Plastic Bottles (ideally 2-litre bottles)
- 4 x 4″ treated Posts
- 2 x 2″ treated Timber
- Garden Canes
- Cement Mix
- 4″ and 3″ Screws
- Fencing Staples
- Gravel, Slabs, Mulch Matting
- Bucket
- Soap
- Water
- Hinges
What tools are needed for this DIY project?
- Measuring Tape
- Scissors
- Trowel
- Hammer
- Cordless Drill
- Spirit Level
- Mitre Block
- Spade
- Pinch Bar
- Step Ladder
How to step-by-step make a DIY Plastic Bottle Greenhouse?
1. Collect Plastic Bottles
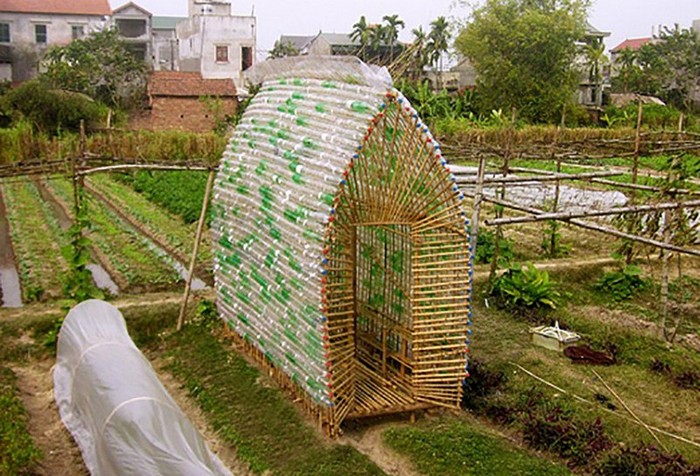
- Gather about 1,500 uniform 2‑liter PET bottles for a medium-sized (2 m × 3 m) greenhouse.
- Use only clear bottles for maximum light transmission.
- Remove and recycle caps and labels as you collect them.
Tip: Organize a neighborhood or school collection drive to speed up the process.
While it may take some time to gather a large number of plastic bottles, it will be well worth the effort in the end.
2. Clean and Prepare the Bottles
- Wash each bottle with warm water and mild soap to remove dirt and residue.
- Rinse thoroughly and let bottles dry completely to prevent mold.
- Inspect for damage — discard bottles with cracks or discoloration.
Optional: Trim off labels and neck ridges for a smoother fit.
3. Build and Set the Main Posts
- Use 4 × 4 in (100 × 100 mm) treated lumber posts.
- Mark your layout (e.g., 2 m × 3 m rectangle).
- Dig post holes 45 to 60 cm deep and fill with concrete for stability.
- Allow concrete to cure for at least 24 hours. .
- Ensure posts are plumb and evenly spaced — these anchor your structure.
4. Construct the Frames
- Build rectangular frames for walls, roof panels, and door using 2 × 2 in (50 × 50 mm) treated timber.
- Double-check dimensions so parts fit together neatly.
- Add cross‑braces for rigidity (especially for larger spans).
- Pre‑drill holes for mounting garden canes and hinges.
Tip: Label each frame (front, side, roof) for easy assembly later.
5. Prepare Bottle Columns
- Cut off the bottle bases using a sharp utility knife.
- Drill a 10 mm hole in the center of each bottle bottom.
- Thread bottles onto a garden cane (8–10 mm diameter), neck into base, until the cane is full.
- Each column should be about 2 m tall, typically 5–7 bottles per cane.
- Secure ends of the cane with small nails, clips, or by hot‑gluing the top bottle to keep them tight.
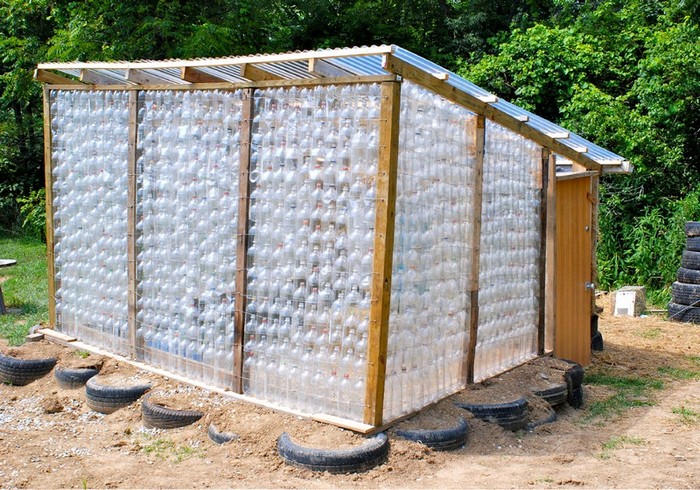
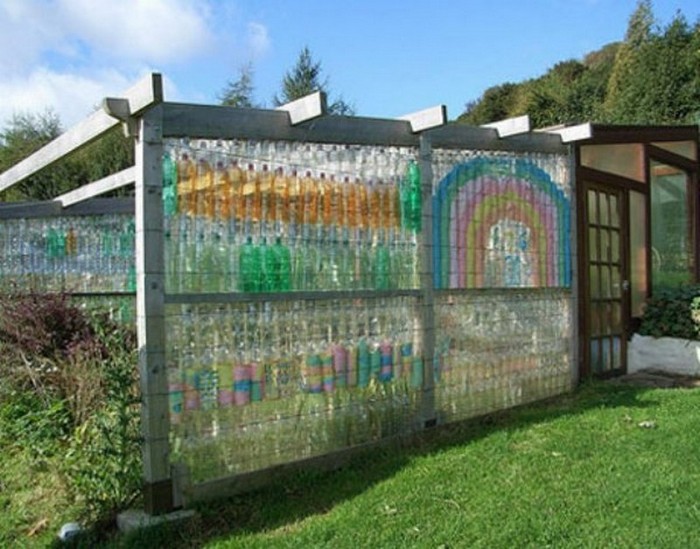
6. Mount Bottle Panels onto Frames
- Align cane columns vertically within your wooden frames.
- Fasten the cane ends to the top and bottom rails using fencing staples, cable ties, or screws with washers.
- Keep 20 to 25 mm spacing between columns for airflow while maintaining coverage.
- For the roof, overlap columns slightly to prevent leaks.
7. Assemble the Greenhouse
- Join the side frames to the corner posts using screws or galvanized brackets.
- Attach the rear and front frames, then secure the roof.
- Install the door frame with hinges and a latch.
- Check for square and level alignment before tightening all joints.
- Optionally, add ventilation panels or windows to manage heat and humidity.
8. Finishing Touches
- Add gravel or mulch matting to the floor to control weeds and improve drainage.
- Seal gaps and joints with weatherproof tape or silicone.
- Coat wood surfaces with outdoor wood sealant to extend lifespan.
- Consider bracing interior corners for wind resistance.
Quick Build Summary
| Item | Typical Quantity | Notes |
|---|---|---|
| Plastic bottles | ~1,500 (2 L) | Washed, labels off |
| Timber posts | 4 pcs (4×4 in) | Set in concrete |
| Frame timber | 6–8 pcs (2×2 in) | For walls + roof |
| Garden canes | ~150 pcs (2 m each) | 5–7 bottles per cane |
| Screws/staples | 50–100 pcs | Use galvanized |
| Tools | Drill, saw, hammer, level, spade | Basic DIY set |
| Build time | 2–4 days | Two people |
| Estimated cost | $120–$280 | Depending on lumber prices |
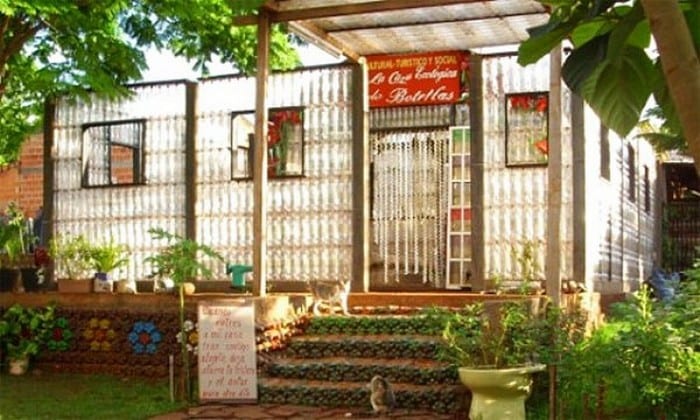
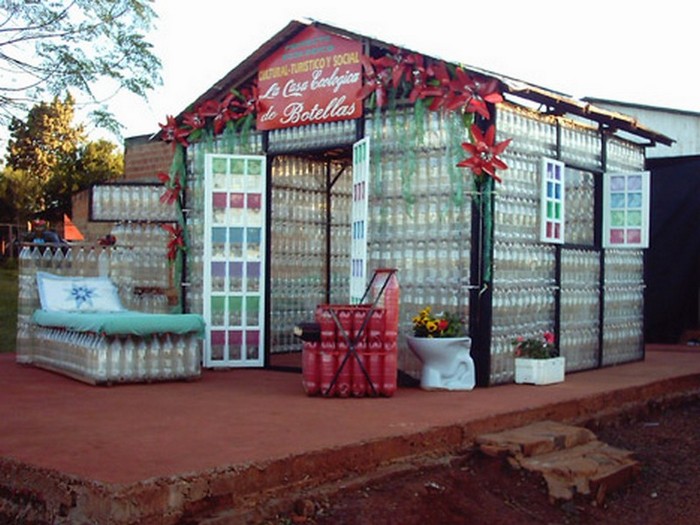
Well, what do you think? Would you love to have your greenhouse made of plastic bottles in your backyard? If so, you can check our gallery for more inspiration. 🙂
Click on any image to start the lightbox display. Use your Esc key to close the lightbox.![]()

You can get step-by-step instructions from REAP over here…
The Wrap Up
Building a DIY plastic bottle greenhouse in just six easy steps is a rewarding and sustainable project that anyone can undertake. By collecting plastic bottles and repurposing them into a functional greenhouse, you not only create a protective environment for your plants but also contribute to reducing plastic waste.
With careful planning, preparation, and execution, you can enjoy the benefits of growing your plants while making a positive impact on the environment. So, roll up your sleeves, gather your materials, and embark on this eco-friendly journey to create a greenhouse that’s both practical and environmentally conscious. Happy gardening!
Frequently Asked Questions
1. What are the benefits of a plastic bottle greenhouse?
It’s an eco‑friendly way to recycle plastic waste while creating a low‑cost, productive growing space. A bottle greenhouse helps extend the growing season and reduces your environmental footprint.
2. How can I collect enough bottles for the project?
Start with your household recycling, then ask friends, neighbors, schools, and local cafés to save bottles. Hosting a community bottle drive can quickly provide the 1,000–1,500 bottles you’ll need.
3. What tools or skills do I need?
Only basic DIY tools — like a drill, saw, scissors, and measuring tape — are required. The design is straightforward and suitable for beginners, though careful measuring helps ensure good fit and stability.
4. How long does construction take?
A medium‑sized (2 m × 3 m) greenhouse usually takes 2–5 days with two people working. Time varies based on size, material availability, and weather.
5. What types of plants grow best inside?
Most vegetables, herbs, and flowers thrive in bottle greenhouses, including tomatoes, lettuce, peppers, and basil. Choose heat‑loving or temperate crops that suit your local climate.
6. How do I maintain my bottle greenhouse?
Clean bottles annually to keep light levels high, check for loose panels, and maintain ventilation. Regularly monitor temperature and humidity to prevent mold or overheating.
7. Can the greenhouse be moved or upgraded later?
Yes. The structure can be dismantled easily — just remove the panels and reassemble them on new posts. You can also retrofit vents, insulation, or solar heating to boost efficiency.