Last Updated on November 3, 2025 by teamobn
From baby crib to toddler bed!
If you have a baby, a crib is an absolute must. Not only does a crib provide a safe and comfortable place for your baby to sleep, but it also gives you a place to put your baby down when you need to take a break. Cribs come in a variety of styles and prices, so you can find one that fits both your budget and your baby’s needs.
What happens to the crib when your child outgrows it? While some parents may feel sentimental about selling or storing away their child’s crib, it’s important to remember that cribs are designed for infants. Once your child reaches a certain age, it’s time to move them on to a toddler bed.
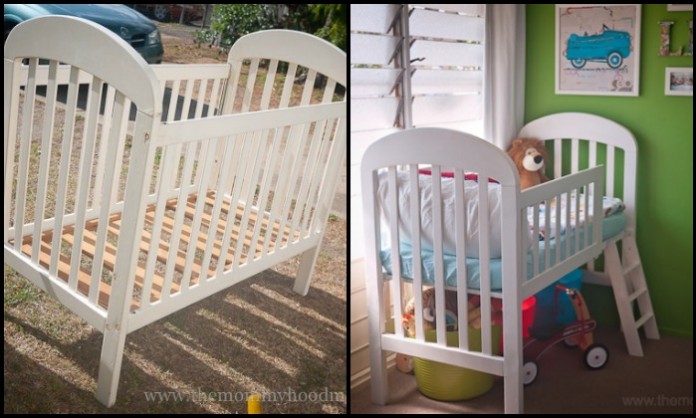
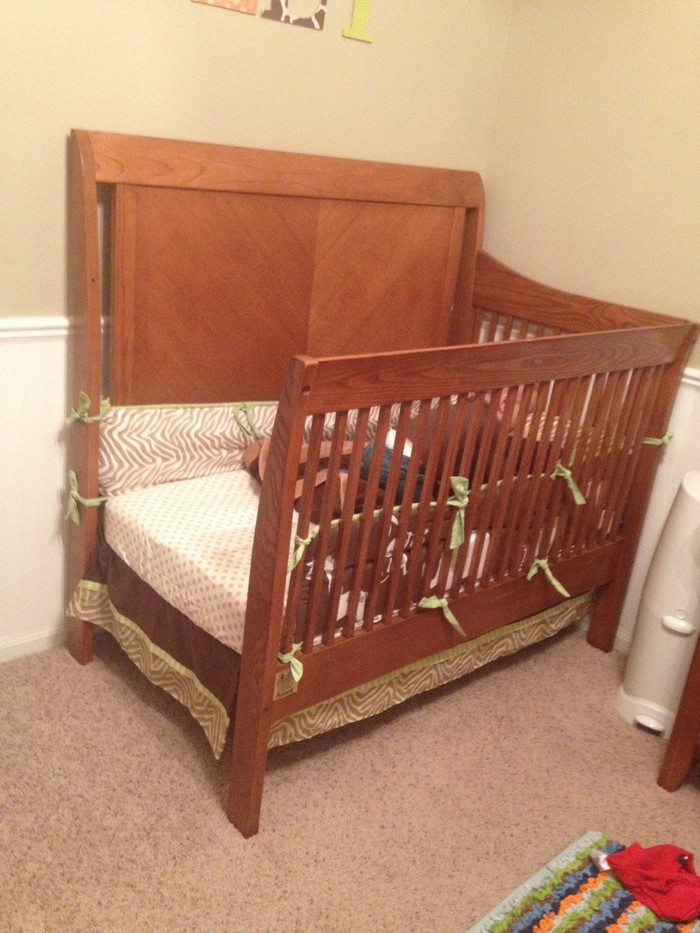
Here’s a clever way to maximize the use of your child’s crib/cot as he or she transitions from being a baby to a toddler! By removing one side of the crib, you can create a makeshift bed for your toddler that will save you money in the long run. Not to mention, it’ll be a comfy spot for your little one to sleep in during those crucial early years.
Instead of selling or giving away your old cot, you can easily convert it into a safe and comfortable toddler bed. By simply removing one side of the cot or turning them upside down, your child will be able to climb in and out of the bed with ease. Plus, the added rails will provide extra safety and security for your little one at night. It’s easy to do and it’s way less costly than getting a brand new bed for your youngster. And of course, it’s a bit of fun for everyone!

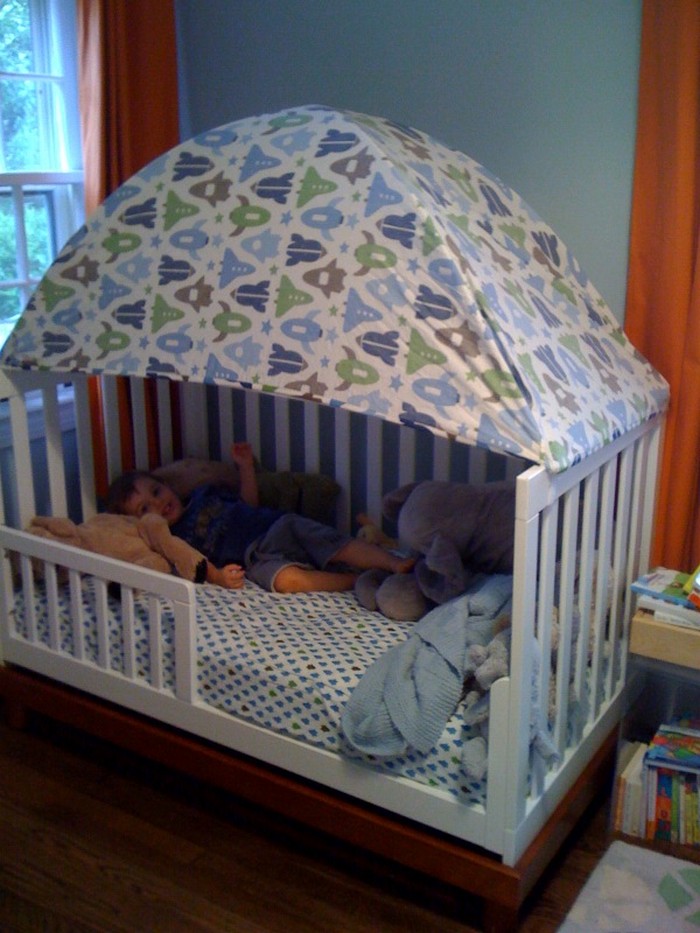
Toddlers are a joy to behold. They are so curious and full of energy, always exploring and learning new things. It’s a time of great growth and development and watching them grow and change is a true delight. Of course, parenting a toddler can also be challenging. Especially putting them to sleep. Most toddlers go through a phase of resisting bedtime. They may cry, throw tantrums, or try to delay bedtime as long as possible. An enjoyable place they can call their own can be of big help – a toddler bed!
Toddler beds are an excellent way to transition your child from a crib to a bed. They are smaller in size than a regular bed, which makes them perfect for toddlers. Additionally, most toddler beds come with rails to prevent your child from falling out.
Toddler beds are a great way to help your child feel more independent and grown up. They can still have the security of rails to keep them safe, but they can also start to feel like they are in their own bed. This can be a big adjustment for some toddlers, so it is important to be patient and help them through it.
Rather than buying a new bed, check out our guide on creating a repurposed crib bed below!
Contents
Building a Repurposed Crib Bed
You’ll need these materials:
- Crib/Cot
- Wood Screws
- Pallet Wood Slats
- Wood Glue
- Metal Angle Brace
- Paint
And these tools:
- Cordless Drill
- Measuring Tape
- Spirit Level
- Miter Saw
- Router
- Sander
Steps:
1 Inspect and measure
Start by checking every joint on the crib. Tighten any loose fasteners. Measure the interior length and width. Note these figures because pallet slats must match them.
2 Strip the crib safely
Remove the drop-side panel with your cordless drill. Keep the headboard and footboard intact. Save all hardware in a cup so nothing goes missing during the build.
3 Cut new slats
Lay pallet wood on the workbench. Use the measuring tape to mark pieces that span the inside width of the crib. Cut each piece on the miter saw. Aim for a slat every four inches to give a firm mattress base.
4 Smooth every edge
Run the sander over the pallet slats and any rough crib rail. Switch through 120, 180, then 220 grit. Sanding prevents splinters and helps paint grip later.
5 Round corners for safety
Mount a ⅜-inch round-over bit in the router. Ease sharp edges on the new slats and exposed crib posts. Kids roll and climb, so soft curves reduce injuries.
6 Reinforce the frame
Set a metal angle brace in each inside corner where rails meet the headboard and footboard. Pre-drill pilot holes. Drive wood screws to lock the braces tight. The repurposed crib bed now resists wobble.
7 Install the slat platform
Brush wood glue along the upper inner rails. Position the first pallet slat flush against the headboard. Check the spirit level. Drive two screws through each end. Repeat down the length, keeping gaps even for airflow.
8 Check alignment
Stand the crib upright. Lay the spirit level across several slats side to side and end to end. Make tiny height tweaks by backing out screws and shimming with wood off-cuts if needed. A level base means no rolling mattress.
9 Apply a fresh finish
Vacuum dust. Wipe with a damp cloth. Brush or spray two light coats of child-safe paint. Let each coat dry completely. A bold color turns the repurposed crib bed into a bedroom focal point.
10 Final safety scan
Run a hand over every surface once the paint cures. Confirm no screws protrude. Shake the frame gently. If nothing rattles, slide the toddler mattress in place and invite your little one to test their new big-kid retreat.
You’ve taken a once-outgrown crib and shaped it into a sturdy, comfortable bed. Short slats support the mattress. Rounded edges and firm braces boost safety. A bright finish completes a project that saves money and keeps good timber out of the landfill. Enjoy the pride of seeing your child stretch out in a repurposed crib bed you built yourself.
Safety checks before converting a repurposed crib
Converting a repurposed crib into a toddler bed starts with a rigorous safety audit. Careful checks prevent hidden hazards and turn cherished furniture into a secure haven.
Inspect joints and hardware
Loose screws and shaky dowels invite trouble. Grip every rail and twist gently. Any movement means retightening or replacing fasteners. Use fresh wood screws that bite deep and hold firm.
Add metal angle braces in weak corners. Test again by shaking the frame. Silence signals success. This early effort protects the child and preserves the value of the repurposed crib project.
Check for recalled parts
Cots built in different eras follow evolving regulations. Look up the model or brand on national recall lists. Pay close attention to drop-side mechanisms and plastic connectors.
Replace any flagged item with modern hardware that meets current standards. If the crib lacks clear labeling, treat unknown parts as suspect. Taking time now eliminates future regret.
Verify spacing of rails
Slats must be narrow enough to stop a curious head. Slide a soda can between two rails. If it passes through, add new slats or mount clear acrylic guards.
Maintain uniform gaps so the mattress fits without pinch points. Always measure twice with a rigid ruler, not an elastic tape. Consistent spacing builds trust in nightly safety.
Test finish for toxins
Older varnish may hide lead or heavy metals. Rub an inconspicuous spot with alcohol on cotton wool. Discoloration hints at unstable paint.
Strip questionable layers with a citrus-based remover, then wash and sand. Apply a water-based, EN-71-3 certified finish afterward. Nontoxic coatings let toddlers chew rails during teething without risk.
Smooth splinters and edges
Run fingertips along every wooden surface. Rough fibers snag pajamas and skin. Shape corners with a router fitted with a round-over bit.
Follow up with 180-grit sanding, then 220-grit for silkiness. Finish by wiping with a damp cloth to raise grain and sanding once more. A gentle feel calms both child and parent before lights out.
Securing a strong mattress platform and slats
A stable mattress platform keeps sleep uninterrupted and joints intact. This section shows how to anchor slats and hardware so the repurposed crib feels rock solid.
Choose durable slat wood
Select kiln-dried pine or hardwood pallet boards free of splits. Each piece should span the inside width with at least one inch resting on the ledge at both ends. Reject warped stock immediately. Predictable grain resists mid-night creaks.
Space slats for airflow
Healthy mattresses breathe. Leave two to three inches between boards. Mark equal gaps with a scrap block as a spacer. Even spacing distributes weight and stops sagging. Good airflow also discourages mold beneath waterproof sheets.
Reinforce corners with braces
Metal L-brackets transform four wooden posts into a sturdy rectangle. Pre-drill pilot holes to prevent splits. Use zinc-plated screws long enough to reach deep heartwood. Tighten until the bracket sits flush. A solid frame keeps the sleeper centered regardless of nightly acrobatics.
Level the platform
Place a spirit level on three random slats. If the bubble drifts, adjust by slipping thin plywood shims under low spots. Recheck until the bubble stays centered. A level base means muscles relax and the spine aligns.
Run a weight test
Stack textbooks equal to the child’s weight plus twenty pounds. Leave them overnight. Return in the morning and look for bent slats or pulled screws. Any failure now prevents a midnight collapse later. The repurposed crib earns parents’ trust only after passing this simple but revealing trial.
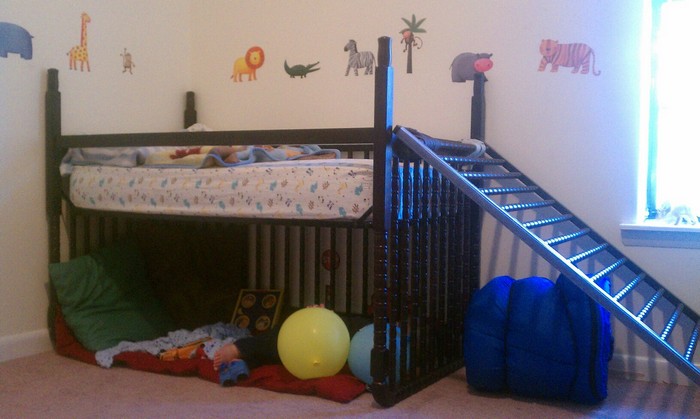
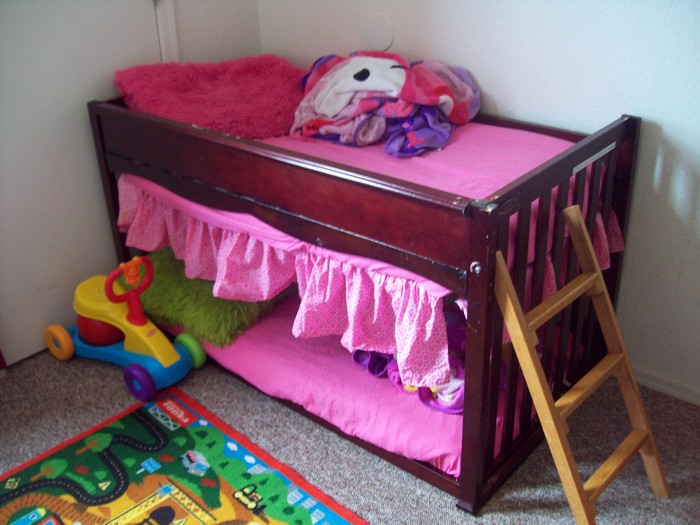
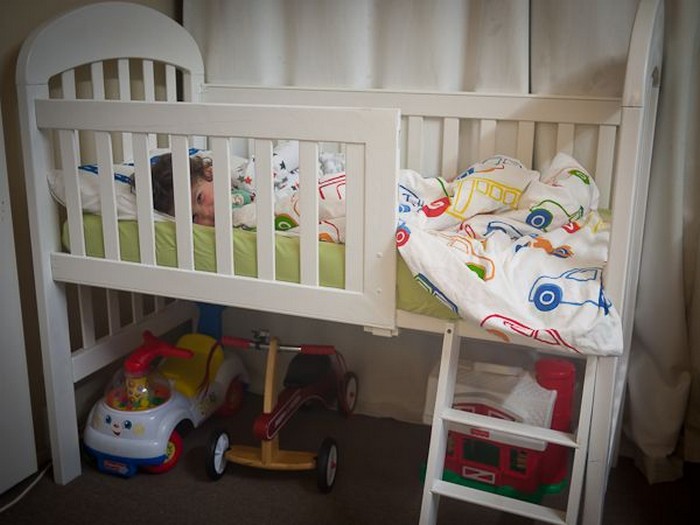
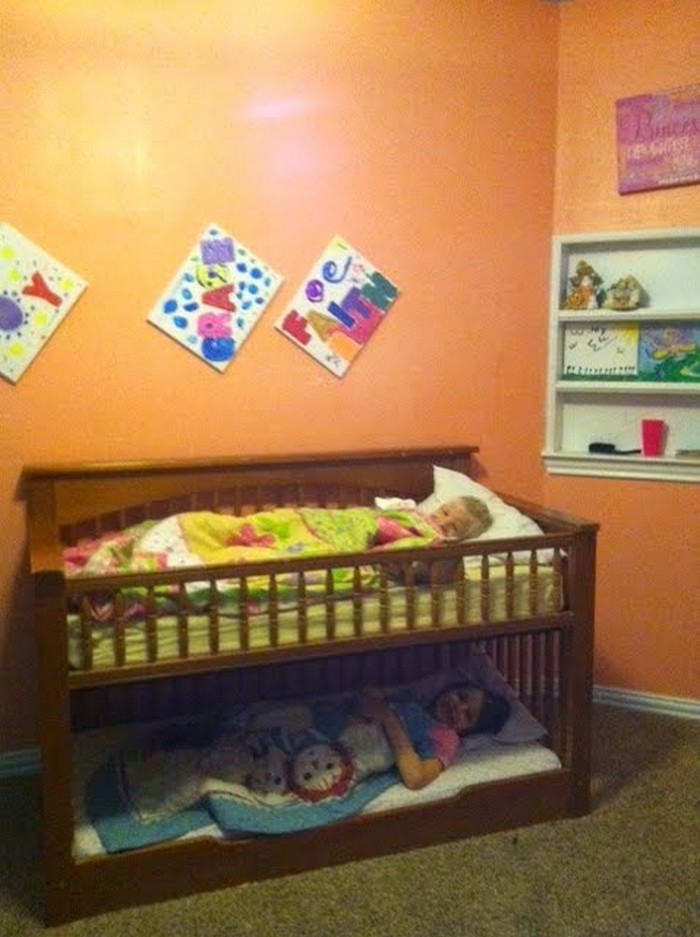
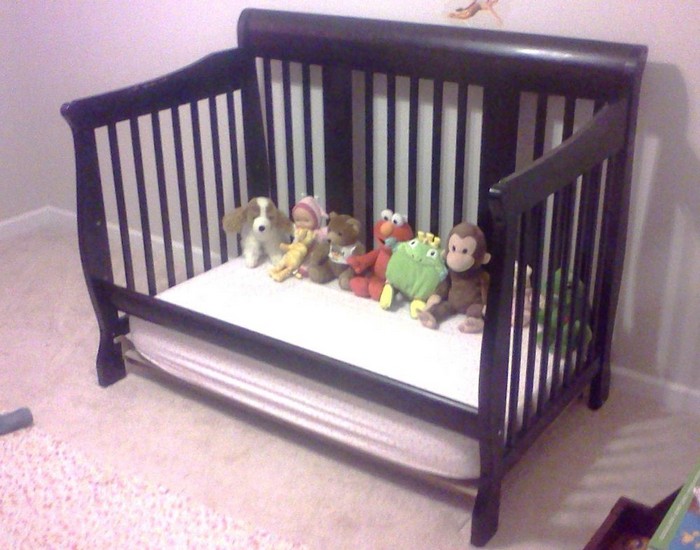
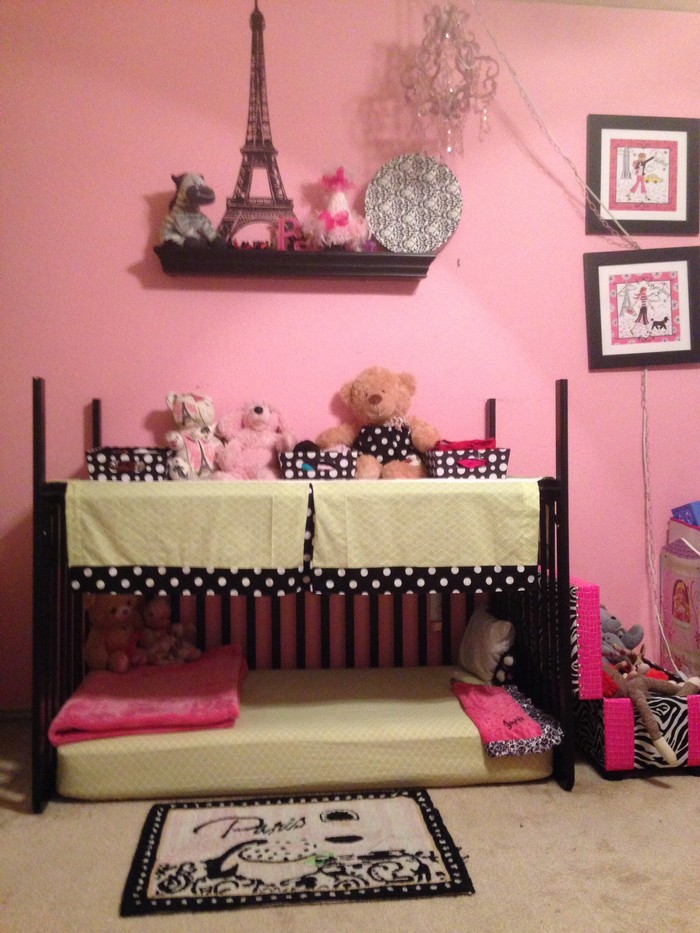
Repurposed Crib Bed Gallery
Click on any image to start the lightbox display. Use your Esc key to close the lightbox.![]()


Adding playful design accents toddlers will love
Design flourishes turn a simple frame into an imaginative retreat. Thoughtful accents encourage bedtime excitement and let the repurposed crib become part of playful storytelling.
Pick a color palette
Soft pastels create calm, while bold hues spark energy. Choose one dominant shade and two supporting tones. Match wall art or favorite plush toys for harmony. Paint with low-VOC enamel for durability.
Paint friendly motifs
Use painter’s tape to outline clouds, stars, or jungle vines. Fill shapes with sponge brushes for gentle texture. Outline details with a fine artist’s brush once the base coat dries. Themes help children own the space and view bedtime as an adventure beside familiar friends.
Attach soft headboard pads
Cut half-inch foam to match headboard panels. Wrap in washable fabric and staple at the back. Screw the pads through existing crib holes so no sharp hardware shows. Cushioned panels protect heads during restless nights and add a cozy, upholstered look.
Under-bed lighting magic
Strip-mounted LED tape under the slats casts a gentle glow. Choose a plug-in kit with an inline switch toddlers can reach. Soft light guides midnight bathroom trips and highlights storage baskets beneath. Hide cords behind a cable raceway fastened to a leg.
Personalize with name plaques
Cut plywood letters or buy pre-made MDF shapes. Sand edges smooth. Prime, paint, and clear-coat for resilience. Mount letters with adhesive strips across the footboard. Seeing their name reinforces ownership and pride. This cherished focal point ensures the repurposed crib remains a treasured keepsake long after the toddler years end.
A thorough safety inspection, rock-solid platform, and cheerful finishing touches work together to transform the repurposed crib into a welcoming toddler sanctuary. The result strikes a balance between parental peace of mind and a child’s sense of wonder and independence, proving that responsible upcycling can be fun, stylish, and deeply meaningful.
Conclusion
You’ve turned a crib that once held an infant into a sturdy, inviting toddler bed. Careful safety checks removed hidden risks and tightened every joint. Solid slats and braces give the frame strength for nightly jumps and daytime play. Child-safe paint and playful accents make the repurposed crib bed a centerpiece kids love. By upcycling instead of buying new, you saved money, reduced waste, and created a family heirloom.
If you liked this, you will also like the “Twelve ways to repurpose that cot!“…


