Last Updated on November 25, 2025 by teamobn
If you’re stuck in a hot room all day, running a full‑size air conditioner is expensive and often unnecessary -especially if you just need to cool yourself, not the whole space.
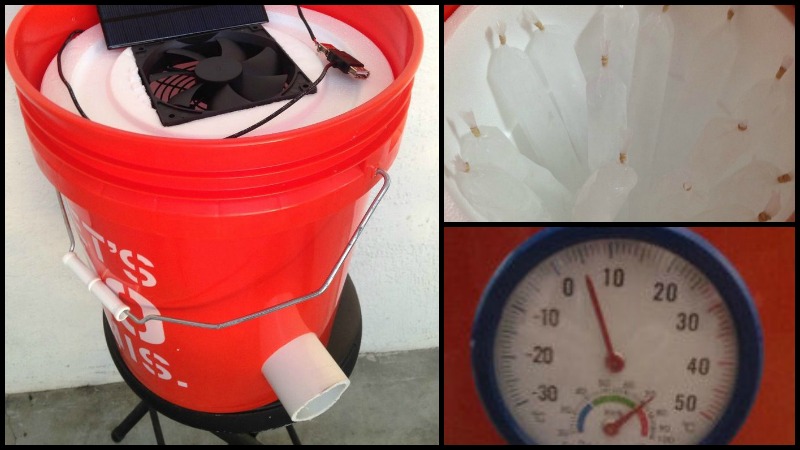
This simple 5‑gallon bucket air conditioner is a DIY cooling project that uses a bucket, a small fan, and ice or reusable cold packs to create a focused stream of cool air.
Contents
- 1 Project Overview
- 2 Crafting a 5-Gallon Bucket Air Conditioner
- 2.1 What are the materials needed to craft a 5-Gallon Bucket Air Conditioner?
- 2.2 What tools are needed for this project?
- 2.3 How to build a 5-Gallon Bucket Air Conditioner?
- 2.3.1 Step 1: Mark and Drill the Outlet Hole
- 2.3.2 Step 2: Drill the Matching Hole in the Foam Liner
- 2.3.3 Step 3: Install the PVC Outlet Pipe
- 2.3.4 Step 4: Cut the Lid and Mount the Fan
- 2.3.5 Step 5: Prepare and Freeze Your “Popsicle” Ice Packs
- 2.3.6 Step 6: Load the Bucket for Maximum Cooling
- 2.3.7 Step 7: Power It up and Enjoy the Cool Air
- 3 Here’s another DIY air conditioner you might like…
- 4 Alternative Cooling Fillers for Your Bucket Air Conditioner
- 5 Safety Precautions
- 6 Frequently Asked Questions
- 7 Conclusion
Project Overview
- Build time: About 1–2 hours
- Skill level: Beginner DIY
- Cost: Usually under $30–$60, depending on what you already have
- Best for: Cooling one person or a small area (desk, workshop, camping spot, patio). It will not cool an entire room like a conventional AC unit.
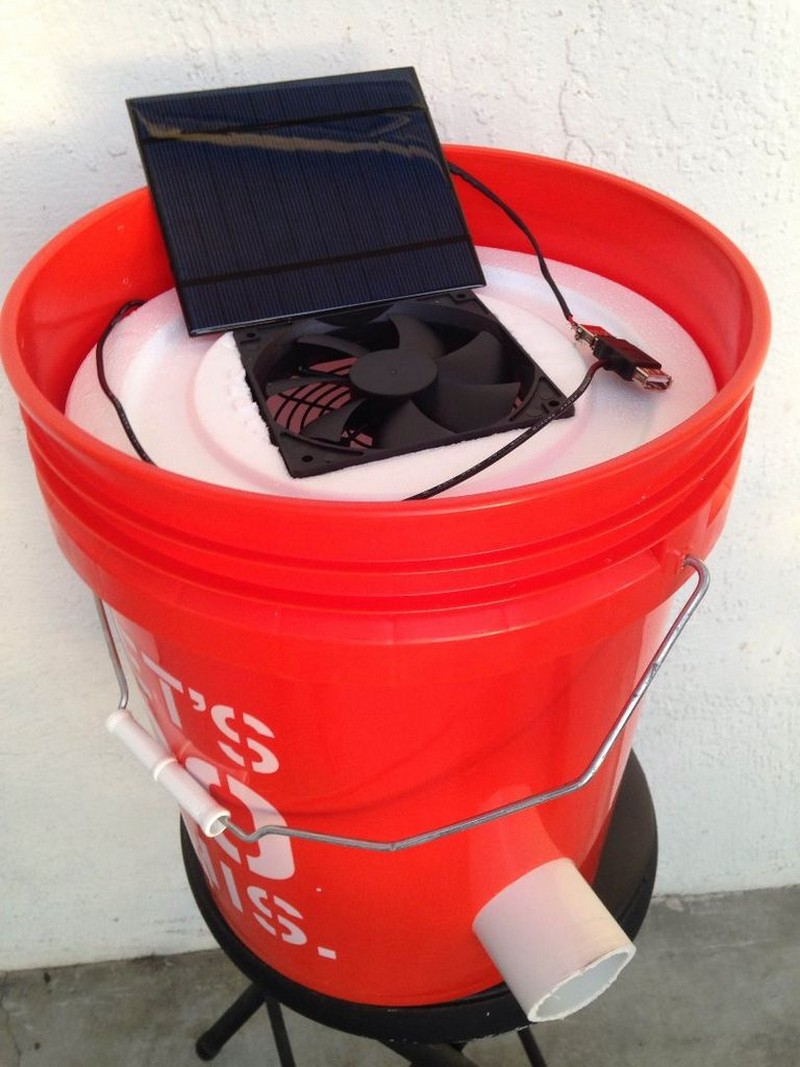
This compact, portable bucket air conditioner is a clever way to stay comfortable in hot weather while keeping your energy bills low. You can even power it with a small solar panel if you have one, making it a handy outdoor or off‑grid cooling option.

Click on any image to start the lightbox display. Use your Esc key to close the lightbox. ?
Crafting a 5-Gallon Bucket Air Conditioner
Before you gather your supplies, it helps to know what makes this little cooler work so well. The design is all about directing chilled air exactly where you need it, using a bucket as the insulated chamber and a small fan to circulate the cold.
With just a handful of inexpensive parts, you can assemble a compact cooling unit that’s surprisingly effective for personal use – perfect for desks, workshops, or outdoor setups.
What are the materials needed to craft a 5-Gallon Bucket Air Conditioner?
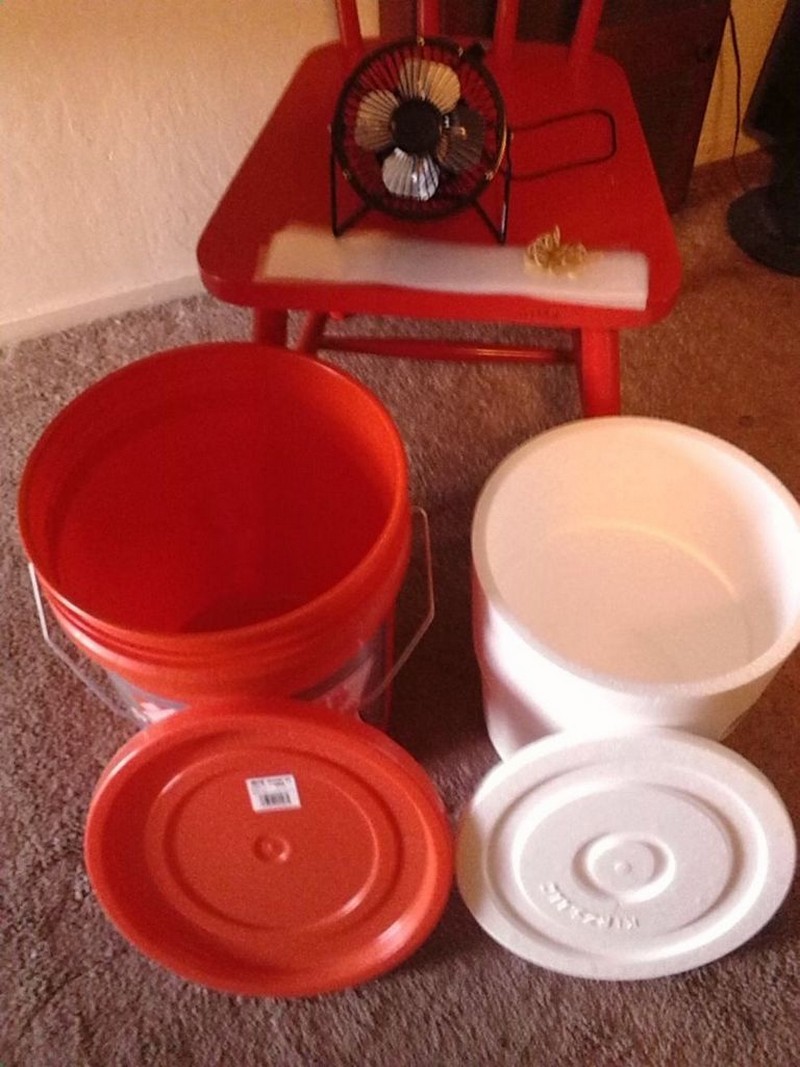
- A clean, food-grade 5-gallon bucket with snap-on lid
- A foam (Styrofoam) bucket liner, snug enough to drop straight in
- One piece of 2″-diameter PVC pipe, 2½ inches long and smoothly cut square at both ends
- A small 5 V USB fan (desktop style or 120 mm CPU fan)
- Popsicle/ice sleeves, a 1-gallon plastic jug, and coarse salt for the ice core
What tools are needed for this project?
- Cordless Drill
- 2 3/8″ Hole Saw
- Sharp Utility Knife
- Hacksaw or PVC Cutter
- Marker
- Ruler
- Sandpaper
How to build a 5-Gallon Bucket Air Conditioner?
Do a quick dry-fit:
- Confirm the liner drops to the bottom but still allows the lid to close tight.
- Slide the PVC pipe through the liner’s wall by hand; it should barely fit; that tightness will later guarantee an airtight seal.
- Plug the USB fan into a power bank to ensure it spins properly before embedding it in foam.
Step 1: Mark and Drill the Outlet Hole
The position of the outlet hole is important for good cold‑air flow.
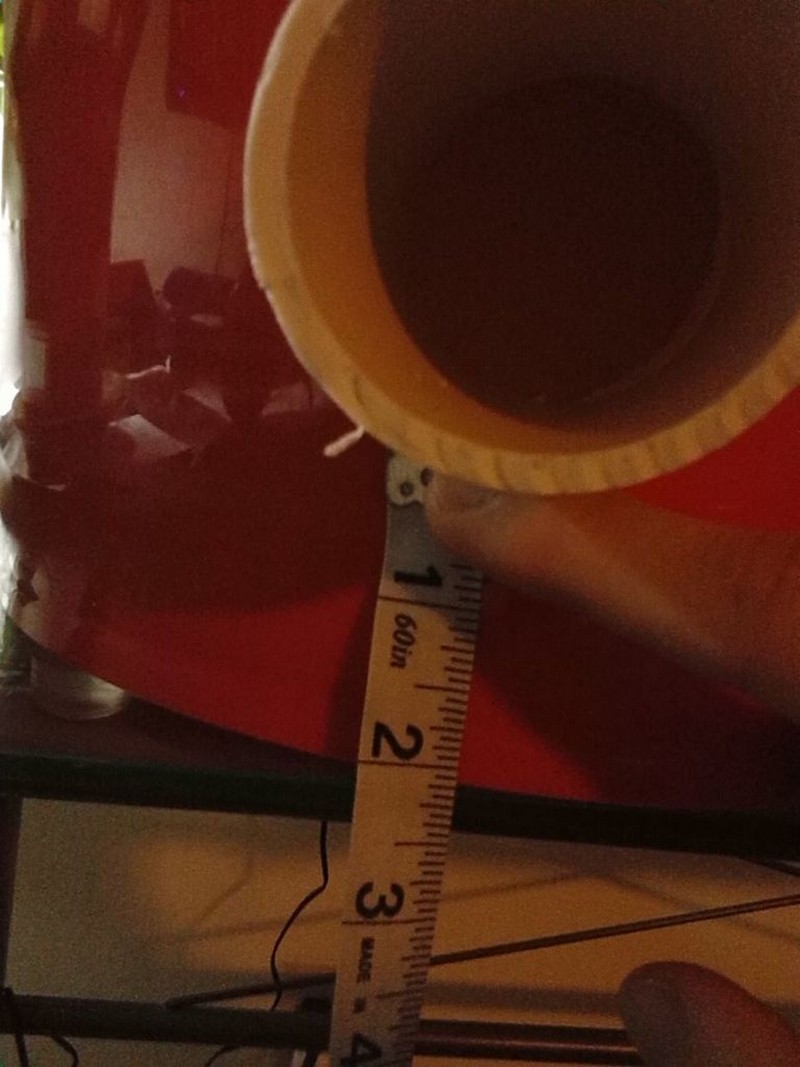
- Measure and mark a point 2″–2½” from the bottom of the bucket.
- Using the 2⅜” hole saw, drill a hole at your mark through the side of the bucket.
- Use your knife to carefully shave off any rough or “hairy” plastic around the hole so the PVC pipe can seat snugly.
You want this hole low enough to pull air across the cold packs, but high enough to avoid any water that may collect at the very bottom.
TIP: If the bucket has a factory seam, place the outlet on the opposite side to avoid extra ridges that can leak air.
Step 2: Drill the Matching Hole in the Foam Liner
- Place the foam bucket liner inside the bucket and center it.
- Press down gently in the middle of the liner with one hand to keep it steady.
- From the outside, run your hole saw back through the bucket hole and drill through the foam liner so both holes are perfectly aligned.
This ensures the PVC outlet lines up correctly and helps keep air moving efficiently through the cold interior.
Step 3: Install the PVC Outlet Pipe
- Push the 2″ PVC pipe through the bucket wall and foam liner from the outside.
- Rotate it gently back and forth as you push until it fits airtight.
- Don’t push it too far inside the liner; ideally, the inner end of the pipe should be flush with the foam liner’s inner wall, not sticking deep into the bucket.
If the pipe extends too far inside, it can restrict airflow and reduce the cooling effect.
Step 4: Cut the Lid and Mount the Fan
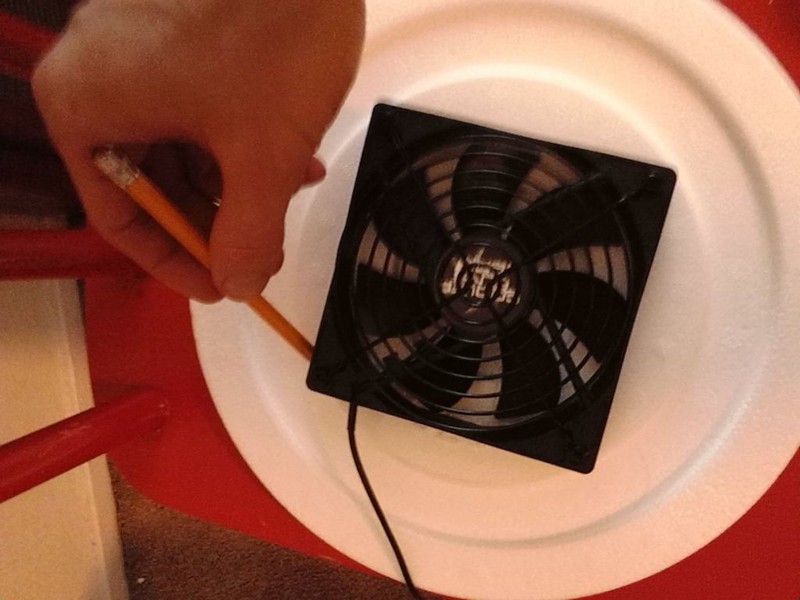
Next, you’ll mount the fan on the lid so it blows air down into the bucket and out through the PVC pipe.
- If you’re using a desktop fan, remove it from its stand or mount (usually just a couple of screws).
- Place the fan centered on top of the foam lid and trace its outline.
- For a round desktop fan, trace the fan housing and then shrink your cut line inward by about ¼” so the blades can sit just inside while the lip rests on top.
- For a square CPU‑type fan, simply trace the outer edges.
- Carefully cut along your line in the foam lid using a knife with a gentle sawing motion. Start small and test fit; foam cuts easily, and it’s better to remove a little at a time.
- Test fit the fan in the opening:
- The blades should sit slightly into the bucket.
- The fan housing should rest securely on top of the foam lid.
Take care not to crack or break the foam lid. Replacement lids can be difficult to find.
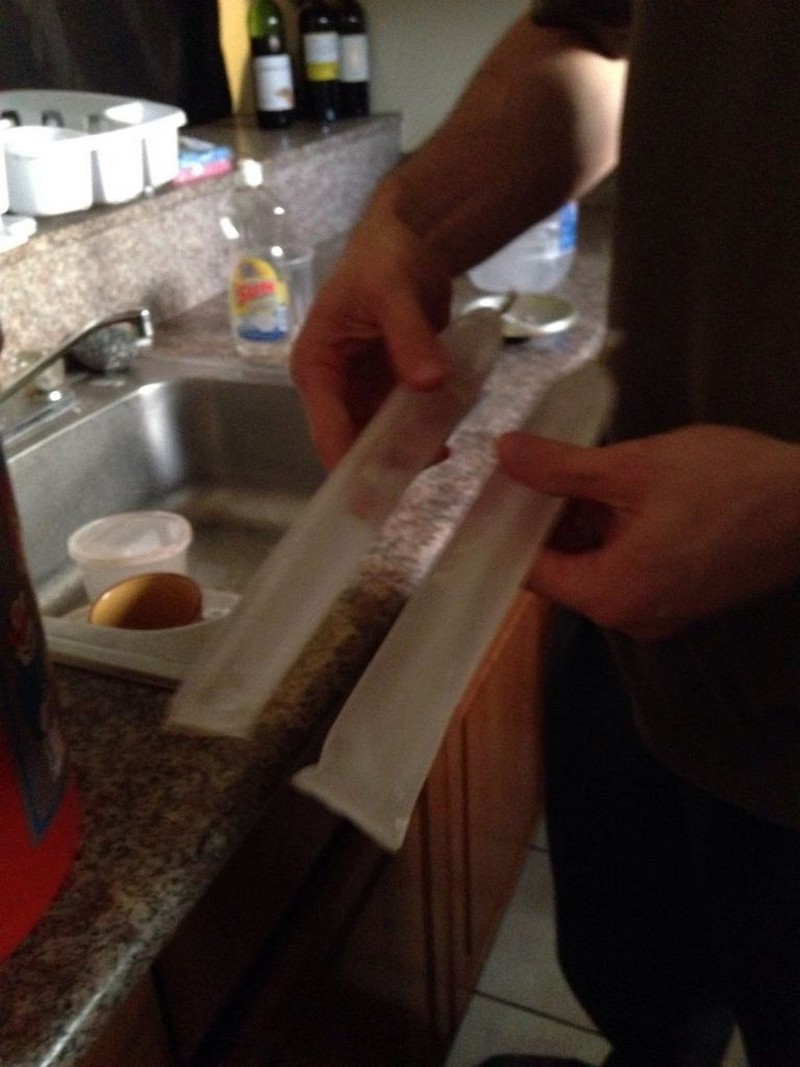
Step 5: Prepare and Freeze Your “Popsicle” Ice Packs
These frozen packs are the heart of your DIY bucket air conditioner.
- Fill the large plastic popsicle sleeves with water.
- For colder, longer‑lasting ice, add a bit of salt to the water (this lowers the freezing point and keeps it colder longer).
- Optional: slide a thick plastic straw into each sleeve before freezing. This can help keep the packs more upright as they melt.
- Seal the sleeves securely and freeze them until they’re solid.
You can also prepare a 1‑gallon jug of saltwater and freeze it as a large ice block. This acts like a “cold reservoir” and can extend your cooling time when used together with the popsicle sleeves.

Step 6: Load the Bucket for Maximum Cooling
To get the most cooling out of your ice, you want to maximize the exposed surface area.
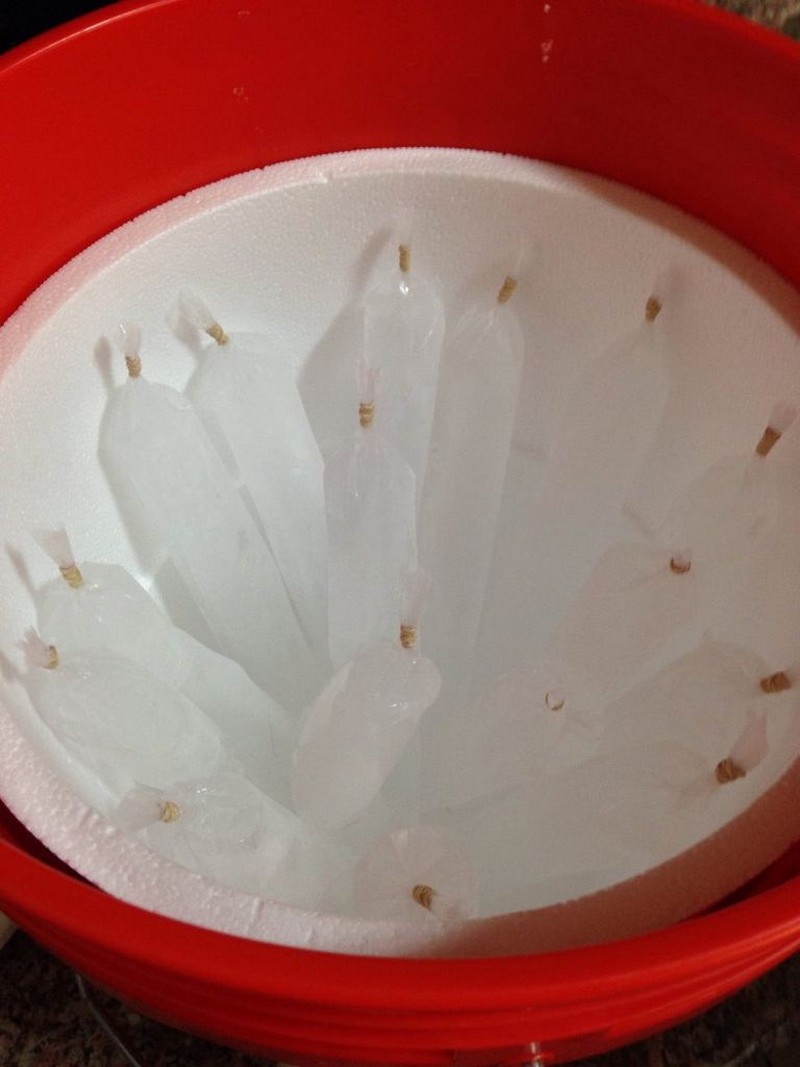
- Once frozen, place the popsicle ice packs upright inside the foam liner.
- Arrange them so the base of each popsicle sleeve faces the center of the bucket and the tops lean against the inner wall of the foam liner.
- This way, only a couple of small points on each pack are covered, and most of the surface is open for air to flow over.
- If you’re using the frozen 1‑gallon jug, place it in the center of the bucket and arrange the popsicle sleeves around it, especially near the outlet pipe for a colder exhaust stream.
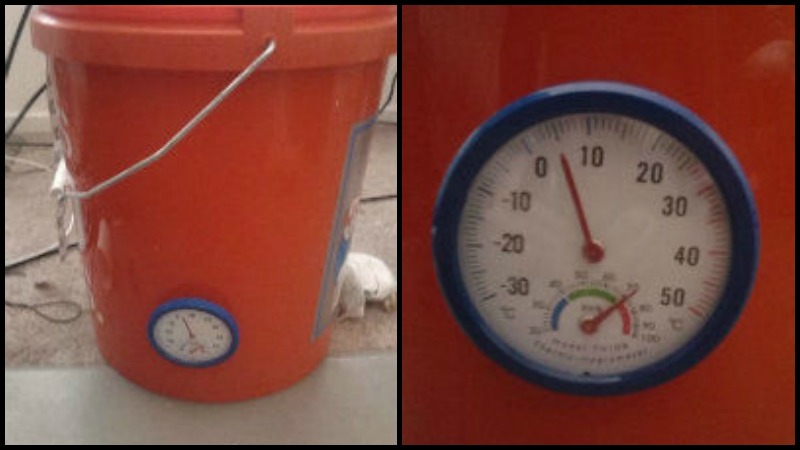
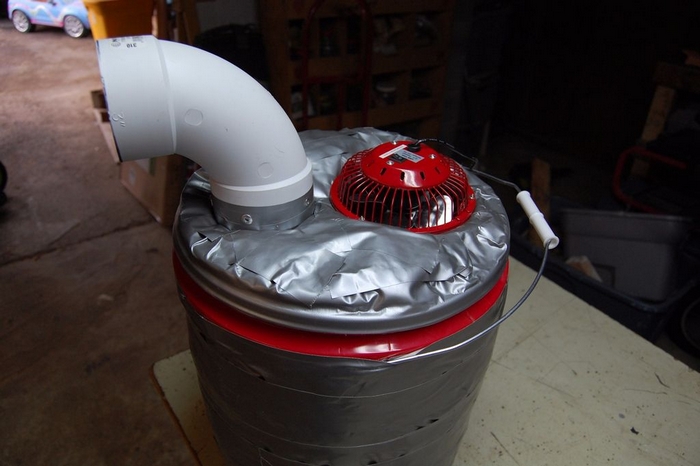
Step 7: Power It up and Enjoy the Cool Air
- Place the foam lid (with the fan mounted) on top of the bucket.
- Plug your 5V USB‑powered fan into a USB power source; this can be a wall adapter, power bank, or a small solar panel setup.
- Aim the PVC outlet pipe toward the area or person you want to cool.
- Turn on the fan and feel the stream of chilled air coming out of the pipe.
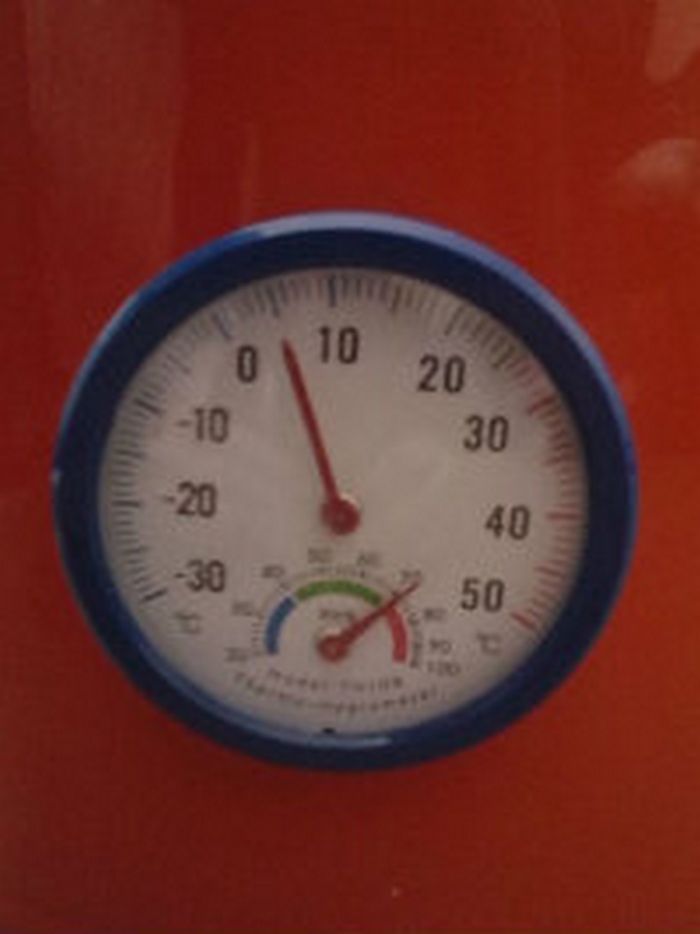
Depending on how much salt you used, your freezer settings, and the ambient room temperature, you can see air temperatures of around 5–10°C (41–50°F) inside the outlet stream.
For longer cooling:
- Use the frozen gallon jug with saltwater plus several popsicle sleeves near the outlet.
- Rotate in fresh frozen popsicle sleeves as others melt and warm up.
This setup can give you several hours of noticeably cooler air without running a full‑size AC unit.
Thanks to
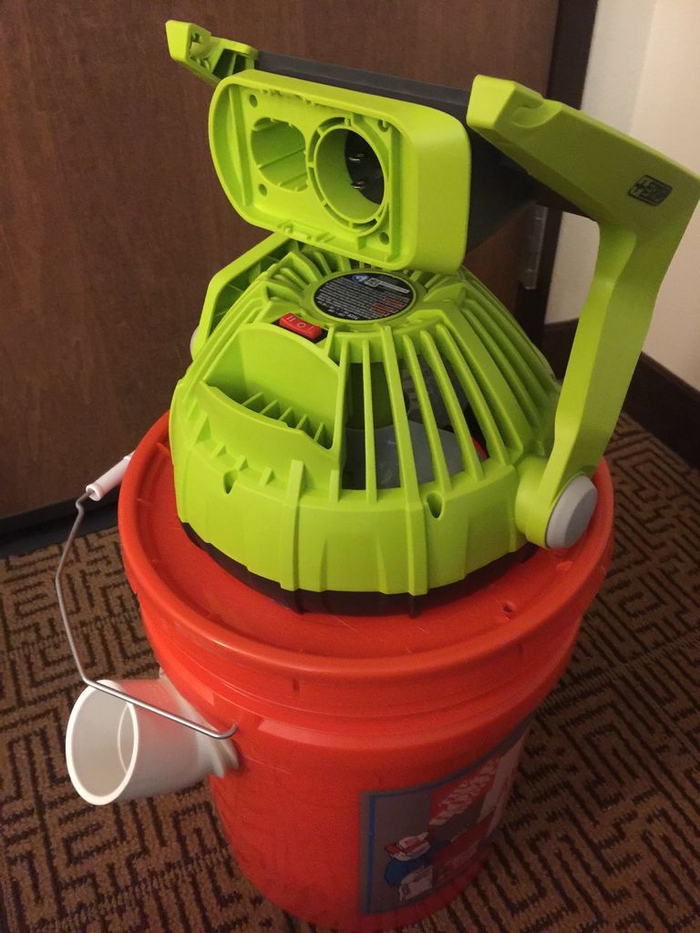
Here’s another DIY air conditioner you might like…
Alternative Cooling Fillers for Your Bucket Air Conditioner
You don’t have to stick to plain ice in plastic sleeves. Several alternative fillers can make your 5‑gallon bucket air conditioner more efficient, longer‑lasting, or more convenient.
Gel Ice Packs
Reusable gel ice packs are a great substitute for water‑filled popsicles.
- They often freeze at a lower temperature than plain ice.
- They stay colder longer and provide more consistent cooling.
- They’re reusable and easy to handle, making them both economical and environmentally friendly.
Place them around the inside of the foam liner, just like the popsicle sleeves.
Hydrogel Beads
Hydrogel beads absorb and hold a lot of water relative to their size. When you:
- Soak, freeze, and place them in sealed containers or mesh bags inside the bucket,
- They gradually release cold as they thaw, helping maintain a steadier temperature drop over time.
Because they’re small, you can arrange them neatly in the bucket and fill gaps that might otherwise be empty air.
Non‑Toxic Freeze Gel
Non‑toxic freeze gels, similar to what’s used in commercial freezer packs, can be poured into plastic sleeves, molds, or bottles.
- They freeze solid and generally last longer than plain water ice.
- This makes them ideal if you want longer cooling sessions before needing to refreeze anything.
Just make sure any gel you use is clearly labeled non‑toxic and kept sealed.
Saltwater Solution
Adding salt to water lowers its freezing point and helps the mixture stay colder than regular ice alone.
- Use saltwater inside your popsicle sleeves, bottles, or the 1‑gallon jug.
- The result is a colder “ice battery” that can extend your cooling time.
This is especially helpful if you’re using the bucket air conditioner in a hot space for longer periods.
Phase‑change materials (PCMs)
Phase‑change materials (PCMs) are special substances that melt and solidify at specific temperatures while storing and releasing large amounts of energy.
- Choose PCMs that change phase just below room temperature.
- They can significantly boost cooling efficiency compared to plain ice.
- Many PCM packs are designed to be reused over and over, aligning with sustainable DIY practices.
If you want to experiment with maximum efficiency and long‑lasting cooling, PCMs are worth considering.
Safety Precautions
Safety should always come first when building and using your 5‑gallon bucket air conditioner. It’s still a DIY electrical and water‑adjacent project, so a few simple rules can help you stay safe.
Electrical Safety
- Keep all electrical components, especially your USB‑powered fan and cables, well away from water and condensation.
- Do not use any fan with frayed, damaged, or exposed wiring.
- Whenever possible, plug the fan into a GFCI (ground fault circuit interrupter) outlet to reduce the risk of electric shock.
- Keep connectors, USB ports, and power strips off the floor or any surface where water might pool.
Water and Leak Prevention
- Check that your bucket and foam liner are intact and watertight before use.
- Place the bucket on a water‑resistant surface or tray to catch any drips from melting ice.
- Inspect the bucket and liner regularly for cracks or damage that could cause leaks.
- Wipe up any spills promptly to avoid slippery floors.
Tool Safety During Construction
- Use sharp tools like knives and hole saws carefully.
- Always cut away from your body and keep your hands clear of the blade.
- Make sure your work surface is stable and well‑lit.
- Store tools safely out of reach of children once you’re finished.
Ventilation and Humidity
Even though this is a small, personal cooling unit, it can add some moisture to the air.
- Use your bucket air conditioner in a well‑ventilated area.
- Avoid running it in small, closed spaces for long periods if you’re concerned about condensation, humidity, mold, or mildew buildup.
- If the room already feels very damp, crack a window or use a small dehumidifier.
Maintenance and Component Checks
- Inspect the fan, cables, PVC pipe, and bucket regularly for wear and tear.
- Replace any damaged parts right away to keep things safe and efficient.
- Clean the interior of the bucket and liner occasionally to prevent mold or odor from forming.
Following these simple precautions lets you enjoy the cooling benefits of your DIY bucket air conditioner with peace of mind.
Frequently Asked Questions
- Does a 5-gallon bucket air conditioner really work?
- Yes, within limits. A 5‑gallon bucket air conditioner acts as a personal cooler: a fan blows air over ice or reusable ice packs and out through a PVC outlet.
- It can drop the air temperature in that stream by several degrees and make you feel much cooler in front of it, but it will not cool an entire room like a traditional air conditioner.
- How long does the cooling last?
- Expect roughly 2–5 hours of noticeable cooling per load of ice or gel packs, depending on:
- How much ice or how many packs you use
- Whether you use plain water, saltwater, or phase‑change materials
- Room temperature and humidity
- Fan speed and airflow
- Using a frozen saltwater jug plus extra packs near the outlet usually gives the longest run time.
- Expect roughly 2–5 hours of noticeable cooling per load of ice or gel packs, depending on:
- How much does it cost to run?
- Very little. The fan typically runs on 5V USB power, so it uses only a few watts. Most of the cost comes from your freezer making ice.
- Compared to running a full‑size AC unit for hours, a bucket air conditioner is much cheaper, especially if you only need to cool one person.
- If you power the fan with a small solar panel or power bank, operating costs are even lower.
- Is it the same as a swamp cooler?
- No. A swamp cooler relies mostly on water evaporation to cool hot, dry air. A 5‑gallon bucket AC primarily uses ice or frozen packs to chill the air.
- It may add some moisture as the ice melts, but it behaves more like a mini ice-based cooler than a classic evaporative cooler and can work in a wider range of humidity levels, though still only on a small, personal scale
- Can I power it with solar?
- Yes. As long as your solar setup can power a USB fan directly or through a battery/power bank, you can run this bucket air conditioner off‑grid. You will still need some way to freeze the ice or packs, which can be a mains-powered freezer, a solar-powered freezer, or pre-frozen packs if you’re going out for a day trip.
- Is a DIY bucket air conditioner safe?
- It is generally safe if you build and use it carefully. Keep all electrical parts away from water, use a GFCI outlet where possible, and place the bucket on a water‑resistant, stable surface. Check regularly for cracks, leaks, or damaged wires, and clean the inside of the bucket to prevent mold and odors.
Conclusion
A 5‑gallon bucket air conditioner is an affordable, portable, and surprisingly effective way to get some relief from the heat without running a full‑size AC all day. Using just a bucket, a small fan, and frozen water or reusable cooling packs, you can create a focused stream of chilled air that’s perfect for a desk, workshop, camper, or patio.
It won’t replace a whole‑house system or cool a large room, but it does offer targeted comfort with very low power use. By experimenting with different fillers, like gel packs, saltwater, or phase‑change materials, you can tune your DIY bucket air conditioner for longer run times and better efficiency, all while keeping your energy consumption and cooling costs down.