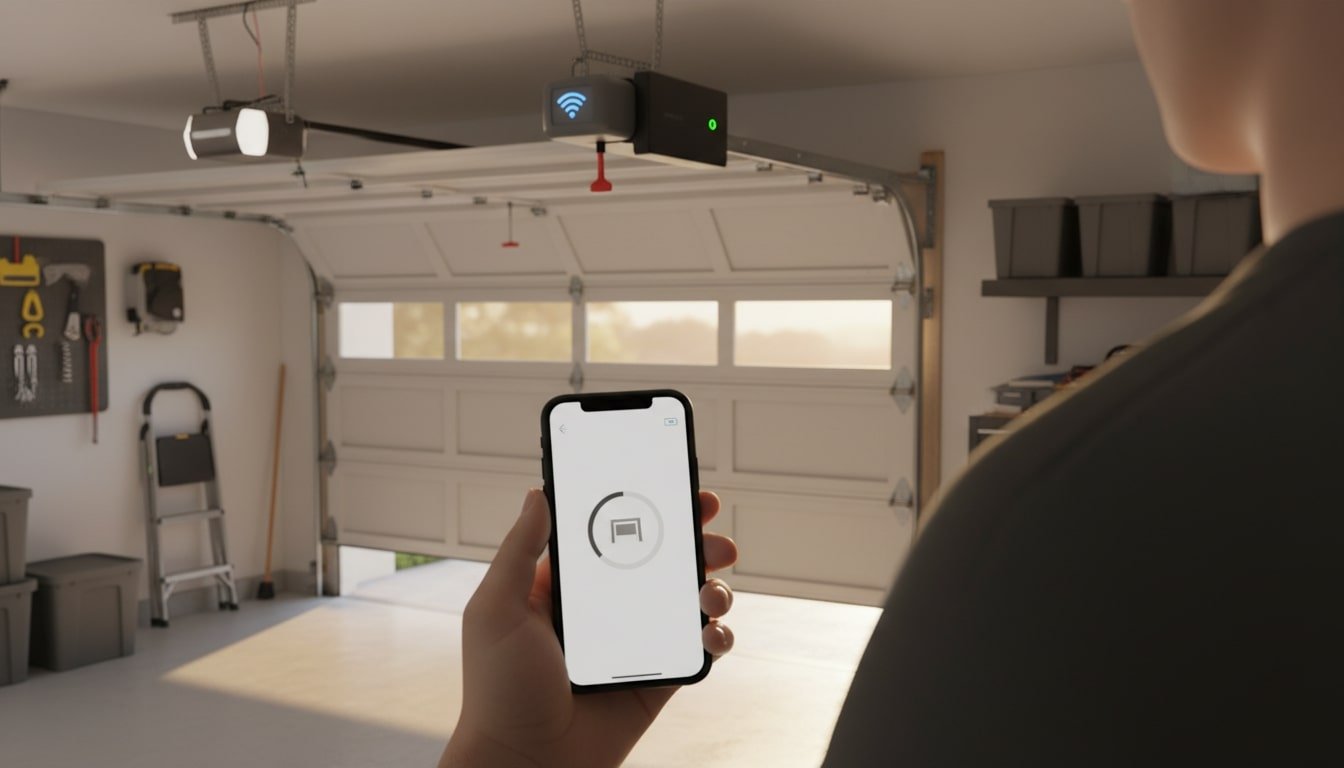
Installing a smart DC belt-drive garage door opener transforms everyday access by delivering quiet performance, strong lifting torque, and dependable safety features that protect both people and hardware. This guide walks you through planning the layout, mounting components securely, wiring controls to code, and calibrating travel and force so the door moves smoothly without strain.
Contents
Key Takeaways
- Choose a quiet DC belt-drive garage door opener matched to your door size, weight, and budget.
- Install the garage door opener to code and calibrate photo-eye sensors, travel limits, and force for safe, smooth operation.
- Maintain the garage door opener with seasonal lubrication, regular reversal tests, smart alerts, and battery backup to ensure long-term reliability.
Guide To Installing a Smart DC Belt-Drive Garage Door Opener
Use this checklist to install a DC belt drive garage door opener. Plan layout, mount securely, wire sensors, calibrate travel and force, connect power, and finalize smart features for reliable operation.
Tools
- Tape measure and pencil
- Stud finder
- 24 inch level
- Step ladder
- Drill or driver with drill bits and nut drivers
- Socket set and adjustable wrench
- Phillips and flathead screwdrivers
- Pliers and locking pliers
- Wire stripper or cutter
- Fish tape or pull rod
- C clamps or vise grips
- Safety glasses and work gloves
- Headlamp or work light
Materials
- DC belt-drive garage door opener kit with rail, trolley, sensors, wall control, and remotes
- Rail extension kit for 8 or 10 ft doors if needed
- Perforated angle iron for backhangs
- Lag screws and washers rated for framing
- Carriage bolts, nuts, and washers for hangers
- Rubber isolation pads
- Low voltage 18 to 22 gauge wire if not included
- Wire staples or cable clips
- Battery backup module if compatible
- Exterior keypad if desired
- Surge protector suitable for a garage door opener
- Garage door lubricant and a 2×4 for safety testing

Steps
- Verify the garage door is balanced and the hardware is in good condition. If it will not stay halfway open, have the springs serviced before installing the garage door opener.
- Mark the centerline on the header above the opening, and mount the header bracket into solid framing.
- Preassemble the rail and trolley according to the manual, and attach the rail to the header bracket.
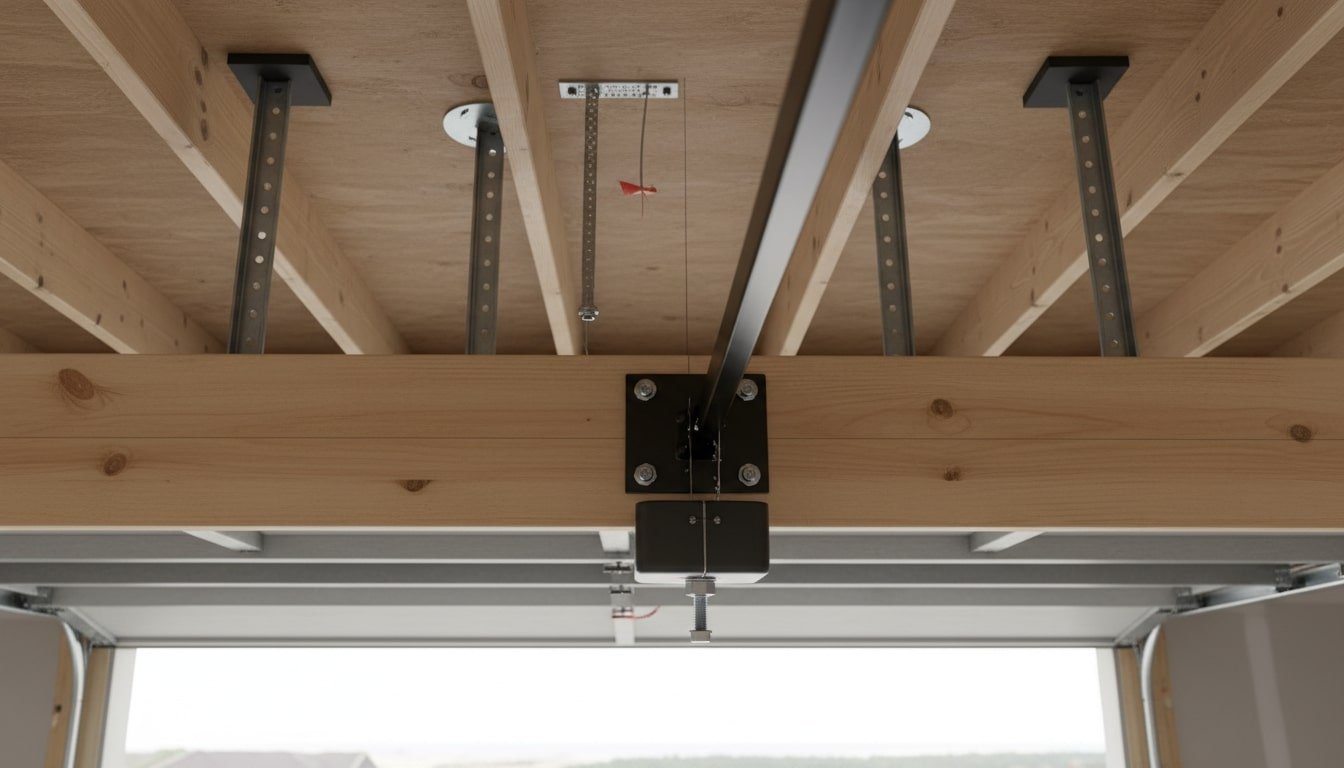
- Hang the opener head from the ceiling joists with angle iron and rubber isolation pads, and keep the rail level and centered.
- Install the belt and set the tension to the manufacturer specification so the belt is snug with slight midspan deflection.
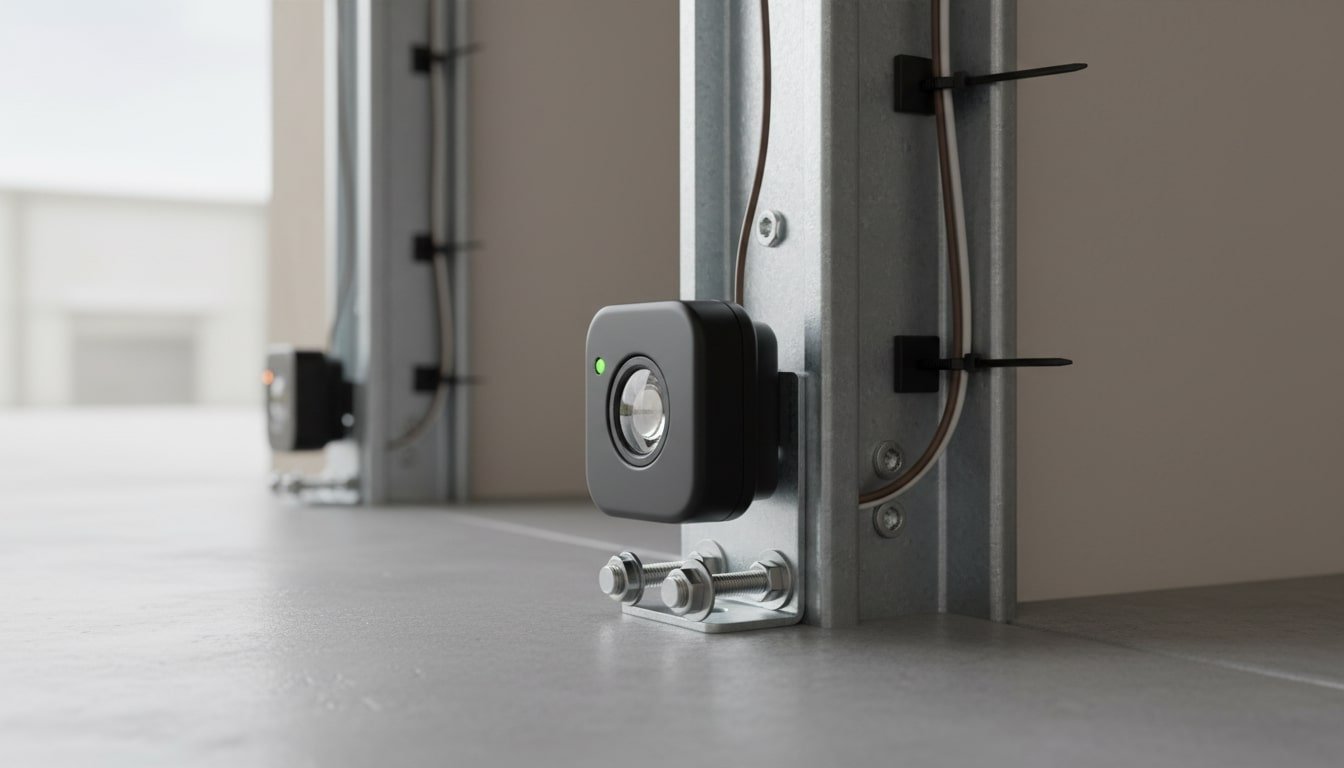
- Mount the photo-eye sensors 4 to 6 inches above the floor, aim them directly at each other, and confirm solid indicator lights.
- Route the low-voltage wires neatly to the opener head and wall control, staple lightly, and mount the wall control at least 5 feet above the floor.
- Plug in the garage door opener, then program the open and close travel limits using the control panel, and set the lowest force that moves the door reliably.
- Run safety tests by blocking the photo-eye beam to confirm it prevents closing, and perform the 2×4 reversal test, then adjust as needed.
- Connect Wi-Fi and accessories, pair remotes and the keypad, test the battery backup if equipped, tighten all hardware, and lubricate hinges and rollers. Do not lubricate the belt or the rail teeth.
Safety, Security, and Code Considerations
Safety, security, and code compliance begin before installing a garage door opener and continue every day. The right hardware, settings, wiring, and tests protect people, property, and peace of mind.
Photo-Eye Sensors And Auto-Reverse
Current safety standards require functional photo-eye sensors that stop and reverse the garage door opener whenever the infrared beam is interrupted. Mount the sensors four to six inches above the floor on rigid brackets, aim them directly at each other.
Confirm that the indicator lights remain solid during operation. Keep the lenses clean, avoid direct sunlight on the receivers, and protect the low-voltage wiring from damage by routing it neatly along framing.
Test the system regularly by starting a close cycle and passing a scrap of cardboard through the beam to confirm an immediate reversal without hesitation or excessive force.
Follow with the wood block reversal test on the floor to verify contact reversal under load. If the sensors blink or the door will not close, realign them, correct wiring polarity, and confirm that force settings are not masking underlying problems.
Force Settings And Travel Limits
Correct travel limits teach the garage door opener where the fully open and fully closed positions are. This prevents binding and reduces stress on hardware and springs. Use the programming buttons to set open and close endpoints. Listening for smooth contact at the stops rather than slamming or chattering. If the door stalls, overshoots, or rebounds, reduce the limit incrementally. Retest until motion is controlled and consistent.
Force settings must be adjusted to the lowest level that reliably moves the door through its full cycle in both directions in typical weather. Excessive force can hide a binding door, increases wear, and undermines safety. Rebalance the door as needed, lubricate hinges and rollers, and repeat both limit and force adjustments after any mechanical change to keep the garage door opener operating safely.
Electrical Codes, Power, And Battery Backup
Provide a dedicated ceiling outlet within reach of the garage door opener. Avoid extension cords, power strips, or shared adapters that can cause voltage drop or nuisance trips. Many jurisdictions require GFCI-protected receptacles in garages. Some require an AFCI protected circuit as well, so consult local electrical codes or a licensed electrician before adding a new outlet. Use a quality surge protector to help protect control boards during storms.
Some municipalities require battery backup on new installations so the door can open during a power outage for safe egress. Choose a model with an integrated battery system, install it according to the instructions, and test operation by unplugging mains power at least annually. Verify compliance with UL 325 for operator safety and review manufacturer labeling that indicates any code-specific requirements for your location.
Mounting Clearances And Egress
Secure the header bracket into solid structural framing at the door centerline, and keep the rail straight, level, and centered so the trolley does not bind near the curve of the track. Maintain headroom clearance for the door, vehicles, and storage items, and avoid placing the opener where ceiling obstructions or low beams will interfere with the path of the garage door opener rail or the safety sensors.
Mount the emergency release handle so it hangs within easy reach and clearly visible, and ensure the release path toward the pedestrian door is unobstructed. Position the wall control within line of sight of the door and at an appropriate height to prevent unintended use by children. Use rated lag screws, perforated angle iron, and rubber isolation to create a rigid yet quiet installation that will not loosen over time.
Security Practices And Access Control
Use rolling-code remotes that change the code with every press, and disable any legacy fixed-code modes that may still exist on older vehicles or universal clickers. Change default keypad PINs on day one, choose a number that is not easily guessed, and place the keypad where it is visible to the user yet not easily observed from the street. Enable the vacation lock on the wall control when you are away.
Protect the emergency release from outside fishing by adding a shield over the top section of the door if needed, and keep windows covered or frosted so valuables are not visible. Connect the garage door opener to the mobile app, review notification options, and use alerts for open, close, and left open events. Audit guest access periodically, remove old devices, and confirm geofencing does not auto open when you do not expect it.
Troubleshooting the Garage Door Opener
Troubleshooting a garage door opener works best when you confirm door health first, then isolate sensors, power, controls, and calibration, because most faults trace to alignment, wiring, or setup issues.
Opener Runs But Door Does Not Move
When the garage door opener hums or the belt travels yet the door remains still, start by checking the red emergency release because the trolley may be disengaged from the door arm after manual operation. Reconnect the trolley by pulling the handle toward the opener, then run a close cycle until the latch clicks, which restores normal coupling.
Inspect the door hardware next, because a set manual slide lock, a broken spring, or a frayed cable can prevent movement while the garage door opener continues to run. Lift the door by hand to confirm smooth balanced travel, look for slack cables at the drums, examine the belt and sprocket for damage, and stop immediately if the door feels unusually heavy.
Door Will Not Close Or Reverses
If the garage door opener refuses to close or reverses near the floor, focus on the photo-eye sensors because misalignment or dirt is the most common cause. Set each sensor four to six inches above the floor, aim them directly at each other until the indicator lights turn solid, and clean the lenses to eliminate false obstruction readings.
Check for bright sunlight striking the receiver, damaged low voltage wiring, or loose brackets that vibrate out of alignment during travel, and correct these issues before changing force settings. Inspect the tracks for debris, confirm the door moves freely by hand, and recalibrate travel limits only after the sensors pass their tests, because calibration cannot compensate for a blocked beam.
Remote, Keypad, Or App Not Working
When remotes, keypads, or the mobile app fail to operate the garage door opener, begin with simple power and lockout checks, as these can mimic connectivity issues. Confirm the opener is plugged in and the wall control is not set to vacation lock, replace remote and keypad batteries, and extend or reposition the opener antenna for better reception.
Eliminate radio interference from certain LED bulbs by swapping to garage door opener compatible lamps, and reprogram remotes or HomeLink if codes were cleared during a power event. For app control, verify the Wi-Fi signal at the opener, connect on 2.4 GHz if the device requires it, update firmware inside the manufacturer app, and rejoin the network through setup mode.
Excessive Noise Or Vibration
When the garage door opener becomes louder than expected, inspect mechanical components that transmit vibration rather than assuming the motor is failing, because most noise originates at the door. Tighten all fasteners on hinges, brackets, and the opener mounts, replace worn rollers with nylon models on ball bearings, and lubricate metal hinges and bearings with a garage rated lubricant.
Verify belt tension according to the manual so the belt is snug with slight midspan deflection, and add rubber isolation pads at the ceiling hangers to reduce resonance without sacrificing rigidity. Check door balance and spring condition, since an unbalanced door forces the opener to work harder, which increases noise and shortens the life of the belt, sprocket, and motor.
Opens Then Immediately Reverses Or Stops Mid-Cycle
If the garage door opener opens a few inches and reverses or stops during travel, expect a limit or force configuration issue rather than a motor fault. Reprogram the open and close travel endpoints so the door does not strike the floor or the header, and set the force to the lowest level that moves the door smoothly through a full cycle.
Inspect for obstructions near the tracks and the top section, look for binding at the curve of the track, and verify that weatherstripping is not sticking to the floor in cold weather. After any mechanical adjustment, repeat limit and force calibration, then operate several full cycles while listening for clean stops without rebound or chatter, which indicates the settings are correct.
After Power Outage Or Battery Backup Use
Following a power outage or extended battery backup operation, the garage door opener may lose the time, the network connection, or the learned travel data, depending on the model. Restore mains power, replace a weak backup battery, and verify that the trolley is reconnected if you pulled the emergency release to move the door manually during the outage.
Reset the clock and reconnect the app if notifications or schedules fail, and run a travel recalibration using the control panel if stops are no longer precise. If the outlet remains dead, check the GFCI or AFCI breaker that may protect the garage circuit, and consider adding surge protection to safeguard the control board during severe weather.
Diagnostic Lights And Error Codes
Many garage door opener models display diagnostic light flashes or code numbers that point to the failing subsystem, which accelerates troubleshooting when you know the legend. Count the flashes from the opener light or the control panel, match the pattern to the chart on the housing or in the manual, and address the indicated sensor, travel, or force issue first.
If the code persists after the obvious fixes, power cycle the unit to clear stored errors, then retest each subsystem systematically, starting with the photo-eye alignment. Document the exact flash pattern, the temperature, and the behavior you observe, because this information helps the manufacturer or a service technician identify intermittent faults that are otherwise difficult to reproduce.
When To Call A Professional
Call a qualified technician when you see a broken torsion spring, a frayed cable at the drum, a bent track, or damage to the door panels, because these repairs involve stored energy that can cause serious injury. Disconnect the garage door opener, leave the door in place, and avoid additional test cycles that could worsen the damage or dislodge components.
Seek professional help if you have repeated reversing despite correct sensor alignment and calibration, if the opener emits burning smells or trips breakers, or if the door is unusually heavy to lift by hand. A technician can rebalance the door, replace failing hardware, and confirm the garage door opener is configured within UL 325 safety limits and any local code requirements.
Conclusion
With a clear plan and the right components, a garage door opener installs cleanly and becomes a quiet, reliable essential rather than a noisy afterthought. Verify door balance, align photo-eye sensors, set travel limits and minimal force, and power the system to code so hardware strain drops and safety functions work consistently. Do these basics well, and the garage door opener will open smoothly, close securely, and stay compliant with local requirements while delivering the long, quiet service you expected.
FAQ: Installing a Garage Door Opener
- Can A Garage Door Opener Work With In-Garage Package Delivery?
- Many carriers support in-garage delivery through approved smart controllers that pair with your garage door opener. Choose an opener or hub that supports authorized carrier programs, use a camera for verification, and create one-time codes for guests. Set notifications for open, close, and left-open events to maintain accountability.
- What Upgrades Help In Cold Or Coastal Climates?
- Cold weather thickens lubricants and weak batteries slow a garage door opener, while coastal air accelerates corrosion. Use a synthetic low-temperature lubricant on hinges and bearings, install sealed nylon rollers, choose stainless or galvanized hardware, and add a battery with higher cold-cranking performance. Rinse salt from tracks during seasonal maintenance.
- Should I Add Surge Protection Or Power Conditioning?
- Modern control boards inside a garage door opener can fail after voltage spikes, so surge protection is smart insurance. Plug the unit into a quality surge protector or install a whole-home device at the service panel. Confirm the garage receptacle is GFCI or AFCI where required and test monthly.