Last Updated on August 25, 2025 by teamobn
A DIY pop can alcohol stove is just another example of ingenuity! This is so small and easy to put in your backpack that you need never be without that hot meal or drink again! This makes it perfect for your next camping trip!
With this product, you’ll be able to enjoy a hot meal or drink no matter where you are – perfect for those times when you want to camp in a remote location.
The components are simple. The only thing you might not already have is a heat-proof metal glue. If you have heat-proof metallic tape, you can use that for this alcohol stove project instead.
Contents
Making a Can Alcohol Stove
You’ll need these materials:
- Soda Can
- Ethyl Alcohol
- Heat-proof Metal Glue
- Pen/Marker
- Sand Paper
- Rag
- Coin
And these tools:
- Scissors
- Pliers
- Awl (or any tool to puncture small holes)
Be sure to clean the whole can by rinsing it with water. You wouldn’t want impurities to mix with your alcohol while using your alcohol stove. Mixing impurities with alcohol will degrade the stove’s performance.

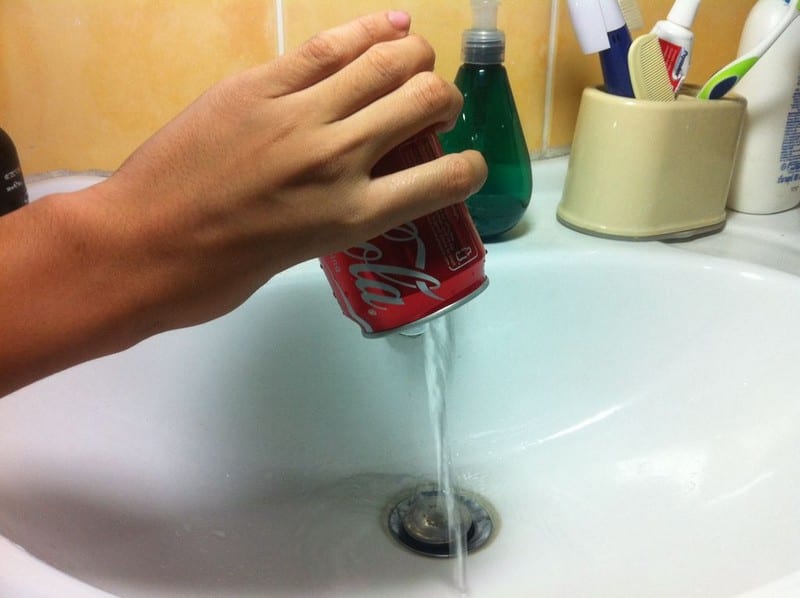
After rinsing it with water dry it with a piece of cloth.

Use a marker to mark it, try to use a flat base like an eraser as a guide to your marker, and rotate the can in a circular motion until you complete the markings.

First, puncture a small hole in its upper part.
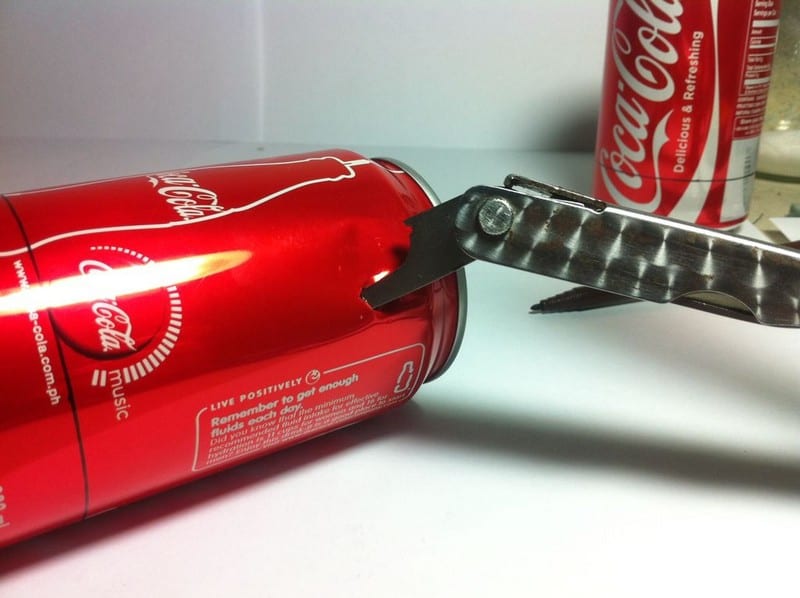
Then use your sharp scissors to cut your desired measurements.
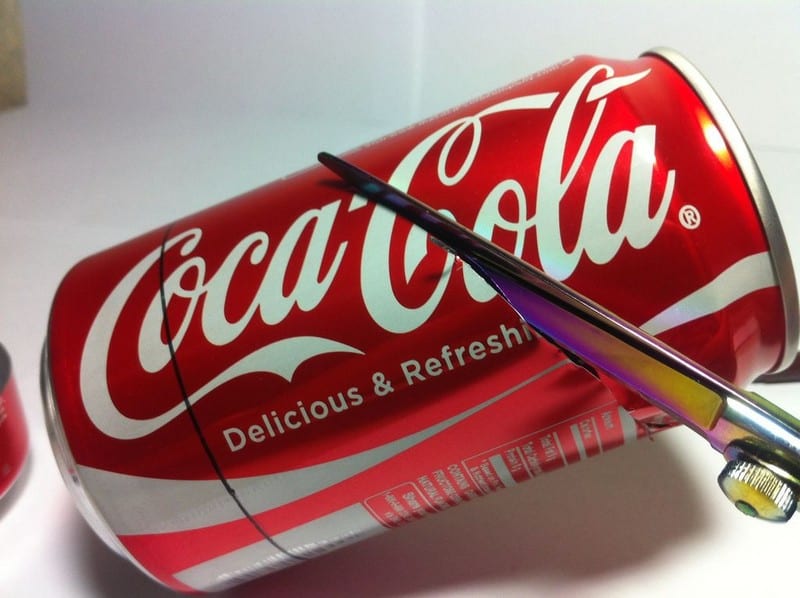
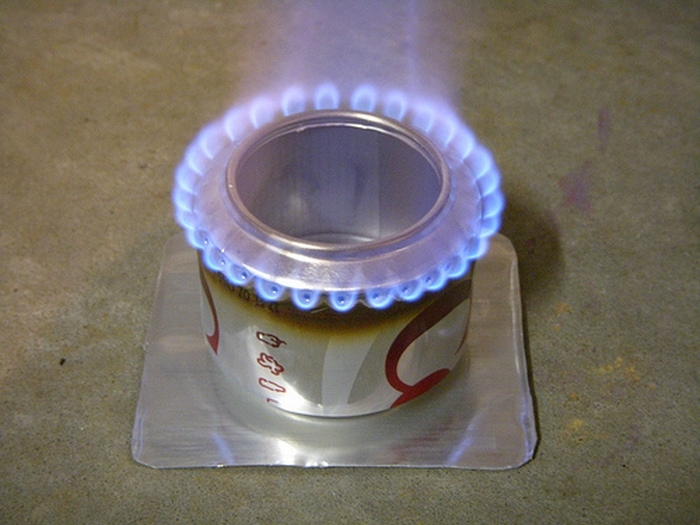
Remember to start cutting from the top to the bottom and the other part must be shorter than the other one (as shown in the last picture).

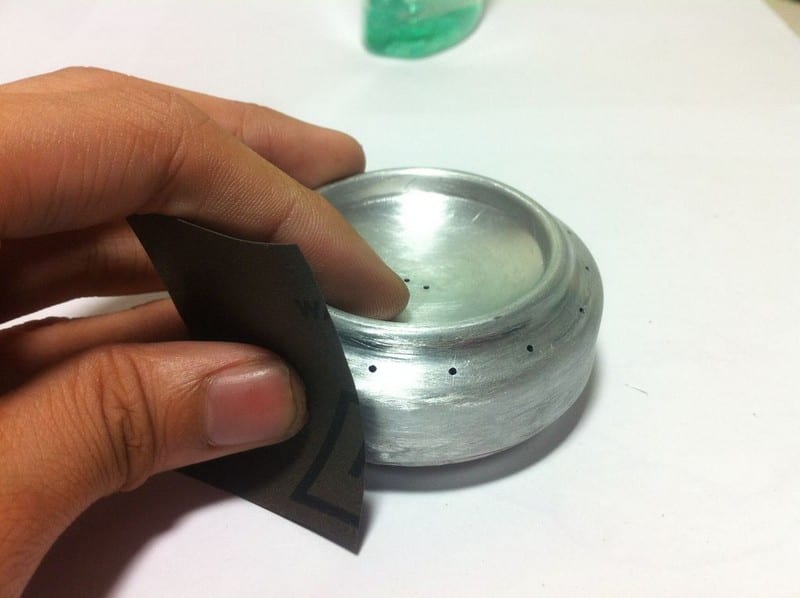
After cutting both of the cans, sand them until the label wears off. Be sure to sand the labels, because if you don’t sand them, the label will somehow melt and turn black thus ruining your alcohol stove’s appearance.
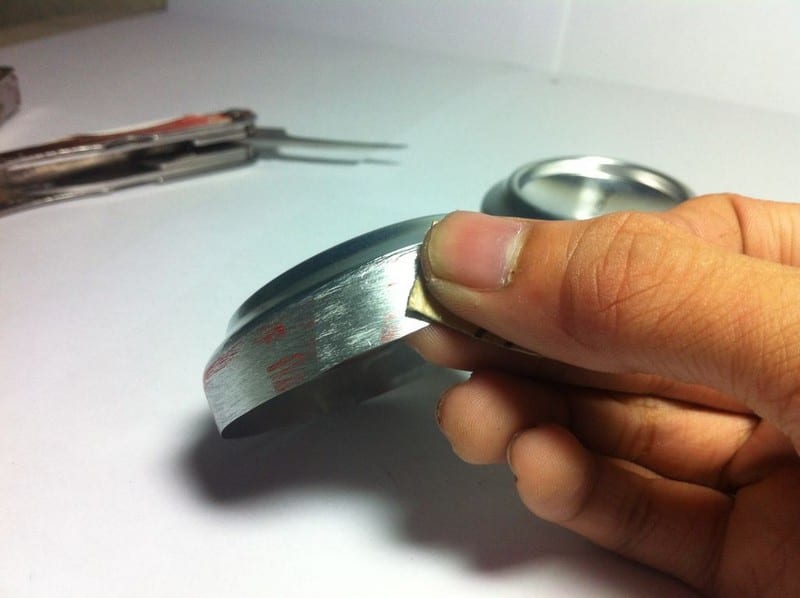
This is now the tricky part, sticking both cans together is the most painstaking task you will encounter in making the alcohol stove. I advise you to bend the shorter can’s edges so it would be easier to insert the it into the long can. This part is more tedious but it is very important so I suggest that you do this part in the slowest and carefulest possible way.

Insert the short can into the long can. Use your Dremel tool for grinding the sharp edges left by the can.

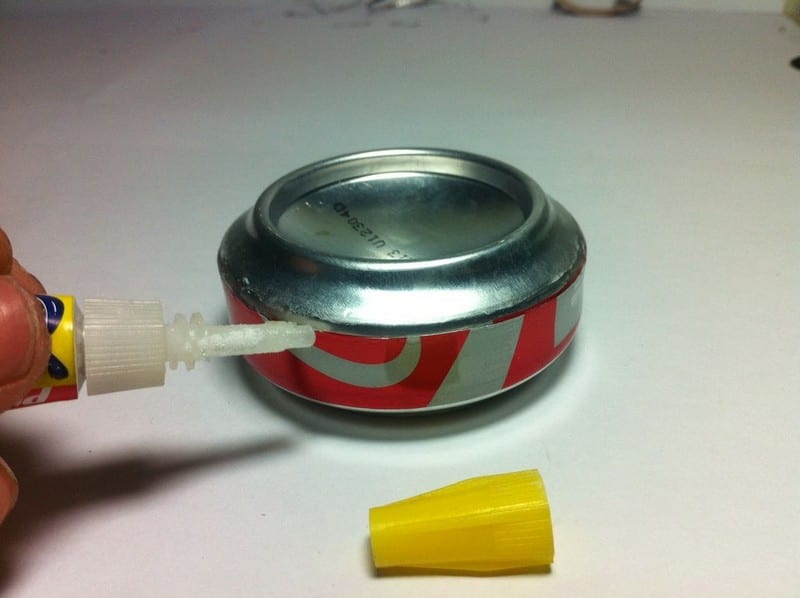
Try to apply super glue into the small gaps left. Be sure to seal it or else flames might exit an unsuspected area. Keeping the stove as airtight as possible is a “must”. Let the glue sip in the gaps. Notice that the super glued area should be the bottom part, Shorter one should be facing downwards and the longer one should face upwards. Flip the can after gluing it. Don’t forget to let it dry for about an hour.
Drill your holes using a Dremel tool or just simply use a sharp object to puncture the can. Please do not make your holes too big or too small. Don’t forget to use a tape measure to guide your holes. Do not make your holes too big or too small. Use a drill bit that is used for PCB making.

Sand every last ink on the printed label, ink from the label usually burns and then turns into a black substance. You wouldn’t want to mess up your stove’s appearance.
These are the steps for using the stove:
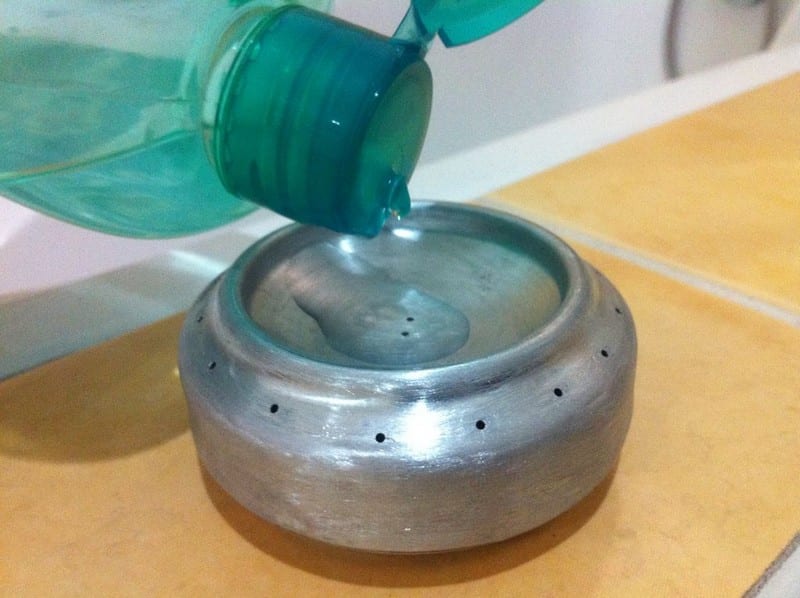
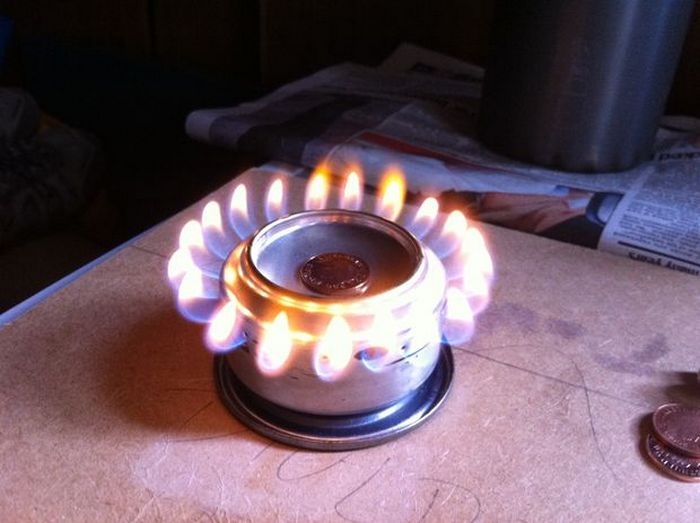
Pour alcohol into the stove’s fuel inlet.
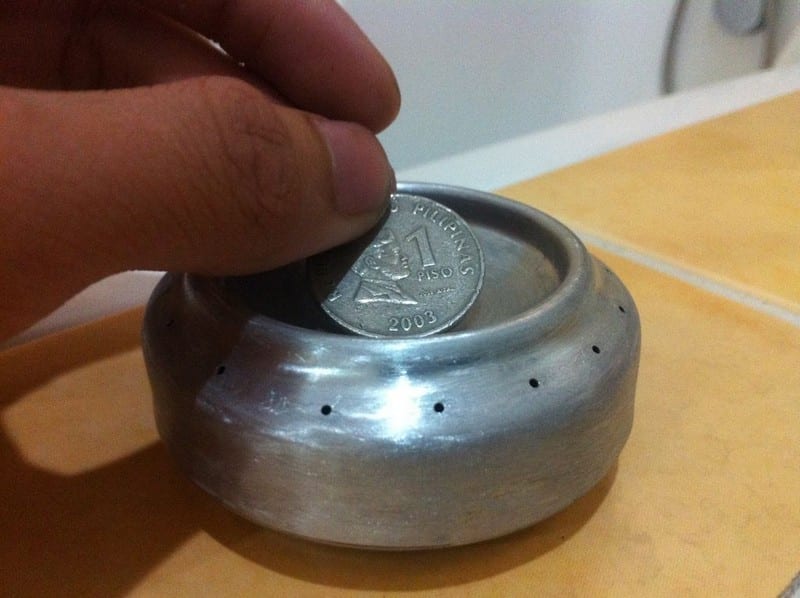
Cover the inlet with a coin or magnet.
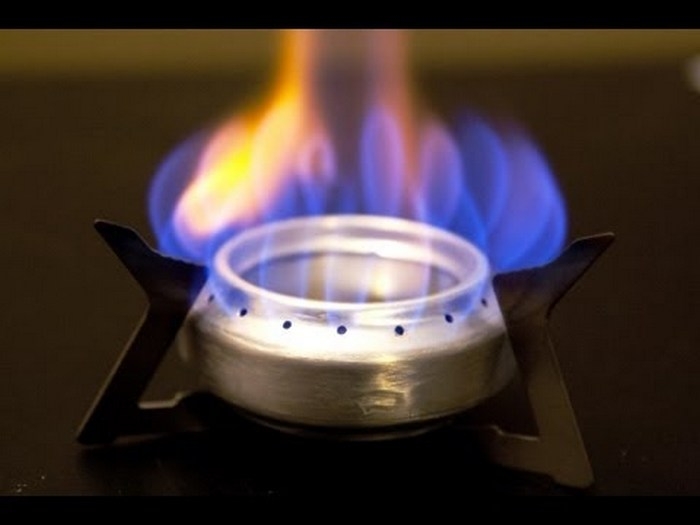
Pour alcohol “around” the stove.

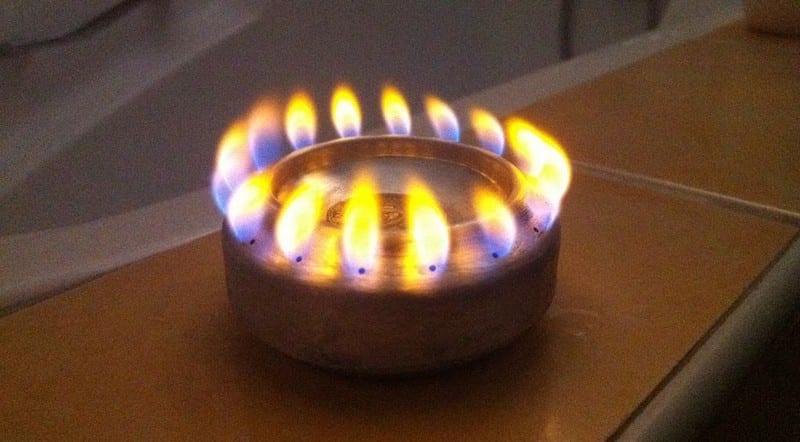
Set the alcohol around the stove on fire.
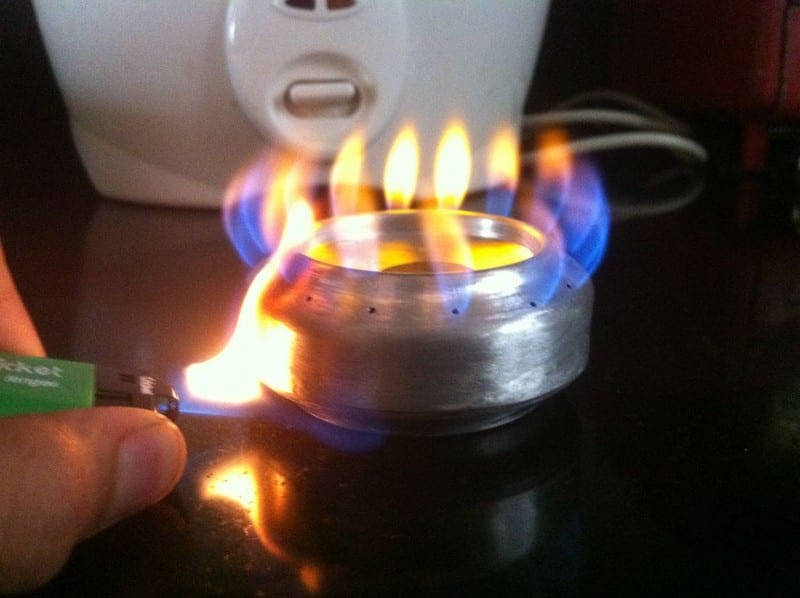
Wait until the jets works, you will hear a boiling sound.
You’re done! Have fun modifying it :))))
If you want a small stove for camping or cooking or even as an emergency stove when you’re without power or gas, this could be the solution. You might want to think twice about throwing that soda can you just finished.
Thanks to ASCAS for this great project.
Can Alcohol Stove Safety And Legal Basics
Safety keeps trips fun and lawful when your kitchen fits in a pocket. Know rules before lighting a flame. Use gear and carry backup. A can alcohol stove demands care.
Know The Rules Before You Camp
Land managers often restrict open flames during dry spells. Check current fire bans, stove policies, and container rules for alcohol fuels. Some parks allow a can alcohol stove only with a solid windscreen and a base that isolates heat. Pack a metal lid to snuff flames. Keep proof of rules on your phone so a ranger sees you did your homework.
Fueling And Lighting Without Risk
Fill on bare soil or a metal tray, never in your tent. Use a small bottle with a flip spout for measured pours. Let the can alcohol stove sit after fueling so vapors settle. Light with a long igniter, then cover the fill hole with a coin. Never add fuel to a hot burner. Wait until it’s cool to the touch.
Stable Setup And Safe Clearances
Level the cooking area and shield wind without trapping heat. Set a heatproof pad under the can alcohol stove to protect soil and tables. Add a pot stand that locks legs or stakes, not makeshift rocks. Keep eight inches of vertical clearance above flame. Never lift a can alcohol stove while burning. Extinguish with a lid and let it cool before moving.
Best Fuels For A Can Alcohol Stove
Fuel choice shapes performance, safety, and taste. Alcohols burn clean, each brings tradeoffs in heat and soot. Learn what to buy hardware aisles or pharmacies for a can alcohol stove.
Denatured Alcohol: Hot And Clean When Formulated Right
Denatured alcohol blends vary by region. Look for high-ethanol content with low water and no oily additives. These burn hot with minimal soot and quick bloom.
Test small batches since labels can be vague. If the flame shows yellow tips, try a different brand. Store in a clearly marked bottle with a flip spout. Keep it away from food containers.
Heet And Methanol: Cold-Weather Friend With Cautions
Yellow HEET is mostly methanol and lights easily in cold. It’s convenient at gas stations. Downsides include lower heat per milliliter and higher toxicity.
Vent well and avoid skin contact. A can alcohol stove will bloom fast with methanol, yet you’ll carry more fuel for the same boils. Don’t use red HEET formulations with additives that smoke and foul jets.
Ethanol And Isopropyl: What Works And What Doesn’t
Ethanol from hardware stores or pharmacies burns clean and hot, especially at 90 percent and up. It’s a great everyday choice. Isopropyl at 70 percent is smoky and stubborn to light. Ninety-one percent isopropyl can work with a primer but leaves soot. If you must use it, accept slower boils and more residue in your can alcohol stove and clean jets often.
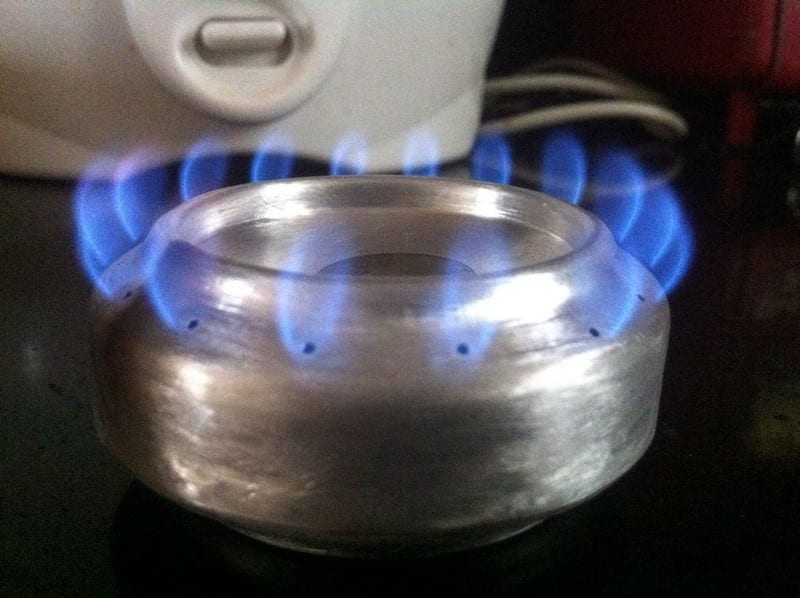
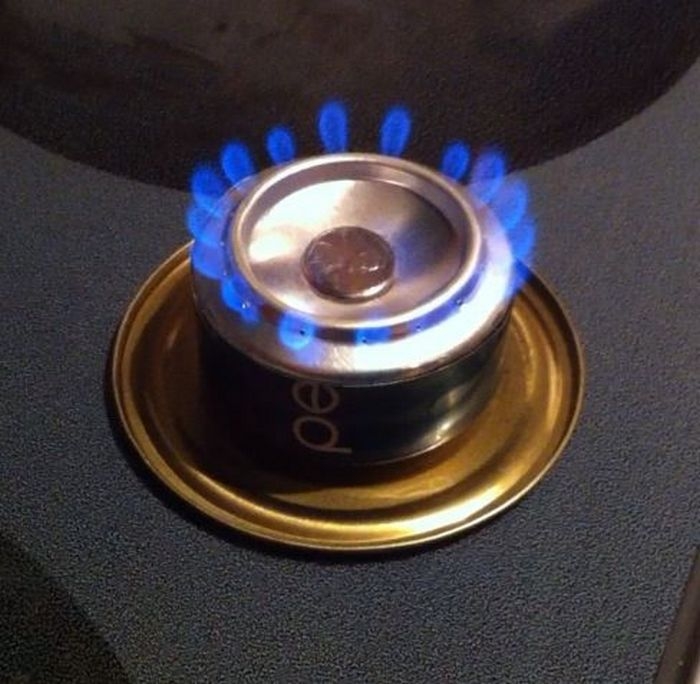
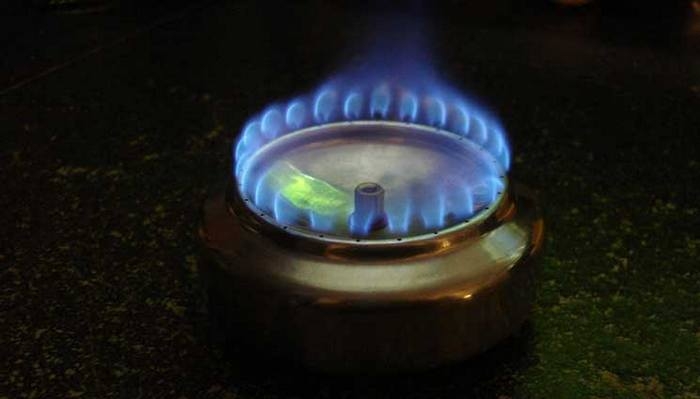
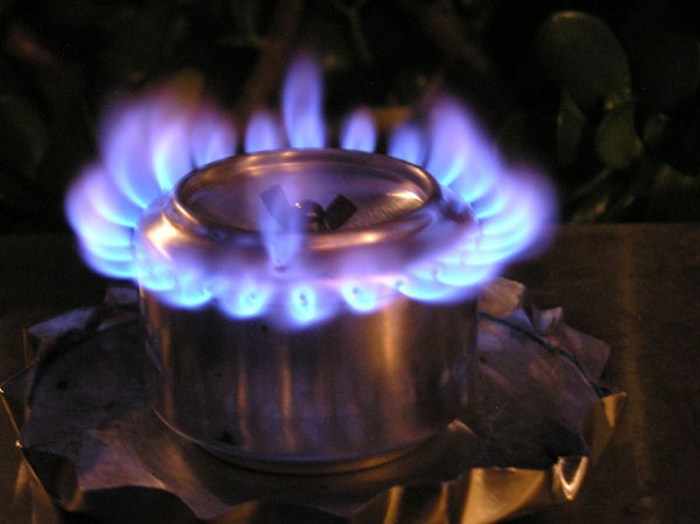
Can Alcohol Stove Gallery
Click on any image to start the lightbox display. Use your Esc key to close the lightbox. ![]()


Windscreen And Pot Stand Designs That Work
Efficient cooking needs steady flame and stable support. A smart windscreen and pot stand cut boil times and fuel use. Build compact pieces that pack flat and fit trail pots.
Core Windscreen Principles
A windscreen should block gusts without choking the flame. Leave a finger-width gap between screen and pot for airflow. Keep 5 to 10 millimeters of clearance around the burner body. Add a small intake notch near the can alcohol stove to feed oxygen. Raise the screen on three tiny spacers so heat can escape downward and avoid scorch marks on tables or soil.
Cone Windscreen For Maximum Efficiency
A cone wraps pot and burner in a tuned chimney that boosts draft and heat transfer. Use thin aluminum flashing or titanium foil. Cut with a paper template that matches pot diameter and height. Punch three tiny rivet holes to lock the seam. The cone can sit on the rim of the can alcohol stove via three inward tabs or ride on a separate pot stand for safer handling.
Folding Panel Windscreen For Flexibility
Flat panels hinge with paper clips or wire so you can shape a circle or U around the pot. Size panels to reach just below pot rim height. Leave a thumb-sized intake slot upwind. Stake one panel with a tent peg in high gusts. This style pairs well with a freestanding pot stand and a can alcohol stove because you can open a panel to access the burner or fuel port.
Minimal Pot Stand Using Rods Or Stakes
A stand must not rest on the stove body. Support the pot from the ground up. Cross three stainless tent stakes through drilled holes in two short aluminum strips, then plant the legs. Space the rails so your smallest mug sits level. Set the can alcohol stove underneath with 25 to 35 millimeters of gap to the pot bottom. That gap reduces soot and speeds bloom.
Mesh And Ring Stands For Light Pots
Hardware cloth or stainless mesh can form a light, rigid ring. Fold edges into double hems to remove sharp points. Add three downward tabs as feet for stability. This ring keeps the pot centered while the can alcohol stove burns cleanly below. Test with a liter of water to confirm no flex or tilt under load. If it sags, add a second wrap and wire-tie the seam.
Heat Shields And Safe Bases
Protect surfaces with a thin aluminum pie pan or a titanium sheet under the burner. Add a small ceramic tile if you cook on picnic tables. The shield reflects heat and catches spills, which improves efficiency and cleanliness. Place the can alcohol stove and windscreen on this base every time. You’ll get repeatable results and fewer surprises in wind or on uneven ground.
Conclusion
A good windscreen and stand turn a small burner into a reliable camp kitchen. Keep airflow, stability, and safe clearances in mind. Build once and test with measured boils. Pack a base, stakes, and a spare clip for field fixes. Your stove will run faster, cleaner, and safer.