Last Updated on December 12, 2025 by teamobn
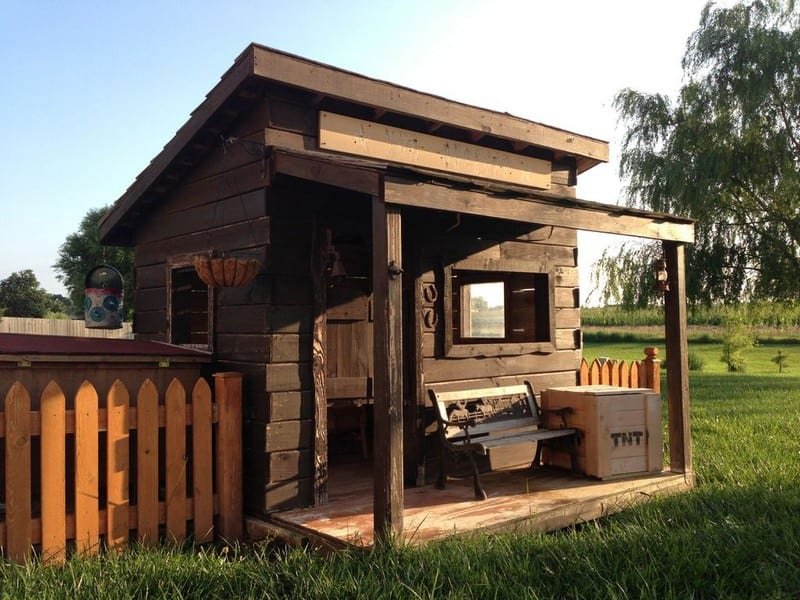
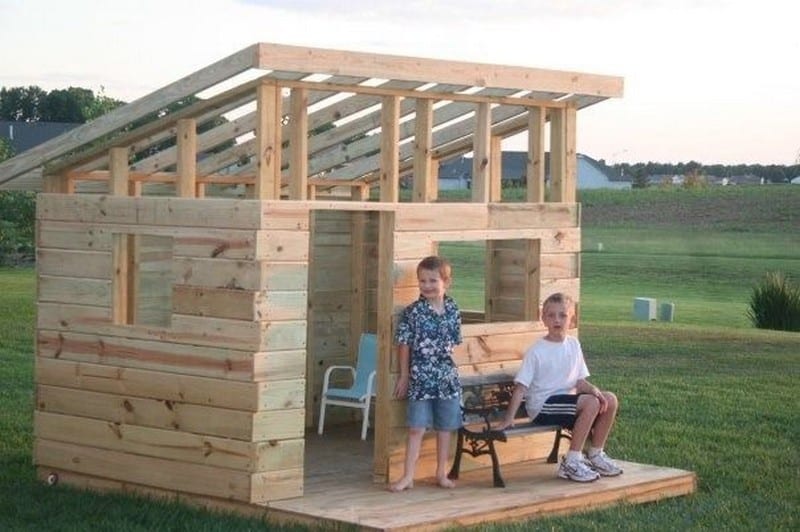
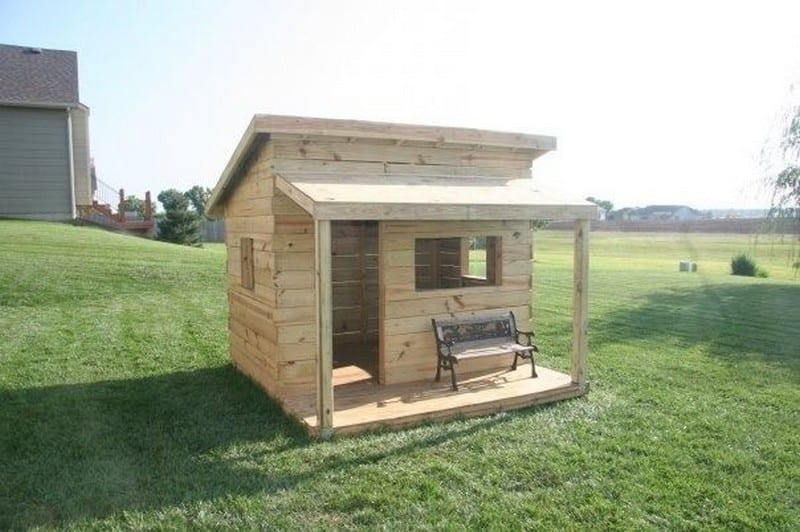
Is there any child who does not love a fort or a cubby house to play in? This DIY kids fort turns your backyard into a Wild West saloon where young outlaws can meet, pretend, and play. In this guide, you will find a full materials list, step-by-step instructions, safety tips, and free plans so you can build a sturdy wooden playhouse with your kids.

Contents
- 1 Project at a Glance
- 1.1 What are the materials needed to build a DIY Kids Fort
- 1.2 How to Build a DIY Kids Fort (Western Saloon Style): Step-by-Step Instruction
- 1.2.1 Step 1: Plan the Location and Prepare the Site
- 1.2.2 Step 2: Build and Level the 8 Ft by 8 Ft Floor Frame
- 1.2.3 Step 3: Anchor the Floor if Needed
- 1.2.4 Step 4: Frame the Walls
- 1.2.5 Step 5: Route the Fence Boards for a Log Cabin Look
- 1.2.6 Step 6: Attach the Siding and Trim
- 1.2.7 Step 7: Frame and Install the Roof
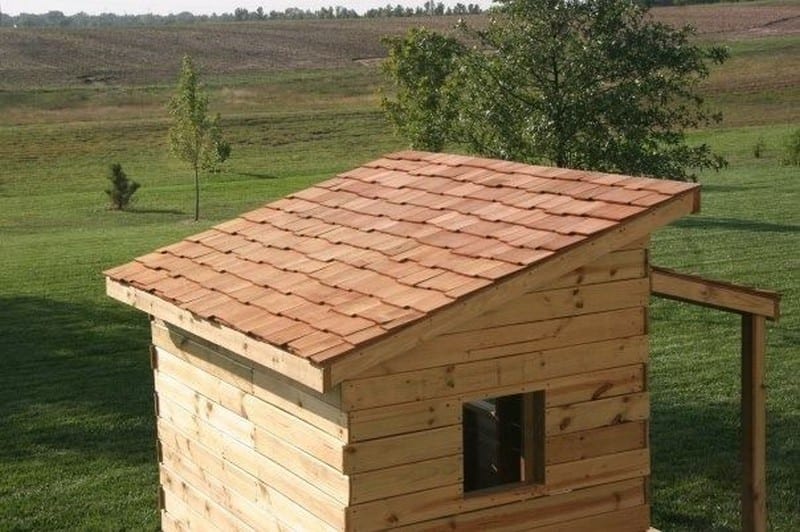
- 1.2.8 Step 8: Protect the Roof and Add Cedar Shingles
- 1.2.9 Step 9: Build Doors and Windows
- 1.2.10 Step 10: Create the Saloon Sign
- 1.2.11 Step 11: Add Decorations and Final Details
- 2 Safety Tips for Building a Kids Fort
- 3 Final Thoughts
Project at a Glance
- Project type: DIY kids fort or wooden backyard playhouse
- Style: Western saloon-themed fort
- Approximate size: 8 ft by 8 ft floor
- Skill level: Intermediate DIY
- Time required: About three and a half months of evenings and weekends
- Main materials: Pressure-treated pine, recycled fence boards, cedar, cedar shingles
- Best for ages: About 4 to 10 years old with adult supervision
Recycled pine fence palings and cedarwood were used in this project which makes it nice and sturdy. It will last until little kids are too grown to play in it. The use of recycled materials also lessens the cost.
Working on free evenings and weekends, and with help from the kids, this kids’ fort project was finished in three and a half months. You too can build this together with your kids. The kids’ fort is a great project to get them interested in planning and building their own playhouse.
Click on any image to start the lightbox display. Use your Esc key to close the lightbox.


What are the materials needed to build a DIY Kids Fort
Timber
- 3/4 in x 4 ft x 8 ft plywood sheets for the floor
- 1/2 in plywood for the roof
- 2 in x 4 in x 8 ft pressure-treated pine studs for framing
- 5/8 in x 5.5 in x 6 ft pressure-treated pine fence boards for siding
- 2 in x 2 in x 8 ft pine for the inside of the ceiling
- 4 in x 4 in x 8 ft pressure-treated pine posts for porch posts
- Rough red cedar fence boards for trim around windows and door
- Smooth cedar board for the saloon sign
Roofing:
- Black Felt Roofing Paper
- Cedar Shingles
- Roofing Nails
Other materials:
- Concrete Deck Blocks
- Ground Anchors, Bolts and Washers
- Deck Screws – multiple sizes
- Plexiglass for windows
- Western-themed decorations such as a bell, lantern, antlers, or signs
- Two metal brackets for holding the 4 x 4 porch posts to the porch, similar to those used in deck construction
Tools:
- Powered miter saw
- Router mounted to a table with a round over bit
- Circular saw, or table saw
- Cordless drill and drill bits
- Electric jigsaw
- Measuring tape and chalk line
- Hammer, level, and square
- Other basic hand tools
- Wood-burning tool
How to Build a DIY Kids Fort (Western Saloon Style): Step-by-Step Instruction
This section walks through the main steps of building the kids’ fort.
Step 1: Plan the Location and Prepare the Site
- Choose a flat area of your backyard that is visible from the house so you can supervise play.
- Mark out an 8 ft by 8 ft square where the floor frame will sit.
- Call your local utility marking service before you dig to make sure there are no power, gas, or water lines where you plan to work.
- Clear away grass, roots, and debris inside the marked area.
You can have fun with the kids pretending you are prospectors searching for gold, but make sure they understand that real digging must be safe and carefully supervised.
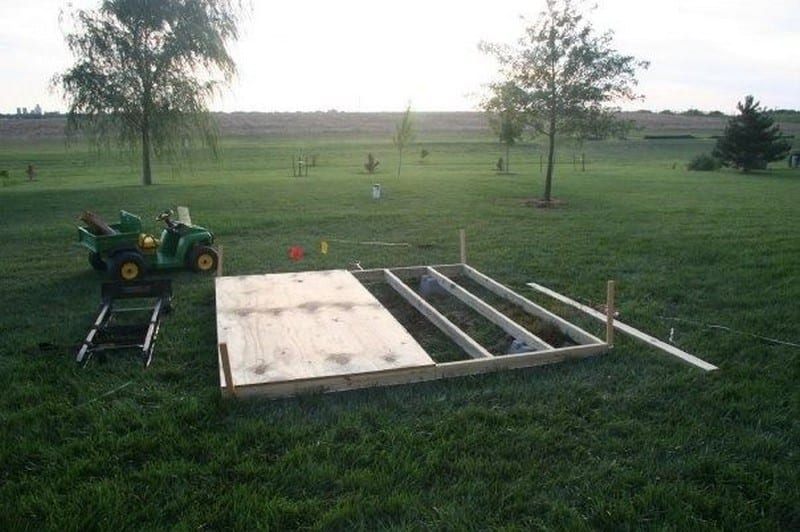
Step 2: Build and Level the 8 Ft by 8 Ft Floor Frame
- Build an 8 ft by 8 ft frame using pressure-treated 2 x 4 or 2 x 6 boards, and screw the corners together.
- Dig holes for concrete deck blocks so the frame will be slightly off the ground. For an 8 ft by 8 ft floor, plan for six deck blocks instead of four so the floor can carry the full weight of the fort.
- Place a small amount of sand in the bottom of each hole to help with leveling.
- Set the deck blocks in the holes and position the floor frame on top.
- Use a level to adjust the blocks and sand until the frame is flat and level in all directions.
- Once level, attach the floor frame to the deck blocks if needed, following the hardware instructions.
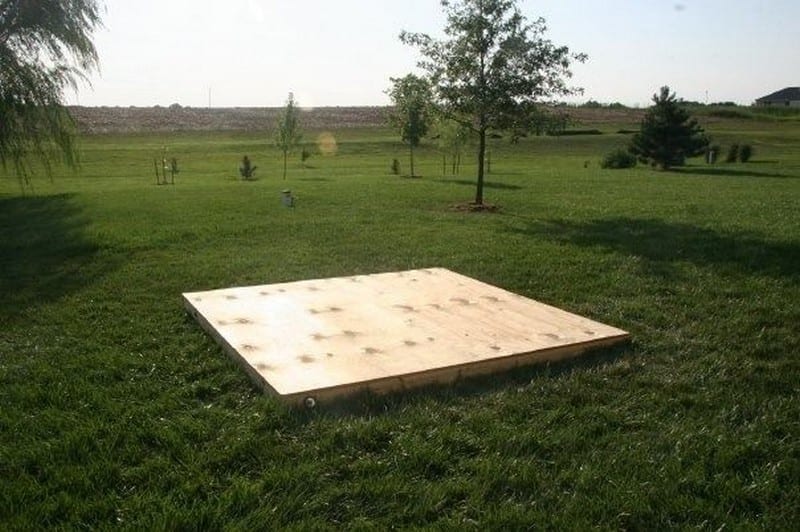
- Cover the frame with two sheets of 3/4 in plywood, cut as needed, and screw them down to create a solid floor.
The frame and floor should not sit directly on the soil. Raising the floor on deck blocks helps protect the wood from moisture and termites.
If you live in a windy area, consider adding ground anchors.
Step 3: Anchor the Floor if Needed
- Install four corkscrew ground anchors at the corners of the floor frame or slightly outside.
- Use bolts and washers or appropriate hardware to connect the anchors to the frame.
- Tighten everything securely so the fort is less likely to shift or move in strong winds.
This step is especially important in places that get strong storms or regular high winds.
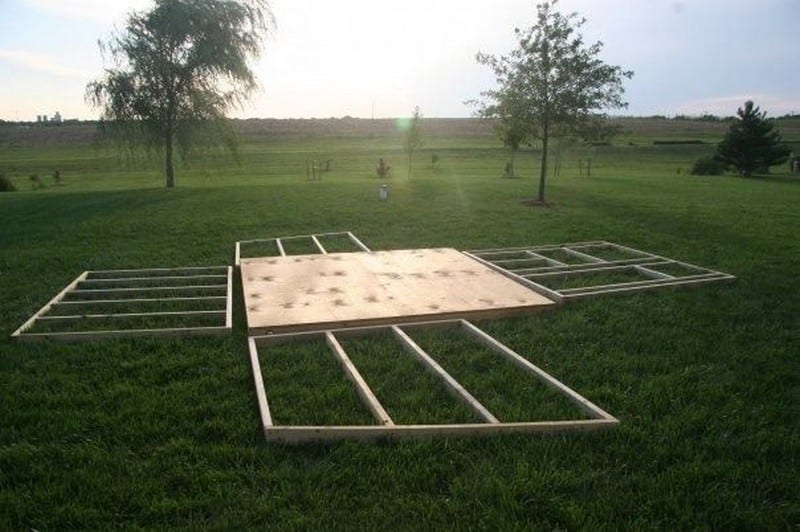
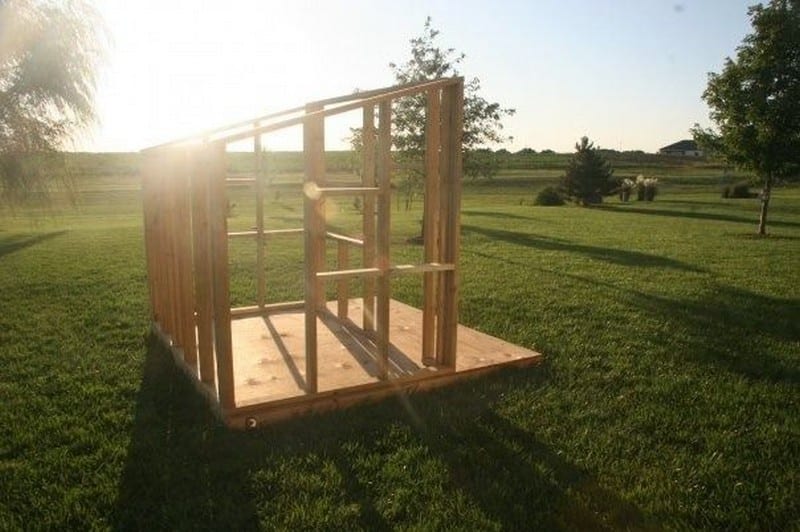
Step 4: Frame the Walls
- Use the construction plans to cut 2 x 4 studs for your wall frames.
- On a smooth, flat surface such as a garage floor, lay out each wall frame.
- Screw the top and bottom plates to the vertical studs.
- Add extra framing where windows and doors will go, according to your plan.
- When all wall frames are complete, carry them out to the floor with help from your assistants.
- Stand each wall frame upright on the floor and line it up with the edge of the floor.
- Use a level to make sure each wall is plumb and square, then screw the wall frames to the floor and to each other at the corners.
This is also a good moment to teach your kids how a level works and why it is important for a structure to be square and straight.
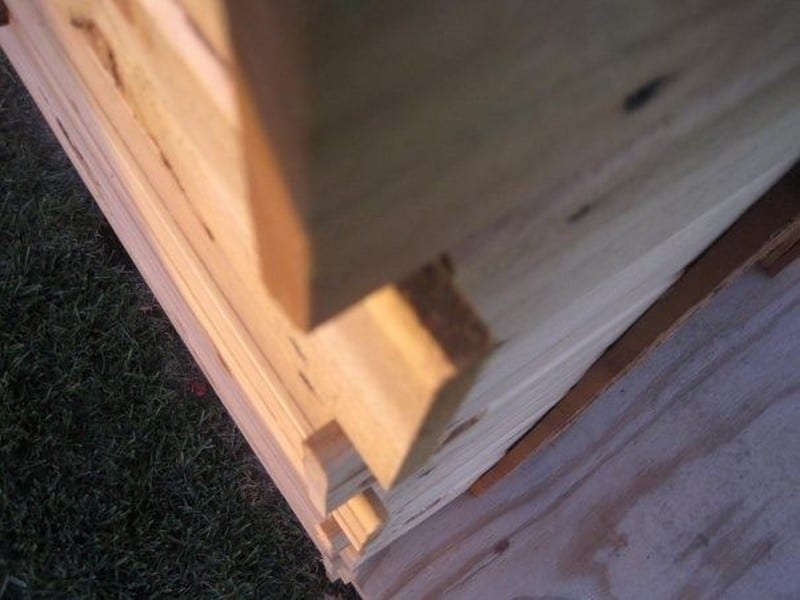
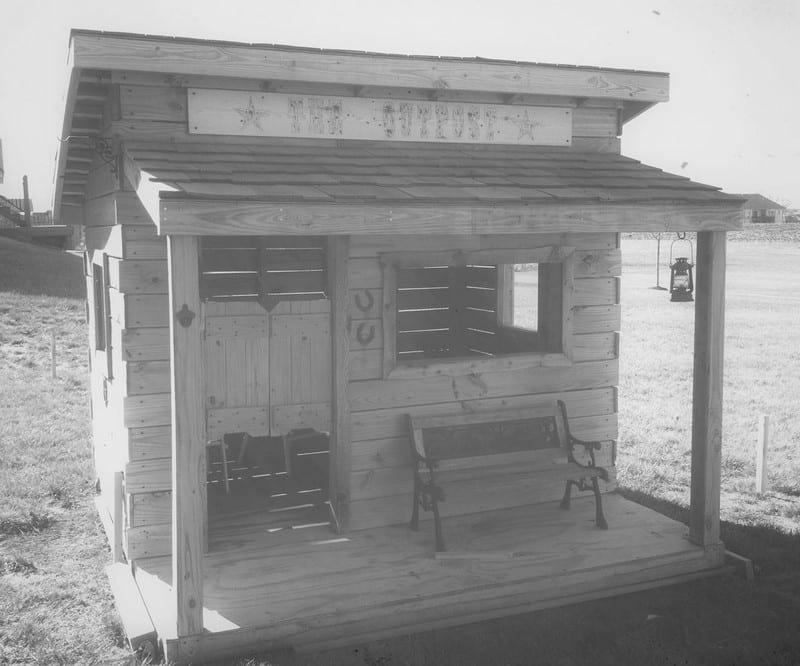
Step 5: Route the Fence Boards for a Log Cabin Look
Plain fence boards laid side by side can look like a basic fence. To give the fort a more rustic, log cabin style, you can round over the edges.
- Mount a router under a table and install a round over bit.
- Put on a dust mask and safety goggles, and keep kids away from the router while it is running.
- Run each fence board along the router so both long edges are rounded. The cross-section of the board will look like the letter “D”.
- Expect a lot of wood shavings and dust. Clean up regularly so your work area stays safe.
This step is repetitive and may take several days of short sessions, but it creates a much nicer finished look.
Step 6: Attach the Siding and Trim
- Starting at the bottom of each wall, cut the routed fence boards to length and screw them onto the wall framing.
- Use screws instead of nails. Fence boards can swell and shrink with moisture. Screws are less likely to pop loose than nails.
- Work upwards row by row, checking with a level every few boards to keep them straight.
- At the corners, alternate the board lengths so they overlap and lock together visually. This mimics log construction and looks more rustic.
- Once the siding is complete, use rough cedar fence boards cut with a jigsaw to create decorative door and window trim. You can cut curvy lines, follow knots in the wood, and give the trim a handmade character. Nail or screw these trim boards in place.
Fence boards are often not perfectly straight, so expect some gaps and small variations. These small imperfections add to the saloon style.
Step 7: Frame and Install the Roof
- Use 2 x lumber to build roof joists according to your plans. The pitch should allow rain to run off.
- Cut notches in the joists as needed, so they sit securely on the wall plates and stay square.
- Attach the joists to the top of the wall frames with screws.
- Add blocking where needed for strength.
- Cover the roof frame with 1/2 in plywood, fastening it with screws.
Now is also a good time to frame the porch cover if you include one. Attach 4 x 4 porch posts with strong metal brackets and screws, then add the porch roof framing and plywood.
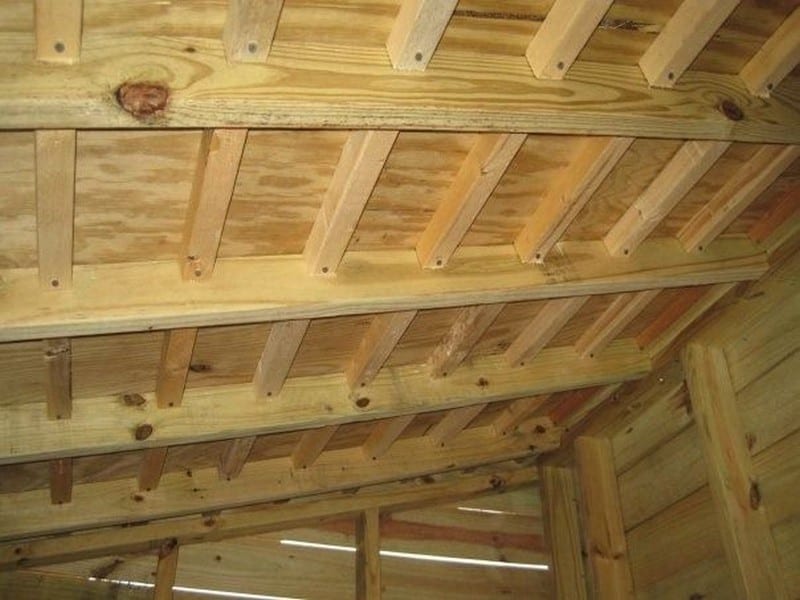
Step 8: Protect the Roof and Add Cedar Shingles
You want a weatherproof roof that does not leave sharp nail tips exposed inside the fort.
- Staple black felt roofing paper to the top surface of the plywood roof. Overlap the edges so the wood is fully covered.
- Mark chalk lines on the roofing paper where the shingle nails will go.
- On the underside of the roof, measure and mark where the nail tips would come through.
- Cut 2 x 2 boards and screw them to the underside of the roof along these lines. This way, the roofing nails will drive into the 2 x 2 boards and not leave sharp points exposed inside.
- Starting from the bottom edge of the roof, install cedar shingles. Work your way up, staggering the widths and positions and following your chalk lines.
This method protects heads from sharp nails, especially when kids stand up inside the fort.
Step 9: Build Doors and Windows
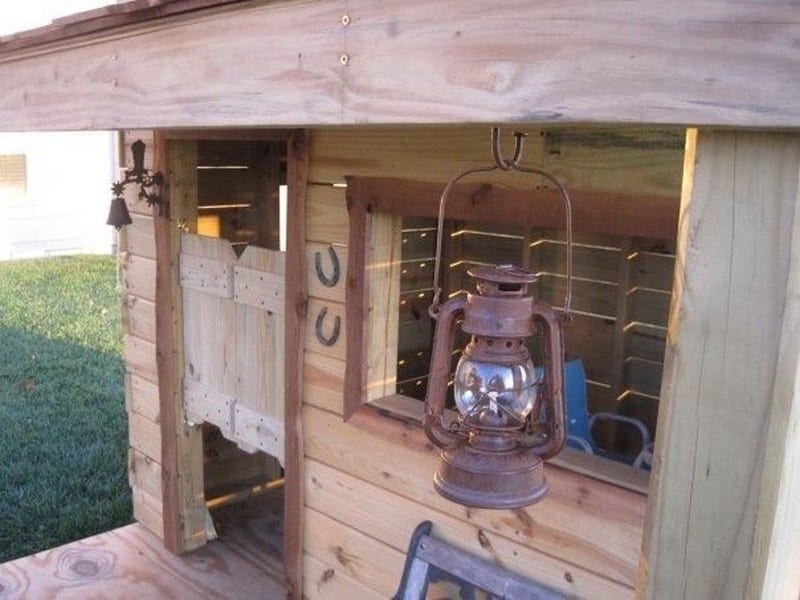
- Use fence board offcuts and scrap lumber to make simple saloon doors. You can choose a classic swinging saloon door shape or a more basic rectangle.
- Assemble the doors with screws and add hinges so they can swing open and closed.
- Install window frames in the openings that you left in the wall framing.
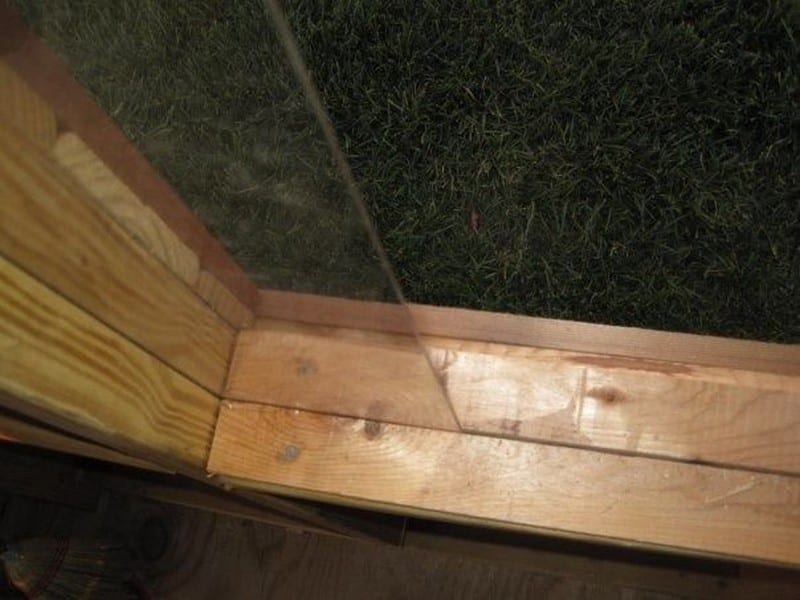
- Cut plexiglass panels to size for the side windows. Plexiglass keeps rain out but is lighter and safer than glass.
- Create grooves in the window frames so the plexiglass panels can slide open and shut.
Plexiglass may scratch and cloud over time, but it is an affordable and child friendly choice.

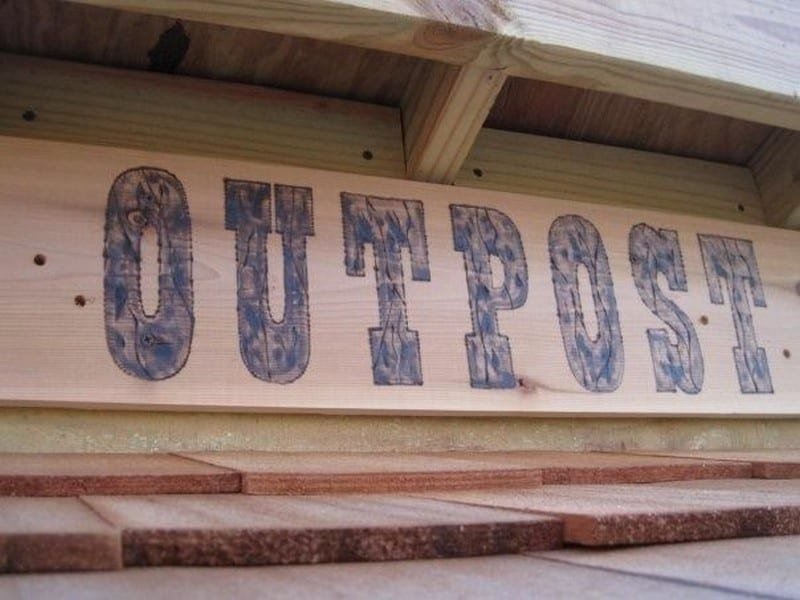
Step 10: Create the Saloon Sign
Every Western fort needs a name.
- Ask your kids to pick a saloon name that they like, such as “Silver Spur Saloon” or “Bandit’s Hideout”.
- Choose a font on your computer that matches the style and print the name onto card stock.
- Cut out the letters to create a stencil.
- Trace the letters onto a smooth cedar board.
- Use a wood burning tool to burn along the edges of each letter and then fill them in with a rustic pattern. Work slowly and carefully.
- If your children are old enough, you can demonstrate how to handle the wood burner safely and allow them to try a small part under supervision.
- For fun, you can use a drill to add small “bullet hole” marks in the sign.
- Mount the sign above the door using screws.
The smell of burning cedar and the look of the finished sign make this step especially rewarding.

Step 11: Add Decorations and Final Details
Little details help the fort feel like a real saloon.
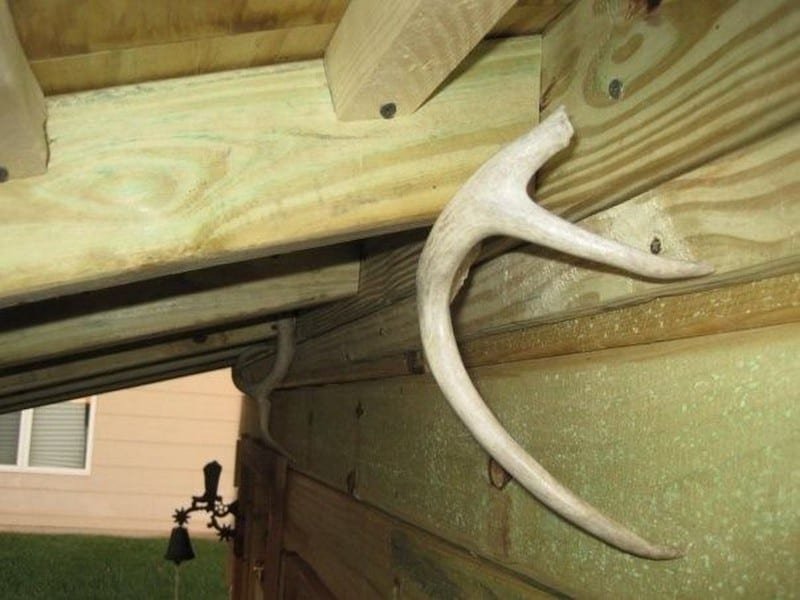
- Visit thrift stores or flea markets to find Western-style decorations. Bells, lanterns, antlers, old signs, or ropes can add character.
- Securely fasten all decorations to the walls so they cannot fall on anyone.
- If you use antlers, turn the tips so they point toward the wall and fasten them firmly. Make sure there is no way a child can be poked or scratched by a point.
- Sweep and clean the inside of the fort and check for any loose boards, sharp edges, or exposed screws.
- Invite the kids to bring in chairs, toy chests, or play props to complete their saloon.
You do not need to spend a lot of money on decorations. Creativity and a few secondhand finds can transform the space.
Safety Tips for Building a Kids Fort
Before you start building, review these safety tips with your helpers.
- Call your local utility marking service before you dig any holes. Hitting a power, gas, or water line can be dangerous.
- Wear safety glasses, hearing protection, and a dust mask when cutting or routing wood, because the dust and noise can be harmful.
- Use pressure treated lumber for any parts that are close to the ground, and avoid letting the wooden frame sit directly on soil to reduce rot and termites.
- Use screws instead of nails on the siding and main structural parts. Screws hold better as the boards expand and contract.
- Check for sharp edges, exposed screw tips, or decorations that could poke or scratch a child.
- Make sure the fort is stable and consider anchoring it if you live in a windy area.
- Children should not use power tools or climb on the roof. Adults should handle any work at height or with sharp tools.
You can still use Wild West jokes and stories, but always include a clear, direct safety sentence like the ones above so everyone understands the rules.

You don’t have to spend a lot of money for the kids to enjoy a playhouse. You just need to be resourceful and work with materials that are found around you. And with a bit of help from the kids 😉
If you’d like to view the plans for the DIY Kids Fort, you’ll find them here. Note that the above project varies from the roof plans shown.
Thanks to jhawkins14 for this great project.
Final Thoughts
You do not have to spend a lot of money to give your kids a great playhouse. With some basic tools, recycled materials, and patience, you can build a backyard kids fort that looks like a real Western saloon. The project is a chance to teach children about planning, measuring, safety, and teamwork, and to create a space where they can play and imagine for years to come.
DIY Kids Fort Frequently Asked Questions
How long does it take to build this DIY kids fort?
This fort took about three and a half months to build, working mainly in the evenings and on weekends, with help from the kids. A very experienced DIYer working full days could finish faster, but it is best to plan on several weeks if you are learning as you go.
How much does it cost to build a backyard kids fort?
The cost depends on lumber prices in your area and how many recycled materials you can find. Using recycled pine fence boards and cedar can reduce costs. Expect to pay for pressure treated framing lumber, plywood, cedar shingles, hardware, and decorations. You can adjust the design to fit your budget.
What skill level do you need to build this fort?
This is an intermediate DIY project. You should be comfortable using a circular saw, drill, and measuring and marking lumber. If you have built a small deck, shed, or similar structure before, you should be ready for this. A careful beginner can still complete it by working slowly, following the plans, and asking for help when needed.
Can kids help build the fort?
Yes. Kids can help with planning, carrying boards, holding pieces in place while you screw them together, sanding edges, and painting or decorating. Power tools and ladders should always be handled by adults. Let kids participate in safe tasks so they feel proud of the finished fort.
Where can I find the DIY kids fort plans?
You can download the free DIY Kids Fort PDF plans from this page. The plans include a cut list, framing diagrams for each wall, roof layout, and porch details. You can print the plans and keep them beside you while you build.