Last Updated on August 6, 2025 by teamobn
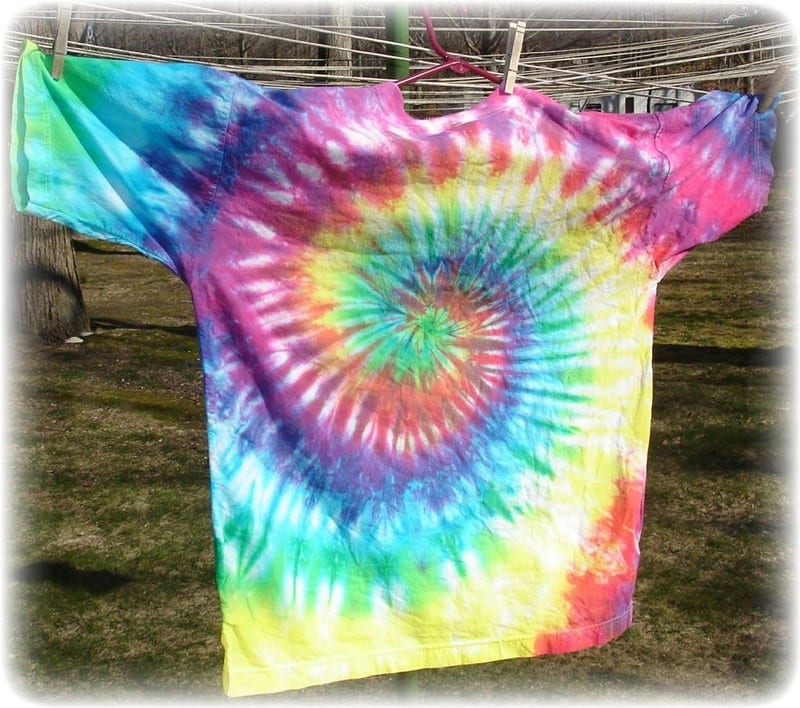
Everytime I see a tie-dye shirt, I remember the early 90’s. It is mostly associated with the 1960’s era, but I know it became popular again in the 90’s. It was the time when almost everybody I saw was wearing these multicoloured tops.
I still think they are cute to own though. If you have old white shirts that aren’t pristine anymore, you can try giving them this hippie look.
Tie-dyes work best with 100% cotton, but you can also use silk or rayon. A 50% cotton, 50% polyester is okay but the results will not be as good. Don’t bother with 100% polyester as your dyes will not hold at all.
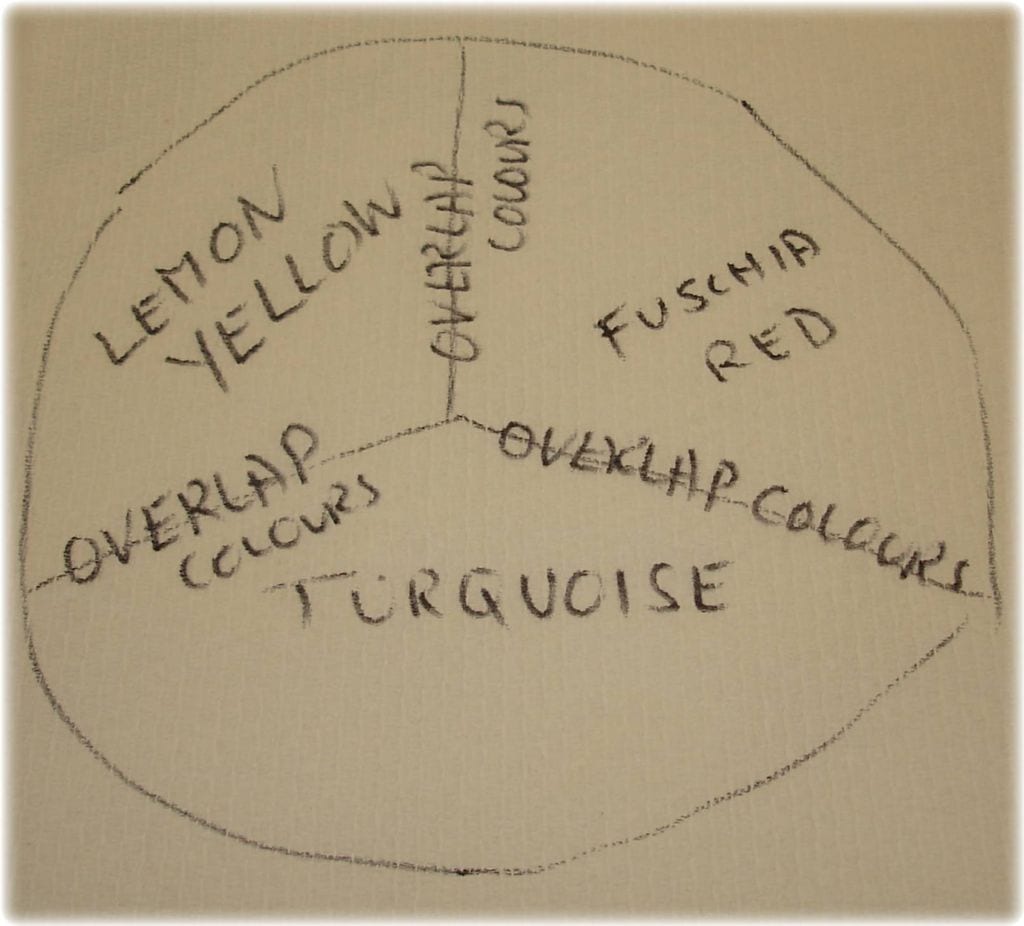
This tutorial shows how to do a spiral rainbow design, and uses three main colours – yellow, fuschia, and turquoise.
Contents
How to Due Dye a White Shirt
Materials:
- White shirt
- Procion dyes (at least three different colours)
- Apron
- Rubber bands
- Rubber/plastic gloves
- Squeeze bottles (depending on how many colors you will use)
- Urea
- Soda ash
- Salt
- Small Tub
- Paper towels or old rags for cleaning
- Plastic cover (to cover work area)
- Ziploc
Steps:
Always wash the shirt first, whether it is newly bought or not.
Wear old clothes. gloves and an apron for an extra protection.

Mix warm baby-bath water, 2 tablespoons of salt, and soda ash (follow instructions on the soda ash package), and soak the shirt in it for about 10 minutes. Wring the shirt thoroughly, the drier the better the absorption of colours.
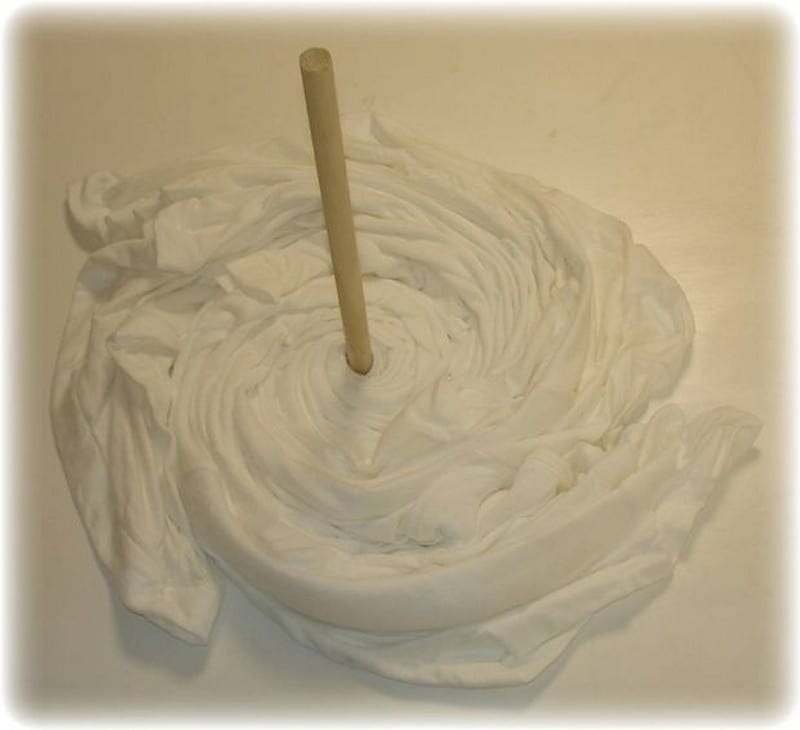
Lay the shirt down on a flat surface. Hold the center either with a rod or simply with your hands and twist it.
This step is more crucial than you think – it will determine the outcome of your shirt. Once your shirt takes the shape of a pie like this, carefully remove whatever it is that is holding the center. Make sure you don’t ruin the form.
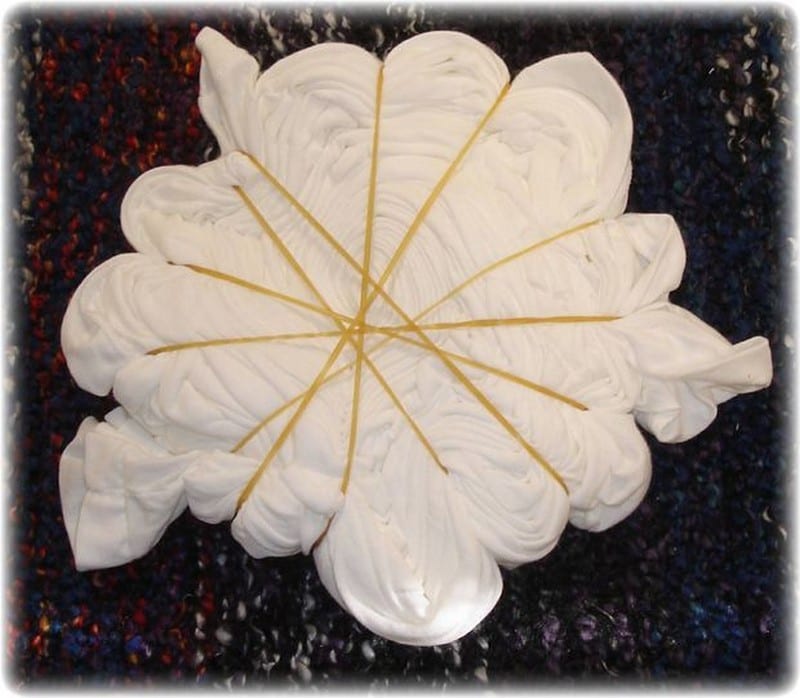
Put rubber bands like in the picture. Halfway through putting the rubber bands on, carefully turn the shirt over and continue putting on more rubber bands. The idea is to keep the shirt flat – no parts are bulging or higher than the others.
Now is the time to dye it. Place the shirt on a paper plate for easier flipping later on.
Start with the lighter colours first. Imagine that you are working with a real pie chart. Starting with the center, squeeze one colour out on 1/3 “pie” of the shirt. Do this in a steady manner to have a nice design.
Then colour the second and third pie with the two other dyes. Overlap the colours to make sure no whites will be left. Remember that some parts of the shirt are hidden.
Prepare a second paper plate and flip the first paper plate over it to transfer the shirt. Now you are working with the other side of the shirt. Dye it the same manner you did on the front side. Make sure the colours at the back and front match.
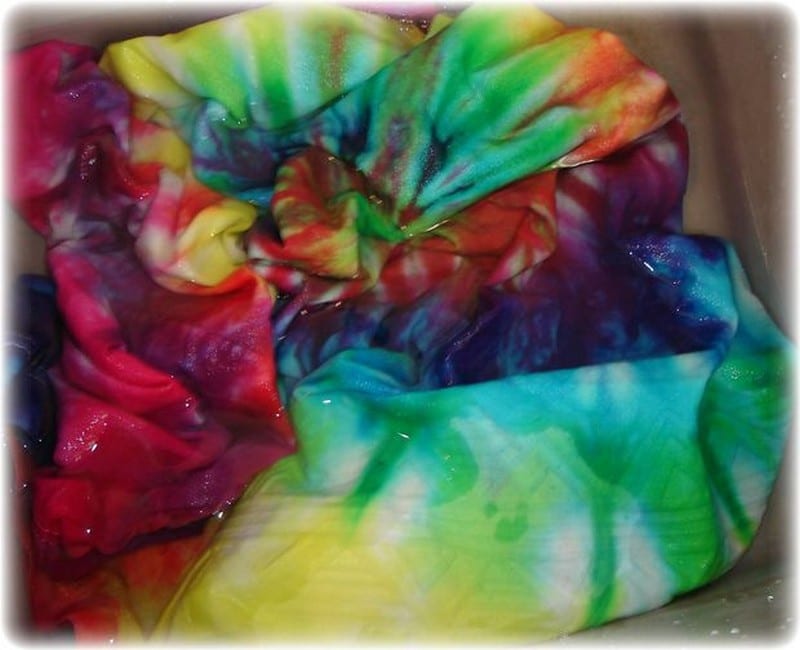
When done, place the shirt in a ziploc and close it tight. Let the colours sit and bond properly with the fabric for 24 hours. If you can’t wait that long, you can check it after 8 hours.
Wear rubber gloves again and old clothes/apron before taking the shirt out of the plastic bag. Carefully remove the rubber bands and rinse the shirt with cold water. It may seem like all the colours are coming out, but don’t worry. Your shirt is well dyed. Keep rinsing until water runs clear.
Wash your dyed clothes at least three times separately before washing them together with your other laundry.
Source: stinkymum
Choosing the Right Fabric for the Best Dye Absorption
Picking the right fabric makes your tie-dye pop. Natural fibers like cotton or rayon are ideal and absorb dyes deeply for vibrant, long-lasting color results.
Fabric Fiber Characteristics
Different fibers absorb dyes differently. Cotton soaks in color deeply. Rayon holds bright shades too. Silk absorbs with a soft sheen. Polyester repels most water-based dyes and may need special formulas. Choose fibers with open weaves and high absorbency. Those let dyes penetrate fully and yield sharp, vivid tie-dye patterns.
Prepping and Prewashing Fabrics
Prewashing removes sizing, oils, and finishes that block dyes. Wash fabrics with a mild, dye-free detergent. Avoid fabric softeners. Rinse thoroughly to strip residues. Give fabrics a final squeeze to remove extra water. This prepping step boosts absorption. Dry or damp fabrics both work. Dyes grip better on a clean, ready surface.
Weave and Thread Count Matters
A tight weave resists dye penetration. Looser weaves allow deeper dye flow. Thread count can alter how dyes spread across fabrics. High-count sheets might show subtle designs with soft edges. Low-count fabrics deliver bolder rings and clear lines. Pick a weave that matches your pattern goals. This choice shapes your final result.
Fabric Blend Considerations
Blends of cotton and polyester absorb dyes unevenly. You’re likely to see dull spots where polyester repels color. Aim for high cotton percentages for stronger hues. Test scraps if your fabric content is a mystery. Always check the label and choose natural fibers whenever possible.
Silk and Rayon Performance
Silk and rayon both take color beautifully. Silk yields a soft sheen and vibrant glow. Rayon absorbs dye deeply yet drapes with fluid movement. These fabrics need gentle handling and specialized dyes. Always prewash them to avoid shrinkage. Handle with care.
Dye Fixatives and Fabric Mordants
Some fibers need help to hold dye. You can treat fabrics with soda ash or special fixatives. This opens fibers and binds dye molecules tightly. Always follow product guidelines for best absorption. Proper mordant use leads to vivid, long-lasting colors. Using too much can weaken fabric. Test small swatches first.
Impact of Fabric Weight and Thickness
Lightweight fabrics let dyes sink quickly. Heavy weaves resist penetration so patterns appear softer. You’re more likely to see subtle gradients on heavy knits. Thicker fabrics take longer to dry fully. Match your design style to fabric weight. Experiment on samples to gauge how dyes spread.
Basics of Color Theory: How to Mix and Blend Hues
Understanding basic color theory helps you mix shades that look great. Learning which hues complement each other leads to balanced, eye-catching, and bold tie-dye designs.
Primary, Secondary, and Tertiary Colors
Primary colors, red, blue, and yellow, form the base of all palettes. Mixing two primaries yields a secondary: green, orange, or purple. Blending a primary with a secondary creates tertiary shades. Knowing these relationships helps you craft balanced schemes. Use primaries for bold contrast. Tertiaries give subtle transitions in your tie-dye designs.
Complementary and Analogous Palettes
Complementary colors sit opposite each other on the wheel and deliver high contrast. Analogous hues live side by side and flow smoothly. Pairing opposites yields dynamic, vibrant effects. Grouping neighbors creates harmonious blends. Experiment by testing small swatches on scrap fabric first. This approach prevents surprises. Choose palettes that match your style vision.
Blending Techniques for Smooth Gradients
Smooth gradients need careful blending. Saturate one area fully, then apply less dye as you move outward. Use squeeze bottles with fine tips for precision. Gently tap or brush colors together to soften harsh lines. Wipe excess on paper towels. Practice on scrap fabric until you perfect your motion. Consistent pressure ensures even transitions.
Rinsing, Washing, and Caring for Your Dyed Shirt
Proper rinsing and washing locks in your vibrant colors and keeps your shirt looking fresh. Caring steps prevent fading, bleeding, and wear over time.
Rinse to Remove Excess Dye
After unbagging your shirt, rinse under cold water until the water runs clear. This helps flush out loose pigment and prevents colors from transferring. Keep the garment moving in the sink and gently stretch it to open fibers. Cold water preserves vivid hues and prevents dye from bleeding during the first wash.
Washing Tips for Color Retention
Turn your shirt inside out and wash it separately on a gentle cycle. Use a mild detergent specifically formulated for colors, and avoid using bleach or harsh chemicals. Choose a cold-water setting to maintain brightness. Remove promptly when the cycle ends to cut down on creasing. Air-dry or tumble-dry on low heat.
Long-Term Care and Storage
Store dyed shirts in a cool, dry place away from direct sunlight. Fold neatly to avoid sharp creases that could fade lines. If you’re hanging garments, use padded hangers to keep shape. Re-wash every few wears to freshen fabric. Spot-clean minor stains quickly to protect dye longevity and keep colors vibrant.
Conclusion
Tying, rinsing, and washing your white shirt brings your design to life. Rinsing under cold water locks in colors and stops extra dye from bleeding. You’ll wash it gently with a mild detergent to keep hues bright. Air-drying or using low heat prevents shrinking and preserves pattern clarity. Proper care will keep your custom shirt vibrant wash after wash.
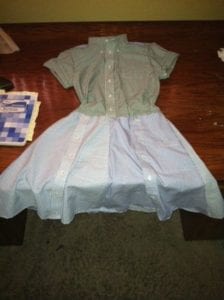
Do you have any shirt that cannot be tye-dyed? Do not just place it in the trush. Check out our guide on 14 ways you can reuse your old shirts.