Installing a Tesla Wall Charger at home is starting to feel less like a luxury and more a practical upgrade. They make it feasible for people in switching to EVs. if you plan it during a build or renovation, you can save money, avoid messy rework, and make the installation process smoother. Things like your electrical panel capacity and where the charger sits aren’t small details. They affect how convenient and safe charging is day to day.
Getting those choices right upfront leads to a cleaner setup that perfrorms well and stays code-compliant. Follow our comprehensive guide to ensure a smooth installation of your Tesla Charger.
Contents
Key Takeaways
- Planning the Wall Charger during a new build or renovation usually costs less and saves you from opening walls later just to run a new circuit.
- A dedicated circuit with the right breaker and wire size keeps charging steady, helps control heat, and cuts down on annoying nuisance trips.
- Mount the charger where the cable naturally reaches the rear driver-side charge port, and aim for roughly 48 inches to the center of the unit so plugging in feels easy, not awkward.
- The Wall Charger can live outdoors, but a garage install is still the better long-term choice since it’s protected, cleaner, and harder for anyone to mess with.
Installing a Tesla Wall Charger
A Tesla Wall Charger install is mostly about doing the electrical work cleanly and safely, then mounting the unit so it’s easy to use every day. If you’re not comfortable working inside a live panel or pulling permits, it’s worth hiring a licensed electrician so the setup is safe and passes inspection.
Materials
- Tesla Wall Charger unit
- Dedicated circuit breaker sized to match your charger setting and local code (often 40A, 50A, or 60A)
- Correct wire size for the circuit and run length (confirm with the installation manual and local code)
- Electrical conduit, if your local code requires it or the wiring is exposed
- Wire connectors and terminal lugs as needed
- Mounting screws and wall anchors suitable for your wall type
- Cable staples or clamps rated for the cable you’re using
Tools
- Voltage tester
- Wire strippers
- Screwdriver set
- Drill with the right bits for your wall surface
- Level
- Fish tape (helpful for pulling wire through walls or conduit)
- Torque screwdriver or wrench (important for terminals)
- Multimeter
Step-by-Step Installation Guide
- Turn off power at the main panel, then confirm power is actually off with a voltage tester and a multimeter.
- Check permitting rules in your area. If a permit or inspection is required, handle that before any work starts.
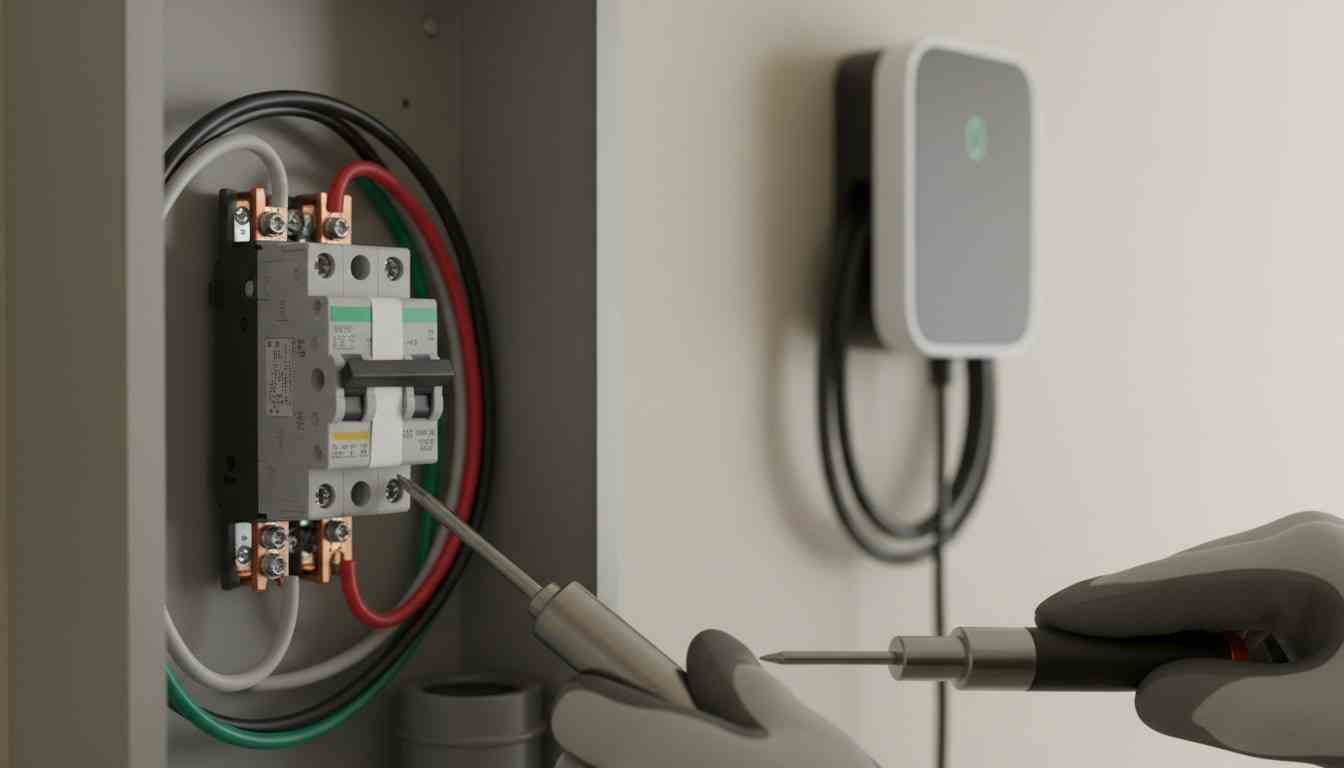
- Install a dedicated breaker in the panel that matches the charger’s configured amperage and your electrical capacity.
- Route the wiring from the panel to the charger location using the method your code allows (in-wall, conduit, along framing), and keep proper clearances and protection along the run.
- Mark the mounting location and height that makes sense for your parking setup. Many installs place the unit around chest height, but follow Tesla’s guidance and any local accessibility rules.
- Mount the charger bracket and unit securely, using a level so the cable hangs neatly and the unit sits flat.
- Strip the conductors to the length Tesla specifies in the manual, no more than necessary.
- Wire the charger exactly as shown in the Tesla wiring diagram for your region and supply type. Don’t rely on “typical” color conventions, verify each conductor and terminal labeling.
- Tighten terminals to Tesla’s specified torque values. Loose terminals are a common cause of overheating and failures.
- Land the conductors on the breaker and ground/neutral bars as required for your wiring method, then torque those connections to spec as well.
- Do a final check before energizing: no exposed copper outside terminals, cable is properly clamped, and the cover is seated correctly.
- Restore power, then follow the Tesla setup steps to confirm the breaker size and charging current are set correctly.
- Test charging with your vehicle to confirm it starts reliably and reaches expected charging speed.
- Complete the final inspection if your area requires it, and keep documentation for warranty and future troubleshooting.
Ideal Placement of a Tesla Wall Charger
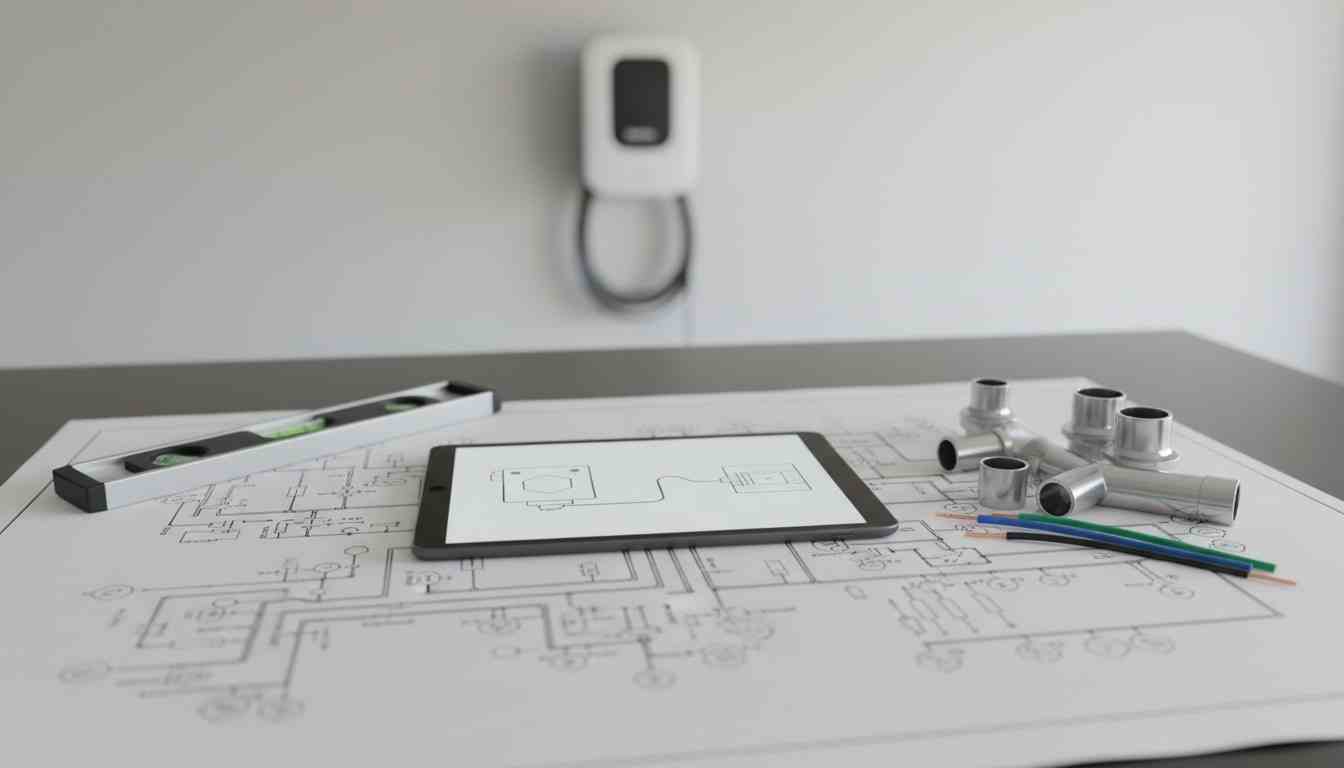
Picking the right spot for your Tesla Wall Charger is mostly about making charging feel effortless. A good location keeps the cable from being stretched, makes your daily plug-in routine smoother, and can even save money by shortening the wire run back to the panel.
Proximity to the Charge Port
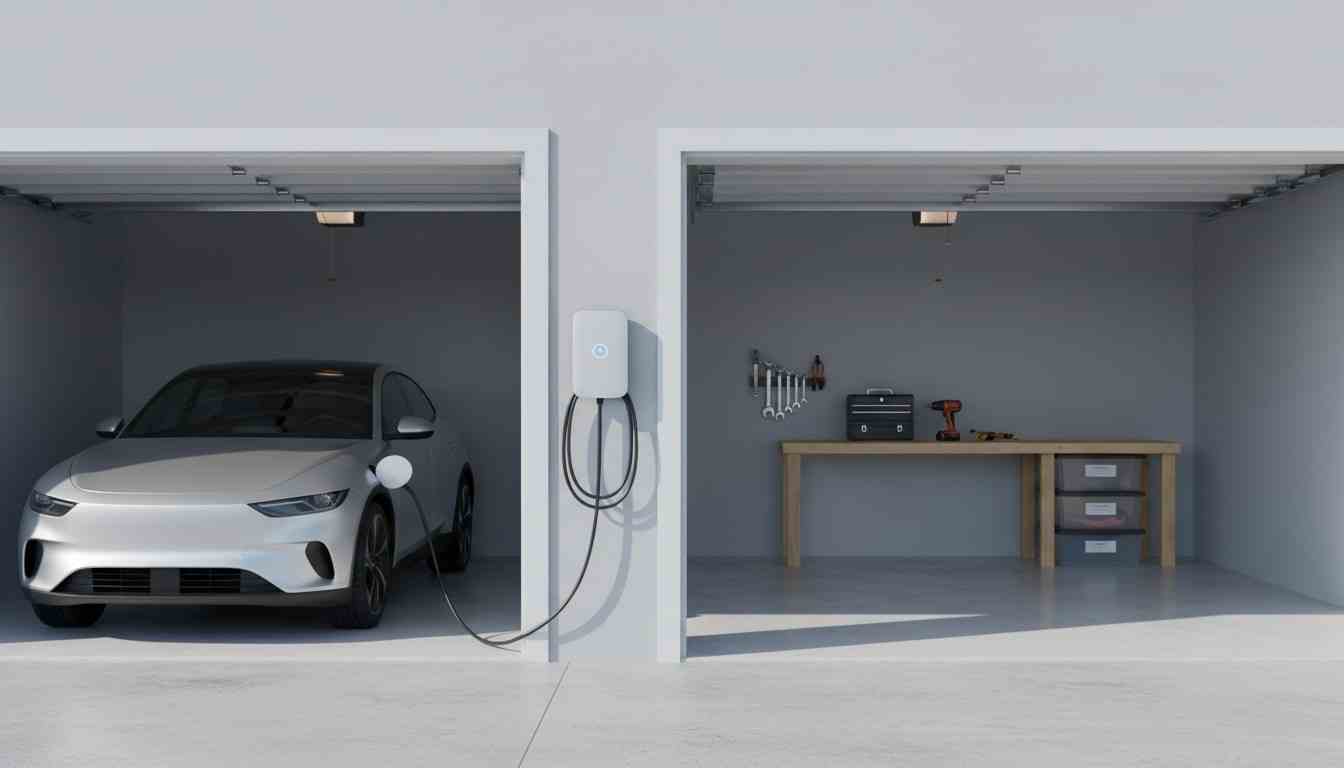
On most Teslas, the charge port is at the driver-side rear tail light. Mounting the charger so the handle naturally reaches that corner of the car makes a big difference. You don’t want the cable pulled tight across a walkway or dragging along the floor where people trip over it. If you usually back into the garage, placing the charger closer to the rear wall tends to feel most natural. If you typically pull in forward, mounting it closer to the garage door side usually lines up better.
Mounting Height and Accessibility
A comfortable height for most people is around 48 inches from the floor to the center of the unit. It’s easy to reach, and it helps the cable stay off the ground when you wrap it up. Leave breathing room around the charger too. A bit of space on all sides makes it easier to coil the cable cleanly and helps with ventilation, especially in warmer garages.
Indoor Versus Outdoor Installation
The Tesla Wall Charger can handle outdoor use, but an indoor garage installation location makes it last longer. Its also less exposed to vehicular bumps, harsh sun, and potential theft. If you have to mount it outside, aim for a spot that’s protected from heavy rain and sunlight exposure. Use watertight conduit and fittings rated for exterior work. Follow local rules so the installed wall charger does not turn into a future headache.
Future-Proofing for Multiple Vehicles
If you think you might add another EV later, plan for it now while you’re choosing a location. A more central spot between two parking positions can make sharing easier. Tesla’s setup can support power sharing between multiple Wall Chargers, so placing the first unit where a second one could be added later can save you a lot of rewiring and wall patching down the road.
Electrical and Safety Requirements
Safe home charging comes down to three things: the electrical design is right, the install follows local code, and the work is done cleanly. When those basics are handled properly, your Tesla Wall Charger runs cooler, trips less, and stays dependable in every season.
Dedicated Circuit and Load Calculations
EV charging should be on its own dedicated circuit. Sharing a circuit with other loads is where you start seeing voltage drop, heat, and random breaker trips when something else in the house kicks on. Before anything gets installed, check your service size and how much room you actually have in the panel. A proper load calculation should include big fixed appliances and anything you might add later, like another EV, an induction range, or a larger A/C.
Charging is usually treated as a continuous load, so you can’t size the circuit like you would for something that only runs in short bursts. Your local rules typically require extra headroom above the charging current. The Wall Charger should also be configured to match the breaker and wire size so the charger never asks the circuit to do more than it’s built for.
Conductor Sizing, Breaker Selection, and Terminations
Wire sizing isn’t just “pick a gauge off a chart.” The right conductor depends on the circuit rating, copper vs aluminum, insulation rating, and real-world conditions. Long wire runs, warm ambient temps, tight conduit fill, and bundled cables can all push you toward upsizing to keep heat down and voltage drop reasonable. Keep splices to a minimum, and use fittings that are listed for the wiring method you’re using.
The connection points matter just as much as the wire. Use lugs and connectors that match the conductor type, and tighten everything to the manufacturer’s torque spec using a torque tool. Loose or over-tightened terminations are a common source of overheating, arcing, and annoying intermittent faults that show up months later.

Ground-Fault Protection, Grounding/Bonding, and Inspection
Ground-fault protection rules depend on where you live and how the equipment is listed. Its worth verifying what’s required in your area. Sometimes the protection is built into the charger while other types require a breaker. Certain inspectors will require both.
Stacking protection can be a nuisance. You do not want to add extra device unless your local code or inspectors call for it. Grounding and bonding also need to be done correctly. This includes sizing the grounding conductor and bonding any metal conduit or enclosures.
Permits and inspections aren’t just the rules. They’re the final check that the breaker, wiring, grounding, and workmanship are all correct and safe. Treat Tesla’s installation manual as part of the requirements. Label the new circuit clearly in the panel and make sure future homeowners or electricians can shut it down safely without guessing.
Conclusion
A Tesla Wall Charger is a home upgrade you use every day because it removes daily friction from using your EV. When planning is down right with the right electrical sizing and mounting location, the charger naturally fits your parking routine. Powering your EV becomes simple and consistent.
Stick to Tesla’s installation manual and your local electrical code. This will save you time and trouble when inspections are done in the future. With the proper pre work, the charger can last and function for years.
FAQ: Tesla Wall Charger
- Do I need a permit to install a Tesla Wall Charger?
- In most places, yes. You’re adding a new, high-amperage circuit, and that usually triggers permitting requirements. The permit and inspection are there to confirm the basics are correct, like breaker sizing, wire type, grounding, and overall workmanship, before the circuit is signed off for regular use.
- What size breaker is required for a Tesla Wall Charger?
- It depends on how you plan to configure the charger and what your electrical system can support. A lot of home installs end up on a 40A, 50A, or 60A breaker, with the Wall Charger set to match that circuit. Charging is treated as a continuous load in many jurisdictions, so the breaker and wiring need enough headroom to meet code.
- Can a Tesla Wall Charger be installed outdoors?
- Yes, it can. The Wall Charger is rated for outdoor use, but it’s still smart to mount it where it won’t get hammered by direct rain or intense afternoon sun. Outdoor installs also need the right weather-rated conduit, fittings, and mounting hardware so everything stays sealed and code-compliant over time.
- How far can the charger be from the electrical panel?
- There’s no hard distance limit, but longer runs usually mean higher cost and more planning. More wire, more conduit, and sometimes thicker conductors to keep voltage drop under control. Keeping the charger closer to the panel can simplify the job, but if a long run is unavoidable, proper wire sizing keeps charging stable and safe.
- Can I add a second Tesla Wall Charger later?
- Yes. Tesla Wall Chargers can be set up for load sharing, which lets multiple units work together without overloading a single circuit when configured correctly. If you think a second EV is likely, a little planning now helps a lot later, like choosing a central location, leaving conduit pathways, and making sure your panel capacity won’t be the bottleneck.


