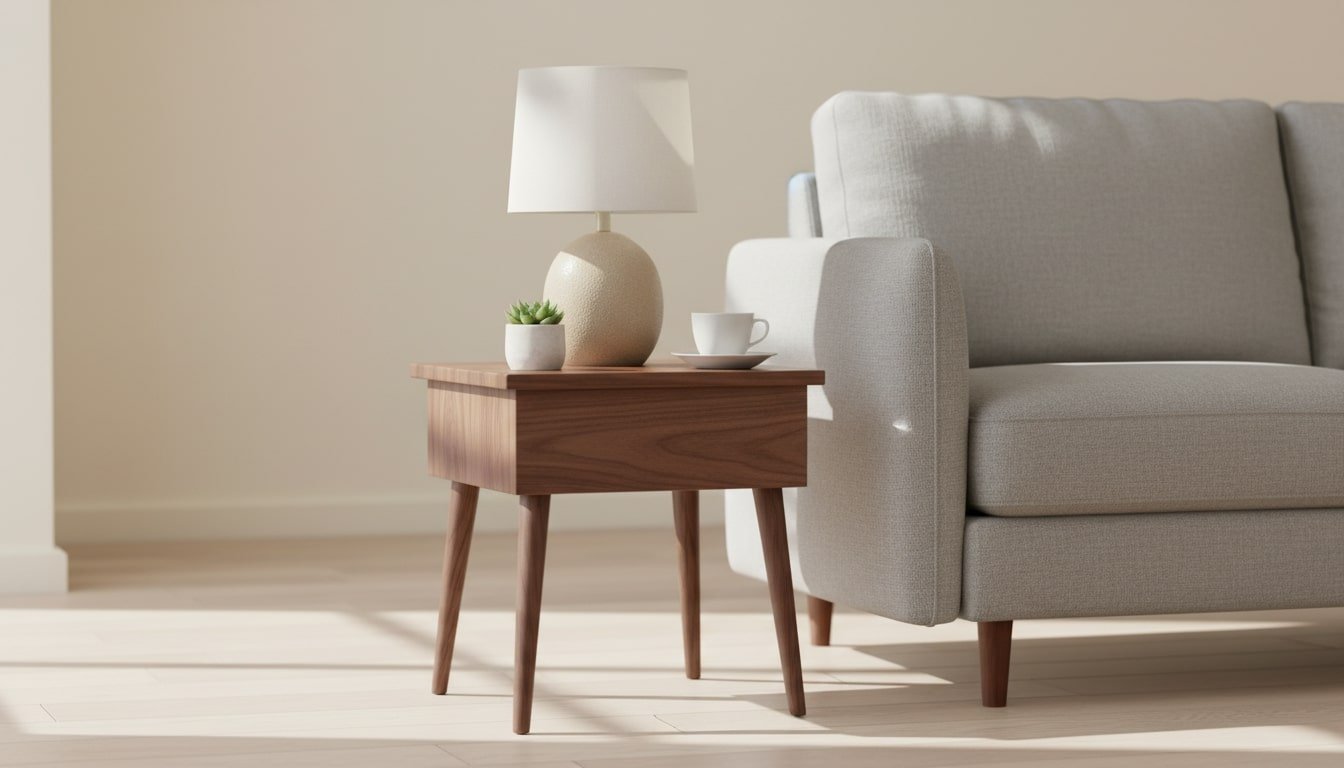
DIY end tables are the kind of project you notice you need the moment you’re balancing a lamp on the floor or babysitting a drink on the couch arm like it’s a full-time job. A lot of store-bought tables look fine, but they’re often the wrong height, don’t have the storage you actually want, or feel flimsy once you start using them every day, especially if your space has an awkward layout.
Building your own gives you control over the size, the finish, and the little details that make it look like it was meant for the room. It will not look like it was picked up from any flea market or local department store. Using our DIY guide to create a smart end table that fits your living room or bedroom.
Contents
Key Takeaways
- Custom DIY end tables solve the common frustration of store-bought furniture that rarely matches your specific sofa height or room layout.
- Building your own furniture ensures a level of stability and durability that mass-produced department store options often lack.
- Success in this project relies on accurate measurements, square cuts, and choosing the right wood species for your desired paint or stain finish.
- A professional result comes from patient preparation, including thorough sanding and applying thin, protective top coats that handle daily wear.
Building DIY End Tables
Building your own end tables is a solid weekend project that makes a room feel more “done” without a big spend. If you’ve got basic tools and decent lumber, you can put together a table that’s the right height, the right size, and actually feels stable next to your sofa.
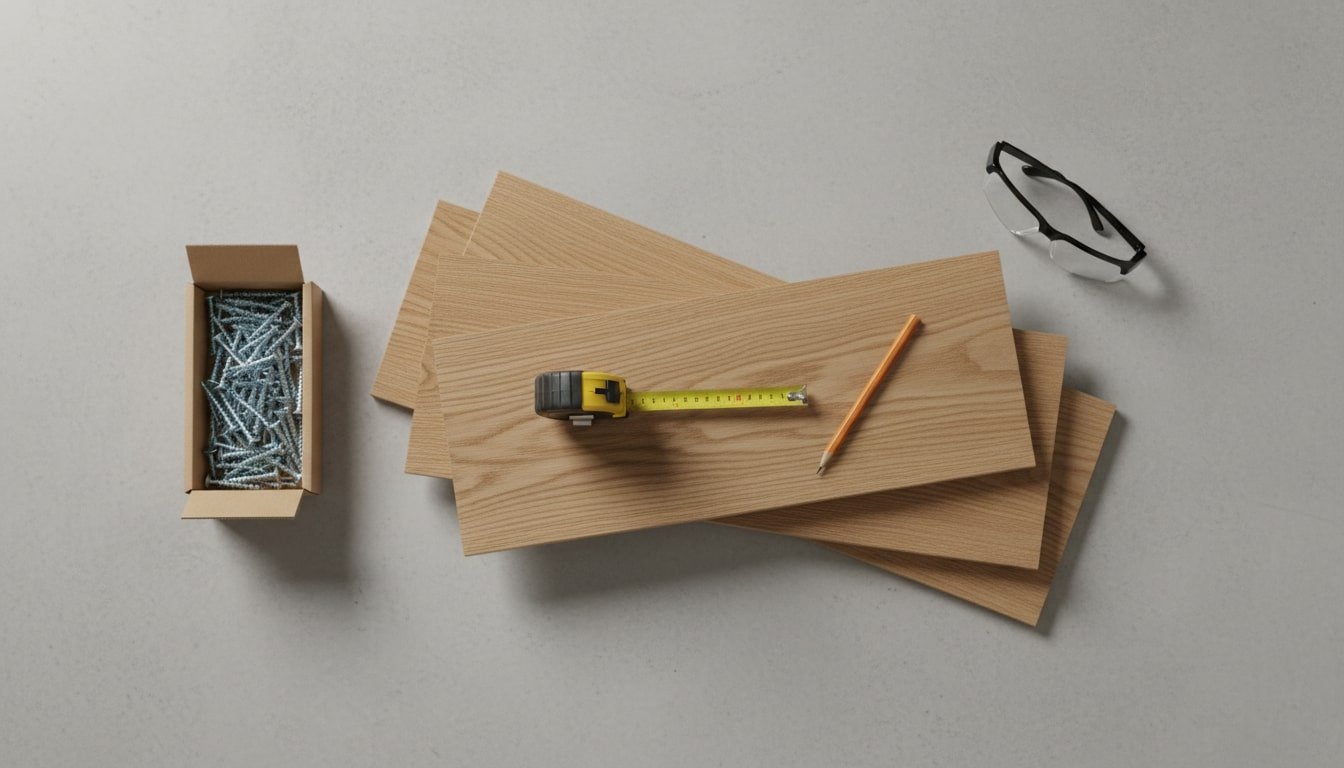
Materials And Tools Needed
- Wood for the tabletop, like 1×12 boards or a pre-made panel
- Wood for the apron and shelf frame, like 1×3 or 1×4 boards
- Four legs, like 2×2 lumber or pre-made table legs
- Optional shelf slats, like 1×2 boards
- 1-1/4 inch wood screws or pocket hole screws
- Wood glue
- Sandpaper in 80, 120, and 220 grit
- Wood filler, stainable or paintable
- Finish, like stain plus clear coat, or primer plus paint
- Measuring tape and pencil
- Speed square or combination square
- Miter saw or circular saw with a straightedge guide
- Drill and driver bits
- Pocket hole jig (optional, but makes apron joinery much easier)
- Clamps (at least two)
- Orbital sander (optional, but faster and more consistent)
Step-By-Step Build Guide
- Start with height. Measure your sofa arm or seat height, then aim for a finished table height that lands about one to two inches above or below that point so it feels natural to use.
- Figure out the tabletop size based on your space. You want enough room for a lamp and a drink, but not so wide it crowds your walkway. Mark it out, then cut your top to size.
- Cut the four legs to length. Take the thickness of the tabletop into account, then label the legs so the best-looking faces end up on the outside once everything is assembled.
- Cut your apron boards to form a rectangle under the top. Dry fit the pieces first, then check for square by measuring corner-to-corner diagonals. If the diagonal measurements match, you’re square.
- Attach the apron to the legs using pocket holes or pre-drilled screws. Add glue at the joints, then clamp as you fasten so the frame pulls together tight and stays aligned.
- Add a lower shelf if you want one. Install shelf supports on the inside faces of the legs, then attach slats or a shelf panel. Leave small gaps between slats so the wood has room to move with seasonal changes.
- Sand the table starting at 80 grit to knock down rough spots and flatten edges, then move to 120 and finish at 220 so the surface feels smooth and takes finish evenly.
- Fill screw holes and small gaps with wood filler. Let it dry fully, then sand again until it feels seamless and looks clean when you glance at it in angled light.
- Attach the tabletop from underneath through the apron. Use elongated holes or figure-eight fasteners so the top can expand and contract without splitting or warping.
- Apply your finish in thin coats. Let each coat dry as directed, lightly sand between coats, and give it proper cure time before loading it up with heavy decor or a lamp.
Finishing Options That Look Custom
A good finish is what makes a DIY end table feel like real furniture, not a weekend experiment. It’s also your first line of defense against the stuff end tables deal with daily, like coffee rings, scuffs, and the occasional spill you don’t catch right away.
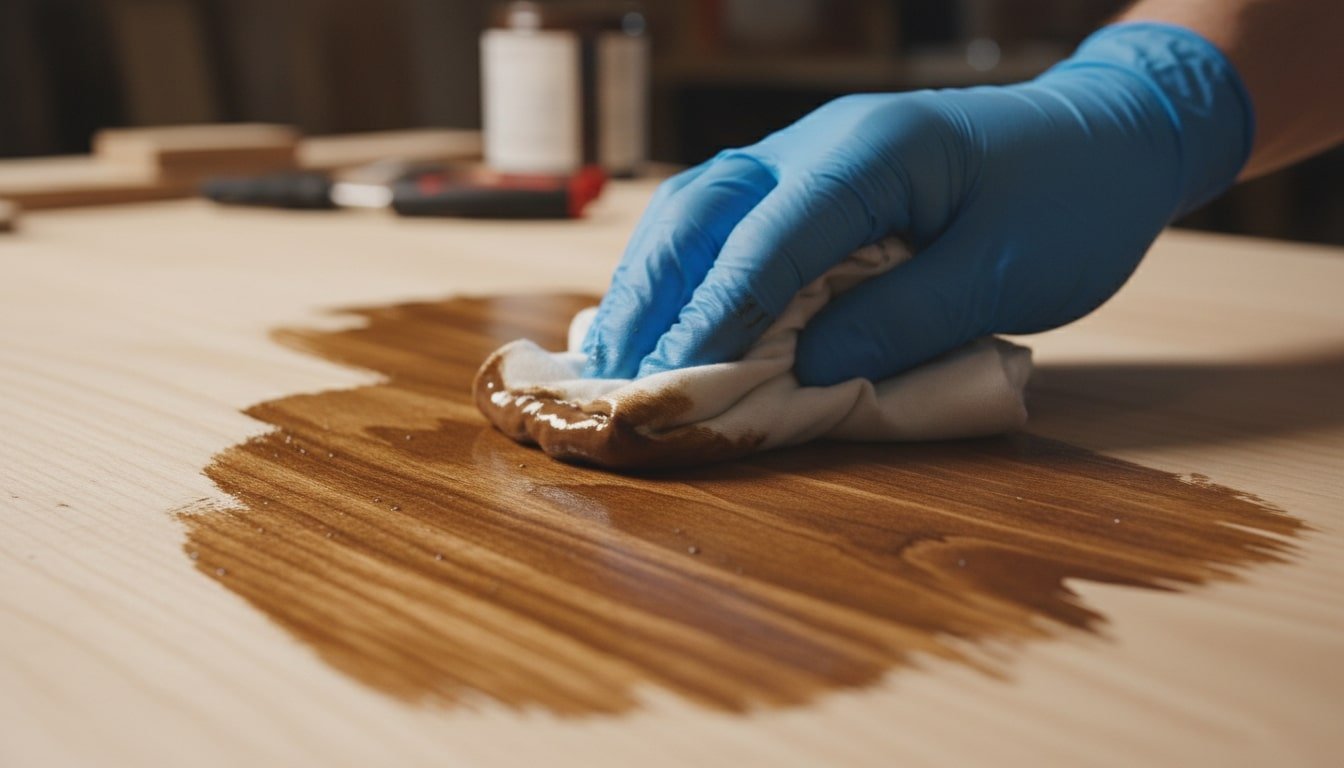
Stain Versus Paint And When To Choose Each
Stain is the better pick when the wood grain is part of the look. It works especially well on woods like oak, ash, and walnut because the grain shows up in a way that feels warm and “finished” without trying to hard. Stain also plays nicely with classic, transitional, and modern spaces. One catch is that paint-grade wood and some plywood tops can stain unevenly, so it’s worth doing a quick test on a scrap or the underside before you commit.
Paint makes more sense when you want a specific color, a cleaner look, or you’re working with mixed pieces that don’t match perfectly. It also hides wood filler and small flaws better than stain, which is helpful if you had to patch a few holes or seams. A durable cabinet or trim paint is usually a better choice than basic wall paint because it levels nicer and holds up better to bumps.

Top Coats For Real-Life Durability
End tables might look decorative, but they get treated like utility surfaces. Drinks sweat, lotion transfers from hands, pets leave their hair, and vacuums clip corners. Protect your tables from these sources of issues with the right top coat.
For stained wood, clear polyurethane is a common go-to. Water-based poly stays clearer and keeps the color closer to what you stained, while oil-based poly adds a slightly warmer tone. For painted tables, a top coat isn’t always necessary if you’re using a tough enamel, but it can still help if your home is high-traffic or you know the table will take a beating.
Sheen matters more than people think. Satin and matte do a better job hiding fingerprints and light scratches, while gloss looks sharp but shows every little flaw. Give your finish time to cure, not just dry, before you put heavy items on it or start using it every day.
Tips For A Smooth Finish Without Brush Marks
A “custom” finish starts with prep, not the first coat. Sand evenly, clean off dust completely, and don’t rush this part because any scratch or leftover grit will show up once the finish hits it. If you’re staining soft woods like pine and you see blotchiness, a wood conditioner or a quick wash coat helps even things out. Apply stain in manageable sections, then wipe consistently so the color doesn’t build up in patches.
For paint, thin coats are your friend. Use a high-quality roller made for smooth surfaces, and don’t overload it. Let each coat dry, lightly sand between coats, then wipe clean so the next layer levels out instead of sitting on dust. If you want the smoothest result, a foam roller or a sprayer for the final coat can make a noticeable difference. Slow, steady passes beat trying to muscle it into one perfect coat.
Common Mistakes And Easy Fixes
Even if you’re careful, DIY end table have a way of exposing little issues you didn’t notice during assembly. Most of them aren’t deal-breakers. A few quick checks and small adjustments usually get things back on track without scrapping the whole build.
Wobble Problems And How To Stop Them
Wobble almost always comes down to one of three things: leg lengths that don’t match, a base that’s slightly twisted, or a floor that isn’t perfectly level. Flip the table upside down on a known flat surface and press on the corners. If one corner lifts, you’ve found the problem leg.
If one leg is a hair short, a furniture pad can fix it fast and nobody will ever know. If one leg is slightly long, you can trim or sand it down carefully. If the frame itself is twisted, loosen the fasteners just enough to let it move, clamp the base square on a flat surface, then tighten everything back up.
Loose joints can also cause rocking, even when the legs are cut perfectly. Add screws from a hidden angle, or work a bit of wood glue into the joint and clamp it overnight. Once the base is solid, the table shouldn’t rock when you press opposite corners.
Gaps, Uneven Legs, And Out-Of-Square Frames
Small gaps at the joints usually happen when a cut is slightly off or a board bows while you’re fastening it. If the gap is minor, wood filler is the easy win. Let it dry fully, sand it smooth, and it’ll disappear under the paint. Often, under stain if you use a stainable filler and match the color well.
Bigger gaps usually mean the base width of square during assembly. The best time to catch this is before the glue sets, so it’s worth measuring diagonals as you build. If the diagonals don’t match, clamp the frame until they do, then fasten while it’s held in place.
Uneven legs are easier to prevent, so if you’re still cutting parts, use a stop block and cut all four legs at once. If you only notice after assembly, find the longest leg and bring the others down to match by trimming or sanding. A speed square also helps you check that each leg is sitting straight before you attach the top.
Finish Issues Like Blotching Or Sticky Clear Coat
A blotchy stain is common on soft woods like pine and poplar because they soak up stain unevenly. A pre-stain conditioner or a light wash coat of thinned shellac helps a lot because it seals the surface just enough to slow down absorption. If blotching already happened, the cleanest fix is sanding back and re-staining with conditioner. If you don’t want to redo it, going slightly darker can reduce the contrast and make it look more even.
Sticky clear coat usually comes from coats that went on too thick, not enough drying time between layers, or humid conditions that slow curing. The simplest fix is giving it more time in a warm, dry spot with good airflow. If it’s still tacky after that, lightly sand the surface to knock down the sticky layer, then recoat with thinner passes. Check the can for temperature ranges and recoat windows, because that stuff matters more than people think.
Conclusion
Building DIY end tables gives you something that actually works for your room, your storage needs, and the way you live day to day, which is where a lot of store-bought tables fall short. Take your time with square cuts, tight joinery, and a finish that can handle real use, and the end result will look clean and feel sturdy. Small hiccups are part of the process, and most of them are easy to fix with a few adjustments and a little patience. If you’re ready to wrap it up, pick a finish you genuinely like and start using your new tables like they were always meant to be there.
FAQ: DIY End Tables
- What Is The Best Height For DIY End Tables Next To A Sofa?
- A reliable target is a tabletop that sits level with your sofa arm, or within one to two inches above or below it. That keeps lamps and drinks easy to reach without straining your arms. Grab a tape measure and check your sofa’s arm height. Build your actual frame around the sofa arm instead of using a generic size end table.
- What Wood Should Beginners Use For DIY End Tables?
- Beginners usually have the easiest time with straight, stable boards that sand well. Poplar is great if you’re painting, and red oak is a friendly option if you’re staining and want the grain to look good. Pine is budget-friendly and easy to cut, but it dents easily and can stain blotchy. If you want the simplest tabletop, a pre-made glued panel from the lumber aisle saves time and looks clean.
- How Do I Keep My End Table From Wobbling On Uneven Floors?
- Start by making sure the legs are actually the same length. Set the table on a flat surface and check if any corner lifts. If the table is square and the wobble only happens in its final spot, your floor is the culprit. Felt pads can solve small issues fast, and adjustable levelers are even better, especially on tile or in older homes where the floor isn’t perfectly flat.
- Do I Need A Top Coat If I Paint My DIY End Tables?
- Not always, and it mostly comes down to the paint you used. A cabinet-grade or enamel paint, fully cured, can hold up well on its own. Add a clear coat if the table is going to take daily abuse, like drinks, keys, and constant wiping. If you do top coat, a compatible water-based polyurethane is a common choice, and testing first is smart so you don’t run into adhesion problems.
- How Long Does It Take To Build And Finish DIY End Tables?
- The build can often be done in a few hours if your cuts are clean and the design is straightforward. Finishing usually takes longer because sanding, drying, and curing add a lot of downtime. Plan on one weekend to build and another for finishing, especially if you’re doing multiple thin coats and want it to feel truly durable.