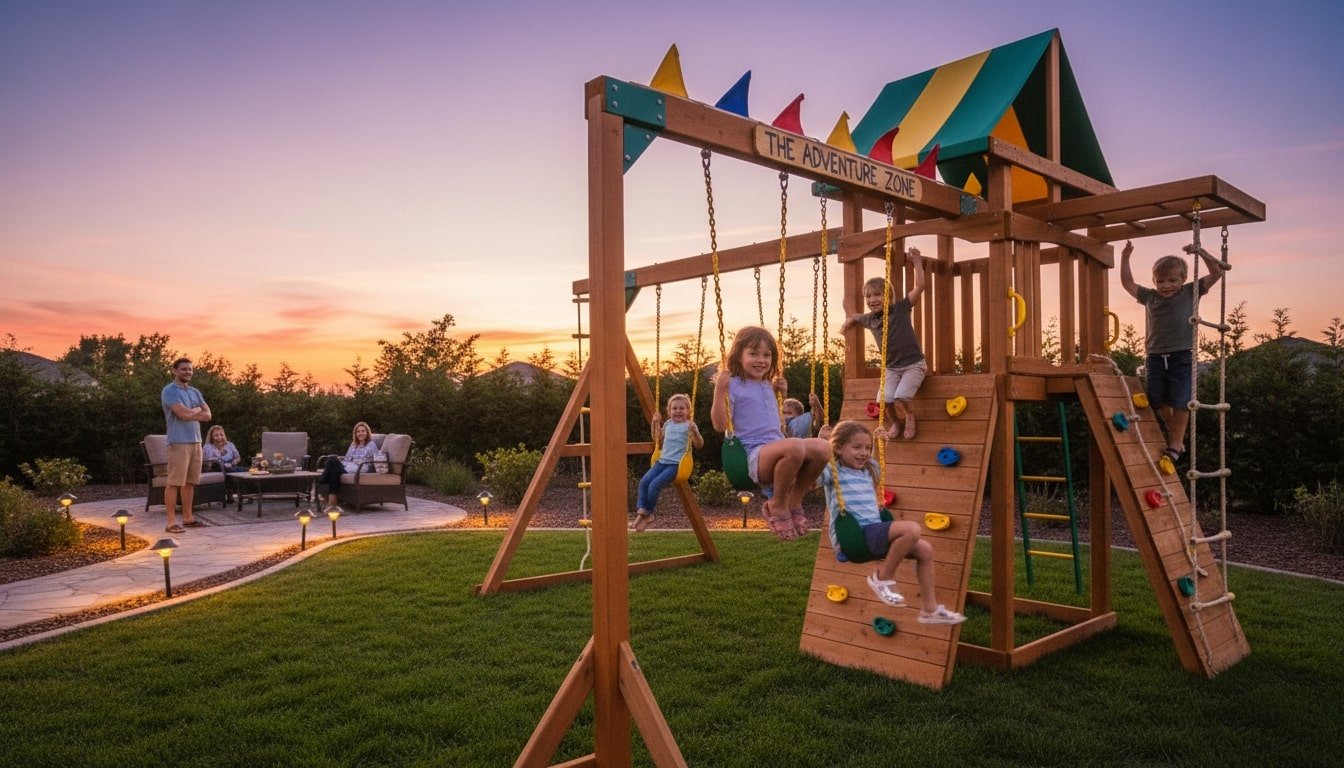
A well-planned backyard playground can turn a regular yard into the spot kids keep coming back to. With a solid layout, the right materials, and a clear build plan, you can create a safe play area that holds up for years without hiring a contractor.
Choosing the best location, using proper surfacing, and building features like swings, slides, and climbing sections keep the area fun for kids. Read our complete guide to build your DIY backyard playground to ensure the structure is safe and fun for your kids.
Contents
Key Takeaways
- A well-planned backyard Playground transforms an ordinary yard into a durable, high-traffic play space without the need for professional contractors.
- Prioritizing solid framing, high-quality exterior hardware, and weather-resistant lumber ensures the structure remains stable and secure for years.
- Designing generous fall zones and maintaining deep safety surfacing are the most effective ways to prevent serious injuries during active play.
- Routine inspections and simple aesthetic touches, like staining and landscaping, protect your investment and keep the area inviting as children grow.
Building Your DIY Backyard Playground
After you’ve finished the layout and design, you can move into the build. This part covers the core materials and tools, then walks you through the build in a practical order so the structure ends up solid, safe, and ready for real use.
Materials Needed
- Pressure-treated 4×4 posts for the main supports
- 2×6 and 2×4 lumber for framing, decking, and railings
- Galvanized or stainless steel bolts, screws, and washers
- Concrete mix for post footings
- Swing hangers, chains, and swing seats
- Slide (purchased or custom-built)
- Joist hangers and corner brackets
- Wood stain or sealant for weatherproofing
- Safety surfacing (wood chips, rubber mulch, or pea gravel)
- Landscape fabric and edging
- Climbing add-ons (rope, cargo net, or rock wall holds)
Tools Needed
- Post hole digger or auger
- Level (4-foot and torpedo)
- Tape measure and carpenter’s square
- Circular saw or miter saw
- Power drill with bits and driver attachments
- Socket wrench set
- Wheelbarrow for mixing concrete
- Shovel and rake
- Safety glasses and work gloves

Step-by-Step Guide
- Mark the layout: Set stakes and run string lines to outline the playground footprint, then mark post locations based on your plan.
- Dig post holes: Excavate holes about 24–36 inches deep, or below your local frost line, using a post hole digger or auger.
- Set the posts: Drop the 4×4 posts into place, check each one for plumb with a level, then pour concrete and brace the posts while it cures (usually 24–48 hours).
- Cut posts to height: Once the concrete is fully set, mark a consistent height for the platform and trim posts to match.
- Install the main frame: Bolt 2×6 beams between posts and use joist hangers where needed to form the platform frame.
- Add floor joists: Install 2×6 joists across the frame at 16-inch intervals so the deck feels stiff and secure underfoot.
- Lay the decking: Fasten deck boards perpendicular to the joists, leaving small gaps to allow water to drain. Countersink screws so nothing catches skin or clothing.
- Build and attach railings: Add 2×4 top and bottom rails, then install vertical balusters with spacing no wider than 3.5 inches to help prevent head entrapment.
- Construct the swing beam: Use dedicated swing posts and a properly sized beam (often doubled lumber) bolted tight, with enough height and clearance for safe swing arcs.
- Attach swing hangers: Install heavy-duty hangers and space swings at least 24 inches apart, then hang seats with chains or rope at an even, comfortable height.
- Install the slide: Mount the slide to the platform at the recommended angle and anchor the bottom so it can’t shift or lift during use.
- Add climbing features: Attach ladders, cargo nets, rock holds, or climbing ropes at the access points you planned, and make sure every attachment is backed with the right hardware.
- Apply weatherproofing: Sand rough corners and edges, then stain or seal all exposed wood to slow down moisture damage and sun wear.
- Prepare the ground: Level the play zone, lay landscape fabric to reduce weeds, and install edging to help keep surfacing where it belongs.
- Add safety surfacing: Spread wood chips, rubber mulch, or pea gravel to around 9–12 inches deep across all fall zones around equipment.
- Inspect and test: Tighten bolts, check every connection, and give each feature a firm shake and load test before kids use it.
Safety First: Standards and Best Practices
A backyard playground should be exciting, but it has to be safe first. Solid construction, the right materials, and properly sized fall zones do more to prevent serious injuries than any “extra” feature you add later.
Basic Safety Guidelines for a Backyard Playground
Start by building around a simpe idea: falls will happen so design for them. The structure must be built rigid without any sharp edges or pinch points. Include guardrails on elevated platforms and barriers where kids could step off. Do not include openings where their head, neck, arms, or legs can get trapped.
Safety doesn’t stop once the build is done. Wood can splinter, bolts can loosen, and parts wear down with weather and heavy use. Do quick monthly checks for loose hardware, exposed nails or screws, rough edges, and any signs of damage. Fixing small problems early keeps the playground safer and helps the whole structure last longer.
Safe Clearances and Fall Zones
Clearances and fall zones are the difference between something that looks safe and something that actually is safe. Swings, slides, and climbers need open space around them so kids can move freely and fall without hitting another part of the structure. Swings, for example, need room in front and behind the swing path, and slides need a clear landing area with no obstacles or hard surfaces nearby.
Try to think, “What happens if a kid falls here?” instead of assuming perfect play. Keep equipment away from fences, trees, sheds, and walls. Leave enough separation between play elements so children don’t collide, especially when the area gets busy. If you’re unsure, give yourself more space and extend the safety surfacing beyond what you think you’ll need.

Choosing Safe Hardware, Fasteners, and Lumber
Your hardware and lumber choices matter as much as the design. Use exterior-grade, corrosion-resistant fasteners like galvanized or stainless steel bolts, lag screws, washers, and brackets, They’re built to handle rain and humidity without rusting out, and they’re less likely to weaken under repeated load. Skip interior fasteners outdoors since they can fail faster than you’d expect.
For lumber, stick with materials rated for outdoor use and choose boards that are straight, properly sized for the load, and not full of big knots. Sand cut ends and exposed edges to reduce splinters, then stain or seal wood to slow down moisture damage and sun wea. Rot, warping, and UV breakdown don’t just look bad. They can slowly compromise the structure over time.
Ongoing Inspection, Maintenance, and Supervision
Playground safety is never “done.” Make inspections part of the routine, watching for loose bolts, cracked boards, frayed ropes, worn swing chains, and thinning or shifted surfacing. Tighten what’s loose, replace what’s damage, and top up mulch, rubber, or gravel where its compacted, especially under swings and at slide exits.
Weather can change things, too. After heavy storms, long wet spells, deep freezes, or extreme heat, check posts for movement, connectors for rust, and wood for warping or splitting. Pair that maintenance with real supervision when kids are playing. Clear rules plus a well-maintained structure is what make a backyard playground feel safe enough for years of climbing, swinging, and sliding.
Finishing Touches and Aesthetics
Once the structure is solid, you get to focus on the part that makes the playground feel like it belongs in your yard. These finishing touches aren’t just about looks. They also help protect the wood, reduce wear and tear, and make the space more comfortable to use throughout the year. A few smart choices with color, landscaping, and small details can turn a basic play set into the heart of your backyard.
Painting, Staining, and Sealing Wood Surfaces
A good finish is one of the best upgrades you can make. Paint, stain, or a clear sealer helps block moisture and sun damage, which slows cracking, splintering, and rot. Pick an exterior-grade product made for decks or fences, then follow the label closely for prep work and dry time so it actually holds up.
Color is where you can make it feel personal. Natural stains and earthy tones blend in nicely if you want a calmer look. Brighter colors on rails, trim, or small panels can make it feel more playful without turning the whole thing into a neon block. Lighter shades on areas that get direct sun can also help reduce how hot surfaces feel on bare hands. Whatever you choose, keep the palette consistent so it looks planned, not patched together over time.
Landscaping Around the Backyard Playground
Landscaping helps the playground looks settled in, not like it was dropped in the middle of the yard. Start at the edges. Simple edding keeps your safety surfacing contained and gives you a clean transition to lawn or garden beds. Then add low, sturdy plants that soften the lines without blocking your view from the house. Ornamental grasses, compact shrubs, and hardy perennials usually work well because they don’t need constant maintenance.
Keep plant choices kid-safe and low-drama. Skip thorny plants, anything that sheds hard seed pods into fall zones, and flowers that pull in a swarm of bees right at kid height. Mulch or groundcover in nearby beds helps cut down on mud and weeds. A few stepping stones or a short path can make the whole area feel more intentional and keep shoes out of wet grass. If you can add shade or a bit of wind protection with smart planting, even better.

Pathways and Lighting for Comfort and Visibility
Easy access is a big reason playgrounds get used more often. A simple path made from pavers, flagstone, or compacted gravel keeps everyone out of mud and makes it easier for adults to walk out carrying snacks, toys, or a tool bag. Aim the path so it flows naturally from your door, patio, or main hangout spot, and give it enough width for an adult to walk beside a child.
Lighting helps with supervision and makes the space feel safer when it gets dark early. Low-voltage landscape lights or solar stake lights along the path and around the perimeter give you enough visibility without blasting the area like a parking lot. Avoid bright fixtures at eye level that can shine into kids’ faces when they’re climbing or sliding. Downward or indirect lighting works better because it highlights steps, edges, and transitions without glare.
Personalizing with Details and Themed Elements
Small touches are what make a playground feel memorable instead of generic. A custom name sign, a hand-painted panel, or a few carved details can add character without taking over the build. Matching swing seats, flags, or weather-resistant fabric banners can pull the look together. Inside a playhouse or under a platform, simple add-ons like a chalkboard, a small bench, or a pretend “shop counter” go a long way for imaginative play.
A theme can help guide your choices without turning into a full-blown project. A nature theme might lean on greens and browns, leaf shapes, and wood stepping stumps. A nautical theme can use blues and whites, rope accents, and a small “ship” flag. Keep it restrained. A few repeated details usually look better than adding something new to every corner. The goal is a backyard playground that feels special, inviting, and easy to enjoy again and again.
Conclusion
A well-planned backyard playground can turn a plain yard into a play space kids actually want to use, year after year. Solid framing, proper safety surfacing, and weather-resistant materials do most of the heavy lifting for durability and peace of mind. Finishing touches like stain, paint, and simple landscaping help it look like it belongs there, not like an afterthought. Keep up with quick inspections and small repairs, and the playground can adapt as children grow and their play changes.
FAQs
- How much does it cost to build a backyard playground?
- Cost depends on the size, materials, and how many features you add. A basic wooden setup with swings and a slide can be done on a smaller budget, while larger multi-level builds can climb into the thousands. Careful planning, comparing prices, and doing the labor yourself usually makes the biggest difference.
- What is the best ground cover for a backyard playground?
- The best ground cover absorbs impact, drains well, and stays manageable over time. Popular options include engineered wood fiber, rubber mulch, pea gravel, and poured-in-place rubber. Depth matters as much as the material, so keep fall zones thick and even to help reduce injury risk.
- How can I make a backyard playground safer?
- Put your attention on the structure, the surfacing, and day-to-day supervision. Make sure the frame doesn’t wobble, hardware stays tight, and there are no sharp edges or openings that could trap a head or limb. Use proper safety surfacing in every fall zone, keep the area clear of obstacles, and check the playground regularly for wear. Adult supervision still matters, especially with younger kids.
- How long does it take to build a backyard playground?
- It depends on how complex the design is, the weather, and how much help you have. A basic build can often be finished over a weekend, while a custom multi-level setup may take a few weekends. Concrete cure time, applying stain or sealant, and final safety checks all add time, but they also make the playground last longer.
- Do I need a permit to build a backyard playground?
- That depends on where you live and how large or permanent the structure is. Smaller play sets are often treated as temporary and don’t need permits, while bigger builds with footings or anchors may fall under local codes or HOA rules. It’s worth checking with your local office and any neighborhood association before you start.