Cluttered shelves and missing shoes make mornings harder than they need to be, which is why a practical closet organizer can change your day. This guide walks you through a weekend-friendly wooden shelf build that fits real closets and real budgets. Small layout rules help you reclaim inches you already own and keep everyday pieces visible without constant refolding.
Contents
Key Takeaways
- A weekend build using 3/4 inch plywood and simple cleats turns vertical gaps into a durable closet organizer.
- Add a secondary rod, standardize slim hangers, and use the door to reclaim hidden space without remodeling.
- Label bins, define clear zones, and do a quick weekly reset to keep mornings calm and fast.
Build a Closet Organizer: Wooden Shelves
If your closet swallows piles and hides shoes, build sturdy wooden shelves that fit your space and budget. A weekend upgrade turns wasted vertical space into dependable storage that lasts.
Materials
- 3/4 in cabinet‑grade plywood for shelves and dividers
- 1×2 or 1×3 pine for cleats and optional face frames
- 2.5 in wood screws for studs
- 1.25 in wood screws for plywood to cleats
- Wood glue
- Edge banding for plywood fronts or 1×2 face trim
- Wood filler and paintable caulk
- Sandpaper: 120, 180, 220 grit
- Paint or polyurethane
- Shelf pins and sleeves, plus a shelf pin jig (optional for adjustable shelves)
- Metal L‑brackets or corner braces (optional)
- Shims
Tools
- Tape measure and pencil
- Stud finder
- 24 in or longer level
- Circular saw with a straightedge guide or track saw
- Drill and driver bits, countersink bit
- Random orbit sander
- Clamps
- Brad nailer with 1 to 1.5 in brads (optional)
- Safety glasses, hearing protection, and a dust mask
- Iron for edge banding or a trim router (optional)
Step‑By‑Step Build Guide
- Measure and Plan: Measure closet width, depth, and height, then sketch a simple layout that fits how you store items. Use 12 in deep shelves for shoes, 14 to 16 in for folded clothes, and 18 to 22 in for bins. Keep shelf spans under about 30 in with 3/4 in plywood or add a vertical divider to prevent sag.
- Mark Studs and Shelf Heights: Empty the closet, remove old wire shelves, and patch holes if needed. Locate studs and mark centerlines. Lightly snap level lines for each shelf height on the back and side walls, leaving at least 12 in clearance for shoes and 10 to 12 in for folded stacks.
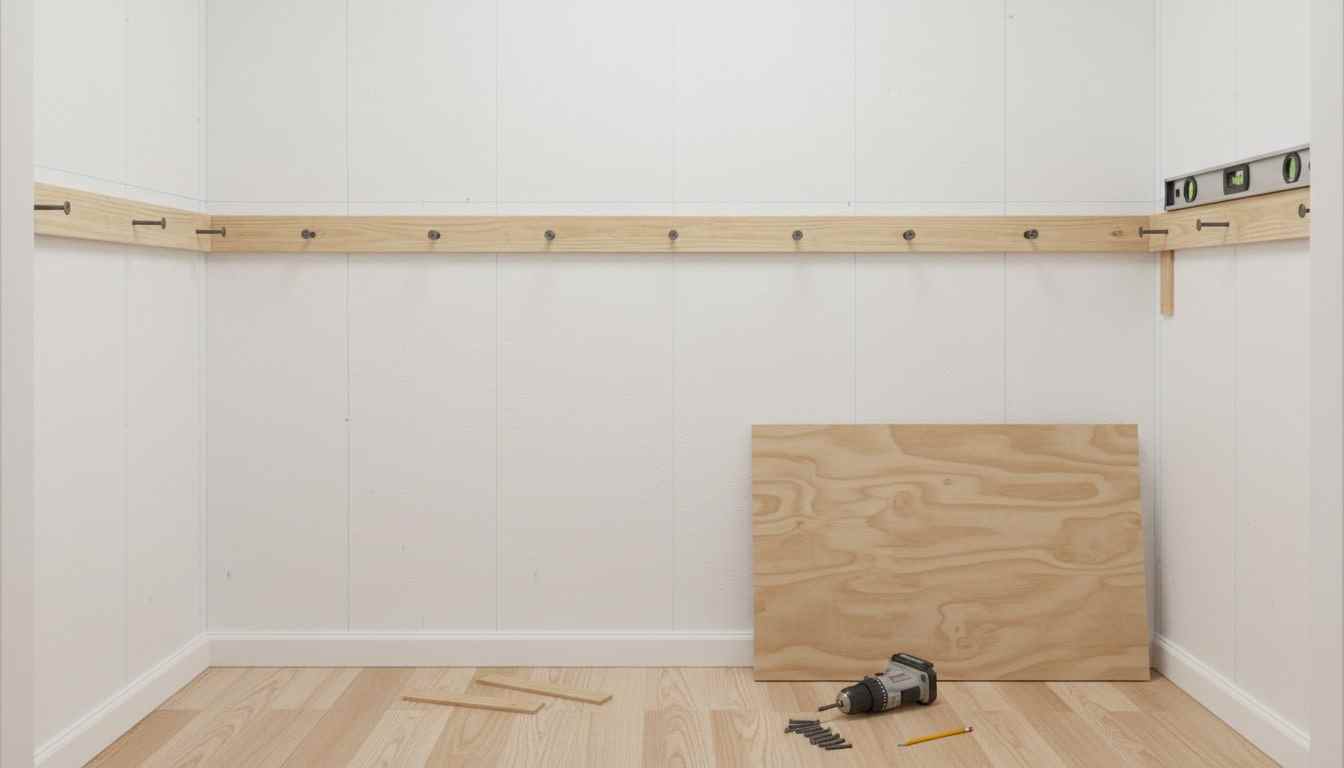
- Cut Cleats: Cut 1×2 or 1×3 cleats for the back wall and both sides at each shelf level. Pre‑drill clearance holes 16 in on center. If baseboards are present, notch side cleats or start the lowest shelf above them.
- Install Cleats: Hold each cleat to the layout line and drive 2.5 in screws into studs. Install the back cleat first, then the two side cleats at the same height so their top edges align. Check level and adjust with shims where walls are uneven.
- Add a Vertical Divider: For wider closets or heavier loads, cut a divider panel from 3/4 in plywood to the desired depth and height. Plumb it on the floor and secure it through the cleats with 1.25 in screws and a couple of L‑brackets into studs. This creates smaller bays and limits sag.
- Cut Shelves and Dry Fit: Rip plywood to the planned shelf depths and crosscut to length. Leave about 1/8 in total wiggle room for out‑of‑square walls. Dry fit each shelf and scribe notches if walls or trim require it.
- Edge‑Band or Face the Fronts: Apply iron‑on edge banding to plywood fronts and trim flush, or attach 1×2 face trim with glue and brads. This stiffens shelves and gives a clean, durable edge.
- Set Shelves and Secure: Apply a thin bead of glue to cleats if you want permanent shelves, then place each shelf on the cleats. Drive 1.25 in screws down into the cleats near the back and sides, keeping fasteners a safe distance from edges to avoid splitting.
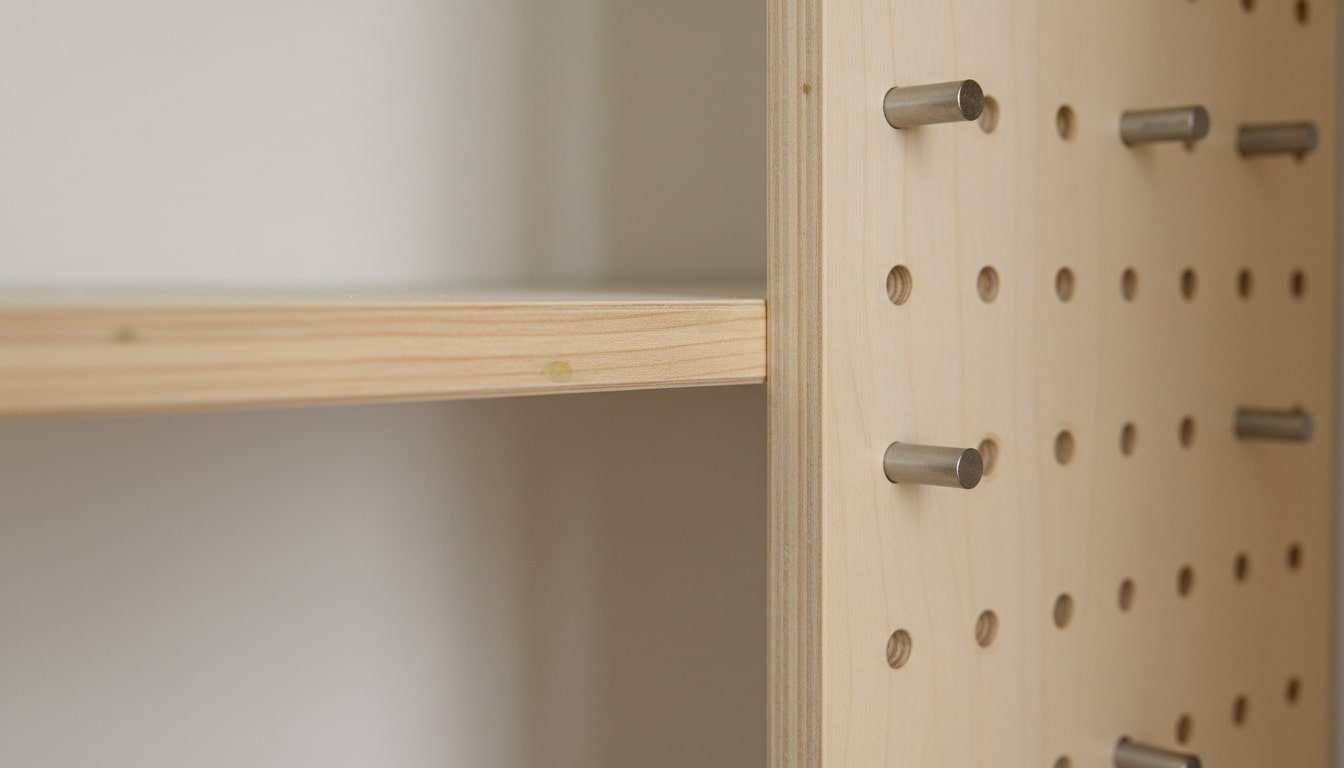
- Make Shelves Adjustable (Optional): If you want flexibility, skip gluing and drill 1/4 in shelf pin holes using a jig. Set holes about 1 in back from the front edge and 2 in from the sides, repeating every 1 in or 1.25 in for fine adjustment.
- Add a Hanging Rod Under a Shelf (Optional): Where hanging storage is needed, mount rod sockets to the underside of a shelf and the opposite wall. Maintain about 40 in from floor to upper rod and about 30 in for a lower rod if creating a double section.
- Fill, Sand, and Finish: Fill holes, caulk small wall gaps, and sand all visible faces through 180 or 220 grit. Paint for a crisp built‑in look or seal with polyurethane for a natural finish. Allow proper cure time before loading.
- Load and Maintain: Place heavy bins low, everyday items at shoulder height, and off‑season pieces up high. Label containers and schedule a quick weekly reset so your closet organizer keeps working as your needs change.
Layout Rules That Save Space Without Remodeling
You can reclaim lost inches in any closet by rethinking zones, heights, and containers. These practical moves work with what you own and create a smoother, faster morning routine daily.
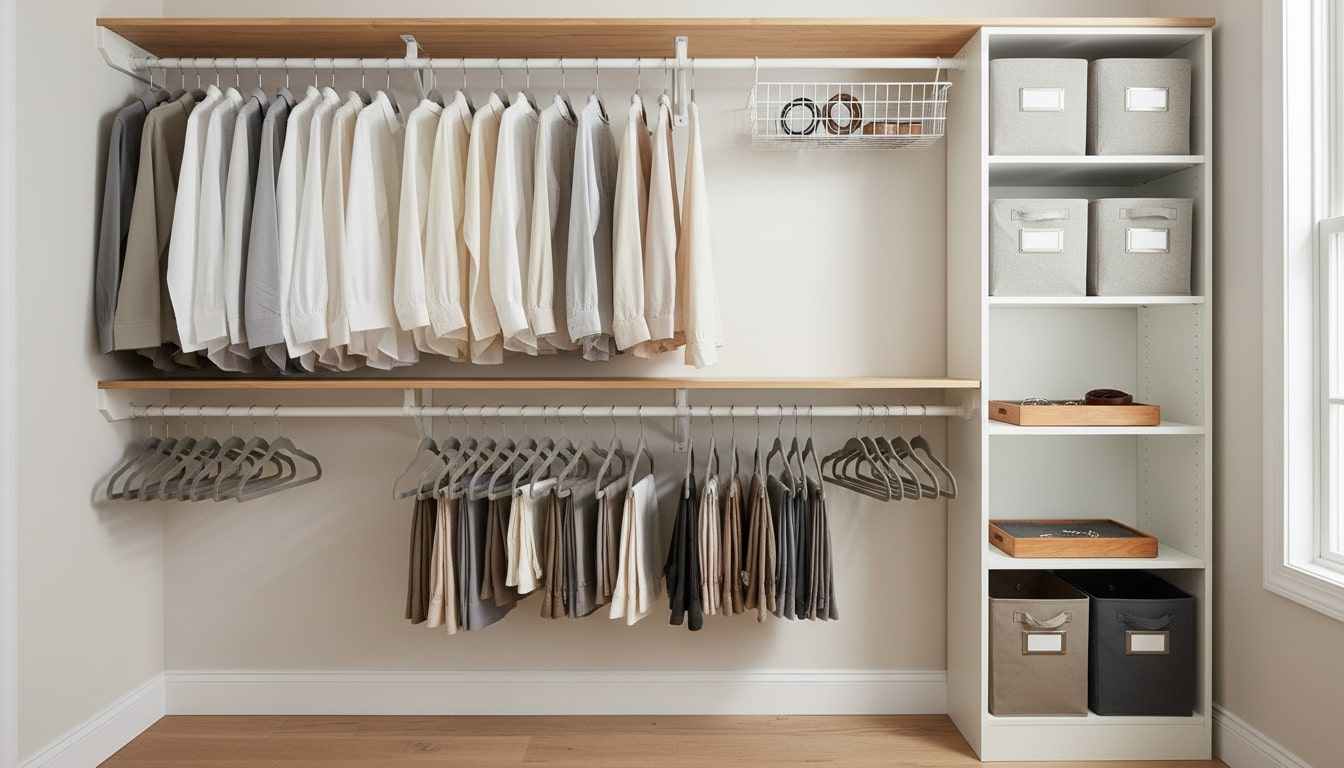
Double Your Hanging Space With a Secondary Rod
Most closets waste the vertical gap beneath shirts and above the floor, which means a simple secondary rod can unlock a full tier of storage without tools. Use a tension rod inside the frame or a clip-on add-on that rests on the primary rail.
Group long dresses and coats to one end so the new lower bar stays open for blouses, skirts, and folded pants on hooks. Leave space under the shortest items for a hamper or stacking bins. The outcome feels like a close organizer upgrade, achieved with a twenty-minute tweak rather than a renovation. Adjust the lower rod height until the hangers clear the bins easily and the sleeves do not brush the floor.
Standardize Hangers To Gain Hidden Inches
Mixed hanger shapes create visual noise and steal inches because the widest styles shove everything forward and sideways. Replace bulky plastic or wire with one slim, non-slip profile so shoulders align and garments hang flat.
Switching is quickest when you stage by category, move items to the new hangers in batches, and remove extras immediately. You will notice straighter rows, fewer shoulder bumps, and a calmer look that makes decisions easier. This simple reset behaves like a close organizer in spirit because it standardizes the system you already have and returns measurable space without changing the structure. If you own specialty clip hangers, reserve them solely for skirts to keep rod spacing predictable.
Organize Left To Right By Garment Length
Arrange garments from shortest at the left to longest at the right or the reverse, and watch usable space appear under the short zone. This length gradient creates a clear niche where bins, a laundry basket, or a rolling cart can live without blocking access.
Once the gradient is set, keep micro categories together so your eye learns the map. Place casual shirts above the cart, then move occasion pieces toward the long end. The tidy negative space reads as intentional design, and the whole setup functions like a close organizer because it converts awkward floor gaps into dependable storage zones you can maintain.
Upgrade Shelves With Risers And Under-Shelf Baskets
Standard shelves often trap dead air above folded stacks, which causes toppling pyramids and wasted height. Shelf risers create lanes for sweaters and jeans, so each pile stands upright, while under-shelf baskets capture the floating space beneath the existing board.
Choose narrow bins for tees and knits so items can stand, file-folded and visible. Label the front edges to cut rummaging and return each piece to its lane after laundry. The effect resembles a close organizer in how it structures movement, yet it relies on inexpensive inserts that drop into place in minutes. Add a small divider near the shelf lip to stop stacks from sliding forward when you pull an item.
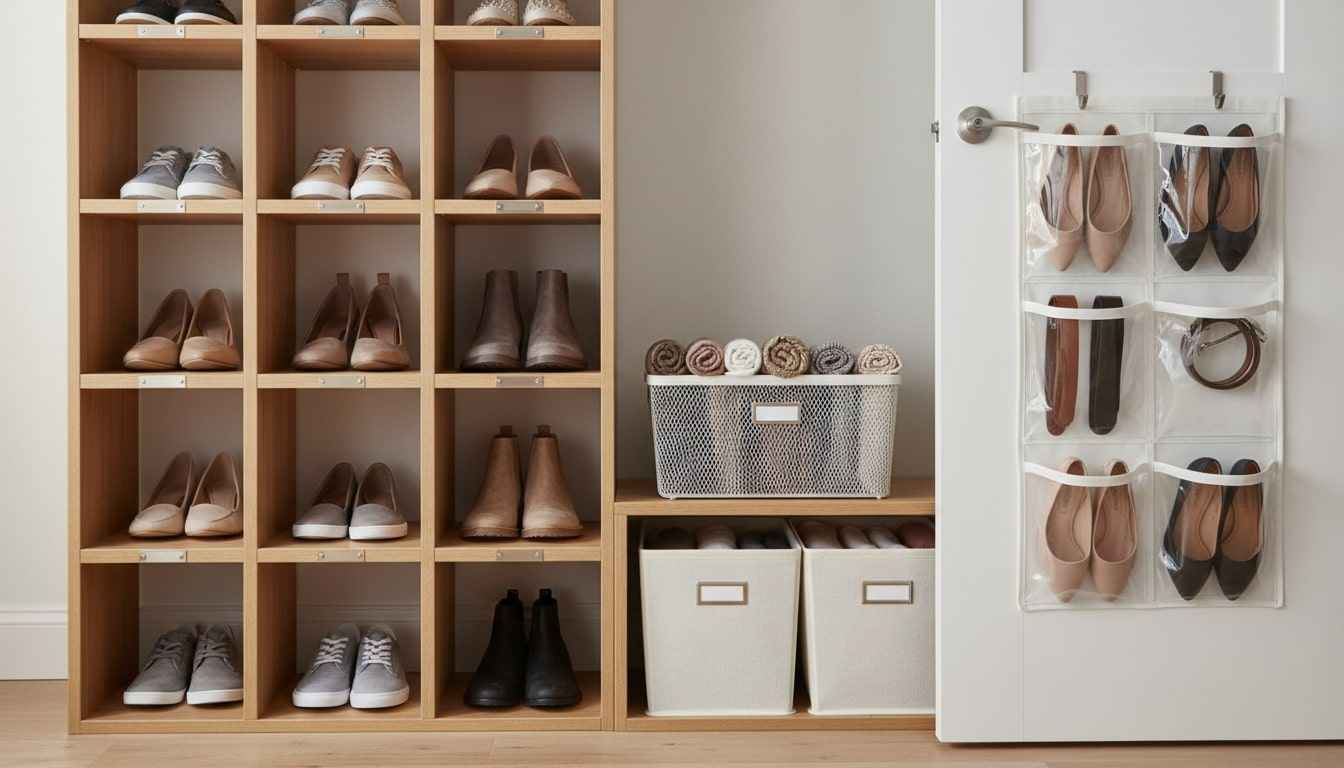
Use The Door As A Bonus Wall
The back of the door supports shoe pockets, narrow baskets, and hook bars that hold scarves, belts, umbrellas, and lightweight totes. These shallow add-ons clear small pieces from shelves and rods without interfering with the swing.
Measure clearance so pockets do not hit the side wall, then place daily items at eye level where your hand lands first. Reserve the lowest row for soft slippers and flip flops that can flex when the door moves. In practice this behaves like a close organizer because it relocates tiny categories to a dedicated station that never gets buried. Choose clear pockets so you can see pairs instantly.
File-Fold And Bin For Visibility
Standing garments upright in bins turns a stack into a catalog, which makes every piece viewable and reduces the urge to rummage. Use narrow containers so each row fits shoulder to shoulder without sagging.
Adopt a simple fold for tees, knits, and workout gear that creates uniform rectangles, then place heavier fabrics toward the back where they provide support. Label the front edge and return each item to the same slot after laundry so the map remains stable. Transparent sides or wire frames help you spot colors quickly and discourage overfilling. Place bins with everyday garments at eye level and push seasonal pieces higher.
Protect The Flow With Simple Rules
A layout that works today will drift unless you create small guardrails that make maintenance easy. The most reliable boundary is one in and one out for each category so capacity remains steady through seasons.
Give every item a clear home and a defined return path after laundry day. Add labels where you find yourself thinking twice, and schedule a two minute reset during the weekly tidy so the closet remains intuitive and quick to use. Small habits preserve the zones you created and keep search time short. Regular editing also stops duplicates from piling up in dark corners. When every category has a limit, you feel the ease of a tidy closet every morning.
Conclusion
Building your own closet organizer turns a tight closet into a calm, reliable system that supports the way you actually live. The right shelf depths, strong cleats, and sealed edges protect clothes and make cleaning easy. Thoughtful details like a double hang section or a tray for small accessories keep your best pieces visible and ready. For more plans and techniques, explore the linked step-by-step instructions to choose the ideas that fit your space and budget.
FAQ: DIY Closet Organizer
- Can I Use Melamine Instead Of Plywood For The Shelves?
- Yes, 3/4 inch melamine works well for a wipe-clean finish, but it is heavier and the core holds screws differently. Support each shelf on three cleats, predrill carefully, and avoid driving fasteners into raw edges. Use edge banding on every cut to seal the core and prevent chipping. If you need extra strength at joints, use confirmat screws or pocket hole joinery into solid cleats.
- How Much Weight Can These Shelves Hold Without Sagging?
- With 3/4 inch plywood at 16-inch depth and a span of about 30 inches fully supported on three sides, a shelf will typically carry 40 to 60 pounds of evenly distributed clothing without noticeable sag. For heavy bins or books, shorten the span to 24 inches or glue and nail a 1×2 hardwood face to stiffen the front. Very wide sections benefit from a vertical divider so loads are shared. When in doubt, check an online shelf sag calculator and choose the conservative result.
- What If My Walls Are Out Of Square Or Have A Bump Out?
- Measure and cut each shelf individually, then scribe the wall edge with a compass so it follows the contour, trim to the line, and the front will sit tight. Add thin filler strips behind cleats where the wall bows to keep everything level. For deep gaps, rip a narrow scribe strip from plywood and glue it to the shelf edge that meets the wall. Prime and caulk small seams before painting for a built-in look.
- How Do I Prevent Musty Smells Or Moisture Damage In The Closet?
- Seal every face and edge, including undersides and cutouts, with paint or water based polyurethane to slow moisture swings. Leave a small gap at the back of the organizer for airflow, use louvered doors if possible, and place a reusable desiccant canister on a low shelf. Avoid packing shelves so tightly that air cannot move. In very humid rooms, a low profile motion fan or a small dehumidifier near the closet can help.
- Can I Add Lighting To The Organizer Without Hardwiring?
- Yes, rechargeable motion-activated LED bars or puck lights mount cleanly under shelves and inside cubbies, and they improve visibility immediately. Place lights toward the front of each shelf to light contents without glare, and secure wiring for strip lights with adhesive clips. Maintain safe clearance around any existing fixtures, and never place fabric near hot bulbs. If you want a hardwired solution, consult local code and a licensed electrician.