Finding woodworking plans that fit your space, time, and tools can be harder than it should be. This roundup spotlights 12 builds that blend style, function, and realistic budgets. Each plan notes skill level, core tools, time estimate, and finishing tips so you can choose with confidence. Use these woodworking plans to pick a project that suits your weekend and your home.
Contents
Key Takeaways
- Pick plans that fit your room, weekend window, and the tools you already own.
- The 12 featured builds deliver useful, stylish results on realistic budgets and timelines.
- Clear callouts for skill level, core tools, time, and finishing remove guesswork.
- Simple jigs, smart tool substitutes, and prefinishing steps speed progress and improve results.
- Start small for momentum, then graduate to bigger projects with the same reliable process.
Featured Woodworking Plans
These woodworking plans are practical, attractive, and friendly to real-life weekends. Each project lists core tools, time, and finish tips so you can choose a build that truly fits today.
Wood Tripod
A clean, mid-century inspired stand for cameras, projectors, lamps, or plants. This plan teaches accurate miters, solid bracing, and crisp proportions using common tools and hardwood offcuts.
- Skill level: Beginner to intermediate
- Time: 1 weekend
- Core tools: Miter saw, drill, sander, clamps
- Tutorial: Wood Tripod Plans
Octagon Picnic Table
Comfortable seating for family dinners and backyard parties. Strong geometry spreads weight evenly and the footprint fits many patios without feeling bulky.
- Skill level: Intermediate
- Time: 1 weekend
- Core tools: Circular saw, drill/driver, jigsaw, sander
- Tutorial: An Awesome Octagon Picnic Table
Upcycled Wooden Ice Chest Cooler
Turn a salvaged cooler or old fridge carcass into an entertaining centerpiece with cedar cladding, drainage, and casters. This is one of those woodworking plans that gets used all summer.
- Skill level: Intermediate
- Time: 1 weekend
- Core tools: Circular saw, drill, pocket hole jig, sander
- Tutorial: Upcycled Wooden Ice Chest Cooler
DIY Porch Swing With Cup Holders
Relaxing porch seating that looks custom and sits comfortably. Built-in cup holders keep spills off the deck and weekend reading within reach.
- Skill level: Confident beginner
- Time: 1 weekend
- Core tools: Circular saw, drill, sander, countersink bit
- Tutorial: DIY Wood Porch Swing With Cup Holders
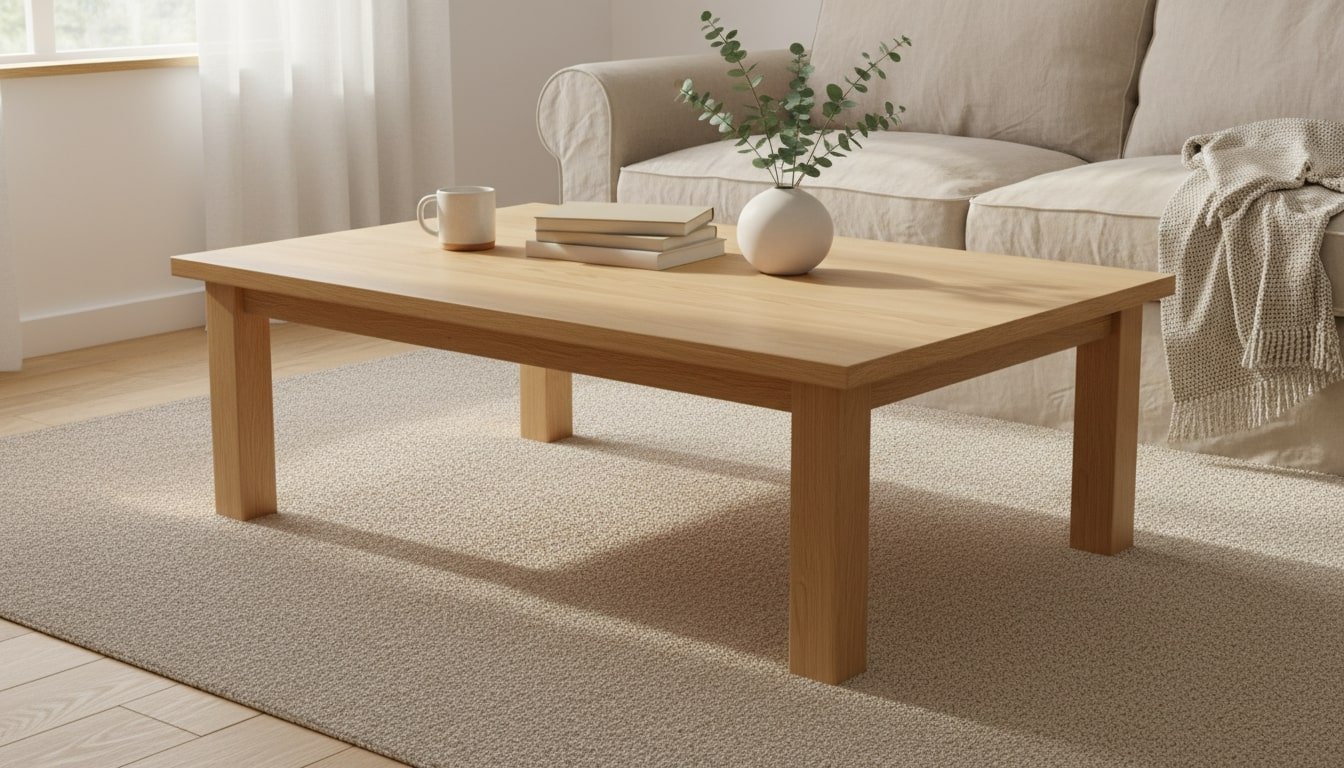
Lift Top Coffee Table
A small-space upgrade with hidden storage and a lift surface for laptops or puzzles. Straight cuts and sturdy hardware keep this project approachable.
- Skill level: Beginner to intermediate
- Time: 1 weekend
- Core tools: Circular saw, drill, pocket hole jig, sander
- Tutorial: DIY Lift Top Coffee Table
License Plate Birdhouse
Charming yard accent and easy gift. Uses scrap wood and a vintage plate for the roof, so every build feels one-of-a-kind.
- Skill level: Beginner
- Time: 2–4 hours
- Core tools: Jigsaw, drill, sander
- Tutorial: DIY License Plate Birdhouse
Countertop Coffee Mug Tree
Tidy storage that frees cabinet space and adds a touch of café style. Simple layout, repeatable cuts, and a forgiving finish.
- Skill level: Beginner
- Time: 1–2 hours
- Core tools: Drill/driver, handsaw or jigsaw, sander
- Tutorial: DIY Coffee Mug Tree
Spinning Spice Rack
Keep labels visible and within reach while saving shelf space. This is one of the quickest woodworking plans to build and instantly useful in any kitchen.
- Skill level: Beginner
- Time: 2–3 hours
- Core tools: Jigsaw or hole saw, drill, sander
- Tutorial: Decorative Spinning Spice Rack
Star Wars AT-AT Loft Bed
A showstopping kid-room build with sleep space above and play value below. Break it into manageable panels and paint before final assembly.
- Skill level: Intermediate
- Time: 2–3 weekends
- Core tools: Circular saw, jigsaw, drill, sander, paint gear
- Tutorial: DIY Star Wars AT-AT Loft Bed
Old Window Coffee Table
Turn a salvaged window into a living room table with display storage. The weathered glass adds character, while the base is straightforward to build.
- Skill level: Confident beginner
- Time: 1 weekend
- Core tools: Circular saw, drill, sander, stapler or pin nailer
- Tutorial: Old Window Coffee Table
DIY Lumber Rack
Safer shop storage that protects boards and clears floor space. Customize the spacing for sheet goods and long stock.
- Skill level: Beginner
- Time: 3–5 hours
- Core tools: Drill/driver, stud finder, level, miter saw
- Tutorial: Smart DIY Lumber Rack Ideas
Waist-High Planter Box
Back-friendly gardening with tidy edges and solid capacity. A great starter for those wanting woodworking plans that serve the home and the garden.
- Skill level: Beginner
- Time: 1 weekend
- Core tools: Circular saw, drill/driver, sander
- Tutorial: Waist High Planter Box
How To Choose Woodworking Plans That Fit Your Life
Great woodworking plans fit your room, tools, time, and taste. Use these checks to pick projects you can finish confidently, without surprise costs or tricky steps that slow you down.
Match the Plan to Your Space and Goals
Measure the room, target footprint, and every doorway the piece must pass through. Compare those numbers with daily routines and traffic lines. A console that looks slim online can crowd a hallway. Coffee tables need knee clearance and mop access.
Benches should tuck fully under tables. If storage drives the project, list what must fit before you pick woodworking plans.
Use painter’s tape on the floor or a quick cardboard mockup to validate scale. Mark wall studs, outlets, vents, and windows that influence placement. Consider pets and kids for rounded corners and tip resistance.
For outdoor builds, map sun, wind, and sprinkler paths. Choose woodworking plans that include clear dimension changes. Skip designs that lock you into awkward sizes when your space needs a custom depth or height. Double-check ceiling heights for tall shelving and overhead lighting swing.
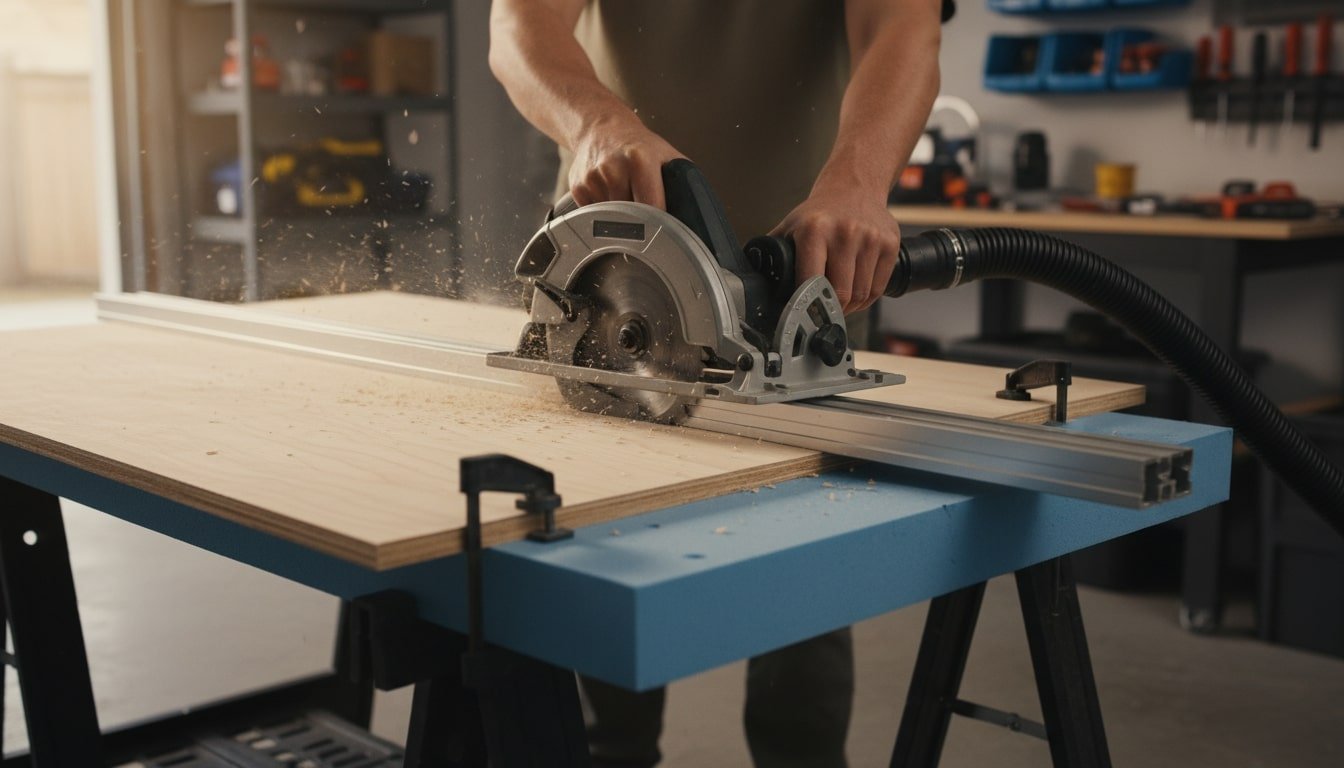
Confirm Tools and Choose Smart Substitutions
Read the tool list carefully before you commit to any woodworking plans. Flag anything you do not own and decide whether to buy, borrow, rent, or substitute. A circular saw with a straight edge can stand in for a table saw on straight cuts.
A drill guide can substitute for a drill press. Pocket holes can replace some mortise and tenon joints when appearance allows. Sharp blades and fresh sandpaper are worth more than another gadget.
Plan for time-consuming setup tasks. Build a simple crosscut sled or cutting jig if repeatable accuracy matters. Check that your space supports safe stock length and outfeed. Confirm you have clamps long enough for the panel width.
If dust is an issue, schedule cuts outdoors and finish indoors. When a plan calls for specialized parts, price those parts and look for comparable joinery that uses tools you already trust.
Budget Your Time and Stage the Build
Treat the time estimate in woodworking plans as a baseline. Break the project into short milestones you can complete and clean up in a single session. Group like tasks together. Mill and cut all parts first, then drill, then sand.
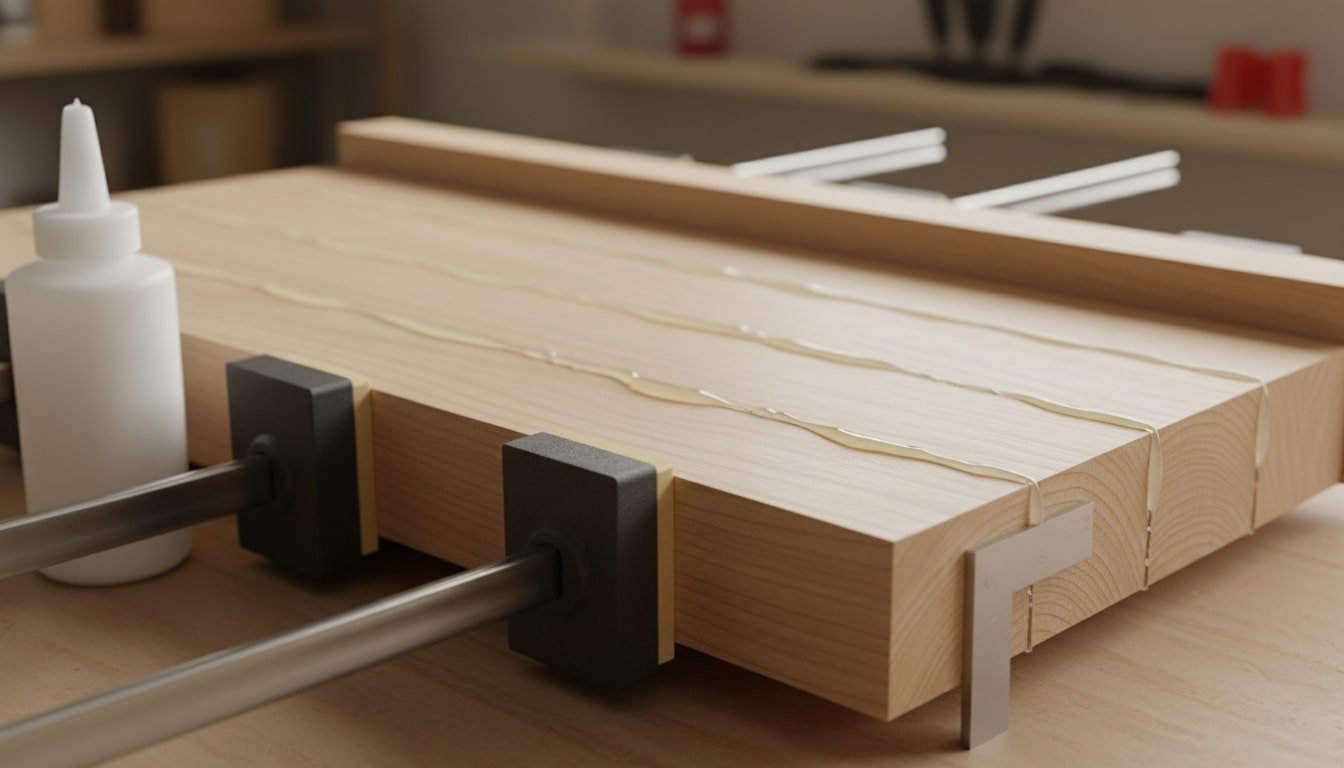
Prefinish when possible to save assembly cleanup. Reserve glue-ups for when you can focus without interruptions. Mark the critical path on a simple checklist so you always know the next step.
Dry times and weather affect schedules. Oil and water-based finishes cure more slowly in cool or humid conditions. Epoxy needs a warm day. Outdoor builds benefit from pre-stained parts and a clear staging area.
If your weekend window is tight, choose joinery that clamps easily and hardware that installs quickly. Stop at logical points such as subassemblies so resuming is simple. A realistic plan turns a stressful rush into a steady win.
Plan the Finish for Look and Durability
Decide where the piece will live and how it is used. Kitchen surfaces need wipeable finishes; kids’ furniture needs tough, safe topcoats; and outdoor surfaces need UV and water resistance. Choose finish types accordingly.
Make sample boards from offcuts to test color, sheen, and stain behavior. Sand through a consistent grit sequence before you test. When woodworking plans do not specify finishes, match a proven system to the wood species and use case.
Oil blends bring warmth to walnut and cherry. Film finishes protect tabletops from spills and crayons. Exterior spar varnish flexes with seasonal movement. Waterborne polyurethane minimizes odor indoors.
Always plan for maintenance. Label your finish cans and store extra hardware in a zip bag taped under the piece for future touch-ups. Good finishing choices make your woodworking plans look custom and keep them looking good for years.
Tools You’ll Need for These Woodworking Plans
Set yourself up to finish these woodworking plans with fewer stalls. Start with reliable basics, then upgrade where it pays. Use the buying guides to choose durable, workshop-ready tools.
Cordless Drill/Driver
Your daily driver for pilots, pocket holes, and hardware installs. Look for a crisp clutch, two speeds, and a metal chuck. Two batteries and a fast charger keep momentum through a full weekend.
If cabinetry or anchors are on your list, prioritize compact size and good low‑speed control for clean starts and fewer blowouts. Compare current picks and platform tips in this practical roundup: Cordless Drill Picks for Owner‑Builders. Want a spec‑heavy comparison too? See the side‑by‑side here: 8 Best Electric Drills.
Brad Nailer (18‑Gauge)
Fast, clean trim and furniture assembly with minimal wood fill. Choose between cordless convenience and pneumatic staying power. Key features that matter on real projects include tool‑free depth adjustment, sequential or bump fire modes, a no‑mar tip, and quick jam release.
If you plan softwood builds or painted finishes, depth control and reliable safety are worth it. See feature breakdowns and budget options in this guide: Best Brad Nailer.
Miter Saw
Accurate crosscuts and repeatable angles make joinery and frames fit right the first time. Decide if you need sliding capacity for wide boards, then check bevel range, detents, fence height, and dust collection.
A quality blade upgrades results more than you think, especially on plywood and prefinished stock. If shop space is tight, a compact saw with a folding stand is a smart compromise. Compare capacities and standouts here: Top 6 Miter Saws.
Circular Saw
Straight, splinter‑smart cuts in sheet goods and lumber without a table saw. Pair with a straightedge or track for cabinet‑grade results. Prioritize a flat shoe, clear sightline, brake, and compatible blade options.
The right blade choice matters as much as the motor. For a balanced starter list that covers the saw plus the rest of a portable kit, scan: Essential Power Tools.
Orbital Sander
Smooth surfaces faster and prep for paint or clear coats without swirl marks. A 5‑inch random orbital with variable speed and hook‑and‑loop pads handles most furniture and built‑in projects. Connect to a vac to control dust and improve finish quality.
Keep extra discs in 80, 120, 150, 220 grits to move efficiently. See where a sander fits in a smart starter setup: Essential Power Tools.
Clamps and Workholding
Good clamping saves fingers and fixes fit issues before glue sets. Mix F‑style, parallel, and quick‑grip clamps, plus cauls for panel glue‑ups. For safer rips and small parts, add push blocks and dovetail clamps that can be built into custom jigs.
Clean workholding tape helps with templates and tiny parts during routing. Explore reliable brand picks for jigs, push blocks, and tapes here: Top Tool Brands at ToolsToday.
Conclusion
With the right woodworking plans, a weekend can turn into furniture you’re proud to use every day. The projects above favor realistic tool lists, clean cuts, and finishes you can complete on schedule. Start with a quick win, then step up as your space, skills, and confidence grow. Pick one plan, set the clock, and enjoy building something beautiful and useful.
FAQs Woodworking Plans
- How do I print woodworking plans to scale at home?
- Open the PDF in your viewer and select Actual Size (100%) and avoid Fit to Page. For large templates, use the Poster/Tiled option at 100% with a small overlap. Verify accuracy with a printed 1″ (25 mm) test square before you cut. For full sheets, a copy shop can print 18×24 or 24×36 inexpensively.
- What wood substitutions are safe if my store doesn’t have the listed species?
- Match the plan’s thickness and strength first, then the look. For paint-grade projects, poplar or clear pine are easy to work and finish smoothly. For stain, oak, maple, or birch plywood are reliable; edge-band exposed plywood for a clean edge. Outdoors, choose cedar or cypress and adjust screw length to the new wood’s density.
- Do I need to acclimate lumber before building?
- Let boards acclimate in the build space for 48–72 hours with stickers (spacers) for airflow. Aim for 6–9% moisture content for indoor projects; a simple moisture meter helps. Design for movement: float panels, avoid trapping wide boards, and finish both sides to balance moisture.
- Can a home center break down sheet goods for me accurately enough?
- Most stores will do rough breakdowns (often the first few cuts free), typically accurate to about ±1/16–1/8″. Use those cuts to make pieces manageable, then trim to final size at home for perfect fits. Bring a clear cut list that accounts for blade kerf, mark grain direction, and request “good face up” to reduce tear-out.