Building your own bookshelf speakers is one of the most rewarding DIY audio projects you can undertake, offering superior sound quality at a fraction of retail prices. Custom bookshelf speakers allow you to tailor the acoustic performance to your exact preferences while gaining valuable knowledge about speaker design and construction. Creating bookshelf speakers from scratch gives you complete control over component selection, cabinet design, and crossover tuning.
Contents
Key Takeaways
- DIY bookshelf speakers deliver sound quality comparable to commercial models costing 2-3 times more while offering complete customization control.
- Proper cabinet sealing and acoustic dampening are critical for achieving optimal bass response and overall sound quality.
- Matching driver sensitivity within 2-3dB and using quality crossover components ensures balanced, coherent sound across all frequencies.
- Patient finishing work with progressive sanding and multiple thin coats transforms raw MDF into professional-looking bookshelf speakers worthy of display.
Bookshelf Speakers Build Guide
Building bookshelf speakers requires careful planning and precision, but the results are worth the effort. Follow this comprehensive guide to create professional-quality bookshelf speakers that deliver exceptional sound performance.
Materials Needed
Speaker Components:
- 2x woofer drivers (5.25″ or 6.5″ recommended)
- 2x tweeter drivers (1″ silk dome or metal dome)
- 2x crossover networks (matching your drivers)
- Speaker wire (16-gauge or thicker)
- Binding posts (gold-plated recommended)
- Acoustic dampening material (polyfill or acoustic foam)
- Wood glue (Titebond II or similar)
- Wood screws (1.25″ and 2″)
- Silicone sealant
Cabinet Materials:
- MDF board (3/4″ thick, approximately 4′ x 8′ sheet)
- Wood veneer or paint for finishing
- Rubber feet or isolation pads
Tools Needed
- Table saw or circular saw
- Drill and drill bits
- Jigsaw or router with circle cutting jig
- Clamps (at least 4)
- Sandpaper (80, 120, 220 grit)
- Measuring tape and square
- Soldering iron and solder
- Multimeter
- Safety glasses and dust mask
Step-by-Step Build Guide
Step 1: Design Your Cabinet
Calculate the internal volume for your bookshelf speakers based on the woofer’s specifications (typically 0.5-1.0 cubic feet per speaker). Design a rectangular cabinet with dimensions approximately 12″ high x 8″ wide x 10″ deep, adjusting based on your driver requirements and desired tuning.
Step 2: Cut the MDF Panels
Cut six panels for each bookshelf speaker: front baffle, back panel, top, bottom, and two side panels. Ensure all cuts are perfectly square using a table saw. The front baffle should be cut to 12″ x 8″, while other panels adjust to accommodate the 3/4″ MDF thickness.
Step 3: Cut Driver Holes
Mark the center points for your woofer and tweeter on the front baffle. Use a router with a circle cutting jig or a jigsaw to cut precise holes matching your driver dimensions. The tweeter should be positioned in the upper third of the baffle, with the woofer centered below.
Step 4: Drill Binding Post Holes
On the back panel, mark and drill holes for your binding posts, typically positioned in the lower center area. Ensure holes are sized correctly for a snug fit of your binding post terminals.
Step 5: Sand All Panels
Sand all MDF panels starting with 80-grit sandpaper, progressing to 120-grit, and finishing with 220-grit. Pay special attention to edges and the front baffle for a professional appearance on your bookshelf speakers.
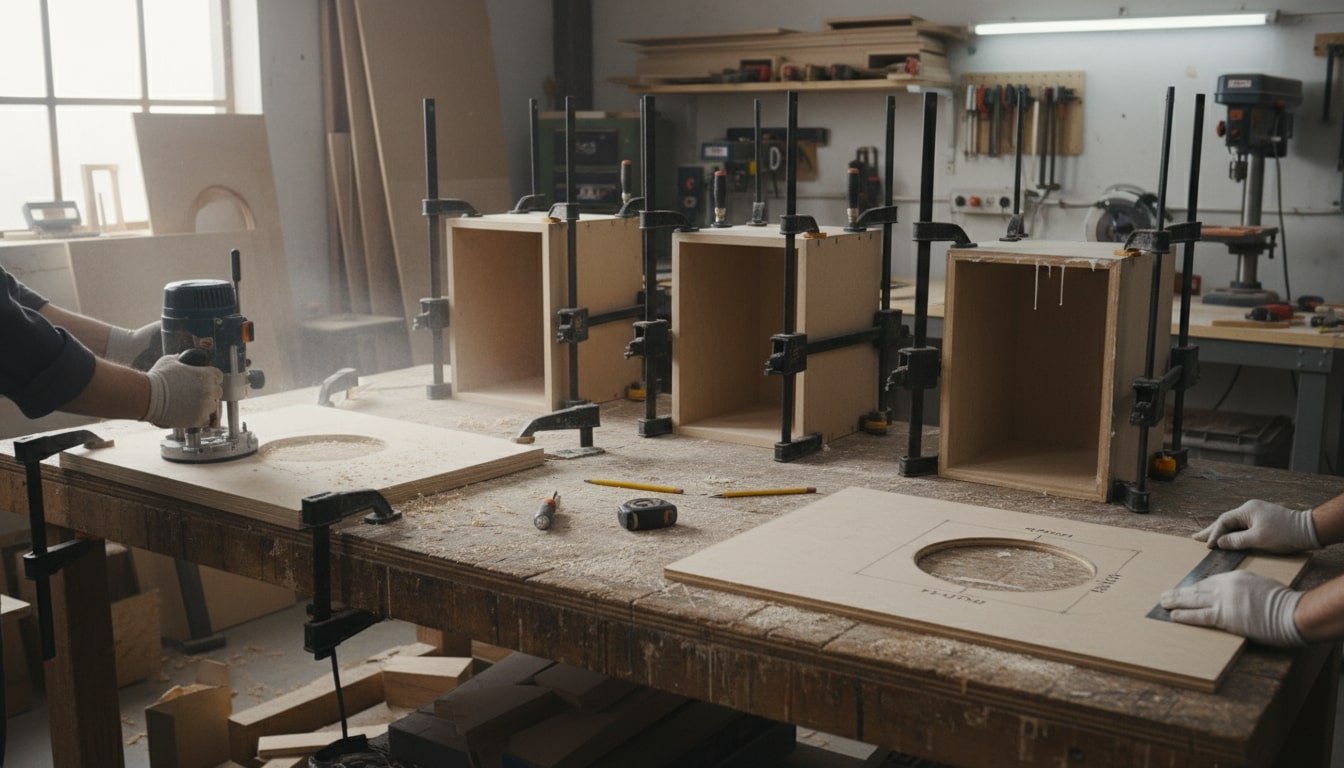
Step 6: Assemble the Cabinet
Apply wood glue to all joining edges and assemble the cabinet box (excluding the front baffle). Use clamps to hold panels together and reinforce joints with wood screws from the inside. Ensure the cabinet is perfectly square before the glue dries.
Step 7: Seal Internal Joints
Once the glue dries, run a bead of silicone sealant along all internal seams to create an airtight enclosure. This is crucial for optimal bass response in your bookshelf speakers.
Step 8: Install Acoustic Dampening
Line the internal walls with acoustic foam or loosely fill the cabinet with polyfill material (approximately 1-2 handfuls per speaker). This reduces internal reflections and improves sound quality.
Step 9: Wire the Crossover Network
Mount the crossover network inside the cabinet near the back panel. Solder wires from the binding posts to the crossover inputs, ensuring correct polarity (positive to positive, negative to negative).
Step 10: Connect the Drivers
Solder wires from the crossover outputs to the appropriate drivers—high-pass to tweeter, low-pass to woofer. Maintain proper polarity throughout to ensure your bookshelf speakers are in phase.
Step 11: Mount the Drivers
Apply a thin bead of silicone sealant around each driver cutout on the front baffle. Carefully position each driver and secure with screws, being careful not to overtighten. Allow silicone to cure for 24 hours.
Step 12: Attach the Front Baffle
Apply wood glue to the front edges of the cabinet and carefully position the front baffle with mounted drivers. Clamp securely and allow to dry completely.
Step 13: Install Binding Posts
Insert binding posts through the back panel holes and secure with the included hardware. Test connections with a multimeter to ensure no shorts.
Step 14: Finish the Cabinet
Sand the entire exterior of your bookshelf speakers with 220-grit sandpaper. Apply wood veneer, paint, or stain according to your aesthetic preferences. Multiple thin coats provide the best finish.
Step 15: Add Isolation Feet
Attach rubber feet or isolation pads to the bottom of each speaker to prevent vibration transfer and protect furniture surfaces.
Step 16: Test Your Bookshelf Speakers
Connect your completed bookshelf speakers to an amplifier at low volume initially. Listen for any rattles or distortion, then gradually increase volume. Break in your new speakers with 20-30 hours of varied music playback for optimal performance.
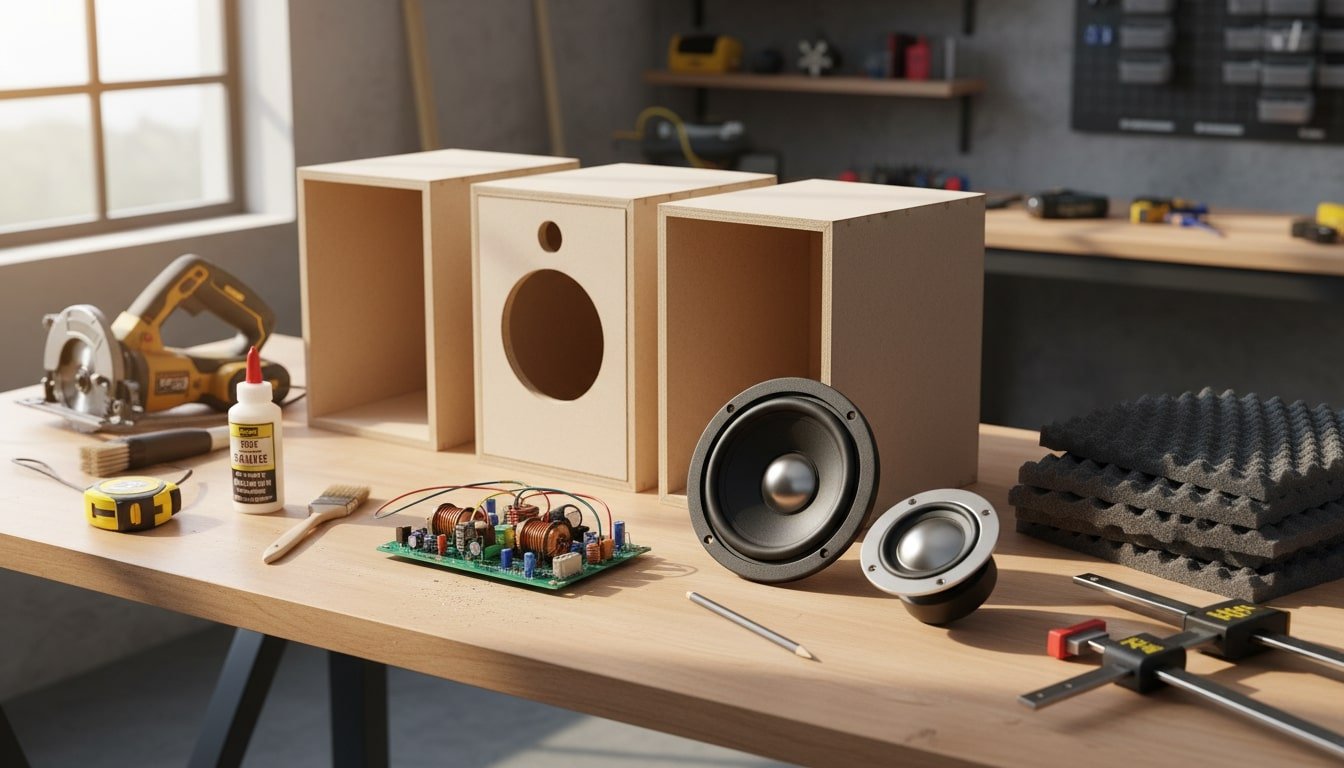
Understanding Bookshelf Speaker Components
Every component in bookshelf speakers plays a vital role in sound reproduction. Understanding how drivers, crossovers, cabinets, and connections work together helps you build better-performing speakers and troubleshoot issues effectively.
The Woofer
Building bookshelf speakers requires understanding the key components that work together to produce quality sound. The woofer is the larger driver responsible for reproducing bass and midrange frequencies (typically 80Hz-3kHz), with common sizes ranging from 4 to 6.5 inches for bookshelf applications.
The Tweeter
The tweeter handles high frequencies (2kHz-20kHz+), with dome tweeters being most popular for their wide dispersion and smooth response.

The Crossover Network
The crossover network is the electrical circuit that divides the audio signal between drivers, sending appropriate frequencies to each while maintaining proper phase relationships. This is crucial for coherent sound in bookshelf speakers.
The Cabinet
The cabinet or enclosure serves multiple purposes: it provides a mounting platform for drivers, controls rear wave energy from the woofer, and contributes to the overall frequency response.
Connection and Dampening Components
Binding posts are the terminals that connect your amplifier to the speakers, with quality posts ensuring reliable connections. Acoustic dampening materials like polyfill or foam absorb internal reflections and smooth the frequency response.
Wiring and Connections
Finally, internal wiring and solder connections must be executed properly to maintain signal integrity throughout your bookshelf speakers. Understanding how these components interact helps you make informed decisions during the design and building process.
Finishing and Aesthetic Options for Bookshelf Speakers
The finishing stage transforms raw MDF cabinets into beautiful bookshelf speakers worthy of display. Proper surface preparation, quality materials, and patient application create professional results that complement both sound quality and home décor.
Surface Preparation
The visual appearance of your bookshelf speakers can be as impressive as their sound with proper finishing techniques. Surface preparation is critical. Fill any gaps or imperfections with wood filler, then sand progressively from 120 to 220 grit for a smooth base.
Veneer Application
Veneer application offers a premium wood appearance. Real wood veneer sheets with pressure-sensitive adhesive can be applied with a roller and trimmed with a sharp knife for professional results on your bookshelf speakers.
Paint Finishes
Paint finishes provide unlimited color options. Use MDF primer first, then multiple thin coats of spray paint or rolled paint, sanding lightly between coats with 320-grit paper for a glass-smooth finish.
Automotive paint techniques can create stunning high-gloss finishes on bookshelf speakers, though they require spray equipment and proper ventilation.
Stain and Polyurethane
Stain and polyurethane work well if you’ve used Baltic birch plywood, highlighting the natural wood grain while protecting the surface.
Grille Construction
Grille construction involves stretching acoustically transparent fabric over a wooden frame that attaches magnetically or with pins. Black grille cloth is traditional, but colored fabrics can make bold statements.
Decorative Details
Edge treatments like rounded corners or decorative trim pieces add sophistication to bookshelf speakers and reduce the boxy appearance. Binding post plates can be recessed or surface-mounted, with options ranging from basic plastic to machined aluminum for different aesthetic effects.
Personal Touches
Decals and badges allow you to brand your custom bookshelf speakers with a personal logo or design name. Two-tone finishes combining different colors or materials (like black sides with wood-grain baffles) create visual interest.
Consider your room’s décor when planning finishes. Bookshelf speakers that complement your space will be displayed proudly rather than hidden away. Take your time with finishing. Rushed work shows, while careful attention to detail produces bookshelf speakers that look as good as they sound.
Conclusion
Building bookshelf speakers is a rewarding journey that combines craftsmanship, technical knowledge, and creative expression into a functional work of art. The skills you develop through this project extend far beyond audio, teaching patience, precision, and problem-solving that apply to countless other endeavors.
Your custom bookshelf speakers will provide years of listening pleasure while serving as a constant reminder of what you can accomplish with your own hands. Whether you build one pair or many, each project deepens your understanding of sound and brings you closer to audio perfection tailored exactly to your preferences.
FAQ: DIY Bookshelf Speakers
- What type of wood glue works best for bookshelf speakers?
- Titebond II wood glue is the gold standard for building bookshelf speakers due to its strong bond, water resistance, and non-toxic properties. It creates joints stronger than the wood itself and dries clear without affecting cabinet resonance. Avoid construction adhesives or epoxies as they can remain flexible and introduce unwanted vibrations in your bookshelf speakers.
- How do I calculate the correct port length for ported bookshelf speakers?
- Port length calculations depend on cabinet volume, port diameter, and desired tuning frequency. Use free software like WinISD or online calculators that factor in these variables. Most bookshelf speakers tune between 40-50Hz, requiring ports 4-8 inches long for typical 2-inch diameter tubes. Always add 0.6 times the port diameter to account for end effects in your calculations.
- Can I use bookshelf speakers without grilles?
- Yes, bookshelf speakers function perfectly without grilles, and many audiophiles prefer the unobstructed sound. Grilles primarily protect drivers from damage and improve aesthetics. If you have children, pets, or curious visitors, grilles provide valuable protection. Acoustically transparent grilles cause minimal sound degradation, typically less than 0.5dB above 2kHz in well-designed bookshelf speakers.
- What’s the difference between series and parallel wiring in bookshelf speakers?
- Series wiring connects the positive terminal of one driver to the negative of another, doubling impedance (two 4-ohm drivers become 8 ohms). Parallel wiring connects positive to positive and negative to negative, halving impedance (two 8-ohm drivers become 4 ohms). Most bookshelf speakers use crossover networks rather than direct series/parallel connections, but understanding this helps when designing multi-driver configurations or impedance compensation circuits.
- How do I fix a buzzing sound coming from my bookshelf speakers?
- Buzzing in bookshelf speakers typically indicates loose screws, air leaks, or objects vibrating inside the cabinet. First, check and tighten all driver mounting screws and binding posts. Inspect internal components to ensure crossover boards and wires are secured and not touching cabinet walls. Apply additional silicone sealant to any gaps or seams. If buzzing persists at specific frequencies, add more dampening material or check for cabinet panel resonances that may require additional bracing.