Last Updated on October 28, 2025 by teamobn
Think beyond tabletop dioramas and small kits. We’ll plan life-size door signs, porch props, and room accents that handle weather and wear. You’ll learn structural tricks, safe lighting, and smart mounting that protect walls and bricks. With budget sourcing and part swaps, your LEGO Halloween ideas become durable, modular builds.
For more seasonal inspiration, explore our complete Halloween decorations guide — it’s packed with creative indoor, outdoor, and family-friendly projects to pair with your LEGO builds.
Contents
Design Principles For LEGO Halloween Decor
Plan for visibility first. Place builds at eye level where guests naturally look. Use bold shapes and high-contrast colors so faces read across a room. Add gentle, even lighting to make details glow without glare. Keep a single theme per area so the scene feels intentional. A tidy shelf with one striking LEGO Halloween centerpiece beats a crowded mix every time.
Design for long-term use next. Choose sturdy shelves or wall hooks with weight ratings that exceed your display. Hide wires in simple boxes or along trim so the scene looks clean. Keep small parts out of reach of kids and pets. Label bins for fast teardown and storage so LEGO Halloween displays return next year in perfect shape.
Using Lightailing Brick Lighting For Your LEGO Halloween Decor
Lightailing adds cinematic glow and depth to spooky builds. Subtle highlights and accents turn bricks into scenes guests notice and photograph. These are ideal for LEGO Halloween displays on shelves, mantels, and entryways.
- Plug-and-play install with pre-connected LEDs that hide easily inside bricks. Fewer tiny parts to manage while you learn.
- Set-specific instructions in downloadable PDFs plus step-by-step video guides for many builds. Great when you’re lighting a scene for the first time.
- Multiple power options including USB and battery boxes.
- Solid after-sales support with replacement help and a stated warranty period on kits.
Check Lightailing’s store to select a kit that matches your set and make your LEGO Halloween scene stand out.
LEGO Halloween Dioramas and Horror Design Tutorials
Give readers three display-ready projects that look great on shelves, mantels, and window ledges. Each build uses common parts, simple lighting, and clean mounting so your LEGO Halloween scenes feel polished and sturdy.
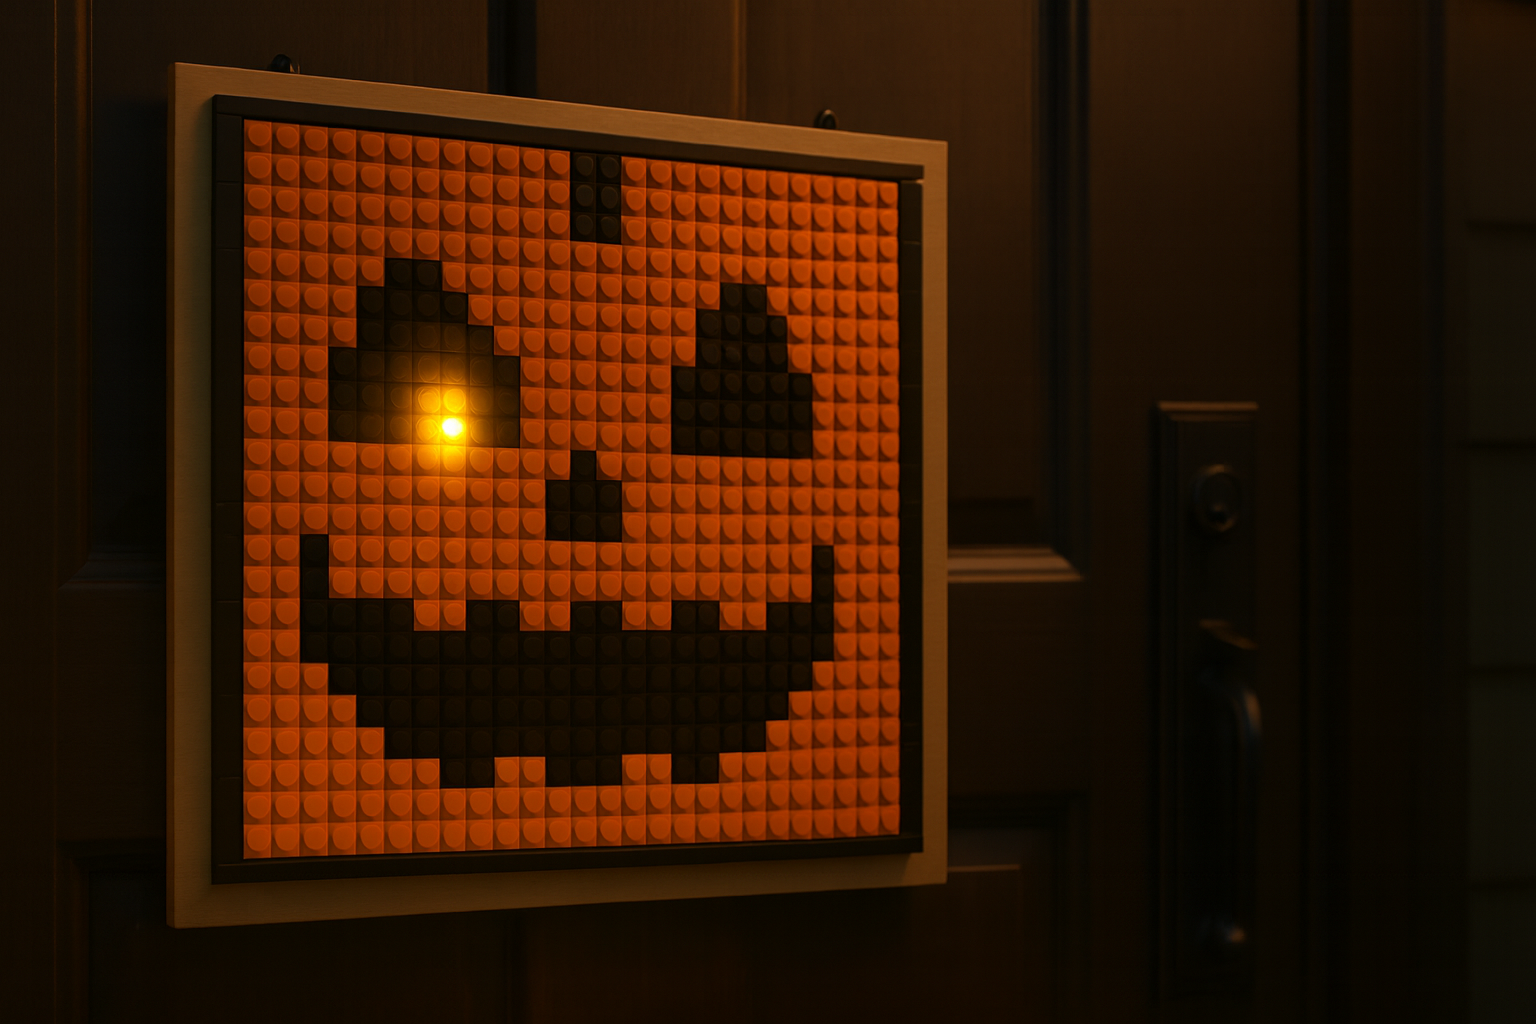
Jack-O’-Lantern Door Mosaic
Turn a doorway into a bold pumpkin face that reads clearly. Large shapes, clean borders, and warm highlights create a scare that photographs beautifully and mounts securely for seasonal use.
Bricks and Pieces
- 32×32 baseplate or two 16×32 baseplates
- Orange plates and tiles for the face field
- Black plates and tiles for eyes, nose, and mouth
- A few 1×1 round plates in yellow for glow accents
- Thin plywood or foam board backer plus picture hangers
- Lightailing LED kit with dot lights and battery box or USB lead
Steps
- Sketch a bold pumpkin face on paper that reads from across the room.
- Cover the baseplate with orange plates to form a square field.
- Tile the face details in black with clear edges and big shapes.
- Add a thin border so the face feels finished.
- Snap Lightailing dot lights behind eyes and mouth and test the glow.
- Route cables along edges and hide under tiles where possible.
- Adhere the baseplate to the backer so the plate stays flat.
- Fix the Lightailing battery box or USB lead behind the backer.
- Hang at eye level and tidy cables toward the nearest outlet.
- Wipe fingerprints from tiles so highlights look clean in photos.
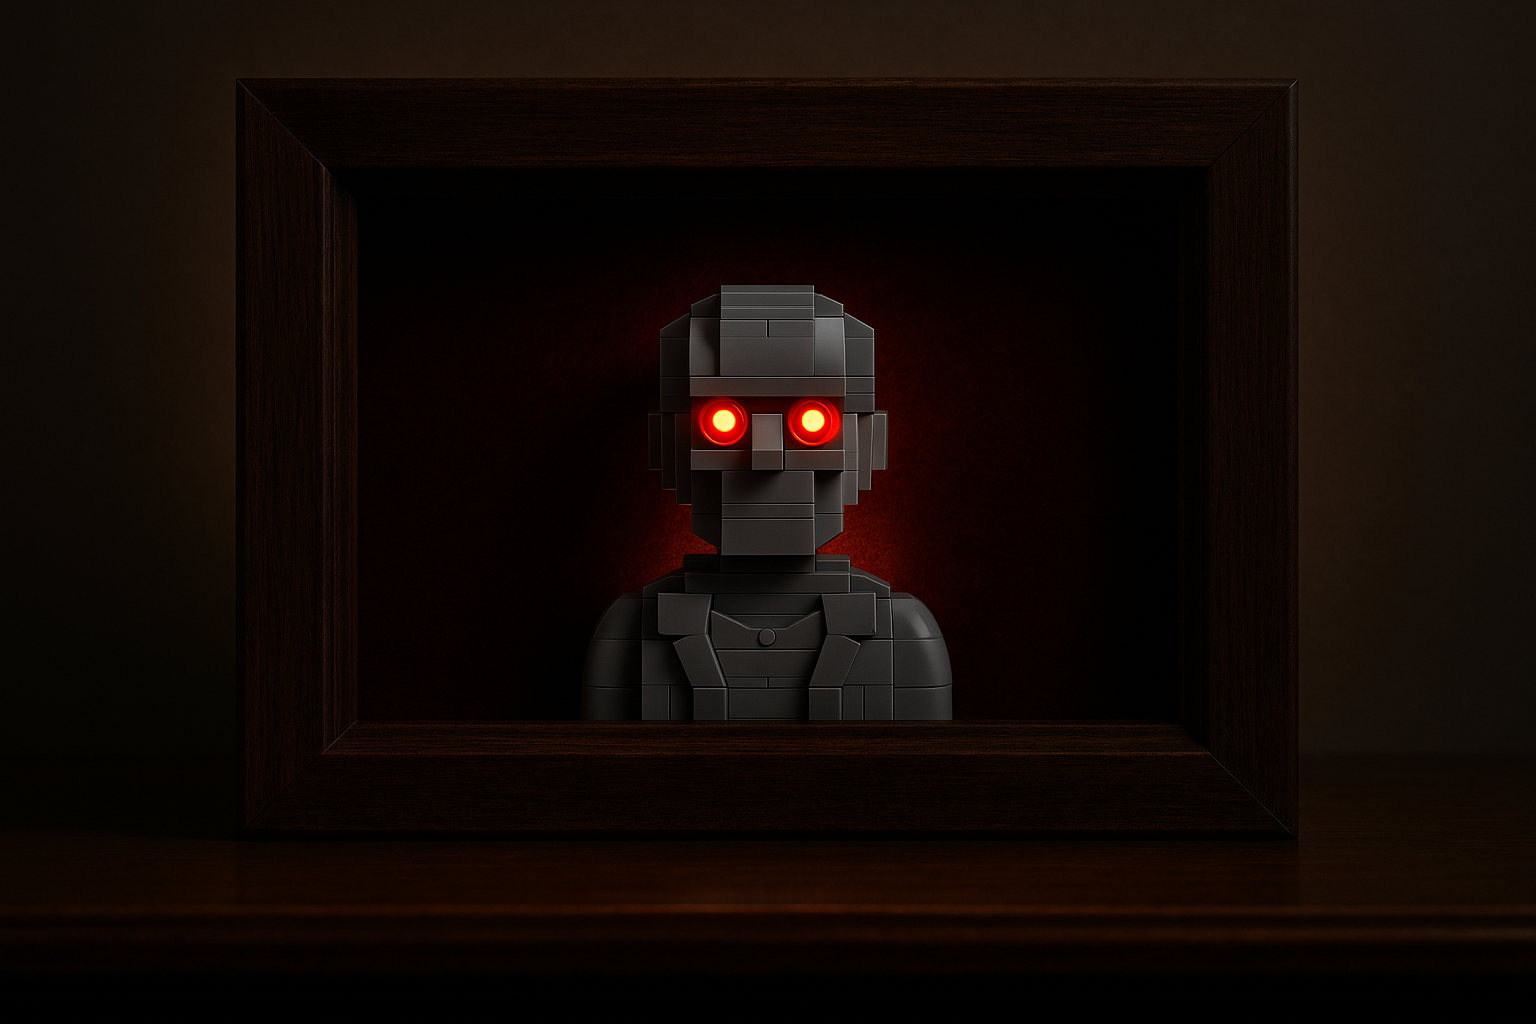
Haunted Portrait Shadowbox
Build an eerie portrait with glowing eyes inside a shallow frame. A dark background, halos, and tidy cable management deliver gallery-like finish that sits safely on mantels, shelves, or walls.
Bricks and Pieces
- 16×16 baseplate
- Black plates and tiles for frame and background
- Dark red or purple plates for a velvet-style backing
- Two minifig heads or 1×1 round tiles for eyes
- Trans-red or trans-yellow 1×1 rounds for glowing pupils
- Shallow photo frame box
- Lightailing LED kit with small dot lights and battery box or USB lead
Steps
- Line the frame box interior with black tiles for a clean border.
- Build a simple background in dark red or purple on the 16×16 base.
- Center a small “bust” using stacked bricks or a minifig for the portrait.
- Seat two minifig heads or 1×1 rounds as oversized eyes.
- Cap each eye with a trans round to suggest glow.
- Place Lightailing dot lights behind the eyes with a thin paper diffuser.
- Close the box and test for a soft halo without hot spots.
- Hide cables behind the frame and secure the battery box.
- Stand the shadowbox on a mantel or hang it with the frame hardware.
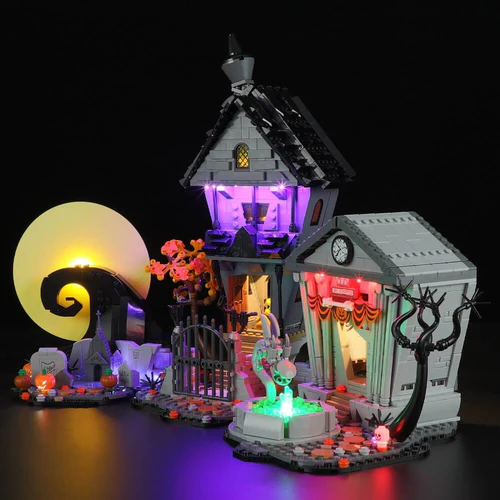
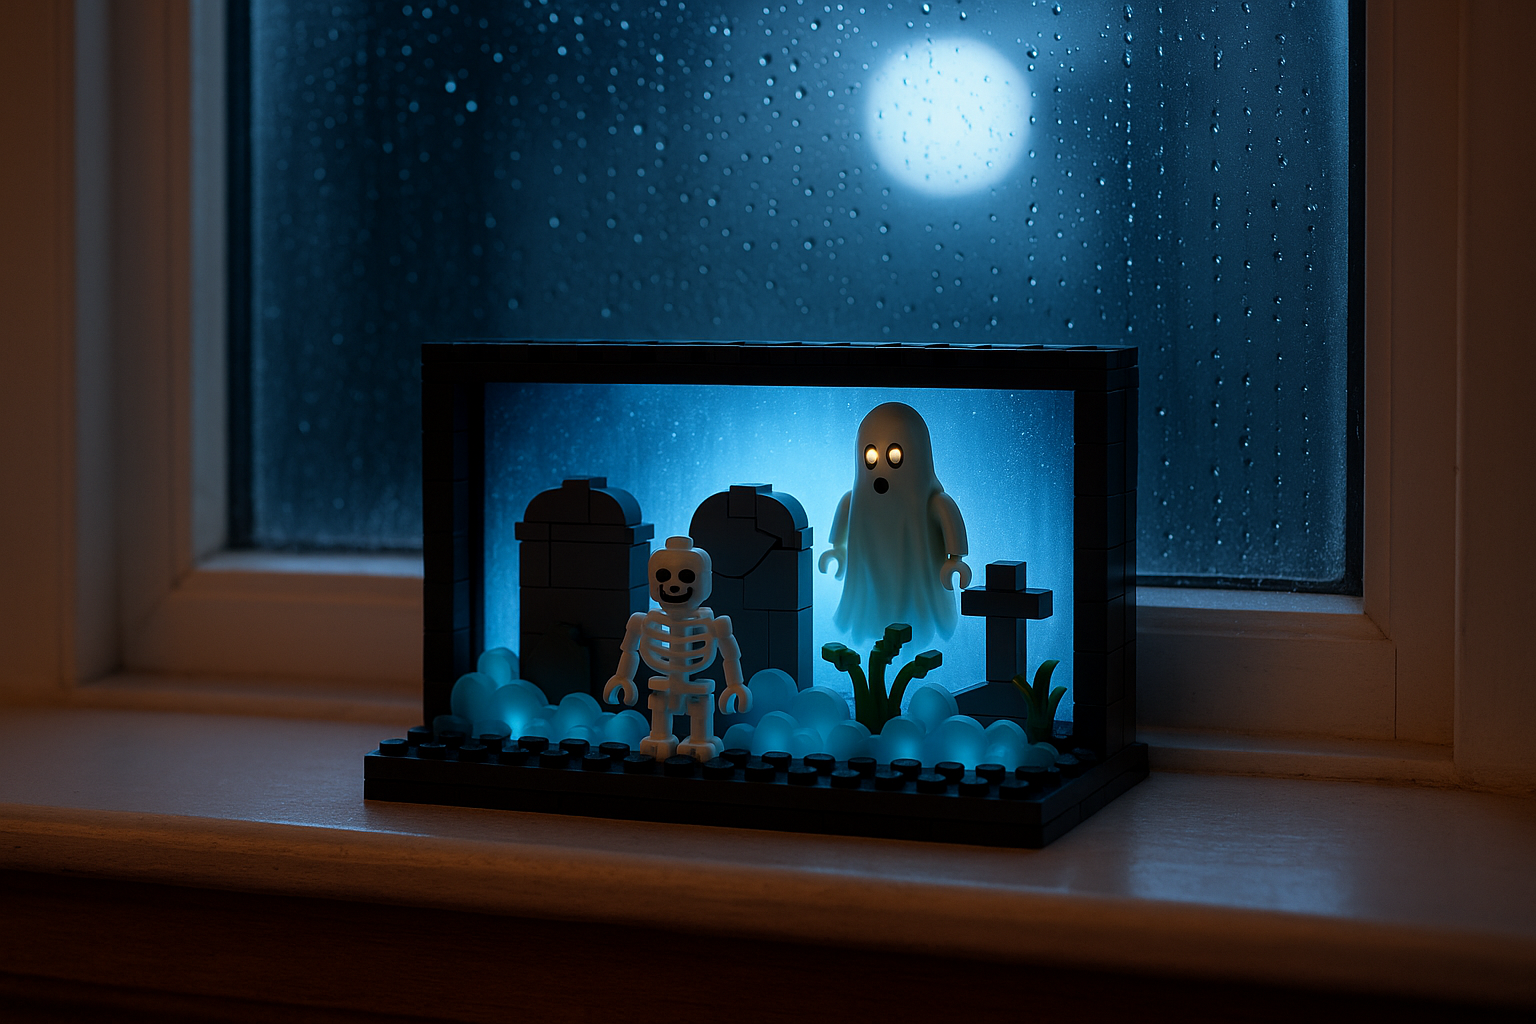
Graveyard Window-Ledge Scene
Create a misty cemetery vignette that glows at dusk. Layer stones, grass, and translucent plates, then backlight the scene so silhouettes pop against glass while staying compact enough for ledges.
Bricks and Pieces
- 16×16 or 16×32 baseplate
- Grey bricks, 1×2 jumpers, and tiles for headstones
- Black plates for ground, dark green for patches of grass
- Skeletal minifig or ghost, plant stems, and leaf elements
- Trans-light blue and trans-clear plates for mist and moonlight
- Lightailing LED kit with strip or dot lights and battery box or USB lead
Steps
- Lay black plates as soil with irregular edges.
- Build two or three headstones from grey bricks and tiles.
- Add a cracked stone by offsetting a tile to create a split.
- Plant stems and leaves in small clusters for texture.
- Pose a skeleton or ghost near the tallest stone.
- Layer trans-light blue plates in a low ridge to suggest mist.
- Place Lightailing lights along the back edge or behind the stones.
- Hide cables behind the base or along window trim to keep them neat.
- Set the diorama on the window ledge and center it at eye level.
- Photograph at dusk so the glow reads without washing the colors.
Display Options For Your LEGO Halloween Projects
Select display spots that make guests pause and look. Aim for eye level, clean backgrounds, and safe lighting. Keep scenes tidy so details read on camera. Choose sturdy supports that outlast the season.
Door and Wall Mounts with Backer Boards
Flat mosaics and lightweight panels shine on doors and walls. Mount your build on a thin plywood or acrylic backer so the weight spreads evenly. Use two picture hangers set wide for stability. Keep cables hidden along the backer edge and drop them to an outlet trim. Add soft LED glow around the piece to separate the silhouette from the wall and boost contrast for photos.
Window Ledge and Sill Vignettes
Windows create dramatic backlight for ghosts, gravestones, and jack-o’-faces. Stage a shallow scene on a baseplate that fits the sill depth. Place LED light along the rear edge facing the glass for a halo. Secure the base with removable putty so bumps don’t send parts flying. Close curtains halfway to frame the scene. The result feels theatrical and keeps your LEGO Halloween vignette safe from drafts.
Mantels and Console Tables
Long, narrow surfaces favor dioramas that read left to right. Start with a runner or mat to define the stage and protect the finish. Lift key elements on small risers to create layers. Hide lighting and cables behind picture frames or candle holders. Keep edges clear so sleeves don’t catch studs. A mantel centerpiece with balanced heights pulls attention the moment someone enters the room.
Bookshelves and Cubes
Shelves make natural shadowboxes. Treat each bay like a mini stage with a bold focal build and one accent. Use neutral books or blank backdrops so colors pop. Slip a short LED strip at the top of the shelf to wash light down. Leave a finger’s width at the front to prevent accidental knocks. Rotating one bay per week keeps the LEGO Halloween display feeling fresh.
Picture Ledges and Rail Displays
Shallow rails keep panels, portraits, and small mosaics upright without heavy hardware. Line a few panels side by side for a gallery feel. Add soft accent lights under the rail to lift the faces. Use non-slip liners so plates don’t slide when doors close. Keep spacing even for a calm, intentional look. This option excels when you want seasonal art that changes quickly.
Shadowboxes and Deep Frames
A shadowbox turns lighting into part of the story. Build the scene on a baseplate cut to fit, then add a dark background to push figures forward. Tuck LEDs behind diffusers to create eerie halos and glowing eyes. Route wires through a small notch and tape the battery pack behind the frame. Hang at eye level away from direct sun. The framed finish elevates any LEGO Halloween build.

Glass Cabinets and Dust Covers
Clear doors protect delicate parts and preserve shine on tiles. Use a low, even light along the top or sides to avoid hotspots. Raise focal builds on small platforms so layers read from a distance. Add discreet cable clips down a back corner for tidy routing. Wipe glass before photos to remove streaks that dull contrast. Cabinets keep your LEGO Halloween displays pristine for the whole month.
Entryway Hooks and Pegboards
Utility boards turn storage into stagecraft. Hang small backer-mounted mosaics and lightweight props at staggered heights. Add a narrow shelf for pumpkins or portraits. Clip a battery pack high and route a single cable downward to minimize clutter. Keep pathways clear of cords and point lights away from eyes. Guests get a quick, spooky reveal the moment they step inside.
Porch and Outdoor Displays
Outdoor scenes need extra care. Place builds inside clear boxes or behind acrylic fronts to block rain and wind. Anchor bases to a heavier board so gusts don’t tip them. Use low-voltage LEDs and weather-safe cable paths along trim. Keep power connections under cover and off the ground. Test at dusk to set brightness and avoid glare. Your LEGO Halloween display stays bright, safe, and photo ready.
Conclusion
Planning your Lego Halloween builds with visibility, sturdiness, and safe lighting turns simple bricks into standout seasonal decor. Select projects that suit your space, then pair them with mounting solutions such as backer boards, shelves, shadow boxes, or window ledges. Lightailing kits unlock cinematic glow, and tidy cable routes keep scenes clean for photos and daily living. If you standardize base sizes and labels, teardown and storage become painless, so you’re ready to refresh displays all season.
For more unique LEGO projects, check out our coffee table with brick storage project!