Last Updated on October 22, 2025 by teamobn
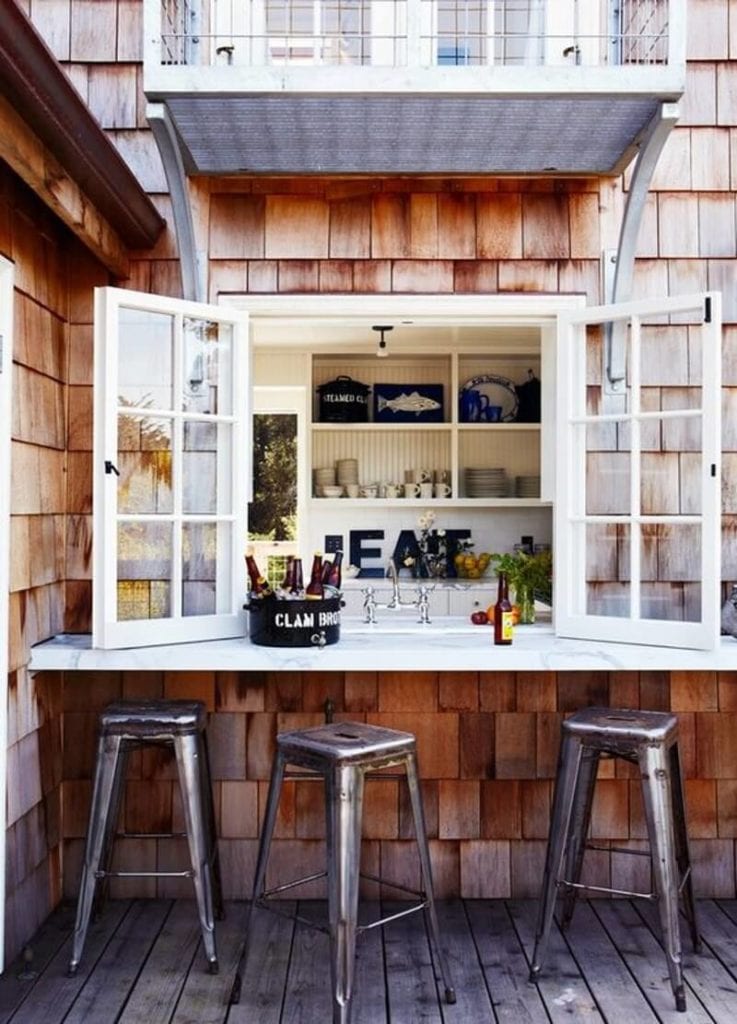
Building an outdoor kitchen can be quite expensive. One of the best ways to keep costs down is to build your outdoor kitchen as close to your interior kitchen as possible. Proximity will ease the transfer of ingredients, trays, drinks, tools, and dishware.
That’s why many homeowners are building outdoor kitchen extensions on existing decks or patios. Whether it’s built of stone, brick, or concrete, these paved areas are frequently used as a socializing location. That’s especially true when there’s food cooking over a grill or fire pit.
Contents
- 1 More Room for Cooking and Entertaining
- 1.1 Deciding on the Location
- 1.2 Determining the Size
- 1.3 Plan Your Outdoor Extension like an Indoor Kitchen
- 1.4 Deciding the Layout
- 1.5 Construction Considerations and Material
- 1.6 Providing Storage Space
- 1.7 Plan and Consider the Transition
- 1.8 Nothing Beats a Meal Outdoors!
- 1.9 Pergola and Canopy Options for Shade and Shelter
- 1.10 Outdoor Kitchen Extension Gallery
- 1.11 Budgeting Strategies and Phased Construction Tips
- 2 Conclusion
More Room for Cooking and Entertaining
An outdoor kitchen extension on your patio or deck can do wonders for your home. Apart from allowing more room for your regular soirees, the extension can make for an ideal solution for a small indoor cooking space.
The practical aspects of building an outdoor extension are, of course, about appointing a builder or securing permits. But before you even get there, you should already begin planning your outdoor space.
Deciding on the Location
Building your patio kitchen next to an exterior wall will allow you easier and more affordable access to plumbing and electricity. That is, of course, if your budget includes buying and operating outdoor sinks and refrigerators.
However, be aware that tapping into your home’s plumbing and gas lines and hard-wiring appliances might be costly and may require building permits.
Determining the Size
Size is also among the most important considerations. The amount of space you need for your patio kitchen will depend on how you plan to use it – so start there. There is no point in spending money on an outdoor kitchen extension that is too small for your needs. Too big isn’t always too good, either.
Plan Your Outdoor Extension like an Indoor Kitchen
You should plan your patio kitchen as an extension of your indoor cooking space. Apart from picking the right grill and counter top, plan for storage and organizational necessities. You may want to install pullout trash and recycling bins, and baskets to hold napkins and glasses, cabinets for cleaning supplies.
Deciding the Layout
When you design your patio or deck kitchen, it’s important to understand the space within which you’ll be working. Make scale drawings of the floor plan. Mark the location of internal and external doors, if any. Ensure a good flow between your indoor kitchen, outdoor cooking and serving area, and the rest of your house. You’ll need to include zones into your layout if you’re designing an open-plan kitchen, too.
Construction Considerations and Material
Outdoor kitchen surfaces must be sturdy enough to withstand the elements. That’s why you should select durable materials such as stainless steel, stone, slate, tile, or stucco. Make sure all countertop surfaces and hardware are recommended for exterior use. If you want to install a kitchen extension on an existing deck, verify that the structure can support the kitchen’s additional weight.
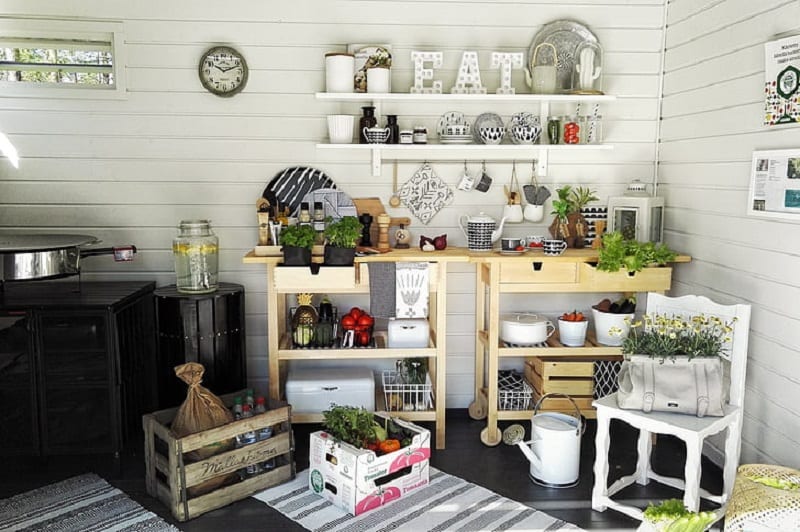
Providing Storage Space
One of the advantages of designing your outdoor kitchen as an extension of your indoor cooking space is the minimal need for new storage systems. Still, you will need to plan for storage room in your outdoor kitchen extension. Make sure that your plans include at least some cabinets or a cart to store grilling tools, utensils, plates, and serving pieces.
Plan and Consider the Transition
Consider, too, the overall look of your indoor kitchen’s patio extension. Choosing materials, furniture, and designs that match those of your indoor kitchen will make the new extension blend seamlessly with the rest of the house.
Nothing Beats a Meal Outdoors!
Nothing beats enjoying a meal outdoors when the weather is warm and pleasant. The tips we’ve outlined above should help you create a perfect environment for your patio kitchen ideas.
You can both prepare and enjoy your food under the warm sun or glittering stars without draining your bank account. Building an outdoor extension to your indoor kitchen should keep your cost down while ensuring that you still get the best outdoor cooking and dining experience possible.
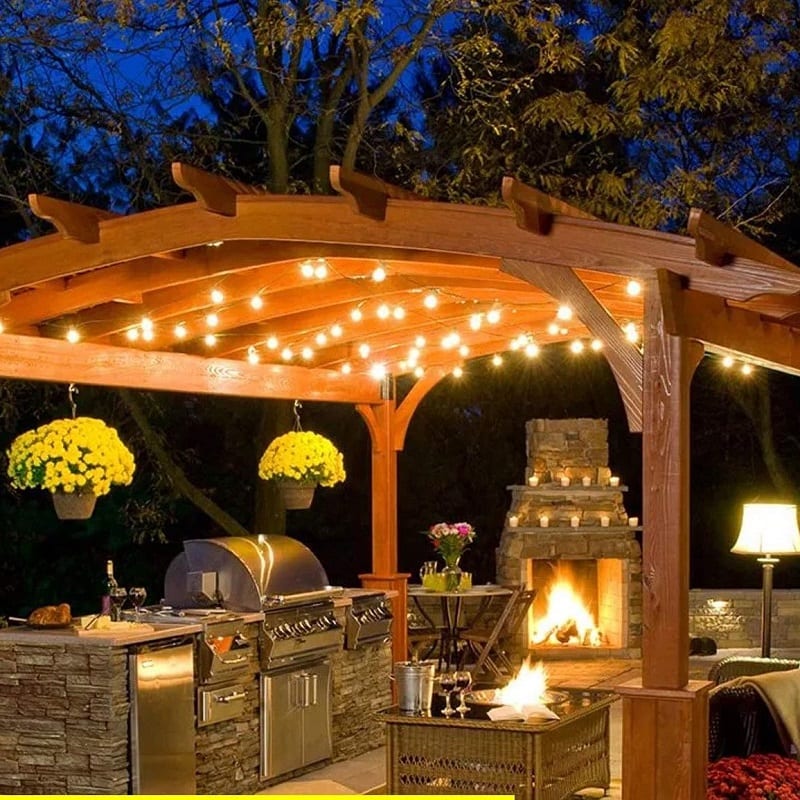
Pergola and Canopy Options for Shade and Shelter
Adding shade and shelter boosts comfort in your cooking space. A well chosen structure blends style with function for your kitchen extension.
Custom-Built Wooden Pergolas
Custom-built wooden pergolas add warmth and charm to any backyard. You can match wood stains to your home design. You’re free to choose post styles and roof patterns. This option works well for a kitchen extension that feels like part of the house.
Wood holds up well when sealed and maintained against rain. H beams and cross rafters create a sturdy frame. You can add climbing vines or hanging lights for a cozy vibe. This style blends craftsmanship with natural appeal.
Aluminum and Steel Pergolas
Aluminum and steel pergolas offer modern durability. They resist rot and rust without heavy maintenance. You can find powder coated finishes in many colors. This framework suits a kitchen extension with a sleek aesthetic.
Metal beams span longer distances for wider coverage. Light weight metal makes installation easier. Metal is non combustible for extra safety around grills. It pairs well with glass roof panels too.
Fabric Canopies and Retractable Awnings
Fabric canopies provide flexible coverage for changing weather. You can choose waterproof fabrics that block UV rays. Retractable awnings roll back when you want full sun. This option makes a kitchen extension feel open yet protected.
Automated systems sync with sensors for rain and wind. You get shade on demand without a permanent roof. Fabric canopies come in stripes or solids to match decor. They’re budget friendly and easy to install.
Polycarbonate and Glass Coverings
Polycarbonate panels offer clear protection from rain and hail. They filter harmful UV rays while admitting natural light. Glass coverings deliver a high end look and smooth finish. This solution fits a kitchen extension that needs bright, sheltered space.
Tempered glass stands tough against impacts and wind. Both materials require strong support beams. You can add gutters to channel water away from cooking areas. Clean surfaces regularly to prevent staining and debris build up.
Shade Sails and Tensioned Fabric Structures
Shade sails bring a contemporary vibe to outdoor areas. You can arrange sails in triangles or rectangles for visual interest. Tensioned fabric structures stretch tight for stability. These options work best with strong anchor points.
You get a canopy effect without bulky posts. Shade sails block sun at different angles. They look light and airy above your prep and dining zones. You can mix sail colors to add a playful touch. Installation costs stay moderate for DIY projects.
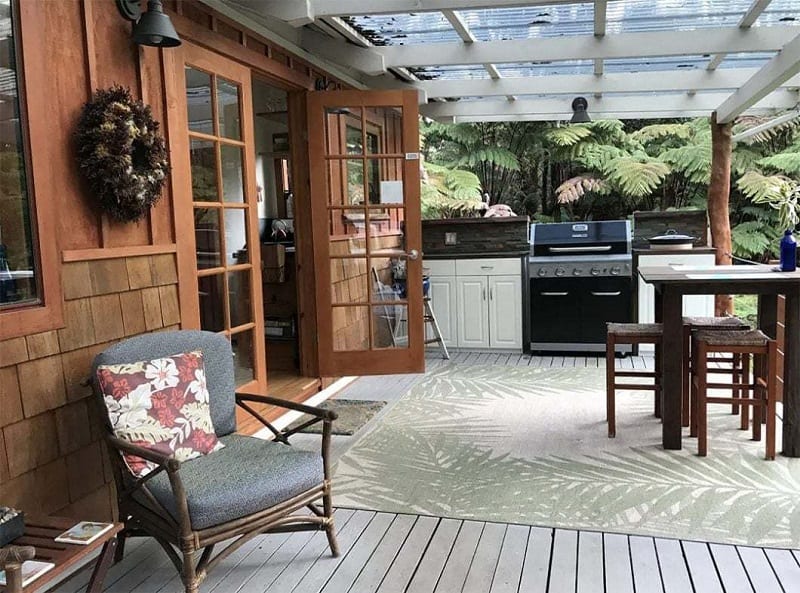
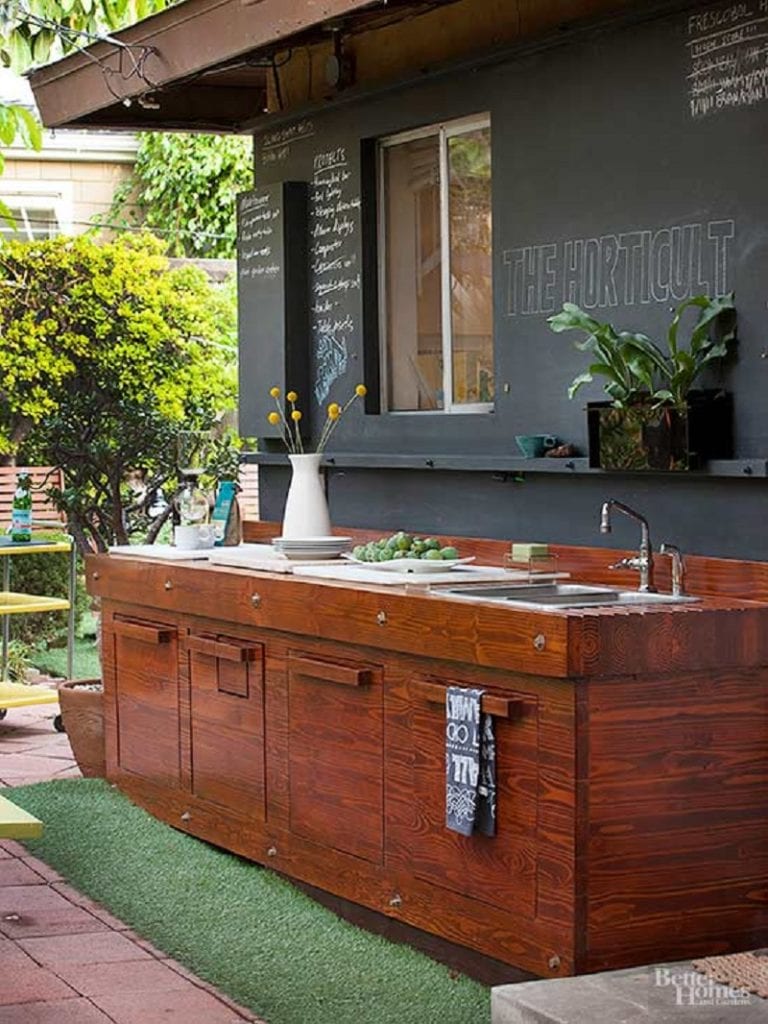
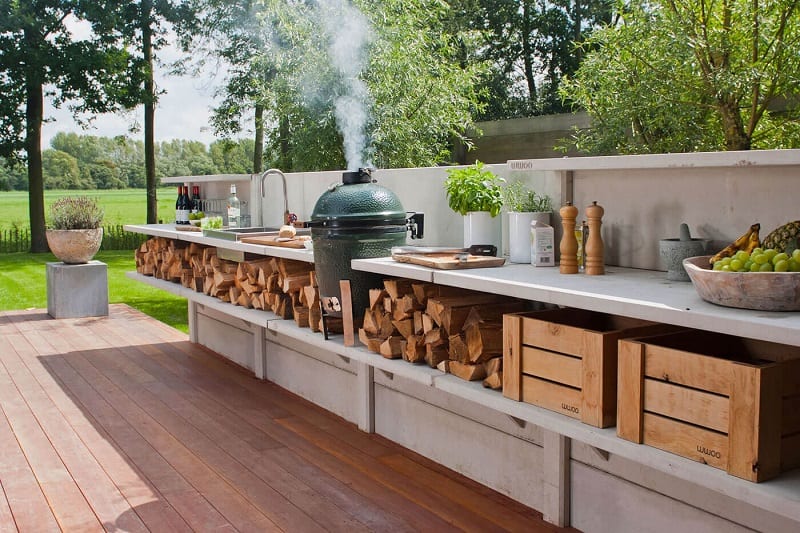
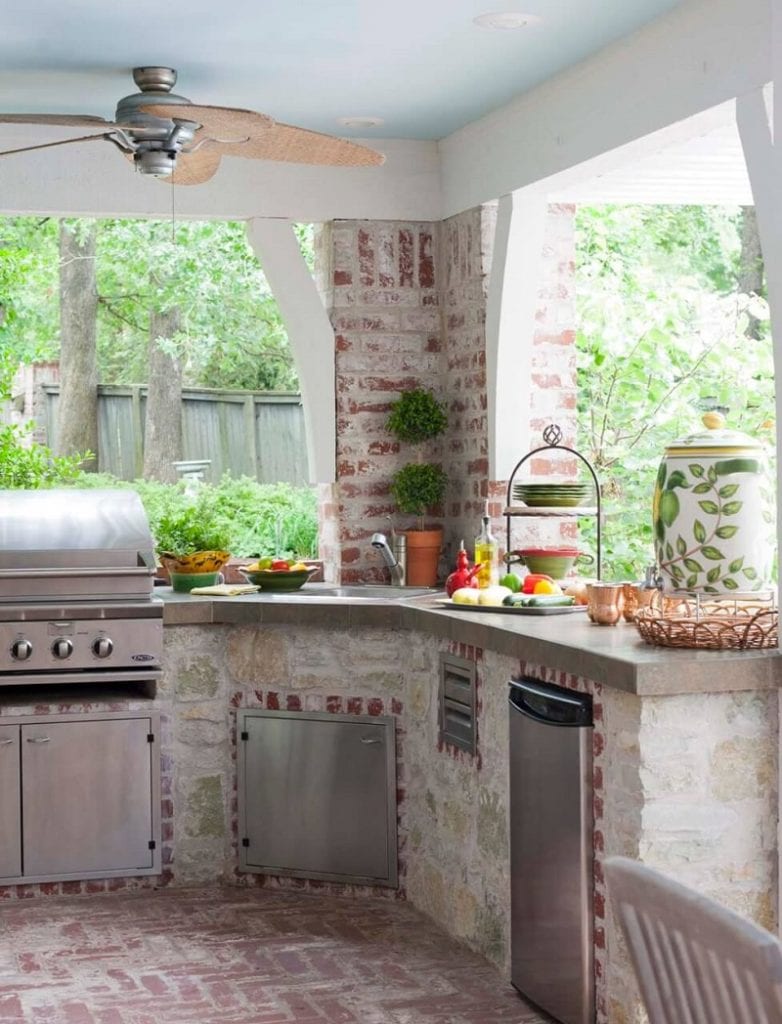
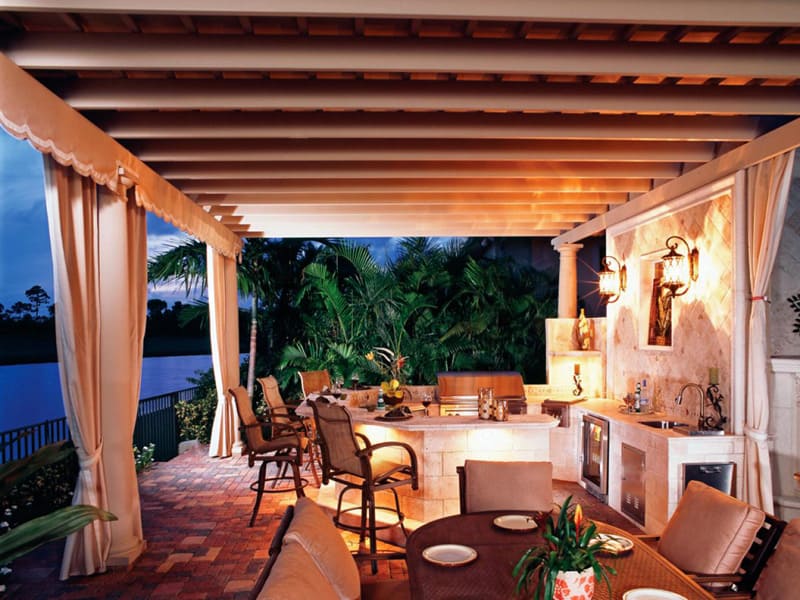
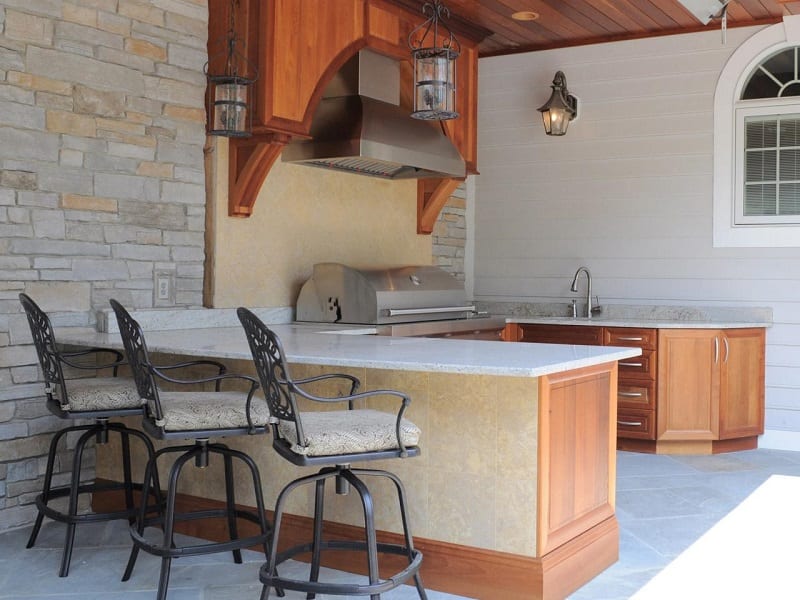
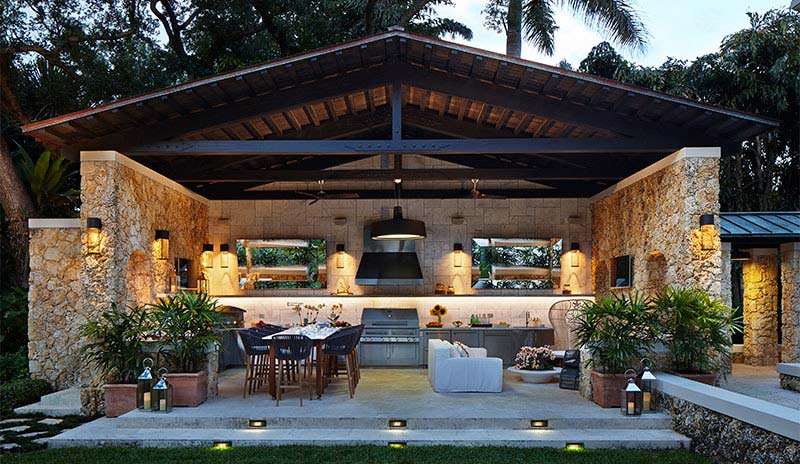
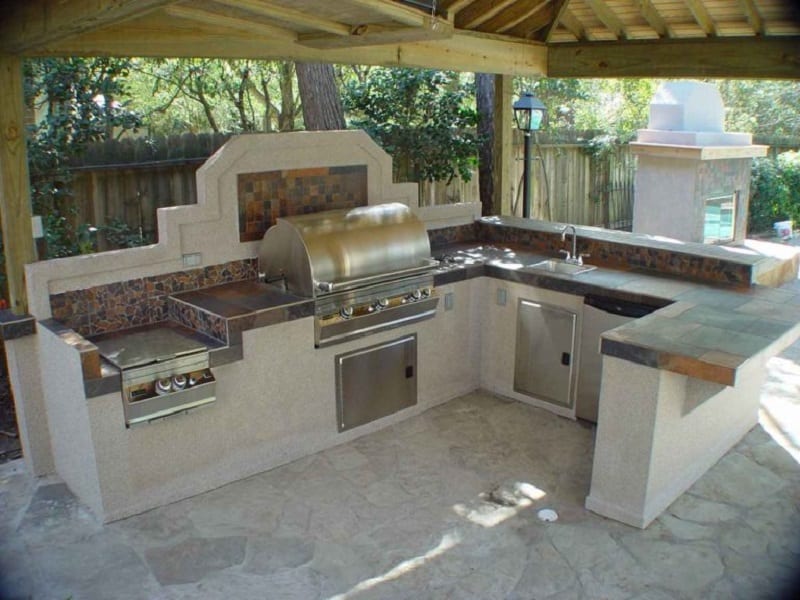
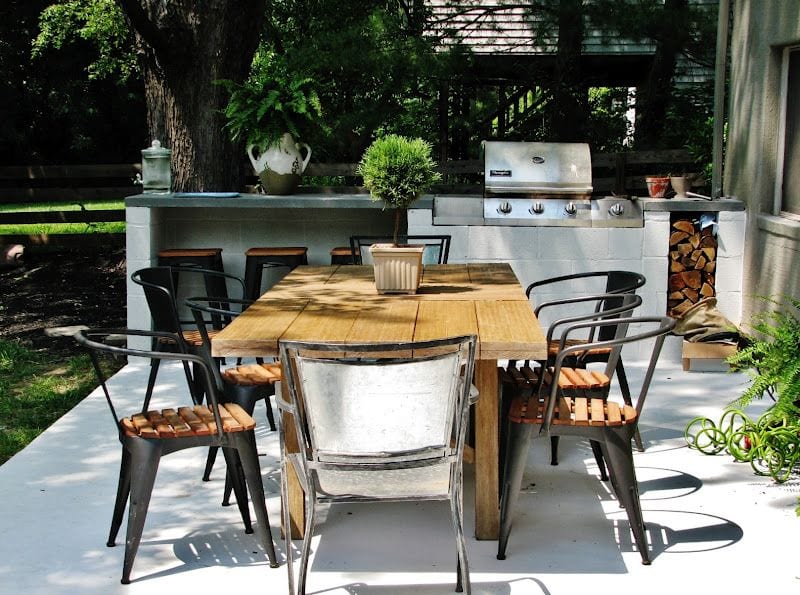
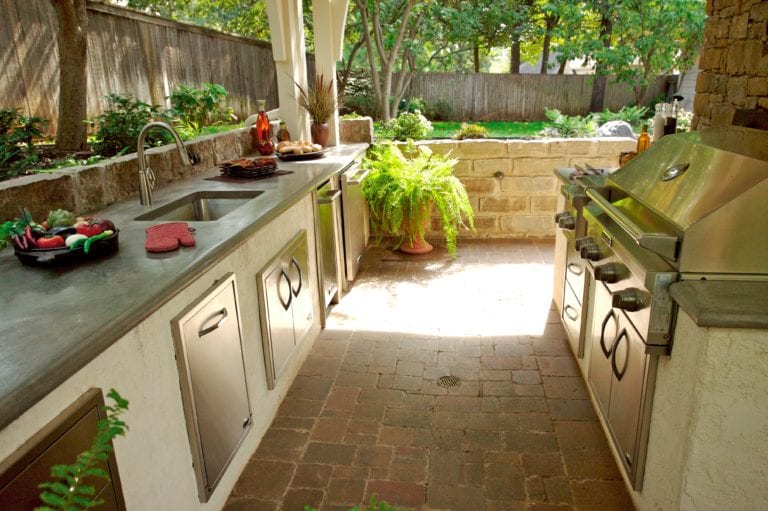
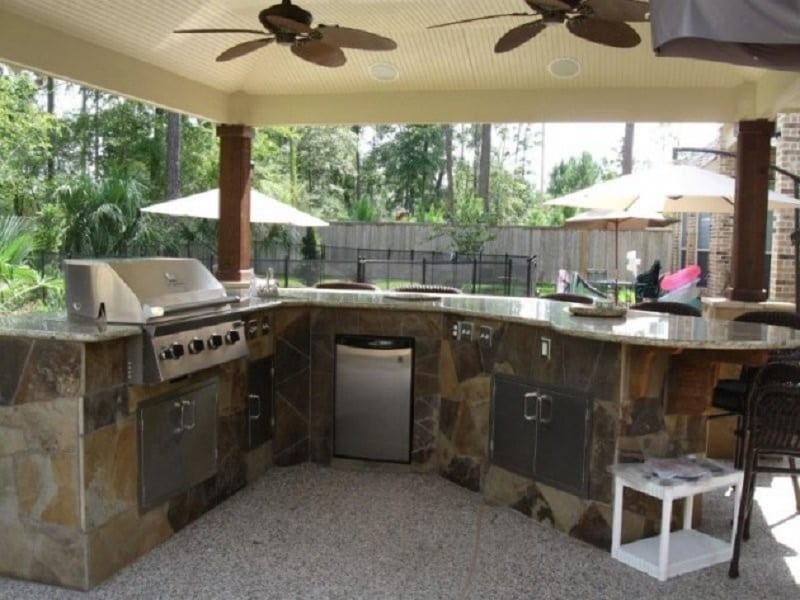
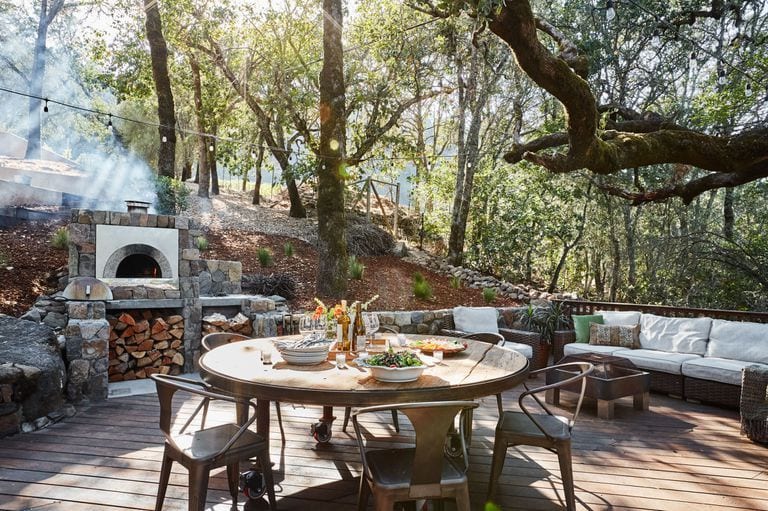
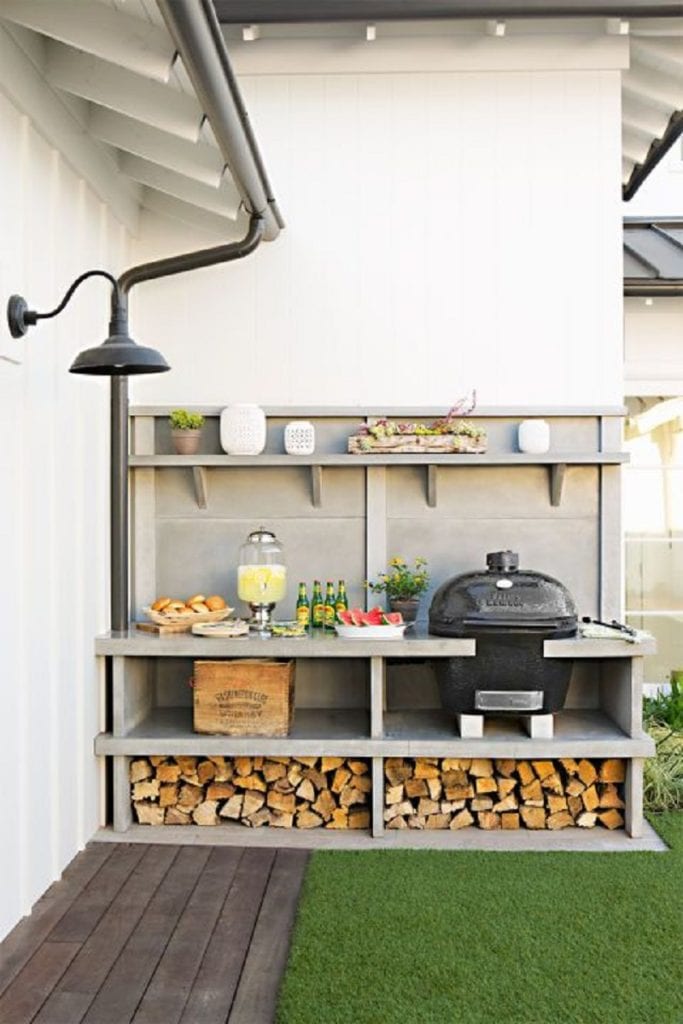
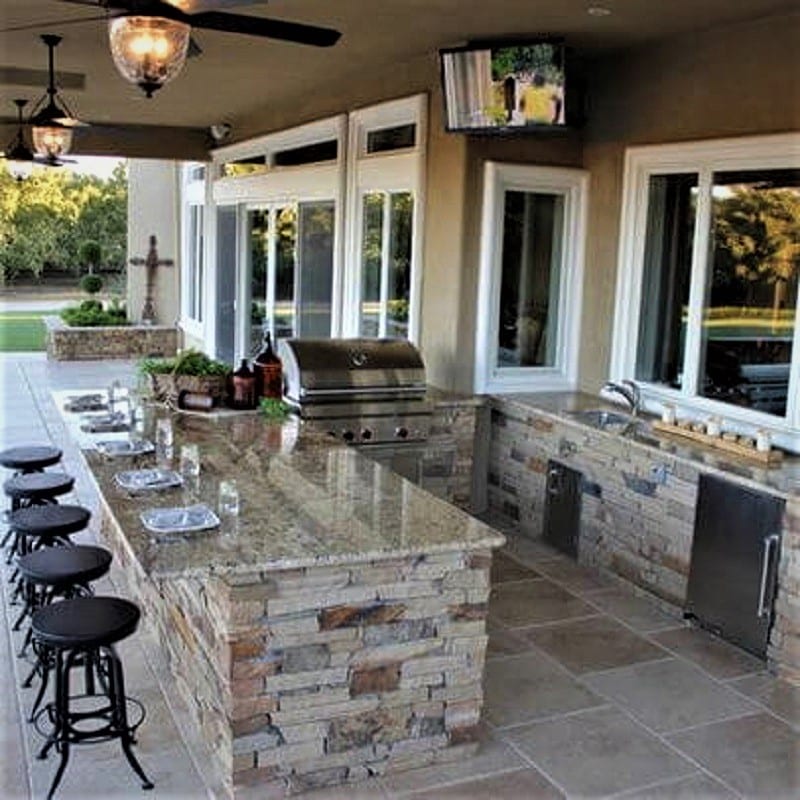
Outdoor Kitchen Extension Gallery
Below are outdoor kitchen ideas to inspire your plans for your patio kitchen extension.

Budgeting Strategies and Phased Construction Tips
Planning a kitchen extension is exciting. It needs clear budgeting and phased construction plans.
Set a Realistic Budget Before Design Begins
Start by defining your overall budget. List all expected costs from framing to finishes. Include quotes for materials and labor. You’re better off overestimating than risking shortfalls. Discuss budgets openly with your contractor.
Factor in delivery fees and setup charges. This gives you a clear financial picture. It helps prevent delays due to funding gaps. A well-defined budget keeps your project on track.
Rank Features by Importance and Cost
Decide which elements matter most to you. Is built-in seating more vital than a stone countertop? You can defer lower-priority features to a later phase. This ensures essential items get done first.
You’re in control of where your money goes. Make a list of must-haves and nice-to-haves. Rank them by cost impact and enjoyment. Focus on features that improve function and resale value. This approach ensures critical work isn’t left incomplete.
Research Material and Labor Options
Shop around for suppliers and installers. Compare prices for cabinetry, countertops, and flooring. Ask local yards about clearance stock and seasonal sales. You might find quality surplus materials at a fraction of the cost.
Get multiple labor estimates to spot outliers. Skilled local trades often charge less than big firms. Check reviews and references before hiring. This research step can shave thousands off your kitchen extension. It keeps quality high without overspending.
Break the Project into Manageable Phases
Divide work into stages like framing, rough-in, and finishing. Start with structural and utility work. Next, tackle cabinets and countertops. Then add lighting, paint, and accessories. Phasing lets you pause between steps to save money or adjust plans.
You can live with a basic prep area while saving for luxury upgrades. This method reduces upfront costs and keeps momentum. It also makes scheduling easier for contractors. You’ll feel less overwhelmed by a big project.
Factor in Contingencies and Permits
Add at least 10 percent to your budget for unexpected costs. Hidden issues like rot or wiring problems often appear once work begins. Permit fees and inspections vary by region. Research local rules early to avoid fines or delays.
Set aside a separate contingency fund. You’ll be ready if an inspector asks for changes. A buffer prevents work stoppage and keeps your timeline intact. It also gives you peace of mind throughout construction.
Track Spending and Adjust the Plan
Use a simple spreadsheet or app to log every expense. Enter material invoices and labor payments as they occur. Review totals weekly to spot overruns early. If you’re close to your budget ceiling, dial back on non-essentials.
You can delay high-end finishes until later. Communicate changes with your contractor right away. This proactive tracking keeps you aligned with your goals. It ensures your kitchen extension stays on budget and on schedule.
Conclusion
An outdoor kitchen extension can transform your backyard into a vibrant gathering spot. Thoughtful design brings cooking and entertaining together. Durable materials ensure your space stands up to every season. Phased construction and budgeting keep the project on track. The result is a stylish and functional outdoor kitchen extension you’ll love.